

VEST - Online
Course
- source_url: https://ambitious.academy/course/vest-online
- dump Date: 2026-08-21 (academy.jsonl Last-Modified Fri, 21 Aug 2026 09:25:14 GMT; fetched_at_utc 2026-08-21T10:42:48Z = 12:42 SAST)
- export post_date: 2025-10-29 11:11:01
- post_author: 28
- post_status: publish
- post_excerpt: (empty)
- post_parent: 0
- comment_status: open
- comment_count: 0
- course_expire_enrollment: 0
- course_type: paid
- course_product_id: 4620
- course_download_id: 0
- course_max_students: 0
- course_language: (empty)
- course_difficulty_level: beginner
- course_benefits: (empty)
- course_requirements: A smart phone capable of recording in 1080p not older than 2019
A basic familiarity with using phones - course_audience: Young Creatives.
Aspiring influencers.
Small and medium business owners.
employees to up-skill in content creation and media. - course_materials: Before Video
Narrative
Gear and Camera
Shots and Composition
Camera Movement and Transitions
Lighting
Sound
Post-Production
Final Video - is_enabled_course_qa: 1
- is_enabled_course_announcements: 1
- course_certificate_id: 2471
- is_disabled_course_review: (empty)
- rcp_membership_levels: []
- course_enable_certificate: (empty)
- edd_price: (empty)
- regular_price: 50
- sale_price: (empty)
- course_duration: 5 hours, 0 minutes, 0 seconds (raw [5,0,0])
- course_intro_video kind: youtube
- course_intro_video raw: ["youtube","https:\/\/youtu.be\/Saz-P0ZIx9I?si=5wwY3iZj-TQjwk3M"]
- catalog Title: VEST - Online
- catalog url: https://ambitious.academy/course/vest-online
- content merge: catalog text matches export after tag-strip; full export HTML→markdown still kept (richer).
Curriculum
Curriculum sections (from course_curriculum):
- section: Introduction
- section: Narrative
- section: Gear and Camera
- section: Shots and Composition
- section: Movement and Transitions
- section: Lighting
- section: Sound
- section: Post-Production
- section: After Video
Curriculum topics (id / name / type) in export order:
- id 77 · lesson · VEST - Introduction
- id 154 · lesson · About VEST
- id 173 · lesson · About Academy
- id 165 · lesson · VEST Certification
- id 150 · lesson · Follow Along
- id 79 · lesson · Before Video
- id 149 · lesson · Before Video Practical
- id 78 · lesson · Intro
- id 141 · lesson · Terminology Planning & Story
- id 80 · lesson · Content & Intention
- id 81 · lesson · Hooks
- id 82 · lesson · Energy & Pacing
- id 83 · lesson · Scripts & Story
- id 4452 · quiz · Narrative Quiz
- id 147 · lesson · Storyboard Template
- id 155 · lesson · Homework Storyboard or Script
- id 84 · lesson · Concluding
- id 85 · lesson · Phone & Gear - Intro
- id 86 · lesson · Phone Optimization
- id 87 · lesson · Camera Settings
- id 88 · lesson · Frame Rates
- id 89 · lesson · Focus
- id 90 · lesson · Exposure
- id 156 · lesson · Camera Settings Tutorial
- id 4454 · quiz · Settings Quiz
- id 91 · lesson · Essential
- id 92 · lesson · Tripods
- id 93 · lesson · Gimbals
- id 94 · lesson · Lighting
- id 95 · lesson · Microphones
- id 4455 · quiz · Essential Gear Quiz
- id 96 · lesson · Gear Conclusion
- id 97 · lesson · Composition & Shots Intro
- id 142 · lesson · Terminology Visuals
- id 98 · lesson · Composition
- id 99 · lesson · Rule-of-Thirds
- id 100 · lesson · Headroom
- id 101 · lesson · Symmetry
- id 102 · lesson · Leading Lines
- id 157 · lesson · Homework Composition
- id 4456 · quiz · Composition Quiz
- id 103 · lesson · Shots
- id 104 · lesson · Close Up
- id 105 · lesson · Medium
- id 106 · lesson · Wides
- id 107 · lesson · Camera Angles
- id 108 · lesson · Eye Level
- id 109 · lesson · Over The Shoulder
- id 110 · lesson · Low Angle
- id 111 · lesson · High Angle
- id 112 · lesson · Dutch Angle
- id 158 · lesson · Homework Shot Types
- id 4457 · quiz · Shot Types Quiz
- id 113 · lesson · Composition & Shots Conclusion
- id 114 · lesson · Movement & Transitions Intro
- id 115 · lesson · Panning
- id 116 · lesson · Tilting
- id 117 · lesson · Tracking
- id 118 · lesson · Push & Pull
- id 119 · lesson · Wip Pan
- id 4458 · quiz · Movement Quiz
- id 120 · lesson · Creative Transitions
- id 4459 · quiz · Creative Transitions Quiz
- id 151 · lesson · Homework The Flow
- id 121 · lesson · Movement & Transitions Conclusion
- id 122 · lesson · Lighting Intro
- id 123 · lesson · Three Point Lighting
- id 4460 · quiz · Three-Point Lighting Quiz
- id 124 · lesson · Natural Lighting
- id 143 · lesson · Terminology Camera Control & Lighting
- id 4461 · quiz · Natural Lighting Quiz
- id 125 · lesson · Lighting Conclusion
- id 126 · lesson · Sound Intro
- id 144 · lesson · Terminology Sound
- id 127 · lesson · Importance of Sound
- id 128 · lesson · Clean Audio
- id 129 · lesson · AI Tools
- id 169 · lesson · AI Tools Resources
- id 130 · lesson · Syncing Sound
- id 131 · lesson · Music
- id 132 · lesson · Sound Effects
- id 133 · lesson · Audio Levels
- id 4462 · quiz · Audio Quiz
- id 152 · lesson · Homework The Polish
- id 134 · lesson · Sound Conclusion
- id 136 · lesson · Post-Production Intro
- id 159 · lesson · Post Part 1
- id 160 · lesson · Post Part 2
- id 161 · lesson · Post Part 3
- id 138 · lesson · Post Part 4
- id 163 · lesson · Assets & Recources
- id 139 · lesson · Post Part 5
- id 145 · lesson · Terminology Editing
- id 140 · lesson · Post-Production
- id 4465 · quiz · Post-Production Quiz
- id 153 · lesson · Homework The Edit Test
- id 137 · lesson · Post-Production Conclusion
- id 146 · lesson · After Video
- id 166 · lesson · VEST Certification Reminder
- id 172 · lesson · VEST Review
- id 135 · lesson · VEST Conclusion
Raw course_curriculum (export, kept in full):
[{"title":"Introduction","content":"About the VEST course and some key notes and requirements on getting started.","topics":[{"id":77,"name":"VEST - Introduction","type":"lesson"},{"id":154,"name":"About VEST","type":"lesson"},{"id":173,"name":"About Academy","type":"lesson"},{"id":165,"name":"VEST Certification","type":"lesson"},{"id":150,"name":"Follow Along","type":"lesson"},{"id":79,"name":"Before Video","type":"lesson"},{"id":149,"name":"Before Video Practical","type":"lesson"}]},{"title":"Narrative","content":"Dive into the world of narrative and see how to turn your ideas into scripts and storyboards.","topics":[{"id":78,"name":"Intro","type":"lesson"},{"id":141,"name":"Terminology Planning & Story","type":"lesson"},{"id":80,"name":"Content & Intention","type":"lesson"},{"id":81,"name":"Hooks","type":"lesson"},{"id":82,"name":"Energy & Pacing","type":"lesson"},{"id":83,"name":"Scripts & Story","type":"lesson"},{"id":4452,"name":"Narrative Quiz","type":"quiz"},{"id":147,"name":"Storyboard Template","type":"lesson"},{"id":155,"name":"Homework Storyboard or Script","type":"lesson"},{"id":84,"name":"Concluding","type":"lesson"}]},{"title":"Gear and Camera","content":"A closer look at the essential gear for shooting and some optimal camera settings.","topics":[{"id":85,"name":"Phone & Gear - Intro","type":"lesson"},{"id":86,"name":"Phone Optimization","type":"lesson"},{"id":87,"name":"Camera Settings","type":"lesson"},{"id":88,"name":"Frame Rates","type":"lesson"},{"id":89,"name":"Focus","type":"lesson"},{"id":90,"name":"Exposure","type":"lesson"},{"id":156,"name":"Camera Settings Tutorial","type":"lesson"},{"id":4454,"name":"Settings Quiz","type":"quiz"},{"id":91,"name":"Essential","type":"lesson"},{"id":92,"name":"Tripods","type":"lesson"},{"id":93,"name":"Gimbals","type":"lesson"},{"id":94,"name":"Lighting","type":"lesson"},{"id":95,"name":"Microphones","type":"lesson"},{"id":4455,"name":"Essential Gear Quiz","type":"quiz"},{"id":96,"name":"Gear Conclusion","type":"lesson"}]},{"title":"Shots and Composition","content":"Learn the different shot types and how to use the correct composition. ","topics":[{"id":97,"name":"Composition & Shots Intro","type":"lesson"},{"id":142,"name":"Terminology Visuals","type":"lesson"},{"id":98,"name":"Composition","type":"lesson"},{"id":99,"name":"Rule-of-Thirds","type":"lesson"},{"id":100,"name":"Headroom","type":"lesson"},{"id":101,"name":"Symmetry","type":"lesson"},{"id":102,"name":"Leading Lines","type":"lesson"},{"id":157,"name":"Homework Composition","type":"lesson"},{"id":4456,"name":"Composition Quiz","type":"quiz"},{"id":103,"name":"Shots","type":"lesson"},{"id":104,"name":"Close Up","type":"lesson"},{"id":105,"name":"Medium","type":"lesson"},{"id":106,"name":"Wides","type":"lesson"},{"id":107,"name":"Camera Angles","type":"lesson"},{"id":108,"name":"Eye Level","type":"lesson"},{"id":109,"name":"Over The Shoulder","type":"lesson"},{"id":110,"name":"Low Angle","type":"lesson"},{"id":111,"name":"High Angle","type":"lesson"},{"id":112,"name":"Dutch Angle","type":"lesson"},{"id":158,"name":"Homework Shot Types","type":"lesson"},{"id":4457,"name":"Shot Types Quiz","type":"quiz"},{"id":113,"name":"Composition & Shots Conclusion","type":"lesson"}]},{"title":"Movement and Transitions","content":"Make your shotes and scenes more dynamic with movement and transitions.","topics":[{"id":114,"name":"Movement & Transitions Intro","type":"lesson"},{"id":115,"name":"Panning","type":"lesson"},{"id":116,"name":"Tilting","type":"lesson"},{"id":117,"name":"Tracking","type":"lesson"},{"id":118,"name":"Push & Pull","type":"lesson"},{"id":119,"name":"Wip Pan","type":"lesson"},{"id":4458,"name":"Movement Quiz","type":"quiz"},{"id":120,"name":"Creative Transitions","type":"lesson"},{"id":4459,"name":"Creative Transitions Quiz","type":"quiz"},{"id":151,"name":"Homework The Flow","type":"lesson"},{"id":121,"name":"Movement & Transitions Conclusion","type":"lesson"}]},{"title":"Lighting ","content":"Understand the fundamentals of lighting and how it effects your content.","topics":[{"id":122,"name":"Lighting Intro","type":"lesson"},{"id":123,"name":"Three Point Lighting","type":"lesson"},{"id":4460,"name":"Three-Point Lighting Quiz","type":"quiz"},{"id":124,"name":"Natural Lighting","type":"lesson"},{"id":143,"name":"Terminology Camera Control & Lighting","type":"lesson"},{"id":4461,"name":"Natural Lighting Quiz","type":"quiz"},{"id":125,"name":"Lighting Conclusion","type":"lesson"}]},{"title":"Sound","content":"Learn how sound effects your overall feel of your content and the importance of it.","topics":[{"id":126,"name":"Sound Intro","type":"lesson"},{"id":144,"name":"Terminology Sound","type":"lesson"},{"id":127,"name":"Importance of Sound","type":"lesson"},{"id":128,"name":"Clean Audio","type":"lesson"},{"id":129,"name":"AI Tools","type":"lesson"},{"id":169,"name":"AI Tools Resources","type":"lesson"},{"id":130,"name":"Syncing Sound","type":"lesson"},{"id":131,"name":"Music","type":"lesson"},{"id":132,"name":"Sound Effects","type":"lesson"},{"id":133,"name":"Audio Levels","type":"lesson"},{"id":4462,"name":"Audio Quiz","type":"quiz"},{"id":152,"name":"Homework The Polish","type":"lesson"},{"id":134,"name":"Sound Conclusion","type":"lesson"}]},{"title":"Post-Production","content":"Tie all the previous lessons together with editing in post-production.","topics":[{"id":136,"name":"Post-Production Intro","type":"lesson"},{"id":159,"name":"Post Part 1","type":"lesson"},{"id":160,"name":"Post Part 2","type":"lesson"},{"id":161,"name":"Post Part 3","type":"lesson"},{"id":138,"name":"Post Part 4","type":"lesson"},{"id":163,"name":"Assets & Recources","type":"lesson"},{"id":139,"name":"Post Part 5","type":"lesson"},{"id":145,"name":"Terminology Editing","type":"lesson"},{"id":140,"name":"Post-Production","type":"lesson"},{"id":4465,"name":"Post-Production Quiz","type":"quiz"},{"id":153,"name":"Homework The Edit Test","type":"lesson"},{"id":137,"name":"Post-Production Conclusion","type":"lesson"}]},{"title":"After Video","content":"Create a final video to show off your skills learned throughout this course. ","topics":[{"id":146,"name":"After Video","type":"lesson"},{"id":166,"name":"VEST Certification Reminder","type":"lesson"},{"id":172,"name":"VEST Review","type":"lesson"},{"id":135,"name":"VEST Conclusion","type":"lesson"}]}]
Course content (academy.jsonl catalog)
dump Date 2026-08-21 (academy.jsonl Last-Modified Fri, 21 Aug 2026 09:25:14 GMT; fetched_at_utc 2026-08-21T10:42:48Z = 12:42 SAST). Public visit link is source_url (paywall).
VEST -
Video Engagement and Skills Training
-
Dive into the online world of VEST and transform your creative ideas into professional-quality mobile videos. This online course will guide you step by step to understanding all the steps required for creating engaging and high-quality content.
From conceptualization and storyboarding to dynamic shooting and post-production, create scroll stopping shorts in no time.
-
What You’ll Learn How to conceptualize script, storyboard and plan ideas. Film those ideas with the best setting, techniques, and accessible gear. Manage different elements like Sound, Lighting and movement. Using software to edit your footage to deliver professional results. Have a completed Before and After video to showcase your improvement. Learn all of the above using only your mobile phones. -
Who This Course Is For Young creatives looking to improve their short form content creations skills Aspiring influencers Small and medium business owners looking to gain additional skills to promote their businesses Companies looking to send their employees to up-skill in the field of content creation and media -
Prerequisites A smart phone capable of recording in 1080p not older than 2019 A basic familiarity with using phones Ideally an Interest in filming, content creation and social media No prior media experience required -
Content Consent: Please note that any content you share with us in regard to the course and course homework, we might use it on our media channels as marketing and student updates.
Course content (export post_content)
History from export post_date 2025-10-29 11:11:01. Full HTML converted; nothing summarized.
VEST
-
Video Engagement and Skills Training
-
Dive into the online world of VEST and transform your creative ideas into professional-quality mobile videos. This online course will guide you step by step to understanding all the steps required for creating engaging and high-quality content.
From conceptualization and storyboarding to dynamic shooting and post-production, create scroll stopping shorts in no time.
-
What You’ll Learn
- How to conceptualize script, storyboard and plan ideas.
- Film those ideas with the best setting, techniques, and accessible gear.
- Manage different elements like Sound, Lighting and movement.
- Using software to edit your footage to deliver professional results.
- Have a completed Before and After video to showcase your improvement.
- Learn all of the above using only your mobile phones.
-
Who This Course Is For
- Young creatives looking to improve their short form content creations skills
- Aspiring influencers
- Small and medium business owners looking to gain additional skills to promote their businesses
- Companies looking to send their employees to up-skill in the field of content creation and media
-
**Prerequisites **
- A smart phone capable of recording in 1080p not older than 2019
- A basic familiarity with using phones
- Ideally an Interest in filming, content creation and social media
- No prior media experience required
-
**Content Consent: Please note that any content you share with us in regard to the course and course homework, we might use it on our media channels as marketing and student updates.
Lessons
Nest order. 90 lessons. Overlapping titles kept as separate lessons. HTML converted in full, not summarized.
1. VEST - Introduction
- title: VEST - Introduction
- status: publish
- author: 0
- is_previewable: (empty)
- video_duration: 0h 1m 10s (raw {"hours":0,"minutes":1,"seconds":10})
- video_source_type: embedded
- drive_file_id:
1qJN92Wl5hlHSFg-5yazho9rBqQVu7qba(source_ref; not a public link) - transcript pending / keyframes pending / presentation extract pending
- video_source_url: (Drive preview omitted as a public link; file id kept as source_ref)
(no lesson_content HTML in export — video-only or empty body; metadata above kept in full)
Drive extract
- file_id:
1qJN92Wl5hlHSFg-5yazho9rBqQVu7qba - filename: VEST Section 0 Welcome to VEST Online Course.mp4
- kind: video
- local_path: /workspace/academy/media/1qJN92Wl5hlHSFg-5yazho9rBqQVu7qba/VEST Section 0 Welcome to VEST Online Course.mp4
- source_ref: drive
1qJN92Wl5hlHSFg-5yazho9rBqQVu7qba· content_length 107350116 · original https://drive.google.com/file/d/1qJN92Wl5hlHSFg-5yazho9rBqQVu7qba/view - extract_status: done
- caption_source: drive_timedtext
- duration_s: 70.078005
- keyframe_count: 8
Transcript
- Hey guys, how you doing? Uh, my name is
- [00:00:02.310] Hey guys, how you doing? Uh, my name is
- [00:00:02.320] Hey guys, how you doing? Uh, my name is Cameron Herren and welcome to the Vest
- [00:00:05.269] Cameron Herren and welcome to the Vest
- [00:00:05.279] Cameron Herren and welcome to the Vest online course. Vest stands for video
- [00:00:07.749] online course. Vest stands for video
- [00:00:07.759] online course. Vest stands for video engagement and skills training. We're so
- [00:00:10.310] engagement and skills training. We're so
- [00:00:10.320] engagement and skills training. We're so excited to, you know, have you all here.
- [00:00:12.629] excited to, you know, have you all here.
- [00:00:12.639] excited to, you know, have you all here. Over the next few sections and videos,
- [00:00:15.030] Over the next few sections and videos,
- [00:00:15.040] Over the next few sections and videos, you'll discover how to create powerful
- [00:00:17.269] you'll discover how to create powerful
- [00:00:17.279] you'll discover how to create powerful and engaging short videos using just
- [00:00:19.990] and engaging short videos using just
- [00:00:20.000] and engaging short videos using just your foes. This course is designed to
- [00:00:22.150] your foes. This course is designed to
- [00:00:22.160] your foes. This course is designed to take you step by step from your very
- [00:00:24.470] take you step by step from your very
- [00:00:24.480] take you step by step from your very first before video all the way through
- [00:00:26.550] first before video all the way through
- [00:00:26.560] first before video all the way through to your final project that shows just
- [00:00:29.269] to your final project that shows just
- [00:00:29.279] to your final project that shows just how far you've come. In this course, you
- [00:00:31.750] how far you've come. In this course, you
- [00:00:31.760] how far you've come. In this course, you can expect some homework and quizzes
- [00:00:34.150] can expect some homework and quizzes
- [00:00:34.160] can expect some homework and quizzes that will allow you to apply the skills
- [00:00:37.270] that will allow you to apply the skills
- [00:00:37.280] that will allow you to apply the skills you've learned almost immediately.
- [00:00:39.510] you've learned almost immediately.
- [00:00:39.520] you've learned almost immediately. Partake in creative challenges that push
- [00:00:42.150] Partake in creative challenges that push
- [00:00:42.160] Partake in creative challenges that push you to experiment and find your unique
- [00:00:44.869] you to experiment and find your unique
- [00:00:44.879] you to experiment and find your unique style. Get supportive feedback from me
- [00:00:47.110] style. Get supportive feedback from me
- [00:00:47.120] style. Get supportive feedback from me and others at Vest to help grow your
- [00:00:49.350] and others at Vest to help grow your
- [00:00:49.360] and others at Vest to help grow your confidence in making short videos.
- [00:00:51.990] confidence in making short videos.
- [00:00:52.000] confidence in making short videos. Remember, it's all about progress, not
- [00:00:54.229] Remember, it's all about progress, not
- [00:00:54.239] Remember, it's all about progress, not perfection. Your first video is just the
- [00:00:56.869] perfection. Your first video is just the
- [00:00:56.879] perfection. Your first video is just the starting out point, and by the end,
- [00:00:58.790] starting out point, and by the end,
- [00:00:58.800] starting out point, and by the end, you'll be amazed at the transformation.
- [00:01:01.270] you'll be amazed at the transformation.
- [00:01:01.280] you'll be amazed at the transformation. So, grab your phone, bring your
- [00:01:03.029] So, grab your phone, bring your
- [00:01:03.039] So, grab your phone, bring your creativity, and let's get started on
- [00:01:05.270] creativity, and let's get started on
- [00:01:05.280] creativity, and let's get started on your journey to becoming a confident
- [00:01:07.510] your journey to becoming a confident
- [00:01:07.520] your journey to becoming a confident video creator.
Keyframes
- /workspace/academy/media/1qJN92Wl5hlHSFg-5yazho9rBqQVu7qba/keyframes/last.jpg
- /workspace/academy/media/1qJN92Wl5hlHSFg-5yazho9rBqQVu7qba/keyframes/t001.jpg
- /workspace/academy/media/1qJN92Wl5hlHSFg-5yazho9rBqQVu7qba/keyframes/t002.jpg
- /workspace/academy/media/1qJN92Wl5hlHSFg-5yazho9rBqQVu7qba/keyframes/t003.jpg
- /workspace/academy/media/1qJN92Wl5hlHSFg-5yazho9rBqQVu7qba/keyframes/t004.jpg
- /workspace/academy/media/1qJN92Wl5hlHSFg-5yazho9rBqQVu7qba/keyframes/t005.jpg
- /workspace/academy/media/1qJN92Wl5hlHSFg-5yazho9rBqQVu7qba/keyframes/t006.jpg
- /workspace/academy/media/1qJN92Wl5hlHSFg-5yazho9rBqQVu7qba/keyframes/t007.jpg
2. About VEST
- title: About VEST
- status: publish
- author: 0
- is_previewable: (empty)
- video_duration: 0h 0m 0s (raw {"hours":0,"minutes":0,"seconds":0})
- video_source_type: (empty)

Video Engagement and Skills Training
Dive into the online world of VEST and transform your creative ideas into professional-quality mobile videos.
This online course will guide you step by step to understand all the steps required for creating engaging and high-quality content.
From conceptualization and storyboarding to dynamic shooting and post-production, create scroll stopping shorts in no time.
What You’ll Learn
- How to conceptualize script, storyboard and plan ideas.
- Film those ideas with the best setting, techniques, and accessible gear.
- Manage different elements like Sound, Lighting and movement.
- Using software to edit your footage to deliver professional results.
- Have a completed Before and After video to showcase your improvement.
- Learn all of the above using only your mobile phones.
Who This Course Is For
- Young creatives looking to improve their short form content creations skills
- Aspiring influencers
- Small and medium business owners looking to gain additional skills to promote their businesses
- Companies looking to send their employees to up-skill in the field of content creation and media
**Prerequisites **
- A smart phone capable of recording in 1080p not older than 2019
- A basic familiarity with using phones
- Ideally an Interest in film, content creation and social media
- No prior media experience required
3. About Academy
- title: About Academy
- status: publish
- author: 0
- is_previewable: (empty)
- video_duration: 0h 0m 0s (raw {"hours":0,"minutes":0,"seconds":0})
- video_source_type: (empty)
About Ambitious Academy

Ambitious Academy is your gateway to the future of manufacturing.
We are an education facility dedicated to empowering individuals and business owners in the advanced machinery industry, with a primary focus on CNC machining.
Our courses are designed with a practical approach to bridge the gap between theoretical knowledge and real-world application, ensuring you gain the hands-on skills necessary to excel in today's competitive landscape.
Ready to Build Your Career?
| Detail | Information |
|---|---|
| Our Focus | CNC Machining, Advanced Machinery, & Industry 4.0 Skills |
| Training Location | State-of-the-art facility at 2 Makro Place, Sunnyrock, Germiston. And Online Courses |
| Contact Us | WhatsApp: 0680 777 777 | Email: info@ambitious.co.zamailto:info@ambitious.co.za |
Explore All Our Courses & Enrol Today Online-courses - Ambitious Academy
4. VEST Certification
- title: VEST Certification
- status: publish
- author: 0
- is_previewable: (empty)
- video_duration: 0h 0m 0s (raw {"hours":0,"minutes":0,"seconds":0})
- video_source_type: (empty)
**

**
Certification & Setting Expectations
**

**
** Important: Course Completion vs. Certification**
Welcome to the VEST! We're thrilled to have you here.
Before you dive in, we want to clarify the goal of this training:
This course is designed to be your essential foundational training platform. It rigorously prepares you with the theoretical knowledge, workflow proficiency, and practical skills necessary to succeed in the Mobile Content Creation industry.
However, this course itself does not grant a professional industry certification.
Instead, our comprehensive curriculum and hands-on projects (like the After Video) are your preparation for a separate, external certification exam. You will be fully equipped to pass that exam after completing our course, but you must register and complete the external test to receive your official credentials.
We are focused on providing you with the practical expertise needed to earn that certification!
VEST Certification Link
https://ambitious.academy/course/vest-certification
5. Follow Along
- title: Follow Along
- status: publish
- author: 0
- is_previewable: (empty)
- video_duration: 0h 0m 0s (raw {"hours":0,"minutes":0,"seconds":0})
- video_source_type: (empty)
In this section we will be looking at some important things for a student to bear in mind throughout the course.
Progression
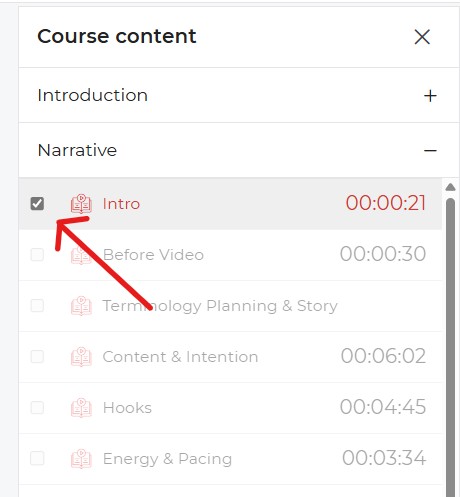
- If it is your first time doing the course, we would recommend that you follow along from start to finish without skipping content.
- If you have completed a lesson and it was not automatically marked as complete, you will have to mark it manually.

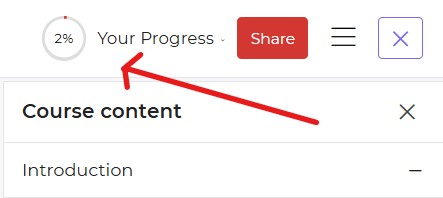
- Your progress will be displayed on the percentage icon at the top right.
- Note: It will only show the progress of content marked as completed.
Quizzes
- After important lessons we have added quizzes, these will help you better retain the lessons learned within that topic.
- The quizzes have no limit in regard to the number of attempts.
Q&A
- If you have any questions that need answers, please leave them below each lesson in the Q&A section.
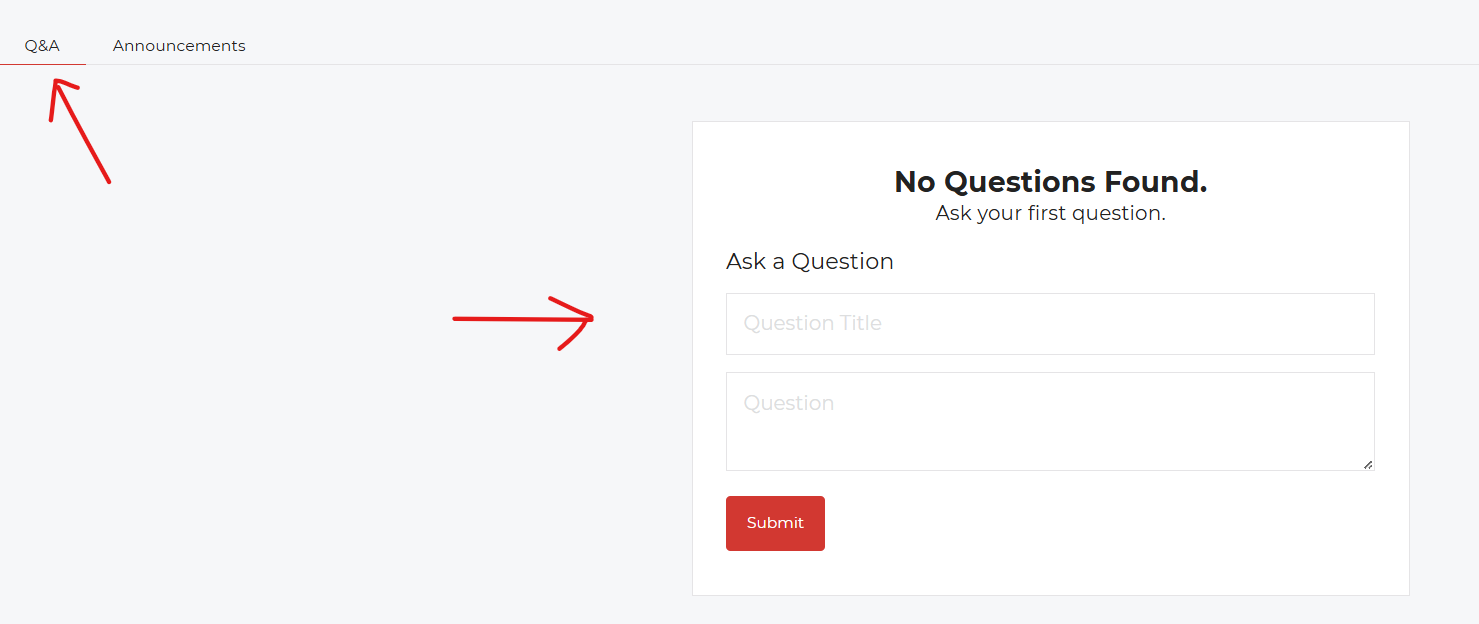
- Keep questions relevant to the lesson at hand.
- Before leaving a question, ensure that a similar question has not been asked and answered already.
Practise
- Theory without practice is not as effective as practising what you've learned.
- The more you practise what has been shown in these lessons, the more value this course will have for you.
**Content Consent: Please note that any content you share with us in regard to the course and homework, we might use it on our media channels as marketing and student updates.
6. Before Video
- title: Before Video
- status: publish
- author: 0
- is_previewable: (empty)
- video_duration: 0h 0m 30s (raw {"hours":0,"minutes":0,"seconds":30})
- video_source_type: embedded
- drive_file_id:
11prNSMwu-OVcbOLPqhVR-LwEAEnoVejT(source_ref; not a public link) - transcript pending / keyframes pending / presentation extract pending
- video_source_url: (Drive preview omitted as a public link; file id kept as source_ref)
(no lesson_content HTML in export — video-only or empty body; metadata above kept in full)
Drive extract
- file_id:
11prNSMwu-OVcbOLPqhVR-LwEAEnoVejT - filename: VEST ONLINE Turorial Narrative 2 - Before video.mp4
- kind: video
- local_path: /workspace/academy/media/11prNSMwu-OVcbOLPqhVR-LwEAEnoVejT/VEST ONLINE Turorial Narrative 2 - Before video.mp4
- source_ref: drive
11prNSMwu-OVcbOLPqhVR-LwEAEnoVejT· content_length 44785282 · original https://drive.google.com/file/d/11prNSMwu-OVcbOLPqhVR-LwEAEnoVejT/view - extract_status: done
- caption_source: drive_timedtext
- duration_s: 30.440998
- keyframe_count: 4
Transcript
- Next up, we'll be looking at before
- [00:00:01.829] Next up, we'll be looking at before
- [00:00:01.839] Next up, we'll be looking at before videos. Remember, your before videos are
- [00:00:04.230] videos. Remember, your before videos are
- [00:00:04.240] videos. Remember, your before videos are a really important part of this course
- [00:00:06.630] a really important part of this course
- [00:00:06.640] a really important part of this course so that you can track your progress and
- [00:00:08.549] so that you can track your progress and
- [00:00:08.559] so that you can track your progress and improvement before and after completing
- [00:00:10.790] improvement before and after completing
- [00:00:10.800] improvement before and after completing vest. Be creative. You know, talk to
- [00:00:13.589] vest. Be creative. You know, talk to
- [00:00:13.599] vest. Be creative. You know, talk to your camera, film a friend. You can do
- [00:00:16.390] your camera, film a friend. You can do
- [00:00:16.400] your camera, film a friend. You can do whatever you want with your before
- [00:00:17.910] whatever you want with your before
- [00:00:17.920] whatever you want with your before videos. Just remember to make sure it is
- [00:00:20.550] videos. Just remember to make sure it is
- [00:00:20.560] videos. Just remember to make sure it is not longer than 1 and 1/2 minutes. But
- [00:00:23.429] not longer than 1 and 1/2 minutes. But
- [00:00:23.439] not longer than 1 and 1/2 minutes. But while shooting your before videos, it's
- [00:00:25.109] while shooting your before videos, it's
- [00:00:25.119] while shooting your before videos, it's also equally important to just have fun.
Keyframes
- /workspace/academy/media/11prNSMwu-OVcbOLPqhVR-LwEAEnoVejT/keyframes/last.jpg
- /workspace/academy/media/11prNSMwu-OVcbOLPqhVR-LwEAEnoVejT/keyframes/t001.jpg
- /workspace/academy/media/11prNSMwu-OVcbOLPqhVR-LwEAEnoVejT/keyframes/t002.jpg
- /workspace/academy/media/11prNSMwu-OVcbOLPqhVR-LwEAEnoVejT/keyframes/t003.jpg
7. Before Video Practical
- title: Before Video Practical
- status: publish
- author: 0
- is_previewable: (empty)
- video_duration: 0h 0m 0s (raw {"hours":0,"minutes":0,"seconds":0})
- video_source_type: (empty)
PRACTICAL: The "Before" Video (Baseline Assessment)
Purpose: To capture your natural, current video-making habits before you dive into the VEST course material. This first video serves as your starting line. By comparing it to your final project, you will clearly see the technical growth you achieve throughout the curriculum.
| Task | Requirements |
|---|---|
| Topic | Record a simple video about a daily activity, your favorite object, or a quick routine. |
| Duration | Maximum 1 minute and 30 seconds (1:30). |
| Focus | Natural Instinct Only. Use your phone as you usually would. Do not consult guides, watch tutorials, or worry about course concepts like lighting, composition, or clean audio. Record it and submit the raw file. |
| Deliverable | Submit the raw video file and a one-sentence reflection on the subject. |
Think of it this way: We want your honest "before" photo. The more naturally you shoot it, the bigger your progress will look at the end!
Upload: Name the video to your student's name or ID and Before Video. (Student Name - Before Video)
Submission Instructions:
Complete this practical then submit via email to the instructor at info@ambitious.co.za or use the Academy portal.
Keep up the practical skills!
8. Intro
- title: Intro
- status: publish
- author: 0
- is_previewable: (empty)
- video_duration: 0h 0m 21s (raw {"hours":0,"minutes":0,"seconds":21})
- video_source_type: embedded
- drive_file_id:
1GtJNdHh8v9PfPVQBPodCPicsrcXY_re-(source_ref; not a public link) - transcript pending / keyframes pending / presentation extract pending
- video_source_url: (Drive preview omitted as a public link; file id kept as source_ref)
(no lesson_content HTML in export — video-only or empty body; metadata above kept in full)
Drive extract
- file_id:
1GtJNdHh8v9PfPVQBPodCPicsrcXY_re- - filename: VEST ONLINE Turorial Narrative 1 - intro.mp4
- kind: video
- local_path: /workspace/academy/media/1GtJNdHh8v9PfPVQBPodCPicsrcXY_re-/VEST ONLINE Turorial Narrative 1 - intro.mp4
- source_ref: drive
1GtJNdHh8v9PfPVQBPodCPicsrcXY_re-· content_length 28904750 · original https://drive.google.com/file/d/1GtJNdHh8v9PfPVQBPodCPicsrcXY_re-/view - extract_status: done
- caption_source: drive_timedtext
- duration_s: 20.572993
- keyframe_count: 3
Transcript
- Hey guys, Cameron from Vest here. In
- [00:00:02.389] Hey guys, Cameron from Vest here. In
- [00:00:02.399] Hey guys, Cameron from Vest here. In this section, we're going to cover
- [00:00:03.669] this section, we're going to cover
- [00:00:03.679] this section, we're going to cover narrative. This is one of my favorite
- [00:00:05.829] narrative. This is one of my favorite
- [00:00:05.839] narrative. This is one of my favorite topics. And in this section, we'll go
- [00:00:07.909] topics. And in this section, we'll go
- [00:00:07.919] topics. And in this section, we'll go over planning, the importance of
- [00:00:09.910] over planning, the importance of
- [00:00:09.920] over planning, the importance of planning, the psychology of short
- [00:00:11.830] planning, the psychology of short
- [00:00:11.840] planning, the psychology of short videos, scripting, and storyboarding,
- [00:00:14.310] videos, scripting, and storyboarding,
- [00:00:14.320] videos, scripting, and storyboarding, and more.
- [00:00:16.390] and more.
- [00:00:16.400] and more. I hope you guys enjoy.
Keyframes
- /workspace/academy/media/1GtJNdHh8v9PfPVQBPodCPicsrcXY_re-/keyframes/last.jpg
- /workspace/academy/media/1GtJNdHh8v9PfPVQBPodCPicsrcXY_re-/keyframes/t001.jpg
- /workspace/academy/media/1GtJNdHh8v9PfPVQBPodCPicsrcXY_re-/keyframes/t002.jpg
9. Terminology Planning & Story
- title: Terminology Planning & Story
- status: publish
- author: 0
- is_previewable: (empty)
- video_duration: 0h 0m 0s (raw {"hours":0,"minutes":0,"seconds":0})
- video_source_type: (empty)
**

**
VEST Essential Terminology Glossary
A shared vocabulary is key to keeping everyone on the same page. Without a clear set of terms, "whip pan" might sound like a new cooking technique!
Here is a list of the core generic terminology your VEST students will encounter throughout the course, along with brief, clear descriptions.
This glossary covers the non-software-specific terms used in the course, from concept to final export.
Planning & Story (Narrative)
| Term | Description |
|---|---|
| Concept | The main idea or core subject of your video (e.g., "Review of a new coffee maker"). |
| Pre-Production | The planning phase: writing a script, creating a shot list, checking the location, and prepping gear. |
| Production | The phase where the video is actually filmed and raw footage is captured (the shooting phase). |
| Post-Production | The phase after shooting, where all clips, audio, and graphics are assembled and refined in editing software. |
| Shot List | A numbered, organized list of all the shots you plan to film, often including the desired angle, movement, and composition for each. |
10. Content & Intention
- title: Content & Intention
- status: publish
- author: 0
- is_previewable: (empty)
- video_duration: 0h 6m 2s (raw {"hours":0,"minutes":6,"seconds":2})
- video_source_type: embedded
- drive_file_id:
1yRuZJQ1n8qFEQk7YR8axyaCZZzrWjv8a(source_ref; not a public link) - transcript pending / keyframes pending / presentation extract pending
- video_source_url: (Drive preview omitted as a public link; file id kept as source_ref)
(no lesson_content HTML in export — video-only or empty body; metadata above kept in full)
Drive extract
- file_id:
1yRuZJQ1n8qFEQk7YR8axyaCZZzrWjv8a - filename: VEST ONLINE Turorial Narrative 3 -con.mp4
- kind: video
- local_path: /workspace/academy/media/1yRuZJQ1n8qFEQk7YR8axyaCZZzrWjv8a/VEST ONLINE Turorial Narrative 3 -con.mp4
- source_ref: drive
1yRuZJQ1n8qFEQk7YR8axyaCZZzrWjv8a· content_length 396768615 · original https://drive.google.com/file/d/1yRuZJQ1n8qFEQk7YR8axyaCZZzrWjv8a/view - extract_status: done
- caption_source: drive_timedtext
- duration_s: 362.255011
- keyframe_count: 24
Transcript
- Now, in today's video, we're going to
- [00:00:01.750] Now, in today's video, we're going to
- [00:00:01.760] Now, in today's video, we're going to look over content and intention. This
- [00:00:04.550] look over content and intention. This
- [00:00:04.560] look over content and intention. This includes different content types, your
- [00:00:06.789] includes different content types, your
- [00:00:06.799] includes different content types, your target audience, why you making your
- [00:00:09.270] target audience, why you making your
- [00:00:09.280] target audience, why you making your video, who you're making it for, and
- [00:00:12.470] video, who you're making it for, and
- [00:00:12.480] video, who you're making it for, and what is the intended reaction you are
- [00:00:14.870] what is the intended reaction you are
- [00:00:14.880] what is the intended reaction you are trying to get out of your audience. You
- [00:00:17.029] trying to get out of your audience. You
- [00:00:17.039] trying to get out of your audience. You know, there's many different types of
- [00:00:18.390] know, there's many different types of
- [00:00:18.400] know, there's many different types of content that you can create. Are you
- [00:00:20.950] content that you can create. Are you
- [00:00:20.960] content that you can create. Are you trying to entertain? Are you trying to
- [00:00:22.870] trying to entertain? Are you trying to
- [00:00:22.880] trying to entertain? Are you trying to make people laugh? Are you reviewing
- [00:00:25.109] make people laugh? Are you reviewing
- [00:00:25.119] make people laugh? Are you reviewing something? Is it a personal vlog? Or you
- [00:00:27.990] something? Is it a personal vlog? Or you
- [00:00:28.000] something? Is it a personal vlog? Or you trying to sell something? There's many
- [00:00:29.669] trying to sell something? There's many
- [00:00:29.679] trying to sell something? There's many different uh directions you can go when
- [00:00:32.470] different uh directions you can go when
- [00:00:32.480] different uh directions you can go when coming up with ideas. Here are some
- [00:00:34.389] coming up with ideas. Here are some
- [00:00:34.399] coming up with ideas. Here are some examples of different content types.
- Yeehaw!
- You see, I use my cheek to move the
- [00:01:41.749] You see, I use my cheek to move the
- [00:01:41.759] You see, I use my cheek to move the door.
- [00:01:43.350] door.
- [00:01:43.360] door. And now this is a very bleak technique.
- Not all baby carriers are created equal.
- [00:02:11.750] Not all baby carriers are created equal.
- [00:02:11.760] Not all baby carriers are created equal. And that carrier your wife loves, it
- [00:02:13.830] And that carrier your wife loves, it
- [00:02:13.840] And that carrier your wife loves, it wasn't made for you. So, we created one
- [00:02:16.070] wasn't made for you. So, we created one
- [00:02:16.080] wasn't made for you. So, we created one that was
- [00:02:17.430] that was
- [00:02:17.440] that was that'sing hot.
- [00:02:18.869] that'sing hot.
- [00:02:18.879] that'sing hot. Many of our bigname competitors still
- [00:02:20.550] Many of our bigname competitors still
- [00:02:20.560] Many of our bigname competitors still use old designs that are impossible to
- [00:02:22.309] use old designs that are impossible to
- [00:02:22.319] use old designs that are impossible to adjust, weigh a ton, and I'll have you
- [00:02:24.309] adjust, weigh a ton, and I'll have you
- [00:02:24.319] adjust, weigh a ton, and I'll have you overheating like a lobster in a French
- [00:02:25.990] overheating like a lobster in a French
- [00:02:26.000] overheating like a lobster in a French kitchen. But, we designed this carrier
- [00:02:27.990] kitchen. But, we designed this carrier
- [00:02:28.000] kitchen. But, we designed this carrier ourselves, tested it on our own babies,
- [00:02:30.150] ourselves, tested it on our own babies,
- [00:02:30.160] ourselves, tested it on our own babies, and got it independently reviewed and
- [00:02:32.229] and got it independently reviewed and
- [00:02:32.239] and got it independently reviewed and certified as hip healthy. This spandex
- [00:02:34.710] certified as hip healthy. This spandex
- [00:02:34.720] certified as hip healthy. This spandex base gently supports your baby's butt,
- [00:02:36.790] base gently supports your baby's butt,
- [00:02:36.800] base gently supports your baby's butt, while this interior liner cradles your
- [00:02:38.710] while this interior liner cradles your
- [00:02:38.720] while this interior liner cradles your baby in a cocoon of cotton carefully
- [00:02:40.869] baby in a cocoon of cotton carefully
- [00:02:40.879] baby in a cocoon of cotton carefully crafted for complete comfort. It's also
- [00:02:43.350] crafted for complete comfort. It's also
- [00:02:43.360] crafted for complete comfort. It's also machine washable because you know [ __ ]
- [00:02:45.670] machine washable because you know [ __ ]
- [00:02:45.680] machine washable because you know [ __ ] happens. The sun shade provides
- [00:02:47.670] happens. The sun shade provides
- [00:02:47.680] happens. The sun shade provides protection for your baby's sensitive
- [00:02:49.190] protection for your baby's sensitive
- [00:02:49.200] protection for your baby's sensitive skin and washable bib protects the
- [00:02:50.949] skin and washable bib protects the
- [00:02:50.959] skin and washable bib protects the carrier from that. To top it off, it's
- [00:02:53.990] carrier from that. To top it off, it's
- [00:02:54.000] carrier from that. To top it off, it's water resistant, too.
- We believe so strongly in our baby
- [00:02:59.750] We believe so strongly in our baby
- [00:02:59.760] We believe so strongly in our baby carrier that we back it with a lifetime
- [00:03:01.430] carrier that we back it with a lifetime
- [00:03:01.440] carrier that we back it with a lifetime guarantee. Not that you'll need it. So,
- [00:03:04.070] guarantee. Not that you'll need it. So,
- [00:03:04.080] guarantee. Not that you'll need it. So, what are you waiting for? A sign
- And remember, you can do this all the
- [00:03:31.589] And remember, you can do this all the
- [00:03:31.599] And remember, you can do this all the time with every single video you watch.
- [00:03:35.030] time with every single video you watch.
- [00:03:35.040] time with every single video you watch. Whether it's a specific creator, it's
- [00:03:37.509] Whether it's a specific creator, it's
- [00:03:37.519] Whether it's a specific creator, it's one of your favorites, or you're just
- [00:03:38.949] one of your favorites, or you're just
- [00:03:38.959] one of your favorites, or you're just doom scrolling on Instagram, pay
- [00:03:41.110] doom scrolling on Instagram, pay
- [00:03:41.120] doom scrolling on Instagram, pay attention to the type of content that
- [00:03:43.670] attention to the type of content that
- [00:03:43.680] attention to the type of content that you yourself watch. Let's look at some
- [00:03:45.990] you yourself watch. Let's look at some
- [00:03:46.000] you yourself watch. Let's look at some examples of target audiences.
- Ah, fishing all alone again.
- [00:04:10.869] Ah, fishing all alone again.
- [00:04:10.879] Ah, fishing all alone again. Are we good?
- [00:04:12.390] Are we good?
- [00:04:12.400] Are we good? Uh, hi.
- [00:04:13.429] Uh, hi.
- [00:04:13.439] Uh, hi. What's your name, bro?
- [00:04:14.470] What's your name, bro?
- [00:04:14.480] What's your name, bro? Yeah, it's
- [00:04:15.110] Yeah, it's
- [00:04:15.120] Yeah, it's trying to get away from my mother. Make
- [00:04:17.349] trying to get away from my mother. Make
- [00:04:17.359] trying to get away from my mother. Make me wash the dishes. I don't wash the
- [00:04:18.789] me wash the dishes. I don't wash the
- [00:04:18.799] me wash the dishes. I don't wash the dishes. I must have anyway. Check my
- [00:04:21.030] dishes. I must have anyway. Check my
- [00:04:21.040] dishes. I must have anyway. Check my trinket.
- What the hell just happened?
- [00:04:25.189] What the hell just happened?
- [00:04:25.199] What the hell just happened? Check my trinket.
- Fascinating. Where's or
- [00:04:30.230] Fascinating. Where's or
- [00:04:30.240] Fascinating. Where's or my bro? Check my Krueger coin. This was
- [00:04:32.469] my bro? Check my Krueger coin. This was
- [00:04:32.479] my bro? Check my Krueger coin. This was my grandfather's Krueger ring. I cut it
- [00:04:34.230] my grandfather's Krueger ring. I cut it
- [00:04:34.240] my grandfather's Krueger ring. I cut it through with a grind. I made a trinket.
- [00:04:36.469] through with a grind. I made a trinket.
- [00:04:36.479] through with a grind. I made a trinket. Yeah, you're not exactly dressed for
- [00:04:38.230] Yeah, you're not exactly dressed for
- [00:04:38.240] Yeah, you're not exactly dressed for fishing, are you?
- [00:04:38.950] fishing, are you?
- [00:04:38.960] fishing, are you? Why did you just say I'm not dressed for
- [00:04:40.390] Why did you just say I'm not dressed for
- [00:04:40.400] Why did you just say I'm not dressed for fishing? Why do you think I'm wearing a
- [00:04:41.749] fishing? Why do you think I'm wearing a
- [00:04:41.759] fishing? Why do you think I'm wearing a pink shirt in a sport? But it's just not
- [00:04:44.150] pink shirt in a sport? But it's just not
- [00:04:44.160] pink shirt in a sport? But it's just not those jeans. I'm a bit tall and my
- [00:04:45.590] those jeans. I'm a bit tall and my
- [00:04:45.600] those jeans. I'm a bit tall and my mother been on a long weekend. But at
- [00:04:47.110] mother been on a long weekend. But at
- [00:04:47.120] mother been on a long weekend. But at least I have sexy ankles to show off my
- [00:04:48.870] least I have sexy ankles to show off my
- [00:04:48.880] least I have sexy ankles to show off my cabas. You know what I'm saying?
- [00:04:49.990] cabas. You know what I'm saying?
- [00:04:50.000] cabas. You know what I'm saying? I mean, I don't what
- [00:04:51.670] I mean, I don't what
- [00:04:51.680] I mean, I don't what that pokey hooters. Lady Chihuahua
- [00:04:53.749] that pokey hooters. Lady Chihuahua
- [00:04:53.759] that pokey hooters. Lady Chihuahua looking stuff. But they like a gold. Why
- [00:04:56.550] looking stuff. But they like a gold. Why
- [00:04:56.560] looking stuff. But they like a gold. Why you think I'm wearing a gold man?
- [00:04:57.830] you think I'm wearing a gold man?
- [00:04:57.840] you think I'm wearing a gold man? What? Why would they?
- Yeah, that's not gonna
- [00:05:09.350] Yeah, that's not gonna
- [00:05:09.360] Yeah, that's not gonna what?
- What the hell is going on?
- Yeah, that's not whatever. I don't care.
- Snake man. [ __ ] my wife.
- [00:05:31.830] Snake man. [ __ ] my wife.
- [00:05:31.840] Snake man. [ __ ] my wife. Oh, thank god that's over. Oh,
- [00:05:34.390] Oh, thank god that's over. Oh,
- [00:05:34.400] Oh, thank god that's over. Oh, what does that mean?
- [00:05:35.909] what does that mean?
- [00:05:35.919] what does that mean? So, when trying to identify your target
- [00:05:38.230] So, when trying to identify your target
- [00:05:38.240] So, when trying to identify your target audience, remember if you try to make
- [00:05:41.110] audience, remember if you try to make
- [00:05:41.120] audience, remember if you try to make content for everyone, you'll find it
- [00:05:43.510] content for everyone, you'll find it
- [00:05:43.520] content for everyone, you'll find it often appeals to no one. So, it's good
- [00:05:46.629] often appeals to no one. So, it's good
- [00:05:46.639] often appeals to no one. So, it's good to be specific. We've just covered
- [00:05:49.510] to be specific. We've just covered
- [00:05:49.520] to be specific. We've just covered content and intention, the different
- [00:05:51.510] content and intention, the different
- [00:05:51.520] content and intention, the different content types, your target audience.
- [00:05:54.070] content types, your target audience.
- [00:05:54.080] content types, your target audience. Basically, why are you making your video
- [00:05:56.629] Basically, why are you making your video
- [00:05:56.639] Basically, why are you making your video and who are you making it for? Thank you
- [00:05:58.469] and who are you making it for? Thank you
- [00:05:58.479] and who are you making it for? Thank you for joining us and I'll see you in the
- [00:05:59.909] for joining us and I'll see you in the
- [00:05:59.919] for joining us and I'll see you in the next one.
Keyframes
- /workspace/academy/media/1yRuZJQ1n8qFEQk7YR8axyaCZZzrWjv8a/keyframes/last.jpg
- /workspace/academy/media/1yRuZJQ1n8qFEQk7YR8axyaCZZzrWjv8a/keyframes/t002.jpg
- /workspace/academy/media/1yRuZJQ1n8qFEQk7YR8axyaCZZzrWjv8a/keyframes/t003.jpg
- /workspace/academy/media/1yRuZJQ1n8qFEQk7YR8axyaCZZzrWjv8a/keyframes/t005.jpg
- /workspace/academy/media/1yRuZJQ1n8qFEQk7YR8axyaCZZzrWjv8a/keyframes/t006.jpg
- /workspace/academy/media/1yRuZJQ1n8qFEQk7YR8axyaCZZzrWjv8a/keyframes/t008.jpg
- /workspace/academy/media/1yRuZJQ1n8qFEQk7YR8axyaCZZzrWjv8a/keyframes/t009.jpg
- /workspace/academy/media/1yRuZJQ1n8qFEQk7YR8axyaCZZzrWjv8a/keyframes/t011.jpg
- /workspace/academy/media/1yRuZJQ1n8qFEQk7YR8axyaCZZzrWjv8a/keyframes/t013.jpg
- /workspace/academy/media/1yRuZJQ1n8qFEQk7YR8axyaCZZzrWjv8a/keyframes/t014.jpg
- /workspace/academy/media/1yRuZJQ1n8qFEQk7YR8axyaCZZzrWjv8a/keyframes/t016.jpg
- /workspace/academy/media/1yRuZJQ1n8qFEQk7YR8axyaCZZzrWjv8a/keyframes/t017.jpg
- /workspace/academy/media/1yRuZJQ1n8qFEQk7YR8axyaCZZzrWjv8a/keyframes/t019.jpg
- /workspace/academy/media/1yRuZJQ1n8qFEQk7YR8axyaCZZzrWjv8a/keyframes/t020.jpg
- /workspace/academy/media/1yRuZJQ1n8qFEQk7YR8axyaCZZzrWjv8a/keyframes/t022.jpg
- /workspace/academy/media/1yRuZJQ1n8qFEQk7YR8axyaCZZzrWjv8a/keyframes/t023.jpg
- /workspace/academy/media/1yRuZJQ1n8qFEQk7YR8axyaCZZzrWjv8a/keyframes/t025.jpg
- /workspace/academy/media/1yRuZJQ1n8qFEQk7YR8axyaCZZzrWjv8a/keyframes/t027.jpg
- /workspace/academy/media/1yRuZJQ1n8qFEQk7YR8axyaCZZzrWjv8a/keyframes/t028.jpg
- /workspace/academy/media/1yRuZJQ1n8qFEQk7YR8axyaCZZzrWjv8a/keyframes/t030.jpg
- /workspace/academy/media/1yRuZJQ1n8qFEQk7YR8axyaCZZzrWjv8a/keyframes/t031.jpg
- /workspace/academy/media/1yRuZJQ1n8qFEQk7YR8axyaCZZzrWjv8a/keyframes/t033.jpg
- /workspace/academy/media/1yRuZJQ1n8qFEQk7YR8axyaCZZzrWjv8a/keyframes/t034.jpg
- /workspace/academy/media/1yRuZJQ1n8qFEQk7YR8axyaCZZzrWjv8a/keyframes/t036.jpg
11. Hooks
- title: Hooks
- status: publish
- author: 0
- is_previewable: (empty)
- video_duration: 0h 4m 45s (raw {"hours":0,"minutes":4,"seconds":45})
- video_source_type: embedded
- drive_file_id:
1dXxdefhB07pdVoxkYoOCvnn06y8dcZzP(source_ref; not a public link) - transcript pending / keyframes pending / presentation extract pending
- video_source_url: (Drive preview omitted as a public link; file id kept as source_ref)
(no lesson_content HTML in export — video-only or empty body; metadata above kept in full)
Drive extract
- file_id:
1dXxdefhB07pdVoxkYoOCvnn06y8dcZzP - filename: VEST ONLINE Turorial Narrative 4 - ho.mp4
- kind: video
- local_path: /workspace/academy/media/1dXxdefhB07pdVoxkYoOCvnn06y8dcZzP/VEST ONLINE Turorial Narrative 4 - ho.mp4
- source_ref: drive
1dXxdefhB07pdVoxkYoOCvnn06y8dcZzP· content_length 333790553 · original https://drive.google.com/file/d/1dXxdefhB07pdVoxkYoOCvnn06y8dcZzP/view - extract_status: done
- caption_source: drive_timedtext
- duration_s: 285.233991
- keyframe_count: 24
Transcript
- Hey again. Today we're going to be going
- [00:00:01.829] Hey again. Today we're going to be going
- [00:00:01.839] Hey again. Today we're going to be going over hooks. It's the first 5 seconds of
- [00:00:04.789] over hooks. It's the first 5 seconds of
- [00:00:04.799] over hooks. It's the first 5 seconds of your videos, which is the most important
- [00:00:07.909] your videos, which is the most important
- [00:00:07.919] your videos, which is the most important time for audience retention, audience
- [00:00:11.190] time for audience retention, audience
- [00:00:11.200] time for audience retention, audience engagement. Basically, if someone
- [00:00:13.270] engagement. Basically, if someone
- [00:00:13.280] engagement. Basically, if someone watches the first 5 seconds of your
- [00:00:15.110] watches the first 5 seconds of your
- [00:00:15.120] watches the first 5 seconds of your video, they're more likely to watch the
- [00:00:17.830] video, they're more likely to watch the
- [00:00:17.840] video, they're more likely to watch the rest of it. The three main types of
- [00:00:19.830] rest of it. The three main types of
- [00:00:19.840] rest of it. The three main types of hooks that we'll be looking at today is
- [00:00:22.310] hooks that we'll be looking at today is
- [00:00:22.320] hooks that we'll be looking at today is bold statements, intriguing questions,
- [00:00:25.509] bold statements, intriguing questions,
- [00:00:25.519] bold statements, intriguing questions, and interesting visuals. There are a few
- [00:00:28.630] and interesting visuals. There are a few
- [00:00:28.640] and interesting visuals. There are a few more than this, but these are the main
- [00:00:31.109] more than this, but these are the main
- [00:00:31.119] more than this, but these are the main three we will be covering at best. So,
- [00:00:34.069] three we will be covering at best. So,
- [00:00:34.079] three we will be covering at best. So, let's go through some examples of our
- [00:00:36.229] let's go through some examples of our
- [00:00:36.239] let's go through some examples of our different types of hooks. First, we have
- [00:00:38.549] different types of hooks. First, we have
- [00:00:38.559] different types of hooks. First, we have bold statements. An example of this
- [00:00:40.709] bold statements. An example of this
- [00:00:40.719] bold statements. An example of this would be your coffee tastes bad because
- [00:00:42.869] would be your coffee tastes bad because
- [00:00:42.879] would be your coffee tastes bad because you're skipping this one simple step.
- [00:00:45.270] you're skipping this one simple step.
- [00:00:45.280] you're skipping this one simple step. You see, it's a little, you know, like
- [00:00:46.790] You see, it's a little, you know, like
- [00:00:46.800] You see, it's a little, you know, like outrageous, uh, a little bit demanding.
- [00:00:49.830] outrageous, uh, a little bit demanding.
- [00:00:49.840] outrageous, uh, a little bit demanding. That's a bold statement. Other examples
- [00:00:52.229] That's a bold statement. Other examples
- [00:00:52.239] That's a bold statement. Other examples could be something like how to see
- [00:00:54.389] could be something like how to see
- [00:00:54.399] could be something like how to see through privacy glass or I'm going to
- [00:00:56.950] through privacy glass or I'm going to
- [00:00:56.960] through privacy glass or I'm going to show you the best move to lose weight or
- [00:00:59.750] show you the best move to lose weight or
- [00:00:59.760] show you the best move to lose weight or how to constantly burn calories. Next up
- [00:01:02.389] how to constantly burn calories. Next up
- [00:01:02.399] how to constantly burn calories. Next up we have intriguing questions. An example
- [00:01:04.549] we have intriguing questions. An example
- [00:01:04.559] we have intriguing questions. An example of this could be want to brew a coffee
- [00:01:06.710] of this could be want to brew a coffee
- [00:01:06.720] of this could be want to brew a coffee like a barista in under 2 minutes. Tired
- [00:01:10.070] like a barista in under 2 minutes. Tired
- [00:01:10.080] like a barista in under 2 minutes. Tired of making bad videos? Want to constantly
- [00:01:12.390] of making bad videos? Want to constantly
- [00:01:12.400] of making bad videos? Want to constantly burn calories? Want to shoot cool
- [00:01:14.550] burn calories? Want to shoot cool
- [00:01:14.560] burn calories? Want to shoot cool transitions? Or do you struggle to
- [00:01:17.109] transitions? Or do you struggle to
- [00:01:17.119] transitions? Or do you struggle to focus? Want some ADHD tips? Next up,
- [00:01:20.710] focus? Want some ADHD tips? Next up,
- [00:01:20.720] focus? Want some ADHD tips? Next up, interesting visuals. This could be a
- [00:01:22.630] interesting visuals. This could be a
- [00:01:22.640] interesting visuals. This could be a transition, it could be a cool action
- [00:01:24.550] transition, it could be a cool action
- [00:01:24.560] transition, it could be a cool action shot. Um, there's many different ways to
- [00:01:26.870] shot. Um, there's many different ways to
- [00:01:26.880] shot. Um, there's many different ways to have an interesting visual, and here are
- [00:01:29.190] have an interesting visual, and here are
- [00:01:29.200] have an interesting visual, and here are some examples.
- Heat. Heat.
- Heat. Heat.
- Heat. Heat.
- How do you ask great questions? Well,
- [00:03:22.149] How do you ask great questions? Well,
- [00:03:22.159] How do you ask great questions? Well, what actually makes a great question?
- [00:03:23.830] what actually makes a great question?
- [00:03:23.840] what actually makes a great question? And I think that's a really good
- [00:03:24.949] And I think that's a really good
- [00:03:24.959] And I think that's a really good question. And in that question, what
- [00:03:26.869] question. And in that question, what
- [00:03:26.879] question. And in that question, what makes a great question? I'm now going to
- [00:03:28.790] makes a great question? I'm now going to
- [00:03:28.800] makes a great question? I'm now going to answer it with the ingredients of a
- [00:03:30.470] answer it with the ingredients of a
- [00:03:30.480] answer it with the ingredients of a great question. Hopefully, that makes
- [00:03:31.830] great question. Hopefully, that makes
- [00:03:31.840] great question. Hopefully, that makes sense. The first thing is clarity. A
- [00:03:33.990] sense. The first thing is clarity. A
- [00:03:34.000] sense. The first thing is clarity. A question that is not clear and concise
- [00:03:36.070] question that is not clear and concise
- [00:03:36.080] question that is not clear and concise is not a good question. Second thing is
- [00:03:38.710] is not a good question. Second thing is
- [00:03:38.720] is not a good question. Second thing is it's purposeful. There's a purpose
- [00:03:40.630] it's purposeful. There's a purpose
- [00:03:40.640] it's purposeful. There's a purpose behind it. The next one is
- [00:03:42.070] behind it. The next one is
- [00:03:42.080] behind it. The next one is open-endedness. I think close-ended
- [00:03:44.390] open-endedness. I think close-ended
- [00:03:44.400] open-endedness. I think close-ended questions tend to get close-ended
- [00:03:46.470] questions tend to get close-ended
- [00:03:46.480] questions tend to get close-ended answers. Open-endedness is very
- [00:03:48.550] answers. Open-endedness is very
- [00:03:48.560] answers. Open-endedness is very important. The next thing is you've got
- [00:03:50.070] important. The next thing is you've got
- [00:03:50.080] important. The next thing is you've got to ask it with a curious mind. Don't ask
- [00:03:53.509] to ask it with a curious mind. Don't ask
- [00:03:53.519] to ask it with a curious mind. Don't ask something where you don't really want
- [00:03:54.949] something where you don't really want
- [00:03:54.959] something where you don't really want the answer. You want to ask a question
- [00:03:56.630] the answer. You want to ask a question
- [00:03:56.640] the answer. You want to ask a question where you're challenging some of your
- [00:03:58.070] where you're challenging some of your
- [00:03:58.080] where you're challenging some of your own assumptions. Otherwise, if you're
- [00:03:59.509] own assumptions. Otherwise, if you're
- [00:03:59.519] own assumptions. Otherwise, if you're asking the question to something you
- [00:04:00.630] asking the question to something you
- [00:04:00.640] asking the question to something you already know, well, that's just you
- [00:04:02.149] already know, well, that's just you
- [00:04:02.159] already know, well, that's just you looking for confirmation that other
- [00:04:03.589] looking for confirmation that other
- [00:04:03.599] looking for confirmation that other people believe in the things you
- [00:04:04.630] people believe in the things you
- [00:04:04.640] people believe in the things you believe. You want to have lots of
- [00:04:05.589] believe. You want to have lots of
- [00:04:05.599] believe. You want to have lots of empathy when you're asking the question.
- [00:04:06.869] empathy when you're asking the question.
- [00:04:06.879] empathy when you're asking the question. You want to make sure your question is
- [00:04:07.830] You want to make sure your question is
- [00:04:07.840] You want to make sure your question is really focused. You want to make sure
- [00:04:09.429] really focused. You want to make sure
- [00:04:09.439] really focused. You want to make sure your question stimulates reflection. And
- [00:04:12.550] your question stimulates reflection. And
- [00:04:12.560] your question stimulates reflection. And you also want to make sure your question
- [00:04:13.990] you also want to make sure your question
- [00:04:14.000] you also want to make sure your question leads to dialogue. These are the core
- [00:04:15.830] leads to dialogue. These are the core
- [00:04:15.840] leads to dialogue. These are the core ones I focus on.
- [00:04:18.949] ones I focus on.
- [00:04:18.959] ones I focus on. I just came back from gym and I'm going
- [00:04:20.949] I just came back from gym and I'm going
- [00:04:20.959] I just came back from gym and I'm going to show you the best move to lose
- [00:04:22.950] to show you the best move to lose
- [00:04:22.960] to show you the best move to lose weight. Just have ADHD.
- So, we just covered hooks. Bold
- [00:04:29.990] So, we just covered hooks. Bold
- [00:04:30.000] So, we just covered hooks. Bold statements, intriguing questions, and
- [00:04:32.629] statements, intriguing questions, and
- [00:04:32.639] statements, intriguing questions, and unexpected visuals. Remember, hooks are
- [00:04:35.430] unexpected visuals. Remember, hooks are
- [00:04:35.440] unexpected visuals. Remember, hooks are the first 5 seconds of your video. They
- [00:04:37.670] the first 5 seconds of your video. They
- [00:04:37.680] the first 5 seconds of your video. They are the most important for retaining
- [00:04:40.310] are the most important for retaining
- [00:04:40.320] are the most important for retaining your audience. I'll see you guys in the
- [00:04:42.629] your audience. I'll see you guys in the
- [00:04:42.639] your audience. I'll see you guys in the next one.
Keyframes
- /workspace/academy/media/1dXxdefhB07pdVoxkYoOCvnn06y8dcZzP/keyframes/last.jpg
- /workspace/academy/media/1dXxdefhB07pdVoxkYoOCvnn06y8dcZzP/keyframes/t001.jpg
- /workspace/academy/media/1dXxdefhB07pdVoxkYoOCvnn06y8dcZzP/keyframes/t003.jpg
- /workspace/academy/media/1dXxdefhB07pdVoxkYoOCvnn06y8dcZzP/keyframes/t004.jpg
- /workspace/academy/media/1dXxdefhB07pdVoxkYoOCvnn06y8dcZzP/keyframes/t005.jpg
- /workspace/academy/media/1dXxdefhB07pdVoxkYoOCvnn06y8dcZzP/keyframes/t006.jpg
- /workspace/academy/media/1dXxdefhB07pdVoxkYoOCvnn06y8dcZzP/keyframes/t008.jpg
- /workspace/academy/media/1dXxdefhB07pdVoxkYoOCvnn06y8dcZzP/keyframes/t009.jpg
- /workspace/academy/media/1dXxdefhB07pdVoxkYoOCvnn06y8dcZzP/keyframes/t010.jpg
- /workspace/academy/media/1dXxdefhB07pdVoxkYoOCvnn06y8dcZzP/keyframes/t011.jpg
- /workspace/academy/media/1dXxdefhB07pdVoxkYoOCvnn06y8dcZzP/keyframes/t013.jpg
- /workspace/academy/media/1dXxdefhB07pdVoxkYoOCvnn06y8dcZzP/keyframes/t014.jpg
- /workspace/academy/media/1dXxdefhB07pdVoxkYoOCvnn06y8dcZzP/keyframes/t015.jpg
- /workspace/academy/media/1dXxdefhB07pdVoxkYoOCvnn06y8dcZzP/keyframes/t016.jpg
- /workspace/academy/media/1dXxdefhB07pdVoxkYoOCvnn06y8dcZzP/keyframes/t018.jpg
- /workspace/academy/media/1dXxdefhB07pdVoxkYoOCvnn06y8dcZzP/keyframes/t019.jpg
- /workspace/academy/media/1dXxdefhB07pdVoxkYoOCvnn06y8dcZzP/keyframes/t020.jpg
- /workspace/academy/media/1dXxdefhB07pdVoxkYoOCvnn06y8dcZzP/keyframes/t021.jpg
- /workspace/academy/media/1dXxdefhB07pdVoxkYoOCvnn06y8dcZzP/keyframes/t023.jpg
- /workspace/academy/media/1dXxdefhB07pdVoxkYoOCvnn06y8dcZzP/keyframes/t024.jpg
- /workspace/academy/media/1dXxdefhB07pdVoxkYoOCvnn06y8dcZzP/keyframes/t025.jpg
- /workspace/academy/media/1dXxdefhB07pdVoxkYoOCvnn06y8dcZzP/keyframes/t026.jpg
- /workspace/academy/media/1dXxdefhB07pdVoxkYoOCvnn06y8dcZzP/keyframes/t028.jpg
- /workspace/academy/media/1dXxdefhB07pdVoxkYoOCvnn06y8dcZzP/keyframes/t029.jpg
12. Energy & Pacing
- title: Energy & Pacing
- status: publish
- author: 0
- is_previewable: (empty)
- video_duration: 0h 3m 34s (raw {"hours":0,"minutes":3,"seconds":34})
- video_source_type: embedded
- drive_file_id:
1jaeJm6PR76p9nvB2Gb3z9w2Ni_DPAIJw(source_ref; not a public link) - transcript pending / keyframes pending / presentation extract pending
- video_source_url: (Drive preview omitted as a public link; file id kept as source_ref)
(no lesson_content HTML in export — video-only or empty body; metadata above kept in full)
Drive extract
- file_id:
1jaeJm6PR76p9nvB2Gb3z9w2Ni_DPAIJw - filename: VEST ONLINE Turorial Narrative 5 - Pacing and Ener.mp4
- kind: video
- local_path: /workspace/academy/media/1jaeJm6PR76p9nvB2Gb3z9w2Ni_DPAIJw/VEST ONLINE Turorial Narrative 5 - Pacing and Ener.mp4
- source_ref: drive
1jaeJm6PR76p9nvB2Gb3z9w2Ni_DPAIJw· content_length 330167446 · original https://drive.google.com/file/d/1jaeJm6PR76p9nvB2Gb3z9w2Ni_DPAIJw/view - extract_status: done
- caption_source: drive_timedtext
- duration_s: 214.412993
- keyframe_count: 22
Transcript
- Hey, next up we're going to look at
- [00:00:02.790] Hey, next up we're going to look at
- [00:00:02.800] Hey, next up we're going to look at pacing and energy. What is pacing and
- [00:00:05.190] pacing and energy. What is pacing and
- [00:00:05.200] pacing and energy. What is pacing and energy? Pacing refers to the speed and
- [00:00:08.790] energy? Pacing refers to the speed and
- [00:00:08.800] energy? Pacing refers to the speed and intensity of your footage and your edit
- [00:00:12.150] intensity of your footage and your edit
- [00:00:12.160] intensity of your footage and your edit and all of that. The energy refers to
- [00:00:14.870] and all of that. The energy refers to
- [00:00:14.880] and all of that. The energy refers to the person in camera, your subject, the
- [00:00:18.470] the person in camera, your subject, the
- [00:00:18.480] the person in camera, your subject, the speed and intensity of your subject, of
- [00:00:21.029] speed and intensity of your subject, of
- [00:00:21.039] speed and intensity of your subject, of your characters, of your products. You
- [00:00:23.750] your characters, of your products. You
- [00:00:23.760] your characters, of your products. You know, if you, you know, shooting an
- [00:00:25.349] know, if you, you know, shooting an
- [00:00:25.359] know, if you, you know, shooting an object and not a person. How do we
- [00:00:27.509] object and not a person. How do we
- [00:00:27.519] object and not a person. How do we measure pacing? We measure pacing based
- [00:00:30.630] measure pacing? We measure pacing based
- [00:00:30.640] measure pacing? We measure pacing based on the speed and intensity of your
- [00:00:34.870] on the speed and intensity of your
- [00:00:34.880] on the speed and intensity of your camera, your edit. Is your camera moving
- [00:00:37.190] camera, your edit. Is your camera moving
- [00:00:37.200] camera, your edit. Is your camera moving around a lot? Do you have a lot of cuts?
- [00:00:39.830] around a lot? Do you have a lot of cuts?
- [00:00:39.840] around a lot? Do you have a lot of cuts? Is your camera stationary and focusing
- [00:00:42.950] Is your camera stationary and focusing
- [00:00:42.960] Is your camera stationary and focusing on one particular person for an extended
- [00:00:46.150] on one particular person for an extended
- [00:00:46.160] on one particular person for an extended period of time? An example of slow
- [00:00:48.790] period of time? An example of slow
- [00:00:48.800] period of time? An example of slow pacing could be actually this video. If
- [00:00:51.430] pacing could be actually this video. If
- [00:00:51.440] pacing could be actually this video. If you see you're, you know, constantly on
- [00:00:53.670] you see you're, you know, constantly on
- [00:00:53.680] you see you're, you know, constantly on me. But if we wanted to speed up the
- [00:00:56.069] me. But if we wanted to speed up the
- [00:00:56.079] me. But if we wanted to speed up the pacing, what we do is we can cut to
- [00:00:59.270] pacing, what we do is we can cut to
- [00:00:59.280] pacing, what we do is we can cut to different stop footage elements like
- [00:01:01.349] different stop footage elements like
- [00:01:01.359] different stop footage elements like this and this or add effects and
- [00:01:03.830] this and this or add effects and
- [00:01:03.840] this and this or add effects and explosions and have different things
- [00:01:06.070] explosions and have different things
- [00:01:06.080] explosions and have different things coming around me. You know, zoom in,
- [00:01:08.310] coming around me. You know, zoom in,
- [00:01:08.320] coming around me. You know, zoom in, zoom out, increase the intensity, maybe
- [00:01:10.870] zoom out, increase the intensity, maybe
- [00:01:10.880] zoom out, increase the intensity, maybe make some dramatic lighting or
- [00:01:12.710] make some dramatic lighting or
- [00:01:12.720] make some dramatic lighting or something. Um, but then if you bring it
- [00:01:15.750] something. Um, but then if you bring it
- [00:01:15.760] something. Um, but then if you bring it back to just normal and have it a
- [00:01:18.230] back to just normal and have it a
- [00:01:18.240] back to just normal and have it a constant uh, you know, video of just me
- [00:01:21.030] constant uh, you know, video of just me
- [00:01:21.040] constant uh, you know, video of just me yapping, that's that's a slower pace.
- [00:01:23.590] yapping, that's that's a slower pace.
- [00:01:23.600] yapping, that's that's a slower pace. Whereas energy is me. So if I'm like
- [00:01:26.310] Whereas energy is me. So if I'm like
- [00:01:26.320] Whereas energy is me. So if I'm like this and bubbly, I I've got a lot of
- [00:01:28.950] this and bubbly, I I've got a lot of
- [00:01:28.960] this and bubbly, I I've got a lot of energy. I'm high energy. You know,
- [00:01:30.870] energy. I'm high energy. You know,
- [00:01:30.880] energy. I'm high energy. You know, generally I am high energy. I'm a
- [00:01:32.550] generally I am high energy. I'm a
- [00:01:32.560] generally I am high energy. I'm a hyperactive person. Um, but if I come
- [00:01:35.429] hyperactive person. Um, but if I come
- [00:01:35.439] hyperactive person. Um, but if I come down and I start talking like I'm going
- [00:01:38.550] down and I start talking like I'm going
- [00:01:38.560] down and I start talking like I'm going to sleep, that that's low energy. Um,
- [00:01:40.710] to sleep, that that's low energy. Um,
- [00:01:40.720] to sleep, that that's low energy. Um, and obviously low energy doesn't just
- [00:01:42.390] and obviously low energy doesn't just
- [00:01:42.400] and obviously low energy doesn't just mean like, oh, sleepy, tired. It can
- [00:01:44.710] mean like, oh, sleepy, tired. It can
- [00:01:44.720] mean like, oh, sleepy, tired. It can also refer to different types of
- [00:01:46.310] also refer to different types of
- [00:01:46.320] also refer to different types of emotions. You know, some are more
- [00:01:48.550] emotions. You know, some are more
- [00:01:48.560] emotions. You know, some are more somber. If you're trying to, for
- [00:01:50.469] somber. If you're trying to, for
- [00:01:50.479] somber. If you're trying to, for example, film a video that's a
- [00:01:53.350] example, film a video that's a
- [00:01:53.360] example, film a video that's a remembrance or memorial for a family
- [00:01:56.550] remembrance or memorial for a family
- [00:01:56.560] remembrance or memorial for a family member or something, obviously that's
- [00:01:58.870] member or something, obviously that's
- [00:01:58.880] member or something, obviously that's not going to be the most exciting and
- [00:02:01.190] not going to be the most exciting and
- [00:02:01.200] not going to be the most exciting and high energy type of video. It's going to
- [00:02:03.510] high energy type of video. It's going to
- [00:02:03.520] high energy type of video. It's going to be more somber, low energy, slower
- [00:02:05.910] be more somber, low energy, slower
- [00:02:05.920] be more somber, low energy, slower paced, cuz you do use energy and pacing
- [00:02:08.469] paced, cuz you do use energy and pacing
- [00:02:08.479] paced, cuz you do use energy and pacing in tandem to complement your narrative,
- [00:02:11.670] in tandem to complement your narrative,
- [00:02:11.680] in tandem to complement your narrative, to complement the type of content and
- [00:02:15.589] to complement the type of content and
- [00:02:15.599] to complement the type of content and intention of that content that you're
- [00:02:17.670] intention of that content that you're
- [00:02:17.680] intention of that content that you're trying to achieve. Even something as
- [00:02:20.470] trying to achieve. Even something as
- [00:02:20.480] trying to achieve. Even something as simple as cars, you will film a very
- [00:02:23.270] simple as cars, you will film a very
- [00:02:23.280] simple as cars, you will film a very different video for a Volvo versus a
- [00:02:25.830] different video for a Volvo versus a
- [00:02:25.840] different video for a Volvo versus a Ferrari. A Ferrari will be foster paced.
- [00:02:28.550] Ferrari. A Ferrari will be foster paced.
- [00:02:28.560] Ferrari. A Ferrari will be foster paced. It'll cut to the different cool aspects
- [00:02:31.270] It'll cut to the different cool aspects
- [00:02:31.280] It'll cut to the different cool aspects of the Ferrari. the seat textures, the
- [00:02:33.830] of the Ferrari. the seat textures, the
- [00:02:33.840] of the Ferrari. the seat textures, the logo, it going super fast. Well, Volvo
- [00:02:36.869] logo, it going super fast. Well, Volvo
- [00:02:36.879] logo, it going super fast. Well, Volvo is trying to like get a family to buy
- [00:02:38.630] is trying to like get a family to buy
- [00:02:38.640] is trying to like get a family to buy it. It's trying to say, "Hey, this car
- [00:02:40.470] it. It's trying to say, "Hey, this car
- [00:02:40.480] it. It's trying to say, "Hey, this car can take you on holiday. It's going to
- [00:02:41.910] can take you on holiday. It's going to
- [00:02:41.920] can take you on holiday. It's going to have a lot more long shots of the car
- [00:02:44.550] have a lot more long shots of the car
- [00:02:44.560] have a lot more long shots of the car traveling down the road. It's not going
- [00:02:46.710] traveling down the road. It's not going
- [00:02:46.720] traveling down the road. It's not going to be as, you know, high intensity. You
- [00:02:50.309] to be as, you know, high intensity. You
- [00:02:50.319] to be as, you know, high intensity. You can start with a slower pace or lower
- [00:02:52.630] can start with a slower pace or lower
- [00:02:52.640] can start with a slower pace or lower energy and, you know, let it get faster,
- [00:02:55.990] energy and, you know, let it get faster,
- [00:02:56.000] energy and, you know, let it get faster, let it get higher, you know, as your
- [00:02:58.150] let it get higher, you know, as your
- [00:02:58.160] let it get higher, you know, as your video goes on." or even vice versa. If
- [00:03:00.869] video goes on." or even vice versa. If
- [00:03:00.879] video goes on." or even vice versa. If you're trying to grab someone's
- [00:03:02.149] you're trying to grab someone's
- [00:03:02.159] you're trying to grab someone's attention, but then you need to tell
- [00:03:03.990] attention, but then you need to tell
- [00:03:04.000] attention, but then you need to tell them something important, you might
- [00:03:05.509] them something important, you might
- [00:03:05.519] them something important, you might start with some higher pacing and then
- [00:03:08.070] start with some higher pacing and then
- [00:03:08.080] start with some higher pacing and then slow down the pacing so that people can
- [00:03:10.550] slow down the pacing so that people can
- [00:03:10.560] slow down the pacing so that people can hear what you're trying to say. But
- [00:03:13.190] hear what you're trying to say. But
- [00:03:13.200] hear what you're trying to say. But mainly the difference between pacing and
- [00:03:15.030] mainly the difference between pacing and
- [00:03:15.040] mainly the difference between pacing and energy is pacing is your camera. It is
- [00:03:19.110] energy is pacing is your camera. It is
- [00:03:19.120] energy is pacing is your camera. It is how quickly it cuts, how much it moves,
- [00:03:21.750] how quickly it cuts, how much it moves,
- [00:03:21.760] how quickly it cuts, how much it moves, all the different effects and things
- [00:03:23.350] all the different effects and things
- [00:03:23.360] all the different effects and things that you'll add in post-prouction.
- [00:03:25.670] that you'll add in post-prouction.
- [00:03:25.680] that you'll add in post-prouction. Energy is me. Energy is your subject.
- [00:03:27.990] Energy is me. Energy is your subject.
- [00:03:28.000] Energy is me. Energy is your subject. That was energy and pacing and I'll see
- [00:03:30.789] That was energy and pacing and I'll see
- [00:03:30.799] That was energy and pacing and I'll see you guys in the next one.
Keyframes
- /workspace/academy/media/1jaeJm6PR76p9nvB2Gb3z9w2Ni_DPAIJw/keyframes/last.jpg
- /workspace/academy/media/1jaeJm6PR76p9nvB2Gb3z9w2Ni_DPAIJw/keyframes/t001.jpg
- /workspace/academy/media/1jaeJm6PR76p9nvB2Gb3z9w2Ni_DPAIJw/keyframes/t002.jpg
- /workspace/academy/media/1jaeJm6PR76p9nvB2Gb3z9w2Ni_DPAIJw/keyframes/t003.jpg
- /workspace/academy/media/1jaeJm6PR76p9nvB2Gb3z9w2Ni_DPAIJw/keyframes/t004.jpg
- /workspace/academy/media/1jaeJm6PR76p9nvB2Gb3z9w2Ni_DPAIJw/keyframes/t005.jpg
- /workspace/academy/media/1jaeJm6PR76p9nvB2Gb3z9w2Ni_DPAIJw/keyframes/t006.jpg
- /workspace/academy/media/1jaeJm6PR76p9nvB2Gb3z9w2Ni_DPAIJw/keyframes/t007.jpg
- /workspace/academy/media/1jaeJm6PR76p9nvB2Gb3z9w2Ni_DPAIJw/keyframes/t008.jpg
- /workspace/academy/media/1jaeJm6PR76p9nvB2Gb3z9w2Ni_DPAIJw/keyframes/t009.jpg
- /workspace/academy/media/1jaeJm6PR76p9nvB2Gb3z9w2Ni_DPAIJw/keyframes/t010.jpg
- /workspace/academy/media/1jaeJm6PR76p9nvB2Gb3z9w2Ni_DPAIJw/keyframes/t011.jpg
- /workspace/academy/media/1jaeJm6PR76p9nvB2Gb3z9w2Ni_DPAIJw/keyframes/t012.jpg
- /workspace/academy/media/1jaeJm6PR76p9nvB2Gb3z9w2Ni_DPAIJw/keyframes/t013.jpg
- /workspace/academy/media/1jaeJm6PR76p9nvB2Gb3z9w2Ni_DPAIJw/keyframes/t014.jpg
- /workspace/academy/media/1jaeJm6PR76p9nvB2Gb3z9w2Ni_DPAIJw/keyframes/t015.jpg
- /workspace/academy/media/1jaeJm6PR76p9nvB2Gb3z9w2Ni_DPAIJw/keyframes/t016.jpg
- /workspace/academy/media/1jaeJm6PR76p9nvB2Gb3z9w2Ni_DPAIJw/keyframes/t017.jpg
- /workspace/academy/media/1jaeJm6PR76p9nvB2Gb3z9w2Ni_DPAIJw/keyframes/t018.jpg
- /workspace/academy/media/1jaeJm6PR76p9nvB2Gb3z9w2Ni_DPAIJw/keyframes/t019.jpg
- /workspace/academy/media/1jaeJm6PR76p9nvB2Gb3z9w2Ni_DPAIJw/keyframes/t020.jpg
- /workspace/academy/media/1jaeJm6PR76p9nvB2Gb3z9w2Ni_DPAIJw/keyframes/t021.jpg
13. Scripts & Story
- title: Scripts & Story
- status: publish
- author: 0
- is_previewable: (empty)
- video_duration: 0h 4m 12s (raw {"hours":0,"minutes":4,"seconds":12})
- video_source_type: embedded
- drive_file_id:
12bUkDI2Jr3VxVRFej463cX5SGaUc2Vbc(source_ref; not a public link) - transcript pending / keyframes pending / presentation extract pending
- video_source_url: (Drive preview omitted as a public link; file id kept as source_ref)
(no lesson_content HTML in export — video-only or empty body; metadata above kept in full)
- quizzes_following_this_lesson: 1 (full text in Quizzes)
- Narrative Quiz (12 questions)
Drive extract
- file_id:
12bUkDI2Jr3VxVRFej463cX5SGaUc2Vbc - filename: VEST ONLINE Turorial Narrative 6 - Scripts & Story.mp4
- kind: video
- local_path: /workspace/academy/media/12bUkDI2Jr3VxVRFej463cX5SGaUc2Vbc/VEST ONLINE Turorial Narrative 6 - Scripts & Story.mp4
- source_ref: drive
12bUkDI2Jr3VxVRFej463cX5SGaUc2Vbc· content_length 330555909 · original https://drive.google.com/file/d/12bUkDI2Jr3VxVRFej463cX5SGaUc2Vbc/view - extract_status: done
- caption_source: drive_timedtext
- duration_s: 252.169002
- keyframe_count: 24
Transcript
- Hey, so today we're going to cover some
- [00:00:01.990] Hey, so today we're going to cover some
- [00:00:02.000] Hey, so today we're going to cover some more planning elements for your
- [00:00:04.390] more planning elements for your
- [00:00:04.400] more planning elements for your narratives, namely scripting and
- [00:00:06.710] narratives, namely scripting and
- [00:00:06.720] narratives, namely scripting and storyboarding. Scripts are more of a
- [00:00:09.509] storyboarding. Scripts are more of a
- [00:00:09.519] storyboarding. Scripts are more of a creative element that help you to define
- [00:00:13.030] creative element that help you to define
- [00:00:13.040] creative element that help you to define your narrative, define what happens,
- [00:00:15.509] your narrative, define what happens,
- [00:00:15.519] your narrative, define what happens, your intention, your target audience,
- [00:00:17.830] your intention, your target audience,
- [00:00:17.840] your intention, your target audience, the type of content. Whereas a story
- [00:00:19.990] the type of content. Whereas a story
- [00:00:20.000] the type of content. Whereas a story board helps you visualize the different
- [00:00:22.470] board helps you visualize the different
- [00:00:22.480] board helps you visualize the different technical elements, the shots that
- [00:00:24.310] technical elements, the shots that
- [00:00:24.320] technical elements, the shots that you'll take, if you're going to have
- [00:00:26.150] you'll take, if you're going to have
- [00:00:26.160] you'll take, if you're going to have transitions, all of that. So, let's get
- [00:00:28.710] transitions, all of that. So, let's get
- [00:00:28.720] transitions, all of that. So, let's get into scripting. There's many different
- [00:00:30.790] into scripting. There's many different
- [00:00:30.800] into scripting. There's many different types of scripts. You know, Hollywood
- [00:00:32.870] types of scripts. You know, Hollywood
- [00:00:32.880] types of scripts. You know, Hollywood uses mainly uh speculative and shooting
- [00:00:35.830] uses mainly uh speculative and shooting
- [00:00:35.840] uses mainly uh speculative and shooting scripts depending if you writing the
- [00:00:38.470] scripts depending if you writing the
- [00:00:38.480] scripts depending if you writing the script to sell it or filming it. We'll
- [00:00:41.270] script to sell it or filming it. We'll
- [00:00:41.280] script to sell it or filming it. We'll mainly go over audiovisisual scripts.
- [00:00:43.590] mainly go over audiovisisual scripts.
- [00:00:43.600] mainly go over audiovisisual scripts. It's a type of script where you've got
- [00:00:45.430] It's a type of script where you've got
- [00:00:45.440] It's a type of script where you've got your different timing of, you know, how
- [00:00:47.750] your different timing of, you know, how
- [00:00:47.760] your different timing of, you know, how long your video is going to be, what
- [00:00:49.510] long your video is going to be, what
- [00:00:49.520] long your video is going to be, what happens at 0 to 5 seconds, and you
- [00:00:52.869] happens at 0 to 5 seconds, and you
- [00:00:52.879] happens at 0 to 5 seconds, and you basically separate different elements
- [00:00:54.869] basically separate different elements
- [00:00:54.879] basically separate different elements like dialogue from the visuals, and it's
- [00:00:57.990] like dialogue from the visuals, and it's
- [00:00:58.000] like dialogue from the visuals, and it's almost like a checklist of what's
- [00:00:59.990] almost like a checklist of what's
- [00:01:00.000] almost like a checklist of what's happening in your videos. And it helps
- [00:01:02.150] happening in your videos. And it helps
- [00:01:02.160] happening in your videos. And it helps you, you know, plan your narrative, come
- [00:01:04.229] you, you know, plan your narrative, come
- [00:01:04.239] you, you know, plan your narrative, come up with that idea and have your hook,
- [00:01:07.510] up with that idea and have your hook,
- [00:01:07.520] up with that idea and have your hook, your beginning, your body, your
- [00:01:10.149] your beginning, your body, your
- [00:01:10.159] your beginning, your body, your conclusion, and your call to action if
- [00:01:12.710] conclusion, and your call to action if
- [00:01:12.720] conclusion, and your call to action if you have one. Plans all those different
- [00:01:14.789] you have one. Plans all those different
- [00:01:14.799] you have one. Plans all those different elements out in a simple, easy to
- [00:01:17.910] elements out in a simple, easy to
- [00:01:17.920] elements out in a simple, easy to understand way. Let's look at some
- [00:01:19.910] understand way. Let's look at some
- [00:01:19.920] understand way. Let's look at some samples of these scripts.
- Now, let's look at some story boards.
- [00:01:39.510] Now, let's look at some story boards.
- [00:01:39.520] Now, let's look at some story boards. So, usually with storyboards, you'd
- [00:01:41.830] So, usually with storyboards, you'd
- [00:01:41.840] So, usually with storyboards, you'd sketch them. Um, but obviously, we're
- [00:01:44.390] sketch them. Um, but obviously, we're
- [00:01:44.400] sketch them. Um, but obviously, we're not all amazing artists, so you don't
- [00:01:46.310] not all amazing artists, so you don't
- [00:01:46.320] not all amazing artists, so you don't have to worry about uh it looking
- [00:01:48.550] have to worry about uh it looking
- [00:01:48.560] have to worry about uh it looking amazing. It's for your benefit to help
- [00:01:50.710] amazing. It's for your benefit to help
- [00:01:50.720] amazing. It's for your benefit to help you. If you stick figures, that's fine.
- [00:01:53.270] you. If you stick figures, that's fine.
- [00:01:53.280] you. If you stick figures, that's fine. What you'd usually have is an image of
- [00:01:55.749] What you'd usually have is an image of
- [00:01:55.759] What you'd usually have is an image of your shot and then a descriptor of what
- [00:01:58.550] your shot and then a descriptor of what
- [00:01:58.560] your shot and then a descriptor of what happens and any camera movement or
- [00:02:01.670] happens and any camera movement or
- [00:02:01.680] happens and any camera movement or transitions or sound elements involved
- [00:02:04.550] transitions or sound elements involved
- [00:02:04.560] transitions or sound elements involved you'd attach to that image and to that
- [00:02:07.030] you'd attach to that image and to that
- [00:02:07.040] you'd attach to that image and to that shot. So you don't always have to draw
- [00:02:08.949] shot. So you don't always have to draw
- [00:02:08.959] shot. So you don't always have to draw it. If you are a little bit
- [00:02:10.630] it. If you are a little bit
- [00:02:10.640] it. If you are a little bit self-conscious about your stick figures
- [00:02:12.630] self-conscious about your stick figures
- [00:02:12.640] self-conscious about your stick figures and your art, you can source videos on
- [00:02:14.869] and your art, you can source videos on
- [00:02:14.879] and your art, you can source videos on Google. Literally just search person in
- [00:02:17.510] Google. Literally just search person in
- [00:02:17.520] Google. Literally just search person in mediumshot and attach that to your story
- [00:02:21.750] mediumshot and attach that to your story
- [00:02:21.760] mediumshot and attach that to your story board. Additionally, you can take photos
- [00:02:24.229] board. Additionally, you can take photos
- [00:02:24.239] board. Additionally, you can take photos yourself. Use your friends, your family,
- [00:02:26.470] yourself. Use your friends, your family,
- [00:02:26.480] yourself. Use your friends, your family, your partners. Just take a picture of
- [00:02:28.949] your partners. Just take a picture of
- [00:02:28.959] your partners. Just take a picture of people from the different angles and
- [00:02:31.430] people from the different angles and
- [00:02:31.440] people from the different angles and closeup, medium, wide, all the different
- [00:02:33.670] closeup, medium, wide, all the different
- [00:02:33.680] closeup, medium, wide, all the different shots. Even if they're not the subject
- [00:02:35.990] shots. Even if they're not the subject
- [00:02:36.000] shots. Even if they're not the subject of your video, you can use them as a
- [00:02:38.150] of your video, you can use them as a
- [00:02:38.160] of your video, you can use them as a fillin for your planning. The best part
- [00:02:40.470] fillin for your planning. The best part
- [00:02:40.480] fillin for your planning. The best part about storyboards is it's a visual
- [00:02:43.589] about storyboards is it's a visual
- [00:02:43.599] about storyboards is it's a visual representation of everything you need.
- [00:02:46.070] representation of everything you need.
- [00:02:46.080] representation of everything you need. So when you're shooting, you know what
- [00:02:48.630] So when you're shooting, you know what
- [00:02:48.640] So when you're shooting, you know what shots you need to take, what shots
- [00:02:50.390] shots you need to take, what shots
- [00:02:50.400] shots you need to take, what shots you've taken, and what you still have to
- [00:02:52.309] you've taken, and what you still have to
- [00:02:52.319] you've taken, and what you still have to take. It allows you to shoot your videos
- [00:02:54.470] take. It allows you to shoot your videos
- [00:02:54.480] take. It allows you to shoot your videos more efficiently, and you won't realize
- [00:02:57.509] more efficiently, and you won't realize
- [00:02:57.519] more efficiently, and you won't realize that you need to go back and get extra
- [00:02:59.350] that you need to go back and get extra
- [00:02:59.360] that you need to go back and get extra shots and stuff when you're in the edit
- [00:03:01.110] shots and stuff when you're in the edit
- [00:03:01.120] shots and stuff when you're in the edit if you have proper planning. And here's
- [00:03:04.070] if you have proper planning. And here's
- [00:03:04.080] if you have proper planning. And here's some examples of storyboards.
- So, we've just covered uh scripts to
- [00:03:59.589] So, we've just covered uh scripts to
- [00:03:59.599] So, we've just covered uh scripts to storyboards, a really important part of
- [00:04:02.470] storyboards, a really important part of
- [00:04:02.480] storyboards, a really important part of planning that will help you in the
- [00:04:04.390] planning that will help you in the
- [00:04:04.400] planning that will help you in the shooting process of completing your
- [00:04:06.470] shooting process of completing your
- [00:04:06.480] shooting process of completing your videos efficiently and effectively. I
- [00:04:09.110] videos efficiently and effectively. I
- [00:04:09.120] videos efficiently and effectively. I will see you guys in the next one.
Keyframes
- /workspace/academy/media/12bUkDI2Jr3VxVRFej463cX5SGaUc2Vbc/keyframes/last.jpg
- /workspace/academy/media/12bUkDI2Jr3VxVRFej463cX5SGaUc2Vbc/keyframes/t001.jpg
- /workspace/academy/media/12bUkDI2Jr3VxVRFej463cX5SGaUc2Vbc/keyframes/t002.jpg
- /workspace/academy/media/12bUkDI2Jr3VxVRFej463cX5SGaUc2Vbc/keyframes/t003.jpg
- /workspace/academy/media/12bUkDI2Jr3VxVRFej463cX5SGaUc2Vbc/keyframes/t004.jpg
- /workspace/academy/media/12bUkDI2Jr3VxVRFej463cX5SGaUc2Vbc/keyframes/t005.jpg
- /workspace/academy/media/12bUkDI2Jr3VxVRFej463cX5SGaUc2Vbc/keyframes/t007.jpg
- /workspace/academy/media/12bUkDI2Jr3VxVRFej463cX5SGaUc2Vbc/keyframes/t008.jpg
- /workspace/academy/media/12bUkDI2Jr3VxVRFej463cX5SGaUc2Vbc/keyframes/t009.jpg
- /workspace/academy/media/12bUkDI2Jr3VxVRFej463cX5SGaUc2Vbc/keyframes/t010.jpg
- /workspace/academy/media/12bUkDI2Jr3VxVRFej463cX5SGaUc2Vbc/keyframes/t011.jpg
- /workspace/academy/media/12bUkDI2Jr3VxVRFej463cX5SGaUc2Vbc/keyframes/t012.jpg
- /workspace/academy/media/12bUkDI2Jr3VxVRFej463cX5SGaUc2Vbc/keyframes/t013.jpg
- /workspace/academy/media/12bUkDI2Jr3VxVRFej463cX5SGaUc2Vbc/keyframes/t014.jpg
- /workspace/academy/media/12bUkDI2Jr3VxVRFej463cX5SGaUc2Vbc/keyframes/t015.jpg
- /workspace/academy/media/12bUkDI2Jr3VxVRFej463cX5SGaUc2Vbc/keyframes/t016.jpg
- /workspace/academy/media/12bUkDI2Jr3VxVRFej463cX5SGaUc2Vbc/keyframes/t017.jpg
- /workspace/academy/media/12bUkDI2Jr3VxVRFej463cX5SGaUc2Vbc/keyframes/t018.jpg
- /workspace/academy/media/12bUkDI2Jr3VxVRFej463cX5SGaUc2Vbc/keyframes/t020.jpg
- /workspace/academy/media/12bUkDI2Jr3VxVRFej463cX5SGaUc2Vbc/keyframes/t021.jpg
- /workspace/academy/media/12bUkDI2Jr3VxVRFej463cX5SGaUc2Vbc/keyframes/t022.jpg
- /workspace/academy/media/12bUkDI2Jr3VxVRFej463cX5SGaUc2Vbc/keyframes/t023.jpg
- /workspace/academy/media/12bUkDI2Jr3VxVRFej463cX5SGaUc2Vbc/keyframes/t024.jpg
- /workspace/academy/media/12bUkDI2Jr3VxVRFej463cX5SGaUc2Vbc/keyframes/t025.jpg
14. Storyboard Template
- title: Storyboard Template
- status: publish
- author: 0
- is_previewable: (empty)
- video_duration: 0h 0m 0s (raw {"hours":0,"minutes":0,"seconds":0})
- video_source_type: (empty)
Storyboard Template
In this section we will be using storyboards.
below you will find a template as a starting point.
The Storyboards document has two tabs, one for vertical and one for horizontal.
15. Homework Storyboard or Script
- title: Homework Storyboard or Script
- status: publish
- author: 0
- is_previewable: (empty)
- video_duration: 0h 0m 0s (raw {"hours":0,"minutes":0,"seconds":0})
- video_source_type: (empty)
PRACTICAL: Narrative & Shots (The Blueprint)
Sections Covered: Narrative; Shots and Coverage
| Task | Requirements | Deliverables |
|---|---|---|
| Objective | Plan a 60-second video on a simple process or topic (e.g., how to make a cup of instant noodles, how to pack a small bag, or a day in the life of your pet). | One (1) Document (Can be text or a clear photo of handwritten notes). |
| Focus | Story & Variety. Think about the structure: Beginning (Introduce the topic/subject), Middle (Show the action/process), and End (Show the final result). | Blueprint Must Include: |
| 1. Basic Script: | Write out the main steps or what you plan to say/show for the 60 seconds. | |
| 2. Coverage Plan: | For your 60-second script, plan out at least five different camera placements to capture the action. Use simple terms to describe the shots. | |
| Example Shot Descriptions: | 1. Shot of the Whole Scene: (Showing the entire kitchen counter.) 2. Shot of the Subject's Face: (Showing them reacting.) 3. Shot of the Hands/Object: (Showing the process up close.) 4. Shot from Low on the Ground: (Looking up at the subject.) 5. Shot from a Distance: (Showing the subject and the whole background.) |
Why This Matters: Planning is the shortcut to success. By writing it down, you ensure you capture all the necessary pieces of the story, preventing awkward gaps when you get to the editing room.
Submission Instructions:
Complete this practical then submit via email to the instructor at info@ambitious.co.za or use the Academy portal.
Keep up the practical skills!
16. Concluding
- title: Concluding
- status: publish
- author: 0
- is_previewable: (empty)
- video_duration: 0h 0m 37s (raw {"hours":0,"minutes":0,"seconds":37})
- video_source_type: embedded
- drive_file_id:
1ffWtoKFM3dsbxz04R6ozobD4l5fNjiM2(source_ref; not a public link) - transcript pending / keyframes pending / presentation extract pending
- video_source_url: (Drive preview omitted as a public link; file id kept as source_ref)
(no lesson_content HTML in export — video-only or empty body; metadata above kept in full)
Drive extract
- file_id:
1ffWtoKFM3dsbxz04R6ozobD4l5fNjiM2 - filename: VEST ONLINE Turorial Narrative 7 - Outro.mp4
- kind: video
- local_path: /workspace/academy/media/1ffWtoKFM3dsbxz04R6ozobD4l5fNjiM2/VEST ONLINE Turorial Narrative 7 - Outro.mp4
- source_ref: drive
1ffWtoKFM3dsbxz04R6ozobD4l5fNjiM2· content_length 54774661 · original https://drive.google.com/file/d/1ffWtoKFM3dsbxz04R6ozobD4l5fNjiM2/view - extract_status: done
- caption_source: drive_timedtext
- duration_s: 36.501995
- keyframe_count: 5
Transcript
- Hey guys, congratulations on completing
- [00:00:02.629] Hey guys, congratulations on completing
- [00:00:02.639] Hey guys, congratulations on completing the narrative section. As I said, this
- [00:00:04.950] the narrative section. As I said, this
- [00:00:04.960] the narrative section. As I said, this was one of my favorite sections. I am a
- [00:00:06.950] was one of my favorite sections. I am a
- [00:00:06.960] was one of my favorite sections. I am a big narrative guy. I think it's an
- [00:00:09.270] big narrative guy. I think it's an
- [00:00:09.280] big narrative guy. I think it's an important part of just every aspect of
- [00:00:11.910] important part of just every aspect of
- [00:00:11.920] important part of just every aspect of anything creative or art related. But
- [00:00:14.870] anything creative or art related. But
- [00:00:14.880] anything creative or art related. But remember, keep practicing, have fun, get
- [00:00:17.430] remember, keep practicing, have fun, get
- [00:00:17.440] remember, keep practicing, have fun, get other content. You know, the best way to
- [00:00:20.070] other content. You know, the best way to
- [00:00:20.080] other content. You know, the best way to get good at this type of thing is to
- [00:00:22.390] get good at this type of thing is to
- [00:00:22.400] get good at this type of thing is to also just watch other people's content
- [00:00:24.390] also just watch other people's content
- [00:00:24.400] also just watch other people's content and learn from it and try to break down
- [00:00:27.830] and learn from it and try to break down
- [00:00:27.840] and learn from it and try to break down uh whatever you see. But thank you guys
- [00:00:30.710] uh whatever you see. But thank you guys
- [00:00:30.720] uh whatever you see. But thank you guys for finishing this section and I'll see
- [00:00:33.270] for finishing this section and I'll see
- [00:00:33.280] for finishing this section and I'll see you in the next one.
Keyframes
- /workspace/academy/media/1ffWtoKFM3dsbxz04R6ozobD4l5fNjiM2/keyframes/last.jpg
- /workspace/academy/media/1ffWtoKFM3dsbxz04R6ozobD4l5fNjiM2/keyframes/t001.jpg
- /workspace/academy/media/1ffWtoKFM3dsbxz04R6ozobD4l5fNjiM2/keyframes/t002.jpg
- /workspace/academy/media/1ffWtoKFM3dsbxz04R6ozobD4l5fNjiM2/keyframes/t003.jpg
- /workspace/academy/media/1ffWtoKFM3dsbxz04R6ozobD4l5fNjiM2/keyframes/t004.jpg
17. Phone & Gear - Intro
- title: Phone & Gear - Intro
- status: publish
- author: 0
- is_previewable: (empty)
- video_duration: 0h 0m 15s (raw {"hours":0,"minutes":0,"seconds":15})
- video_source_type: embedded
- drive_file_id:
18-3rWNphgPnB73sgfuKg8GCZ9vMW6SZR(source_ref; not a public link) - transcript pending / keyframes pending / presentation extract pending
- video_source_url: (Drive preview omitted as a public link; file id kept as source_ref)
(no lesson_content HTML in export — video-only or empty body; metadata above kept in full)
Drive extract
- file_id:
18-3rWNphgPnB73sgfuKg8GCZ9vMW6SZR - filename: VEST Section 2 Phone & Gear 1 Intro.mp4
- kind: video
- local_path: /workspace/academy/media/18-3rWNphgPnB73sgfuKg8GCZ9vMW6SZR/VEST Section 2 Phone & Gear 1 Intro.mp4
- source_ref: drive
18-3rWNphgPnB73sgfuKg8GCZ9vMW6SZR· content_length 21617824 · original https://drive.google.com/file/d/18-3rWNphgPnB73sgfuKg8GCZ9vMW6SZR/view - extract_status: done
- caption_source: drive_timedtext_asr_srt
- duration_s: 14.675011
- keyframe_count: 2
Transcript
- [00:00:00.160] Hey guys, Cameron here. Welcome to the
- [00:00:02.800] second section in the Vest online
- [00:00:05.120] course. Today we're going to be going
- [00:00:06.960] over phone optimization, camera
- [00:00:09.040] settings, and essential gear. Hope you
- [00:00:10.960] guys enjoy. I'll check you in the next
- [00:00:12.559] video.
Keyframes
- /workspace/academy/media/18-3rWNphgPnB73sgfuKg8GCZ9vMW6SZR/keyframes/last.jpg
- /workspace/academy/media/18-3rWNphgPnB73sgfuKg8GCZ9vMW6SZR/keyframes/t001.jpg
18. Phone Optimization
- title: Phone Optimization
- status: publish
- author: 0
- is_previewable: (empty)
- video_duration: 0h 1m 48s (raw {"hours":0,"minutes":1,"seconds":48})
- video_source_type: embedded
- drive_file_id:
19gYq_jtMlCPrWgRyPC6yQLFYwB6Jc7Gl(source_ref; not a public link) - transcript pending / keyframes pending / presentation extract pending
- video_source_url: (Drive preview omitted as a public link; file id kept as source_ref)
(no lesson_content HTML in export — video-only or empty body; metadata above kept in full)
Drive extract
- file_id:
19gYq_jtMlCPrWgRyPC6yQLFYwB6Jc7Gl - filename: VEST Section 2 Phone & Gear 2 Phone Optimization.mp4
- kind: video
- local_path: /workspace/academy/media/19gYq_jtMlCPrWgRyPC6yQLFYwB6Jc7Gl/VEST Section 2 Phone & Gear 2 Phone Optimization.mp4
- source_ref: drive
19gYq_jtMlCPrWgRyPC6yQLFYwB6Jc7Gl· content_length 123560107 · original https://drive.google.com/file/d/19gYq_jtMlCPrWgRyPC6yQLFYwB6Jc7Gl/view - extract_status: done
- caption_source: drive_timedtext
- duration_s: 108.275011
- keyframe_count: 12
Transcript
- Hey guys, in this video we're going to
- [00:00:02.389] Hey guys, in this video we're going to
- [00:00:02.399] Hey guys, in this video we're going to be going over phone optimization.
- [00:00:04.950] be going over phone optimization.
- [00:00:04.960] be going over phone optimization. Basically, you just want to make sure
- [00:00:06.390] Basically, you just want to make sure
- [00:00:06.400] Basically, you just want to make sure your phone storage is clear. You clean
- [00:00:09.110] your phone storage is clear. You clean
- [00:00:09.120] your phone storage is clear. You clean the lens of your camera. Want to make
- [00:00:11.110] the lens of your camera. Want to make
- [00:00:11.120] the lens of your camera. Want to make sure your phone's on airplane mode or do
- [00:00:13.589] sure your phone's on airplane mode or do
- [00:00:13.599] sure your phone's on airplane mode or do not disturb so that you don't get a ton
- [00:00:15.589] not disturb so that you don't get a ton
- [00:00:15.599] not disturb so that you don't get a ton of messages while you're filming your
- [00:00:17.189] of messages while you're filming your
- [00:00:17.199] of messages while you're filming your content. Here's some options on how to
- [00:00:19.349] content. Here's some options on how to
- [00:00:19.359] content. Here's some options on how to free up storage on your Android device.
- Here's
- some options on how to free up storage
- [00:00:38.950] some options on how to free up storage
- [00:00:38.960] some options on how to free up storage on your Apple device.
- Here's how to turn your phone on do not
- [00:00:57.590] Here's how to turn your phone on do not
- [00:00:57.600] Here's how to turn your phone on do not disturb or airplane mode.
- Here's some safe techniques on how to
- [00:01:10.469] Here's some safe techniques on how to
- [00:01:10.479] Here's some safe techniques on how to clean your camera lens. Remember, using
- [00:01:12.630] clean your camera lens. Remember, using
- [00:01:12.640] clean your camera lens. Remember, using a microfiber cloth is the safest way to
- [00:01:15.510] a microfiber cloth is the safest way to
- [00:01:15.520] a microfiber cloth is the safest way to clean your camera lens.
- Avoid using scratchy or dirty cloths.
- [00:01:27.749] Avoid using scratchy or dirty cloths.
- [00:01:27.759] Avoid using scratchy or dirty cloths. Don't use tissue paper. Use a microfiber
- [00:01:30.310] Don't use tissue paper. Use a microfiber
- [00:01:30.320] Don't use tissue paper. Use a microfiber cloth. So, there's a few techniques to
- [00:01:32.310] cloth. So, there's a few techniques to
- [00:01:32.320] cloth. So, there's a few techniques to optimize your phone settings, but
- [00:01:34.390] optimize your phone settings, but
- [00:01:34.400] optimize your phone settings, but remember, the most important thing is to
- [00:01:36.230] remember, the most important thing is to
- [00:01:36.240] remember, the most important thing is to keep your phone's battery charged. You
- [00:01:38.310] keep your phone's battery charged. You
- [00:01:38.320] keep your phone's battery charged. You can use a power bank if you're shooting
- [00:01:40.069] can use a power bank if you're shooting
- [00:01:40.079] can use a power bank if you're shooting long shots, or just make sure you've
- [00:01:41.910] long shots, or just make sure you've
- [00:01:41.920] long shots, or just make sure you've planned in advance to keep it in the
- [00:01:43.590] planned in advance to keep it in the
- [00:01:43.600] planned in advance to keep it in the wall. Otherwise, I hope you guys enjoy.
- [00:01:45.510] wall. Otherwise, I hope you guys enjoy.
- [00:01:45.520] wall. Otherwise, I hope you guys enjoy. I'll see you in the next video.
Keyframes
- /workspace/academy/media/19gYq_jtMlCPrWgRyPC6yQLFYwB6Jc7Gl/keyframes/last.jpg
- /workspace/academy/media/19gYq_jtMlCPrWgRyPC6yQLFYwB6Jc7Gl/keyframes/t001.jpg
- /workspace/academy/media/19gYq_jtMlCPrWgRyPC6yQLFYwB6Jc7Gl/keyframes/t002.jpg
- /workspace/academy/media/19gYq_jtMlCPrWgRyPC6yQLFYwB6Jc7Gl/keyframes/t003.jpg
- /workspace/academy/media/19gYq_jtMlCPrWgRyPC6yQLFYwB6Jc7Gl/keyframes/t004.jpg
- /workspace/academy/media/19gYq_jtMlCPrWgRyPC6yQLFYwB6Jc7Gl/keyframes/t005.jpg
- /workspace/academy/media/19gYq_jtMlCPrWgRyPC6yQLFYwB6Jc7Gl/keyframes/t006.jpg
- /workspace/academy/media/19gYq_jtMlCPrWgRyPC6yQLFYwB6Jc7Gl/keyframes/t007.jpg
- /workspace/academy/media/19gYq_jtMlCPrWgRyPC6yQLFYwB6Jc7Gl/keyframes/t008.jpg
- /workspace/academy/media/19gYq_jtMlCPrWgRyPC6yQLFYwB6Jc7Gl/keyframes/t009.jpg
- /workspace/academy/media/19gYq_jtMlCPrWgRyPC6yQLFYwB6Jc7Gl/keyframes/t010.jpg
- /workspace/academy/media/19gYq_jtMlCPrWgRyPC6yQLFYwB6Jc7Gl/keyframes/t011.jpg
19. Camera Settings
- title: Camera Settings
- status: publish
- author: 0
- is_previewable: (empty)
- video_duration: 0h 0m 19s (raw {"hours":0,"minutes":0,"seconds":19})
- video_source_type: embedded
- drive_file_id:
1bkE-G-jRlM9OCfBw4TOkRiIV6_tjnCX3(source_ref; not a public link) - transcript pending / keyframes pending / presentation extract pending
- video_source_url: (Drive preview omitted as a public link; file id kept as source_ref)
(no lesson_content HTML in export — video-only or empty body; metadata above kept in full)
Drive extract
- file_id:
1bkE-G-jRlM9OCfBw4TOkRiIV6_tjnCX3 - filename: VEST Section 2 Phone & Gear 3 Camera Settings.mp4
- kind: video
- local_path: /workspace/academy/media/1bkE-G-jRlM9OCfBw4TOkRiIV6_tjnCX3/VEST Section 2 Phone & Gear 3 Camera Settings.mp4
- source_ref: drive
1bkE-G-jRlM9OCfBw4TOkRiIV6_tjnCX3· content_length 26869992 · original https://drive.google.com/file/d/1bkE-G-jRlM9OCfBw4TOkRiIV6_tjnCX3/view - extract_status: done
- caption_source: drive_timedtext_asr_srt
- duration_s: 18.853991
- keyframe_count: 3
Transcript
- [00:00:00.160] Hey guys, welcome to the camera settings
- [00:00:02.320] video. In this tutorial, we'll be going
- [00:00:04.799] over frame rates, uh, auto versus manual
- [00:00:07.919] settings, exposure, focus, uh, and a few
- [00:00:11.519] other techniques to optimize your camera
- [00:00:14.000] settings. I'll see you guys in the next
- [00:00:16.320] one.
Keyframes
- /workspace/academy/media/1bkE-G-jRlM9OCfBw4TOkRiIV6_tjnCX3/keyframes/last.jpg
- /workspace/academy/media/1bkE-G-jRlM9OCfBw4TOkRiIV6_tjnCX3/keyframes/t001.jpg
- /workspace/academy/media/1bkE-G-jRlM9OCfBw4TOkRiIV6_tjnCX3/keyframes/t002.jpg
20. Frame Rates
- title: Frame Rates
- status: publish
- author: 0
- is_previewable: (empty)
- video_duration: 0h 1m 55s (raw {"hours":0,"minutes":1,"seconds":55})
- video_source_type: embedded
- drive_file_id:
1AFy0q0bFbRv8-yb1OZqa6g2SqEsq1nyF(source_ref; not a public link) - transcript pending / keyframes pending / presentation extract pending
- video_source_url: (Drive preview omitted as a public link; file id kept as source_ref)
(no lesson_content HTML in export — video-only or empty body; metadata above kept in full)
Drive extract
- file_id:
1AFy0q0bFbRv8-yb1OZqa6g2SqEsq1nyF - filename: VEST Section 2 Phone & Gear 4 Frame Rates.mp4
- kind: video
- local_path: /workspace/academy/media/1AFy0q0bFbRv8-yb1OZqa6g2SqEsq1nyF/VEST Section 2 Phone & Gear 4 Frame Rates.mp4
- source_ref: drive
1AFy0q0bFbRv8-yb1OZqa6g2SqEsq1nyF· content_length 176711299 · original https://drive.google.com/file/d/1AFy0q0bFbRv8-yb1OZqa6g2SqEsq1nyF/view - extract_status: done
- caption_source: drive_timedtext
- duration_s: 115.148005
- keyframe_count: 12
Transcript
- Hey guys, in this tutorial we're going
- [00:00:02.389] Hey guys, in this tutorial we're going
- [00:00:02.399] Hey guys, in this tutorial we're going to be going over frame rates. This
- [00:00:04.710] to be going over frame rates. This
- [00:00:04.720] to be going over frame rates. This includes 60 fps, 30 fps, and 24 fps. I'm
- [00:00:08.870] includes 60 fps, 30 fps, and 24 fps. I'm
- [00:00:08.880] includes 60 fps, 30 fps, and 24 fps. I'm going to tell you when to use them and
- [00:00:11.190] going to tell you when to use them and
- [00:00:11.200] going to tell you when to use them and why we use them. Firstly, 24 frames a
- [00:00:13.830] why we use them. Firstly, 24 frames a
- [00:00:13.840] why we use them. Firstly, 24 frames a second is usually used for a more
- [00:00:16.470] second is usually used for a more
- [00:00:16.480] second is usually used for a more cinematic look. That's the main default
- [00:00:19.109] cinematic look. That's the main default
- [00:00:19.119] cinematic look. That's the main default for films and cinema. But if you're
- [00:00:21.910] for films and cinema. But if you're
- [00:00:21.920] for films and cinema. But if you're making content and you're trying to make
- [00:00:23.509] making content and you're trying to make
- [00:00:23.519] making content and you're trying to make it look like an action scene or
- [00:00:25.109] it look like an action scene or
- [00:00:25.119] it look like an action scene or cinematic and really cool, you can use
- [00:00:27.349] cinematic and really cool, you can use
- [00:00:27.359] cinematic and really cool, you can use 24 frames a second. Next, let's go over
- [00:00:29.349] 24 frames a second. Next, let's go over
- [00:00:29.359] 24 frames a second. Next, let's go over 30 frames a second. This is best for
- [00:00:32.150] 30 frames a second. This is best for
- [00:00:32.160] 30 frames a second. This is best for short form content, talking to the
- [00:00:34.310] short form content, talking to the
- [00:00:34.320] short form content, talking to the camera, vlogs, YouTube videos. It's one
- [00:00:36.950] camera, vlogs, YouTube videos. It's one
- [00:00:36.960] camera, vlogs, YouTube videos. It's one of the most common formats for online
- [00:00:39.750] of the most common formats for online
- [00:00:39.760] of the most common formats for online videos. It's the frame rate that feels
- [00:00:41.750] videos. It's the frame rate that feels
- [00:00:41.760] videos. It's the frame rate that feels most natural. I'm actually filming in 30
- [00:00:44.389] most natural. I'm actually filming in 30
- [00:00:44.399] most natural. I'm actually filming in 30 frames a second as we speak. Next, we'll
- [00:00:47.510] frames a second as we speak. Next, we'll
- [00:00:47.520] frames a second as we speak. Next, we'll be covering 60 frames a second. Now, 60
- [00:00:50.150] be covering 60 frames a second. Now, 60
- [00:00:50.160] be covering 60 frames a second. Now, 60 frames a second is perfect for action.
- [00:00:52.869] frames a second is perfect for action.
- [00:00:52.879] frames a second is perfect for action. So, if you want to slow down footage,
- [00:00:54.790] So, if you want to slow down footage,
- [00:00:54.800] So, if you want to slow down footage, you usually start at 60 and you can even
- [00:00:56.790] you usually start at 60 and you can even
- [00:00:56.800] you usually start at 60 and you can even go higher on some phones, but 60 is
- [00:00:58.950] go higher on some phones, but 60 is
- [00:00:58.960] go higher on some phones, but 60 is what's used for sport, for action, it
- [00:01:01.670] what's used for sport, for action, it
- [00:01:01.680] what's used for sport, for action, it slows down the motion blur. There's less
- [00:01:04.390] slows down the motion blur. There's less
- [00:01:04.400] slows down the motion blur. There's less motion blur on movement. It's great for
- [00:01:07.670] motion blur on movement. It's great for
- [00:01:07.680] motion blur on movement. It's great for capturing that movement, that action
- [00:01:09.510] capturing that movement, that action
- [00:01:09.520] capturing that movement, that action when you are filming. So, for example,
- [00:01:11.590] when you are filming. So, for example,
- [00:01:11.600] when you are filming. So, for example, most sport is filmed in 60 frames a
- [00:01:14.070] most sport is filmed in 60 frames a
- [00:01:14.080] most sport is filmed in 60 frames a second. You know, football, Formula 1,
- [00:01:16.870] second. You know, football, Formula 1,
- [00:01:16.880] second. You know, football, Formula 1, uh you don't want to see the blurriness.
- [00:01:19.109] uh you don't want to see the blurriness.
- [00:01:19.119] uh you don't want to see the blurriness. You don't need to see how fast or hard
- [00:01:21.510] You don't need to see how fast or hard
- [00:01:21.520] You don't need to see how fast or hard the football's been kicked. You need to
- [00:01:23.190] the football's been kicked. You need to
- [00:01:23.200] the football's been kicked. You need to see where the football is at all times.
- [00:01:25.190] see where the football is at all times.
- [00:01:25.200] see where the football is at all times. So, we just covered frame rates, uh, you
- [00:01:27.670] So, we just covered frame rates, uh, you
- [00:01:27.680] So, we just covered frame rates, uh, you know, 24 frames, 30 frames, and 60
- [00:01:29.990] know, 24 frames, 30 frames, and 60
- [00:01:30.000] know, 24 frames, 30 frames, and 60 frames a second. Remember, this is only
- [00:01:32.230] frames a second. Remember, this is only
- [00:01:32.240] frames a second. Remember, this is only for shooting. When you export from your
- [00:01:35.749] for shooting. When you export from your
- [00:01:35.759] for shooting. When you export from your editing software, you'll never export in
- [00:01:38.710] editing software, you'll never export in
- [00:01:38.720] editing software, you'll never export in 60 frames a second. You'll only ever
- [00:01:40.789] 60 frames a second. You'll only ever
- [00:01:40.799] 60 frames a second. You'll only ever export in 24 or 30. The only exception
- [00:01:43.990] export in 24 or 30. The only exception
- [00:01:44.000] export in 24 or 30. The only exception will be video games if you're exporting
- [00:01:46.069] will be video games if you're exporting
- [00:01:46.079] will be video games if you're exporting gameplay, you know, streamer type of
- [00:01:48.389] gameplay, you know, streamer type of
- [00:01:48.399] gameplay, you know, streamer type of thing. But otherwise, thank you for
- [00:01:50.149] thing. But otherwise, thank you for
- [00:01:50.159] thing. But otherwise, thank you for joining the frame rates video and I'll
- [00:01:52.469] joining the frame rates video and I'll
- [00:01:52.479] joining the frame rates video and I'll see you in the next one.
Keyframes
- /workspace/academy/media/1AFy0q0bFbRv8-yb1OZqa6g2SqEsq1nyF/keyframes/last.jpg
- /workspace/academy/media/1AFy0q0bFbRv8-yb1OZqa6g2SqEsq1nyF/keyframes/t001.jpg
- /workspace/academy/media/1AFy0q0bFbRv8-yb1OZqa6g2SqEsq1nyF/keyframes/t002.jpg
- /workspace/academy/media/1AFy0q0bFbRv8-yb1OZqa6g2SqEsq1nyF/keyframes/t003.jpg
- /workspace/academy/media/1AFy0q0bFbRv8-yb1OZqa6g2SqEsq1nyF/keyframes/t004.jpg
- /workspace/academy/media/1AFy0q0bFbRv8-yb1OZqa6g2SqEsq1nyF/keyframes/t005.jpg
- /workspace/academy/media/1AFy0q0bFbRv8-yb1OZqa6g2SqEsq1nyF/keyframes/t007.jpg
- /workspace/academy/media/1AFy0q0bFbRv8-yb1OZqa6g2SqEsq1nyF/keyframes/t008.jpg
- /workspace/academy/media/1AFy0q0bFbRv8-yb1OZqa6g2SqEsq1nyF/keyframes/t009.jpg
- /workspace/academy/media/1AFy0q0bFbRv8-yb1OZqa6g2SqEsq1nyF/keyframes/t010.jpg
- /workspace/academy/media/1AFy0q0bFbRv8-yb1OZqa6g2SqEsq1nyF/keyframes/t011.jpg
- /workspace/academy/media/1AFy0q0bFbRv8-yb1OZqa6g2SqEsq1nyF/keyframes/t012.jpg
21. Focus
- title: Focus
- status: publish
- author: 0
- is_previewable: (empty)
- video_duration: 0h 1m 41s (raw {"hours":0,"minutes":1,"seconds":41})
- video_source_type: embedded
- drive_file_id:
177FfqixT5u5tUaszXYm4JJHop9VTnW2w(source_ref; not a public link) - transcript pending / keyframes pending / presentation extract pending
- video_source_url: (Drive preview omitted as a public link; file id kept as source_ref)
(no lesson_content HTML in export — video-only or empty body; metadata above kept in full)
Drive extract
- file_id:
177FfqixT5u5tUaszXYm4JJHop9VTnW2w - filename: VEST Section 2 Phone & Gear 5 Focus.mp4
- kind: video
- local_path: /workspace/academy/media/177FfqixT5u5tUaszXYm4JJHop9VTnW2w/VEST Section 2 Phone & Gear 5 Focus.mp4
- source_ref: drive
177FfqixT5u5tUaszXYm4JJHop9VTnW2w· content_length 154353448 · original https://drive.google.com/file/d/177FfqixT5u5tUaszXYm4JJHop9VTnW2w/view - extract_status: done
- caption_source: drive_timedtext
- duration_s: 101.052993
- keyframe_count: 11
Transcript
- Hey guys. So, in this tutorial, we're
- [00:00:02.950] Hey guys. So, in this tutorial, we're
- [00:00:02.960] Hey guys. So, in this tutorial, we're going to be going over focus, manual
- [00:00:05.110] going to be going over focus, manual
- [00:00:05.120] going to be going over focus, manual focus versus autofocus. When we should
- [00:00:07.590] focus versus autofocus. When we should
- [00:00:07.600] focus versus autofocus. When we should we use them, why should we use them? So,
- [00:00:09.669] we use them, why should we use them? So,
- [00:00:09.679] we use them, why should we use them? So, with autofocus, you generally want to
- [00:00:11.990] with autofocus, you generally want to
- [00:00:12.000] with autofocus, you generally want to use it with more dynamic shots. Maybe
- [00:00:14.150] use it with more dynamic shots. Maybe
- [00:00:14.160] use it with more dynamic shots. Maybe there's a lot of action happening. You
- [00:00:16.630] there's a lot of action happening. You
- [00:00:16.640] there's a lot of action happening. You have to, you know, chase after people,
- [00:00:18.950] have to, you know, chase after people,
- [00:00:18.960] have to, you know, chase after people, track people, follow them around, move
- [00:00:21.189] track people, follow them around, move
- [00:00:21.199] track people, follow them around, move quickly with your phone, and capture,
- [00:00:24.310] quickly with your phone, and capture,
- [00:00:24.320] quickly with your phone, and capture, you know, capture many different
- [00:00:25.590] you know, capture many different
- [00:00:25.600] you know, capture many different elements and pay attention to a lot of
- [00:00:27.349] elements and pay attention to a lot of
- [00:00:27.359] elements and pay attention to a lot of different things. So having autofocus on
- [00:00:29.910] different things. So having autofocus on
- [00:00:29.920] different things. So having autofocus on your phone in that regard helps uh you
- [00:00:32.229] your phone in that regard helps uh you
- [00:00:32.239] your phone in that regard helps uh you not need to use the focus up here too
- [00:00:34.310] not need to use the focus up here too
- [00:00:34.320] not need to use the focus up here too hard. Manual focus is good for more
- [00:00:37.430] hard. Manual focus is good for more
- [00:00:37.440] hard. Manual focus is good for more static shots, you know, more calmer if
- [00:00:40.229] static shots, you know, more calmer if
- [00:00:40.239] static shots, you know, more calmer if people are, you know, just walking
- [00:00:41.910] people are, you know, just walking
- [00:00:41.920] people are, you know, just walking across the frame or towards or away from
- [00:00:44.150] across the frame or towards or away from
- [00:00:44.160] across the frame or towards or away from you. You can use the focus pulling to
- [00:00:46.630] you. You can use the focus pulling to
- [00:00:46.640] you. You can use the focus pulling to have more control over who's in focus,
- [00:00:50.310] have more control over who's in focus,
- [00:00:50.320] have more control over who's in focus, you know, how you want them to be in
- [00:00:51.830] you know, how you want them to be in
- [00:00:51.840] you know, how you want them to be in focus. And you can actually play around
- [00:00:54.150] focus. And you can actually play around
- [00:00:54.160] focus. And you can actually play around with your manual focus to be a little
- [00:00:57.110] with your manual focus to be a little
- [00:00:57.120] with your manual focus to be a little bit more creative, a little bit more
- [00:00:58.709] bit more creative, a little bit more
- [00:00:58.719] bit more creative, a little bit more artsy by focus pulling. Let's look at
- [00:01:00.950] artsy by focus pulling. Let's look at
- [00:01:00.960] artsy by focus pulling. Let's look at some samples of manual focus.
- So yeah, that's the difference between
- [00:01:21.910] So yeah, that's the difference between
- [00:01:21.920] So yeah, that's the difference between autofocus and manual focus. Remember,
- [00:01:25.350] autofocus and manual focus. Remember,
- [00:01:25.360] autofocus and manual focus. Remember, autofocus is for more dynamic shoots,
- [00:01:27.510] autofocus is for more dynamic shoots,
- [00:01:27.520] autofocus is for more dynamic shoots, but you have less control. Manual focus
- [00:01:30.390] but you have less control. Manual focus
- [00:01:30.400] but you have less control. Manual focus is for more static shoots, and it gives
- [00:01:32.789] is for more static shoots, and it gives
- [00:01:32.799] is for more static shoots, and it gives you a lot more control over what you
- [00:01:35.109] you a lot more control over what you
- [00:01:35.119] you a lot more control over what you have in focus. Anyway, thank you guys,
- [00:01:37.670] have in focus. Anyway, thank you guys,
- [00:01:37.680] have in focus. Anyway, thank you guys, and I will see you in the next one.
Keyframes
- /workspace/academy/media/177FfqixT5u5tUaszXYm4JJHop9VTnW2w/keyframes/last.jpg
- /workspace/academy/media/177FfqixT5u5tUaszXYm4JJHop9VTnW2w/keyframes/t001.jpg
- /workspace/academy/media/177FfqixT5u5tUaszXYm4JJHop9VTnW2w/keyframes/t002.jpg
- /workspace/academy/media/177FfqixT5u5tUaszXYm4JJHop9VTnW2w/keyframes/t003.jpg
- /workspace/academy/media/177FfqixT5u5tUaszXYm4JJHop9VTnW2w/keyframes/t004.jpg
- /workspace/academy/media/177FfqixT5u5tUaszXYm4JJHop9VTnW2w/keyframes/t005.jpg
- /workspace/academy/media/177FfqixT5u5tUaszXYm4JJHop9VTnW2w/keyframes/t006.jpg
- /workspace/academy/media/177FfqixT5u5tUaszXYm4JJHop9VTnW2w/keyframes/t007.jpg
- /workspace/academy/media/177FfqixT5u5tUaszXYm4JJHop9VTnW2w/keyframes/t008.jpg
- /workspace/academy/media/177FfqixT5u5tUaszXYm4JJHop9VTnW2w/keyframes/t009.jpg
- /workspace/academy/media/177FfqixT5u5tUaszXYm4JJHop9VTnW2w/keyframes/t010.jpg
22. Exposure
- title: Exposure
- status: publish
- author: 0
- is_previewable: (empty)
- video_duration: 0h 2m 20s (raw {"hours":0,"minutes":2,"seconds":20})
- video_source_type: embedded
- drive_file_id:
1yB6SORj6J5CJ-RAZi9F9dYLgKfh5oppS(source_ref; not a public link) - transcript pending / keyframes pending / presentation extract pending
- video_source_url: (Drive preview omitted as a public link; file id kept as source_ref)
(no lesson_content HTML in export — video-only or empty body; metadata above kept in full)
Drive extract
- file_id:
1yB6SORj6J5CJ-RAZi9F9dYLgKfh5oppS - filename: VEST Section 2 Phone & Gear 6 Exposure.mp4
- kind: video
- local_path: /workspace/academy/media/1yB6SORj6J5CJ-RAZi9F9dYLgKfh5oppS/VEST Section 2 Phone & Gear 6 Exposure.mp4
- source_ref: drive
1yB6SORj6J5CJ-RAZi9F9dYLgKfh5oppS· content_length 213027679 · original https://drive.google.com/file/d/1yB6SORj6J5CJ-RAZi9F9dYLgKfh5oppS/view - extract_status: done
- caption_source: drive_timedtext
- duration_s: 140.086009
- keyframe_count: 12
Transcript
- Hey guys, today we're going to be going
- [00:00:01.829] Hey guys, today we're going to be going
- [00:00:01.839] Hey guys, today we're going to be going over exposure in camera settings. You
- [00:00:05.190] over exposure in camera settings. You
- [00:00:05.200] over exposure in camera settings. You know, you've got high exposure versus
- [00:00:06.869] know, you've got high exposure versus
- [00:00:06.879] know, you've got high exposure versus low exposure. And the two methods you
- [00:00:08.870] low exposure. And the two methods you
- [00:00:08.880] low exposure. And the two methods you use would be your auto exposure or your
- [00:00:11.430] use would be your auto exposure or your
- [00:00:11.440] use would be your auto exposure or your manual exposure. So, why would we, you
- [00:00:13.910] manual exposure. So, why would we, you
- [00:00:13.920] manual exposure. So, why would we, you know, have high exposure? High exposure
- [00:00:16.230] know, have high exposure? High exposure
- [00:00:16.240] know, have high exposure? High exposure would be something that you usually want
- [00:00:18.550] would be something that you usually want
- [00:00:18.560] would be something that you usually want to do in a darker environment if you do
- [00:00:20.710] to do in a darker environment if you do
- [00:00:20.720] to do in a darker environment if you do not have any lighting or gear like that.
- [00:00:22.710] not have any lighting or gear like that.
- [00:00:22.720] not have any lighting or gear like that. But remember, if you do overdo, you
- [00:00:25.349] But remember, if you do overdo, you
- [00:00:25.359] But remember, if you do overdo, you know, increasing the exposure in a dark
- [00:00:27.589] know, increasing the exposure in a dark
- [00:00:27.599] know, increasing the exposure in a dark environment, it will make your footage
- [00:00:29.750] environment, it will make your footage
- [00:00:29.760] environment, it will make your footage look a little bit grainy and not the
- [00:00:32.310] look a little bit grainy and not the
- [00:00:32.320] look a little bit grainy and not the best. Uh, you know, similarly, if you're
- [00:00:34.310] best. Uh, you know, similarly, if you're
- [00:00:34.320] best. Uh, you know, similarly, if you're in a very bright environment, like
- [00:00:36.549] in a very bright environment, like
- [00:00:36.559] in a very bright environment, like outdoors and the sun is really intense
- [00:00:38.950] outdoors and the sun is really intense
- [00:00:38.960] outdoors and the sun is really intense and bright, you'd want to lower your
- [00:00:41.030] and bright, you'd want to lower your
- [00:00:41.040] and bright, you'd want to lower your exposure. But, but again, you don't want
- [00:00:42.950] exposure. But, but again, you don't want
- [00:00:42.960] exposure. But, but again, you don't want to overdo it because you'll make things
- [00:00:44.869] to overdo it because you'll make things
- [00:00:44.879] to overdo it because you'll make things too dark, too shadowy. When you have
- [00:00:47.270] too dark, too shadowy. When you have
- [00:00:47.280] too dark, too shadowy. When you have your camera settings, you'd use either
- [00:00:49.590] your camera settings, you'd use either
- [00:00:49.600] your camera settings, you'd use either manual or auto exposure. Auto exposure
- [00:00:53.189] manual or auto exposure. Auto exposure
- [00:00:53.199] manual or auto exposure. Auto exposure is great because it'll automatically
- [00:00:55.750] is great because it'll automatically
- [00:00:55.760] is great because it'll automatically find the the best balance between, you
- [00:00:58.869] find the the best balance between, you
- [00:00:58.879] find the the best balance between, you know, actually seeing the subject
- [00:01:00.869] know, actually seeing the subject
- [00:01:00.879] know, actually seeing the subject clearly and not overdoing it as to make
- [00:01:03.349] clearly and not overdoing it as to make
- [00:01:03.359] clearly and not overdoing it as to make the footage too grainy or too dark. Um
- [00:01:06.950] the footage too grainy or too dark. Um
- [00:01:06.960] the footage too grainy or too dark. Um though you do want to lock your exposure
- [00:01:09.190] though you do want to lock your exposure
- [00:01:09.200] though you do want to lock your exposure when you get your auto exposure whether
- [00:01:11.670] when you get your auto exposure whether
- [00:01:11.680] when you get your auto exposure whether you just tap the screen otherwise it
- [00:01:14.230] you just tap the screen otherwise it
- [00:01:14.240] you just tap the screen otherwise it will change you know constantly and that
- [00:01:17.270] will change you know constantly and that
- [00:01:17.280] will change you know constantly and that can be a bit of a problem while you're
- [00:01:18.789] can be a bit of a problem while you're
- [00:01:18.799] can be a bit of a problem while you're filming whereas manual exposure is great
- [00:01:22.070] filming whereas manual exposure is great
- [00:01:22.080] filming whereas manual exposure is great cuz it you know obviously it's going to
- [00:01:23.590] cuz it you know obviously it's going to
- [00:01:23.600] cuz it you know obviously it's going to be automatically locked depending where
- [00:01:25.190] be automatically locked depending where
- [00:01:25.200] be automatically locked depending where you set it and it gives you a lot more
- [00:01:27.190] you set it and it gives you a lot more
- [00:01:27.200] you set it and it gives you a lot more control and it gives you room to also
- [00:01:29.190] control and it gives you room to also
- [00:01:29.200] control and it gives you room to also get a bit creative with your exposure.
- [00:01:32.710] get a bit creative with your exposure.
- [00:01:32.720] get a bit creative with your exposure. Maybe you want to overexpose something a
- [00:01:34.870] Maybe you want to overexpose something a
- [00:01:34.880] Maybe you want to overexpose something a little bit for an artsy effect or
- [00:01:36.550] little bit for an artsy effect or
- [00:01:36.560] little bit for an artsy effect or underexpose it. There's many different
- [00:01:38.550] underexpose it. There's many different
- [00:01:38.560] underexpose it. There's many different ways you can use exposure to aid in the
- [00:01:42.310] ways you can use exposure to aid in the
- [00:01:42.320] ways you can use exposure to aid in the content you're trying to make. Another
- [00:01:44.310] content you're trying to make. Another
- [00:01:44.320] content you're trying to make. Another thing we have is exposure pulling.
- [00:01:46.389] thing we have is exposure pulling.
- [00:01:46.399] thing we have is exposure pulling. Similar to focus pulling, it's where you
- [00:01:49.510] Similar to focus pulling, it's where you
- [00:01:49.520] Similar to focus pulling, it's where you change your exposure using the manual
- [00:01:52.230] change your exposure using the manual
- [00:01:52.240] change your exposure using the manual settings while filming. Here is some
- [00:01:54.469] settings while filming. Here is some
- [00:01:54.479] settings while filming. Here is some examples of exposure pulling.
- So, we just covered exposure, you know,
- [00:02:10.550] So, we just covered exposure, you know,
- [00:02:10.560] So, we just covered exposure, you know, high versus low, manual versus auto, and
- [00:02:13.830] high versus low, manual versus auto, and
- [00:02:13.840] high versus low, manual versus auto, and when and where to use it. Thank you for
- [00:02:16.070] when and where to use it. Thank you for
- [00:02:16.080] when and where to use it. Thank you for joining me, and I'll see you in the next
- [00:02:18.070] joining me, and I'll see you in the next
- [00:02:18.080] joining me, and I'll see you in the next one.
Keyframes
- /workspace/academy/media/1yB6SORj6J5CJ-RAZi9F9dYLgKfh5oppS/keyframes/last.jpg
- /workspace/academy/media/1yB6SORj6J5CJ-RAZi9F9dYLgKfh5oppS/keyframes/t001.jpg
- /workspace/academy/media/1yB6SORj6J5CJ-RAZi9F9dYLgKfh5oppS/keyframes/t003.jpg
- /workspace/academy/media/1yB6SORj6J5CJ-RAZi9F9dYLgKfh5oppS/keyframes/t004.jpg
- /workspace/academy/media/1yB6SORj6J5CJ-RAZi9F9dYLgKfh5oppS/keyframes/t005.jpg
- /workspace/academy/media/1yB6SORj6J5CJ-RAZi9F9dYLgKfh5oppS/keyframes/t006.jpg
- /workspace/academy/media/1yB6SORj6J5CJ-RAZi9F9dYLgKfh5oppS/keyframes/t008.jpg
- /workspace/academy/media/1yB6SORj6J5CJ-RAZi9F9dYLgKfh5oppS/keyframes/t009.jpg
- /workspace/academy/media/1yB6SORj6J5CJ-RAZi9F9dYLgKfh5oppS/keyframes/t010.jpg
- /workspace/academy/media/1yB6SORj6J5CJ-RAZi9F9dYLgKfh5oppS/keyframes/t011.jpg
- /workspace/academy/media/1yB6SORj6J5CJ-RAZi9F9dYLgKfh5oppS/keyframes/t013.jpg
- /workspace/academy/media/1yB6SORj6J5CJ-RAZi9F9dYLgKfh5oppS/keyframes/t014.jpg
23. Camera Settings Tutorial
- title: Camera Settings Tutorial
- status: publish
- author: 0
- is_previewable: (empty)
- video_duration: 0h 0m 0s (raw {"hours":0,"minutes":0,"seconds":0})
- video_source_type: (empty)
**

**
Camera Settings Tutorial: Taking Control
Most modern phone cameras use advanced algorithms to guess what looks best (Auto Mode). To get professional results, you need to tell the camera exactly what to do (Manual Mode).
1. Auto vs. Manual Control
| Setting | Auto Mode | Manual Mode (Pro Mode) |
|---|---|---|
| How it Works | The camera constantly changes settings (like brightness, focus, and color) while you record, trying to maintain a balanced image. | You lock down the key settings before you start recording, so the image and lighting stay consistent. |
| Why it's Bad | If a person moves or the light changes slightly, the video will have visible "jumps" in brightness or color. This looks amateurish. | |
| The Goal | Always shoot in Manual/Pro mode for serious video work to lock your settings and prevent distracting changes. | |
| How to Access | Usually labeled as "Pro," "Manual," "Film," or "Advanced" within your phone's camera app (or via a third-party app like FiLMiC Pro). |
2. Frame Rate (FPS)
The frame rate is the number of individual images (frames) your camera captures per second.
- Standard Cinematic Look 24 FPS:
- This is the standard rate for movies and narrative content.
- It gives a slight motion blur that feels organic and "filmic."
- Use this for: Short films, cinematic sequences, and slow-moving subjects.
- Standard Video/Broadcast Look 30 FPS:
- This is common for TV, news, and general content.
- It looks a little sharper and less stylized than 24 FPS.
- Use this for: Vlogs, News reports, quick social media clips, or any time the "filmic" look isn't necessary.
- Slow Motion 60 FPS or higher:
- Capturing more frames allows you to play the footage back at a normal speed, making the action appear smooth and slow.
- Use this for: Action shots, revealing a movement, or emphasizing a detail.
The Golden Rule: Choose your frame rate before you start shooting and keep it consistent throughout your project.
3. Focus (Sharpness Control)
Focus determines what part of the image is sharp and what is blurred.
| Focus Method | How to Use | When to Use |
|---|---|---|
| Autofocus (AF) | The camera constantly adjusts focus. | Only use if your subject is always moving and you can't manually follow them (risky!). |
| Tap to Focus | Tap your subject on the screen once. This usually locks the focus. | Best for simple videos. Lock it and leave it to prevent focus "breathing" (the image subtly going in and out of focus). |
| Manual Focus | Adjust a slider in your Pro Mode to set focus exactly where you want it. | When you are very close to your subject or if the subject is staying still (e.g., interviews, product shots). |
Pro Tip: If your camera app has a setting for AE/AF Lock (Auto-Exposure / Auto-Focus Lock), use it immediately after tapping your subject. This locks both the light and the focus, guaranteeing consistency.
4. Exposure (Brightness Control)
Exposure determines how bright or dark your image is. It is primarily controlled by three settings (though phones simplify this).
- ISO: This controls the phone sensor's sensitivity to light. A lower number 100-200 means a darker, cleaner image (best for bright days). A higher number 800-3200 means a brighter, but grainier (noisier) image (used in low light).
- Rule: Always use the lowest ISO possible to keep your image clean.
- Shutter Speed: This controls how long the sensor is exposed to light.
- The 180-degree Rule: For smooth, natural motion blur, your shutter speed number should be approximately double your frame rate.
- If shooting at 24 FPS, use a shutter speed of 1/48 (or 1/50).
- If shooting at 30 FPS, use a shutter speed of 1/60.
- The 180-degree Rule: For smooth, natural motion blur, your shutter speed number should be approximately double your frame rate.
- Exposure Slider: In Auto mode, you often only see a brightness slider EV. Drag it up or down to fine-tune the brightness of your locked shot.
By mastering these manual settings, you are telling the camera exactly how you want your video to look, eliminating distracting automated adjustments!
- quizzes_following_this_lesson: 1 (full text in Quizzes)
- Settings Quiz (8 questions)
24. Essential
- title: Essential
- status: publish
- author: 0
- is_previewable: (empty)
- video_duration: 0h 0m 22s (raw {"hours":0,"minutes":0,"seconds":22})
- video_source_type: embedded
- drive_file_id:
1SgPq4ZLZVaO3MMiPb1agu4-o70pi5hkO(source_ref; not a public link) - transcript pending / keyframes pending / presentation extract pending
- video_source_url: (Drive preview omitted as a public link; file id kept as source_ref)
(no lesson_content HTML in export — video-only or empty body; metadata above kept in full)
Drive extract
- file_id:
1SgPq4ZLZVaO3MMiPb1agu4-o70pi5hkO - filename: VEST Section 2 Phone & Gear 7 Essential Gear.mp4
- kind: video
- local_path: /workspace/academy/media/1SgPq4ZLZVaO3MMiPb1agu4-o70pi5hkO/VEST Section 2 Phone & Gear 7 Essential Gear.mp4
- source_ref: drive
1SgPq4ZLZVaO3MMiPb1agu4-o70pi5hkO· content_length 33214171 · original https://drive.google.com/file/d/1SgPq4ZLZVaO3MMiPb1agu4-o70pi5hkO/view - extract_status: done
- caption_source: drive_timedtext
- duration_s: 22.151995
- keyframe_count: 3
Transcript
- Hey guys, welcome to the essential gear
- [00:00:03.030] Hey guys, welcome to the essential gear
- [00:00:03.040] Hey guys, welcome to the essential gear tutorial. In this tutorial, we'll be
- [00:00:05.110] tutorial. In this tutorial, we'll be
- [00:00:05.120] tutorial. In this tutorial, we'll be covering the different type of gear that
- [00:00:06.950] covering the different type of gear that
- [00:00:06.960] covering the different type of gear that you will use for your short form videos.
- [00:00:09.509] you will use for your short form videos.
- [00:00:09.519] you will use for your short form videos. This includes tripods, gimbals,
- [00:00:11.910] This includes tripods, gimbals,
- [00:00:11.920] This includes tripods, gimbals, lighting, and microphones. You know,
- [00:00:14.070] lighting, and microphones. You know,
- [00:00:14.080] lighting, and microphones. You know, different gear that will help you make
- [00:00:17.029] different gear that will help you make
- [00:00:17.039] different gear that will help you make better quality content. I hope you guys
- [00:00:19.429] better quality content. I hope you guys
- [00:00:19.439] better quality content. I hope you guys enjoy
Keyframes
- /workspace/academy/media/1SgPq4ZLZVaO3MMiPb1agu4-o70pi5hkO/keyframes/last.jpg
- /workspace/academy/media/1SgPq4ZLZVaO3MMiPb1agu4-o70pi5hkO/keyframes/t001.jpg
- /workspace/academy/media/1SgPq4ZLZVaO3MMiPb1agu4-o70pi5hkO/keyframes/t002.jpg
25. Tripods
- title: Tripods
- status: publish
- author: 0
- is_previewable: (empty)
- video_duration: 0h 3m 39s (raw {"hours":0,"minutes":3,"seconds":39})
- video_source_type: embedded
- drive_file_id:
1_0dQwGq66kMGG5Eh_7jvrAa9c7yl8GRS(source_ref; not a public link) - transcript pending / keyframes pending / presentation extract pending
- video_source_url: (Drive preview omitted as a public link; file id kept as source_ref)
(no lesson_content HTML in export — video-only or empty body; metadata above kept in full)
Drive extract
- file_id:
1_0dQwGq66kMGG5Eh_7jvrAa9c7yl8GRS - filename: VEST Section 2 Phone & Gear 8 TriPods.mp4
- kind: video
- local_path: /workspace/academy/media/1_0dQwGq66kMGG5Eh_7jvrAa9c7yl8GRS/VEST Section 2 Phone & Gear 8 TriPods.mp4
- source_ref: drive
1_0dQwGq66kMGG5Eh_7jvrAa9c7yl8GRS· content_length 333308190 · original https://drive.google.com/file/d/1_0dQwGq66kMGG5Eh_7jvrAa9c7yl8GRS/view - extract_status: done
- caption_source: drive_timedtext
- duration_s: 218.848005
- keyframe_count: 23
Transcript
- Hey guys. So, today in Essential Gear,
- [00:00:03.110] Hey guys. So, today in Essential Gear,
- [00:00:03.120] Hey guys. So, today in Essential Gear, we're going to be going over tripods, uh
- [00:00:05.829] we're going to be going over tripods, uh
- [00:00:05.839] we're going to be going over tripods, uh when to use them, when not to use them,
- [00:00:08.549] when to use them, when not to use them,
- [00:00:08.559] when to use them, when not to use them, um and you know, what they are, how to
- [00:00:10.310] um and you know, what they are, how to
- [00:00:10.320] um and you know, what they are, how to use them. So, tripods are three-legged
- [00:00:12.870] use them. So, tripods are three-legged
- [00:00:12.880] use them. So, tripods are three-legged stands that look like this.
- You'd usually use them when you want
- [00:00:21.189] You'd usually use them when you want
- [00:00:21.199] You'd usually use them when you want your camera to be stable. You can pan
- [00:00:23.830] your camera to be stable. You can pan
- [00:00:23.840] your camera to be stable. You can pan and tilt on a tripod, but it normally
- [00:00:26.310] and tilt on a tripod, but it normally
- [00:00:26.320] and tilt on a tripod, but it normally gives you a very stabilized effect.
- [00:00:28.390] gives you a very stabilized effect.
- [00:00:28.400] gives you a very stabilized effect. Contrary, you wouldn't use a tripod if
- [00:00:30.950] Contrary, you wouldn't use a tripod if
- [00:00:30.960] Contrary, you wouldn't use a tripod if you want to symbolize a voyeristic
- [00:00:33.270] you want to symbolize a voyeristic
- [00:00:33.280] you want to symbolize a voyeristic effect. Like I don't know if you've ever
- [00:00:34.549] effect. Like I don't know if you've ever
- [00:00:34.559] effect. Like I don't know if you've ever seen The Office or sitcoms like Parks
- [00:00:37.030] seen The Office or sitcoms like Parks
- [00:00:37.040] seen The Office or sitcoms like Parks and Recreation. They have this camera
- [00:00:38.950] and Recreation. They have this camera
- [00:00:38.960] and Recreation. They have this camera that's a little bit wobbly and it gives
- [00:00:40.790] that's a little bit wobbly and it gives
- [00:00:40.800] that's a little bit wobbly and it gives the effect that you're there with the
- [00:00:42.069] the effect that you're there with the
- [00:00:42.079] the effect that you're there with the people. That would be handheld. So you
- [00:00:44.549] people. That would be handheld. So you
- [00:00:44.559] people. That would be handheld. So you use handheld in those situations. Say if
- [00:00:47.029] use handheld in those situations. Say if
- [00:00:47.039] use handheld in those situations. Say if you want to do a lot of tracking,
- [00:00:48.790] you want to do a lot of tracking,
- [00:00:48.800] you want to do a lot of tracking, obviously you're not going to pick up a
- [00:00:50.470] obviously you're not going to pick up a
- [00:00:50.480] obviously you're not going to pick up a tripod and walk around with it. You
- [00:00:52.150] tripod and walk around with it. You
- [00:00:52.160] tripod and walk around with it. You shouldn't do that. A tripod is to keep
- [00:00:54.630] shouldn't do that. A tripod is to keep
- [00:00:54.640] shouldn't do that. A tripod is to keep your camera on a fixed spot, a fixed
- [00:00:57.270] your camera on a fixed spot, a fixed
- [00:00:57.280] your camera on a fixed spot, a fixed axis. And you can, you know, pan to the
- [00:00:59.990] axis. And you can, you know, pan to the
- [00:01:00.000] axis. And you can, you know, pan to the left and the right or you can tilt it up
- [00:01:01.910] left and the right or you can tilt it up
- [00:01:01.920] left and the right or you can tilt it up and down. Using a tripod is good if you
- [00:01:04.549] and down. Using a tripod is good if you
- [00:01:04.559] and down. Using a tripod is good if you have to capture yourself and you're
- [00:01:06.149] have to capture yourself and you're
- [00:01:06.159] have to capture yourself and you're alone. So you set up your phone on the
- [00:01:09.190] alone. So you set up your phone on the
- [00:01:09.200] alone. So you set up your phone on the tripod. You can do a test video, make
- [00:01:11.670] tripod. You can do a test video, make
- [00:01:11.680] tripod. You can do a test video, make sure you're in frame, you know, blocking
- [00:01:13.750] sure you're in frame, you know, blocking
- [00:01:13.760] sure you're in frame, you know, blocking or whatever is fine. You can just
- [00:01:16.070] or whatever is fine. You can just
- [00:01:16.080] or whatever is fine. You can just capture yourself on your own. That's uh
- [00:01:18.710] capture yourself on your own. That's uh
- [00:01:18.720] capture yourself on your own. That's uh one of the biggest benefits about using
- [00:01:20.630] one of the biggest benefits about using
- [00:01:20.640] one of the biggest benefits about using a tripod. Let's look at some examples of
- [00:01:23.190] a tripod. Let's look at some examples of
- [00:01:23.200] a tripod. Let's look at some examples of using a tripod versus going handheld.
- Let's look at some examples of how to
- [00:01:59.270] Let's look at some examples of how to
- [00:01:59.280] Let's look at some examples of how to set up and operate a tripod. We have one
- [00:02:01.910] set up and operate a tripod. We have one
- [00:02:01.920] set up and operate a tripod. We have one right here in our little bag. You'll see
- [00:02:04.950] right here in our little bag. You'll see
- [00:02:04.960] right here in our little bag. You'll see we also have a know little attachment
- [00:02:08.309] we also have a know little attachment
- [00:02:08.319] we also have a know little attachment here. This one is for our phones. What
- [00:02:13.270] here. This one is for our phones. What
- [00:02:13.280] here. This one is for our phones. What we do is we open that and we slip our
- [00:02:17.190] we do is we open that and we slip our
- [00:02:17.200] we do is we open that and we slip our phones in and you know film so that we
- [00:02:19.990] phones in and you know film so that we
- [00:02:20.000] phones in and you know film so that we can uh you know connect our phones to
- [00:02:22.070] can uh you know connect our phones to
- [00:02:22.080] can uh you know connect our phones to the camera tripod. With a tripod you
- [00:02:24.630] the camera tripod. With a tripod you
- [00:02:24.640] the camera tripod. With a tripod you have you know obviously as the name
- [00:02:25.910] have you know obviously as the name
- [00:02:25.920] have you know obviously as the name suggests you got the three legs that's
- [00:02:27.589] suggests you got the three legs that's
- [00:02:27.599] suggests you got the three legs that's what divines a tripod. So with this
- [00:02:29.750] what divines a tripod. So with this
- [00:02:29.760] what divines a tripod. So with this tripod is uh you know obviously you can
- [00:02:31.990] tripod is uh you know obviously you can
- [00:02:32.000] tripod is uh you know obviously you can change you know how tall how short you
- [00:02:34.309] change you know how tall how short you
- [00:02:34.319] change you know how tall how short you want it is keep it a bit short. So I
- [00:02:36.229] want it is keep it a bit short. So I
- [00:02:36.239] want it is keep it a bit short. So I actually show you guys on the video.
- [00:02:37.990] actually show you guys on the video.
- [00:02:38.000] actually show you guys on the video. Plug your phone into this section. Pop
- [00:02:40.150] Plug your phone into this section. Pop
- [00:02:40.160] Plug your phone into this section. Pop that in right here. give it a release
- [00:02:42.869] that in right here. give it a release
- [00:02:42.879] that in right here. give it a release and then you'd film with your tripod.
- [00:02:46.229] and then you'd film with your tripod.
- [00:02:46.239] and then you'd film with your tripod. You wouldn't never pick up your tripod
- [00:02:47.990] You wouldn't never pick up your tripod
- [00:02:48.000] You wouldn't never pick up your tripod to film. Tripod is to keep it, you know,
- [00:02:50.470] to film. Tripod is to keep it, you know,
- [00:02:50.480] to film. Tripod is to keep it, you know, stationary on a fixed axis. But then
- [00:02:52.550] stationary on a fixed axis. But then
- [00:02:52.560] stationary on a fixed axis. But then what you can do is you can, you know,
- [00:02:54.949] what you can do is you can, you know,
- [00:02:54.959] what you can do is you can, you know, pan like this with this little lever
- [00:02:57.589] pan like this with this little lever
- [00:02:57.599] pan like this with this little lever here, which, you know, turning this
- [00:02:59.910] here, which, you know, turning this
- [00:02:59.920] here, which, you know, turning this tightens it or loosens it, allowing you
- [00:03:02.309] tightens it or loosens it, allowing you
- [00:03:02.319] tightens it or loosens it, allowing you to move, you know, side to side. Um,
- [00:03:05.830] to move, you know, side to side. Um,
- [00:03:05.840] to move, you know, side to side. Um, this little lever, if you turn this, it
- [00:03:08.149] this little lever, if you turn this, it
- [00:03:08.159] this little lever, if you turn this, it allows you to move up and down, give you
- [00:03:11.030] allows you to move up and down, give you
- [00:03:11.040] allows you to move up and down, give you a tilt. So, you've got your pan and
- [00:03:13.350] a tilt. So, you've got your pan and
- [00:03:13.360] a tilt. So, you've got your pan and you've got your tilt. If you wanted to
- [00:03:15.190] you've got your tilt. If you wanted to
- [00:03:15.200] you've got your tilt. If you wanted to film in portrait instead of landscape,
- [00:03:17.830] film in portrait instead of landscape,
- [00:03:17.840] film in portrait instead of landscape, you'd loosen it and
- [00:03:20.149] you'd loosen it and
- [00:03:20.159] you'd loosen it and put it like that. Now, you can film in
- [00:03:23.589] put it like that. Now, you can film in
- [00:03:23.599] put it like that. Now, you can film in portrait with your phone. So, yeah, this
- [00:03:25.589] portrait with your phone. So, yeah, this
- [00:03:25.599] portrait with your phone. So, yeah, this is our tripod. So, we just took a look
- [00:03:28.229] is our tripod. So, we just took a look
- [00:03:28.239] is our tripod. So, we just took a look at how to use a tripod, how to set it
- [00:03:30.789] at how to use a tripod, how to set it
- [00:03:30.799] at how to use a tripod, how to set it up, and when to use a tripod versus
- [00:03:33.430] up, and when to use a tripod versus
- [00:03:33.440] up, and when to use a tripod versus going handheld. Thank you for joining me
- [00:03:35.589] going handheld. Thank you for joining me
- [00:03:35.599] going handheld. Thank you for joining me today and I'll see you in the next one.
Keyframes
- /workspace/academy/media/1_0dQwGq66kMGG5Eh_7jvrAa9c7yl8GRS/keyframes/last.jpg
- /workspace/academy/media/1_0dQwGq66kMGG5Eh_7jvrAa9c7yl8GRS/keyframes/t001.jpg
- /workspace/academy/media/1_0dQwGq66kMGG5Eh_7jvrAa9c7yl8GRS/keyframes/t002.jpg
- /workspace/academy/media/1_0dQwGq66kMGG5Eh_7jvrAa9c7yl8GRS/keyframes/t003.jpg
- /workspace/academy/media/1_0dQwGq66kMGG5Eh_7jvrAa9c7yl8GRS/keyframes/t004.jpg
- /workspace/academy/media/1_0dQwGq66kMGG5Eh_7jvrAa9c7yl8GRS/keyframes/t005.jpg
- /workspace/academy/media/1_0dQwGq66kMGG5Eh_7jvrAa9c7yl8GRS/keyframes/t006.jpg
- /workspace/academy/media/1_0dQwGq66kMGG5Eh_7jvrAa9c7yl8GRS/keyframes/t007.jpg
- /workspace/academy/media/1_0dQwGq66kMGG5Eh_7jvrAa9c7yl8GRS/keyframes/t008.jpg
- /workspace/academy/media/1_0dQwGq66kMGG5Eh_7jvrAa9c7yl8GRS/keyframes/t009.jpg
- /workspace/academy/media/1_0dQwGq66kMGG5Eh_7jvrAa9c7yl8GRS/keyframes/t010.jpg
- /workspace/academy/media/1_0dQwGq66kMGG5Eh_7jvrAa9c7yl8GRS/keyframes/t011.jpg
- /workspace/academy/media/1_0dQwGq66kMGG5Eh_7jvrAa9c7yl8GRS/keyframes/t012.jpg
- /workspace/academy/media/1_0dQwGq66kMGG5Eh_7jvrAa9c7yl8GRS/keyframes/t013.jpg
- /workspace/academy/media/1_0dQwGq66kMGG5Eh_7jvrAa9c7yl8GRS/keyframes/t014.jpg
- /workspace/academy/media/1_0dQwGq66kMGG5Eh_7jvrAa9c7yl8GRS/keyframes/t015.jpg
- /workspace/academy/media/1_0dQwGq66kMGG5Eh_7jvrAa9c7yl8GRS/keyframes/t016.jpg
- /workspace/academy/media/1_0dQwGq66kMGG5Eh_7jvrAa9c7yl8GRS/keyframes/t017.jpg
- /workspace/academy/media/1_0dQwGq66kMGG5Eh_7jvrAa9c7yl8GRS/keyframes/t018.jpg
- /workspace/academy/media/1_0dQwGq66kMGG5Eh_7jvrAa9c7yl8GRS/keyframes/t019.jpg
- /workspace/academy/media/1_0dQwGq66kMGG5Eh_7jvrAa9c7yl8GRS/keyframes/t020.jpg
- /workspace/academy/media/1_0dQwGq66kMGG5Eh_7jvrAa9c7yl8GRS/keyframes/t021.jpg
- /workspace/academy/media/1_0dQwGq66kMGG5Eh_7jvrAa9c7yl8GRS/keyframes/t022.jpg
26. Gimbals
- title: Gimbals
- status: publish
- author: 0
- is_previewable: (empty)
- video_duration: 0h 5m 19s (raw {"hours":0,"minutes":5,"seconds":19})
- video_source_type: embedded
- drive_file_id:
16QTuEd7ooxZdMt0xwwjGS2kS8_zzQIeH(source_ref; not a public link) - transcript pending / keyframes pending / presentation extract pending
- video_source_url: (Drive preview omitted as a public link; file id kept as source_ref)
(no lesson_content HTML in export — video-only or empty body; metadata above kept in full)
Drive extract
- file_id:
16QTuEd7ooxZdMt0xwwjGS2kS8_zzQIeH - filename: VEST Section 2 Phone & Gear 9 Gimbals.mp4
- kind: video
- local_path: /workspace/academy/media/16QTuEd7ooxZdMt0xwwjGS2kS8_zzQIeH/VEST Section 2 Phone & Gear 9 Gimbals.mp4
- source_ref: drive
16QTuEd7ooxZdMt0xwwjGS2kS8_zzQIeH· content_length 492206633 · original https://drive.google.com/file/d/16QTuEd7ooxZdMt0xwwjGS2kS8_zzQIeH/view - extract_status: done
- caption_source: drive_timedtext
- duration_s: 319.205011
- keyframe_count: 24
Transcript
- Hey guys, welcome back to the Essential
- [00:00:02.310] Hey guys, welcome back to the Essential
- [00:00:02.320] Hey guys, welcome back to the Essential Gear tutorial. Today we're going to
- [00:00:03.909] Gear tutorial. Today we're going to
- [00:00:03.919] Gear tutorial. Today we're going to learn how to stabilize your footage
- [00:00:05.829] learn how to stabilize your footage
- [00:00:05.839] learn how to stabilize your footage using gimbals, your phone's inbuilt
- [00:00:07.909] using gimbals, your phone's inbuilt
- [00:00:07.919] using gimbals, your phone's inbuilt stabilization, and some techniques with
- [00:00:10.709] stabilization, and some techniques with
- [00:00:10.719] stabilization, and some techniques with the Essential Gear. So, first off,
- [00:00:12.950] the Essential Gear. So, first off,
- [00:00:12.960] the Essential Gear. So, first off, here's gimbals. Gimbals are used to
- [00:00:15.110] here's gimbals. Gimbals are used to
- [00:00:15.120] here's gimbals. Gimbals are used to stabilize your, you know, footage, get
- [00:00:17.750] stabilize your, you know, footage, get
- [00:00:17.760] stabilize your, you know, footage, get rid of any shakiness. It is a really
- [00:00:19.750] rid of any shakiness. It is a really
- [00:00:19.760] rid of any shakiness. It is a really good piece of gear for those interested
- [00:00:21.670] good piece of gear for those interested
- [00:00:21.680] good piece of gear for those interested in vlogging, capturing yourself, filming
- [00:00:24.390] in vlogging, capturing yourself, filming
- [00:00:24.400] in vlogging, capturing yourself, filming things as you walk. But, you know,
- [00:00:26.630] things as you walk. But, you know,
- [00:00:26.640] things as you walk. But, you know, obviously, just like with tripods,
- [00:00:28.470] obviously, just like with tripods,
- [00:00:28.480] obviously, just like with tripods, sometimes you want to use gimbal,
- [00:00:29.990] sometimes you want to use gimbal,
- [00:00:30.000] sometimes you want to use gimbal, sometimes you don't. Uh, for example, if
- [00:00:32.470] sometimes you don't. Uh, for example, if
- [00:00:32.480] sometimes you don't. Uh, for example, if you're walking on a trail and your
- [00:00:35.350] you're walking on a trail and your
- [00:00:35.360] you're walking on a trail and your intention is to showcase the trail and
- [00:00:37.670] intention is to showcase the trail and
- [00:00:37.680] intention is to showcase the trail and the view and everything, you'd want to
- [00:00:40.630] the view and everything, you'd want to
- [00:00:40.640] the view and everything, you'd want to use a gimbal. But if you're not trying
- [00:00:42.470] use a gimbal. But if you're not trying
- [00:00:42.480] use a gimbal. But if you're not trying to tell a story where, you know,
- [00:00:44.150] to tell a story where, you know,
- [00:00:44.160] to tell a story where, you know, there's, you know, some monster chasing
- [00:00:46.470] there's, you know, some monster chasing
- [00:00:46.480] there's, you know, some monster chasing you, you wouldn't use a gimbal there cuz
- [00:00:48.229] you, you wouldn't use a gimbal there cuz
- [00:00:48.239] you, you wouldn't use a gimbal there cuz it wouldn't make sense to the story to
- [00:00:50.709] it wouldn't make sense to the story to
- [00:00:50.719] it wouldn't make sense to the story to the video you're trying to tell. There's
- [00:00:52.630] the video you're trying to tell. There's
- [00:00:52.640] the video you're trying to tell. There's many different types of gimbals. Mainly
- [00:00:54.470] many different types of gimbals. Mainly
- [00:00:54.480] many different types of gimbals. Mainly we're going to focus on threeaxis
- [00:00:56.470] we're going to focus on threeaxis
- [00:00:56.480] we're going to focus on threeaxis motorized gimbals for, you know, short
- [00:00:59.029] motorized gimbals for, you know, short
- [00:00:59.039] motorized gimbals for, you know, short form content creation, the ones designed
- [00:01:01.029] form content creation, the ones designed
- [00:01:01.039] form content creation, the ones designed to hold your cell phones. But you can
- [00:01:02.950] to hold your cell phones. But you can
- [00:01:02.960] to hold your cell phones. But you can also make your own twoaxis gimbal using
- [00:01:05.509] also make your own twoaxis gimbal using
- [00:01:05.519] also make your own twoaxis gimbal using weight balancing and, you know, that's a
- [00:01:08.230] weight balancing and, you know, that's a
- [00:01:08.240] weight balancing and, you know, that's a whole other story for an arts and crafts
- [00:01:10.070] whole other story for an arts and crafts
- [00:01:10.080] whole other story for an arts and crafts project. Gimbals are a useful tool to
- [00:01:12.630] project. Gimbals are a useful tool to
- [00:01:12.640] project. Gimbals are a useful tool to help stabilize your footage. An
- [00:01:14.789] help stabilize your footage. An
- [00:01:14.799] help stabilize your footage. An alternative to gimbals, cuz they can be
- [00:01:16.550] alternative to gimbals, cuz they can be
- [00:01:16.560] alternative to gimbals, cuz they can be a little bit pricey to either buy or
- [00:01:18.710] a little bit pricey to either buy or
- [00:01:18.720] a little bit pricey to either buy or make, is the inbuilt stabilization, you
- [00:01:21.749] make, is the inbuilt stabilization, you
- [00:01:21.759] make, is the inbuilt stabilization, you know, within your phone's camera. That's
- [00:01:23.830] know, within your phone's camera. That's
- [00:01:23.840] know, within your phone's camera. That's something that a lot of newer phones
- [00:01:25.670] something that a lot of newer phones
- [00:01:25.680] something that a lot of newer phones will have. Additionally, you can use uh
- [00:01:28.469] will have. Additionally, you can use uh
- [00:01:28.479] will have. Additionally, you can use uh third-party software after the fact to
- [00:01:31.030] third-party software after the fact to
- [00:01:31.040] third-party software after the fact to stabilize your footage, but we will
- [00:01:33.190] stabilize your footage, but we will
- [00:01:33.200] stabilize your footage, but we will cover that in a in a later section.
- [00:01:35.510] cover that in a in a later section.
- [00:01:35.520] cover that in a in a later section. Another thing is to just have good
- [00:01:37.350] Another thing is to just have good
- [00:01:37.360] Another thing is to just have good technique. Remember, when you hold your
- [00:01:39.749] technique. Remember, when you hold your
- [00:01:39.759] technique. Remember, when you hold your camera, go handheld and you're filming,
- [00:01:42.390] camera, go handheld and you're filming,
- [00:01:42.400] camera, go handheld and you're filming, you do want to not turn your camera like
- [00:01:45.270] you do want to not turn your camera like
- [00:01:45.280] you do want to not turn your camera like this and use your wrist. You want to
- [00:01:47.030] this and use your wrist. You want to
- [00:01:47.040] this and use your wrist. You want to move with your body. You know, you want
- [00:01:49.429] move with your body. You know, you want
- [00:01:49.439] move with your body. You know, you want to keep it in line with your head, with
- [00:01:51.109] to keep it in line with your head, with
- [00:01:51.119] to keep it in line with your head, with your chest and turn yourself in order
- [00:01:54.550] your chest and turn yourself in order
- [00:01:54.560] your chest and turn yourself in order to, you know, if you want to turn to
- [00:01:56.630] to, you know, if you want to turn to
- [00:01:56.640] to, you know, if you want to turn to different elements and things. That is
- [00:01:58.789] different elements and things. That is
- [00:01:58.799] different elements and things. That is very good practice when you are filming
- [00:02:01.270] very good practice when you are filming
- [00:02:01.280] very good practice when you are filming and you're going handheld and you don't
- [00:02:03.190] and you're going handheld and you don't
- [00:02:03.200] and you're going handheld and you don't have like a gimbal and other elements
- [00:02:05.429] have like a gimbal and other elements
- [00:02:05.439] have like a gimbal and other elements like that. Let me show you guys how a
- [00:02:07.190] like that. Let me show you guys how a
- [00:02:07.200] like that. Let me show you guys how a gimbal works and how we set it up and
- [00:02:09.510] gimbal works and how we set it up and
- [00:02:09.520] gimbal works and how we set it up and the different settings and things it can
- [00:02:11.510] the different settings and things it can
- [00:02:11.520] the different settings and things it can help us achieve. So, here's our gimbal.
- [00:02:14.150] help us achieve. So, here's our gimbal.
- [00:02:14.160] help us achieve. So, here's our gimbal. Uh this is the DJI Osmo, you know,
- [00:02:17.670] Uh this is the DJI Osmo, you know,
- [00:02:17.680] Uh this is the DJI Osmo, you know, mobile version. This one has a software
- [00:02:21.430] mobile version. This one has a software
- [00:02:21.440] mobile version. This one has a software that you can use, you know, download on
- [00:02:23.190] that you can use, you know, download on
- [00:02:23.200] that you can use, you know, download on your phones that helps you, you know,
- [00:02:25.110] your phones that helps you, you know,
- [00:02:25.120] your phones that helps you, you know, control it quite nicely as well. Um so
- [00:02:27.430] control it quite nicely as well. Um so
- [00:02:27.440] control it quite nicely as well. Um so let's look at how to set this thing up.
- [00:02:29.110] let's look at how to set this thing up.
- [00:02:29.120] let's look at how to set this thing up. Here's our gimbal. Um this is our little
- [00:02:31.750] Here's our gimbal. Um this is our little
- [00:02:31.760] Here's our gimbal. Um this is our little head that goes on our phone. And here we
- [00:02:35.190] head that goes on our phone. And here we
- [00:02:35.200] head that goes on our phone. And here we have a mini little tripod stand to
- [00:02:38.949] have a mini little tripod stand to
- [00:02:38.959] have a mini little tripod stand to attach to our gimbal. First off, we will
- [00:02:42.150] attach to our gimbal. First off, we will
- [00:02:42.160] attach to our gimbal. First off, we will screw this onto our gimbal. And that
- [00:02:44.949] screw this onto our gimbal. And that
- [00:02:44.959] screw this onto our gimbal. And that gives us a little, you know, a little
- [00:02:46.949] gives us a little, you know, a little
- [00:02:46.959] gives us a little, you know, a little stand for, you know, our gimbal to sit
- [00:02:49.910] stand for, you know, our gimbal to sit
- [00:02:49.920] stand for, you know, our gimbal to sit on like that. This section you'd put on
- [00:02:52.550] on like that. This section you'd put on
- [00:02:52.560] on like that. This section you'd put on your phone. So on the back of your
- [00:02:54.790] your phone. So on the back of your
- [00:02:54.800] your phone. So on the back of your phone, you'd wrap that on and it would
- [00:02:57.030] phone, you'd wrap that on and it would
- [00:02:57.040] phone, you'd wrap that on and it would hold your phone vertically like that. So
- [00:02:59.830] hold your phone vertically like that. So
- [00:02:59.840] hold your phone vertically like that. So then it holds your phone, you know,
- [00:03:01.910] then it holds your phone, you know,
- [00:03:01.920] then it holds your phone, you know, vertically like this. and it has a
- [00:03:05.509] vertically like this. and it has a
- [00:03:05.519] vertically like this. and it has a magnet that attaches to your your
- [00:03:09.110] magnet that attaches to your your
- [00:03:09.120] magnet that attaches to your your gimbal. So, you'd open your g gimbal up
- [00:03:11.990] gimbal. So, you'd open your g gimbal up
- [00:03:12.000] gimbal. So, you'd open your g gimbal up and what would happen with a gimbal is
- [00:03:14.790] and what would happen with a gimbal is
- [00:03:14.800] and what would happen with a gimbal is once you've attached your phone and
- [00:03:16.470] once you've attached your phone and
- [00:03:16.480] once you've attached your phone and you've clipped that on, um you need to
- [00:03:19.270] you've clipped that on, um you need to
- [00:03:19.280] you've clipped that on, um you need to balance your gimbal. So, what happens is
- [00:03:23.270] balance your gimbal. So, what happens is
- [00:03:23.280] balance your gimbal. So, what happens is your phone will sit this way and if your
- [00:03:26.229] your phone will sit this way and if your
- [00:03:26.239] your phone will sit this way and if your phone falls like this and turns the
- [00:03:28.149] phone falls like this and turns the
- [00:03:28.159] phone falls like this and turns the gimbal like this, it's unbalanced. So
- [00:03:30.949] gimbal like this, it's unbalanced. So
- [00:03:30.959] gimbal like this, it's unbalanced. So you need to move and adjust your phone
- [00:03:33.589] you need to move and adjust your phone
- [00:03:33.599] you need to move and adjust your phone so that it uh you know stays upright
- [00:03:37.110] so that it uh you know stays upright
- [00:03:37.120] so that it uh you know stays upright with the screen facing upwards. And this
- [00:03:39.110] with the screen facing upwards. And this
- [00:03:39.120] with the screen facing upwards. And this is one of the things where um you know
- [00:03:41.830] is one of the things where um you know
- [00:03:41.840] is one of the things where um you know you can play around with it. It has many
- [00:03:43.509] you can play around with it. It has many
- [00:03:43.519] you can play around with it. It has many different settings and options. You know
- [00:03:45.670] different settings and options. You know
- [00:03:45.680] different settings and options. You know this little dial will turn the gimbal
- [00:03:48.789] this little dial will turn the gimbal
- [00:03:48.799] this little dial will turn the gimbal that will connect to your phone so you
- [00:03:50.710] that will connect to your phone so you
- [00:03:50.720] that will connect to your phone so you can hit record from your gimbal. This
- [00:03:53.190] can hit record from your gimbal. This
- [00:03:53.200] can hit record from your gimbal. This one will allow you to turn your um you
- [00:03:56.070] one will allow you to turn your um you
- [00:03:56.080] one will allow you to turn your um you know different landscape portrait. So
- [00:03:58.550] know different landscape portrait. So
- [00:03:58.560] know different landscape portrait. So yeah, that is our little DJI gimbal. So
- [00:04:01.910] yeah, that is our little DJI gimbal. So
- [00:04:01.920] yeah, that is our little DJI gimbal. So here's some examples of, you know,
- [00:04:04.229] here's some examples of, you know,
- [00:04:04.239] here's some examples of, you know, filming with versus without a gimbal.
- So, we just covered gimbals and phone
- [00:05:14.870] So, we just covered gimbals and phone
- [00:05:14.880] So, we just covered gimbals and phone stabilization. Thank you guys, and I'll
- [00:05:17.029] stabilization. Thank you guys, and I'll
- [00:05:17.039] stabilization. Thank you guys, and I'll see you in the next one.
Keyframes
- /workspace/academy/media/16QTuEd7ooxZdMt0xwwjGS2kS8_zzQIeH/keyframes/last.jpg
- /workspace/academy/media/16QTuEd7ooxZdMt0xwwjGS2kS8_zzQIeH/keyframes/t001.jpg
- /workspace/academy/media/16QTuEd7ooxZdMt0xwwjGS2kS8_zzQIeH/keyframes/t003.jpg
- /workspace/academy/media/16QTuEd7ooxZdMt0xwwjGS2kS8_zzQIeH/keyframes/t004.jpg
- /workspace/academy/media/16QTuEd7ooxZdMt0xwwjGS2kS8_zzQIeH/keyframes/t006.jpg
- /workspace/academy/media/16QTuEd7ooxZdMt0xwwjGS2kS8_zzQIeH/keyframes/t007.jpg
- /workspace/academy/media/16QTuEd7ooxZdMt0xwwjGS2kS8_zzQIeH/keyframes/t008.jpg
- /workspace/academy/media/16QTuEd7ooxZdMt0xwwjGS2kS8_zzQIeH/keyframes/t010.jpg
- /workspace/academy/media/16QTuEd7ooxZdMt0xwwjGS2kS8_zzQIeH/keyframes/t011.jpg
- /workspace/academy/media/16QTuEd7ooxZdMt0xwwjGS2kS8_zzQIeH/keyframes/t013.jpg
- /workspace/academy/media/16QTuEd7ooxZdMt0xwwjGS2kS8_zzQIeH/keyframes/t014.jpg
- /workspace/academy/media/16QTuEd7ooxZdMt0xwwjGS2kS8_zzQIeH/keyframes/t015.jpg
- /workspace/academy/media/16QTuEd7ooxZdMt0xwwjGS2kS8_zzQIeH/keyframes/t017.jpg
- /workspace/academy/media/16QTuEd7ooxZdMt0xwwjGS2kS8_zzQIeH/keyframes/t018.jpg
- /workspace/academy/media/16QTuEd7ooxZdMt0xwwjGS2kS8_zzQIeH/keyframes/t019.jpg
- /workspace/academy/media/16QTuEd7ooxZdMt0xwwjGS2kS8_zzQIeH/keyframes/t021.jpg
- /workspace/academy/media/16QTuEd7ooxZdMt0xwwjGS2kS8_zzQIeH/keyframes/t022.jpg
- /workspace/academy/media/16QTuEd7ooxZdMt0xwwjGS2kS8_zzQIeH/keyframes/t024.jpg
- /workspace/academy/media/16QTuEd7ooxZdMt0xwwjGS2kS8_zzQIeH/keyframes/t025.jpg
- /workspace/academy/media/16QTuEd7ooxZdMt0xwwjGS2kS8_zzQIeH/keyframes/t026.jpg
- /workspace/academy/media/16QTuEd7ooxZdMt0xwwjGS2kS8_zzQIeH/keyframes/t028.jpg
- /workspace/academy/media/16QTuEd7ooxZdMt0xwwjGS2kS8_zzQIeH/keyframes/t029.jpg
- /workspace/academy/media/16QTuEd7ooxZdMt0xwwjGS2kS8_zzQIeH/keyframes/t031.jpg
- /workspace/academy/media/16QTuEd7ooxZdMt0xwwjGS2kS8_zzQIeH/keyframes/t032.jpg
27. Lighting
- title: Lighting
- status: publish
- author: 0
- is_previewable: (empty)
- video_duration: 0h 5m 55s (raw {"hours":0,"minutes":5,"seconds":55})
- video_source_type: embedded
- drive_file_id:
1NsMA8VEM4WsSxXJYF8vMtOGIRTkEtJrX(source_ref; not a public link) - transcript pending / keyframes pending / presentation extract pending
- video_source_url: (Drive preview omitted as a public link; file id kept as source_ref)
(no lesson_content HTML in export — video-only or empty body; metadata above kept in full)
Drive extract
- file_id:
1NsMA8VEM4WsSxXJYF8vMtOGIRTkEtJrX - filename: VEST Section 2 Phone & Gear 10 Lighting.mp4
- kind: video
- local_path: /workspace/academy/media/1NsMA8VEM4WsSxXJYF8vMtOGIRTkEtJrX/VEST Section 2 Phone & Gear 10 Lighting.mp4
- source_ref: drive
1NsMA8VEM4WsSxXJYF8vMtOGIRTkEtJrX· content_length 548650663 · original https://drive.google.com/file/d/1NsMA8VEM4WsSxXJYF8vMtOGIRTkEtJrX/view - extract_status: done
- caption_source: drive_timedtext
- duration_s: 355.289002
- keyframe_count: 24
Transcript
- Hey guys, welcome back to Essential
- [00:00:02.310] Hey guys, welcome back to Essential
- [00:00:02.320] Hey guys, welcome back to Essential Gear. Today we're going to be going over
- [00:00:04.230] Gear. Today we're going to be going over
- [00:00:04.240] Gear. Today we're going to be going over lighting and the different types of
- [00:00:06.150] lighting and the different types of
- [00:00:06.160] lighting and the different types of lights, how to set them up, and when to
- [00:00:08.390] lights, how to set them up, and when to
- [00:00:08.400] lights, how to set them up, and when to use them. First off, we have panel
- [00:00:10.390] use them. First off, we have panel
- [00:00:10.400] use them. First off, we have panel lights. These are, you know, LED panel
- [00:00:12.870] lights. These are, you know, LED panel
- [00:00:12.880] lights. These are, you know, LED panel lights. They're very good at giving you
- [00:00:15.509] lights. They're very good at giving you
- [00:00:15.519] lights. They're very good at giving you a lot of light for a situation. Um,
- [00:00:17.670] a lot of light for a situation. Um,
- [00:00:17.680] a lot of light for a situation. Um, additionally, you have ring lights,
- [00:00:20.390] additionally, you have ring lights,
- [00:00:20.400] additionally, you have ring lights, which are these uh circular
- [00:00:23.910] which are these uh circular
- [00:00:23.920] which are these uh circular uh lights that you see a lot of
- [00:00:25.429] uh lights that you see a lot of
- [00:00:25.439] uh lights that you see a lot of influencers and content creators use.
- [00:00:28.070] influencers and content creators use.
- [00:00:28.080] influencers and content creators use. They're great for, you know, lighting up
- [00:00:30.310] They're great for, you know, lighting up
- [00:00:30.320] They're great for, you know, lighting up the entirety of your face. Then you also
- [00:00:32.389] the entirety of your face. Then you also
- [00:00:32.399] the entirety of your face. Then you also have obviously ambient lighting, the
- [00:00:34.549] have obviously ambient lighting, the
- [00:00:34.559] have obviously ambient lighting, the lighting that exists already in any
- [00:00:36.709] lighting that exists already in any
- [00:00:36.719] lighting that exists already in any space. You know, the ceiling lights or,
- [00:00:39.510] space. You know, the ceiling lights or,
- [00:00:39.520] space. You know, the ceiling lights or, you know, light through a window, or you
- [00:00:41.110] you know, light through a window, or you
- [00:00:41.120] you know, light through a window, or you could just go outside and see what light
- [00:00:42.790] could just go outside and see what light
- [00:00:42.800] could just go outside and see what light is there. You can also use lights to
- [00:00:45.270] is there. You can also use lights to
- [00:00:45.280] is there. You can also use lights to decorate your space, you know, some like
- [00:00:47.350] decorate your space, you know, some like
- [00:00:47.360] decorate your space, you know, some like Christmas lights, fairy lights. Another
- [00:00:49.670] Christmas lights, fairy lights. Another
- [00:00:49.680] Christmas lights, fairy lights. Another thing that you use a lot is reflector
- [00:00:52.950] thing that you use a lot is reflector
- [00:00:52.960] thing that you use a lot is reflector boards. You can literally grab like a
- [00:00:55.350] boards. You can literally grab like a
- [00:00:55.360] boards. You can literally grab like a sheet of polyyrene and if you're, you
- [00:00:58.150] sheet of polyyrene and if you're, you
- [00:00:58.160] sheet of polyyrene and if you're, you know, filming outside, you can use that
- [00:01:00.150] know, filming outside, you can use that
- [00:01:00.160] know, filming outside, you can use that to reflect the ambient light of the sun,
- [00:01:04.070] to reflect the ambient light of the sun,
- [00:01:04.080] to reflect the ambient light of the sun, you can use that also indoors to reflect
- [00:01:06.310] you can use that also indoors to reflect
- [00:01:06.320] you can use that also indoors to reflect your panel lights. You know, not
- [00:01:07.670] your panel lights. You know, not
- [00:01:07.680] your panel lights. You know, not everyone can afford four different panel
- [00:01:09.429] everyone can afford four different panel
- [00:01:09.439] everyone can afford four different panel lights. So, you can create more using
- [00:01:12.550] lights. So, you can create more using
- [00:01:12.560] lights. So, you can create more using reflectors. You also then have diffusers
- [00:01:15.750] reflectors. You also then have diffusers
- [00:01:15.760] reflectors. You also then have diffusers which diffuse the light, you know, make
- [00:01:17.910] which diffuse the light, you know, make
- [00:01:17.920] which diffuse the light, you know, make shadows less harsh. And then obviously
- [00:01:20.070] shadows less harsh. And then obviously
- [00:01:20.080] shadows less harsh. And then obviously you have blockers. If uh you've got too
- [00:01:22.710] you have blockers. If uh you've got too
- [00:01:22.720] you have blockers. If uh you've got too much light entering the space, you can
- [00:01:24.950] much light entering the space, you can
- [00:01:24.960] much light entering the space, you can close a curtain to stop light from
- [00:01:28.070] close a curtain to stop light from
- [00:01:28.080] close a curtain to stop light from hitting inside, you know, from outdoor.
- [00:01:29.990] hitting inside, you know, from outdoor.
- [00:01:30.000] hitting inside, you know, from outdoor. So there's many different types of
- [00:01:31.350] So there's many different types of
- [00:01:31.360] So there's many different types of lights, but there's also many different
- [00:01:33.190] lights, but there's also many different
- [00:01:33.200] lights, but there's also many different types of ways of manipulating that light
- [00:01:36.310] types of ways of manipulating that light
- [00:01:36.320] types of ways of manipulating that light through gear. So here is some examples
- [00:01:39.270] through gear. So here is some examples
- [00:01:39.280] through gear. So here is some examples of how to set up a a light on a light
- [00:01:42.789] of how to set up a a light on a light
- [00:01:42.799] of how to set up a a light on a light stand. This is how to set up a light on
- [00:01:45.429] stand. This is how to set up a light on
- [00:01:45.439] stand. This is how to set up a light on a light stand. So here you see we have
- [00:01:48.149] a light stand. So here you see we have
- [00:01:48.159] a light stand. So here you see we have our panel light which comes with
- [00:01:50.230] our panel light which comes with
- [00:01:50.240] our panel light which comes with batteries that you can just clip in and
- [00:01:53.510] batteries that you can just clip in and
- [00:01:53.520] batteries that you can just clip in and you know then you don't need to like
- [00:01:55.190] you know then you don't need to like
- [00:01:55.200] you know then you don't need to like plug it to the power all the time. But I
- [00:01:57.749] plug it to the power all the time. But I
- [00:01:57.759] plug it to the power all the time. But I do have a power connector for it. We
- [00:02:00.950] do have a power connector for it. We
- [00:02:00.960] do have a power connector for it. We have our dimmer switch, our color switch
- [00:02:03.830] have our dimmer switch, our color switch
- [00:02:03.840] have our dimmer switch, our color switch and you know like our on switch. So we
- [00:02:06.469] and you know like our on switch. So we
- [00:02:06.479] and you know like our on switch. So we open up the panels, turn this on. So we
- [00:02:10.070] open up the panels, turn this on. So we
- [00:02:10.080] open up the panels, turn this on. So we have light. You can adjust the color to
- [00:02:12.229] have light. You can adjust the color to
- [00:02:12.239] have light. You can adjust the color to be warmer or colder. Adjust the dim. So
- [00:02:15.589] be warmer or colder. Adjust the dim. So
- [00:02:15.599] be warmer or colder. Adjust the dim. So it's going to be bright or dim. And
- [00:02:17.750] it's going to be bright or dim. And
- [00:02:17.760] it's going to be bright or dim. And yeah, that is how to turn on and you
- [00:02:20.710] yeah, that is how to turn on and you
- [00:02:20.720] yeah, that is how to turn on and you know adjust you know the different
- [00:02:21.990] know adjust you know the different
- [00:02:22.000] know adjust you know the different temperature and intensity of the light.
- [00:02:24.309] temperature and intensity of the light.
- [00:02:24.319] temperature and intensity of the light. But now let's focus on putting this on
- [00:02:26.710] But now let's focus on putting this on
- [00:02:26.720] But now let's focus on putting this on our light stand. So a light stand um
- [00:02:29.910] our light stand. So a light stand um
- [00:02:29.920] our light stand. So a light stand um don't be fooled. Even though it looks
- [00:02:31.589] don't be fooled. Even though it looks
- [00:02:31.599] don't be fooled. Even though it looks similar to a tripod, it is not a tripod.
- [00:02:34.949] similar to a tripod, it is not a tripod.
- [00:02:34.959] similar to a tripod, it is not a tripod. If you try to open it like a tripod with
- [00:02:36.949] If you try to open it like a tripod with
- [00:02:36.959] If you try to open it like a tripod with the legs, you risk breaking it. So this
- [00:02:39.509] the legs, you risk breaking it. So this
- [00:02:39.519] the legs, you risk breaking it. So this is a little miniature version uh that I
- [00:02:42.150] is a little miniature version uh that I
- [00:02:42.160] is a little miniature version uh that I have to show you. So, a tripod usually
- [00:02:45.190] have to show you. So, a tripod usually
- [00:02:45.200] have to show you. So, a tripod usually opens with its legs um you know going
- [00:02:48.630] opens with its legs um you know going
- [00:02:48.640] opens with its legs um you know going out. You don't want to open this with
- [00:02:50.550] out. You don't want to open this with
- [00:02:50.560] out. You don't want to open this with its legs going out because a light stand
- [00:02:52.710] its legs going out because a light stand
- [00:02:52.720] its legs going out because a light stand opens more like an umbrella with the
- [00:02:54.869] opens more like an umbrella with the
- [00:02:54.879] opens more like an umbrella with the neck coming up. And if you want to close
- [00:02:57.509] neck coming up. And if you want to close
- [00:02:57.519] neck coming up. And if you want to close a light stand, you put the neck down.
- [00:02:59.910] a light stand, you put the neck down.
- [00:02:59.920] a light stand, you put the neck down. So, it opens more like an umbrella in
- [00:03:02.229] So, it opens more like an umbrella in
- [00:03:02.239] So, it opens more like an umbrella in that way. And a proper light stand is a
- [00:03:04.309] that way. And a proper light stand is a
- [00:03:04.319] that way. And a proper light stand is a lot bigger. This is just a mini one for
- [00:03:06.550] lot bigger. This is just a mini one for
- [00:03:06.560] lot bigger. This is just a mini one for the purpose of the tutorial to show you
- [00:03:09.110] the purpose of the tutorial to show you
- [00:03:09.120] the purpose of the tutorial to show you what it looks like. They can be really
- [00:03:11.270] what it looks like. They can be really
- [00:03:11.280] what it looks like. They can be really tall. they, you know, will have longer
- [00:03:13.910] tall. they, you know, will have longer
- [00:03:13.920] tall. they, you know, will have longer legs to keep them a little bit more uh
- [00:03:16.869] legs to keep them a little bit more uh
- [00:03:16.879] legs to keep them a little bit more uh secure. But yeah, this is our light
- [00:03:19.030] secure. But yeah, this is our light
- [00:03:19.040] secure. But yeah, this is our light stand. And then this little fitting goes
- [00:03:22.390] stand. And then this little fitting goes
- [00:03:22.400] stand. And then this little fitting goes onto the underneath of your light. It
- [00:03:25.190] onto the underneath of your light. It
- [00:03:25.200] onto the underneath of your light. It will attach to your light stand and
- [00:03:27.270] will attach to your light stand and
- [00:03:27.280] will attach to your light stand and allow you to, you know, move and rotate
- [00:03:29.190] allow you to, you know, move and rotate
- [00:03:29.200] allow you to, you know, move and rotate your light around. We can now tighten
- [00:03:31.589] your light around. We can now tighten
- [00:03:31.599] your light around. We can now tighten that. And now attach him to our light
- [00:03:35.670] that. And now attach him to our light
- [00:03:35.680] that. And now attach him to our light stand. And we can attach this guy. Let's
- [00:03:38.550] stand. And we can attach this guy. Let's
- [00:03:38.560] stand. And we can attach this guy. Let's put him down a bit. So, there's our
- [00:03:40.710] put him down a bit. So, there's our
- [00:03:40.720] put him down a bit. So, there's our light on our light stand. And if we
- [00:03:42.470] light on our light stand. And if we
- [00:03:42.480] light on our light stand. And if we tighten him, um, he stays, you know,
- [00:03:45.190] tighten him, um, he stays, you know,
- [00:03:45.200] tighten him, um, he stays, you know, quite nice. If we loosen the fitting, it
- [00:03:47.430] quite nice. If we loosen the fitting, it
- [00:03:47.440] quite nice. If we loosen the fitting, it allows us to, you know, rotate our light
- [00:03:50.710] allows us to, you know, rotate our light
- [00:03:50.720] allows us to, you know, rotate our light to whatever angle or position we want.
- [00:03:53.190] to whatever angle or position we want.
- [00:03:53.200] to whatever angle or position we want. Put him down like that. There, he'll be
- [00:03:55.190] Put him down like that. There, he'll be
- [00:03:55.200] Put him down like that. There, he'll be tight. open up our panels and we can
- [00:03:58.149] tight. open up our panels and we can
- [00:03:58.159] tight. open up our panels and we can plug in our power, turn on our light and
- [00:04:02.630] plug in our power, turn on our light and
- [00:04:02.640] plug in our power, turn on our light and adjust our dimness, our color,
- [00:04:06.229] adjust our dimness, our color,
- [00:04:06.239] adjust our dimness, our color, choose whatever brightness, temperature
- [00:04:08.710] choose whatever brightness, temperature
- [00:04:08.720] choose whatever brightness, temperature and you know that is how to set up your
- [00:04:11.110] and you know that is how to set up your
- [00:04:11.120] and you know that is how to set up your light on a light stand. Here's some
- [00:04:12.869] light on a light stand. Here's some
- [00:04:12.879] light on a light stand. Here's some examples of different lights. First, we
- [00:04:15.509] examples of different lights. First, we
- [00:04:15.519] examples of different lights. First, we have the panel light. This is the one we
- [00:04:17.830] have the panel light. This is the one we
- [00:04:17.840] have the panel light. This is the one we used when setting up our light on our
- [00:04:19.830] used when setting up our light on our
- [00:04:19.840] used when setting up our light on our light stand. This is a more powerful
- [00:04:22.150] light stand. This is a more powerful
- [00:04:22.160] light stand. This is a more powerful light and you'll find that on film
- [00:04:25.189] light and you'll find that on film
- [00:04:25.199] light and you'll find that on film shoots and, you know, productions and
- [00:04:27.590] shoots and, you know, productions and
- [00:04:27.600] shoots and, you know, productions and stuff. Panel lights are used a lot more
- [00:04:30.629] stuff. Panel lights are used a lot more
- [00:04:30.639] stuff. Panel lights are used a lot more often, but much bigger ones. You have
- [00:04:33.110] often, but much bigger ones. You have
- [00:04:33.120] often, but much bigger ones. You have your different dials. You can adjust
- [00:04:34.710] your different dials. You can adjust
- [00:04:34.720] your different dials. You can adjust your dimness and color. Another light
- [00:04:37.189] your dimness and color. Another light
- [00:04:37.199] your dimness and color. Another light that you'll see often is a ring light.
- [00:04:39.990] that you'll see often is a ring light.
- [00:04:40.000] that you'll see often is a ring light. This light is great for, you know, short
- [00:04:42.950] This light is great for, you know, short
- [00:04:42.960] This light is great for, you know, short form content, but more so like makeup
- [00:04:45.110] form content, but more so like makeup
- [00:04:45.120] form content, but more so like makeup tutorials or things where you have to
- [00:04:46.870] tutorials or things where you have to
- [00:04:46.880] tutorials or things where you have to highlight your face. What you end up
- [00:04:49.270] highlight your face. What you end up
- [00:04:49.280] highlight your face. What you end up having is, you know, this little holder
- [00:04:52.390] having is, you know, this little holder
- [00:04:52.400] having is, you know, this little holder here goes in the middle here and would
- [00:04:56.629] here goes in the middle here and would
- [00:04:56.639] here goes in the middle here and would hold your phone in this middle bit. You
- [00:04:59.510] hold your phone in this middle bit. You
- [00:04:59.520] hold your phone in this middle bit. You know, you'd film yourself like that. So,
- [00:05:01.990] know, you'd film yourself like that. So,
- [00:05:02.000] know, you'd film yourself like that. So, it creates a nice outline and it lights
- [00:05:04.870] it creates a nice outline and it lights
- [00:05:04.880] it creates a nice outline and it lights up your face equally if you want uh your
- [00:05:07.830] up your face equally if you want uh your
- [00:05:07.840] up your face equally if you want uh your audience to focus on your eyes and your
- [00:05:09.909] audience to focus on your eyes and your
- [00:05:09.919] audience to focus on your eyes and your face. It gives a a really cool effect.
- [00:05:12.390] face. It gives a a really cool effect.
- [00:05:12.400] face. It gives a a really cool effect. Another option that we have is, you
- [00:05:14.950] Another option that we have is, you
- [00:05:14.960] Another option that we have is, you know, decorative lighting. This is a,
- [00:05:18.070] know, decorative lighting. This is a,
- [00:05:18.080] know, decorative lighting. This is a, you know, little colorful decorative
- [00:05:19.749] you know, little colorful decorative
- [00:05:19.759] you know, little colorful decorative light that creates this cool starry
- [00:05:21.590] light that creates this cool starry
- [00:05:21.600] light that creates this cool starry effect, uh, when you turn it on. So,
- [00:05:24.310] effect, uh, when you turn it on. So,
- [00:05:24.320] effect, uh, when you turn it on. So, remember to take advantage of, you know,
- [00:05:26.629] remember to take advantage of, you know,
- [00:05:26.639] remember to take advantage of, you know, fairy lights, even lamps in your home.
- [00:05:29.029] fairy lights, even lamps in your home.
- [00:05:29.039] fairy lights, even lamps in your home. Heck, you can even use the ambient light
- [00:05:31.590] Heck, you can even use the ambient light
- [00:05:31.600] Heck, you can even use the ambient light from a television screen or your phone
- [00:05:33.590] from a television screen or your phone
- [00:05:33.600] from a television screen or your phone screen to create cool effects. So, you
- [00:05:35.830] screen to create cool effects. So, you
- [00:05:35.840] screen to create cool effects. So, you know, you can get creative with that.
- [00:05:37.590] know, you can get creative with that.
- [00:05:37.600] know, you can get creative with that. So, we just covered the different types
- [00:05:39.510] So, we just covered the different types
- [00:05:39.520] So, we just covered the different types of lights, panel, ring, ambient,
- [00:05:42.070] of lights, panel, ring, ambient,
- [00:05:42.080] of lights, panel, ring, ambient, decorative. We also showed you how to
- [00:05:44.390] decorative. We also showed you how to
- [00:05:44.400] decorative. We also showed you how to set up a light on a light stand and how
- [00:05:47.909] set up a light on a light stand and how
- [00:05:47.919] set up a light on a light stand and how to use these uh different panels and
- [00:05:50.390] to use these uh different panels and
- [00:05:50.400] to use these uh different panels and diffusers. Cool. I'll see you guys in
- [00:05:52.870] diffusers. Cool. I'll see you guys in
- [00:05:52.880] diffusers. Cool. I'll see you guys in the next one.
Keyframes
- /workspace/academy/media/1NsMA8VEM4WsSxXJYF8vMtOGIRTkEtJrX/keyframes/last.jpg
- /workspace/academy/media/1NsMA8VEM4WsSxXJYF8vMtOGIRTkEtJrX/keyframes/t002.jpg
- /workspace/academy/media/1NsMA8VEM4WsSxXJYF8vMtOGIRTkEtJrX/keyframes/t003.jpg
- /workspace/academy/media/1NsMA8VEM4WsSxXJYF8vMtOGIRTkEtJrX/keyframes/t005.jpg
- /workspace/academy/media/1NsMA8VEM4WsSxXJYF8vMtOGIRTkEtJrX/keyframes/t006.jpg
- /workspace/academy/media/1NsMA8VEM4WsSxXJYF8vMtOGIRTkEtJrX/keyframes/t008.jpg
- /workspace/academy/media/1NsMA8VEM4WsSxXJYF8vMtOGIRTkEtJrX/keyframes/t009.jpg
- /workspace/academy/media/1NsMA8VEM4WsSxXJYF8vMtOGIRTkEtJrX/keyframes/t011.jpg
- /workspace/academy/media/1NsMA8VEM4WsSxXJYF8vMtOGIRTkEtJrX/keyframes/t013.jpg
- /workspace/academy/media/1NsMA8VEM4WsSxXJYF8vMtOGIRTkEtJrX/keyframes/t014.jpg
- /workspace/academy/media/1NsMA8VEM4WsSxXJYF8vMtOGIRTkEtJrX/keyframes/t016.jpg
- /workspace/academy/media/1NsMA8VEM4WsSxXJYF8vMtOGIRTkEtJrX/keyframes/t017.jpg
- /workspace/academy/media/1NsMA8VEM4WsSxXJYF8vMtOGIRTkEtJrX/keyframes/t019.jpg
- /workspace/academy/media/1NsMA8VEM4WsSxXJYF8vMtOGIRTkEtJrX/keyframes/t020.jpg
- /workspace/academy/media/1NsMA8VEM4WsSxXJYF8vMtOGIRTkEtJrX/keyframes/t022.jpg
- /workspace/academy/media/1NsMA8VEM4WsSxXJYF8vMtOGIRTkEtJrX/keyframes/t023.jpg
- /workspace/academy/media/1NsMA8VEM4WsSxXJYF8vMtOGIRTkEtJrX/keyframes/t025.jpg
- /workspace/academy/media/1NsMA8VEM4WsSxXJYF8vMtOGIRTkEtJrX/keyframes/t027.jpg
- /workspace/academy/media/1NsMA8VEM4WsSxXJYF8vMtOGIRTkEtJrX/keyframes/t028.jpg
- /workspace/academy/media/1NsMA8VEM4WsSxXJYF8vMtOGIRTkEtJrX/keyframes/t030.jpg
- /workspace/academy/media/1NsMA8VEM4WsSxXJYF8vMtOGIRTkEtJrX/keyframes/t031.jpg
- /workspace/academy/media/1NsMA8VEM4WsSxXJYF8vMtOGIRTkEtJrX/keyframes/t033.jpg
- /workspace/academy/media/1NsMA8VEM4WsSxXJYF8vMtOGIRTkEtJrX/keyframes/t034.jpg
- /workspace/academy/media/1NsMA8VEM4WsSxXJYF8vMtOGIRTkEtJrX/keyframes/t036.jpg
28. Microphones
- title: Microphones
- status: publish
- author: 0
- is_previewable: (empty)
- video_duration: 0h 3m 31s (raw {"hours":0,"minutes":3,"seconds":31})
- video_source_type: embedded
- drive_file_id:
1YtRnm0oZuZU61QOPrx_px3kyI6rBHu1m(source_ref; not a public link) - transcript pending / keyframes pending / presentation extract pending
- video_source_url: (Drive preview omitted as a public link; file id kept as source_ref)
(no lesson_content HTML in export — video-only or empty body; metadata above kept in full)
- quizzes_following_this_lesson: 1 (full text in Quizzes)
- Essential Gear Quiz (3 questions)
Drive extract
- file_id:
1YtRnm0oZuZU61QOPrx_px3kyI6rBHu1m - filename: VEST Section 2 Phone & Gear 11 Microphones.mp4
- kind: video
- local_path: /workspace/academy/media/1YtRnm0oZuZU61QOPrx_px3kyI6rBHu1m/VEST Section 2 Phone & Gear 11 Microphones.mp4
- source_ref: drive
1YtRnm0oZuZU61QOPrx_px3kyI6rBHu1m· content_length 322637176 · original https://drive.google.com/file/d/1YtRnm0oZuZU61QOPrx_px3kyI6rBHu1m/view - extract_status: done
- caption_source: drive_timedtext
- duration_s: 211.301995
- keyframe_count: 22
Transcript
- Now, another very important essential
- [00:00:02.950] Now, another very important essential
- [00:00:02.960] Now, another very important essential piece of gear is microphones. More
- [00:00:05.510] piece of gear is microphones. More
- [00:00:05.520] piece of gear is microphones. More importantly, external microphones. Why
- [00:00:07.670] importantly, external microphones. Why
- [00:00:07.680] importantly, external microphones. Why would you use them? What are the
- [00:00:09.190] would you use them? What are the
- [00:00:09.200] would you use them? What are the different types you can use? And what
- [00:00:10.950] different types you can use? And what
- [00:00:10.960] different types you can use? And what specific microphone is best for short
- [00:00:14.070] specific microphone is best for short
- [00:00:14.080] specific microphone is best for short form content? So, the reason you'd use
- [00:00:15.910] form content? So, the reason you'd use
- [00:00:15.920] form content? So, the reason you'd use an external microphone is to give
- [00:00:17.990] an external microphone is to give
- [00:00:18.000] an external microphone is to give yourself more control when trying to
- [00:00:20.710] yourself more control when trying to
- [00:00:20.720] yourself more control when trying to manage the sound of your videos. It is
- [00:00:23.590] manage the sound of your videos. It is
- [00:00:23.600] manage the sound of your videos. It is impossible to watch a video with bad
- [00:00:25.750] impossible to watch a video with bad
- [00:00:25.760] impossible to watch a video with bad sound. But you can watch a video with
- [00:00:27.670] sound. But you can watch a video with
- [00:00:27.680] sound. But you can watch a video with great sound and bad video and you won't
- [00:00:30.150] great sound and bad video and you won't
- [00:00:30.160] great sound and bad video and you won't be as bothered. You see, sound is the
- [00:00:32.549] be as bothered. You see, sound is the
- [00:00:32.559] be as bothered. You see, sound is the most important aspect for retaining
- [00:00:35.190] most important aspect for retaining
- [00:00:35.200] most important aspect for retaining engagement in your videos. There are
- [00:00:36.950] engagement in your videos. There are
- [00:00:36.960] engagement in your videos. There are different types of external microphones
- [00:00:38.549] different types of external microphones
- [00:00:38.559] different types of external microphones that we use. In podcasts, you'll find
- [00:00:41.030] that we use. In podcasts, you'll find
- [00:00:41.040] that we use. In podcasts, you'll find they tend to use a condenser mic. On
- [00:00:43.590] they tend to use a condenser mic. On
- [00:00:43.600] they tend to use a condenser mic. On film sets, they use what is called a
- [00:00:45.430] film sets, they use what is called a
- [00:00:45.440] film sets, they use what is called a boom or shotgun mic. It's the one that
- [00:00:47.510] boom or shotgun mic. It's the one that
- [00:00:47.520] boom or shotgun mic. It's the one that the sound guy holds up there on a big
- [00:00:49.830] the sound guy holds up there on a big
- [00:00:49.840] the sound guy holds up there on a big pole. But for the purpose of short form
- [00:00:52.069] pole. But for the purpose of short form
- [00:00:52.079] pole. But for the purpose of short form content, we're going to focus on Lavlia
- [00:00:54.549] content, we're going to focus on Lavlia
- [00:00:54.559] content, we're going to focus on Lavlia mics or lav mics. These microphones are
- [00:00:58.069] mics or lav mics. These microphones are
- [00:00:58.079] mics or lav mics. These microphones are used a lot for like interviews, but they
- [00:01:00.150] used a lot for like interviews, but they
- [00:01:00.160] used a lot for like interviews, but they are perfect for short form content. I am
- [00:01:02.869] are perfect for short form content. I am
- [00:01:02.879] are perfect for short form content. I am actually wearing a lav mic right now on
- [00:01:05.590] actually wearing a lav mic right now on
- [00:01:05.600] actually wearing a lav mic right now on my chest here. But what you'll find is
- [00:01:08.230] my chest here. But what you'll find is
- [00:01:08.240] my chest here. But what you'll find is you get different shapes and sizes. You
- [00:01:10.230] you get different shapes and sizes. You
- [00:01:10.240] you get different shapes and sizes. You can hide them behind your collar.
- [00:01:12.469] can hide them behind your collar.
- [00:01:12.479] can hide them behind your collar. Sometimes they'll have a um wire and the
- [00:01:16.310] Sometimes they'll have a um wire and the
- [00:01:16.320] Sometimes they'll have a um wire and the wire runs underneath your shirt to a
- [00:01:18.550] wire runs underneath your shirt to a
- [00:01:18.560] wire runs underneath your shirt to a transmitter that's kept in your pocket
- [00:01:20.630] transmitter that's kept in your pocket
- [00:01:20.640] transmitter that's kept in your pocket or on your belt and then the camera has
- [00:01:23.429] or on your belt and then the camera has
- [00:01:23.439] or on your belt and then the camera has a receiver that receives it. This one is
- [00:01:25.830] a receiver that receives it. This one is
- [00:01:25.840] a receiver that receives it. This one is a bit more fancy. It directly, you know,
- [00:01:28.469] a bit more fancy. It directly, you know,
- [00:01:28.479] a bit more fancy. It directly, you know, gives the sound to the camera. Some of
- [00:01:30.710] gives the sound to the camera. Some of
- [00:01:30.720] gives the sound to the camera. Some of these will come with some really fancy
- [00:01:32.950] these will come with some really fancy
- [00:01:32.960] these will come with some really fancy features like built-in noise
- [00:01:34.550] features like built-in noise
- [00:01:34.560] features like built-in noise cancellation or safety recordings, uh,
- [00:01:38.149] cancellation or safety recordings, uh,
- [00:01:38.159] cancellation or safety recordings, uh, you know, on your different channels and
- [00:01:39.749] you know, on your different channels and
- [00:01:39.759] you know, on your different channels and that. Um, others aren't as fancy and
- [00:01:43.030] that. Um, others aren't as fancy and
- [00:01:43.040] that. Um, others aren't as fancy and obviously uh, as with most things you,
- [00:01:45.590] obviously uh, as with most things you,
- [00:01:45.600] obviously uh, as with most things you, you know, you pay for what you get. Um,
- [00:01:47.830] you know, you pay for what you get. Um,
- [00:01:47.840] you know, you pay for what you get. Um, but there are a lot of other techniques
- [00:01:50.230] but there are a lot of other techniques
- [00:01:50.240] but there are a lot of other techniques that we will show you later in the
- [00:01:52.149] that we will show you later in the
- [00:01:52.159] that we will show you later in the course. If you don't have, you know, the
- [00:01:54.149] course. If you don't have, you know, the
- [00:01:54.159] course. If you don't have, you know, the money to buy some fancy gear, you can,
- [00:01:56.389] money to buy some fancy gear, you can,
- [00:01:56.399] money to buy some fancy gear, you can, you know, fix your sound with some
- [00:01:58.630] you know, fix your sound with some
- [00:01:58.640] you know, fix your sound with some online tools and AI tools and such, but
- [00:02:01.429] online tools and AI tools and such, but
- [00:02:01.439] online tools and AI tools and such, but we will cover that in a later video on
- [00:02:03.990] we will cover that in a later video on
- [00:02:04.000] we will cover that in a later video on post-prouction. Let me show you a
- [00:02:06.389] post-prouction. Let me show you a
- [00:02:06.399] post-prouction. Let me show you a close-up look at some lavier mics. So
- [00:02:09.830] close-up look at some lavier mics. So
- [00:02:09.840] close-up look at some lavier mics. So this is our little lab mark. Um this is
- [00:02:12.949] this is our little lab mark. Um this is
- [00:02:12.959] this is our little lab mark. Um this is our receiver and this is our
- [00:02:15.830] our receiver and this is our
- [00:02:15.840] our receiver and this is our transmitter. This transmitter will, you
- [00:02:18.790] transmitter. This transmitter will, you
- [00:02:18.800] transmitter. This transmitter will, you know, record our voice. Um it also has
- [00:02:22.229] know, record our voice. Um it also has
- [00:02:22.239] know, record our voice. Um it also has an option to plug in a wired microphone
- [00:02:25.990] an option to plug in a wired microphone
- [00:02:26.000] an option to plug in a wired microphone where you could put a little wind sock
- [00:02:27.670] where you could put a little wind sock
- [00:02:27.680] where you could put a little wind sock on for outdoors for um you know more
- [00:02:32.070] on for outdoors for um you know more
- [00:02:32.080] on for outdoors for um you know more complicated. It also allows you to hide
- [00:02:33.910] complicated. It also allows you to hide
- [00:02:33.920] complicated. It also allows you to hide the microphone whereas this one just
- [00:02:35.990] the microphone whereas this one just
- [00:02:36.000] the microphone whereas this one just clips on your shirt or attaches via this
- [00:02:38.790] clips on your shirt or attaches via this
- [00:02:38.800] clips on your shirt or attaches via this magnet. Um it has a record function and
- [00:02:42.470] magnet. Um it has a record function and
- [00:02:42.480] magnet. Um it has a record function and if you can look on our receiver how it
- [00:02:45.670] if you can look on our receiver how it
- [00:02:45.680] if you can look on our receiver how it is receiving the sound the audio here
- [00:02:48.309] is receiving the sound the audio here
- [00:02:48.319] is receiving the sound the audio here right now. So obviously they come in
- [00:02:50.470] right now. So obviously they come in
- [00:02:50.480] right now. So obviously they come in this little charging case which is quite
- [00:02:52.390] this little charging case which is quite
- [00:02:52.400] this little charging case which is quite nice um to keep them you know together
- [00:02:55.670] nice um to keep them you know together
- [00:02:55.680] nice um to keep them you know together keep them charged. Remember they don't
- [00:02:57.589] keep them charged. Remember they don't
- [00:02:57.599] keep them charged. Remember they don't all look identical. Um there's different
- [00:03:00.229] all look identical. Um there's different
- [00:03:00.239] all look identical. Um there's different brands, different styles. This is
- [00:03:02.949] brands, different styles. This is
- [00:03:02.959] brands, different styles. This is actually quite an expensive fancy Lavark
- [00:03:06.630] actually quite an expensive fancy Lavark
- [00:03:06.640] actually quite an expensive fancy Lavark uh the Boyer brand. It's a good brand,
- [00:03:08.949] uh the Boyer brand. It's a good brand,
- [00:03:08.959] uh the Boyer brand. It's a good brand, but you get many different styles, many
- [00:03:10.790] but you get many different styles, many
- [00:03:10.800] but you get many different styles, many different variations, and this is the
- [00:03:13.910] different variations, and this is the
- [00:03:13.920] different variations, and this is the one we use. So, we've just covered
- [00:03:16.309] one we use. So, we've just covered
- [00:03:16.319] one we use. So, we've just covered microphones, uh the different types, uh
- [00:03:18.710] microphones, uh the different types, uh
- [00:03:18.720] microphones, uh the different types, uh why we use an external versus an
- [00:03:20.949] why we use an external versus an
- [00:03:20.959] why we use an external versus an internal microphone, and the importance
- [00:03:23.430] internal microphone, and the importance
- [00:03:23.440] internal microphone, and the importance of, you know, having good sound in your
- [00:03:25.990] of, you know, having good sound in your
- [00:03:26.000] of, you know, having good sound in your videos. Um, thank you guys, and I hope
- [00:03:28.390] videos. Um, thank you guys, and I hope
- [00:03:28.400] videos. Um, thank you guys, and I hope you enjoy the next video.
Keyframes
- /workspace/academy/media/1YtRnm0oZuZU61QOPrx_px3kyI6rBHu1m/keyframes/last.jpg
- /workspace/academy/media/1YtRnm0oZuZU61QOPrx_px3kyI6rBHu1m/keyframes/t001.jpg
- /workspace/academy/media/1YtRnm0oZuZU61QOPrx_px3kyI6rBHu1m/keyframes/t002.jpg
- /workspace/academy/media/1YtRnm0oZuZU61QOPrx_px3kyI6rBHu1m/keyframes/t003.jpg
- /workspace/academy/media/1YtRnm0oZuZU61QOPrx_px3kyI6rBHu1m/keyframes/t004.jpg
- /workspace/academy/media/1YtRnm0oZuZU61QOPrx_px3kyI6rBHu1m/keyframes/t005.jpg
- /workspace/academy/media/1YtRnm0oZuZU61QOPrx_px3kyI6rBHu1m/keyframes/t006.jpg
- /workspace/academy/media/1YtRnm0oZuZU61QOPrx_px3kyI6rBHu1m/keyframes/t007.jpg
- /workspace/academy/media/1YtRnm0oZuZU61QOPrx_px3kyI6rBHu1m/keyframes/t008.jpg
- /workspace/academy/media/1YtRnm0oZuZU61QOPrx_px3kyI6rBHu1m/keyframes/t009.jpg
- /workspace/academy/media/1YtRnm0oZuZU61QOPrx_px3kyI6rBHu1m/keyframes/t010.jpg
- /workspace/academy/media/1YtRnm0oZuZU61QOPrx_px3kyI6rBHu1m/keyframes/t011.jpg
- /workspace/academy/media/1YtRnm0oZuZU61QOPrx_px3kyI6rBHu1m/keyframes/t012.jpg
- /workspace/academy/media/1YtRnm0oZuZU61QOPrx_px3kyI6rBHu1m/keyframes/t013.jpg
- /workspace/academy/media/1YtRnm0oZuZU61QOPrx_px3kyI6rBHu1m/keyframes/t014.jpg
- /workspace/academy/media/1YtRnm0oZuZU61QOPrx_px3kyI6rBHu1m/keyframes/t015.jpg
- /workspace/academy/media/1YtRnm0oZuZU61QOPrx_px3kyI6rBHu1m/keyframes/t016.jpg
- /workspace/academy/media/1YtRnm0oZuZU61QOPrx_px3kyI6rBHu1m/keyframes/t017.jpg
- /workspace/academy/media/1YtRnm0oZuZU61QOPrx_px3kyI6rBHu1m/keyframes/t018.jpg
- /workspace/academy/media/1YtRnm0oZuZU61QOPrx_px3kyI6rBHu1m/keyframes/t019.jpg
- /workspace/academy/media/1YtRnm0oZuZU61QOPrx_px3kyI6rBHu1m/keyframes/t020.jpg
- /workspace/academy/media/1YtRnm0oZuZU61QOPrx_px3kyI6rBHu1m/keyframes/t021.jpg
29. Gear Conclusion
- title: Gear Conclusion
- status: publish
- author: 0
- is_previewable: (empty)
- video_duration: 0h 0m 22s (raw {"hours":0,"minutes":0,"seconds":22})
- video_source_type: embedded
- drive_file_id:
1YShJLeA6VcYDIfJsFit-ZmqXOzP5e9SF(source_ref; not a public link) - transcript pending / keyframes pending / presentation extract pending
- video_source_url: (Drive preview omitted as a public link; file id kept as source_ref)
(no lesson_content HTML in export — video-only or empty body; metadata above kept in full)
Drive extract
- file_id:
1YShJLeA6VcYDIfJsFit-ZmqXOzP5e9SF - filename: VEST Section 2 Phone & Gear 12 Outro.mp4
- kind: video
- local_path: /workspace/academy/media/1YShJLeA6VcYDIfJsFit-ZmqXOzP5e9SF/VEST Section 2 Phone & Gear 12 Outro.mp4
- source_ref: drive
1YShJLeA6VcYDIfJsFit-ZmqXOzP5e9SF· content_length 34545802 · original https://drive.google.com/file/d/1YShJLeA6VcYDIfJsFit-ZmqXOzP5e9SF/view - extract_status: done
- caption_source: drive_timedtext
- duration_s: 22.383991
- keyframe_count: 3
Transcript
- Hey guys, well done in completing uh
- [00:00:02.869] Hey guys, well done in completing uh
- [00:00:02.879] Hey guys, well done in completing uh tutorial two of the Vest online course.
- [00:00:05.749] tutorial two of the Vest online course.
- [00:00:05.759] tutorial two of the Vest online course. You've just gone over your essential
- [00:00:07.670] You've just gone over your essential
- [00:00:07.680] You've just gone over your essential gear, your different phone optimization,
- [00:00:10.150] gear, your different phone optimization,
- [00:00:10.160] gear, your different phone optimization, camera settings, focus, exposure,
- [00:00:13.030] camera settings, focus, exposure,
- [00:00:13.040] camera settings, focus, exposure, tripods, microphones, lighting, all the
- [00:00:15.669] tripods, microphones, lighting, all the
- [00:00:15.679] tripods, microphones, lighting, all the different gear. And I hope you guys
- [00:00:17.510] different gear. And I hope you guys
- [00:00:17.520] different gear. And I hope you guys enjoyed this section and I can't wait to
- [00:00:19.670] enjoyed this section and I can't wait to
- [00:00:19.680] enjoyed this section and I can't wait to see you in the next one.
Keyframes
- /workspace/academy/media/1YShJLeA6VcYDIfJsFit-ZmqXOzP5e9SF/keyframes/last.jpg
- /workspace/academy/media/1YShJLeA6VcYDIfJsFit-ZmqXOzP5e9SF/keyframes/t001.jpg
- /workspace/academy/media/1YShJLeA6VcYDIfJsFit-ZmqXOzP5e9SF/keyframes/t002.jpg
30. Composition & Shots Intro
- title: Composition & Shots Intro
- status: publish
- author: 0
- is_previewable: (empty)
- video_duration: 0h 0m 34s (raw {"hours":0,"minutes":0,"seconds":34})
- video_source_type: embedded
- drive_file_id:
1wi7HLmtCIXXWh1Zxp9nefscUK9vEH9Q3(source_ref; not a public link) - transcript pending / keyframes pending / presentation extract pending
- video_source_url: (Drive preview omitted as a public link; file id kept as source_ref)
(no lesson_content HTML in export — video-only or empty body; metadata above kept in full)
Drive extract
- file_id:
1wi7HLmtCIXXWh1Zxp9nefscUK9vEH9Q3 - filename: VEST Section 3 Composition & Shot Types 1 Intro.mp4
- kind: video
- local_path: /workspace/academy/media/1wi7HLmtCIXXWh1Zxp9nefscUK9vEH9Q3/VEST Section 3 Composition & Shot Types 1 Intro.mp4
- source_ref: drive
1wi7HLmtCIXXWh1Zxp9nefscUK9vEH9Q3· content_length 51768243 · original https://drive.google.com/file/d/1wi7HLmtCIXXWh1Zxp9nefscUK9vEH9Q3/view - extract_status: done
- caption_source: drive_timedtext
- duration_s: 34.18
- keyframe_count: 4
Transcript
- Hey guys, welcome to section three. In
- [00:00:03.110] Hey guys, welcome to section three. In
- [00:00:03.120] Hey guys, welcome to section three. In this section, we'll be going over
- [00:00:04.550] this section, we'll be going over
- [00:00:04.560] this section, we'll be going over composition and different shot types.
- [00:00:06.630] composition and different shot types.
- [00:00:06.640] composition and different shot types. So, you're going to actually, you know,
- [00:00:07.909] So, you're going to actually, you know,
- [00:00:07.919] So, you're going to actually, you know, start shooting with your phones is quite
- [00:00:09.910] start shooting with your phones is quite
- [00:00:09.920] start shooting with your phones is quite exciting. First, we'll go over the rule
- [00:00:12.150] exciting. First, we'll go over the rule
- [00:00:12.160] exciting. First, we'll go over the rule of thirds, leading lines, symmetry, and
- [00:00:15.430] of thirds, leading lines, symmetry, and
- [00:00:15.440] of thirds, leading lines, symmetry, and general composition. Then, we'll go over
- [00:00:18.470] general composition. Then, we'll go over
- [00:00:18.480] general composition. Then, we'll go over shot types. talk about close-ups,
- [00:00:20.310] shot types. talk about close-ups,
- [00:00:20.320] shot types. talk about close-ups, mediums, wides, different camera angles,
- [00:00:23.109] mediums, wides, different camera angles,
- [00:00:23.119] mediums, wides, different camera angles, low, high angle, Dutch angle, all of
- [00:00:25.990] low, high angle, Dutch angle, all of
- [00:00:26.000] low, high angle, Dutch angle, all of those different elements of actually
- [00:00:28.470] those different elements of actually
- [00:00:28.480] those different elements of actually shooting your content. I'll check you
- [00:00:30.070] shooting your content. I'll check you
- [00:00:30.080] shooting your content. I'll check you guys in the next video and I hope you
- [00:00:31.669] guys in the next video and I hope you
- [00:00:31.679] guys in the next video and I hope you enjoy this section.
Keyframes
- /workspace/academy/media/1wi7HLmtCIXXWh1Zxp9nefscUK9vEH9Q3/keyframes/last.jpg
- /workspace/academy/media/1wi7HLmtCIXXWh1Zxp9nefscUK9vEH9Q3/keyframes/t001.jpg
- /workspace/academy/media/1wi7HLmtCIXXWh1Zxp9nefscUK9vEH9Q3/keyframes/t002.jpg
- /workspace/academy/media/1wi7HLmtCIXXWh1Zxp9nefscUK9vEH9Q3/keyframes/t003.jpg
31. Terminology Visuals
- title: Terminology Visuals
- status: publish
- author: 0
- is_previewable: (empty)
- video_duration: 0h 0m 0s (raw {"hours":0,"minutes":0,"seconds":0})
- video_source_type: (empty)
**
**
VEST Essential Terminology Glossary
Here is a list of the core generic terminology your VEST students will encounter throughout the course, along with brief, clear descriptions.
This glossary covers the non-software-specific terms used in the course, from concept to final export.
Visuals (Shots & Composition)
| Term | Description |
|---|---|
| Frame | The visible area of the video image, or the boundaries of the image you are recording. |
| Composition | How the elements within the frame are visually arranged (e.g., where the subject is placed, where the lines guide the eye). |
| Rule-of-Thirds | A compositional guideline that divides the frame into nine equal sections, suggesting subjects should be placed along the lines or at the intersections. |
| Headroom | The amount of space left above the subject's head and the top edge of the frame. Too much makes the subject look small; too little feels cramped. |
| B-Roll | Supplementary or supporting footage (e.g., close-ups of hands working, scenery, graphics) used to cover voiceover or jump cuts. |
| A-Roll | The primary, essential footage, usually of a person talking (e.g., an interview or a vlogger speaking directly to the camera). |
32. Composition
- title: Composition
- status: publish
- author: 0
- is_previewable: (empty)
- video_duration: 0h 0m 53s (raw {"hours":0,"minutes":0,"seconds":53})
- video_source_type: embedded
- drive_file_id:
1J5BIWys0NPmynFRivTi5luS_cKy9wOe8(source_ref; not a public link) - transcript pending / keyframes pending / presentation extract pending
- video_source_url: (Drive preview omitted as a public link; file id kept as source_ref)
(no lesson_content HTML in export — video-only or empty body; metadata above kept in full)
Drive extract
- file_id:
1J5BIWys0NPmynFRivTi5luS_cKy9wOe8 - filename: VEST Section 3 Composition & Shot Types 2 Comp.mp4
- kind: video
- local_path: /workspace/academy/media/1J5BIWys0NPmynFRivTi5luS_cKy9wOe8/VEST Section 3 Composition & Shot Types 2 Comp.mp4
- source_ref: drive
1J5BIWys0NPmynFRivTi5luS_cKy9wOe8· content_length 80472634 · original https://drive.google.com/file/d/1J5BIWys0NPmynFRivTi5luS_cKy9wOe8/view - extract_status: done
- caption_source: drive_timedtext
- duration_s: 53.010998
- keyframe_count: 6
Transcript
- Hey guys, in this video we'll be going
- [00:00:02.070] Hey guys, in this video we'll be going
- [00:00:02.080] Hey guys, in this video we'll be going over composition. Composition is how you
- [00:00:05.030] over composition. Composition is how you
- [00:00:05.040] over composition. Composition is how you arrange the elements in your frame of
- [00:00:07.829] arrange the elements in your frame of
- [00:00:07.839] arrange the elements in your frame of your shot and you know how they captured
- [00:00:10.629] your shot and you know how they captured
- [00:00:10.639] your shot and you know how they captured their relationship with each other. It
- [00:00:12.790] their relationship with each other. It
- [00:00:12.800] their relationship with each other. It helps you to create a balanced image. It
- [00:00:15.190] helps you to create a balanced image. It
- [00:00:15.200] helps you to create a balanced image. It helps you to create an image that is
- [00:00:17.670] helps you to create an image that is
- [00:00:17.680] helps you to create an image that is appealing to audiences. Firstly, we'll
- [00:00:20.070] appealing to audiences. Firstly, we'll
- [00:00:20.080] appealing to audiences. Firstly, we'll cover the rule of thirds which is one of
- [00:00:22.550] cover the rule of thirds which is one of
- [00:00:22.560] cover the rule of thirds which is one of the most basic fundamental aspects of
- [00:00:25.269] the most basic fundamental aspects of
- [00:00:25.279] the most basic fundamental aspects of composition. Then we'll move on to some
- [00:00:28.070] composition. Then we'll move on to some
- [00:00:28.080] composition. Then we'll move on to some of the techniques that do break the rule
- [00:00:30.470] of the techniques that do break the rule
- [00:00:30.480] of the techniques that do break the rule of thirds, that being symmetry and
- [00:00:32.549] of thirds, that being symmetry and
- [00:00:32.559] of thirds, that being symmetry and leading lines. And we'll also go over
- [00:00:34.470] leading lines. And we'll also go over
- [00:00:34.480] leading lines. And we'll also go over how you can combine those different
- [00:00:35.990] how you can combine those different
- [00:00:36.000] how you can combine those different techniques to create something really
- [00:00:38.069] techniques to create something really
- [00:00:38.079] techniques to create something really unique. There are a lot more techniques
- [00:00:40.950] unique. There are a lot more techniques
- [00:00:40.960] unique. There are a lot more techniques to composition and different things you
- [00:00:43.270] to composition and different things you
- [00:00:43.280] to composition and different things you can do. But in this course, we'll mainly
- [00:00:45.830] can do. But in this course, we'll mainly
- [00:00:45.840] can do. But in this course, we'll mainly cover the rule of thirds, symmetry, and
- [00:00:48.630] cover the rule of thirds, symmetry, and
- [00:00:48.640] cover the rule of thirds, symmetry, and leading lies. Let's dive in.
Keyframes
- /workspace/academy/media/1J5BIWys0NPmynFRivTi5luS_cKy9wOe8/keyframes/last.jpg
- /workspace/academy/media/1J5BIWys0NPmynFRivTi5luS_cKy9wOe8/keyframes/t001.jpg
- /workspace/academy/media/1J5BIWys0NPmynFRivTi5luS_cKy9wOe8/keyframes/t002.jpg
- /workspace/academy/media/1J5BIWys0NPmynFRivTi5luS_cKy9wOe8/keyframes/t003.jpg
- /workspace/academy/media/1J5BIWys0NPmynFRivTi5luS_cKy9wOe8/keyframes/t004.jpg
- /workspace/academy/media/1J5BIWys0NPmynFRivTi5luS_cKy9wOe8/keyframes/t005.jpg
33. Rule-of-Thirds
- title: Rule-of-Thirds
- status: publish
- author: 0
- is_previewable: (empty)
- video_duration: 0h 2m 2s (raw {"hours":0,"minutes":2,"seconds":2})
- video_source_type: embedded
- drive_file_id:
1_7hIgnqAOXn_HhFktNgPf08u3YvnNGRe(source_ref; not a public link) - transcript pending / keyframes pending / presentation extract pending
- video_source_url: (Drive preview omitted as a public link; file id kept as source_ref)
(no lesson_content HTML in export — video-only or empty body; metadata above kept in full)
Drive extract
- file_id:
1_7hIgnqAOXn_HhFktNgPf08u3YvnNGRe - filename: VEST Section 3 Composition & Shot Types 3 Rule 3rd.mp4
- kind: video
- local_path: /workspace/academy/media/1_7hIgnqAOXn_HhFktNgPf08u3YvnNGRe/VEST Section 3 Composition & Shot Types 3 Rule 3rd.mp4
- source_ref: drive
1_7hIgnqAOXn_HhFktNgPf08u3YvnNGRe· content_length 171821377 · original https://drive.google.com/file/d/1_7hIgnqAOXn_HhFktNgPf08u3YvnNGRe/view - extract_status: done
- caption_source: drive_timedtext
- duration_s: 121.487007
- keyframe_count: 12
Transcript
- Hey guys, in this video we're going to
- [00:00:02.310] Hey guys, in this video we're going to
- [00:00:02.320] Hey guys, in this video we're going to cover the composition technique called
- [00:00:04.630] cover the composition technique called
- [00:00:04.640] cover the composition technique called the rule of thirds. The rule of thirds
- [00:00:06.550] the rule of thirds. The rule of thirds
- [00:00:06.560] the rule of thirds. The rule of thirds is a technique that is used to balance
- [00:00:09.270] is a technique that is used to balance
- [00:00:09.280] is a technique that is used to balance your image and make use of the empty
- [00:00:11.589] your image and make use of the empty
- [00:00:11.599] your image and make use of the empty space to draw your attention to your
- [00:00:14.150] space to draw your attention to your
- [00:00:14.160] space to draw your attention to your subject more effectively. The rule of
- [00:00:16.550] subject more effectively. The rule of
- [00:00:16.560] subject more effectively. The rule of thirds is a guideline that places your
- [00:00:19.189] thirds is a guideline that places your
- [00:00:19.199] thirds is a guideline that places your subject in the left or right third of an
- [00:00:21.990] subject in the left or right third of an
- [00:00:22.000] subject in the left or right third of an image. It leaves the other thirds more
- [00:00:23.990] image. It leaves the other thirds more
- [00:00:24.000] image. It leaves the other thirds more open and you have these different lines
- [00:00:27.029] open and you have these different lines
- [00:00:27.039] open and you have these different lines that divide your image. Um, and where
- [00:00:29.429] that divide your image. Um, and where
- [00:00:29.439] that divide your image. Um, and where those lines intersect, those are called
- [00:00:31.349] those lines intersect, those are called
- [00:00:31.359] those lines intersect, those are called powerpoints. Those powerpoints are where
- [00:00:34.470] powerpoints. Those powerpoints are where
- [00:00:34.480] powerpoints. Those powerpoints are where an audience's eyes are naturally drawn
- [00:00:36.630] an audience's eyes are naturally drawn
- [00:00:36.640] an audience's eyes are naturally drawn towards. So, you tend to usually place
- [00:00:38.950] towards. So, you tend to usually place
- [00:00:38.960] towards. So, you tend to usually place really important elements on those
- [00:00:41.590] really important elements on those
- [00:00:41.600] really important elements on those powerpoints. For example, if someone's
- [00:00:43.830] powerpoints. For example, if someone's
- [00:00:43.840] powerpoints. For example, if someone's speaking to the camera, you'd maybe put
- [00:00:46.310] speaking to the camera, you'd maybe put
- [00:00:46.320] speaking to the camera, you'd maybe put them mouth near those powerpoints. If
- [00:00:48.549] them mouth near those powerpoints. If
- [00:00:48.559] them mouth near those powerpoints. If you're trying to focus on someone's
- [00:00:50.150] you're trying to focus on someone's
- [00:00:50.160] you're trying to focus on someone's emotions, you put their eyes by their
- [00:00:52.150] emotions, you put their eyes by their
- [00:00:52.160] emotions, you put their eyes by their powerpoints. If it's a landscape shot
- [00:00:54.389] powerpoints. If it's a landscape shot
- [00:00:54.399] powerpoints. If it's a landscape shot and you have different elements, you
- [00:00:56.150] and you have different elements, you
- [00:00:56.160] and you have different elements, you want to try and arrange those different
- [00:00:57.910] want to try and arrange those different
- [00:00:57.920] want to try and arrange those different elements like a boat on the water or you
- [00:01:00.470] elements like a boat on the water or you
- [00:01:00.480] elements like a boat on the water or you know mountains in the sky as close to
- [00:01:03.349] know mountains in the sky as close to
- [00:01:03.359] know mountains in the sky as close to those intersecting lines as possible. So
- [00:01:06.630] those intersecting lines as possible. So
- [00:01:06.640] those intersecting lines as possible. So here is some examples of rule of thirds.
- So, we just covered rule of thirds.
- [00:01:41.590] So, we just covered rule of thirds.
- [00:01:41.600] So, we just covered rule of thirds. Remember, when it comes to rule of
- [00:01:43.270] Remember, when it comes to rule of
- [00:01:43.280] Remember, when it comes to rule of thirds, you want to arrange the empty
- [00:01:45.990] thirds, you want to arrange the empty
- [00:01:46.000] thirds, you want to arrange the empty space to help balance your image and
- [00:01:48.789] space to help balance your image and
- [00:01:48.799] space to help balance your image and then also use your powerpoints to draw
- [00:01:51.270] then also use your powerpoints to draw
- [00:01:51.280] then also use your powerpoints to draw the eye to the focal points to the
- [00:01:53.990] the eye to the focal points to the
- [00:01:54.000] the eye to the focal points to the important details of your video. Thank
- [00:01:56.870] important details of your video. Thank
- [00:01:56.880] important details of your video. Thank you so much and I'll see you in the next
- [00:01:59.510] you so much and I'll see you in the next
- [00:01:59.520] you so much and I'll see you in the next video.
Keyframes
- /workspace/academy/media/1_7hIgnqAOXn_HhFktNgPf08u3YvnNGRe/keyframes/last.jpg
- /workspace/academy/media/1_7hIgnqAOXn_HhFktNgPf08u3YvnNGRe/keyframes/t001.jpg
- /workspace/academy/media/1_7hIgnqAOXn_HhFktNgPf08u3YvnNGRe/keyframes/t002.jpg
- /workspace/academy/media/1_7hIgnqAOXn_HhFktNgPf08u3YvnNGRe/keyframes/t003.jpg
- /workspace/academy/media/1_7hIgnqAOXn_HhFktNgPf08u3YvnNGRe/keyframes/t004.jpg
- /workspace/academy/media/1_7hIgnqAOXn_HhFktNgPf08u3YvnNGRe/keyframes/t005.jpg
- /workspace/academy/media/1_7hIgnqAOXn_HhFktNgPf08u3YvnNGRe/keyframes/t007.jpg
- /workspace/academy/media/1_7hIgnqAOXn_HhFktNgPf08u3YvnNGRe/keyframes/t008.jpg
- /workspace/academy/media/1_7hIgnqAOXn_HhFktNgPf08u3YvnNGRe/keyframes/t009.jpg
- /workspace/academy/media/1_7hIgnqAOXn_HhFktNgPf08u3YvnNGRe/keyframes/t010.jpg
- /workspace/academy/media/1_7hIgnqAOXn_HhFktNgPf08u3YvnNGRe/keyframes/t011.jpg
- /workspace/academy/media/1_7hIgnqAOXn_HhFktNgPf08u3YvnNGRe/keyframes/t012.jpg
34. Headroom
- title: Headroom
- status: publish
- author: 0
- is_previewable: (empty)
- video_duration: 0h 2m 9s (raw {"hours":0,"minutes":2,"seconds":9})
- video_source_type: embedded
- drive_file_id:
1fgJPc6oUZYJIF8GVG_C_tyHupM7Eb498(source_ref; not a public link) - transcript pending / keyframes pending / presentation extract pending
- video_source_url: (Drive preview omitted as a public link; file id kept as source_ref)
(no lesson_content HTML in export — video-only or empty body; metadata above kept in full)
Drive extract
- file_id:
1fgJPc6oUZYJIF8GVG_C_tyHupM7Eb498 - filename: VEST Section 3 Composition & Shot Types 4 Headroom.mp4
- kind: video
- local_path: /workspace/academy/media/1fgJPc6oUZYJIF8GVG_C_tyHupM7Eb498/VEST Section 3 Composition & Shot Types 4 Headroom.mp4
- source_ref: drive
1fgJPc6oUZYJIF8GVG_C_tyHupM7Eb498· content_length 196558289 · original https://drive.google.com/file/d/1fgJPc6oUZYJIF8GVG_C_tyHupM7Eb498/view - extract_status: done
- caption_source: drive_timedtext
- duration_s: 128.685011
- keyframe_count: 12
Transcript
- So um another important aspect of
- [00:00:04.630] So um another important aspect of
- [00:00:04.640] So um another important aspect of composition is headroom. Headroom is you
- [00:00:07.829] composition is headroom. Headroom is you
- [00:00:07.839] composition is headroom. Headroom is you know as the name suggests the amount of
- [00:00:10.230] know as the name suggests the amount of
- [00:00:10.240] know as the name suggests the amount of space above my head in the frame. Um
- [00:00:13.830] space above my head in the frame. Um
- [00:00:13.840] space above my head in the frame. Um generally when it comes to headroom it
- [00:00:15.910] generally when it comes to headroom it
- [00:00:15.920] generally when it comes to headroom it will differ depending whether you're
- [00:00:18.390] will differ depending whether you're
- [00:00:18.400] will differ depending whether you're doing a shot that is close up or far
- [00:00:21.269] doing a shot that is close up or far
- [00:00:21.279] doing a shot that is close up or far away or somewhere in the middle. A good
- [00:00:23.830] away or somewhere in the middle. A good
- [00:00:23.840] away or somewhere in the middle. A good rule to follow is if it's a closeup from
- [00:00:27.429] rule to follow is if it's a closeup from
- [00:00:27.439] rule to follow is if it's a closeup from the chest up to my head, you don't want
- [00:00:29.990] the chest up to my head, you don't want
- [00:00:30.000] the chest up to my head, you don't want to cut my head off. You want to keep a
- [00:00:31.750] to cut my head off. You want to keep a
- [00:00:31.760] to cut my head off. You want to keep a little bit of space, but you can use the
- [00:00:34.549] little bit of space, but you can use the
- [00:00:34.559] little bit of space, but you can use the dividing lines that you see um in a
- [00:00:38.310] dividing lines that you see um in a
- [00:00:38.320] dividing lines that you see um in a camera and in your shots. The same one
- [00:00:40.549] camera and in your shots. The same one
- [00:00:40.559] camera and in your shots. The same one you'd use with the rule of thirds. You
- [00:00:43.030] you'd use with the rule of thirds. You
- [00:00:43.040] you'd use with the rule of thirds. You can use those to help arrange the space.
- [00:00:46.389] can use those to help arrange the space.
- [00:00:46.399] can use those to help arrange the space. So, the top block uh in my cam in the
- [00:00:49.510] So, the top block uh in my cam in the
- [00:00:49.520] So, the top block uh in my cam in the camera, hopefully we have an overlay
- [00:00:51.190] camera, hopefully we have an overlay
- [00:00:51.200] camera, hopefully we have an overlay happen here so I can show you. You
- [00:00:53.590] happen here so I can show you. You
- [00:00:53.600] happen here so I can show you. You should see that my head isn't cut off,
- [00:00:56.709] should see that my head isn't cut off,
- [00:00:56.719] should see that my head isn't cut off, but it does fill most of the space in
- [00:00:59.110] but it does fill most of the space in
- [00:00:59.120] but it does fill most of the space in that block. But if we were doing a, you
- [00:01:01.750] that block. But if we were doing a, you
- [00:01:01.760] that block. But if we were doing a, you know, like say a wide shot and I had a
- [00:01:03.670] know, like say a wide shot and I had a
- [00:01:03.680] know, like say a wide shot and I had a building behind me, obviously the a part
- [00:01:05.910] building behind me, obviously the a part
- [00:01:05.920] building behind me, obviously the a part of the subject is the building behind
- [00:01:07.830] of the subject is the building behind
- [00:01:07.840] of the subject is the building behind me, is the environment. So, you know,
- [00:01:10.070] me, is the environment. So, you know,
- [00:01:10.080] me, is the environment. So, you know, you don't want to then cut off specific
- [00:01:11.910] you don't want to then cut off specific
- [00:01:11.920] you don't want to then cut off specific elements there. Say for example, you're
- [00:01:14.070] elements there. Say for example, you're
- [00:01:14.080] elements there. Say for example, you're taking a landscape of a mountainous
- [00:01:15.910] taking a landscape of a mountainous
- [00:01:15.920] taking a landscape of a mountainous region. The headroom will be your
- [00:01:18.149] region. The headroom will be your
- [00:01:18.159] region. The headroom will be your mountains, not as someone standing like
- [00:01:20.469] mountains, not as someone standing like
- [00:01:20.479] mountains, not as someone standing like a little ant, you know, in the picture.
- [00:01:22.390] a little ant, you know, in the picture.
- [00:01:22.400] a little ant, you know, in the picture. But yeah, when it comes to headroom, you
- [00:01:23.990] But yeah, when it comes to headroom, you
- [00:01:24.000] But yeah, when it comes to headroom, you want to make sure that um you don't cut
- [00:01:27.109] want to make sure that um you don't cut
- [00:01:27.119] want to make sure that um you don't cut off the head and you don't leave too
- [00:01:28.710] off the head and you don't leave too
- [00:01:28.720] off the head and you don't leave too much room. You see how that can be a
- [00:01:30.950] much room. You see how that can be a
- [00:01:30.960] much room. You see how that can be a little bit, you know, a little bit
- [00:01:32.870] little bit, you know, a little bit
- [00:01:32.880] little bit, you know, a little bit jarring.
- [00:01:34.630] jarring.
- [00:01:34.640] jarring. So, let's look at some samples of good
- [00:01:36.550] So, let's look at some samples of good
- [00:01:36.560] So, let's look at some samples of good headroom versus bad headroom.
- So, we just covered headroom, you know,
- [00:01:52.710] So, we just covered headroom, you know,
- [00:01:52.720] So, we just covered headroom, you know, bad headroom versus good headroom. And,
- [00:01:55.510] bad headroom versus good headroom. And,
- [00:01:55.520] bad headroom versus good headroom. And, you know, the the rule we generally
- [00:01:57.350] you know, the the rule we generally
- [00:01:57.360] you know, the the rule we generally follow to make sure we don't cut off
- [00:01:59.190] follow to make sure we don't cut off
- [00:01:59.200] follow to make sure we don't cut off people's heads or give too much space
- [00:02:01.270] people's heads or give too much space
- [00:02:01.280] people's heads or give too much space above them and make them look very tiny.
- [00:02:03.670] above them and make them look very tiny.
- [00:02:03.680] above them and make them look very tiny. Thank you guys for watching this video
- [00:02:05.429] Thank you guys for watching this video
- [00:02:05.439] Thank you guys for watching this video and I'll see you in the next one.
Keyframes
- /workspace/academy/media/1fgJPc6oUZYJIF8GVG_C_tyHupM7Eb498/keyframes/last.jpg
- /workspace/academy/media/1fgJPc6oUZYJIF8GVG_C_tyHupM7Eb498/keyframes/t001.jpg
- /workspace/academy/media/1fgJPc6oUZYJIF8GVG_C_tyHupM7Eb498/keyframes/t002.jpg
- /workspace/academy/media/1fgJPc6oUZYJIF8GVG_C_tyHupM7Eb498/keyframes/t004.jpg
- /workspace/academy/media/1fgJPc6oUZYJIF8GVG_C_tyHupM7Eb498/keyframes/t005.jpg
- /workspace/academy/media/1fgJPc6oUZYJIF8GVG_C_tyHupM7Eb498/keyframes/t006.jpg
- /workspace/academy/media/1fgJPc6oUZYJIF8GVG_C_tyHupM7Eb498/keyframes/t007.jpg
- /workspace/academy/media/1fgJPc6oUZYJIF8GVG_C_tyHupM7Eb498/keyframes/t008.jpg
- /workspace/academy/media/1fgJPc6oUZYJIF8GVG_C_tyHupM7Eb498/keyframes/t009.jpg
- /workspace/academy/media/1fgJPc6oUZYJIF8GVG_C_tyHupM7Eb498/keyframes/t011.jpg
- /workspace/academy/media/1fgJPc6oUZYJIF8GVG_C_tyHupM7Eb498/keyframes/t012.jpg
- /workspace/academy/media/1fgJPc6oUZYJIF8GVG_C_tyHupM7Eb498/keyframes/t013.jpg
35. Symmetry
- title: Symmetry
- status: publish
- author: 0
- is_previewable: (empty)
- video_duration: 0h 1m 57s (raw {"hours":0,"minutes":1,"seconds":57})
- video_source_type: embedded
- drive_file_id:
1-0a1HI9ek-H_ECyR15w2sC1KQuGfBglO(source_ref; not a public link) - transcript pending / keyframes pending / presentation extract pending
- video_source_url: (Drive preview omitted as a public link; file id kept as source_ref)
(no lesson_content HTML in export — video-only or empty body; metadata above kept in full)
Drive extract
- file_id:
1-0a1HI9ek-H_ECyR15w2sC1KQuGfBglO - filename: VEST Section 3 Composition & Shot Types 5 Symmetry.mp4
- kind: video
- local_path: /workspace/academy/media/1-0a1HI9ek-H_ECyR15w2sC1KQuGfBglO/VEST Section 3 Composition & Shot Types 5 Symmetry.mp4
- source_ref: drive
1-0a1HI9ek-H_ECyR15w2sC1KQuGfBglO· content_length 168938915 · original https://drive.google.com/file/d/1-0a1HI9ek-H_ECyR15w2sC1KQuGfBglO/view - extract_status: done
- caption_source: drive_timedtext
- duration_s: 117.353991
- keyframe_count: 12
Transcript
- Hey guys. So, in this video, we'll be
- [00:00:01.910] Hey guys. So, in this video, we'll be
- [00:00:01.920] Hey guys. So, in this video, we'll be going over the composition technique of
- [00:00:04.230] going over the composition technique of
- [00:00:04.240] going over the composition technique of symmetry. So, symmetry involves
- [00:00:06.470] symmetry. So, symmetry involves
- [00:00:06.480] symmetry. So, symmetry involves arranging elements uh equally on both
- [00:00:09.030] arranging elements uh equally on both
- [00:00:09.040] arranging elements uh equally on both sides to create a sense of balance. It
- [00:00:11.830] sides to create a sense of balance. It
- [00:00:11.840] sides to create a sense of balance. It creates a visually pleasing and
- [00:00:13.589] creates a visually pleasing and
- [00:00:13.599] creates a visually pleasing and harmonious effect. It's, you know, most
- [00:00:16.310] harmonious effect. It's, you know, most
- [00:00:16.320] harmonious effect. It's, you know, most effectively used when you have like
- [00:00:18.710] effectively used when you have like
- [00:00:18.720] effectively used when you have like grand architecture or if there's
- [00:00:21.349] grand architecture or if there's
- [00:00:21.359] grand architecture or if there's reflections uh and you have like a
- [00:00:23.910] reflections uh and you have like a
- [00:00:23.920] reflections uh and you have like a central central subject, the symmetry of
- [00:00:27.509] central central subject, the symmetry of
- [00:00:27.519] central central subject, the symmetry of the environment. Remember, it's the
- [00:00:29.109] the environment. Remember, it's the
- [00:00:29.119] the environment. Remember, it's the symmetry of your environment, not
- [00:00:30.870] symmetry of your environment, not
- [00:00:30.880] symmetry of your environment, not necessarily your subject. That symmetry
- [00:00:33.430] necessarily your subject. That symmetry
- [00:00:33.440] necessarily your subject. That symmetry eliminates distractions from an
- [00:00:35.510] eliminates distractions from an
- [00:00:35.520] eliminates distractions from an audience, and turns your subject, who
- [00:00:39.510] audience, and turns your subject, who
- [00:00:39.520] audience, and turns your subject, who would be central in that uh symmetry
- [00:00:42.790] would be central in that uh symmetry
- [00:00:42.800] would be central in that uh symmetry into the focal point. And you get both
- [00:00:45.510] into the focal point. And you get both
- [00:00:45.520] into the focal point. And you get both horizontal and vertical symmetry. So,
- [00:00:48.389] horizontal and vertical symmetry. So,
- [00:00:48.399] horizontal and vertical symmetry. So, you can have straight down the middle,
- [00:00:51.110] you can have straight down the middle,
- [00:00:51.120] you can have straight down the middle, same thing on either side. Um, and you
- [00:00:54.229] same thing on either side. Um, and you
- [00:00:54.239] same thing on either side. Um, and you know, that brings the focus to your
- [00:00:56.069] know, that brings the focus to your
- [00:00:56.079] know, that brings the focus to your central subject. Or you could have a
- [00:00:59.270] central subject. Or you could have a
- [00:00:59.280] central subject. Or you could have a reflection say of a lake and the
- [00:01:02.150] reflection say of a lake and the
- [00:01:02.160] reflection say of a lake and the symmetry is you know through that line
- [00:01:05.030] symmetry is you know through that line
- [00:01:05.040] symmetry is you know through that line that uh that horizontal line instead of
- [00:01:07.429] that uh that horizontal line instead of
- [00:01:07.439] that uh that horizontal line instead of the vertical line. Here's some samples
- [00:01:09.510] the vertical line. Here's some samples
- [00:01:09.520] the vertical line. Here's some samples of symmetry.
- So, we just covered the composition
- [00:01:43.350] So, we just covered the composition
- [00:01:43.360] So, we just covered the composition technique, symmetry. Uh, symmetry is a
- [00:01:45.910] technique, symmetry. Uh, symmetry is a
- [00:01:45.920] technique, symmetry. Uh, symmetry is a really good technique to create a sense
- [00:01:47.910] really good technique to create a sense
- [00:01:47.920] really good technique to create a sense of order and balance and harmony in your
- [00:01:51.190] of order and balance and harmony in your
- [00:01:51.200] of order and balance and harmony in your videos. Um, and thank you guys, and I
- [00:01:53.830] videos. Um, and thank you guys, and I
- [00:01:53.840] videos. Um, and thank you guys, and I hope you enjoy the next video.
Keyframes
- /workspace/academy/media/1-0a1HI9ek-H_ECyR15w2sC1KQuGfBglO/keyframes/last.jpg
- /workspace/academy/media/1-0a1HI9ek-H_ECyR15w2sC1KQuGfBglO/keyframes/t001.jpg
- /workspace/academy/media/1-0a1HI9ek-H_ECyR15w2sC1KQuGfBglO/keyframes/t002.jpg
- /workspace/academy/media/1-0a1HI9ek-H_ECyR15w2sC1KQuGfBglO/keyframes/t003.jpg
- /workspace/academy/media/1-0a1HI9ek-H_ECyR15w2sC1KQuGfBglO/keyframes/t004.jpg
- /workspace/academy/media/1-0a1HI9ek-H_ECyR15w2sC1KQuGfBglO/keyframes/t005.jpg
- /workspace/academy/media/1-0a1HI9ek-H_ECyR15w2sC1KQuGfBglO/keyframes/t007.jpg
- /workspace/academy/media/1-0a1HI9ek-H_ECyR15w2sC1KQuGfBglO/keyframes/t008.jpg
- /workspace/academy/media/1-0a1HI9ek-H_ECyR15w2sC1KQuGfBglO/keyframes/t009.jpg
- /workspace/academy/media/1-0a1HI9ek-H_ECyR15w2sC1KQuGfBglO/keyframes/t010.jpg
- /workspace/academy/media/1-0a1HI9ek-H_ECyR15w2sC1KQuGfBglO/keyframes/t011.jpg
- /workspace/academy/media/1-0a1HI9ek-H_ECyR15w2sC1KQuGfBglO/keyframes/t012.jpg
36. Leading Lines
- title: Leading Lines
- status: publish
- author: 0
- is_previewable: (empty)
- video_duration: 0h 1m 43s (raw {"hours":0,"minutes":1,"seconds":43})
- video_source_type: embedded
- drive_file_id:
1Cr_IFnOdxJlo_d7T-XyFgM2WFnq-sNht(source_ref; not a public link) - transcript pending / keyframes pending / presentation extract pending
- video_source_url: (Drive preview omitted as a public link; file id kept as source_ref)
(no lesson_content HTML in export — video-only or empty body; metadata above kept in full)
Drive extract
- file_id:
1Cr_IFnOdxJlo_d7T-XyFgM2WFnq-sNht - filename: VEST Section 3 Composition & Shot Types 6 Leadlines.mp4
- kind: video
- local_path: /workspace/academy/media/1Cr_IFnOdxJlo_d7T-XyFgM2WFnq-sNht/VEST Section 3 Composition & Shot Types 6 Leadlines.mp4
- source_ref: drive
1Cr_IFnOdxJlo_d7T-XyFgM2WFnq-sNht· content_length 156627880 · original https://drive.google.com/file/d/1Cr_IFnOdxJlo_d7T-XyFgM2WFnq-sNht/view - extract_status: done
- caption_source: drive_timedtext
- duration_s: 102.910998
- keyframe_count: 11
Transcript
- Hey guys. So today we're going to be
- [00:00:01.590] Hey guys. So today we're going to be
- [00:00:01.600] Hey guys. So today we're going to be going over another composition technique
- [00:00:03.830] going over another composition technique
- [00:00:03.840] going over another composition technique called leading lines. Leading lines is a
- [00:00:06.550] called leading lines. Leading lines is a
- [00:00:06.560] called leading lines. Leading lines is a technique where you use natural, you
- [00:00:08.390] technique where you use natural, you
- [00:00:08.400] technique where you use natural, you know, leading lines in an environment to
- [00:00:10.629] know, leading lines in an environment to
- [00:00:10.639] know, leading lines in an environment to basically direct the focus and the
- [00:00:13.030] basically direct the focus and the
- [00:00:13.040] basically direct the focus and the attention to your subject. They are
- [00:00:15.110] attention to your subject. They are
- [00:00:15.120] attention to your subject. They are lines within the frame within the
- [00:00:16.950] lines within the frame within the
- [00:00:16.960] lines within the frame within the environment or you can use props or
- [00:00:19.590] environment or you can use props or
- [00:00:19.600] environment or you can use props or different things that point towards like
- [00:00:22.230] different things that point towards like
- [00:00:22.240] different things that point towards like big arrows in the environment towards
- [00:00:24.150] big arrows in the environment towards
- [00:00:24.160] big arrows in the environment towards your subject even though they're not
- [00:00:25.670] your subject even though they're not
- [00:00:25.680] your subject even though they're not necessarily arrows. though there's a
- [00:00:27.670] necessarily arrows. though there's a
- [00:00:27.680] necessarily arrows. though there's a good example there. If you're standing
- [00:00:29.109] good example there. If you're standing
- [00:00:29.119] good example there. If you're standing next to a street sign with an arrow,
- [00:00:30.870] next to a street sign with an arrow,
- [00:00:30.880] next to a street sign with an arrow, it's a leading line. These lines create
- [00:00:34.069] it's a leading line. These lines create
- [00:00:34.079] it's a leading line. These lines create a sense of depth and they direct the v
- [00:00:37.190] a sense of depth and they direct the v
- [00:00:37.200] a sense of depth and they direct the v focus to your subject. Here's some
- [00:00:39.190] focus to your subject. Here's some
- [00:00:39.200] focus to your subject. Here's some really good examples of leading lines.
- [00:00:41.750] really good examples of leading lines.
- [00:00:41.760] really good examples of leading lines. Look how these lines point towards your
- [00:00:43.910] Look how these lines point towards your
- [00:00:43.920] Look how these lines point towards your subject.
- When it comes to leading lines, it's
- [00:00:50.229] When it comes to leading lines, it's
- [00:00:50.239] When it comes to leading lines, it's something that you have to find with
- [00:00:52.069] something that you have to find with
- [00:00:52.079] something that you have to find with your camera placement. uh move your
- [00:00:54.470] your camera placement. uh move your
- [00:00:54.480] your camera placement. uh move your camera around to make sure as many lines
- [00:00:57.110] camera around to make sure as many lines
- [00:00:57.120] camera around to make sure as many lines in the environment as possible point
- [00:00:59.910] in the environment as possible point
- [00:00:59.920] in the environment as possible point towards your subject. But another thing
- [00:01:02.069] towards your subject. But another thing
- [00:01:02.079] towards your subject. But another thing you can do is you can add elements to
- [00:01:04.070] you can do is you can add elements to
- [00:01:04.080] you can do is you can add elements to your frame. You know, whether it's
- [00:01:05.509] your frame. You know, whether it's
- [00:01:05.519] your frame. You know, whether it's props, whether it's, you know, desks,
- [00:01:07.990] props, whether it's, you know, desks,
- [00:01:08.000] props, whether it's, you know, desks, chs, different set dressing. Let's look
- [00:01:10.789] chs, different set dressing. Let's look
- [00:01:10.799] chs, different set dressing. Let's look at a few more examples of leading lies.
- We just covered leading lines, uh, a
- [00:01:32.149] We just covered leading lines, uh, a
- [00:01:32.159] We just covered leading lines, uh, a composition technique that is really
- [00:01:34.390] composition technique that is really
- [00:01:34.400] composition technique that is really creative and interesting to add to your
- [00:01:37.510] creative and interesting to add to your
- [00:01:37.520] creative and interesting to add to your short form videos. Thank you so much and
- [00:01:39.910] short form videos. Thank you so much and
- [00:01:39.920] short form videos. Thank you so much and I'll see you in the next video.
Keyframes
- /workspace/academy/media/1Cr_IFnOdxJlo_d7T-XyFgM2WFnq-sNht/keyframes/last.jpg
- /workspace/academy/media/1Cr_IFnOdxJlo_d7T-XyFgM2WFnq-sNht/keyframes/t001.jpg
- /workspace/academy/media/1Cr_IFnOdxJlo_d7T-XyFgM2WFnq-sNht/keyframes/t002.jpg
- /workspace/academy/media/1Cr_IFnOdxJlo_d7T-XyFgM2WFnq-sNht/keyframes/t003.jpg
- /workspace/academy/media/1Cr_IFnOdxJlo_d7T-XyFgM2WFnq-sNht/keyframes/t004.jpg
- /workspace/academy/media/1Cr_IFnOdxJlo_d7T-XyFgM2WFnq-sNht/keyframes/t005.jpg
- /workspace/academy/media/1Cr_IFnOdxJlo_d7T-XyFgM2WFnq-sNht/keyframes/t006.jpg
- /workspace/academy/media/1Cr_IFnOdxJlo_d7T-XyFgM2WFnq-sNht/keyframes/t007.jpg
- /workspace/academy/media/1Cr_IFnOdxJlo_d7T-XyFgM2WFnq-sNht/keyframes/t008.jpg
- /workspace/academy/media/1Cr_IFnOdxJlo_d7T-XyFgM2WFnq-sNht/keyframes/t009.jpg
- /workspace/academy/media/1Cr_IFnOdxJlo_d7T-XyFgM2WFnq-sNht/keyframes/t010.jpg
37. Homework Composition
- title: Homework Composition
- status: publish
- author: 0
- is_previewable: (empty)
- video_duration: 0h 0m 0s (raw {"hours":0,"minutes":0,"seconds":0})
- video_source_type: (empty)
Homework: Composition (The Director's Eye)
Objective: To practice recognizing and intentionally using foundational composition rules, demonstrating control over the image's narrative impact.
Instructions: Using only your phone camera, complete the following tasks. Do not edit the resulting photos or videos (no filters, no cuts).
PRACTICAL: The Composition Challenge (5 Photos)
Capture five still photos that showcase each specific compositional rule. Use the built-in grid overlay on your phone's camera (if available) for precision.
| Photo Requirement | Composition Principle to Demonstrate | Goal/Notes |
|---|---|---|
| Photo 1 | Rule-of-Thirds | Place your main subject (or a key detail) clearly on one of the intersection points or along a vertical/horizontal grid line. |
| Photo 2 | Headroom Control | Take a photo of a person (or pet) with correct and pleasing headroom. No excessive space above the head, but also no chopping the top of the head off. |
| Photo 3 | Symmetry | Find a scene (architectural, natural, or a staged object) that is perfectly balanced when a line is drawn through the center. (The two halves should mirror each other.) |
| Photo 4 | Leading Lines | Find an object (e.g., a path, a fence, a shadow) that acts as a line to guide the viewer's eye deep into the background of the shot. |
| Photo 5 | Creative Headroom Mistake | Deliberately take a photo of a subject with too much headroom (making them look small) or too little headroom (making them look crushed). This proves you can recognize and control the rule. |
Submission: Submit the five required photos. Label your files clearly (e.g., "Your Name_Pic4_LowAngle").
Why this matters: The difference between an amateur and a pro is intention. By completing this, you move from passively recording to actively directing the viewer's attention.
Submission Instructions:
Complete this practical then submit via email to the instructor at info@ambitious.co.za or use the Academy portal.
Keep up the practical skills!
- quizzes_following_this_lesson: 1 (full text in Quizzes)
- Composition Quiz (4 questions)
38. Shots
- title: Shots
- status: publish
- author: 0
- is_previewable: (empty)
- video_duration: 0h 0m 20s (raw {"hours":0,"minutes":0,"seconds":20})
- video_source_type: embedded
- drive_file_id:
1e16yBEHK4SgoJRVUMcFLSst6SiGqfKIT(source_ref; not a public link) - transcript pending / keyframes pending / presentation extract pending
- video_source_url: (Drive preview omitted as a public link; file id kept as source_ref)
(no lesson_content HTML in export — video-only or empty body; metadata above kept in full)
Drive extract
- file_id:
1e16yBEHK4SgoJRVUMcFLSst6SiGqfKIT - filename: VEST Section 3 Composition & Shot Types 7 Shots.mp4
- kind: video
- local_path: /workspace/academy/media/1e16yBEHK4SgoJRVUMcFLSst6SiGqfKIT/VEST Section 3 Composition & Shot Types 7 Shots.mp4
- source_ref: drive
1e16yBEHK4SgoJRVUMcFLSst6SiGqfKIT· content_length 28201677 · original https://drive.google.com/file/d/1e16yBEHK4SgoJRVUMcFLSst6SiGqfKIT/view - extract_status: done
- caption_source: drive_timedtext
- duration_s: 19.737007
- keyframe_count: 3
Transcript
- Hey guys, welcome to the next section of
- [00:00:02.710] Hey guys, welcome to the next section of
- [00:00:02.720] Hey guys, welcome to the next section of the Vest online course. Today we're
- [00:00:04.309] the Vest online course. Today we're
- [00:00:04.319] the Vest online course. Today we're going to be going over shot types and
- [00:00:06.390] going to be going over shot types and
- [00:00:06.400] going to be going over shot types and why we need to use the different ones.
- [00:00:08.470] why we need to use the different ones.
- [00:00:08.480] why we need to use the different ones. We will focus on the main three that is
- [00:00:11.509] We will focus on the main three that is
- [00:00:11.519] We will focus on the main three that is close-ups, wides, and mediums. Thank
- [00:00:14.870] close-ups, wides, and mediums. Thank
- [00:00:14.880] close-ups, wides, and mediums. Thank you, and I'll see you guys in the next
- [00:00:16.710] you, and I'll see you guys in the next
- [00:00:16.720] you, and I'll see you guys in the next video.
Keyframes
- /workspace/academy/media/1e16yBEHK4SgoJRVUMcFLSst6SiGqfKIT/keyframes/last.jpg
- /workspace/academy/media/1e16yBEHK4SgoJRVUMcFLSst6SiGqfKIT/keyframes/t001.jpg
- /workspace/academy/media/1e16yBEHK4SgoJRVUMcFLSst6SiGqfKIT/keyframes/t002.jpg
39. Close Up
- title: Close Up
- status: publish
- author: 0
- is_previewable: (empty)
- video_duration: 0h 0m 53s (raw {"hours":0,"minutes":0,"seconds":53})
- video_source_type: embedded
- drive_file_id:
1v3fylcqSbqcKYwzDtzJzu4uopu5yMpmr(source_ref; not a public link) - transcript pending / keyframes pending / presentation extract pending
- video_source_url: (Drive preview omitted as a public link; file id kept as source_ref)
(no lesson_content HTML in export — video-only or empty body; metadata above kept in full)
Drive extract
- file_id:
1v3fylcqSbqcKYwzDtzJzu4uopu5yMpmr - filename: VEST Section 3 Composition & Shot Types 8 Close Up.mp4
- kind: video
- local_path: /workspace/academy/media/1v3fylcqSbqcKYwzDtzJzu4uopu5yMpmr/VEST Section 3 Composition & Shot Types 8 Close Up.mp4
- source_ref: drive
1v3fylcqSbqcKYwzDtzJzu4uopu5yMpmr· content_length 82176478 · original https://drive.google.com/file/d/1v3fylcqSbqcKYwzDtzJzu4uopu5yMpmr/view - extract_status: done
- caption_source: drive_timedtext
- duration_s: 53.312993
- keyframe_count: 6
Transcript
- Hey guys. Uh, today we're going to focus
- [00:00:02.310] Hey guys. Uh, today we're going to focus
- [00:00:02.320] Hey guys. Uh, today we're going to focus on the shot type of close-ups. Close-ups
- [00:00:05.990] on the shot type of close-ups. Close-ups
- [00:00:06.000] on the shot type of close-ups. Close-ups highlight the emotions and reactions of
- [00:00:09.190] highlight the emotions and reactions of
- [00:00:09.200] highlight the emotions and reactions of your subject or the details of an
- [00:00:12.870] your subject or the details of an
- [00:00:12.880] your subject or the details of an object. If you know an object is your
- [00:00:14.709] object. If you know an object is your
- [00:00:14.719] object. If you know an object is your subject instead of a person, to achieve
- [00:00:16.790] subject instead of a person, to achieve
- [00:00:16.800] subject instead of a person, to achieve a close-up, you want to fill the
- [00:00:18.630] a close-up, you want to fill the
- [00:00:18.640] a close-up, you want to fill the majority of the screen with your
- [00:00:20.470] majority of the screen with your
- [00:00:20.480] majority of the screen with your subject. And obviously, you want to make
- [00:00:22.710] subject. And obviously, you want to make
- [00:00:22.720] subject. And obviously, you want to make sure that you have good lighting so that
- [00:00:24.710] sure that you have good lighting so that
- [00:00:24.720] sure that you have good lighting so that you can see those details. is you want
- [00:00:26.310] you can see those details. is you want
- [00:00:26.320] you can see those details. is you want to make sure everything important is
- [00:00:28.630] to make sure everything important is
- [00:00:28.640] to make sure everything important is easily seen in the camera. Here's some
- [00:00:31.189] easily seen in the camera. Here's some
- [00:00:31.199] easily seen in the camera. Here's some examples of close-up shots.
- So, we just covered close-ups. It's
- [00:00:43.750] So, we just covered close-ups. It's
- [00:00:43.760] So, we just covered close-ups. It's detail orientated and it wants you to
- [00:00:46.790] detail orientated and it wants you to
- [00:00:46.800] detail orientated and it wants you to focus on the emotion and reactions of
- [00:00:48.869] focus on the emotion and reactions of
- [00:00:48.879] focus on the emotion and reactions of your subjects. Thank you and I'll see
- [00:00:51.270] your subjects. Thank you and I'll see
- [00:00:51.280] your subjects. Thank you and I'll see you guys in the next video.
Keyframes
- /workspace/academy/media/1v3fylcqSbqcKYwzDtzJzu4uopu5yMpmr/keyframes/last.jpg
- /workspace/academy/media/1v3fylcqSbqcKYwzDtzJzu4uopu5yMpmr/keyframes/t001.jpg
- /workspace/academy/media/1v3fylcqSbqcKYwzDtzJzu4uopu5yMpmr/keyframes/t002.jpg
- /workspace/academy/media/1v3fylcqSbqcKYwzDtzJzu4uopu5yMpmr/keyframes/t003.jpg
- /workspace/academy/media/1v3fylcqSbqcKYwzDtzJzu4uopu5yMpmr/keyframes/t004.jpg
- /workspace/academy/media/1v3fylcqSbqcKYwzDtzJzu4uopu5yMpmr/keyframes/t005.jpg
40. Medium
- title: Medium
- status: publish
- author: 0
- is_previewable: (empty)
- video_duration: 0h 1m 16s (raw {"hours":0,"minutes":1,"seconds":16})
- video_source_type: embedded
- drive_file_id:
1FmtlXQ5x0jxn5pbEyq5pcssXoeOFBca8(source_ref; not a public link) - transcript pending / keyframes pending / presentation extract pending
- video_source_url: (Drive preview omitted as a public link; file id kept as source_ref)
(no lesson_content HTML in export — video-only or empty body; metadata above kept in full)
Drive extract
- file_id:
1FmtlXQ5x0jxn5pbEyq5pcssXoeOFBca8 - filename: VEST Section 3 Composition & Shot Types 9 Medium.mp4
- kind: video
- local_path: /workspace/academy/media/1FmtlXQ5x0jxn5pbEyq5pcssXoeOFBca8/VEST Section 3 Composition & Shot Types 9 Medium.mp4
- source_ref: drive
1FmtlXQ5x0jxn5pbEyq5pcssXoeOFBca8· content_length 114462412 · original https://drive.google.com/file/d/1FmtlXQ5x0jxn5pbEyq5pcssXoeOFBca8/view - extract_status: done
- caption_source: drive_timedtext
- duration_s: 75.603991
- keyframe_count: 9
Transcript
- Hey guys, welcome back to Shot Types.
- [00:00:02.710] Hey guys, welcome back to Shot Types.
- [00:00:02.720] Hey guys, welcome back to Shot Types. Today we're going to be focusing on the
- [00:00:04.630] Today we're going to be focusing on the
- [00:00:04.640] Today we're going to be focusing on the medium shot. The medium is the in
- [00:00:07.190] medium shot. The medium is the in
- [00:00:07.200] medium shot. The medium is the in between the close-up and the wide shot.
- [00:00:10.150] between the close-up and the wide shot.
- [00:00:10.160] between the close-up and the wide shot. You'd usually focus from the waist to
- [00:00:12.390] You'd usually focus from the waist to
- [00:00:12.400] You'd usually focus from the waist to the head for a medium. It shows the
- [00:00:15.030] the head for a medium. It shows the
- [00:00:15.040] the head for a medium. It shows the subject and their environment equally.
- [00:00:17.830] subject and their environment equally.
- [00:00:17.840] subject and their environment equally. You know, it highlights that both are
- [00:00:19.750] You know, it highlights that both are
- [00:00:19.760] You know, it highlights that both are equally important to that shot. So, you
- [00:00:22.070] equally important to that shot. So, you
- [00:00:22.080] equally important to that shot. So, you want to see the reaction and the emotion
- [00:00:24.870] want to see the reaction and the emotion
- [00:00:24.880] want to see the reaction and the emotion of your subject, but you also want to
- [00:00:26.630] of your subject, but you also want to
- [00:00:26.640] of your subject, but you also want to see their body language. You want to see
- [00:00:28.150] see their body language. You want to see
- [00:00:28.160] see their body language. You want to see them moving their arms, their hands.
- [00:00:29.990] them moving their arms, their hands.
- [00:00:30.000] them moving their arms, their hands. You'd usually limit the amount of
- [00:00:31.669] You'd usually limit the amount of
- [00:00:31.679] You'd usually limit the amount of subjects you have in a medium. You
- [00:00:33.750] subjects you have in a medium. You
- [00:00:33.760] subjects you have in a medium. You usually have one, but no more than two.
- [00:00:36.069] usually have one, but no more than two.
- [00:00:36.079] usually have one, but no more than two. And you don't want too much movement
- [00:00:37.830] And you don't want too much movement
- [00:00:37.840] And you don't want too much movement happening in a medium shot. Not too much
- [00:00:39.750] happening in a medium shot. Not too much
- [00:00:39.760] happening in a medium shot. Not too much action or, you know, like stunts or all
- [00:00:42.549] action or, you know, like stunts or all
- [00:00:42.559] action or, you know, like stunts or all these things because, you know, you're
- [00:00:44.229] these things because, you know, you're
- [00:00:44.239] these things because, you know, you're not going to see everything clearly.
- [00:00:45.750] not going to see everything clearly.
- [00:00:45.760] not going to see everything clearly. Here's some examples of medium shots.
- So, we just covered the medium shot. Um,
- [00:01:01.990] So, we just covered the medium shot. Um,
- [00:01:02.000] So, we just covered the medium shot. Um, it's, you know, the middle between
- [00:01:03.750] it's, you know, the middle between
- [00:01:03.760] it's, you know, the middle between closeup and wide. It's to show the
- [00:01:06.550] closeup and wide. It's to show the
- [00:01:06.560] closeup and wide. It's to show the importance of your subject and their
- [00:01:08.710] importance of your subject and their
- [00:01:08.720] importance of your subject and their environment equally. Uh, thank you and
- [00:01:11.429] environment equally. Uh, thank you and
- [00:01:11.439] environment equally. Uh, thank you and I'll see you guys in the next video.
Keyframes
- /workspace/academy/media/1FmtlXQ5x0jxn5pbEyq5pcssXoeOFBca8/keyframes/last.jpg
- /workspace/academy/media/1FmtlXQ5x0jxn5pbEyq5pcssXoeOFBca8/keyframes/t001.jpg
- /workspace/academy/media/1FmtlXQ5x0jxn5pbEyq5pcssXoeOFBca8/keyframes/t002.jpg
- /workspace/academy/media/1FmtlXQ5x0jxn5pbEyq5pcssXoeOFBca8/keyframes/t003.jpg
- /workspace/academy/media/1FmtlXQ5x0jxn5pbEyq5pcssXoeOFBca8/keyframes/t004.jpg
- /workspace/academy/media/1FmtlXQ5x0jxn5pbEyq5pcssXoeOFBca8/keyframes/t005.jpg
- /workspace/academy/media/1FmtlXQ5x0jxn5pbEyq5pcssXoeOFBca8/keyframes/t006.jpg
- /workspace/academy/media/1FmtlXQ5x0jxn5pbEyq5pcssXoeOFBca8/keyframes/t007.jpg
- /workspace/academy/media/1FmtlXQ5x0jxn5pbEyq5pcssXoeOFBca8/keyframes/t008.jpg
41. Wides
- title: Wides
- status: publish
- author: 0
- is_previewable: (empty)
- video_duration: 0h 0m 58s (raw {"hours":0,"minutes":0,"seconds":58})
- video_source_type: embedded
- drive_file_id:
1tldJnvftqJYMDmCLHGat0uByvDfhoU7U(source_ref; not a public link) - transcript pending / keyframes pending / presentation extract pending
- video_source_url: (Drive preview omitted as a public link; file id kept as source_ref)
(no lesson_content HTML in export — video-only or empty body; metadata above kept in full)
Drive extract
- file_id:
1tldJnvftqJYMDmCLHGat0uByvDfhoU7U - filename: VEST Section 3 Composition & Shot Types 10 Wides.mp4
- kind: video
- local_path: /workspace/academy/media/1tldJnvftqJYMDmCLHGat0uByvDfhoU7U/VEST Section 3 Composition & Shot Types 10 Wides.mp4
- source_ref: drive
1tldJnvftqJYMDmCLHGat0uByvDfhoU7U· content_length 176316719 · original https://drive.google.com/file/d/1tldJnvftqJYMDmCLHGat0uByvDfhoU7U/view - extract_status: done
- caption_source: drive_timedtext
- duration_s: 117.818005
- keyframe_count: 12
Transcript
- Hey guys, welcome back to Shot Types.
- [00:00:02.470] Hey guys, welcome back to Shot Types.
- [00:00:02.480] Hey guys, welcome back to Shot Types. Today we're going to go over the wide
- [00:00:04.150] Today we're going to go over the wide
- [00:00:04.160] Today we're going to go over the wide shot. So, we'd usually use a wide shot
- [00:00:06.390] shot. So, we'd usually use a wide shot
- [00:00:06.400] shot. So, we'd usually use a wide shot to establish a setting or location.
- [00:00:09.430] to establish a setting or location.
- [00:00:09.440] to establish a setting or location. We'll show the relationship between a
- [00:00:11.589] We'll show the relationship between a
- [00:00:11.599] We'll show the relationship between a subject and their greater surroundings.
- [00:00:13.589] subject and their greater surroundings.
- [00:00:13.599] subject and their greater surroundings. It gives context to the scene. You want
- [00:00:16.550] It gives context to the scene. You want
- [00:00:16.560] It gives context to the scene. You want to position the camera to capture your
- [00:00:18.470] to position the camera to capture your
- [00:00:18.480] to position the camera to capture your subject in their entirety, you know,
- [00:00:20.470] subject in their entirety, you know,
- [00:00:20.480] subject in their entirety, you know, their whole body. And you want to show a
- [00:00:23.029] their whole body. And you want to show a
- [00:00:23.039] their whole body. And you want to show a lot of the background uh in your shot.
- [00:00:26.710] lot of the background uh in your shot.
- [00:00:26.720] lot of the background uh in your shot. Um, the background will take up the
- [00:00:29.109] Um, the background will take up the
- [00:00:29.119] Um, the background will take up the majority of the frame space. Though, you
- [00:00:31.269] majority of the frame space. Though, you
- [00:00:31.279] majority of the frame space. Though, you also do want to make sure your subject
- [00:00:32.950] also do want to make sure your subject
- [00:00:32.960] also do want to make sure your subject isn't lost in the frame. You don't have
- [00:00:35.430] isn't lost in the frame. You don't have
- [00:00:35.440] isn't lost in the frame. You don't have to look for who is, you know, your
- [00:00:38.069] to look for who is, you know, your
- [00:00:38.079] to look for who is, you know, your person in the background. You want to
- [00:00:40.389] person in the background. You want to
- [00:00:40.399] person in the background. You want to make sure that, you know, they still the
- [00:00:42.069] make sure that, you know, they still the
- [00:00:42.079] make sure that, you know, they still the main focus in in in your shot. It's not
- [00:00:45.190] main focus in in in your shot. It's not
- [00:00:45.200] main focus in in in your shot. It's not a landscape shot. It's not a, oh, here's
- [00:00:47.830] a landscape shot. It's not a, oh, here's
- [00:00:47.840] a landscape shot. It's not a, oh, here's some hills and mountains. No, it's a
- [00:00:49.670] some hills and mountains. No, it's a
- [00:00:49.680] some hills and mountains. No, it's a shot of someone on a path in the hills
- [00:00:52.869] shot of someone on a path in the hills
- [00:00:52.879] shot of someone on a path in the hills and mountains. You still want to show
- [00:00:54.709] and mountains. You still want to show
- [00:00:54.719] and mountains. You still want to show that that person is walking that path. A
- [00:00:57.270] that that person is walking that path. A
- [00:00:57.280] that that person is walking that path. A wide is ideal for introducing the
- [00:01:00.229] wide is ideal for introducing the
- [00:01:00.239] wide is ideal for introducing the setting and the location, but also it
- [00:01:02.549] setting and the location, but also it
- [00:01:02.559] setting and the location, but also it can be used to add a level of scale to
- [00:01:04.869] can be used to add a level of scale to
- [00:01:04.879] can be used to add a level of scale to your environment. You know, say if
- [00:01:06.710] your environment. You know, say if
- [00:01:06.720] your environment. You know, say if someone's entered the big city for the
- [00:01:08.630] someone's entered the big city for the
- [00:01:08.640] someone's entered the big city for the first time and you show them um in the
- [00:01:11.750] first time and you show them um in the
- [00:01:11.760] first time and you show them um in the middle of the frame, you know,
- [00:01:13.109] middle of the frame, you know,
- [00:01:13.119] middle of the frame, you know, surrounded by these huge buildings and
- [00:01:15.590] surrounded by these huge buildings and
- [00:01:15.600] surrounded by these huge buildings and bustling streets and all the busy people
- [00:01:18.310] bustling streets and all the busy people
- [00:01:18.320] bustling streets and all the busy people and stuff. Let's look at some examples
- [00:01:20.469] and stuff. Let's look at some examples
- [00:01:20.479] and stuff. Let's look at some examples of wide shots.
- So, we just covered wide shots. Wides
- [00:01:44.630] So, we just covered wide shots. Wides
- [00:01:44.640] So, we just covered wide shots. Wides are important for establishing setting.
- [00:01:46.950] are important for establishing setting.
- [00:01:46.960] are important for establishing setting. They show scale. They show the
- [00:01:49.270] They show scale. They show the
- [00:01:49.280] They show scale. They show the relationship between your subject and
- [00:01:50.950] relationship between your subject and
- [00:01:50.960] relationship between your subject and their greater surroundings. Um, thank
- [00:01:53.590] their greater surroundings. Um, thank
- [00:01:53.600] their greater surroundings. Um, thank you guys and I'll see you in the next
- [00:01:55.270] you guys and I'll see you in the next
- [00:01:55.280] you guys and I'll see you in the next video.
Keyframes
- /workspace/academy/media/1tldJnvftqJYMDmCLHGat0uByvDfhoU7U/keyframes/last.jpg
- /workspace/academy/media/1tldJnvftqJYMDmCLHGat0uByvDfhoU7U/keyframes/t001.jpg
- /workspace/academy/media/1tldJnvftqJYMDmCLHGat0uByvDfhoU7U/keyframes/t002.jpg
- /workspace/academy/media/1tldJnvftqJYMDmCLHGat0uByvDfhoU7U/keyframes/t003.jpg
- /workspace/academy/media/1tldJnvftqJYMDmCLHGat0uByvDfhoU7U/keyframes/t004.jpg
- /workspace/academy/media/1tldJnvftqJYMDmCLHGat0uByvDfhoU7U/keyframes/t005.jpg
- /workspace/academy/media/1tldJnvftqJYMDmCLHGat0uByvDfhoU7U/keyframes/t007.jpg
- /workspace/academy/media/1tldJnvftqJYMDmCLHGat0uByvDfhoU7U/keyframes/t008.jpg
- /workspace/academy/media/1tldJnvftqJYMDmCLHGat0uByvDfhoU7U/keyframes/t009.jpg
- /workspace/academy/media/1tldJnvftqJYMDmCLHGat0uByvDfhoU7U/keyframes/t010.jpg
- /workspace/academy/media/1tldJnvftqJYMDmCLHGat0uByvDfhoU7U/keyframes/t011.jpg
- /workspace/academy/media/1tldJnvftqJYMDmCLHGat0uByvDfhoU7U/keyframes/t012.jpg
42. Camera Angles
- title: Camera Angles
- status: publish
- author: 0
- is_previewable: (empty)
- video_duration: 0h 0m 17s (raw {"hours":0,"minutes":0,"seconds":17})
- video_source_type: embedded
- drive_file_id:
1wv2EJUcCOHzGTjxndSCS1CiUSTDgkg91(source_ref; not a public link) - transcript pending / keyframes pending / presentation extract pending
- video_source_url: (Drive preview omitted as a public link; file id kept as source_ref)
(no lesson_content HTML in export — video-only or empty body; metadata above kept in full)
Drive extract
- file_id:
1wv2EJUcCOHzGTjxndSCS1CiUSTDgkg91 - filename: VEST Section 3 Composition & Shot Types 11 Cam Ang.mp4
- kind: video
- local_path: /workspace/academy/media/1wv2EJUcCOHzGTjxndSCS1CiUSTDgkg91/VEST Section 3 Composition & Shot Types 11 Cam Ang.mp4
- source_ref: drive
1wv2EJUcCOHzGTjxndSCS1CiUSTDgkg91· content_length 25088833 · original https://drive.google.com/file/d/1wv2EJUcCOHzGTjxndSCS1CiUSTDgkg91/view - extract_status: done
- caption_source: drive_timedtext_asr_srt
- duration_s: 16.973991
- keyframe_count: 3
Transcript
- [00:00:00.080] Hey guys. So, in this section, we're
- [00:00:02.000] going to be going over some camera
- [00:00:03.439] angles and what we'd use them for. The
- [00:00:05.759] main ones we'll focus on are over the
- [00:00:08.080] shoulder, high angles, low angles, and
- [00:00:11.519] the Dutch angle. Thank you guys, and
- [00:00:13.679] I'll see you in the next video.
Keyframes
- /workspace/academy/media/1wv2EJUcCOHzGTjxndSCS1CiUSTDgkg91/keyframes/last.jpg
- /workspace/academy/media/1wv2EJUcCOHzGTjxndSCS1CiUSTDgkg91/keyframes/t001.jpg
- /workspace/academy/media/1wv2EJUcCOHzGTjxndSCS1CiUSTDgkg91/keyframes/t002.jpg
43. Eye Level
- title: Eye Level
- status: publish
- author: 0
- is_previewable: (empty)
- video_duration: 0h 1m 4s (raw {"hours":0,"minutes":1,"seconds":4})
- video_source_type: embedded
- drive_file_id:
1kZTB5sX6PHkRB6Te4CnlqnLIdEW-cPf7(source_ref; not a public link) - transcript pending / keyframes pending / presentation extract pending
- video_source_url: (Drive preview omitted as a public link; file id kept as source_ref)
(no lesson_content HTML in export — video-only or empty body; metadata above kept in full)
Drive extract
- file_id:
1kZTB5sX6PHkRB6Te4CnlqnLIdEW-cPf7 - filename: VEST Section 3 Composition & Shot Types 12 Eye Lev.mp4
- kind: video
- local_path: /workspace/academy/media/1kZTB5sX6PHkRB6Te4CnlqnLIdEW-cPf7/VEST Section 3 Composition & Shot Types 12 Eye Lev.mp4
- source_ref: drive
1kZTB5sX6PHkRB6Te4CnlqnLIdEW-cPf7· content_length 96807638 · original https://drive.google.com/file/d/1kZTB5sX6PHkRB6Te4CnlqnLIdEW-cPf7/view - extract_status: done
- caption_source: drive_timedtext
- duration_s: 63.855011
- keyframe_count: 7
Transcript
- Hey guys, we're going to cover eye
- [00:00:02.149] Hey guys, we're going to cover eye
- [00:00:02.159] Hey guys, we're going to cover eye levels under camera angles. The eye
- [00:00:04.550] levels under camera angles. The eye
- [00:00:04.560] levels under camera angles. The eye level angle will, you know, be your
- [00:00:06.630] level angle will, you know, be your
- [00:00:06.640] level angle will, you know, be your default angle. It's it's what you're
- [00:00:08.549] default angle. It's it's what you're
- [00:00:08.559] default angle. It's it's what you're looking at me with. Now, if I'm looking
- [00:00:10.709] looking at me with. Now, if I'm looking
- [00:00:10.719] looking at me with. Now, if I'm looking equally at the camera, it puts, you
- [00:00:12.709] equally at the camera, it puts, you
- [00:00:12.719] equally at the camera, it puts, you know, me and the camera on equal
- [00:00:14.629] know, me and the camera on equal
- [00:00:14.639] know, me and the camera on equal footing. It doesn't adjust any power
- [00:00:17.029] footing. It doesn't adjust any power
- [00:00:17.039] footing. It doesn't adjust any power scales, nor does it uh put you, you
- [00:00:19.990] scales, nor does it uh put you, you
- [00:00:20.000] scales, nor does it uh put you, you know, next to me or behind me in a
- [00:00:22.390] know, next to me or behind me in a
- [00:00:22.400] know, next to me or behind me in a conversation. I am looking at you and
- [00:00:24.550] conversation. I am looking at you and
- [00:00:24.560] conversation. I am looking at you and you are looking at me. That's the
- [00:00:26.710] you are looking at me. That's the
- [00:00:26.720] you are looking at me. That's the default for most videos. So any other
- [00:00:29.910] default for most videos. So any other
- [00:00:29.920] default for most videos. So any other camera angle comes by changing this one.
- [00:00:33.110] camera angle comes by changing this one.
- [00:00:33.120] camera angle comes by changing this one. Whether we put you high, whether we put
- [00:00:34.790] Whether we put you high, whether we put
- [00:00:34.800] Whether we put you high, whether we put you low, whether we tilt you, move you,
- [00:00:36.870] you low, whether we tilt you, move you,
- [00:00:36.880] you low, whether we tilt you, move you, put you behind someone else, that's when
- [00:00:39.110] put you behind someone else, that's when
- [00:00:39.120] put you behind someone else, that's when we change the camera angle to something
- [00:00:40.950] we change the camera angle to something
- [00:00:40.960] we change the camera angle to something else. Uh let's look at some examples of
- [00:00:43.910] else. Uh let's look at some examples of
- [00:00:43.920] else. Uh let's look at some examples of eye level.
- So we just covered the eyele camera
- [00:00:54.869] So we just covered the eyele camera
- [00:00:54.879] So we just covered the eyele camera angle. This is the default camera angle.
- [00:00:57.670] angle. This is the default camera angle.
- [00:00:57.680] angle. This is the default camera angle. It puts us on equal footing. Thank you
- [00:00:59.830] It puts us on equal footing. Thank you
- [00:00:59.840] It puts us on equal footing. Thank you guys and I hope you enjoy the next
- [00:01:01.670] guys and I hope you enjoy the next
- [00:01:01.680] guys and I hope you enjoy the next video.
Keyframes
- /workspace/academy/media/1kZTB5sX6PHkRB6Te4CnlqnLIdEW-cPf7/keyframes/last.jpg
- /workspace/academy/media/1kZTB5sX6PHkRB6Te4CnlqnLIdEW-cPf7/keyframes/t001.jpg
- /workspace/academy/media/1kZTB5sX6PHkRB6Te4CnlqnLIdEW-cPf7/keyframes/t002.jpg
- /workspace/academy/media/1kZTB5sX6PHkRB6Te4CnlqnLIdEW-cPf7/keyframes/t003.jpg
- /workspace/academy/media/1kZTB5sX6PHkRB6Te4CnlqnLIdEW-cPf7/keyframes/t004.jpg
- /workspace/academy/media/1kZTB5sX6PHkRB6Te4CnlqnLIdEW-cPf7/keyframes/t005.jpg
- /workspace/academy/media/1kZTB5sX6PHkRB6Te4CnlqnLIdEW-cPf7/keyframes/t006.jpg
44. Over The Shoulder
- title: Over The Shoulder
- status: publish
- author: 0
- is_previewable: (empty)
- video_duration: 0h 1m 40s (raw {"hours":0,"minutes":1,"seconds":40})
- video_source_type: embedded
- drive_file_id:
1akd743gsvmZsmFE2i6lKOefXd6SMJNIJ(source_ref; not a public link) - transcript pending / keyframes pending / presentation extract pending
- video_source_url: (Drive preview omitted as a public link; file id kept as source_ref)
(no lesson_content HTML in export — video-only or empty body; metadata above kept in full)
Drive extract
- file_id:
1akd743gsvmZsmFE2i6lKOefXd6SMJNIJ - filename: VEST Section 3 Composition & Shot Types 13 OTS.mp4
- kind: video
- local_path: /workspace/academy/media/1akd743gsvmZsmFE2i6lKOefXd6SMJNIJ/VEST Section 3 Composition & Shot Types 13 OTS.mp4
- source_ref: drive
1akd743gsvmZsmFE2i6lKOefXd6SMJNIJ· content_length 151060030 · original https://drive.google.com/file/d/1akd743gsvmZsmFE2i6lKOefXd6SMJNIJ/view - extract_status: done
- caption_source: drive_timedtext
- duration_s: 99.682993
- keyframe_count: 11
Transcript
- Hey guys. So, in this camera angle
- [00:00:02.230] Hey guys. So, in this camera angle
- [00:00:02.240] Hey guys. So, in this camera angle video, we'll be covering the over the
- [00:00:04.230] video, we'll be covering the over the
- [00:00:04.240] video, we'll be covering the over the shoulder type of angle. This is a camera
- [00:00:07.030] shoulder type of angle. This is a camera
- [00:00:07.040] shoulder type of angle. This is a camera angle where you'd normally position your
- [00:00:09.430] angle where you'd normally position your
- [00:00:09.440] angle where you'd normally position your camera behind one of your subjects. And,
- [00:00:13.749] camera behind one of your subjects. And,
- [00:00:13.759] camera behind one of your subjects. And, you know, usually you'd use it for a
- [00:00:15.749] you know, usually you'd use it for a
- [00:00:15.759] you know, usually you'd use it for a conversation. So, if they're talking to
- [00:00:17.590] conversation. So, if they're talking to
- [00:00:17.600] conversation. So, if they're talking to another person in front of them or if
- [00:00:19.830] another person in front of them or if
- [00:00:19.840] another person in front of them or if they're working on something, say it's
- [00:00:21.590] they're working on something, say it's
- [00:00:21.600] they're working on something, say it's someone fixing a phone, you'd position
- [00:00:23.830] someone fixing a phone, you'd position
- [00:00:23.840] someone fixing a phone, you'd position the camera over their shoulder to show
- [00:00:26.550] the camera over their shoulder to show
- [00:00:26.560] the camera over their shoulder to show what they're looking at. It's almost
- [00:00:28.230] what they're looking at. It's almost
- [00:00:28.240] what they're looking at. It's almost like a a point of view type of shot. It
- [00:00:31.029] like a a point of view type of shot. It
- [00:00:31.039] like a a point of view type of shot. It gives you a very voyuristic sense of a
- [00:00:34.310] gives you a very voyuristic sense of a
- [00:00:34.320] gives you a very voyuristic sense of a conversation. It gives an audience the
- [00:00:37.110] conversation. It gives an audience the
- [00:00:37.120] conversation. It gives an audience the sense that they're there with the people
- [00:00:39.990] sense that they're there with the people
- [00:00:40.000] sense that they're there with the people talking or the person working on
- [00:00:41.910] talking or the person working on
- [00:00:41.920] talking or the person working on whatever he's working on. Hence, over
- [00:00:44.069] whatever he's working on. Hence, over
- [00:00:44.079] whatever he's working on. Hence, over the shoulder, you're literally looking
- [00:00:45.750] the shoulder, you're literally looking
- [00:00:45.760] the shoulder, you're literally looking over their shoulder. Here's an example
- [00:00:47.910] over their shoulder. Here's an example
- [00:00:47.920] over their shoulder. Here's an example of some over the shoulder angles.
- So, we just covered the over- the-sh
- [00:01:33.109] So, we just covered the over- the-sh
- [00:01:33.119] So, we just covered the over- the-sh shoulder angle and why we use it. Thank
- [00:01:35.590] shoulder angle and why we use it. Thank
- [00:01:35.600] shoulder angle and why we use it. Thank you guys, and I'll see you in the next
- [00:01:37.190] you guys, and I'll see you in the next
- [00:01:37.200] you guys, and I'll see you in the next video.
Keyframes
- /workspace/academy/media/1akd743gsvmZsmFE2i6lKOefXd6SMJNIJ/keyframes/last.jpg
- /workspace/academy/media/1akd743gsvmZsmFE2i6lKOefXd6SMJNIJ/keyframes/t001.jpg
- /workspace/academy/media/1akd743gsvmZsmFE2i6lKOefXd6SMJNIJ/keyframes/t002.jpg
- /workspace/academy/media/1akd743gsvmZsmFE2i6lKOefXd6SMJNIJ/keyframes/t003.jpg
- /workspace/academy/media/1akd743gsvmZsmFE2i6lKOefXd6SMJNIJ/keyframes/t004.jpg
- /workspace/academy/media/1akd743gsvmZsmFE2i6lKOefXd6SMJNIJ/keyframes/t005.jpg
- /workspace/academy/media/1akd743gsvmZsmFE2i6lKOefXd6SMJNIJ/keyframes/t006.jpg
- /workspace/academy/media/1akd743gsvmZsmFE2i6lKOefXd6SMJNIJ/keyframes/t007.jpg
- /workspace/academy/media/1akd743gsvmZsmFE2i6lKOefXd6SMJNIJ/keyframes/t008.jpg
- /workspace/academy/media/1akd743gsvmZsmFE2i6lKOefXd6SMJNIJ/keyframes/t009.jpg
- /workspace/academy/media/1akd743gsvmZsmFE2i6lKOefXd6SMJNIJ/keyframes/t010.jpg
45. Low Angle
- title: Low Angle
- status: publish
- author: 0
- is_previewable: (empty)
- video_duration: 0h 1m 0s (raw {"hours":0,"minutes":1,"seconds":0})
- video_source_type: embedded
- drive_file_id:
1_eH0OVRmYQ43Ajc2n8GVV6O-ebNiA765(source_ref; not a public link) - transcript pending / keyframes pending / presentation extract pending
- video_source_url: (Drive preview omitted as a public link; file id kept as source_ref)
(no lesson_content HTML in export — video-only or empty body; metadata above kept in full)
Drive extract
- file_id:
1_eH0OVRmYQ43Ajc2n8GVV6O-ebNiA765 - filename: VEST Section 3 Composition & Shot Types 14 Low Ang.mp4
- kind: video
- local_path: /workspace/academy/media/1_eH0OVRmYQ43Ajc2n8GVV6O-ebNiA765/VEST Section 3 Composition & Shot Types 14 Low Ang.mp4
- source_ref: drive
1_eH0OVRmYQ43Ajc2n8GVV6O-ebNiA765· content_length 91206096 · original https://drive.google.com/file/d/1_eH0OVRmYQ43Ajc2n8GVV6O-ebNiA765/view - extract_status: done
- caption_source: drive_timedtext
- duration_s: 60.0
- keyframe_count: 7
Transcript
- Hey guys, welcome back to the camera
- [00:00:02.869] Hey guys, welcome back to the camera
- [00:00:02.879] Hey guys, welcome back to the camera angle section. Today we're going to be
- [00:00:04.950] angle section. Today we're going to be
- [00:00:04.960] angle section. Today we're going to be covering the low angle. The low angle is
- [00:00:07.990] covering the low angle. The low angle is
- [00:00:08.000] covering the low angle. The low angle is when you position the camera at, you
- [00:00:10.070] when you position the camera at, you
- [00:00:10.080] when you position the camera at, you know, as the name suggests, a low angle,
- [00:00:12.310] know, as the name suggests, a low angle,
- [00:00:12.320] know, as the name suggests, a low angle, and you look up at your subject. This
- [00:00:14.549] and you look up at your subject. This
- [00:00:14.559] and you look up at your subject. This makes your subject seem, you know, in a
- [00:00:16.870] makes your subject seem, you know, in a
- [00:00:16.880] makes your subject seem, you know, in a position of power. Whether it's good or
- [00:00:18.950] position of power. Whether it's good or
- [00:00:18.960] position of power. Whether it's good or bad is up to you. It could be a villain
- [00:00:21.109] bad is up to you. It could be a villain
- [00:00:21.119] bad is up to you. It could be a villain dominating someone or a hero saving
- [00:00:23.590] dominating someone or a hero saving
- [00:00:23.600] dominating someone or a hero saving someone. It makes your product or your
- [00:00:26.470] someone. It makes your product or your
- [00:00:26.480] someone. It makes your product or your person or your subject look powerful and
- [00:00:29.830] person or your subject look powerful and
- [00:00:29.840] person or your subject look powerful and important. Um that is the purpose of a
- [00:00:33.430] important. Um that is the purpose of a
- [00:00:33.440] important. Um that is the purpose of a low angle. Here are some examples of low
- [00:00:36.870] low angle. Here are some examples of low
- [00:00:36.880] low angle. Here are some examples of low angles.
- So we just covered the low angle. you
- [00:00:49.029] So we just covered the low angle. you
- [00:00:49.039] So we just covered the low angle. you know, the low angles when you look up at
- [00:00:50.790] know, the low angles when you look up at
- [00:00:50.800] know, the low angles when you look up at your subject and gives them a sense of
- [00:00:53.670] your subject and gives them a sense of
- [00:00:53.680] your subject and gives them a sense of importance or power. Uh, thank you guys
- [00:00:56.470] importance or power. Uh, thank you guys
- [00:00:56.480] importance or power. Uh, thank you guys and I'll see you in the next video.
Keyframes
- /workspace/academy/media/1_eH0OVRmYQ43Ajc2n8GVV6O-ebNiA765/keyframes/last.jpg
- /workspace/academy/media/1_eH0OVRmYQ43Ajc2n8GVV6O-ebNiA765/keyframes/t001.jpg
- /workspace/academy/media/1_eH0OVRmYQ43Ajc2n8GVV6O-ebNiA765/keyframes/t002.jpg
- /workspace/academy/media/1_eH0OVRmYQ43Ajc2n8GVV6O-ebNiA765/keyframes/t003.jpg
- /workspace/academy/media/1_eH0OVRmYQ43Ajc2n8GVV6O-ebNiA765/keyframes/t004.jpg
- /workspace/academy/media/1_eH0OVRmYQ43Ajc2n8GVV6O-ebNiA765/keyframes/t005.jpg
- /workspace/academy/media/1_eH0OVRmYQ43Ajc2n8GVV6O-ebNiA765/keyframes/t006.jpg
46. High Angle
- title: High Angle
- status: publish
- author: 0
- is_previewable: (empty)
- video_duration: 0h 0m 54s (raw {"hours":0,"minutes":0,"seconds":54})
- video_source_type: embedded
- drive_file_id:
1w9bRzmOVjvsB5VzRY2Z0pCo7EloWgZ9Z(source_ref; not a public link) - transcript pending / keyframes pending / presentation extract pending
- video_source_url: (Drive preview omitted as a public link; file id kept as source_ref)
(no lesson_content HTML in export — video-only or empty body; metadata above kept in full)
Drive extract
- file_id:
1w9bRzmOVjvsB5VzRY2Z0pCo7EloWgZ9Z - filename: VEST Section 3 Composition & Shot Types 15 High An.mp4
- kind: video
- local_path: /workspace/academy/media/1w9bRzmOVjvsB5VzRY2Z0pCo7EloWgZ9Z/VEST Section 3 Composition & Shot Types 15 High An.mp4
- source_ref: drive
1w9bRzmOVjvsB5VzRY2Z0pCo7EloWgZ9Z· content_length 81366902 · original https://drive.google.com/file/d/1w9bRzmOVjvsB5VzRY2Z0pCo7EloWgZ9Z/view - extract_status: done
- caption_source: drive_timedtext
- duration_s: 53.8
- keyframe_count: 6
Transcript
- Hey guys, welcome back to the angle
- [00:00:02.230] Hey guys, welcome back to the angle
- [00:00:02.240] Hey guys, welcome back to the angle section. Today we're going to be
- [00:00:03.429] section. Today we're going to be
- [00:00:03.439] section. Today we're going to be covering high angles. High angles is
- [00:00:05.829] covering high angles. High angles is
- [00:00:05.839] covering high angles. High angles is when you position your camera high and
- [00:00:07.990] when you position your camera high and
- [00:00:08.000] when you position your camera high and you look down on your subject. Makes
- [00:00:09.990] you look down on your subject. Makes
- [00:00:10.000] you look down on your subject. Makes them look a little bit more vulnerable
- [00:00:11.509] them look a little bit more vulnerable
- [00:00:11.519] them look a little bit more vulnerable or weak. Or you can use it to make them
- [00:00:13.669] or weak. Or you can use it to make them
- [00:00:13.679] or weak. Or you can use it to make them seem innocent or inexperienced.
- [00:00:16.630] seem innocent or inexperienced.
- [00:00:16.640] seem innocent or inexperienced. Basically, it's a power scale. When
- [00:00:18.630] Basically, it's a power scale. When
- [00:00:18.640] Basically, it's a power scale. When you're looking down on your subject from
- [00:00:20.550] you're looking down on your subject from
- [00:00:20.560] you're looking down on your subject from a high angle, you're giving them less
- [00:00:22.870] a high angle, you're giving them less
- [00:00:22.880] a high angle, you're giving them less power. Whereas obviously like what we've
- [00:00:25.750] power. Whereas obviously like what we've
- [00:00:25.760] power. Whereas obviously like what we've covered with the low angle, when you're
- [00:00:27.509] covered with the low angle, when you're
- [00:00:27.519] covered with the low angle, when you're looking up at your subject, you give
- [00:00:29.269] looking up at your subject, you give
- [00:00:29.279] looking up at your subject, you give them more power. Here's some examples of
- [00:00:31.830] them more power. Here's some examples of
- [00:00:31.840] them more power. Here's some examples of high angles.
- So, we just covered the high angle where
- [00:00:44.310] So, we just covered the high angle where
- [00:00:44.320] So, we just covered the high angle where you position your camera above your
- [00:00:46.310] you position your camera above your
- [00:00:46.320] you position your camera above your subject looking down on them to give
- [00:00:48.310] subject looking down on them to give
- [00:00:48.320] subject looking down on them to give them less power. Thank you, and I'll see
- [00:00:50.549] them less power. Thank you, and I'll see
- [00:00:50.559] them less power. Thank you, and I'll see you in the next video.
Keyframes
- /workspace/academy/media/1w9bRzmOVjvsB5VzRY2Z0pCo7EloWgZ9Z/keyframes/last.jpg
- /workspace/academy/media/1w9bRzmOVjvsB5VzRY2Z0pCo7EloWgZ9Z/keyframes/t001.jpg
- /workspace/academy/media/1w9bRzmOVjvsB5VzRY2Z0pCo7EloWgZ9Z/keyframes/t002.jpg
- /workspace/academy/media/1w9bRzmOVjvsB5VzRY2Z0pCo7EloWgZ9Z/keyframes/t003.jpg
- /workspace/academy/media/1w9bRzmOVjvsB5VzRY2Z0pCo7EloWgZ9Z/keyframes/t004.jpg
- /workspace/academy/media/1w9bRzmOVjvsB5VzRY2Z0pCo7EloWgZ9Z/keyframes/t005.jpg
47. Dutch Angle
- title: Dutch Angle
- status: publish
- author: 0
- is_previewable: (empty)
- video_duration: 0h 1m 13s (raw {"hours":0,"minutes":1,"seconds":13})
- video_source_type: embedded
- drive_file_id:
1BpPsF5aQQqz24Y5x7DjGmDyHXRyaemjm(source_ref; not a public link) - transcript pending / keyframes pending / presentation extract pending
- video_source_url: (Drive preview omitted as a public link; file id kept as source_ref)
(no lesson_content HTML in export — video-only or empty body; metadata above kept in full)
Drive extract
- file_id:
1BpPsF5aQQqz24Y5x7DjGmDyHXRyaemjm - filename: VEST Section 3 Composition & Shot Types 16 Dutch.mp4
- kind: video
- local_path: /workspace/academy/media/1BpPsF5aQQqz24Y5x7DjGmDyHXRyaemjm/VEST Section 3 Composition & Shot Types 16 Dutch.mp4
- source_ref: drive
1BpPsF5aQQqz24Y5x7DjGmDyHXRyaemjm· content_length 110867299 · original https://drive.google.com/file/d/1BpPsF5aQQqz24Y5x7DjGmDyHXRyaemjm/view - extract_status: done
- caption_source: drive_timedtext
- duration_s: 72.678005
- keyframe_count: 8
Transcript
- Hey guys. So today under camera angles,
- [00:00:02.790] Hey guys. So today under camera angles,
- [00:00:02.800] Hey guys. So today under camera angles, we're going to cover the Dutch angle. So
- [00:00:04.870] we're going to cover the Dutch angle. So
- [00:00:04.880] we're going to cover the Dutch angle. So the Dutch angle is when you take your
- [00:00:06.470] the Dutch angle is when you take your
- [00:00:06.480] the Dutch angle is when you take your camera and you tilt it slightly to give
- [00:00:09.190] camera and you tilt it slightly to give
- [00:00:09.200] camera and you tilt it slightly to give a little, you know, tilt to your
- [00:00:11.030] a little, you know, tilt to your
- [00:00:11.040] a little, you know, tilt to your horizontal lines in your frame. And this
- [00:00:13.430] horizontal lines in your frame. And this
- [00:00:13.440] horizontal lines in your frame. And this creates a sense of unease or tension or,
- [00:00:16.790] creates a sense of unease or tension or,
- [00:00:16.800] creates a sense of unease or tension or, you know, drama within your frame. You
- [00:00:19.429] you know, drama within your frame. You
- [00:00:19.439] you know, drama within your frame. You can use it to highlight something
- [00:00:21.429] can use it to highlight something
- [00:00:21.439] can use it to highlight something supernatural or divine, you know, just
- [00:00:24.630] supernatural or divine, you know, just
- [00:00:24.640] supernatural or divine, you know, just something that's not normal. But because
- [00:00:27.029] something that's not normal. But because
- [00:00:27.039] something that's not normal. But because you're highlighting something that's,
- [00:00:29.109] you're highlighting something that's,
- [00:00:29.119] you're highlighting something that's, you know, abnormal or extra tension or
- [00:00:31.910] you know, abnormal or extra tension or
- [00:00:31.920] you know, abnormal or extra tension or drama, you know, you want to use it
- [00:00:33.670] drama, you know, you want to use it
- [00:00:33.680] drama, you know, you want to use it sparingly. You don't want to keep that
- [00:00:35.430] sparingly. You don't want to keep that
- [00:00:35.440] sparingly. You don't want to keep that angle constantly tilted. Otherwise, your
- [00:00:37.990] angle constantly tilted. Otherwise, your
- [00:00:38.000] angle constantly tilted. Otherwise, your audience is going to start watching your
- [00:00:39.670] audience is going to start watching your
- [00:00:39.680] audience is going to start watching your content with their head like this. Here
- [00:00:41.510] content with their head like this. Here
- [00:00:41.520] content with their head like this. Here are some examples of the Dutch angle.
- So, we just covered the Dutch angles
- [00:00:55.910] So, we just covered the Dutch angles
- [00:00:55.920] So, we just covered the Dutch angles where you tilt your camera ever so
- [00:00:57.590] where you tilt your camera ever so
- [00:00:57.600] where you tilt your camera ever so slightly to give a sense of unease or
- [00:01:00.389] slightly to give a sense of unease or
- [00:01:00.399] slightly to give a sense of unease or tension and drama to your frame.
- [00:01:02.310] tension and drama to your frame.
- [00:01:02.320] tension and drama to your frame. Remember not to overdo it. You tilt it
- [00:01:04.390] Remember not to overdo it. You tilt it
- [00:01:04.400] Remember not to overdo it. You tilt it slightly. And also remember to use your
- [00:01:06.630] slightly. And also remember to use your
- [00:01:06.640] slightly. And also remember to use your Dutch angle sparingly. Thank you guys
- [00:01:09.109] Dutch angle sparingly. Thank you guys
- [00:01:09.119] Dutch angle sparingly. Thank you guys and I'll see you in the next video.
Keyframes
- /workspace/academy/media/1BpPsF5aQQqz24Y5x7DjGmDyHXRyaemjm/keyframes/last.jpg
- /workspace/academy/media/1BpPsF5aQQqz24Y5x7DjGmDyHXRyaemjm/keyframes/t001.jpg
- /workspace/academy/media/1BpPsF5aQQqz24Y5x7DjGmDyHXRyaemjm/keyframes/t002.jpg
- /workspace/academy/media/1BpPsF5aQQqz24Y5x7DjGmDyHXRyaemjm/keyframes/t003.jpg
- /workspace/academy/media/1BpPsF5aQQqz24Y5x7DjGmDyHXRyaemjm/keyframes/t004.jpg
- /workspace/academy/media/1BpPsF5aQQqz24Y5x7DjGmDyHXRyaemjm/keyframes/t005.jpg
- /workspace/academy/media/1BpPsF5aQQqz24Y5x7DjGmDyHXRyaemjm/keyframes/t006.jpg
- /workspace/academy/media/1BpPsF5aQQqz24Y5x7DjGmDyHXRyaemjm/keyframes/t007.jpg
48. Homework Shot Types
- title: Homework Shot Types
- status: publish
- author: 0
- is_previewable: (empty)
- video_duration: 0h 0m 0s (raw {"hours":0,"minutes":0,"seconds":0})
- video_source_type: (empty)
Homework: Shot Types
Objective: To practice recognizing and intentionally using foundational shot types, demonstrating control over the image's narrative impact.
Instructions: Using only your phone camera, complete the following tasks. Do not edit the resulting photos or videos (no filters, no cuts).
PRACTICAL: The Shot Type Portfolio (6 Video Clips)
Record five short (5-second) video clips demonstrating the required shot type or camera angle. Use a stationary subject or an object as your focus.
| Clip Requirement | Shot Type or Angle to Demonstrate | Narrative Purpose Reminder |
|---|---|---|
| Clip 1 | Extreme Close Up (CU) | Show intense detail or emotion (e.g., just an eye, just a hand holding a key). |
| Clip 2 | Medium Shot (MS) | Show a subject from the waist up. The most common shot for Vlogs/Interviews. |
| Clip 3 | Wide Shot (WS) | Show the subject's entire body AND their relation to the environment (the context). |
| Clip 4 | Low Angle | Film the subject looking up at them (makes them look powerful/imposing). |
| Clip 5 | Dutch Angle (Canted) | Tilt your phone so the horizon is noticeably slanted. (Should evoke a feeling of tension or unease.) |
| Clip 6 | Over the Shoulder (OTS) | Position the camera behind the shoulder of a subject, looking toward a second subject or object. (Used for conversations/reactions.) |
Submission: Submit the six required short video clips. Label your files clearly (e.g., "Your Name_Clip4_LowAngle").
Why this matters: The difference between an amateur and a pro is intention. By completing this, you move from passively recording to actively directing the viewer's attention.
Submission Instructions:
Complete this practical then submit via email to the instructor at info@ambitious.co.za or use the Academy portal.
Keep up the practical skills!
- quizzes_following_this_lesson: 1 (full text in Quizzes)
- Shot Types Quiz (6 questions)
49. Composition & Shots Conclusion
- title: Composition & Shots Conclusion
- status: publish
- author: 0
- is_previewable: (empty)
- video_duration: 0h 0m 22s (raw {"hours":0,"minutes":0,"seconds":22})
- video_source_type: embedded
- drive_file_id:
1un3f9GJqVHfY4aI6YtpB5xia50m4RITY(source_ref; not a public link) - transcript pending / keyframes pending / presentation extract pending
- video_source_url: (Drive preview omitted as a public link; file id kept as source_ref)
(no lesson_content HTML in export — video-only or empty body; metadata above kept in full)
Drive extract
- file_id:
1un3f9GJqVHfY4aI6YtpB5xia50m4RITY - filename: VEST Section 3 Composition & Shot Types 17 Outro.mp4
- kind: video
- local_path: /workspace/academy/media/1un3f9GJqVHfY4aI6YtpB5xia50m4RITY/VEST Section 3 Composition & Shot Types 17 Outro.mp4
- source_ref: drive
1un3f9GJqVHfY4aI6YtpB5xia50m4RITY· content_length 33210252 · original https://drive.google.com/file/d/1un3f9GJqVHfY4aI6YtpB5xia50m4RITY/view - extract_status: done
- caption_source: drive_timedtext
- duration_s: 22.407007
- keyframe_count: 3
Transcript
- Hey guys, uh congratulations on
- [00:00:02.629] Hey guys, uh congratulations on
- [00:00:02.639] Hey guys, uh congratulations on completing composition and shot types.
- [00:00:04.950] completing composition and shot types.
- [00:00:04.960] completing composition and shot types. This section is important for, you know,
- [00:00:07.030] This section is important for, you know,
- [00:00:07.040] This section is important for, you know, like when you're actually filming. We've
- [00:00:09.190] like when you're actually filming. We've
- [00:00:09.200] like when you're actually filming. We've covered composition, different shot
- [00:00:11.110] covered composition, different shot
- [00:00:11.120] covered composition, different shot types and camera angles, but you need to
- [00:00:13.430] types and camera angles, but you need to
- [00:00:13.440] types and camera angles, but you need to use them in tandem with your narrative,
- [00:00:15.509] use them in tandem with your narrative,
- [00:00:15.519] use them in tandem with your narrative, with your story, with everything you're
- [00:00:17.029] with your story, with everything you're
- [00:00:17.039] with your story, with everything you're trying to tell. So, thank you guys, and
- [00:00:18.790] trying to tell. So, thank you guys, and
- [00:00:18.800] trying to tell. So, thank you guys, and I'll see you in the next video.
Keyframes
- /workspace/academy/media/1un3f9GJqVHfY4aI6YtpB5xia50m4RITY/keyframes/last.jpg
- /workspace/academy/media/1un3f9GJqVHfY4aI6YtpB5xia50m4RITY/keyframes/t001.jpg
- /workspace/academy/media/1un3f9GJqVHfY4aI6YtpB5xia50m4RITY/keyframes/t002.jpg
50. Movement & Transitions Intro
- title: Movement & Transitions Intro
- status: publish
- author: 0
- is_previewable: (empty)
- video_duration: 0h 0m 23s (raw {"hours":0,"minutes":0,"seconds":23})
- video_source_type: embedded
- drive_file_id:
1PQM_c4fKzW3L6fcFBEzMXNxHm-bAnqd4(source_ref; not a public link) - transcript pending / keyframes pending / presentation extract pending
- video_source_url: (Drive preview omitted as a public link; file id kept as source_ref)
(no lesson_content HTML in export — video-only or empty body; metadata above kept in full)
Drive extract
- file_id:
1PQM_c4fKzW3L6fcFBEzMXNxHm-bAnqd4 - filename: VEST Section 4 Movement & Transitions 1 Intro.mp4
- kind: video
- local_path: /workspace/academy/media/1PQM_c4fKzW3L6fcFBEzMXNxHm-bAnqd4/VEST Section 4 Movement & Transitions 1 Intro.mp4
- source_ref: drive
1PQM_c4fKzW3L6fcFBEzMXNxHm-bAnqd4· content_length 35068701 · original https://drive.google.com/file/d/1PQM_c4fKzW3L6fcFBEzMXNxHm-bAnqd4/view - extract_status: done
- caption_source: drive_timedtext
- duration_s: 23.451995
- keyframe_count: 3
Transcript
- Hey guys, welcome to the next section.
- [00:00:02.389] Hey guys, welcome to the next section.
- [00:00:02.399] Hey guys, welcome to the next section. Uh, in this section, we're going to
- [00:00:03.750] Uh, in this section, we're going to
- [00:00:03.760] Uh, in this section, we're going to cover camera movement and transitions.
- [00:00:06.230] cover camera movement and transitions.
- [00:00:06.240] cover camera movement and transitions. We're going to learn about how to
- [00:00:07.749] We're going to learn about how to
- [00:00:07.759] We're going to learn about how to achieve them and why we'd use them.
- [00:00:10.629] achieve them and why we'd use them.
- [00:00:10.639] achieve them and why we'd use them. We're going to go over panning, tilting,
- [00:00:12.709] We're going to go over panning, tilting,
- [00:00:12.719] We're going to go over panning, tilting, tracking, pushins, pull outs, whip pans,
- [00:00:15.829] tracking, pushins, pull outs, whip pans,
- [00:00:15.839] tracking, pushins, pull outs, whip pans, whip pans as transitions, and other
- [00:00:18.070] whip pans as transitions, and other
- [00:00:18.080] whip pans as transitions, and other creative transitions. Thank you, and
- [00:00:20.150] creative transitions. Thank you, and
- [00:00:20.160] creative transitions. Thank you, and I'll see you in the next video.
Keyframes
- /workspace/academy/media/1PQM_c4fKzW3L6fcFBEzMXNxHm-bAnqd4/keyframes/last.jpg
- /workspace/academy/media/1PQM_c4fKzW3L6fcFBEzMXNxHm-bAnqd4/keyframes/t001.jpg
- /workspace/academy/media/1PQM_c4fKzW3L6fcFBEzMXNxHm-bAnqd4/keyframes/t002.jpg
51. Panning
- title: Panning
- status: publish
- author: 0
- is_previewable: (empty)
- video_duration: 0h 1m 46s (raw {"hours":0,"minutes":1,"seconds":46})
- video_source_type: embedded
- drive_file_id:
1_H-pQSETspmHSqJd2s2EADQjAZXGRCEL(source_ref; not a public link) - transcript pending / keyframes pending / presentation extract pending
- video_source_url: (Drive preview omitted as a public link; file id kept as source_ref)
(no lesson_content HTML in export — video-only or empty body; metadata above kept in full)
Drive extract
- file_id:
1_H-pQSETspmHSqJd2s2EADQjAZXGRCEL - filename: VEST Section 4 Movement & Transitions 3 Panning.mp4
- kind: video
- local_path: /workspace/academy/media/1_H-pQSETspmHSqJd2s2EADQjAZXGRCEL/VEST Section 4 Movement & Transitions 3 Panning.mp4
- source_ref: drive
1_H-pQSETspmHSqJd2s2EADQjAZXGRCEL· content_length 161537329 · original https://drive.google.com/file/d/1_H-pQSETspmHSqJd2s2EADQjAZXGRCEL/view - extract_status: done
- caption_source: drive_timedtext
- duration_s: 105.673991
- keyframe_count: 12
Transcript
- Hey guys. So, in camera movement, we're
- [00:00:02.310] Hey guys. So, in camera movement, we're
- [00:00:02.320] Hey guys. So, in camera movement, we're going to cover panning. Panning is a
- [00:00:05.110] going to cover panning. Panning is a
- [00:00:05.120] going to cover panning. Panning is a technique where you move the camera
- [00:00:07.590] technique where you move the camera
- [00:00:07.600] technique where you move the camera horizontally on a fixed axis to reveal
- [00:00:10.790] horizontally on a fixed axis to reveal
- [00:00:10.800] horizontally on a fixed axis to reveal the greater setting to make what would
- [00:00:13.509] the greater setting to make what would
- [00:00:13.519] the greater setting to make what would normally be a static shot more
- [00:00:16.630] normally be a static shot more
- [00:00:16.640] normally be a static shot more interesting and give it some movement,
- [00:00:18.390] interesting and give it some movement,
- [00:00:18.400] interesting and give it some movement, some dynamics. And you can use it to
- [00:00:20.790] some dynamics. And you can use it to
- [00:00:20.800] some dynamics. And you can use it to like, you know, follow someone walking
- [00:00:22.470] like, you know, follow someone walking
- [00:00:22.480] like, you know, follow someone walking across the screen or, you know, just
- [00:00:25.029] across the screen or, you know, just
- [00:00:25.039] across the screen or, you know, just reveal uh more information to your
- [00:00:27.830] reveal uh more information to your
- [00:00:27.840] reveal uh more information to your audience. So, when you are panning, you
- [00:00:31.029] audience. So, when you are panning, you
- [00:00:31.039] audience. So, when you are panning, you want to take your camera and either you
- [00:00:33.350] want to take your camera and either you
- [00:00:33.360] want to take your camera and either you want to place it on a tripod um or if
- [00:00:36.069] want to place it on a tripod um or if
- [00:00:36.079] want to place it on a tripod um or if you're going handheld, you want to make
- [00:00:37.510] you're going handheld, you want to make
- [00:00:37.520] you're going handheld, you want to make sure you hold it steady. You face it in
- [00:00:39.990] sure you hold it steady. You face it in
- [00:00:40.000] sure you hold it steady. You face it in one direction and then a pan is simply
- [00:00:42.790] one direction and then a pan is simply
- [00:00:42.800] one direction and then a pan is simply you move your camera on your fixed axis
- [00:00:46.869] you move your camera on your fixed axis
- [00:00:46.879] you move your camera on your fixed axis um as you're filming to reveal a you
- [00:00:50.630] um as you're filming to reveal a you
- [00:00:50.640] um as you're filming to reveal a you know greater scene. Remember, if you are
- [00:00:53.110] know greater scene. Remember, if you are
- [00:00:53.120] know greater scene. Remember, if you are going handheld to keep it in line with
- [00:00:54.950] going handheld to keep it in line with
- [00:00:54.960] going handheld to keep it in line with your body, with your face and your
- [00:00:56.389] your body, with your face and your
- [00:00:56.399] your body, with your face and your chest. Don't don't move your wrist to
- [00:00:58.549] chest. Don't don't move your wrist to
- [00:00:58.559] chest. Don't don't move your wrist to pan. Move your body to pan. It keeps it
- [00:01:00.470] pan. Move your body to pan. It keeps it
- [00:01:00.480] pan. Move your body to pan. It keeps it a lot more stable. But then obviously if
- [00:01:02.790] a lot more stable. But then obviously if
- [00:01:02.800] a lot more stable. But then obviously if you're on a tripod, the tripod's going
- [00:01:04.390] you're on a tripod, the tripod's going
- [00:01:04.400] you're on a tripod, the tripod's going to keep it stable for you. Here are some
- [00:01:06.789] to keep it stable for you. Here are some
- [00:01:06.799] to keep it stable for you. Here are some examples of panning.
- So, we just covered panning, uh, how to
- [00:01:39.109] So, we just covered panning, uh, how to
- [00:01:39.119] So, we just covered panning, uh, how to achieve it and why we use it. Thank you
- [00:01:41.670] achieve it and why we use it. Thank you
- [00:01:41.680] achieve it and why we use it. Thank you guys and I'll see you in the next video.
Keyframes
- /workspace/academy/media/1_H-pQSETspmHSqJd2s2EADQjAZXGRCEL/keyframes/last.jpg
- /workspace/academy/media/1_H-pQSETspmHSqJd2s2EADQjAZXGRCEL/keyframes/t001.jpg
- /workspace/academy/media/1_H-pQSETspmHSqJd2s2EADQjAZXGRCEL/keyframes/t002.jpg
- /workspace/academy/media/1_H-pQSETspmHSqJd2s2EADQjAZXGRCEL/keyframes/t003.jpg
- /workspace/academy/media/1_H-pQSETspmHSqJd2s2EADQjAZXGRCEL/keyframes/t004.jpg
- /workspace/academy/media/1_H-pQSETspmHSqJd2s2EADQjAZXGRCEL/keyframes/t005.jpg
- /workspace/academy/media/1_H-pQSETspmHSqJd2s2EADQjAZXGRCEL/keyframes/t006.jpg
- /workspace/academy/media/1_H-pQSETspmHSqJd2s2EADQjAZXGRCEL/keyframes/t007.jpg
- /workspace/academy/media/1_H-pQSETspmHSqJd2s2EADQjAZXGRCEL/keyframes/t008.jpg
- /workspace/academy/media/1_H-pQSETspmHSqJd2s2EADQjAZXGRCEL/keyframes/t009.jpg
- /workspace/academy/media/1_H-pQSETspmHSqJd2s2EADQjAZXGRCEL/keyframes/t010.jpg
- /workspace/academy/media/1_H-pQSETspmHSqJd2s2EADQjAZXGRCEL/keyframes/t011.jpg
52. Tilting
- title: Tilting
- status: publish
- author: 0
- is_previewable: (empty)
- video_duration: 0h 1m 41s (raw {"hours":0,"minutes":1,"seconds":41})
- video_source_type: embedded
- drive_file_id:
1-sJdO8NShfttY1SYd9mshWqRcSzzIU3P(source_ref; not a public link) - transcript pending / keyframes pending / presentation extract pending
- video_source_url: (Drive preview omitted as a public link; file id kept as source_ref)
(no lesson_content HTML in export — video-only or empty body; metadata above kept in full)
Drive extract
- file_id:
1-sJdO8NShfttY1SYd9mshWqRcSzzIU3P - filename: VEST Section 4 Movement & Transitions 4 Tilting.mp4
- kind: video
- local_path: /workspace/academy/media/1-sJdO8NShfttY1SYd9mshWqRcSzzIU3P/VEST Section 4 Movement & Transitions 4 Tilting.mp4
- source_ref: drive
1-sJdO8NShfttY1SYd9mshWqRcSzzIU3P· content_length 155730822 · original https://drive.google.com/file/d/1-sJdO8NShfttY1SYd9mshWqRcSzzIU3P/view - extract_status: done
- caption_source: drive_timedtext
- duration_s: 100.913991
- keyframe_count: 11
Transcript
- Hey guys, welcome to the next video in
- [00:00:03.190] Hey guys, welcome to the next video in
- [00:00:03.200] Hey guys, welcome to the next video in camera movement. Today we're going to
- [00:00:04.789] camera movement. Today we're going to
- [00:00:04.799] camera movement. Today we're going to cover tilting. Tilting is a lot like
- [00:00:07.030] cover tilting. Tilting is a lot like
- [00:00:07.040] cover tilting. Tilting is a lot like panning except it is not the horizontal
- [00:00:09.990] panning except it is not the horizontal
- [00:00:10.000] panning except it is not the horizontal movement, it's the vertical movement. It
- [00:00:12.629] movement, it's the vertical movement. It
- [00:00:12.639] movement, it's the vertical movement. It is when you hold your camera on a fixed
- [00:00:14.870] is when you hold your camera on a fixed
- [00:00:14.880] is when you hold your camera on a fixed app axis and you move it up or downward
- [00:00:17.910] app axis and you move it up or downward
- [00:00:17.920] app axis and you move it up or downward to reveal more information to also it
- [00:00:21.269] to reveal more information to also it
- [00:00:21.279] to reveal more information to also it can help you show a sense of scale um or
- [00:00:24.390] can help you show a sense of scale um or
- [00:00:24.400] can help you show a sense of scale um or presence um and can also help with a
- [00:00:27.349] presence um and can also help with a
- [00:00:27.359] presence um and can also help with a change in emotion. you know, if you're
- [00:00:29.109] change in emotion. you know, if you're
- [00:00:29.119] change in emotion. you know, if you're going from, we covered high angles and
- [00:00:30.950] going from, we covered high angles and
- [00:00:30.960] going from, we covered high angles and low angles, um, and eye level, a tilt
- [00:00:34.310] low angles, um, and eye level, a tilt
- [00:00:34.320] low angles, um, and eye level, a tilt allows you to change between those
- [00:00:36.150] allows you to change between those
- [00:00:36.160] allows you to change between those angles to, you know, show a an emotional
- [00:00:39.110] angles to, you know, show a an emotional
- [00:00:39.120] angles to, you know, show a an emotional change or a change in power. Um, so if
- [00:00:42.069] change or a change in power. Um, so if
- [00:00:42.079] change or a change in power. Um, so if you want to achieve a tilt, what you're
- [00:00:44.229] you want to achieve a tilt, what you're
- [00:00:44.239] you want to achieve a tilt, what you're going to do is you're going to usually
- [00:00:45.670] going to do is you're going to usually
- [00:00:45.680] going to do is you're going to usually put your camera on a tripod or you can
- [00:00:47.990] put your camera on a tripod or you can
- [00:00:48.000] put your camera on a tripod or you can go handheld. And what you do is you tilt
- [00:00:51.750] go handheld. And what you do is you tilt
- [00:00:51.760] go handheld. And what you do is you tilt upward and then you tilt downward.
- [00:00:54.630] upward and then you tilt downward.
- [00:00:54.640] upward and then you tilt downward. Obviously, you have a lot more uh
- [00:00:57.430] Obviously, you have a lot more uh
- [00:00:57.440] Obviously, you have a lot more uh stability when using a tripod and then
- [00:00:59.510] stability when using a tripod and then
- [00:00:59.520] stability when using a tripod and then you're just using the handle to tilt.
- [00:01:01.590] you're just using the handle to tilt.
- [00:01:01.600] you're just using the handle to tilt. But if you're going to tilt with your
- [00:01:02.869] But if you're going to tilt with your
- [00:01:02.879] But if you're going to tilt with your wrists, same with panning, um you should
- [00:01:06.149] wrists, same with panning, um you should
- [00:01:06.159] wrists, same with panning, um you should avoid that. You must use your body if
- [00:01:08.230] avoid that. You must use your body if
- [00:01:08.240] avoid that. You must use your body if you're going handheld to tilt. Keep your
- [00:01:10.230] you're going handheld to tilt. Keep your
- [00:01:10.240] you're going handheld to tilt. Keep your eyes on your on what you're seeing on
- [00:01:12.390] eyes on your on what you're seeing on
- [00:01:12.400] eyes on your on what you're seeing on your screen and use your body to tilt.
- [00:01:15.350] your screen and use your body to tilt.
- [00:01:15.360] your screen and use your body to tilt. Here's some examples of tilting.
- So, we just covered tilting, uh, how to
- [00:01:34.550] So, we just covered tilting, uh, how to
- [00:01:34.560] So, we just covered tilting, uh, how to do it and why we use it. Thank you guys,
- [00:01:37.030] do it and why we use it. Thank you guys,
- [00:01:37.040] do it and why we use it. Thank you guys, and I'll see you in the next video.
Keyframes
- /workspace/academy/media/1-sJdO8NShfttY1SYd9mshWqRcSzzIU3P/keyframes/last.jpg
- /workspace/academy/media/1-sJdO8NShfttY1SYd9mshWqRcSzzIU3P/keyframes/t001.jpg
- /workspace/academy/media/1-sJdO8NShfttY1SYd9mshWqRcSzzIU3P/keyframes/t002.jpg
- /workspace/academy/media/1-sJdO8NShfttY1SYd9mshWqRcSzzIU3P/keyframes/t003.jpg
- /workspace/academy/media/1-sJdO8NShfttY1SYd9mshWqRcSzzIU3P/keyframes/t004.jpg
- /workspace/academy/media/1-sJdO8NShfttY1SYd9mshWqRcSzzIU3P/keyframes/t005.jpg
- /workspace/academy/media/1-sJdO8NShfttY1SYd9mshWqRcSzzIU3P/keyframes/t006.jpg
- /workspace/academy/media/1-sJdO8NShfttY1SYd9mshWqRcSzzIU3P/keyframes/t007.jpg
- /workspace/academy/media/1-sJdO8NShfttY1SYd9mshWqRcSzzIU3P/keyframes/t008.jpg
- /workspace/academy/media/1-sJdO8NShfttY1SYd9mshWqRcSzzIU3P/keyframes/t009.jpg
- /workspace/academy/media/1-sJdO8NShfttY1SYd9mshWqRcSzzIU3P/keyframes/t010.jpg
53. Tracking
- title: Tracking
- status: publish
- author: 0
- is_previewable: (empty)
- video_duration: 0h 2m 59s (raw {"hours":0,"minutes":2,"seconds":59})
- video_source_type: embedded
- drive_file_id:
1RuOUVvad7Nb8lgtvaUwwJd_B9qlLM_ao(source_ref; not a public link) - transcript pending / keyframes pending / presentation extract pending
- video_source_url: (Drive preview omitted as a public link; file id kept as source_ref)
(no lesson_content HTML in export — video-only or empty body; metadata above kept in full)
Drive extract
- file_id:
1RuOUVvad7Nb8lgtvaUwwJd_B9qlLM_ao - filename: VEST Section 4 Movement & Transitions 5 Tracking.mp4
- kind: video
- local_path: /workspace/academy/media/1RuOUVvad7Nb8lgtvaUwwJd_B9qlLM_ao/VEST Section 4 Movement & Transitions 5 Tracking.mp4
- source_ref: drive
1RuOUVvad7Nb8lgtvaUwwJd_B9qlLM_ao· content_length 271922579 · original https://drive.google.com/file/d/1RuOUVvad7Nb8lgtvaUwwJd_B9qlLM_ao/view - extract_status: done
- caption_source: drive_timedtext
- duration_s: 178.538005
- keyframe_count: 12
Transcript
- Hey guys. So today in camera movement,
- [00:00:02.950] Hey guys. So today in camera movement,
- [00:00:02.960] Hey guys. So today in camera movement, we're going to cover tracking. Tracking,
- [00:00:05.110] we're going to cover tracking. Tracking,
- [00:00:05.120] we're going to cover tracking. Tracking, as the name suggests, is when you follow
- [00:00:07.590] as the name suggests, is when you follow
- [00:00:07.600] as the name suggests, is when you follow your subject. You either use a dolly,
- [00:00:10.230] your subject. You either use a dolly,
- [00:00:10.240] your subject. You either use a dolly, you can use a gimbal, or you can go
- [00:00:11.990] you can use a gimbal, or you can go
- [00:00:12.000] you can use a gimbal, or you can go handheld. But unlike panning and
- [00:00:15.030] handheld. But unlike panning and
- [00:00:15.040] handheld. But unlike panning and tilting, your camera should not be on a
- [00:00:17.430] tilting, your camera should not be on a
- [00:00:17.440] tilting, your camera should not be on a tripod. You are moving your camera. you
- [00:00:20.150] tripod. You are moving your camera. you
- [00:00:20.160] tripod. You are moving your camera. you are following um a subject, you know,
- [00:00:23.590] are following um a subject, you know,
- [00:00:23.600] are following um a subject, you know, whether it's behind them, in front of
- [00:00:25.750] whether it's behind them, in front of
- [00:00:25.760] whether it's behind them, in front of them, beside them, or a mixture of, you
- [00:00:28.870] them, beside them, or a mixture of, you
- [00:00:28.880] them, beside them, or a mixture of, you know, those different angles. Your
- [00:00:31.029] know, those different angles. Your
- [00:00:31.039] know, those different angles. Your camera is on the move when you are
- [00:00:33.350] camera is on the move when you are
- [00:00:33.360] camera is on the move when you are tracking. A tracking shot is used to,
- [00:00:36.069] tracking. A tracking shot is used to,
- [00:00:36.079] tracking. A tracking shot is used to, you know, immerse viewers in the action
- [00:00:38.229] you know, immerse viewers in the action
- [00:00:38.239] you know, immerse viewers in the action of a scene. It makes you get a sense
- [00:00:40.310] of a scene. It makes you get a sense
- [00:00:40.320] of a scene. It makes you get a sense like you're there with the character.
- [00:00:42.069] like you're there with the character.
- [00:00:42.079] like you're there with the character. So, if you'd want to achieve a tracking
- [00:00:43.590] So, if you'd want to achieve a tracking
- [00:00:43.600] So, if you'd want to achieve a tracking movement, what you want to do is make
- [00:00:45.350] movement, what you want to do is make
- [00:00:45.360] movement, what you want to do is make sure you have some stability on your
- [00:00:47.510] sure you have some stability on your
- [00:00:47.520] sure you have some stability on your camera. If you're going handheld, enable
- [00:00:50.069] camera. If you're going handheld, enable
- [00:00:50.079] camera. If you're going handheld, enable any um stabilizers that are inbuilt into
- [00:00:53.029] any um stabilizers that are inbuilt into
- [00:00:53.039] any um stabilizers that are inbuilt into your phone or camera or use a gimbal or,
- [00:00:55.990] your phone or camera or use a gimbal or,
- [00:00:56.000] your phone or camera or use a gimbal or, you know, just use good technique when
- [00:00:57.830] you know, just use good technique when
- [00:00:57.840] you know, just use good technique when holding your uh camera. So, for example,
- [00:01:01.270] holding your uh camera. So, for example,
- [00:01:01.280] holding your uh camera. So, for example, if I'm going and I'm going to walk
- [00:01:02.630] if I'm going and I'm going to walk
- [00:01:02.640] if I'm going and I'm going to walk around now, we want to keep our camera
- [00:01:04.950] around now, we want to keep our camera
- [00:01:04.960] around now, we want to keep our camera steady and in line with our chest and
- [00:01:06.710] steady and in line with our chest and
- [00:01:06.720] steady and in line with our chest and our face. We don't want things to turn
- [00:01:09.190] our face. We don't want things to turn
- [00:01:09.200] our face. We don't want things to turn away. So, if I'm going to follow
- [00:01:10.870] away. So, if I'm going to follow
- [00:01:10.880] away. So, if I'm going to follow someone, I'm not going to follow them
- [00:01:13.030] someone, I'm not going to follow them
- [00:01:13.040] someone, I'm not going to follow them like this and then walk and that. I'm
- [00:01:15.350] like this and then walk and that. I'm
- [00:01:15.360] like this and then walk and that. I'm going to move and I'm going to follow
- [00:01:17.109] going to move and I'm going to follow
- [00:01:17.119] going to move and I'm going to follow them and I'm going to walk towards them.
- [00:01:18.630] them and I'm going to walk towards them.
- [00:01:18.640] them and I'm going to walk towards them. I'm going to walk away from them. I'm
- [00:01:20.550] I'm going to walk away from them. I'm
- [00:01:20.560] I'm going to walk away from them. I'm not going to do this. I'm going to walk.
- [00:01:22.870] not going to do this. I'm going to walk.
- [00:01:22.880] not going to do this. I'm going to walk. That's how um you'll zoom in and out
- [00:01:25.429] That's how um you'll zoom in and out
- [00:01:25.439] That's how um you'll zoom in and out when you want to do that. But when it
- [00:01:26.950] when you want to do that. But when it
- [00:01:26.960] when you want to do that. But when it comes to tracking, you tend to combine a
- [00:01:28.950] comes to tracking, you tend to combine a
- [00:01:28.960] comes to tracking, you tend to combine a lot of different camera angles in to
- [00:01:31.109] lot of different camera angles in to
- [00:01:31.119] lot of different camera angles in to what seems like one continuous shot. You
- [00:01:33.670] what seems like one continuous shot. You
- [00:01:33.680] what seems like one continuous shot. You can also use other things like creative
- [00:01:35.510] can also use other things like creative
- [00:01:35.520] can also use other things like creative transitions, which we will cover, to
- [00:01:37.590] transitions, which we will cover, to
- [00:01:37.600] transitions, which we will cover, to hide any cuts that you make. Tracking
- [00:01:39.749] hide any cuts that you make. Tracking
- [00:01:39.759] hide any cuts that you make. Tracking shots are very popular in what seems
- [00:01:42.469] shots are very popular in what seems
- [00:01:42.479] shots are very popular in what seems like one shot takes. um where the entire
- [00:01:46.069] like one shot takes. um where the entire
- [00:01:46.079] like one shot takes. um where the entire scene is a continuous shot. Um but also
- [00:01:49.830] scene is a continuous shot. Um but also
- [00:01:49.840] scene is a continuous shot. Um but also you use tracking shots in a you know if
- [00:01:52.950] you use tracking shots in a you know if
- [00:01:52.960] you use tracking shots in a you know if you're actually a vlogger, you're
- [00:01:54.870] you're actually a vlogger, you're
- [00:01:54.880] you're actually a vlogger, you're holding the gimbal with a camera on it
- [00:01:57.270] holding the gimbal with a camera on it
- [00:01:57.280] holding the gimbal with a camera on it filming yourself. If you're walking
- [00:01:58.870] filming yourself. If you're walking
- [00:01:58.880] filming yourself. If you're walking around, that still counts as a tracking
- [00:02:00.789] around, that still counts as a tracking
- [00:02:00.799] around, that still counts as a tracking shot. It's just you are both the subject
- [00:02:04.069] shot. It's just you are both the subject
- [00:02:04.079] shot. It's just you are both the subject and tracking yourself with the camera.
- [00:02:06.389] and tracking yourself with the camera.
- [00:02:06.399] and tracking yourself with the camera. Here are some examples of tracking
- [00:02:08.949] Here are some examples of tracking
- [00:02:08.959] Here are some examples of tracking shots.
- [00:02:11.589] shots.
- [00:02:11.599] shots. Heat. Heat.
- So, we just covered tracking shots, uh,
- [00:02:53.509] So, we just covered tracking shots, uh,
- [00:02:53.519] So, we just covered tracking shots, uh, how and when we use them. Thank you
- [00:02:55.430] how and when we use them. Thank you
- [00:02:55.440] how and when we use them. Thank you guys, and I'll see you in the next
- [00:02:56.550] guys, and I'll see you in the next
- [00:02:56.560] guys, and I'll see you in the next video.
Keyframes
- /workspace/academy/media/1RuOUVvad7Nb8lgtvaUwwJd_B9qlLM_ao/keyframes/last.jpg
- /workspace/academy/media/1RuOUVvad7Nb8lgtvaUwwJd_B9qlLM_ao/keyframes/t002.jpg
- /workspace/academy/media/1RuOUVvad7Nb8lgtvaUwwJd_B9qlLM_ao/keyframes/t003.jpg
- /workspace/academy/media/1RuOUVvad7Nb8lgtvaUwwJd_B9qlLM_ao/keyframes/t005.jpg
- /workspace/academy/media/1RuOUVvad7Nb8lgtvaUwwJd_B9qlLM_ao/keyframes/t007.jpg
- /workspace/academy/media/1RuOUVvad7Nb8lgtvaUwwJd_B9qlLM_ao/keyframes/t008.jpg
- /workspace/academy/media/1RuOUVvad7Nb8lgtvaUwwJd_B9qlLM_ao/keyframes/t010.jpg
- /workspace/academy/media/1RuOUVvad7Nb8lgtvaUwwJd_B9qlLM_ao/keyframes/t011.jpg
- /workspace/academy/media/1RuOUVvad7Nb8lgtvaUwwJd_B9qlLM_ao/keyframes/t013.jpg
- /workspace/academy/media/1RuOUVvad7Nb8lgtvaUwwJd_B9qlLM_ao/keyframes/t015.jpg
- /workspace/academy/media/1RuOUVvad7Nb8lgtvaUwwJd_B9qlLM_ao/keyframes/t016.jpg
- /workspace/academy/media/1RuOUVvad7Nb8lgtvaUwwJd_B9qlLM_ao/keyframes/t018.jpg
54. Push & Pull
- title: Push & Pull
- status: publish
- author: 0
- is_previewable: (empty)
- video_duration: 0h 3m 2s (raw {"hours":0,"minutes":3,"seconds":2})
- video_source_type: embedded
- drive_file_id:
1EsWYJIj5iaMTw_QSfof1mgi7avfkefLZ(source_ref; not a public link) - transcript pending / keyframes pending / presentation extract pending
- video_source_url: (Drive preview omitted as a public link; file id kept as source_ref)
(no lesson_content HTML in export — video-only or empty body; metadata above kept in full)
Drive extract
- file_id:
1EsWYJIj5iaMTw_QSfof1mgi7avfkefLZ - filename: VEST Section 4 Movement & Transitions 6 Push & Pull.mp4
- kind: video
- local_path: /workspace/academy/media/1EsWYJIj5iaMTw_QSfof1mgi7avfkefLZ/VEST Section 4 Movement & Transitions 6 Push & Pull.mp4
- source_ref: drive
1EsWYJIj5iaMTw_QSfof1mgi7avfkefLZ· content_length 278347946 · original https://drive.google.com/file/d/1EsWYJIj5iaMTw_QSfof1mgi7avfkefLZ/view - extract_status: done
- caption_source: drive_timedtext
- duration_s: 181.719002
- keyframe_count: 19
Transcript
- Hey guys. So today in camera movement,
- [00:00:02.550] Hey guys. So today in camera movement,
- [00:00:02.560] Hey guys. So today in camera movement, we're going to be covering some more uh
- [00:00:04.870] we're going to be covering some more uh
- [00:00:04.880] we're going to be covering some more uh tracking shot dynamics. This is going to
- [00:00:07.269] tracking shot dynamics. This is going to
- [00:00:07.279] tracking shot dynamics. This is going to include the push in and the pull out. So
- [00:00:10.310] include the push in and the pull out. So
- [00:00:10.320] include the push in and the pull out. So these shots, as the name suggests, is to
- [00:00:12.950] these shots, as the name suggests, is to
- [00:00:12.960] these shots, as the name suggests, is to push in and to pull out. When we're
- [00:00:14.950] push in and to pull out. When we're
- [00:00:14.960] push in and to pull out. When we're filming, we never use the zoom feature
- [00:00:17.269] filming, we never use the zoom feature
- [00:00:17.279] filming, we never use the zoom feature on our camera. What we actually do is
- [00:00:20.230] on our camera. What we actually do is
- [00:00:20.240] on our camera. What we actually do is take our camera and physically move it
- [00:00:22.710] take our camera and physically move it
- [00:00:22.720] take our camera and physically move it closer or further away from a subject to
- [00:00:26.230] closer or further away from a subject to
- [00:00:26.240] closer or further away from a subject to gain that zoom effect. These are called
- [00:00:28.710] gain that zoom effect. These are called
- [00:00:28.720] gain that zoom effect. These are called the pushins or pull outs or even dolly
- [00:00:31.669] the pushins or pull outs or even dolly
- [00:00:31.679] the pushins or pull outs or even dolly ins or dolly outs if you're using that
- [00:00:34.150] ins or dolly outs if you're using that
- [00:00:34.160] ins or dolly outs if you're using that piece of equipment. You can also use a
- [00:00:36.310] piece of equipment. You can also use a
- [00:00:36.320] piece of equipment. You can also use a gimbal. You can you can make your own
- [00:00:38.869] gimbal. You can you can make your own
- [00:00:38.879] gimbal. You can you can make your own dolly with um wheels and things like
- [00:00:41.590] dolly with um wheels and things like
- [00:00:41.600] dolly with um wheels and things like that, but they tend to not be as stable
- [00:00:43.830] that, but they tend to not be as stable
- [00:00:43.840] that, but they tend to not be as stable as what you'd find uh professionally,
- [00:00:46.549] as what you'd find uh professionally,
- [00:00:46.559] as what you'd find uh professionally, which is a dolly on tracks. But with a
- [00:00:49.190] which is a dolly on tracks. But with a
- [00:00:49.200] which is a dolly on tracks. But with a push in and a pull out, they reveal
- [00:00:51.750] push in and a pull out, they reveal
- [00:00:51.760] push in and a pull out, they reveal they're the same movement but reversed,
- [00:00:53.990] they're the same movement but reversed,
- [00:00:54.000] they're the same movement but reversed, which is cool because they actually have
- [00:00:55.990] which is cool because they actually have
- [00:00:56.000] which is cool because they actually have the opposite effect. They have the
- [00:00:58.709] the opposite effect. They have the
- [00:00:58.719] the opposite effect. They have the opposite intention. A push in is taking
- [00:01:02.069] opposite intention. A push in is taking
- [00:01:02.079] opposite intention. A push in is taking the greater environment and you are then
- [00:01:05.030] the greater environment and you are then
- [00:01:05.040] the greater environment and you are then bringing focus to what would normally be
- [00:01:07.830] bringing focus to what would normally be
- [00:01:07.840] bringing focus to what would normally be a detail or the emotions of a subject.
- [00:01:10.630] a detail or the emotions of a subject.
- [00:01:10.640] a detail or the emotions of a subject. Whereas a pull out will start closer in
- [00:01:14.310] Whereas a pull out will start closer in
- [00:01:14.320] Whereas a pull out will start closer in and it will pull out to reveal the
- [00:01:16.710] and it will pull out to reveal the
- [00:01:16.720] and it will pull out to reveal the greater context and environment of a
- [00:01:19.350] greater context and environment of a
- [00:01:19.360] greater context and environment of a scene. So one of my favorite examples to
- [00:01:22.310] scene. So one of my favorite examples to
- [00:01:22.320] scene. So one of my favorite examples to use is um a wedding gone wrong. So if
- [00:01:25.830] use is um a wedding gone wrong. So if
- [00:01:25.840] use is um a wedding gone wrong. So if you are focusing on the face of a bride
- [00:01:29.429] you are focusing on the face of a bride
- [00:01:29.439] you are focusing on the face of a bride laughing maniacally and you pull out to
- [00:01:33.030] laughing maniacally and you pull out to
- [00:01:33.040] laughing maniacally and you pull out to reveal the chaos of a wedding gone
- [00:01:35.590] reveal the chaos of a wedding gone
- [00:01:35.600] reveal the chaos of a wedding gone wrong, what you are doing is you are
- [00:01:37.830] wrong, what you are doing is you are
- [00:01:37.840] wrong, what you are doing is you are showing why is this bride laughing like
- [00:01:40.870] showing why is this bride laughing like
- [00:01:40.880] showing why is this bride laughing like a crazy person. Um whereas if you did
- [00:01:44.230] a crazy person. Um whereas if you did
- [00:01:44.240] a crazy person. Um whereas if you did the opposite and you revealed the chaos
- [00:01:47.190] the opposite and you revealed the chaos
- [00:01:47.200] the opposite and you revealed the chaos of the scene um of a wedding gone wrong
- [00:01:50.550] of the scene um of a wedding gone wrong
- [00:01:50.560] of the scene um of a wedding gone wrong and you see there you know in the
- [00:01:53.190] and you see there you know in the
- [00:01:53.200] and you see there you know in the background um you know of a wide shot
- [00:01:57.109] background um you know of a wide shot
- [00:01:57.119] background um you know of a wide shot the bride almost looks like she's crying
- [00:01:59.590] the bride almost looks like she's crying
- [00:01:59.600] the bride almost looks like she's crying from you know that far distance and then
- [00:02:02.310] from you know that far distance and then
- [00:02:02.320] from you know that far distance and then if you push in to her face and reveal no
- [00:02:05.510] if you push in to her face and reveal no
- [00:02:05.520] if you push in to her face and reveal no she's not crying she's laughing
- [00:02:07.429] she's not crying she's laughing
- [00:02:07.439] she's not crying she's laughing maniacally. So then you are revealing
- [00:02:10.070] maniacally. So then you are revealing
- [00:02:10.080] maniacally. So then you are revealing her reaction to the chaos as opposed to
- [00:02:13.670] her reaction to the chaos as opposed to
- [00:02:13.680] her reaction to the chaos as opposed to revealing what is making her react that
- [00:02:16.470] revealing what is making her react that
- [00:02:16.480] revealing what is making her react that way. So yes, a push in and a pull out
- [00:02:19.350] way. So yes, a push in and a pull out
- [00:02:19.360] way. So yes, a push in and a pull out can cause the exact same moment to
- [00:02:22.790] can cause the exact same moment to
- [00:02:22.800] can cause the exact same moment to reveal the information in the opposite
- [00:02:25.270] reveal the information in the opposite
- [00:02:25.280] reveal the information in the opposite order. Here are some examples of
- [00:02:27.830] order. Here are some examples of
- [00:02:27.840] order. Here are some examples of pushins.
- Here
- are some examples of pull outs.
- So, we just covered the camera movement
- [00:02:51.270] So, we just covered the camera movement
- [00:02:51.280] So, we just covered the camera movement techniques of pushins and pull outs.
- [00:02:53.830] techniques of pushins and pull outs.
- [00:02:53.840] techniques of pushins and pull outs. They have the opposite effect depending
- [00:02:55.589] They have the opposite effect depending
- [00:02:55.599] They have the opposite effect depending which one you use in the same scene.
- [00:02:57.350] which one you use in the same scene.
- [00:02:57.360] which one you use in the same scene. Thank you guys and I'll see you in the
- [00:02:59.190] Thank you guys and I'll see you in the
- [00:02:59.200] Thank you guys and I'll see you in the next video.
Keyframes
- /workspace/academy/media/1EsWYJIj5iaMTw_QSfof1mgi7avfkefLZ/keyframes/last.jpg
- /workspace/academy/media/1EsWYJIj5iaMTw_QSfof1mgi7avfkefLZ/keyframes/t001.jpg
- /workspace/academy/media/1EsWYJIj5iaMTw_QSfof1mgi7avfkefLZ/keyframes/t002.jpg
- /workspace/academy/media/1EsWYJIj5iaMTw_QSfof1mgi7avfkefLZ/keyframes/t003.jpg
- /workspace/academy/media/1EsWYJIj5iaMTw_QSfof1mgi7avfkefLZ/keyframes/t004.jpg
- /workspace/academy/media/1EsWYJIj5iaMTw_QSfof1mgi7avfkefLZ/keyframes/t005.jpg
- /workspace/academy/media/1EsWYJIj5iaMTw_QSfof1mgi7avfkefLZ/keyframes/t006.jpg
- /workspace/academy/media/1EsWYJIj5iaMTw_QSfof1mgi7avfkefLZ/keyframes/t007.jpg
- /workspace/academy/media/1EsWYJIj5iaMTw_QSfof1mgi7avfkefLZ/keyframes/t008.jpg
- /workspace/academy/media/1EsWYJIj5iaMTw_QSfof1mgi7avfkefLZ/keyframes/t009.jpg
- /workspace/academy/media/1EsWYJIj5iaMTw_QSfof1mgi7avfkefLZ/keyframes/t010.jpg
- /workspace/academy/media/1EsWYJIj5iaMTw_QSfof1mgi7avfkefLZ/keyframes/t011.jpg
- /workspace/academy/media/1EsWYJIj5iaMTw_QSfof1mgi7avfkefLZ/keyframes/t012.jpg
- /workspace/academy/media/1EsWYJIj5iaMTw_QSfof1mgi7avfkefLZ/keyframes/t013.jpg
- /workspace/academy/media/1EsWYJIj5iaMTw_QSfof1mgi7avfkefLZ/keyframes/t014.jpg
- /workspace/academy/media/1EsWYJIj5iaMTw_QSfof1mgi7avfkefLZ/keyframes/t015.jpg
- /workspace/academy/media/1EsWYJIj5iaMTw_QSfof1mgi7avfkefLZ/keyframes/t016.jpg
- /workspace/academy/media/1EsWYJIj5iaMTw_QSfof1mgi7avfkefLZ/keyframes/t017.jpg
- /workspace/academy/media/1EsWYJIj5iaMTw_QSfof1mgi7avfkefLZ/keyframes/t018.jpg
55. Whip Pan
- title: Whip Pan
- status: publish
- author: 0
- is_previewable: (empty)
- video_duration: 0h 3m 37s (raw {"hours":0,"minutes":3,"seconds":37})
- video_source_type: embedded
- drive_file_id:
1NZh6XZm5O3YkTyJAnfdXU8XqeD8DlkW8(source_ref; not a public link) - transcript pending / keyframes pending / presentation extract pending
- video_source_url: (Drive preview omitted as a public link; file id kept as source_ref)
(no lesson_content HTML in export — video-only or empty body; metadata above kept in full)
- quizzes_following_this_lesson: 1 (full text in Quizzes)
- Movement Quiz (5 questions)
Drive extract
- file_id:
1NZh6XZm5O3YkTyJAnfdXU8XqeD8DlkW8 - filename: VEST Section 4 Movement & Transitions 7 WhipPan.mp4
- kind: video
- local_path: /workspace/academy/media/1NZh6XZm5O3YkTyJAnfdXU8XqeD8DlkW8/VEST Section 4 Movement & Transitions 7 WhipPan.mp4
- source_ref: drive
1NZh6XZm5O3YkTyJAnfdXU8XqeD8DlkW8· content_length 333093701 · original https://drive.google.com/file/d/1NZh6XZm5O3YkTyJAnfdXU8XqeD8DlkW8/view - extract_status: done
- caption_source: drive_timedtext
- duration_s: 216.502993
- keyframe_count: 23
Transcript
- Hey guys. So, welcome back to Camera
- [00:00:02.230] Hey guys. So, welcome back to Camera
- [00:00:02.240] Hey guys. So, welcome back to Camera Movement. Today, we're going to focus on
- [00:00:05.110] Movement. Today, we're going to focus on
- [00:00:05.120] Movement. Today, we're going to focus on the whip pan. So, the whip pan is, as
- [00:00:07.749] the whip pan. So, the whip pan is, as
- [00:00:07.759] the whip pan. So, the whip pan is, as the name suggests, a very quick pan.
- [00:00:10.709] the name suggests, a very quick pan.
- [00:00:10.719] the name suggests, a very quick pan. You'll use this to cause a sense of
- [00:00:13.030] You'll use this to cause a sense of
- [00:00:13.040] You'll use this to cause a sense of urgency and high energy. Um, usually
- [00:00:16.390] urgency and high energy. Um, usually
- [00:00:16.400] urgency and high energy. Um, usually it'll be used to break some tension. And
- [00:00:19.590] it'll be used to break some tension. And
- [00:00:19.600] it'll be used to break some tension. And you'll start with, for example, two
- [00:00:21.590] you'll start with, for example, two
- [00:00:21.600] you'll start with, for example, two people having a conversation and it'll
- [00:00:24.390] people having a conversation and it'll
- [00:00:24.400] people having a conversation and it'll be slower paced and then suddenly
- [00:00:26.470] be slower paced and then suddenly
- [00:00:26.480] be slower paced and then suddenly someone will barge into a room yelling
- [00:00:29.189] someone will barge into a room yelling
- [00:00:29.199] someone will barge into a room yelling something and then you pan very quickly
- [00:00:31.669] something and then you pan very quickly
- [00:00:31.679] something and then you pan very quickly to the person at the door. That's called
- [00:00:33.910] to the person at the door. That's called
- [00:00:33.920] to the person at the door. That's called a whip pan. What these whip pans will
- [00:00:36.470] a whip pan. What these whip pans will
- [00:00:36.480] a whip pan. What these whip pans will allow us to do is create a segue as well
- [00:00:39.510] allow us to do is create a segue as well
- [00:00:39.520] allow us to do is create a segue as well into creative transitions because we can
- [00:00:42.630] into creative transitions because we can
- [00:00:42.640] into creative transitions because we can cut on whip pans. And when we make a cut
- [00:00:44.950] cut on whip pans. And when we make a cut
- [00:00:44.960] cut on whip pans. And when we make a cut in the edit on a whip pan, it allows us
- [00:00:47.270] in the edit on a whip pan, it allows us
- [00:00:47.280] in the edit on a whip pan, it allows us to also pan to another type of shot, you
- [00:00:51.830] to also pan to another type of shot, you
- [00:00:51.840] to also pan to another type of shot, you know, another shot somewhere else,
- [00:00:53.670] know, another shot somewhere else,
- [00:00:53.680] know, another shot somewhere else, whether we're changing location or
- [00:00:56.229] whether we're changing location or
- [00:00:56.239] whether we're changing location or changing the scene entirely. When you
- [00:00:58.630] changing the scene entirely. When you
- [00:00:58.640] changing the scene entirely. When you are trying to achieve a whip pan, what
- [00:01:00.630] are trying to achieve a whip pan, what
- [00:01:00.640] are trying to achieve a whip pan, what you'd often do is, you know, remember
- [00:01:02.630] you'd often do is, you know, remember
- [00:01:02.640] you'd often do is, you know, remember when we moving with panning, we want to
- [00:01:04.869] when we moving with panning, we want to
- [00:01:04.879] when we moving with panning, we want to keep our camera steady in line with our
- [00:01:07.030] keep our camera steady in line with our
- [00:01:07.040] keep our camera steady in line with our eyes and our chest. Also, if you're on a
- [00:01:09.830] eyes and our chest. Also, if you're on a
- [00:01:09.840] eyes and our chest. Also, if you're on a tripod, you can use it, but they are
- [00:01:12.390] tripod, you can use it, but they are
- [00:01:12.400] tripod, you can use it, but they are more effective when you use them
- [00:01:13.830] more effective when you use them
- [00:01:13.840] more effective when you use them handheld because what you're doing is
- [00:01:16.630] handheld because what you're doing is
- [00:01:16.640] handheld because what you're doing is moving very quickly. So, on a tripod,
- [00:01:19.190] moving very quickly. So, on a tripod,
- [00:01:19.200] moving very quickly. So, on a tripod, you might find resistance if you not
- [00:01:21.910] you might find resistance if you not
- [00:01:21.920] you might find resistance if you not practiced with that enough. Um, so just
- [00:01:25.270] practiced with that enough. Um, so just
- [00:01:25.280] practiced with that enough. Um, so just remember when we're doing a whip pan, we
- [00:01:28.230] remember when we're doing a whip pan, we
- [00:01:28.240] remember when we're doing a whip pan, we move quickly, but we keep our phone
- [00:01:30.550] move quickly, but we keep our phone
- [00:01:30.560] move quickly, but we keep our phone aligned with our eyes on our chest
- [00:01:32.230] aligned with our eyes on our chest
- [00:01:32.240] aligned with our eyes on our chest looking at our screen. Um, so if you
- [00:01:34.630] looking at our screen. Um, so if you
- [00:01:34.640] looking at our screen. Um, so if you want to do a whip pan transition, what
- [00:01:36.950] want to do a whip pan transition, what
- [00:01:36.960] want to do a whip pan transition, what you do is start your shot, you know, as
- [00:01:39.830] you do is start your shot, you know, as
- [00:01:39.840] you do is start your shot, you know, as normal and then end your shot with a
- [00:01:43.910] normal and then end your shot with a
- [00:01:43.920] normal and then end your shot with a quick pan to one direction. And then
- [00:01:48.389] quick pan to one direction. And then
- [00:01:48.399] quick pan to one direction. And then your next shot, you will start with the
- [00:01:51.510] your next shot, you will start with the
- [00:01:51.520] your next shot, you will start with the same pan continuing the direction. So if
- [00:01:54.630] same pan continuing the direction. So if
- [00:01:54.640] same pan continuing the direction. So if you moved left to end your previous
- [00:01:56.550] you moved left to end your previous
- [00:01:56.560] you moved left to end your previous shot, you must move left to start your
- [00:01:59.270] shot, you must move left to start your
- [00:01:59.280] shot, you must move left to start your next shot. and you continue that and
- [00:02:01.510] next shot. and you continue that and
- [00:02:01.520] next shot. and you continue that and then you stop and you know you finish
- [00:02:04.469] then you stop and you know you finish
- [00:02:04.479] then you stop and you know you finish your scene that you're fil forming as
- [00:02:06.230] your scene that you're fil forming as
- [00:02:06.240] your scene that you're fil forming as normal. Uh and then that will transition
- [00:02:09.029] normal. Uh and then that will transition
- [00:02:09.039] normal. Uh and then that will transition really nicely in the edit. So here are
- [00:02:11.670] really nicely in the edit. So here are
- [00:02:11.680] really nicely in the edit. So here are some examples of whip pans.
- Here are some examples of whip pens as
- [00:02:20.309] Here are some examples of whip pens as
- [00:02:20.319] Here are some examples of whip pens as creative transitions.
- Hey, want to shoot cool transitions
- [00:02:31.910] Hey, want to shoot cool transitions
- [00:02:31.920] Hey, want to shoot cool transitions using only your phone?
- [00:02:34.630] using only your phone?
- [00:02:34.640] using only your phone? Just pull out your phone, open up the
- [00:02:36.949] Just pull out your phone, open up the
- [00:02:36.959] Just pull out your phone, open up the camera, hit record, frame yourself, take
- [00:02:40.070] camera, hit record, frame yourself, take
- [00:02:40.080] camera, hit record, frame yourself, take a spin like a ballerina,
- [00:02:42.790] a spin like a ballerina,
- [00:02:42.800] a spin like a ballerina, and while spinning, hit pause.
- Hey,
- find your new location. Remember to hit
- [00:03:11.670] find your new location. Remember to hit
- [00:03:11.680] find your new location. Remember to hit record while spinning. And
- [00:03:14.949] record while spinning. And
- [00:03:14.959] record while spinning. And you have your new transition. So, we
- [00:03:17.190] you have your new transition. So, we
- [00:03:17.200] you have your new transition. So, we just covered whip pans and why we use
- [00:03:19.990] just covered whip pans and why we use
- [00:03:20.000] just covered whip pans and why we use them and how to use them as creative
- [00:03:22.309] them and how to use them as creative
- [00:03:22.319] them and how to use them as creative transitions. This will segue us into the
- [00:03:25.350] transitions. This will segue us into the
- [00:03:25.360] transitions. This will segue us into the next video where we'll cover a lot of
- [00:03:27.190] next video where we'll cover a lot of
- [00:03:27.200] next video where we'll cover a lot of other creative transitions like color
- [00:03:29.270] other creative transitions like color
- [00:03:29.280] other creative transitions like color transitions, match cuts, etc. Thank you
- [00:03:32.309] transitions, match cuts, etc. Thank you
- [00:03:32.319] transitions, match cuts, etc. Thank you guys and I'll see you in the next video.
Keyframes
- /workspace/academy/media/1NZh6XZm5O3YkTyJAnfdXU8XqeD8DlkW8/keyframes/last.jpg
- /workspace/academy/media/1NZh6XZm5O3YkTyJAnfdXU8XqeD8DlkW8/keyframes/t001.jpg
- /workspace/academy/media/1NZh6XZm5O3YkTyJAnfdXU8XqeD8DlkW8/keyframes/t002.jpg
- /workspace/academy/media/1NZh6XZm5O3YkTyJAnfdXU8XqeD8DlkW8/keyframes/t003.jpg
- /workspace/academy/media/1NZh6XZm5O3YkTyJAnfdXU8XqeD8DlkW8/keyframes/t004.jpg
- /workspace/academy/media/1NZh6XZm5O3YkTyJAnfdXU8XqeD8DlkW8/keyframes/t005.jpg
- /workspace/academy/media/1NZh6XZm5O3YkTyJAnfdXU8XqeD8DlkW8/keyframes/t006.jpg
- /workspace/academy/media/1NZh6XZm5O3YkTyJAnfdXU8XqeD8DlkW8/keyframes/t007.jpg
- /workspace/academy/media/1NZh6XZm5O3YkTyJAnfdXU8XqeD8DlkW8/keyframes/t008.jpg
- /workspace/academy/media/1NZh6XZm5O3YkTyJAnfdXU8XqeD8DlkW8/keyframes/t009.jpg
- /workspace/academy/media/1NZh6XZm5O3YkTyJAnfdXU8XqeD8DlkW8/keyframes/t010.jpg
- /workspace/academy/media/1NZh6XZm5O3YkTyJAnfdXU8XqeD8DlkW8/keyframes/t011.jpg
- /workspace/academy/media/1NZh6XZm5O3YkTyJAnfdXU8XqeD8DlkW8/keyframes/t012.jpg
- /workspace/academy/media/1NZh6XZm5O3YkTyJAnfdXU8XqeD8DlkW8/keyframes/t013.jpg
- /workspace/academy/media/1NZh6XZm5O3YkTyJAnfdXU8XqeD8DlkW8/keyframes/t014.jpg
- /workspace/academy/media/1NZh6XZm5O3YkTyJAnfdXU8XqeD8DlkW8/keyframes/t015.jpg
- /workspace/academy/media/1NZh6XZm5O3YkTyJAnfdXU8XqeD8DlkW8/keyframes/t016.jpg
- /workspace/academy/media/1NZh6XZm5O3YkTyJAnfdXU8XqeD8DlkW8/keyframes/t017.jpg
- /workspace/academy/media/1NZh6XZm5O3YkTyJAnfdXU8XqeD8DlkW8/keyframes/t018.jpg
- /workspace/academy/media/1NZh6XZm5O3YkTyJAnfdXU8XqeD8DlkW8/keyframes/t019.jpg
- /workspace/academy/media/1NZh6XZm5O3YkTyJAnfdXU8XqeD8DlkW8/keyframes/t020.jpg
- /workspace/academy/media/1NZh6XZm5O3YkTyJAnfdXU8XqeD8DlkW8/keyframes/t021.jpg
- /workspace/academy/media/1NZh6XZm5O3YkTyJAnfdXU8XqeD8DlkW8/keyframes/t022.jpg
56. Creative Transitions
- title: Creative Transitions
- status: publish
- author: 0
- is_previewable: (empty)
- video_duration: 0h 4m 53s (raw {"hours":0,"minutes":4,"seconds":53})
- video_source_type: embedded
- drive_file_id:
1d95k8kr5SqHkEpd1bdI4vV-FjyHluA1s(source_ref; not a public link) - transcript pending / keyframes pending / presentation extract pending
- video_source_url: (Drive preview omitted as a public link; file id kept as source_ref)
(no lesson_content HTML in export — video-only or empty body; metadata above kept in full)
- quizzes_following_this_lesson: 1 (full text in Quizzes)
- Creative Transitions Quiz (5 questions)
Drive extract
- file_id:
1d95k8kr5SqHkEpd1bdI4vV-FjyHluA1s - filename: VEST Section 4 Movement & Transitions 8 Creative T.mp4
- kind: video
- local_path: /workspace/academy/media/1d95k8kr5SqHkEpd1bdI4vV-FjyHluA1s/VEST Section 4 Movement & Transitions 8 Creative T.mp4
- source_ref: drive
1d95k8kr5SqHkEpd1bdI4vV-FjyHluA1s· content_length 450526067 · original https://drive.google.com/file/d/1d95k8kr5SqHkEpd1bdI4vV-FjyHluA1s/view - extract_status: done
- caption_source: drive_timedtext
- duration_s: 293.245011
- keyframe_count: 24
Transcript
- Hey guys. So, we just covered uh camera
- [00:00:03.990] Hey guys. So, we just covered uh camera
- [00:00:04.000] Hey guys. So, we just covered uh camera movement and ended with whip pans and
- [00:00:06.550] movement and ended with whip pans and
- [00:00:06.560] movement and ended with whip pans and also how we can use them to, you know,
- [00:00:08.710] also how we can use them to, you know,
- [00:00:08.720] also how we can use them to, you know, be a creative transition. Today, we're
- [00:00:10.950] be a creative transition. Today, we're
- [00:00:10.960] be a creative transition. Today, we're going to cover some more creative
- [00:00:12.390] going to cover some more creative
- [00:00:12.400] going to cover some more creative transitions. So, whip pan was a type of
- [00:00:14.870] transitions. So, whip pan was a type of
- [00:00:14.880] transitions. So, whip pan was a type of movement transition where you moved the
- [00:00:18.070] movement transition where you moved the
- [00:00:18.080] movement transition where you moved the camera and used that motion blur of
- [00:00:20.390] camera and used that motion blur of
- [00:00:20.400] camera and used that motion blur of moving the camera to make a cut and make
- [00:00:22.550] moving the camera to make a cut and make
- [00:00:22.560] moving the camera to make a cut and make a seamless looking transition. Other
- [00:00:24.790] a seamless looking transition. Other
- [00:00:24.800] a seamless looking transition. Other movement transitions, you know, will
- [00:00:26.630] movement transitions, you know, will
- [00:00:26.640] movement transitions, you know, will include not just moving the camera, but
- [00:00:29.189] include not just moving the camera, but
- [00:00:29.199] include not just moving the camera, but continuing the movement of a subject,
- [00:00:31.189] continuing the movement of a subject,
- [00:00:31.199] continuing the movement of a subject, matching someone walking in different
- [00:00:33.510] matching someone walking in different
- [00:00:33.520] matching someone walking in different environments. Then you can also use
- [00:00:35.910] environments. Then you can also use
- [00:00:35.920] environments. Then you can also use objects. Say you throw a tennis ball up
- [00:00:38.229] objects. Say you throw a tennis ball up
- [00:00:38.239] objects. Say you throw a tennis ball up and you follow it up and while it's in
- [00:00:40.709] and you follow it up and while it's in
- [00:00:40.719] and you follow it up and while it's in the air, you cut to it being thrown up
- [00:00:42.869] the air, you cut to it being thrown up
- [00:00:42.879] the air, you cut to it being thrown up somewhere else and you catch it again
- [00:00:44.470] somewhere else and you catch it again
- [00:00:44.480] somewhere else and you catch it again and you're in a different location. Um,
- [00:00:46.310] and you're in a different location. Um,
- [00:00:46.320] and you're in a different location. Um, there's many different types of movement
- [00:00:47.990] there's many different types of movement
- [00:00:48.000] there's many different types of movement transitions. So, we're going to cover,
- [00:00:50.069] transitions. So, we're going to cover,
- [00:00:50.079] transitions. So, we're going to cover, you know, rules of things like that. Um
- [00:00:51.830] you know, rules of things like that. Um
- [00:00:51.840] you know, rules of things like that. Um then we're going to also go over color
- [00:00:53.750] then we're going to also go over color
- [00:00:53.760] then we're going to also go over color transitions. So color transitions as the
- [00:00:56.310] transitions. So color transitions as the
- [00:00:56.320] transitions. So color transitions as the name suggests um is just matching a
- [00:00:58.950] name suggests um is just matching a
- [00:00:58.960] name suggests um is just matching a color. So, what you usually do is you
- [00:01:01.349] color. So, what you usually do is you
- [00:01:01.359] color. So, what you usually do is you push in to a color at the end of a shot
- [00:01:05.830] push in to a color at the end of a shot
- [00:01:05.840] push in to a color at the end of a shot and then at the beginning of a different
- [00:01:08.070] and then at the beginning of a different
- [00:01:08.080] and then at the beginning of a different shot, you want to find an object or a
- [00:01:10.390] shot, you want to find an object or a
- [00:01:10.400] shot, you want to find an object or a space of similar color and then you'll
- [00:01:13.030] space of similar color and then you'll
- [00:01:13.040] space of similar color and then you'll start close and then you'll pull out of
- [00:01:15.109] start close and then you'll pull out of
- [00:01:15.119] start close and then you'll pull out of that color and that'll give you a
- [00:01:17.990] that color and that'll give you a
- [00:01:18.000] that color and that'll give you a matching uh transition, a matching image
- [00:01:20.950] matching uh transition, a matching image
- [00:01:20.960] matching uh transition, a matching image to cut between the two scenes. You can
- [00:01:23.109] to cut between the two scenes. You can
- [00:01:23.119] to cut between the two scenes. You can also do that with textures. Another
- [00:01:25.030] also do that with textures. Another
- [00:01:25.040] also do that with textures. Another thing you can do is audio transitions.
- [00:01:28.230] thing you can do is audio transitions.
- [00:01:28.240] thing you can do is audio transitions. So, if you're talking and you use a
- [00:01:31.830] So, if you're talking and you use a
- [00:01:31.840] So, if you're talking and you use a sound effect from the next scene, say
- [00:01:33.910] sound effect from the next scene, say
- [00:01:33.920] sound effect from the next scene, say someone's hooting, you know, at uh cars
- [00:01:36.950] someone's hooting, you know, at uh cars
- [00:01:36.960] someone's hooting, you know, at uh cars in traffic, um you end the scene where
- [00:01:39.749] in traffic, um you end the scene where
- [00:01:39.759] in traffic, um you end the scene where two people are having a conversation
- [00:01:41.350] two people are having a conversation
- [00:01:41.360] two people are having a conversation with a loud hoot that carries over to
- [00:01:43.590] with a loud hoot that carries over to
- [00:01:43.600] with a loud hoot that carries over to the next scene, and that's an audio
- [00:01:45.030] the next scene, and that's an audio
- [00:01:45.040] the next scene, and that's an audio transition. You can also then use just,
- [00:01:47.670] transition. You can also then use just,
- [00:01:47.680] transition. You can also then use just, you know, normal movement, continuing
- [00:01:49.830] you know, normal movement, continuing
- [00:01:49.840] you know, normal movement, continuing the movement of a person or an object to
- [00:01:53.350] the movement of a person or an object to
- [00:01:53.360] the movement of a person or an object to have transitions to different cuts, but
- [00:01:55.350] have transitions to different cuts, but
- [00:01:55.360] have transitions to different cuts, but in the same scenes. So, if I turn to one
- [00:01:58.469] in the same scenes. So, if I turn to one
- [00:01:58.479] in the same scenes. So, if I turn to one direction and then there's a camera
- [00:02:00.630] direction and then there's a camera
- [00:02:00.640] direction and then there's a camera there and I continue that movement in
- [00:02:03.109] there and I continue that movement in
- [00:02:03.119] there and I continue that movement in such a way where it looks seamless, that
- [00:02:05.590] such a way where it looks seamless, that
- [00:02:05.600] such a way where it looks seamless, that makes a natural cut to transition to a
- [00:02:08.630] makes a natural cut to transition to a
- [00:02:08.640] makes a natural cut to transition to a different angle. Those are different
- [00:02:09.910] different angle. Those are different
- [00:02:09.920] different angle. Those are different angle transitions. Um, other things you
- [00:02:12.470] angle transitions. Um, other things you
- [00:02:12.480] angle transitions. Um, other things you can do is use the camera movement
- [00:02:14.229] can do is use the camera movement
- [00:02:14.239] can do is use the camera movement techniques we've learned. You know, push
- [00:02:16.070] techniques we've learned. You know, push
- [00:02:16.080] techniques we've learned. You know, push ins, pull outs. Um, you can use your
- [00:02:19.270] ins, pull outs. Um, you can use your
- [00:02:19.280] ins, pull outs. Um, you can use your tracking, your panning, your tilting,
- [00:02:22.869] tracking, your panning, your tilting,
- [00:02:22.879] tracking, your panning, your tilting, continuing that movement just in a cut
- [00:02:25.190] continuing that movement just in a cut
- [00:02:25.200] continuing that movement just in a cut where it doesn't look seamless like it
- [00:02:27.110] where it doesn't look seamless like it
- [00:02:27.120] where it doesn't look seamless like it bled into each other, but you're just
- [00:02:29.190] bled into each other, but you're just
- [00:02:29.200] bled into each other, but you're just zooming into a camera. Um, say like you
- [00:02:32.470] zooming into a camera. Um, say like you
- [00:02:32.480] zooming into a camera. Um, say like you zooming into a camera's lens and then
- [00:02:34.309] zooming into a camera's lens and then
- [00:02:34.319] zooming into a camera's lens and then you coming out of a person's eye, that
- [00:02:36.949] you coming out of a person's eye, that
- [00:02:36.959] you coming out of a person's eye, that object of a camera lens and a person's
- [00:02:39.030] object of a camera lens and a person's
- [00:02:39.040] object of a camera lens and a person's eye, you know, they have similar similar
- [00:02:41.350] eye, you know, they have similar similar
- [00:02:41.360] eye, you know, they have similar similar purposes. They are designed to capture
- [00:02:43.910] purposes. They are designed to capture
- [00:02:43.920] purposes. They are designed to capture image. And by having that zoom in, zoom
- [00:02:46.710] image. And by having that zoom in, zoom
- [00:02:46.720] image. And by having that zoom in, zoom out gives you a really seamless looking
- [00:02:49.509] out gives you a really seamless looking
- [00:02:49.519] out gives you a really seamless looking transition. It looks quite natural in
- [00:02:51.190] transition. It looks quite natural in
- [00:02:51.200] transition. It looks quite natural in the edit. Um, so when it does come to
- [00:02:53.750] the edit. Um, so when it does come to
- [00:02:53.760] the edit. Um, so when it does come to transitions and especially creative
- [00:02:55.910] transitions and especially creative
- [00:02:55.920] transitions and especially creative transitions and just making cuts in
- [00:02:58.229] transitions and just making cuts in
- [00:02:58.239] transitions and just making cuts in general, you want to make sure it looks
- [00:03:00.390] general, you want to make sure it looks
- [00:03:00.400] general, you want to make sure it looks natural. Make sure it's not pulling you
- [00:03:02.710] natural. Make sure it's not pulling you
- [00:03:02.720] natural. Make sure it's not pulling you out of the video you're watching. There
- [00:03:05.270] out of the video you're watching. There
- [00:03:05.280] out of the video you're watching. There are many different ways you can create
- [00:03:06.869] are many different ways you can create
- [00:03:06.879] are many different ways you can create your own uh and play with your own
- [00:03:08.869] your own uh and play with your own
- [00:03:08.879] your own uh and play with your own creative transitions and come up with
- [00:03:10.869] creative transitions and come up with
- [00:03:10.879] creative transitions and come up with things. Just know that yeah, you know,
- [00:03:12.869] things. Just know that yeah, you know,
- [00:03:12.879] things. Just know that yeah, you know, you're going to use a lot of the
- [00:03:14.229] you're going to use a lot of the
- [00:03:14.239] you're going to use a lot of the techniques we've already learned in
- [00:03:16.149] techniques we've already learned in
- [00:03:16.159] techniques we've already learned in camera movement and angles to achieve
- [00:03:18.710] camera movement and angles to achieve
- [00:03:18.720] camera movement and angles to achieve these. Here are some examples of color
- [00:03:21.030] these. Here are some examples of color
- [00:03:21.040] these. Here are some examples of color transitions.
- Here are some examples of movement
- [00:03:43.430] Here are some examples of movement
- [00:03:43.440] Here are some examples of movement transitions.
- Here
- are some examples of camera movement
- [00:03:59.910] are some examples of camera movement
- [00:03:59.920] are some examples of camera movement transitions.
- Here are some examples of object
- [00:04:09.990] Here are some examples of object
- [00:04:10.000] Here are some examples of object transitions.
- So, we just covered creative
- [00:04:30.310] So, we just covered creative
- [00:04:30.320] So, we just covered creative transitions. And remember, you mix and
- [00:04:32.230] transitions. And remember, you mix and
- [00:04:32.240] transitions. And remember, you mix and match these transitions. You get
- [00:04:34.310] match these transitions. You get
- [00:04:34.320] match these transitions. You get creative. You find your own way of doing
- [00:04:36.390] creative. You find your own way of doing
- [00:04:36.400] creative. You find your own way of doing things. But what's important is that
- [00:04:38.710] things. But what's important is that
- [00:04:38.720] things. But what's important is that they look interesting, but they also fit
- [00:04:41.909] they look interesting, but they also fit
- [00:04:41.919] they look interesting, but they also fit your narrative. They're not jarring.
- [00:04:43.830] your narrative. They're not jarring.
- [00:04:43.840] your narrative. They're not jarring. They don't pull you out of it. They seem
- [00:04:45.909] They don't pull you out of it. They seem
- [00:04:45.919] They don't pull you out of it. They seem natural in your edit. They fit what
- [00:04:47.670] natural in your edit. They fit what
- [00:04:47.680] natural in your edit. They fit what you're making. Otherwise, thank you guys
- [00:04:49.590] you're making. Otherwise, thank you guys
- [00:04:49.600] you're making. Otherwise, thank you guys and I'll see you in the next video.
Keyframes
- /workspace/academy/media/1d95k8kr5SqHkEpd1bdI4vV-FjyHluA1s/keyframes/last.jpg
- /workspace/academy/media/1d95k8kr5SqHkEpd1bdI4vV-FjyHluA1s/keyframes/t001.jpg
- /workspace/academy/media/1d95k8kr5SqHkEpd1bdI4vV-FjyHluA1s/keyframes/t003.jpg
- /workspace/academy/media/1d95k8kr5SqHkEpd1bdI4vV-FjyHluA1s/keyframes/t004.jpg
- /workspace/academy/media/1d95k8kr5SqHkEpd1bdI4vV-FjyHluA1s/keyframes/t005.jpg
- /workspace/academy/media/1d95k8kr5SqHkEpd1bdI4vV-FjyHluA1s/keyframes/t006.jpg
- /workspace/academy/media/1d95k8kr5SqHkEpd1bdI4vV-FjyHluA1s/keyframes/t008.jpg
- /workspace/academy/media/1d95k8kr5SqHkEpd1bdI4vV-FjyHluA1s/keyframes/t009.jpg
- /workspace/academy/media/1d95k8kr5SqHkEpd1bdI4vV-FjyHluA1s/keyframes/t010.jpg
- /workspace/academy/media/1d95k8kr5SqHkEpd1bdI4vV-FjyHluA1s/keyframes/t011.jpg
- /workspace/academy/media/1d95k8kr5SqHkEpd1bdI4vV-FjyHluA1s/keyframes/t013.jpg
- /workspace/academy/media/1d95k8kr5SqHkEpd1bdI4vV-FjyHluA1s/keyframes/t014.jpg
- /workspace/academy/media/1d95k8kr5SqHkEpd1bdI4vV-FjyHluA1s/keyframes/t015.jpg
- /workspace/academy/media/1d95k8kr5SqHkEpd1bdI4vV-FjyHluA1s/keyframes/t016.jpg
- /workspace/academy/media/1d95k8kr5SqHkEpd1bdI4vV-FjyHluA1s/keyframes/t018.jpg
- /workspace/academy/media/1d95k8kr5SqHkEpd1bdI4vV-FjyHluA1s/keyframes/t019.jpg
- /workspace/academy/media/1d95k8kr5SqHkEpd1bdI4vV-FjyHluA1s/keyframes/t020.jpg
- /workspace/academy/media/1d95k8kr5SqHkEpd1bdI4vV-FjyHluA1s/keyframes/t021.jpg
- /workspace/academy/media/1d95k8kr5SqHkEpd1bdI4vV-FjyHluA1s/keyframes/t023.jpg
- /workspace/academy/media/1d95k8kr5SqHkEpd1bdI4vV-FjyHluA1s/keyframes/t024.jpg
- /workspace/academy/media/1d95k8kr5SqHkEpd1bdI4vV-FjyHluA1s/keyframes/t025.jpg
- /workspace/academy/media/1d95k8kr5SqHkEpd1bdI4vV-FjyHluA1s/keyframes/t026.jpg
- /workspace/academy/media/1d95k8kr5SqHkEpd1bdI4vV-FjyHluA1s/keyframes/t028.jpg
- /workspace/academy/media/1d95k8kr5SqHkEpd1bdI4vV-FjyHluA1s/keyframes/t029.jpg
57. Homework The Flow
- title: Homework The Flow
- status: publish
- author: 0
- is_previewable: (empty)
- video_duration: 0h 0m 0s (raw {"hours":0,"minutes":0,"seconds":0})
- video_source_type: (empty)
PRACTICAL: Stability, Movement & Transitions (The Flow)
Sections Covered: Gear and Camera; Camera Movement and Transitions
Submission Instructions:
Complete this practical then submit via email to the instructor at info@ambitious.co.za or use the Academy portal.
Keep up the practical skills!
| Task | Requirements | Deliverables |
|---|---|---|
| Objective | Create a sequence of clips demonstrating smooth camera moves and an intended transition. | Three (3) Raw Clips for a 3-clip sequence. |
| Focus | Smooth Motion. Practice controlling your phone's movement. | Clip 1: A smooth, intentional Pan or Tilt (use a tripod/stable surface if possible). |
| Clip 2: A sequence showing a Tracking Shot or Push In/Pull Out. | ||
| Clip 3: A fast shot ending in an Object or Whip Pan for a creative transition setup. |
58. Movement & Transitions Conclusion
- title: Movement & Transitions Conclusion
- status: publish
- author: 0
- is_previewable: (empty)
- video_duration: 0h 0m 20s (raw {"hours":0,"minutes":0,"seconds":20})
- video_source_type: embedded
- drive_file_id:
1GPIpE2H35BV2GNGKoNjL_v1-RmFKE_an(source_ref; not a public link) - transcript pending / keyframes pending / presentation extract pending
- video_source_url: (Drive preview omitted as a public link; file id kept as source_ref)
(no lesson_content HTML in export — video-only or empty body; metadata above kept in full)
Drive extract
- file_id:
1GPIpE2H35BV2GNGKoNjL_v1-RmFKE_an - filename: VEST Section 4 Movement & Transitions 9 Outro.mp4
- kind: video
- local_path: /workspace/academy/media/1GPIpE2H35BV2GNGKoNjL_v1-RmFKE_an/VEST Section 4 Movement & Transitions 9 Outro.mp4
- source_ref: drive
1GPIpE2H35BV2GNGKoNjL_v1-RmFKE_an· content_length 29100861 · original https://drive.google.com/file/d/1GPIpE2H35BV2GNGKoNjL_v1-RmFKE_an/view - extract_status: done
- caption_source: drive_timedtext
- duration_s: 19.667007
- keyframe_count: 3
Transcript
- Hey guys. So, we just finished camera
- [00:00:03.190] Hey guys. So, we just finished camera
- [00:00:03.200] Hey guys. So, we just finished camera movement and creative transitions. Uh,
- [00:00:06.550] movement and creative transitions. Uh,
- [00:00:06.560] movement and creative transitions. Uh, remember when you achieving these
- [00:00:08.390] remember when you achieving these
- [00:00:08.400] remember when you achieving these different techniques that you've just
- [00:00:09.830] different techniques that you've just
- [00:00:09.840] different techniques that you've just learned, you want to make sure they
- [00:00:11.509] learned, you want to make sure they
- [00:00:11.519] learned, you want to make sure they complement your narrative. They
- [00:00:13.030] complement your narrative. They
- [00:00:13.040] complement your narrative. They complement the content you're trying to
- [00:00:14.709] complement the content you're trying to
- [00:00:14.719] complement the content you're trying to make. Thank you guys, and I'll see you
- [00:00:16.390] make. Thank you guys, and I'll see you
- [00:00:16.400] make. Thank you guys, and I'll see you in the next section.
Keyframes
- /workspace/academy/media/1GPIpE2H35BV2GNGKoNjL_v1-RmFKE_an/keyframes/last.jpg
- /workspace/academy/media/1GPIpE2H35BV2GNGKoNjL_v1-RmFKE_an/keyframes/t001.jpg
- /workspace/academy/media/1GPIpE2H35BV2GNGKoNjL_v1-RmFKE_an/keyframes/t002.jpg
59. Lighting Intro
- title: Lighting Intro
- status: publish
- author: 0
- is_previewable: (empty)
- video_duration: 0h 0m 47s (raw {"hours":0,"minutes":0,"seconds":47})
- video_source_type: embedded
- drive_file_id:
1FxHxBIAMWxQHq_Q_9lESAceMhMCADXaI(source_ref; not a public link) - transcript pending / keyframes pending / presentation extract pending
- video_source_url: (Drive preview omitted as a public link; file id kept as source_ref)
(no lesson_content HTML in export — video-only or empty body; metadata above kept in full)
Drive extract
- file_id:
1FxHxBIAMWxQHq_Q_9lESAceMhMCADXaI - filename: VEST Section 5 Lighting 1 Intro.mp4
- kind: video
- local_path: /workspace/academy/media/1FxHxBIAMWxQHq_Q_9lESAceMhMCADXaI/VEST Section 5 Lighting 1 Intro.mp4
- source_ref: drive
1FxHxBIAMWxQHq_Q_9lESAceMhMCADXaI· content_length 70514759 · original https://drive.google.com/file/d/1FxHxBIAMWxQHq_Q_9lESAceMhMCADXaI/view - extract_status: done
- caption_source: drive_timedtext
- duration_s: 46.833991
- keyframe_count: 6
Transcript
- Hey guys, uh welcome to the next
- [00:00:02.389] Hey guys, uh welcome to the next
- [00:00:02.399] Hey guys, uh welcome to the next section. In this section, we're going to
- [00:00:04.470] section. In this section, we're going to
- [00:00:04.480] section. In this section, we're going to be covering lighting. Lighting is one of
- [00:00:06.950] be covering lighting. Lighting is one of
- [00:00:06.960] be covering lighting. Lighting is one of the fundamental aspects of shooting. It
- [00:00:10.150] the fundamental aspects of shooting. It
- [00:00:10.160] the fundamental aspects of shooting. It helps improve your footage and is, you
- [00:00:13.270] helps improve your footage and is, you
- [00:00:13.280] helps improve your footage and is, you know, one of the elements that you need
- [00:00:14.789] know, one of the elements that you need
- [00:00:14.799] know, one of the elements that you need to try and get control over. Um, bad
- [00:00:17.510] to try and get control over. Um, bad
- [00:00:17.520] to try and get control over. Um, bad lighting will result in grainy looking
- [00:00:19.990] lighting will result in grainy looking
- [00:00:20.000] lighting will result in grainy looking footage and, you know, having good
- [00:00:22.710] footage and, you know, having good
- [00:00:22.720] footage and, you know, having good lighting, uh, gives you a lot more
- [00:00:24.550] lighting, uh, gives you a lot more
- [00:00:24.560] lighting, uh, gives you a lot more control and solves a lot of problems
- [00:00:26.550] control and solves a lot of problems
- [00:00:26.560] control and solves a lot of problems when you get to post-prouction. In this
- [00:00:28.470] when you get to post-prouction. In this
- [00:00:28.480] when you get to post-prouction. In this section, we're going to be covering the
- [00:00:30.470] section, we're going to be covering the
- [00:00:30.480] section, we're going to be covering the threepoint lighting setup, one of the
- [00:00:32.310] threepoint lighting setup, one of the
- [00:00:32.320] threepoint lighting setup, one of the fundamentals of lighting. We're going to
- [00:00:34.310] fundamentals of lighting. We're going to
- [00:00:34.320] fundamentals of lighting. We're going to move on to artificial versus natural
- [00:00:37.030] move on to artificial versus natural
- [00:00:37.040] move on to artificial versus natural lighting, and the best time of day to
- [00:00:40.150] lighting, and the best time of day to
- [00:00:40.160] lighting, and the best time of day to shoot your footage outside. Thank you,
- [00:00:42.229] shoot your footage outside. Thank you,
- [00:00:42.239] shoot your footage outside. Thank you, and I hope you guys enjoy this section.
Keyframes
- /workspace/academy/media/1FxHxBIAMWxQHq_Q_9lESAceMhMCADXaI/keyframes/last.jpg
- /workspace/academy/media/1FxHxBIAMWxQHq_Q_9lESAceMhMCADXaI/keyframes/t001.jpg
- /workspace/academy/media/1FxHxBIAMWxQHq_Q_9lESAceMhMCADXaI/keyframes/t002.jpg
- /workspace/academy/media/1FxHxBIAMWxQHq_Q_9lESAceMhMCADXaI/keyframes/t003.jpg
- /workspace/academy/media/1FxHxBIAMWxQHq_Q_9lESAceMhMCADXaI/keyframes/t004.jpg
- /workspace/academy/media/1FxHxBIAMWxQHq_Q_9lESAceMhMCADXaI/keyframes/t005.jpg
60. Three Point Lighting
- title: Three Point Lighting
- status: publish
- author: 0
- is_previewable: (empty)
- video_duration: 0h 5m 47s (raw {"hours":0,"minutes":5,"seconds":47})
- video_source_type: embedded
- drive_file_id:
1OxQD8EF9fnTkYSF_dcGFZMRzJmXMeYXS(source_ref; not a public link) - transcript pending / keyframes pending / presentation extract pending
- video_source_url: (Drive preview omitted as a public link; file id kept as source_ref)
(no lesson_content HTML in export — video-only or empty body; metadata above kept in full)
- quizzes_following_this_lesson: 1 (full text in Quizzes)
- Three-Point Lighting Quiz (4 questions)
Drive extract
- file_id:
1OxQD8EF9fnTkYSF_dcGFZMRzJmXMeYXS - filename: VEST Section 5 Lighting 2 three point lighting.mp4
- kind: video
- local_path: /workspace/academy/media/1OxQD8EF9fnTkYSF_dcGFZMRzJmXMeYXS/VEST Section 5 Lighting 2 three point lighting.mp4
- source_ref: drive
1OxQD8EF9fnTkYSF_dcGFZMRzJmXMeYXS· content_length 534356934 · original https://drive.google.com/file/d/1OxQD8EF9fnTkYSF_dcGFZMRzJmXMeYXS/view - extract_status: done
- caption_source: drive_timedtext
- duration_s: 346.907007
- keyframe_count: 24
Transcript
- Hey guys. So today we're going to cover
- [00:00:02.070] Hey guys. So today we're going to cover
- [00:00:02.080] Hey guys. So today we're going to cover threepoint lighting. It's one of the
- [00:00:04.070] threepoint lighting. It's one of the
- [00:00:04.080] threepoint lighting. It's one of the fundamental techniques to setting up
- [00:00:06.630] fundamental techniques to setting up
- [00:00:06.640] fundamental techniques to setting up your lights uh for a shoot. Three-point
- [00:00:09.110] your lights uh for a shoot. Three-point
- [00:00:09.120] your lights uh for a shoot. Three-point lighting is a basic setup. There are
- [00:00:11.350] lighting is a basic setup. There are
- [00:00:11.360] lighting is a basic setup. There are other lighting setups you can use, but
- [00:00:14.070] other lighting setups you can use, but
- [00:00:14.080] other lighting setups you can use, but this is one of the foundations of, you
- [00:00:16.630] this is one of the foundations of, you
- [00:00:16.640] this is one of the foundations of, you know, setting up your lights. Under
- [00:00:18.230] know, setting up your lights. Under
- [00:00:18.240] know, setting up your lights. Under threepoint lighting setup, you have your
- [00:00:20.070] threepoint lighting setup, you have your
- [00:00:20.080] threepoint lighting setup, you have your three points. You have your key light,
- [00:00:22.870] three points. You have your key light,
- [00:00:22.880] three points. You have your key light, your fill light, and your backlight. So
- [00:00:25.429] your fill light, and your backlight. So
- [00:00:25.439] your fill light, and your backlight. So your key light is your main source of
- [00:00:27.429] your key light is your main source of
- [00:00:27.439] your key light is your main source of light. It should be set up at a 45
- [00:00:30.790] light. It should be set up at a 45
- [00:00:30.800] light. It should be set up at a 45 degree angle to your subject and ideally
- [00:00:33.750] degree angle to your subject and ideally
- [00:00:33.760] degree angle to your subject and ideally it would be set up above your subject's
- [00:00:36.229] it would be set up above your subject's
- [00:00:36.239] it would be set up above your subject's ey line. Your fill light softens the
- [00:00:38.549] ey line. Your fill light softens the
- [00:00:38.559] ey line. Your fill light softens the shadows caused by your key light. And I
- [00:00:41.910] shadows caused by your key light. And I
- [00:00:41.920] shadows caused by your key light. And I like to like, you know, to help people
- [00:00:43.430] like to like, you know, to help people
- [00:00:43.440] like to like, you know, to help people remember, I say it fills in the gaps.
- [00:00:45.750] remember, I say it fills in the gaps.
- [00:00:45.760] remember, I say it fills in the gaps. That's your fill light. It is set up on
- [00:00:48.470] That's your fill light. It is set up on
- [00:00:48.480] That's your fill light. It is set up on the opposite side of your key light. And
- [00:00:52.470] the opposite side of your key light. And
- [00:00:52.480] the opposite side of your key light. And it doesn't have a specific angle like
- [00:00:55.270] it doesn't have a specific angle like
- [00:00:55.280] it doesn't have a specific angle like the key light. You can experiment with
- [00:00:57.590] the key light. You can experiment with
- [00:00:57.600] the key light. You can experiment with it, adjust the angles, the height. Um,
- [00:01:00.549] it, adjust the angles, the height. Um,
- [00:01:00.559] it, adjust the angles, the height. Um, and it's but it is usually less intense
- [00:01:03.349] and it's but it is usually less intense
- [00:01:03.359] and it's but it is usually less intense than your key light. Next, you have your
- [00:01:05.830] than your key light. Next, you have your
- [00:01:05.840] than your key light. Next, you have your backlight, otherwise known as your rim
- [00:01:08.310] backlight, otherwise known as your rim
- [00:01:08.320] backlight, otherwise known as your rim light. This light is set up a little bit
- [00:01:11.190] light. This light is set up a little bit
- [00:01:11.200] light. This light is set up a little bit behind your subject, usually on the same
- [00:01:13.990] behind your subject, usually on the same
- [00:01:14.000] behind your subject, usually on the same side as your fill light. And this light
- [00:01:16.630] side as your fill light. And this light
- [00:01:16.640] side as your fill light. And this light creates a halo like glow, a rim around
- [00:01:19.990] creates a halo like glow, a rim around
- [00:01:20.000] creates a halo like glow, a rim around your subject and separates them from the
- [00:01:22.950] your subject and separates them from the
- [00:01:22.960] your subject and separates them from the background. Those are your threepoint
- [00:01:25.030] background. Those are your threepoint
- [00:01:25.040] background. Those are your threepoint lighting setups. is your key light, your
- [00:01:27.830] lighting setups. is your key light, your
- [00:01:27.840] lighting setups. is your key light, your fill light, and your rim light. Using
- [00:01:30.149] fill light, and your rim light. Using
- [00:01:30.159] fill light, and your rim light. Using these lights in tandem create a sense of
- [00:01:32.630] these lights in tandem create a sense of
- [00:01:32.640] these lights in tandem create a sense of depth. It separates your subject from
- [00:01:35.270] depth. It separates your subject from
- [00:01:35.280] depth. It separates your subject from the background, but it also allows for,
- [00:01:38.310] the background, but it also allows for,
- [00:01:38.320] the background, but it also allows for, you know, diversity on the face. Makes
- [00:01:40.230] you know, diversity on the face. Makes
- [00:01:40.240] you know, diversity on the face. Makes it look a little bit more interesting.
- [00:01:42.069] it look a little bit more interesting.
- [00:01:42.079] it look a little bit more interesting. You have a different level of shadow
- [00:01:44.310] You have a different level of shadow
- [00:01:44.320] You have a different level of shadow cast on one side of the face than the
- [00:01:46.389] cast on one side of the face than the
- [00:01:46.399] cast on one side of the face than the other. It brings out the details in a
- [00:01:49.429] other. It brings out the details in a
- [00:01:49.439] other. It brings out the details in a subject and it makes them stand out,
- [00:01:53.590] subject and it makes them stand out,
- [00:01:53.600] subject and it makes them stand out, which is great for if you're filming a
- [00:01:55.830] which is great for if you're filming a
- [00:01:55.840] which is great for if you're filming a podcast or an interview um and just, you
- [00:01:59.429] podcast or an interview um and just, you
- [00:01:59.439] podcast or an interview um and just, you know, just a single person in a frame.
- [00:02:02.149] know, just a single person in a frame.
- [00:02:02.159] know, just a single person in a frame. Here are some examples of how to set up
- [00:02:06.149] Here are some examples of how to set up
- [00:02:06.159] Here are some examples of how to set up uh your threepoint lighting setup. As
- [00:02:08.389] uh your threepoint lighting setup. As
- [00:02:08.399] uh your threepoint lighting setup. As you can see, this lighting setup is
- [00:02:10.229] you can see, this lighting setup is
- [00:02:10.239] you can see, this lighting setup is currently quite ugly. It's just the
- [00:02:13.190] currently quite ugly. It's just the
- [00:02:13.200] currently quite ugly. It's just the normal ceiling house lights of, you
- [00:02:15.589] normal ceiling house lights of, you
- [00:02:15.599] normal ceiling house lights of, you know, the room I'm in. First things
- [00:02:17.350] know, the room I'm in. First things
- [00:02:17.360] know, the room I'm in. First things first, let's get these house lights
- [00:02:19.589] first, let's get these house lights
- [00:02:19.599] first, let's get these house lights turned off.
- [00:02:21.589] turned off.
- [00:02:21.599] turned off. So, it's quite dark in here. Let's get
- [00:02:23.510] So, it's quite dark in here. Let's get
- [00:02:23.520] So, it's quite dark in here. Let's get our key light first on.
- [00:02:27.190] our key light first on.
- [00:02:27.200] our key light first on. So, with our key light, as you can see,
- [00:02:29.750] So, with our key light, as you can see,
- [00:02:29.760] So, with our key light, as you can see, I'm, you know, fully lit up, but I have
- [00:02:32.630] I'm, you know, fully lit up, but I have
- [00:02:32.640] I'm, you know, fully lit up, but I have this harsh shadow at the side of my
- [00:02:34.309] this harsh shadow at the side of my
- [00:02:34.319] this harsh shadow at the side of my face. The key light is at a 45° angle
- [00:02:37.589] face. The key light is at a 45° angle
- [00:02:37.599] face. The key light is at a 45° angle and is above my eye level. That's where
- [00:02:39.589] and is above my eye level. That's where
- [00:02:39.599] and is above my eye level. That's where you should have your key light. But
- [00:02:41.190] you should have your key light. But
- [00:02:41.200] you should have your key light. But next, I'm going to show you what happens
- [00:02:42.949] next, I'm going to show you what happens
- [00:02:42.959] next, I'm going to show you what happens when we turn the fill light on. And as
- [00:02:45.670] when we turn the fill light on. And as
- [00:02:45.680] when we turn the fill light on. And as you can see, um the shadows on the other
- [00:02:48.630] you can see, um the shadows on the other
- [00:02:48.640] you can see, um the shadows on the other side of my face are now a lot softer. Um
- [00:02:51.830] side of my face are now a lot softer. Um
- [00:02:51.840] side of my face are now a lot softer. Um but I'm still blending in with my
- [00:02:53.910] but I'm still blending in with my
- [00:02:53.920] but I'm still blending in with my background. And to fix that, we turn on
- [00:02:56.790] background. And to fix that, we turn on
- [00:02:56.800] background. And to fix that, we turn on our backlight, otherwise known as our
- [00:02:58.869] our backlight, otherwise known as our
- [00:02:58.879] our backlight, otherwise known as our rim light. And this gives me a nice halo
- [00:03:01.509] rim light. And this gives me a nice halo
- [00:03:01.519] rim light. And this gives me a nice halo glow on, you know, outline from behind
- [00:03:04.949] glow on, you know, outline from behind
- [00:03:04.959] glow on, you know, outline from behind me. So the backlight you want placed
- [00:03:07.030] me. So the backlight you want placed
- [00:03:07.040] me. So the backlight you want placed behind you h to separate you from your
- [00:03:09.750] behind you h to separate you from your
- [00:03:09.760] behind you h to separate you from your background. Another thing which we can
- [00:03:11.990] background. Another thing which we can
- [00:03:12.000] background. Another thing which we can do is add some more decorative ambient
- [00:03:14.790] do is add some more decorative ambient
- [00:03:14.800] do is add some more decorative ambient lighting to you know further decorate
- [00:03:17.750] lighting to you know further decorate
- [00:03:17.760] lighting to you know further decorate the space.
- [00:03:19.589] the space.
- [00:03:19.599] the space. And as you can see now my background is
- [00:03:22.309] And as you can see now my background is
- [00:03:22.319] And as you can see now my background is a little bit more interesting but I am
- [00:03:23.990] a little bit more interesting but I am
- [00:03:24.000] a little bit more interesting but I am still separated from it cuz we've given
- [00:03:26.309] still separated from it cuz we've given
- [00:03:26.319] still separated from it cuz we've given our background a different color. So
- [00:03:28.470] our background a different color. So
- [00:03:28.480] our background a different color. So let's quickly cut back to our before and
- [00:03:31.509] let's quickly cut back to our before and
- [00:03:31.519] let's quickly cut back to our before and our after. This is our before and after.
- [00:03:35.430] our after. This is our before and after.
- [00:03:35.440] our after. This is our before and after. So, this is our threepoint lighting
- [00:03:37.750] So, this is our threepoint lighting
- [00:03:37.760] So, this is our threepoint lighting setup. Um, there's many different other
- [00:03:40.229] setup. Um, there's many different other
- [00:03:40.239] setup. Um, there's many different other lighting setups you can choose, but the
- [00:03:42.470] lighting setups you can choose, but the
- [00:03:42.480] lighting setups you can choose, but the threepoint is your fundamental setup.
- [00:03:45.030] threepoint is your fundamental setup.
- [00:03:45.040] threepoint is your fundamental setup. It's the basic setup. You start there
- [00:03:47.509] It's the basic setup. You start there
- [00:03:47.519] It's the basic setup. You start there and then you add or change, you know,
- [00:03:49.589] and then you add or change, you know,
- [00:03:49.599] and then you add or change, you know, from here. Um, we have added other
- [00:03:52.309] from here. Um, we have added other
- [00:03:52.319] from here. Um, we have added other things to our setup like the background
- [00:03:54.949] things to our setup like the background
- [00:03:54.959] things to our setup like the background light giving us that purple color behind
- [00:03:57.429] light giving us that purple color behind
- [00:03:57.439] light giving us that purple color behind me. And we've used two lights to make
- [00:03:59.990] me. And we've used two lights to make
- [00:04:00.000] me. And we've used two lights to make our key lights more powerful. So both of
- [00:04:02.630] our key lights more powerful. So both of
- [00:04:02.640] our key lights more powerful. So both of the lights on the side of me are acting
- [00:04:04.710] the lights on the side of me are acting
- [00:04:04.720] the lights on the side of me are acting as the key light. So let's take a step
- [00:04:07.429] as the key light. So let's take a step
- [00:04:07.439] as the key light. So let's take a step back and see the setup itself.
- So this is our actual setup. These are
- [00:04:17.189] So this is our actual setup. These are
- [00:04:17.199] So this is our actual setup. These are our key lights which are being combined
- [00:04:19.749] our key lights which are being combined
- [00:04:19.759] our key lights which are being combined to be a bit more powerful. They're
- [00:04:21.830] to be a bit more powerful. They're
- [00:04:21.840] to be a bit more powerful. They're placed at the 45° angle and opposite our
- [00:04:25.189] placed at the 45° angle and opposite our
- [00:04:25.199] placed at the 45° angle and opposite our key light is the fill light. The fill
- [00:04:28.070] key light is the fill light. The fill
- [00:04:28.080] key light is the fill light. The fill light is softening the shadows created
- [00:04:30.870] light is softening the shadows created
- [00:04:30.880] light is softening the shadows created on this side of my face by the key
- [00:04:33.430] on this side of my face by the key
- [00:04:33.440] on this side of my face by the key light. Behind me, we have the backlight
- [00:04:36.550] light. Behind me, we have the backlight
- [00:04:36.560] light. Behind me, we have the backlight or the rim light creating that halo
- [00:04:38.790] or the rim light creating that halo
- [00:04:38.800] or the rim light creating that halo outline. And below here is our
- [00:04:41.590] outline. And below here is our
- [00:04:41.600] outline. And below here is our decorative background light which is
- [00:04:43.749] decorative background light which is
- [00:04:43.759] decorative background light which is adding some color behind me. This is our
- [00:04:46.390] adding some color behind me. This is our
- [00:04:46.400] adding some color behind me. This is our threepoint lighting setup and I'll see
- [00:04:48.469] threepoint lighting setup and I'll see
- [00:04:48.479] threepoint lighting setup and I'll see you guys back in the lesson. So, we just
- [00:04:51.430] you guys back in the lesson. So, we just
- [00:04:51.440] you guys back in the lesson. So, we just covered the threepoint lighting setup.
- [00:04:53.510] covered the threepoint lighting setup.
- [00:04:53.520] covered the threepoint lighting setup. This includes the key light, the fill
- [00:04:55.270] This includes the key light, the fill
- [00:04:55.280] This includes the key light, the fill light, and the rim light. I showed you
- [00:04:57.189] light, and the rim light. I showed you
- [00:04:57.199] light, and the rim light. I showed you how to set it up and you know why we use
- [00:04:59.590] how to set it up and you know why we use
- [00:04:59.600] how to set it up and you know why we use it. But remember, there are many
- [00:05:02.310] it. But remember, there are many
- [00:05:02.320] it. But remember, there are many different types of lighting setups that
- [00:05:04.710] different types of lighting setups that
- [00:05:04.720] different types of lighting setups that you can use for different types of
- [00:05:06.390] you can use for different types of
- [00:05:06.400] you can use for different types of content, different scenes. And I
- [00:05:08.390] content, different scenes. And I
- [00:05:08.400] content, different scenes. And I encourage you to do some research and
- [00:05:10.710] encourage you to do some research and
- [00:05:10.720] encourage you to do some research and see what works best for you. And
- [00:05:12.390] see what works best for you. And
- [00:05:12.400] see what works best for you. And remember, you don't also need expensive
- [00:05:14.629] remember, you don't also need expensive
- [00:05:14.639] remember, you don't also need expensive panel lights or ring lights. You can
- [00:05:16.790] panel lights or ring lights. You can
- [00:05:16.800] panel lights or ring lights. You can recreate a threepoint lighting setup
- [00:05:18.950] recreate a threepoint lighting setup
- [00:05:18.960] recreate a threepoint lighting setup using lamps from your house. you know,
- [00:05:21.909] using lamps from your house. you know,
- [00:05:21.919] using lamps from your house. you know, turn on your ceiling light, grab a lamp,
- [00:05:24.950] turn on your ceiling light, grab a lamp,
- [00:05:24.960] turn on your ceiling light, grab a lamp, put it up somewhere, put a back light
- [00:05:27.430] put it up somewhere, put a back light
- [00:05:27.440] put it up somewhere, put a back light using fairy lights, and, you know, get
- [00:05:29.990] using fairy lights, and, you know, get
- [00:05:30.000] using fairy lights, and, you know, get creative, play around. Lighting is one
- [00:05:32.070] creative, play around. Lighting is one
- [00:05:32.080] creative, play around. Lighting is one of those uh disciplines where you can be
- [00:05:35.270] of those uh disciplines where you can be
- [00:05:35.280] of those uh disciplines where you can be as creative and, you know, find so many
- [00:05:38.390] as creative and, you know, find so many
- [00:05:38.400] as creative and, you know, find so many new possibilities to make an interesting
- [00:05:41.110] new possibilities to make an interesting
- [00:05:41.120] new possibilities to make an interesting image. Thank you guys so much and I hope
- [00:05:44.150] image. Thank you guys so much and I hope
- [00:05:44.160] image. Thank you guys so much and I hope to see you in the next video.
Keyframes
- /workspace/academy/media/1OxQD8EF9fnTkYSF_dcGFZMRzJmXMeYXS/keyframes/last.jpg
- /workspace/academy/media/1OxQD8EF9fnTkYSF_dcGFZMRzJmXMeYXS/keyframes/t002.jpg
- /workspace/academy/media/1OxQD8EF9fnTkYSF_dcGFZMRzJmXMeYXS/keyframes/t003.jpg
- /workspace/academy/media/1OxQD8EF9fnTkYSF_dcGFZMRzJmXMeYXS/keyframes/t005.jpg
- /workspace/academy/media/1OxQD8EF9fnTkYSF_dcGFZMRzJmXMeYXS/keyframes/t006.jpg
- /workspace/academy/media/1OxQD8EF9fnTkYSF_dcGFZMRzJmXMeYXS/keyframes/t008.jpg
- /workspace/academy/media/1OxQD8EF9fnTkYSF_dcGFZMRzJmXMeYXS/keyframes/t009.jpg
- /workspace/academy/media/1OxQD8EF9fnTkYSF_dcGFZMRzJmXMeYXS/keyframes/t011.jpg
- /workspace/academy/media/1OxQD8EF9fnTkYSF_dcGFZMRzJmXMeYXS/keyframes/t012.jpg
- /workspace/academy/media/1OxQD8EF9fnTkYSF_dcGFZMRzJmXMeYXS/keyframes/t014.jpg
- /workspace/academy/media/1OxQD8EF9fnTkYSF_dcGFZMRzJmXMeYXS/keyframes/t015.jpg
- /workspace/academy/media/1OxQD8EF9fnTkYSF_dcGFZMRzJmXMeYXS/keyframes/t017.jpg
- /workspace/academy/media/1OxQD8EF9fnTkYSF_dcGFZMRzJmXMeYXS/keyframes/t018.jpg
- /workspace/academy/media/1OxQD8EF9fnTkYSF_dcGFZMRzJmXMeYXS/keyframes/t020.jpg
- /workspace/academy/media/1OxQD8EF9fnTkYSF_dcGFZMRzJmXMeYXS/keyframes/t021.jpg
- /workspace/academy/media/1OxQD8EF9fnTkYSF_dcGFZMRzJmXMeYXS/keyframes/t023.jpg
- /workspace/academy/media/1OxQD8EF9fnTkYSF_dcGFZMRzJmXMeYXS/keyframes/t024.jpg
- /workspace/academy/media/1OxQD8EF9fnTkYSF_dcGFZMRzJmXMeYXS/keyframes/t026.jpg
- /workspace/academy/media/1OxQD8EF9fnTkYSF_dcGFZMRzJmXMeYXS/keyframes/t027.jpg
- /workspace/academy/media/1OxQD8EF9fnTkYSF_dcGFZMRzJmXMeYXS/keyframes/t029.jpg
- /workspace/academy/media/1OxQD8EF9fnTkYSF_dcGFZMRzJmXMeYXS/keyframes/t030.jpg
- /workspace/academy/media/1OxQD8EF9fnTkYSF_dcGFZMRzJmXMeYXS/keyframes/t032.jpg
- /workspace/academy/media/1OxQD8EF9fnTkYSF_dcGFZMRzJmXMeYXS/keyframes/t033.jpg
- /workspace/academy/media/1OxQD8EF9fnTkYSF_dcGFZMRzJmXMeYXS/keyframes/t035.jpg
61. Natural Lighting
- title: Natural Lighting
- status: publish
- author: 0
- is_previewable: (empty)
- video_duration: 0h 3m 50s (raw {"hours":0,"minutes":3,"seconds":50})
- video_source_type: embedded
- drive_file_id:
1-BoNYyR32TS-lvh8sfRQ1aZPyITVmvx9(source_ref; not a public link) - transcript pending / keyframes pending / presentation extract pending
- video_source_url: (Drive preview omitted as a public link; file id kept as source_ref)
(no lesson_content HTML in export — video-only or empty body; metadata above kept in full)
Drive extract
- file_id:
1-BoNYyR32TS-lvh8sfRQ1aZPyITVmvx9 - filename: VEST Section 5 Lighting 3 Natural Lighting.mp4
- kind: video
- local_path: /workspace/academy/media/1-BoNYyR32TS-lvh8sfRQ1aZPyITVmvx9/VEST Section 5 Lighting 3 Natural Lighting.mp4
- source_ref: drive
1-BoNYyR32TS-lvh8sfRQ1aZPyITVmvx9· content_length 355863367 · original https://drive.google.com/file/d/1-BoNYyR32TS-lvh8sfRQ1aZPyITVmvx9/view - extract_status: done
- caption_source: drive_timedtext
- duration_s: 229.785011
- keyframe_count: 24
Transcript
- Hey guys, welcome back to the lighting
- [00:00:02.230] Hey guys, welcome back to the lighting
- [00:00:02.240] Hey guys, welcome back to the lighting tutorial. Today we're going to cover
- [00:00:03.830] tutorial. Today we're going to cover
- [00:00:03.840] tutorial. Today we're going to cover natural lighting. This includes the
- [00:00:06.550] natural lighting. This includes the
- [00:00:06.560] natural lighting. This includes the perfect time to shoot outdoors um and
- [00:00:09.430] perfect time to shoot outdoors um and
- [00:00:09.440] perfect time to shoot outdoors um and also how to compensate when you can't
- [00:00:11.430] also how to compensate when you can't
- [00:00:11.440] also how to compensate when you can't use that perfect time. Firstly, I'm
- [00:00:13.430] use that perfect time. Firstly, I'm
- [00:00:13.440] use that perfect time. Firstly, I'm going to cover golden hour versus the
- [00:00:15.749] going to cover golden hour versus the
- [00:00:15.759] going to cover golden hour versus the harsh midday sun. So, golden hour is the
- [00:00:18.870] harsh midday sun. So, golden hour is the
- [00:00:18.880] harsh midday sun. So, golden hour is the hour after sunrise and before sunset. It
- [00:00:22.470] hour after sunrise and before sunset. It
- [00:00:22.480] hour after sunrise and before sunset. It is the most beautiful time to film
- [00:00:25.670] is the most beautiful time to film
- [00:00:25.680] is the most beautiful time to film outdoors. you get your sun at a very low
- [00:00:28.630] outdoors. you get your sun at a very low
- [00:00:28.640] outdoors. you get your sun at a very low angle and it creates soft shadows and
- [00:00:31.509] angle and it creates soft shadows and
- [00:00:31.519] angle and it creates soft shadows and gives a yellowy light on your face,
- [00:00:34.150] gives a yellowy light on your face,
- [00:00:34.160] gives a yellowy light on your face, hence the name golden hour. But if you
- [00:00:36.950] hence the name golden hour. But if you
- [00:00:36.960] hence the name golden hour. But if you can't and you have to shoot in what we'd
- [00:00:39.510] can't and you have to shoot in what we'd
- [00:00:39.520] can't and you have to shoot in what we'd call a harsh midday sun. So during the
- [00:00:42.630] call a harsh midday sun. So during the
- [00:00:42.640] call a harsh midday sun. So during the middle of the day, the sun is right
- [00:00:44.389] middle of the day, the sun is right
- [00:00:44.399] middle of the day, the sun is right above your head and it casts these ugly
- [00:00:47.430] above your head and it casts these ugly
- [00:00:47.440] above your head and it casts these ugly shadows below your eyes. um makes your
- [00:00:50.150] shadows below your eyes. um makes your
- [00:00:50.160] shadows below your eyes. um makes your face look tired and it basically washes
- [00:00:53.830] face look tired and it basically washes
- [00:00:53.840] face look tired and it basically washes out all the light on your subjects. So
- [00:00:56.470] out all the light on your subjects. So
- [00:00:56.480] out all the light on your subjects. So if you have to shoot in the midday sun
- [00:00:58.630] if you have to shoot in the midday sun
- [00:00:58.640] if you have to shoot in the midday sun or you know any other time that isn't as
- [00:01:02.150] or you know any other time that isn't as
- [00:01:02.160] or you know any other time that isn't as nice as like golden hour, it's good to
- [00:01:04.869] nice as like golden hour, it's good to
- [00:01:04.879] nice as like golden hour, it's good to shoot in shade like under trees or use
- [00:01:07.670] shoot in shade like under trees or use
- [00:01:07.680] shoot in shade like under trees or use things like diffusers to diffuse the
- [00:01:09.830] things like diffusers to diffuse the
- [00:01:09.840] things like diffusers to diffuse the light um blockers create shadows for
- [00:01:12.149] light um blockers create shadows for
- [00:01:12.159] light um blockers create shadows for yourself. That being said, if your
- [00:01:14.390] yourself. That being said, if your
- [00:01:14.400] yourself. That being said, if your intention is to make someone look tired
- [00:01:18.469] intention is to make someone look tired
- [00:01:18.479] intention is to make someone look tired and burnt out, maybe shooting them under
- [00:01:21.830] and burnt out, maybe shooting them under
- [00:01:21.840] and burnt out, maybe shooting them under the harsh midday sun can have narrative
- [00:01:24.230] the harsh midday sun can have narrative
- [00:01:24.240] the harsh midday sun can have narrative reasons. Another thing you can do is
- [00:01:26.630] reasons. Another thing you can do is
- [00:01:26.640] reasons. Another thing you can do is take advantage of ambient light. If
- [00:01:28.710] take advantage of ambient light. If
- [00:01:28.720] take advantage of ambient light. If you're shooting indoors and you don't
- [00:01:31.109] you're shooting indoors and you don't
- [00:01:31.119] you're shooting indoors and you don't have fancy lighting setups, shoot next
- [00:01:33.429] have fancy lighting setups, shoot next
- [00:01:33.439] have fancy lighting setups, shoot next to windows and use the light leaking in
- [00:01:36.149] to windows and use the light leaking in
- [00:01:36.159] to windows and use the light leaking in through window sills to, you know,
- [00:01:38.469] through window sills to, you know,
- [00:01:38.479] through window sills to, you know, create a creative image. You can even
- [00:01:40.630] create a creative image. You can even
- [00:01:40.640] create a creative image. You can even use the shadows and the light rays cast
- [00:01:44.230] use the shadows and the light rays cast
- [00:01:44.240] use the shadows and the light rays cast by different windows, different light,
- [00:01:46.310] by different windows, different light,
- [00:01:46.320] by different windows, different light, different ambience to even further
- [00:01:48.950] different ambience to even further
- [00:01:48.960] different ambience to even further elevate your composition. So, just
- [00:01:51.670] elevate your composition. So, just
- [00:01:51.680] elevate your composition. So, just remember when using natural lighting to
- [00:01:53.990] remember when using natural lighting to
- [00:01:54.000] remember when using natural lighting to get creative with where and when you
- [00:01:58.149] get creative with where and when you
- [00:01:58.159] get creative with where and when you film. Lighting is one of the disciplines
- [00:02:00.630] film. Lighting is one of the disciplines
- [00:02:00.640] film. Lighting is one of the disciplines that's about control. And you can't
- [00:02:03.030] that's about control. And you can't
- [00:02:03.040] that's about control. And you can't control the sun, but you can control
- [00:02:05.510] control the sun, but you can control
- [00:02:05.520] control the sun, but you can control when you shoot under the sun. Another
- [00:02:07.670] when you shoot under the sun. Another
- [00:02:07.680] when you shoot under the sun. Another great natural diffuser for the harsh
- [00:02:09.669] great natural diffuser for the harsh
- [00:02:09.679] great natural diffuser for the harsh midday sun is just clouds. If you have
- [00:02:12.390] midday sun is just clouds. If you have
- [00:02:12.400] midday sun is just clouds. If you have to shoot during the day and it's a
- [00:02:15.030] to shoot during the day and it's a
- [00:02:15.040] to shoot during the day and it's a cloudy day, it will look a lot better
- [00:02:17.990] cloudy day, it will look a lot better
- [00:02:18.000] cloudy day, it will look a lot better than if the sun is directly above you at
- [00:02:20.309] than if the sun is directly above you at
- [00:02:20.319] than if the sun is directly above you at full intensity. Here are some examples
- [00:02:23.190] full intensity. Here are some examples
- [00:02:23.200] full intensity. Here are some examples of golden hour versus the midday sun.
- Here are some examples of shooting
- [00:02:33.750] Here are some examples of shooting
- [00:02:33.760] Here are some examples of shooting directly under the sun versus in the
- [00:02:35.910] directly under the sun versus in the
- [00:02:35.920] directly under the sun versus in the shade or with diffusers.
- Here's some examples of ambient light.
- Here's some examples of diffusers,
- [00:02:52.390] Here's some examples of diffusers,
- [00:02:52.400] Here's some examples of diffusers, blockers, and reflectors and how we use
- [00:02:55.030] blockers, and reflectors and how we use
- [00:02:55.040] blockers, and reflectors and how we use them. So here we have an example of a uh
- [00:02:59.509] them. So here we have an example of a uh
- [00:02:59.519] them. So here we have an example of a uh reflector and blocker and you know
- [00:03:01.910] reflector and blocker and you know
- [00:03:01.920] reflector and blocker and you know diffuser. So this is a nice all-in-one
- [00:03:04.309] diffuser. So this is a nice all-in-one
- [00:03:04.319] diffuser. So this is a nice all-in-one package. We open this up. On this side
- [00:03:07.350] package. We open this up. On this side
- [00:03:07.360] package. We open this up. On this side we have our blocker. On this side we
- [00:03:09.670] we have our blocker. On this side we
- [00:03:09.680] we have our blocker. On this side we have our reflector which will allow us
- [00:03:11.589] have our reflector which will allow us
- [00:03:11.599] have our reflector which will allow us to reflect light. Um and if we open this
- [00:03:16.470] to reflect light. Um and if we open this
- [00:03:16.480] to reflect light. Um and if we open this off and take the sleeve off, we have our
- [00:03:21.670] off and take the sleeve off, we have our
- [00:03:21.680] off and take the sleeve off, we have our diffuser of light. So this one will then
- [00:03:24.790] diffuser of light. So this one will then
- [00:03:24.800] diffuser of light. So this one will then diffuse light and make it less harsh and
- [00:03:27.509] diffuse light and make it less harsh and
- [00:03:27.519] diffuse light and make it less harsh and the shadows, you know, not as bad on
- [00:03:29.430] the shadows, you know, not as bad on
- [00:03:29.440] the shadows, you know, not as bad on your face. So yeah, that's our blocker
- [00:03:32.710] your face. So yeah, that's our blocker
- [00:03:32.720] your face. So yeah, that's our blocker reflector and diffuser. So we just
- [00:03:35.589] reflector and diffuser. So we just
- [00:03:35.599] reflector and diffuser. So we just covered natural lighting, golden hour
- [00:03:37.910] covered natural lighting, golden hour
- [00:03:37.920] covered natural lighting, golden hour versus the midday sun, you know, ambient
- [00:03:40.550] versus the midday sun, you know, ambient
- [00:03:40.560] versus the midday sun, you know, ambient lighting and how to use blockers,
- [00:03:43.030] lighting and how to use blockers,
- [00:03:43.040] lighting and how to use blockers, diffusers, and reflectors. Thank you
- [00:03:45.270] diffusers, and reflectors. Thank you
- [00:03:45.280] diffusers, and reflectors. Thank you guys, and I hope to see you soon.
Keyframes
- /workspace/academy/media/1-BoNYyR32TS-lvh8sfRQ1aZPyITVmvx9/keyframes/last.jpg
- /workspace/academy/media/1-BoNYyR32TS-lvh8sfRQ1aZPyITVmvx9/keyframes/t001.jpg
- /workspace/academy/media/1-BoNYyR32TS-lvh8sfRQ1aZPyITVmvx9/keyframes/t002.jpg
- /workspace/academy/media/1-BoNYyR32TS-lvh8sfRQ1aZPyITVmvx9/keyframes/t003.jpg
- /workspace/academy/media/1-BoNYyR32TS-lvh8sfRQ1aZPyITVmvx9/keyframes/t004.jpg
- /workspace/academy/media/1-BoNYyR32TS-lvh8sfRQ1aZPyITVmvx9/keyframes/t005.jpg
- /workspace/academy/media/1-BoNYyR32TS-lvh8sfRQ1aZPyITVmvx9/keyframes/t006.jpg
- /workspace/academy/media/1-BoNYyR32TS-lvh8sfRQ1aZPyITVmvx9/keyframes/t007.jpg
- /workspace/academy/media/1-BoNYyR32TS-lvh8sfRQ1aZPyITVmvx9/keyframes/t008.jpg
- /workspace/academy/media/1-BoNYyR32TS-lvh8sfRQ1aZPyITVmvx9/keyframes/t009.jpg
- /workspace/academy/media/1-BoNYyR32TS-lvh8sfRQ1aZPyITVmvx9/keyframes/t010.jpg
- /workspace/academy/media/1-BoNYyR32TS-lvh8sfRQ1aZPyITVmvx9/keyframes/t011.jpg
- /workspace/academy/media/1-BoNYyR32TS-lvh8sfRQ1aZPyITVmvx9/keyframes/t012.jpg
- /workspace/academy/media/1-BoNYyR32TS-lvh8sfRQ1aZPyITVmvx9/keyframes/t013.jpg
- /workspace/academy/media/1-BoNYyR32TS-lvh8sfRQ1aZPyITVmvx9/keyframes/t014.jpg
- /workspace/academy/media/1-BoNYyR32TS-lvh8sfRQ1aZPyITVmvx9/keyframes/t015.jpg
- /workspace/academy/media/1-BoNYyR32TS-lvh8sfRQ1aZPyITVmvx9/keyframes/t016.jpg
- /workspace/academy/media/1-BoNYyR32TS-lvh8sfRQ1aZPyITVmvx9/keyframes/t017.jpg
- /workspace/academy/media/1-BoNYyR32TS-lvh8sfRQ1aZPyITVmvx9/keyframes/t018.jpg
- /workspace/academy/media/1-BoNYyR32TS-lvh8sfRQ1aZPyITVmvx9/keyframes/t019.jpg
- /workspace/academy/media/1-BoNYyR32TS-lvh8sfRQ1aZPyITVmvx9/keyframes/t020.jpg
- /workspace/academy/media/1-BoNYyR32TS-lvh8sfRQ1aZPyITVmvx9/keyframes/t021.jpg
- /workspace/academy/media/1-BoNYyR32TS-lvh8sfRQ1aZPyITVmvx9/keyframes/t022.jpg
- /workspace/academy/media/1-BoNYyR32TS-lvh8sfRQ1aZPyITVmvx9/keyframes/t023.jpg
62. Terminology Camera Control & Lighting
- title: Terminology Camera Control & Lighting
- status: publish
- author: 0
- is_previewable: (empty)
- video_duration: 0h 0m 0s (raw {"hours":0,"minutes":0,"seconds":0})
- video_source_type: (empty)
**
**
VEST Essential Terminology Glossary
Here is a list of the core generic terminology your VEST students will encounter throughout the course, along with brief, clear descriptions.
This glossary covers the non-software-specific terms used in the course, from concept to final export.
Camera Control (Movement & Gear)
| Term | Description |
|---|---|
| Pan / Panning | Rotating the camera horizontally (left or right) from a fixed point (like turning your head). |
| Tilt / Tilting | Rotating the camera vertically (up or down) from a fixed point (like nodding your head). |
| Tracking Shot | Physically moving the camera parallel to the subject (e.g., walking alongside a subject). |
| Key Light | The primary and brightest light source, setting the overall look and shadows on the subject. |
| Fill Light | The secondary light source used to soften or fill in the shadows created by the Key Light. |
| Diffuser | A material (like a sheer curtain or translucent fabric) placed between the light and the subject to soften harsh light and reduce contrast. |
| Reflector | A surface (often white, silver, or gold) used to bounce existing light back onto the subject to fill shadows. |
- quizzes_following_this_lesson: 1 (full text in Quizzes)
- Natural Lighting Quiz (5 questions)
63. Lighting Conclusion
- title: Lighting Conclusion
- status: publish
- author: 0
- is_previewable: (empty)
- video_duration: 0h 1m 39s (raw {"hours":0,"minutes":1,"seconds":39})
- video_source_type: embedded
- drive_file_id:
15kQcpettXHn6ZETHIHYLx_pQOKvFNcHg(source_ref; not a public link) - transcript pending / keyframes pending / presentation extract pending
- video_source_url: (Drive preview omitted as a public link; file id kept as source_ref)
(no lesson_content HTML in export — video-only or empty body; metadata above kept in full)
Drive extract
- file_id:
15kQcpettXHn6ZETHIHYLx_pQOKvFNcHg - filename: VEST Section 5 Lighting 4 Outro.mp4
- kind: video
- local_path: /workspace/academy/media/15kQcpettXHn6ZETHIHYLx_pQOKvFNcHg/VEST Section 5 Lighting 4 Outro.mp4
- source_ref: drive
15kQcpettXHn6ZETHIHYLx_pQOKvFNcHg· content_length 147282110 · original https://drive.google.com/file/d/15kQcpettXHn6ZETHIHYLx_pQOKvFNcHg/view - extract_status: done
- caption_source: drive_timedtext
- duration_s: 99.149002
- keyframe_count: 11
Transcript
- Hey guys. So, you just completed the
- [00:00:02.550] Hey guys. So, you just completed the
- [00:00:02.560] Hey guys. So, you just completed the lighting section. Um, we covered some of
- [00:00:05.269] lighting section. Um, we covered some of
- [00:00:05.279] lighting section. Um, we covered some of the rules and techniques of lighting
- [00:00:07.990] the rules and techniques of lighting
- [00:00:08.000] the rules and techniques of lighting such as threepoint lighting. We spoke
- [00:00:09.830] such as threepoint lighting. We spoke
- [00:00:09.840] such as threepoint lighting. We spoke about natural lighting, um, golden hour
- [00:00:12.790] about natural lighting, um, golden hour
- [00:00:12.800] about natural lighting, um, golden hour versus the midday sun. But remember,
- [00:00:14.950] versus the midday sun. But remember,
- [00:00:14.960] versus the midday sun. But remember, there's also many different ways of
- [00:00:16.950] there's also many different ways of
- [00:00:16.960] there's also many different ways of being creative with lighting. Use the
- [00:00:19.269] being creative with lighting. Use the
- [00:00:19.279] being creative with lighting. Use the temperature and the color of your
- [00:00:20.870] temperature and the color of your
- [00:00:20.880] temperature and the color of your lights. Even if it's the threepoint
- [00:00:22.870] lights. Even if it's the threepoint
- [00:00:22.880] lights. Even if it's the threepoint setup and you're changing the
- [00:00:24.710] setup and you're changing the
- [00:00:24.720] setup and you're changing the temperature to be cooler or warmer or
- [00:00:27.349] temperature to be cooler or warmer or
- [00:00:27.359] temperature to be cooler or warmer or have a different color or a weird color
- [00:00:29.429] have a different color or a weird color
- [00:00:29.439] have a different color or a weird color like green or purple, that can actually
- [00:00:32.389] like green or purple, that can actually
- [00:00:32.399] like green or purple, that can actually add to a narrative. It can add to a
- [00:00:35.670] add to a narrative. It can add to a
- [00:00:35.680] add to a narrative. It can add to a story you're trying to tell. It can add
- [00:00:37.910] story you're trying to tell. It can add
- [00:00:37.920] story you're trying to tell. It can add to whatever content you're trying to
- [00:00:39.590] to whatever content you're trying to
- [00:00:39.600] to whatever content you're trying to make. It does elevate your narrative.
- [00:00:41.990] make. It does elevate your narrative.
- [00:00:42.000] make. It does elevate your narrative. You can use decorative lights, fairy
- [00:00:44.069] You can use decorative lights, fairy
- [00:00:44.079] You can use decorative lights, fairy lights. Um, if you look at the
- [00:00:46.069] lights. Um, if you look at the
- [00:00:46.079] lights. Um, if you look at the background behind me, that's actually a
- [00:00:47.990] background behind me, that's actually a
- [00:00:48.000] background behind me, that's actually a white wall and we're using lighting to
- [00:00:51.510] white wall and we're using lighting to
- [00:00:51.520] white wall and we're using lighting to make it look more interesting and more
- [00:00:53.270] make it look more interesting and more
- [00:00:53.280] make it look more interesting and more colorful. So, just remember to get
- [00:00:55.350] colorful. So, just remember to get
- [00:00:55.360] colorful. So, just remember to get creative. You make use of color and
- [00:00:57.750] creative. You make use of color and
- [00:00:57.760] creative. You make use of color and temperature and experiment. Always start
- [00:01:00.470] temperature and experiment. Always start
- [00:01:00.480] temperature and experiment. Always start with your threepoint lighting setup and
- [00:01:02.869] with your threepoint lighting setup and
- [00:01:02.879] with your threepoint lighting setup and then from there change it. With all that
- [00:01:04.869] then from there change it. With all that
- [00:01:04.879] then from there change it. With all that being said, remember you still want to
- [00:01:06.550] being said, remember you still want to
- [00:01:06.560] being said, remember you still want to keep um your lighting consistent. You
- [00:01:08.870] keep um your lighting consistent. You
- [00:01:08.880] keep um your lighting consistent. You don't want to have one shot where it's
- [00:01:10.870] don't want to have one shot where it's
- [00:01:10.880] don't want to have one shot where it's dark and mysterious and then all of a
- [00:01:13.590] dark and mysterious and then all of a
- [00:01:13.600] dark and mysterious and then all of a sudden it's bright and you can see
- [00:01:15.350] sudden it's bright and you can see
- [00:01:15.360] sudden it's bright and you can see everything. And if lighting does change,
- [00:01:17.990] everything. And if lighting does change,
- [00:01:18.000] everything. And if lighting does change, you want to show a reason for that
- [00:01:19.350] you want to show a reason for that
- [00:01:19.360] you want to show a reason for that change in your narrative. Did someone
- [00:01:20.870] change in your narrative. Did someone
- [00:01:20.880] change in your narrative. Did someone switch on a light switch? Did someone um
- [00:01:23.270] switch on a light switch? Did someone um
- [00:01:23.280] switch on a light switch? Did someone um light a match? You know, you need to
- [00:01:25.749] light a match? You know, you need to
- [00:01:25.759] light a match? You know, you need to make sure that your lighting is
- [00:01:27.350] make sure that your lighting is
- [00:01:27.360] make sure that your lighting is consistent and if there is change,
- [00:01:29.350] consistent and if there is change,
- [00:01:29.360] consistent and if there is change, there's a narrative reason behind it.
- [00:01:31.429] there's a narrative reason behind it.
- [00:01:31.439] there's a narrative reason behind it. Thank you guys and I hope to see you in
- [00:01:33.510] Thank you guys and I hope to see you in
- [00:01:33.520] Thank you guys and I hope to see you in the next section.
Keyframes
- /workspace/academy/media/15kQcpettXHn6ZETHIHYLx_pQOKvFNcHg/keyframes/last.jpg
- /workspace/academy/media/15kQcpettXHn6ZETHIHYLx_pQOKvFNcHg/keyframes/t001.jpg
- /workspace/academy/media/15kQcpettXHn6ZETHIHYLx_pQOKvFNcHg/keyframes/t002.jpg
- /workspace/academy/media/15kQcpettXHn6ZETHIHYLx_pQOKvFNcHg/keyframes/t003.jpg
- /workspace/academy/media/15kQcpettXHn6ZETHIHYLx_pQOKvFNcHg/keyframes/t004.jpg
- /workspace/academy/media/15kQcpettXHn6ZETHIHYLx_pQOKvFNcHg/keyframes/t005.jpg
- /workspace/academy/media/15kQcpettXHn6ZETHIHYLx_pQOKvFNcHg/keyframes/t006.jpg
- /workspace/academy/media/15kQcpettXHn6ZETHIHYLx_pQOKvFNcHg/keyframes/t007.jpg
- /workspace/academy/media/15kQcpettXHn6ZETHIHYLx_pQOKvFNcHg/keyframes/t008.jpg
- /workspace/academy/media/15kQcpettXHn6ZETHIHYLx_pQOKvFNcHg/keyframes/t009.jpg
- /workspace/academy/media/15kQcpettXHn6ZETHIHYLx_pQOKvFNcHg/keyframes/t010.jpg
64. Sound Intro
- title: Sound Intro
- status: publish
- author: 0
- is_previewable: (empty)
- video_duration: 0h 0m 29s (raw {"hours":0,"minutes":0,"seconds":29})
- video_source_type: embedded
- drive_file_id:
10tM9njbdKSe8UA-9lULk2etWNIQE-LzS(source_ref; not a public link) - transcript pending / keyframes pending / presentation extract pending
- video_source_url: (Drive preview omitted as a public link; file id kept as source_ref)
(no lesson_content HTML in export — video-only or empty body; metadata above kept in full)
Drive extract
- file_id:
10tM9njbdKSe8UA-9lULk2etWNIQE-LzS - filename: VEST Section 6 Sound 1 Intro.mp4
- kind: video
- local_path: /workspace/academy/media/10tM9njbdKSe8UA-9lULk2etWNIQE-LzS/VEST Section 6 Sound 1 Intro.mp4
- source_ref: drive
10tM9njbdKSe8UA-9lULk2etWNIQE-LzS· content_length 43233952 · original https://drive.google.com/file/d/10tM9njbdKSe8UA-9lULk2etWNIQE-LzS/view - extract_status: done
- caption_source: drive_timedtext
- duration_s: 28.816009
- keyframe_count: 4
Transcript
- Hey guys, welcome back to the Vest
- [00:00:02.230] Hey guys, welcome back to the Vest
- [00:00:02.240] Hey guys, welcome back to the Vest online course. In this section, we're
- [00:00:04.550] online course. In this section, we're
- [00:00:04.560] online course. In this section, we're going to be covering sound and why it's
- [00:00:06.710] going to be covering sound and why it's
- [00:00:06.720] going to be covering sound and why it's an important part of your online
- [00:00:09.509] an important part of your online
- [00:00:09.519] an important part of your online content. I'm going to show you different
- [00:00:12.310] content. I'm going to show you different
- [00:00:12.320] content. I'm going to show you different techniques to help you manage and
- [00:00:14.629] techniques to help you manage and
- [00:00:14.639] techniques to help you manage and control your sound and also how to add
- [00:00:17.109] control your sound and also how to add
- [00:00:17.119] control your sound and also how to add different elements like music, sound
- [00:00:19.349] different elements like music, sound
- [00:00:19.359] different elements like music, sound effects, ambience to elevate your
- [00:00:21.750] effects, ambience to elevate your
- [00:00:21.760] effects, ambience to elevate your content and make it more engaging. Thank
- [00:00:24.390] content and make it more engaging. Thank
- [00:00:24.400] content and make it more engaging. Thank you and I hope you guys enjoy this
- [00:00:26.230] you and I hope you guys enjoy this
- [00:00:26.240] you and I hope you guys enjoy this section.
Keyframes
- /workspace/academy/media/10tM9njbdKSe8UA-9lULk2etWNIQE-LzS/keyframes/last.jpg
- /workspace/academy/media/10tM9njbdKSe8UA-9lULk2etWNIQE-LzS/keyframes/t001.jpg
- /workspace/academy/media/10tM9njbdKSe8UA-9lULk2etWNIQE-LzS/keyframes/t002.jpg
- /workspace/academy/media/10tM9njbdKSe8UA-9lULk2etWNIQE-LzS/keyframes/t003.jpg
65. Terminology Sound
- title: Terminology Sound
- status: publish
- author: 0
- is_previewable: (empty)
- video_duration: 0h 0m 0s (raw {"hours":0,"minutes":0,"seconds":0})
- video_source_type: (empty)
**
**
VEST Essential Terminology Glossary
Here is a list of the core generic terminology your VEST students will encounter throughout the course, along with brief, clear descriptions.
This glossary covers the non-software-specific terms used in the course, from concept to final export.
Sound (Audio Mixing)
| Term | Description |
|---|---|
| Dialogue | The spoken words of the subject; this is the most critical audio track. |
| Sound Effects (SFX) | Supplemental audio used to emphasize actions, realism, or transitions (e.g., a door closing, a whoosh). |
| Reverb | The persistence of sound in a large, empty space after the original sound has stopped (echoing); a common indicator of poor recording acoustics. |
| Audio Levels (Mixing) | The process of setting the volume for all sound tracks to ensure a balanced, clear final product (Dialogue must be loudest). |
| Sync | The process of aligning external audio with the video footage to ensure the sound matches the mouth movements and actions on screen. |
66. Importance of Sound
- title: Importance of Sound
- status: publish
- author: 0
- is_previewable: (empty)
- video_duration: 0h 2m 10s (raw {"hours":0,"minutes":2,"seconds":10})
- video_source_type: embedded
- drive_file_id:
1iP-6AwG_IESR4O2F5iDjO1DMDfJE2Vuc(source_ref; not a public link) - transcript pending / keyframes pending / presentation extract pending
- video_source_url: (Drive preview omitted as a public link; file id kept as source_ref)
(no lesson_content HTML in export — video-only or empty body; metadata above kept in full)
Drive extract
- file_id:
1iP-6AwG_IESR4O2F5iDjO1DMDfJE2Vuc - filename: VEST Section 6 Sound 2 Importance of Sound.mp4
- kind: video
- local_path: /workspace/academy/media/1iP-6AwG_IESR4O2F5iDjO1DMDfJE2Vuc/VEST Section 6 Sound 2 Importance of Sound.mp4
- source_ref: drive
1iP-6AwG_IESR4O2F5iDjO1DMDfJE2Vuc· content_length 201061018 · original https://drive.google.com/file/d/1iP-6AwG_IESR4O2F5iDjO1DMDfJE2Vuc/view - extract_status: done
- caption_source: drive_timedtext
- duration_s: 130.055011
- keyframe_count: 12
Transcript
- Hey guys, today in sound we're going to
- [00:00:02.310] Hey guys, today in sound we're going to
- [00:00:02.320] Hey guys, today in sound we're going to be covering why it's important and I'm
- [00:00:04.710] be covering why it's important and I'm
- [00:00:04.720] be covering why it's important and I'm going to show you how jarring bad sound
- [00:00:07.510] going to show you how jarring bad sound
- [00:00:07.520] going to show you how jarring bad sound can actually be. So even when video and
- [00:00:09.990] can actually be. So even when video and
- [00:00:10.000] can actually be. So even when video and cinema was first invented, they still
- [00:00:12.150] cinema was first invented, they still
- [00:00:12.160] cinema was first invented, they still added sound in the form of music.
- [00:00:14.310] added sound in the form of music.
- [00:00:14.320] added sound in the form of music. Someone playing the piano at the front
- [00:00:16.070] Someone playing the piano at the front
- [00:00:16.080] Someone playing the piano at the front of the cinema because sound is one of
- [00:00:18.630] of the cinema because sound is one of
- [00:00:18.640] of the cinema because sound is one of the most important aspects of video,
- [00:00:22.790] the most important aspects of video,
- [00:00:22.800] the most important aspects of video, funny enough to keep engagement, to keep
- [00:00:25.429] funny enough to keep engagement, to keep
- [00:00:25.439] funny enough to keep engagement, to keep people watching so that people don't
- [00:00:27.029] people watching so that people don't
- [00:00:27.039] people watching so that people don't lose interest or get bored. How many
- [00:00:29.189] lose interest or get bored. How many
- [00:00:29.199] lose interest or get bored. How many times have you turned off the TV or been
- [00:00:31.990] times have you turned off the TV or been
- [00:00:32.000] times have you turned off the TV or been in a cinema with a bad speaker and the
- [00:00:34.790] in a cinema with a bad speaker and the
- [00:00:34.800] in a cinema with a bad speaker and the problematic sound is so off-putting that
- [00:00:37.910] problematic sound is so off-putting that
- [00:00:37.920] problematic sound is so off-putting that you want to leave or complain or turn it
- [00:00:40.150] you want to leave or complain or turn it
- [00:00:40.160] you want to leave or complain or turn it off? It is so much easier to watch a bad
- [00:00:43.830] off? It is so much easier to watch a bad
- [00:00:43.840] off? It is so much easier to watch a bad quality video with good sound than it is
- [00:00:46.630] quality video with good sound than it is
- [00:00:46.640] quality video with good sound than it is to watch, you know, a good quality video
- [00:00:48.549] to watch, you know, a good quality video
- [00:00:48.559] to watch, you know, a good quality video with bad sound. So, that being said,
- [00:00:50.709] with bad sound. So, that being said,
- [00:00:50.719] with bad sound. So, that being said, here is an example of a video that is
- [00:00:54.709] here is an example of a video that is
- [00:00:54.719] here is an example of a video that is good quality, but the sound is bad.
- [00:00:58.790] good quality, but the sound is bad.
- [00:00:58.800] good quality, but the sound is bad. So guys, our 10,000 rand DTF giveaway
- [00:01:02.470] So guys, our 10,000 rand DTF giveaway
- [00:01:02.480] So guys, our 10,000 rand DTF giveaway competition is finally coming to a close
- [00:01:05.590] competition is finally coming to a close
- [00:01:05.600] competition is finally coming to a close and I've taken the t-shirts behind me
- [00:01:07.750] and I've taken the t-shirts behind me
- [00:01:07.760] and I've taken the t-shirts behind me with the most amount of signatures and
- [00:01:09.910] with the most amount of signatures and
- [00:01:09.920] with the most amount of signatures and what we're going to do is go ahead and
- [00:01:11.830] what we're going to do is go ahead and
- [00:01:11.840] what we're going to do is go ahead and tally them up to see who's actually won.
- [00:01:14.950] tally them up to see who's actually won.
- [00:01:14.960] tally them up to see who's actually won. From there, we'll give the person a
- [00:01:16.789] From there, we'll give the person a
- [00:01:16.799] From there, we'll give the person a call. So, while that's happening, stand
- [00:01:19.350] call. So, while that's happening, stand
- [00:01:19.360] call. So, while that's happening, stand by while we count those signatures.
- [00:01:22.070] by while we count those signatures.
- [00:01:22.080] by while we count those signatures. And here's an example of that same video
- [00:01:24.469] And here's an example of that same video
- [00:01:24.479] And here's an example of that same video in bad quality, but now with good sound.
- [00:01:27.990] in bad quality, but now with good sound.
- [00:01:28.000] in bad quality, but now with good sound. So guys, our 10,000 rand DTF giveaway
- [00:01:31.670] So guys, our 10,000 rand DTF giveaway
- [00:01:31.680] So guys, our 10,000 rand DTF giveaway competition is finally coming to a
- [00:01:34.069] competition is finally coming to a
- [00:01:34.079] competition is finally coming to a close. And I've taken the t-shirts
- [00:01:36.390] close. And I've taken the t-shirts
- [00:01:36.400] close. And I've taken the t-shirts behind me with the most amount of
- [00:01:38.069] behind me with the most amount of
- [00:01:38.079] behind me with the most amount of signatures. And what we're going to do
- [00:01:39.830] signatures. And what we're going to do
- [00:01:39.840] signatures. And what we're going to do is go ahead and tally them up to see
- [00:01:42.469] is go ahead and tally them up to see
- [00:01:42.479] is go ahead and tally them up to see who's actually won. From there, we'll
- [00:01:45.030] who's actually won. From there, we'll
- [00:01:45.040] who's actually won. From there, we'll give the person a call. So while that's
- [00:01:47.510] give the person a call. So while that's
- [00:01:47.520] give the person a call. So while that's happening, stand by while we count those
- [00:01:49.670] happening, stand by while we count those
- [00:01:49.680] happening, stand by while we count those signatures. So, we just covered why
- [00:01:52.950] signatures. So, we just covered why
- [00:01:52.960] signatures. So, we just covered why having good sound is important, and I
- [00:01:55.109] having good sound is important, and I
- [00:01:55.119] having good sound is important, and I showed you how jarring bad sound can
- [00:01:57.270] showed you how jarring bad sound can
- [00:01:57.280] showed you how jarring bad sound can actually be. Um, in the next few
- [00:01:59.429] actually be. Um, in the next few
- [00:01:59.439] actually be. Um, in the next few segments, we'll cover how you can
- [00:02:01.510] segments, we'll cover how you can
- [00:02:01.520] segments, we'll cover how you can improve the sound quality and different
- [00:02:04.069] improve the sound quality and different
- [00:02:04.079] improve the sound quality and different elements of all your content. Thank you
- [00:02:06.789] elements of all your content. Thank you
- [00:02:06.799] elements of all your content. Thank you guys. I'll check you in the next video.
Keyframes
- /workspace/academy/media/1iP-6AwG_IESR4O2F5iDjO1DMDfJE2Vuc/keyframes/last.jpg
- /workspace/academy/media/1iP-6AwG_IESR4O2F5iDjO1DMDfJE2Vuc/keyframes/t001.jpg
- /workspace/academy/media/1iP-6AwG_IESR4O2F5iDjO1DMDfJE2Vuc/keyframes/t002.jpg
- /workspace/academy/media/1iP-6AwG_IESR4O2F5iDjO1DMDfJE2Vuc/keyframes/t004.jpg
- /workspace/academy/media/1iP-6AwG_IESR4O2F5iDjO1DMDfJE2Vuc/keyframes/t005.jpg
- /workspace/academy/media/1iP-6AwG_IESR4O2F5iDjO1DMDfJE2Vuc/keyframes/t006.jpg
- /workspace/academy/media/1iP-6AwG_IESR4O2F5iDjO1DMDfJE2Vuc/keyframes/t007.jpg
- /workspace/academy/media/1iP-6AwG_IESR4O2F5iDjO1DMDfJE2Vuc/keyframes/t008.jpg
- /workspace/academy/media/1iP-6AwG_IESR4O2F5iDjO1DMDfJE2Vuc/keyframes/t009.jpg
- /workspace/academy/media/1iP-6AwG_IESR4O2F5iDjO1DMDfJE2Vuc/keyframes/t011.jpg
- /workspace/academy/media/1iP-6AwG_IESR4O2F5iDjO1DMDfJE2Vuc/keyframes/t012.jpg
- /workspace/academy/media/1iP-6AwG_IESR4O2F5iDjO1DMDfJE2Vuc/keyframes/t013.jpg
67. Clean Audio
- title: Clean Audio
- status: publish
- author: 0
- is_previewable: (empty)
- video_duration: 0h 5m 31s (raw {"hours":0,"minutes":5,"seconds":31})
- video_source_type: embedded
- drive_file_id:
1HgOOYjjXIriRudRHK_X6-rc7tCUDI9wo(source_ref; not a public link) - transcript pending / keyframes pending / presentation extract pending
- video_source_url: (Drive preview omitted as a public link; file id kept as source_ref)
(no lesson_content HTML in export — video-only or empty body; metadata above kept in full)
Drive extract
- file_id:
1HgOOYjjXIriRudRHK_X6-rc7tCUDI9wo - filename: VEST Section 6 Sound 3 Clean Audio.mp4
- kind: video
- local_path: /workspace/academy/media/1HgOOYjjXIriRudRHK_X6-rc7tCUDI9wo/VEST Section 6 Sound 3 Clean Audio.mp4
- source_ref: drive
1HgOOYjjXIriRudRHK_X6-rc7tCUDI9wo· content_length 511875421 · original https://drive.google.com/file/d/1HgOOYjjXIriRudRHK_X6-rc7tCUDI9wo/view - extract_status: done
- caption_source: drive_timedtext
- duration_s: 331.000998
- keyframe_count: 24
Transcript
- Hey guys, um welcome back to the sound
- [00:00:02.790] Hey guys, um welcome back to the sound
- [00:00:02.800] Hey guys, um welcome back to the sound tutorial. Today we're going to be
- [00:00:04.390] tutorial. Today we're going to be
- [00:00:04.400] tutorial. Today we're going to be covering clean audio and you know how to
- [00:00:06.950] covering clean audio and you know how to
- [00:00:06.960] covering clean audio and you know how to achieve it. It's going to include things
- [00:00:09.030] achieve it. It's going to include things
- [00:00:09.040] achieve it. It's going to include things like managing background noise, um
- [00:00:11.430] like managing background noise, um
- [00:00:11.440] like managing background noise, um external verse, internal microphones,
- [00:00:13.990] external verse, internal microphones,
- [00:00:14.000] external verse, internal microphones, close vers, and more. Let's jump in with
- [00:00:17.349] close vers, and more. Let's jump in with
- [00:00:17.359] close vers, and more. Let's jump in with background noise. So, one of the biggest
- [00:00:20.390] background noise. So, one of the biggest
- [00:00:20.400] background noise. So, one of the biggest things about sound is trying to control
- [00:00:23.349] things about sound is trying to control
- [00:00:23.359] things about sound is trying to control the things you can control and trying to
- [00:00:26.070] the things you can control and trying to
- [00:00:26.080] the things you can control and trying to avoid the things you can't control. So,
- [00:00:28.230] avoid the things you can't control. So,
- [00:00:28.240] avoid the things you can't control. So, when you get to a location and look
- [00:00:30.390] when you get to a location and look
- [00:00:30.400] when you get to a location and look around to see if it is the best fit for
- [00:00:33.030] around to see if it is the best fit for
- [00:00:33.040] around to see if it is the best fit for your footage, not only should you look
- [00:00:35.270] your footage, not only should you look
- [00:00:35.280] your footage, not only should you look if it's pretty or goodlooking or
- [00:00:37.430] if it's pretty or goodlooking or
- [00:00:37.440] if it's pretty or goodlooking or whatever, you should also listen. Is
- [00:00:39.750] whatever, you should also listen. Is
- [00:00:39.760] whatever, you should also listen. Is there a lot of background noise? Is
- [00:00:41.350] there a lot of background noise? Is
- [00:00:41.360] there a lot of background noise? Is there construction going on? Is there
- [00:00:43.190] there construction going on? Is there
- [00:00:43.200] there construction going on? Is there traffic? There are other tools that can
- [00:00:45.750] traffic? There are other tools that can
- [00:00:45.760] traffic? There are other tools that can help you reduce background noise when
- [00:00:47.670] help you reduce background noise when
- [00:00:47.680] help you reduce background noise when you get into post-prouction. And we will
- [00:00:49.830] you get into post-prouction. And we will
- [00:00:49.840] you get into post-prouction. And we will cover those tools. Um, but for now, let
- [00:00:52.549] cover those tools. Um, but for now, let
- [00:00:52.559] cover those tools. Um, but for now, let me also show you the difference between,
- [00:00:55.510] me also show you the difference between,
- [00:00:55.520] me also show you the difference between, you know, having a lot of background
- [00:00:56.950] you know, having a lot of background
- [00:00:56.960] you know, having a lot of background noise and not. Here's a sample of
- [00:00:59.189] noise and not. Here's a sample of
- [00:00:59.199] noise and not. Here's a sample of background noise versus no background
- [00:01:01.430] background noise versus no background
- [00:01:01.440] background noise versus no background noise.
- [00:01:02.229] noise.
- [00:01:02.239] noise. Not a lot of adults in the world really
- [00:01:04.789] Not a lot of adults in the world really
- [00:01:04.799] Not a lot of adults in the world really care about our future. And we are very
- [00:01:08.630] care about our future. And we are very
- [00:01:08.640] care about our future. And we are very privileged and thankful and grateful for
- [00:01:10.870] privileged and thankful and grateful for
- [00:01:10.880] privileged and thankful and grateful for what you did for us yesterday because
- [00:01:12.310] what you did for us yesterday because
- [00:01:12.320] what you did for us yesterday because this never really happens. And we just
- [00:01:14.310] this never really happens. And we just
- [00:01:14.320] this never really happens. And we just wanted to say thank you. And we are
- [00:01:17.030] wanted to say thank you. And we are
- [00:01:17.040] wanted to say thank you. And we are really inspired by you guys. Not a lot
- [00:01:19.830] really inspired by you guys. Not a lot
- [00:01:19.840] really inspired by you guys. Not a lot of adults in the world really care about
- [00:01:22.789] of adults in the world really care about
- [00:01:22.799] of adults in the world really care about our future and we are very privileged
- [00:01:26.070] our future and we are very privileged
- [00:01:26.080] our future and we are very privileged and thankful and grateful for what you
- [00:01:28.310] and thankful and grateful for what you
- [00:01:28.320] and thankful and grateful for what you did for us yesterday because this never
- [00:01:29.830] did for us yesterday because this never
- [00:01:29.840] did for us yesterday because this never really happens and we just wanted to say
- [00:01:31.990] really happens and we just wanted to say
- [00:01:32.000] really happens and we just wanted to say thank you and we are really inspired by
- [00:01:35.109] thank you and we are really inspired by
- [00:01:35.119] thank you and we are really inspired by you guys.
- [00:01:36.310] you guys.
- [00:01:36.320] you guys. So that was background noise and
- [00:01:38.230] So that was background noise and
- [00:01:38.240] So that was background noise and remember if your microphone or your
- [00:01:40.630] remember if your microphone or your
- [00:01:40.640] remember if your microphone or your camera supports noise cancellation you
- [00:01:43.109] camera supports noise cancellation you
- [00:01:43.119] camera supports noise cancellation you know it's good to enable that setting.
- [00:01:45.910] know it's good to enable that setting.
- [00:01:45.920] know it's good to enable that setting. Next, we're going to go on close versus
- [00:01:48.469] Next, we're going to go on close versus
- [00:01:48.479] Next, we're going to go on close versus far. You know what it's going to sound
- [00:01:50.310] far. You know what it's going to sound
- [00:01:50.320] far. You know what it's going to sound like if your microphone is all the way
- [00:01:52.630] like if your microphone is all the way
- [00:01:52.640] like if your microphone is all the way over there versus, you know, up close
- [00:01:54.389] over there versus, you know, up close
- [00:01:54.399] over there versus, you know, up close like the one on my shirt. The closer you
- [00:01:56.310] like the one on my shirt. The closer you
- [00:01:56.320] like the one on my shirt. The closer you are to your microphone, the, you know,
- [00:01:58.469] are to your microphone, the, you know,
- [00:01:58.479] are to your microphone, the, you know, louder you sound, the more clearly you
- [00:02:00.389] louder you sound, the more clearly you
- [00:02:00.399] louder you sound, the more clearly you are, the more presence your voice has.
- [00:02:02.550] are, the more presence your voice has.
- [00:02:02.560] are, the more presence your voice has. So, here is an example of having a
- [00:02:05.590] So, here is an example of having a
- [00:02:05.600] So, here is an example of having a microphone close versus far away. It's
- [00:02:07.910] microphone close versus far away. It's
- [00:02:07.920] microphone close versus far away. It's going to be absolutely fun. The designs
- [00:02:10.550] going to be absolutely fun. The designs
- [00:02:10.560] going to be absolutely fun. The designs are going to be uh quite a tricky one
- [00:02:13.110] are going to be uh quite a tricky one
- [00:02:13.120] are going to be uh quite a tricky one because, well, this thing weighs 40 kg.
- [00:02:15.430] because, well, this thing weighs 40 kg.
- [00:02:15.440] because, well, this thing weighs 40 kg. So, we possibly looking in the excess of
- [00:02:16.949] So, we possibly looking in the excess of
- [00:02:16.959] So, we possibly looking in the excess of about 140 150 kg per cabinet, but there
- [00:02:20.630] about 140 150 kg per cabinet, but there
- [00:02:20.640] about 140 150 kg per cabinet, but there is going to be more bass than any
- [00:02:22.390] is going to be more bass than any
- [00:02:22.400] is going to be more bass than any product on the market. Next, we're going
- [00:02:24.390] product on the market. Next, we're going
- [00:02:24.400] product on the market. Next, we're going to go over using internal microphones
- [00:02:27.190] to go over using internal microphones
- [00:02:27.200] to go over using internal microphones versus external microphones. So, I'm
- [00:02:29.910] versus external microphones. So, I'm
- [00:02:29.920] versus external microphones. So, I'm actually using an external microphone
- [00:02:32.229] actually using an external microphone
- [00:02:32.239] actually using an external microphone right now. It's this little boy on my
- [00:02:34.790] right now. It's this little boy on my
- [00:02:34.800] right now. It's this little boy on my shirt. And having an external microphone
- [00:02:37.670] shirt. And having an external microphone
- [00:02:37.680] shirt. And having an external microphone is really good cuz you can actually
- [00:02:40.229] is really good cuz you can actually
- [00:02:40.239] is really good cuz you can actually bring it closer to your subject than if
- [00:02:42.229] bring it closer to your subject than if
- [00:02:42.239] bring it closer to your subject than if you're using your camera's inbuilt
- [00:02:44.070] you're using your camera's inbuilt
- [00:02:44.080] you're using your camera's inbuilt microphone. And the microphones on a
- [00:02:46.309] microphone. And the microphones on a
- [00:02:46.319] microphone. And the microphones on a camera are also not always, you know,
- [00:02:48.550] camera are also not always, you know,
- [00:02:48.560] camera are also not always, you know, the best quality to capture sound
- [00:02:50.470] the best quality to capture sound
- [00:02:50.480] the best quality to capture sound anyway. When you have specialized
- [00:02:52.550] anyway. When you have specialized
- [00:02:52.560] anyway. When you have specialized equipment for that, um, they sound a lot
- [00:02:55.110] equipment for that, um, they sound a lot
- [00:02:55.120] equipment for that, um, they sound a lot better. Sometimes external microphones,
- [00:02:57.830] better. Sometimes external microphones,
- [00:02:57.840] better. Sometimes external microphones, uh, record separately to your camera and
- [00:03:00.229] uh, record separately to your camera and
- [00:03:00.239] uh, record separately to your camera and sometimes they have onboard recording.
- [00:03:02.550] sometimes they have onboard recording.
- [00:03:02.560] sometimes they have onboard recording. Um, and sometimes, you know, like they
- [00:03:04.390] Um, and sometimes, you know, like they
- [00:03:04.400] Um, and sometimes, you know, like they can record directly to your footage. But
- [00:03:07.030] can record directly to your footage. But
- [00:03:07.040] can record directly to your footage. But when the microphones don't record, you
- [00:03:09.830] when the microphones don't record, you
- [00:03:09.840] when the microphones don't record, you know, directly to your footage, you will
- [00:03:12.550] know, directly to your footage, you will
- [00:03:12.560] know, directly to your footage, you will have to sync your audio with your video.
- [00:03:14.869] have to sync your audio with your video.
- [00:03:14.879] have to sync your audio with your video. A lot of the time this will involve
- [00:03:16.630] A lot of the time this will involve
- [00:03:16.640] A lot of the time this will involve using a clapper board. So, you know,
- [00:03:19.990] using a clapper board. So, you know,
- [00:03:20.000] using a clapper board. So, you know, we'll cover clapperboards and clapping
- [00:03:22.470] we'll cover clapperboards and clapping
- [00:03:22.480] we'll cover clapperboards and clapping um in a later stage, but just just be
- [00:03:25.430] um in a later stage, but just just be
- [00:03:25.440] um in a later stage, but just just be aware that when using external
- [00:03:27.190] aware that when using external
- [00:03:27.200] aware that when using external microphones, you will have to um sync
- [00:03:30.789] microphones, you will have to um sync
- [00:03:30.799] microphones, you will have to um sync that audio sometimes uh unless it has
- [00:03:33.750] that audio sometimes uh unless it has
- [00:03:33.760] that audio sometimes uh unless it has that uh ability to sync it, you know,
- [00:03:36.470] that uh ability to sync it, you know,
- [00:03:36.480] that uh ability to sync it, you know, while you're filming. Here are some
- [00:03:38.470] while you're filming. Here are some
- [00:03:38.480] while you're filming. Here are some examples of using an internal microphone
- [00:03:41.350] examples of using an internal microphone
- [00:03:41.360] examples of using an internal microphone versus an external microphone.
- [00:03:43.430] versus an external microphone.
- [00:03:43.440] versus an external microphone. Okay, so the big question is what is
- [00:03:45.990] Okay, so the big question is what is
- [00:03:46.000] Okay, so the big question is what is inside the box?
- [00:03:48.710] inside the box?
- [00:03:48.720] inside the box? I would normally do this type of
- [00:03:50.470] I would normally do this type of
- [00:03:50.480] I would normally do this type of unboxing with my teeth, but
- [00:03:51.830] unboxing with my teeth, but
- [00:03:51.840] unboxing with my teeth, but unfortunately there are kids that might
- [00:03:53.350] unfortunately there are kids that might
- [00:03:53.360] unfortunately there are kids that might watch this video and I don't want to
- [00:03:54.390] watch this video and I don't want to
- [00:03:54.400] watch this video and I don't want to scare anyone because this is quite a
- [00:03:57.190] scare anyone because this is quite a
- [00:03:57.200] scare anyone because this is quite a scary bit of gear that we have here.
- [00:03:59.990] scary bit of gear that we have here.
- [00:04:00.000] scary bit of gear that we have here. Okay, so the big question is what is
- [00:04:02.550] Okay, so the big question is what is
- [00:04:02.560] Okay, so the big question is what is inside the box?
- [00:04:05.270] inside the box?
- [00:04:05.280] inside the box? I would normally do this type of
- [00:04:07.030] I would normally do this type of
- [00:04:07.040] I would normally do this type of unboxing with my teeth, but
- [00:04:08.390] unboxing with my teeth, but
- [00:04:08.400] unboxing with my teeth, but unfortunately there are kids that might
- [00:04:09.830] unfortunately there are kids that might
- [00:04:09.840] unfortunately there are kids that might watch this video and I don't want to
- [00:04:10.949] watch this video and I don't want to
- [00:04:10.959] watch this video and I don't want to scare anyone because this is quite a
- [00:04:13.670] scare anyone because this is quite a
- [00:04:13.680] scare anyone because this is quite a scary bit of gear that we have here. So,
- [00:04:16.629] scary bit of gear that we have here. So,
- [00:04:16.639] scary bit of gear that we have here. So, next I'm going to talk about echo and
- [00:04:18.550] next I'm going to talk about echo and
- [00:04:18.560] next I'm going to talk about echo and reverb. This is when you're in a
- [00:04:20.710] reverb. This is when you're in a
- [00:04:20.720] reverb. This is when you're in a location that distorts your voice and
- [00:04:23.350] location that distorts your voice and
- [00:04:23.360] location that distorts your voice and makes it bounce around on different
- [00:04:25.270] makes it bounce around on different
- [00:04:25.280] makes it bounce around on different surfaces and doesn't sound nice when
- [00:04:27.830] surfaces and doesn't sound nice when
- [00:04:27.840] surfaces and doesn't sound nice when recording it. Sometimes you can't
- [00:04:29.670] recording it. Sometimes you can't
- [00:04:29.680] recording it. Sometimes you can't control these things. You know, usually
- [00:04:31.590] control these things. You know, usually
- [00:04:31.600] control these things. You know, usually you can put up sound padding or, you
- [00:04:33.749] you can put up sound padding or, you
- [00:04:33.759] you can put up sound padding or, you know, layer carpet um to try and, you
- [00:04:36.390] know, layer carpet um to try and, you
- [00:04:36.400] know, layer carpet um to try and, you know, absorb some of the sound bouncing
- [00:04:38.469] know, absorb some of the sound bouncing
- [00:04:38.479] know, absorb some of the sound bouncing around the room. But, you know, when
- [00:04:40.710] around the room. But, you know, when
- [00:04:40.720] around the room. But, you know, when that's impossible, there are AI tools
- [00:04:43.749] that's impossible, there are AI tools
- [00:04:43.759] that's impossible, there are AI tools and post tools and filters that can help
- [00:04:46.469] and post tools and filters that can help
- [00:04:46.479] and post tools and filters that can help you fix, you know, the sound of that
- [00:04:49.110] you fix, you know, the sound of that
- [00:04:49.120] you fix, you know, the sound of that echo and that reverb and those different
- [00:04:51.189] echo and that reverb and those different
- [00:04:51.199] echo and that reverb and those different problems. Here is some examples of a
- [00:04:54.390] problems. Here is some examples of a
- [00:04:54.400] problems. Here is some examples of a voice with echo and reverb.
- [00:04:56.790] voice with echo and reverb.
- [00:04:56.800] voice with echo and reverb. Normally, you would buy metal frames if
- [00:04:59.350] Normally, you would buy metal frames if
- [00:04:59.360] Normally, you would buy metal frames if you want to make picture frames, but
- [00:05:00.870] you want to make picture frames, but
- [00:05:00.880] you want to make picture frames, but we're going to make one on a machine
- [00:05:02.230] we're going to make one on a machine
- [00:05:02.240] we're going to make one on a machine because it's actually really easy and we
- [00:05:04.070] because it's actually really easy and we
- [00:05:04.080] because it's actually really easy and we can do it with loads of precision. I've
- [00:05:06.070] can do it with loads of precision. I've
- [00:05:06.080] can do it with loads of precision. I've drawn up some CAD files which you are
- [00:05:07.590] drawn up some CAD files which you are
- [00:05:07.600] drawn up some CAD files which you are going to be able to follow if you want
- [00:05:08.710] going to be able to follow if you want
- [00:05:08.720] going to be able to follow if you want to make frames similar to this. So,
- [00:05:10.550] to make frames similar to this. So,
- [00:05:10.560] to make frames similar to this. So, let's go ahead and go get things set up.
- [00:05:12.390] let's go ahead and go get things set up.
- [00:05:12.400] let's go ahead and go get things set up. We just covered uh the different
- [00:05:14.230] We just covered uh the different
- [00:05:14.240] We just covered uh the different elements of sound that we need to
- [00:05:16.070] elements of sound that we need to
- [00:05:16.080] elements of sound that we need to control to make sure you know we have
- [00:05:17.990] control to make sure you know we have
- [00:05:18.000] control to make sure you know we have clean audio. This included background
- [00:05:20.070] clean audio. This included background
- [00:05:20.080] clean audio. This included background noise, echo and reverb, internal versus
- [00:05:22.950] noise, echo and reverb, internal versus
- [00:05:22.960] noise, echo and reverb, internal versus external microphones, and setting them
- [00:05:25.189] external microphones, and setting them
- [00:05:25.199] external microphones, and setting them up close versus far away. Thank you guys
- [00:05:27.510] up close versus far away. Thank you guys
- [00:05:27.520] up close versus far away. Thank you guys so much and I'll see you in the next
- [00:05:29.029] so much and I'll see you in the next
- [00:05:29.039] so much and I'll see you in the next video.
Keyframes
- /workspace/academy/media/1HgOOYjjXIriRudRHK_X6-rc7tCUDI9wo/keyframes/last.jpg
- /workspace/academy/media/1HgOOYjjXIriRudRHK_X6-rc7tCUDI9wo/keyframes/t001.jpg
- /workspace/academy/media/1HgOOYjjXIriRudRHK_X6-rc7tCUDI9wo/keyframes/t003.jpg
- /workspace/academy/media/1HgOOYjjXIriRudRHK_X6-rc7tCUDI9wo/keyframes/t004.jpg
- /workspace/academy/media/1HgOOYjjXIriRudRHK_X6-rc7tCUDI9wo/keyframes/t006.jpg
- /workspace/academy/media/1HgOOYjjXIriRudRHK_X6-rc7tCUDI9wo/keyframes/t007.jpg
- /workspace/academy/media/1HgOOYjjXIriRudRHK_X6-rc7tCUDI9wo/keyframes/t009.jpg
- /workspace/academy/media/1HgOOYjjXIriRudRHK_X6-rc7tCUDI9wo/keyframes/t010.jpg
- /workspace/academy/media/1HgOOYjjXIriRudRHK_X6-rc7tCUDI9wo/keyframes/t011.jpg
- /workspace/academy/media/1HgOOYjjXIriRudRHK_X6-rc7tCUDI9wo/keyframes/t013.jpg
- /workspace/academy/media/1HgOOYjjXIriRudRHK_X6-rc7tCUDI9wo/keyframes/t014.jpg
- /workspace/academy/media/1HgOOYjjXIriRudRHK_X6-rc7tCUDI9wo/keyframes/t016.jpg
- /workspace/academy/media/1HgOOYjjXIriRudRHK_X6-rc7tCUDI9wo/keyframes/t017.jpg
- /workspace/academy/media/1HgOOYjjXIriRudRHK_X6-rc7tCUDI9wo/keyframes/t019.jpg
- /workspace/academy/media/1HgOOYjjXIriRudRHK_X6-rc7tCUDI9wo/keyframes/t020.jpg
- /workspace/academy/media/1HgOOYjjXIriRudRHK_X6-rc7tCUDI9wo/keyframes/t022.jpg
- /workspace/academy/media/1HgOOYjjXIriRudRHK_X6-rc7tCUDI9wo/keyframes/t023.jpg
- /workspace/academy/media/1HgOOYjjXIriRudRHK_X6-rc7tCUDI9wo/keyframes/t024.jpg
- /workspace/academy/media/1HgOOYjjXIriRudRHK_X6-rc7tCUDI9wo/keyframes/t026.jpg
- /workspace/academy/media/1HgOOYjjXIriRudRHK_X6-rc7tCUDI9wo/keyframes/t027.jpg
- /workspace/academy/media/1HgOOYjjXIriRudRHK_X6-rc7tCUDI9wo/keyframes/t029.jpg
- /workspace/academy/media/1HgOOYjjXIriRudRHK_X6-rc7tCUDI9wo/keyframes/t030.jpg
- /workspace/academy/media/1HgOOYjjXIriRudRHK_X6-rc7tCUDI9wo/keyframes/t032.jpg
- /workspace/academy/media/1HgOOYjjXIriRudRHK_X6-rc7tCUDI9wo/keyframes/t033.jpg
68. AI Tools
- title: AI Tools
- status: publish
- author: 0
- is_previewable: (empty)
- video_duration: 0h 1m 3s (raw {"hours":0,"minutes":1,"seconds":3})
- video_source_type: embedded
- drive_file_id:
1mq9rrb9xAL361FiS8RUzm_ZFxg28qbd9(source_ref; not a public link) - transcript pending / keyframes pending / presentation extract pending
- video_source_url: (Drive preview omitted as a public link; file id kept as source_ref)
(no lesson_content HTML in export — video-only or empty body; metadata above kept in full)
Drive extract
- file_id:
1mq9rrb9xAL361FiS8RUzm_ZFxg28qbd9 - filename: VEST Section 6 Sound 4 AI Tools.mp4
- kind: video
- local_path: /workspace/academy/media/1mq9rrb9xAL361FiS8RUzm_ZFxg28qbd9/VEST Section 6 Sound 4 AI Tools.mp4
- source_ref: drive
1mq9rrb9xAL361FiS8RUzm_ZFxg28qbd9· content_length 95229514 · original https://drive.google.com/file/d/1mq9rrb9xAL361FiS8RUzm_ZFxg28qbd9/view - extract_status: done
- caption_source: drive_timedtext
- duration_s: 62.508005
- keyframe_count: 7
Transcript
- Hey guys, welcome back to sound. Today
- [00:00:02.470] Hey guys, welcome back to sound. Today
- [00:00:02.480] Hey guys, welcome back to sound. Today we're going to cover AI tools. AI tools
- [00:00:05.110] we're going to cover AI tools. AI tools
- [00:00:05.120] we're going to cover AI tools. AI tools are, you know, a bit of a last resort
- [00:00:07.269] are, you know, a bit of a last resort
- [00:00:07.279] are, you know, a bit of a last resort because sometimes you can't control all
- [00:00:09.669] because sometimes you can't control all
- [00:00:09.679] because sometimes you can't control all the different aspects of audio when you
- [00:00:11.990] the different aspects of audio when you
- [00:00:12.000] the different aspects of audio when you are filming. You do want to make sure
- [00:00:13.910] are filming. You do want to make sure
- [00:00:13.920] are filming. You do want to make sure your environments don't have background
- [00:00:15.669] your environments don't have background
- [00:00:15.679] your environments don't have background noise or echoes, but sometimes you are
- [00:00:18.230] noise or echoes, but sometimes you are
- [00:00:18.240] noise or echoes, but sometimes you are forced to film in noisy environments
- [00:00:21.349] forced to film in noisy environments
- [00:00:21.359] forced to film in noisy environments with an echo or, you know, problematic
- [00:00:23.830] with an echo or, you know, problematic
- [00:00:23.840] with an echo or, you know, problematic acoustics. And these AI tools will allow
- [00:00:26.870] acoustics. And these AI tools will allow
- [00:00:26.880] acoustics. And these AI tools will allow you to fix that after the fact. So, we
- [00:00:29.830] you to fix that after the fact. So, we
- [00:00:29.840] you to fix that after the fact. So, we will include a couple links for you to,
- [00:00:33.110] will include a couple links for you to,
- [00:00:33.120] will include a couple links for you to, you know, play around with these tools
- [00:00:34.950] you know, play around with these tools
- [00:00:34.960] you know, play around with these tools and help you improve the sound of your
- [00:00:37.830] and help you improve the sound of your
- [00:00:37.840] and help you improve the sound of your content. Here are some examples of
- [00:00:40.549] content. Here are some examples of
- [00:00:40.559] content. Here are some examples of having messy audio before and after
- [00:00:43.190] having messy audio before and after
- [00:00:43.200] having messy audio before and after using AI tools. Tired of making bad
- [00:00:45.670] using AI tools. Tired of making bad
- [00:00:45.680] using AI tools. Tired of making bad videos like this one? Tired of making
- [00:00:48.709] videos like this one? Tired of making
- [00:00:48.719] videos like this one? Tired of making bad videos like this one? Okay guys, so
- [00:00:52.470] bad videos like this one? Okay guys, so
- [00:00:52.480] bad videos like this one? Okay guys, so that's AI tools for you. Um, I hope you
- [00:00:54.869] that's AI tools for you. Um, I hope you
- [00:00:54.879] that's AI tools for you. Um, I hope you guys make full use of them and, you
- [00:00:57.430] guys make full use of them and, you
- [00:00:57.440] guys make full use of them and, you know, enjoy the process. Thank you and
- [00:00:59.750] know, enjoy the process. Thank you and
- [00:00:59.760] know, enjoy the process. Thank you and I'll see you in the next video.
Keyframes
- /workspace/academy/media/1mq9rrb9xAL361FiS8RUzm_ZFxg28qbd9/keyframes/last.jpg
- /workspace/academy/media/1mq9rrb9xAL361FiS8RUzm_ZFxg28qbd9/keyframes/t001.jpg
- /workspace/academy/media/1mq9rrb9xAL361FiS8RUzm_ZFxg28qbd9/keyframes/t002.jpg
- /workspace/academy/media/1mq9rrb9xAL361FiS8RUzm_ZFxg28qbd9/keyframes/t003.jpg
- /workspace/academy/media/1mq9rrb9xAL361FiS8RUzm_ZFxg28qbd9/keyframes/t004.jpg
- /workspace/academy/media/1mq9rrb9xAL361FiS8RUzm_ZFxg28qbd9/keyframes/t005.jpg
- /workspace/academy/media/1mq9rrb9xAL361FiS8RUzm_ZFxg28qbd9/keyframes/t006.jpg
69. AI Tools Resources
- title: AI Tools Resources
- status: publish
- author: 0
- is_previewable: (empty)
- video_duration: 0h 0m 0s (raw {"hours":0,"minutes":0,"seconds":0})
- video_source_type: (empty)
**

**
The Secret Weapon: Online Audio Cleanup Tools
Professional audio is non-negotiable. Luckily, you don't need expensive software to fix problems like background hum, hiss, or echo. These AI tools can make a clip recorded on a cheap phone sound like it was captured in a dedicated studio.
I. Free & Easy-Access Tools (The Essentials)
Start here. These tools require minimal setup, and often use powerful AI to get stunning results with just one click.
| Tool | Focus & How to Use | Why We Love It |
|---|---|---|
| 1. Adobe Podcast Enhance | Focus: Dialogue/Spoken Word. How to Use: Upload your audio file (or video) to their browser tool. The AI automatically removes noise and echo, and enhances speech quality. | It's Magic. It can take a low-quality recording and make it sound uncannily clean and studio-quality. Free for generous daily usage. |
| 2. Audacity | Focus: Manual Cleanup. How to Use: This is a traditional, open-source desktop software (you must download it). It's not AI, but it offers powerful manual tools like Noise Reduction and EQ if you have consistent background noise. | Ultimate Control. The best free option if you want to manually fix issues and fine-tune your sound, but it has a steeper learning curve. |
| 3. Audo Studio | Focus: One-Click AI Cleanup. How to Use: Browser-based tool. Upload your file, and it uses AI to reduce noise and automatically adjust volume levels. | Great for Beginners. Excellent, straightforward AI alternative to Adobe. Offers a limited free starter plan each month. |
II. Paid & Subscription-Based Tools (The Professional Upgrade)
When you are ready to invest in advanced, high-volume production, these paid options offer comprehensive audio suites and deeper controls.
| Tool | Focus & Key Features | Best For |
|---|---|---|
| 1. Descript | Focus: Text-Based Editing. A complete editing studio where you edit the video/audio simply by editing the transcript text. Includes Studio Sound (a powerful AI cleanup feature). | Creators who want to integrate editing and cleanup seamlessly. |
| 2. iZotope RX | Focus: Audio Restoration. This is the industry standard professional audio repair suite (used by major studios). It includes tools for spectral editing, precise removal of clicks, mouth noise, and reverb. | Serious audio professionals and those dealing with severely damaged audio files. |
| 3. Adobe Audition | Focus: Full Audio Workstation. Part of the Adobe Creative Cloud suite. Offers multi-track mixing, advanced noise reduction effects, and spectral display for deep, precise, non-destructive audio editing. | Editors already using Adobe Premiere Pro, as it integrates seamlessly with the video workflow. |
Pro Tip: Always record your dialogue as clean as possible first. AI can work wonders, but it can't fix a recording that is completely muffled or distorted. Garbage in, less-crappy garbage out. Start clean!
70. Syncing Sound
- title: Syncing Sound
- status: publish
- author: 0
- is_previewable: (empty)
- video_duration: 0h 2m 56s (raw {"hours":0,"minutes":2,"seconds":56})
- video_source_type: embedded
- drive_file_id:
1aw_HUY6rNzVDCI64-SRN_VS443OLNc9Y(source_ref; not a public link) - transcript pending / keyframes pending / presentation extract pending
- video_source_url: (Drive preview omitted as a public link; file id kept as source_ref)
(no lesson_content HTML in export — video-only or empty body; metadata above kept in full)
Drive extract
- file_id:
1aw_HUY6rNzVDCI64-SRN_VS443OLNc9Y - filename: VEST Section 6 Sound 5 Syncing Sound.mp4
- kind: video
- local_path: /workspace/academy/media/1aw_HUY6rNzVDCI64-SRN_VS443OLNc9Y/VEST Section 6 Sound 5 Syncing Sound.mp4
- source_ref: drive
1aw_HUY6rNzVDCI64-SRN_VS443OLNc9Y· content_length 268956568 · original https://drive.google.com/file/d/1aw_HUY6rNzVDCI64-SRN_VS443OLNc9Y/view - extract_status: done
- caption_source: drive_timedtext
- duration_s: 175.52
- keyframe_count: 12
Transcript
- Hey guys, uh welcome back to, you know,
- [00:00:02.710] Hey guys, uh welcome back to, you know,
- [00:00:02.720] Hey guys, uh welcome back to, you know, the sound section. Today we're going to
- [00:00:04.710] the sound section. Today we're going to
- [00:00:04.720] the sound section. Today we're going to be covering syncing your audio. Um so
- [00:00:07.670] be covering syncing your audio. Um so
- [00:00:07.680] be covering syncing your audio. Um so sometimes when you use external
- [00:00:09.110] sometimes when you use external
- [00:00:09.120] sometimes when you use external microphones, the audio is recorded
- [00:00:11.509] microphones, the audio is recorded
- [00:00:11.519] microphones, the audio is recorded separately than, you know, the the
- [00:00:13.669] separately than, you know, the the
- [00:00:13.679] separately than, you know, the the camera footage. So it's important to,
- [00:00:15.990] camera footage. So it's important to,
- [00:00:16.000] camera footage. So it's important to, you know, have a workflow that helps you
- [00:00:17.990] you know, have a workflow that helps you
- [00:00:18.000] you know, have a workflow that helps you sync your video and your audio more
- [00:00:19.990] sync your video and your audio more
- [00:00:20.000] sync your video and your audio more effectively. Um so what we're going to
- [00:00:21.670] effectively. Um so what we're going to
- [00:00:21.680] effectively. Um so what we're going to cover is clapping. So, I don't know if
- [00:00:23.750] cover is clapping. So, I don't know if
- [00:00:23.760] cover is clapping. So, I don't know if you've ever seen a film, they have those
- [00:00:25.509] you've ever seen a film, they have those
- [00:00:25.519] you've ever seen a film, they have those square boards with the black and white
- [00:00:27.990] square boards with the black and white
- [00:00:28.000] square boards with the black and white straps and the different uh information
- [00:00:31.189] straps and the different uh information
- [00:00:31.199] straps and the different uh information written on and they hold them up and
- [00:00:33.030] written on and they hold them up and
- [00:00:33.040] written on and they hold them up and they go scene one, take one, shot one,
- [00:00:35.270] they go scene one, take one, shot one,
- [00:00:35.280] they go scene one, take one, shot one, and then they snap it. That's called a
- [00:00:37.350] and then they snap it. That's called a
- [00:00:37.360] and then they snap it. That's called a clapper board. What that's used for is
- [00:00:39.590] clapper board. What that's used for is
- [00:00:39.600] clapper board. What that's used for is to mark what the shot is, um, you know,
- [00:00:42.310] to mark what the shot is, um, you know,
- [00:00:42.320] to mark what the shot is, um, you know, with the different writing on the board.
- [00:00:44.389] with the different writing on the board.
- [00:00:44.399] with the different writing on the board. But more importantly, the sound of the
- [00:00:47.350] But more importantly, the sound of the
- [00:00:47.360] But more importantly, the sound of the wooden uh claps hitting each other is
- [00:00:50.470] wooden uh claps hitting each other is
- [00:00:50.480] wooden uh claps hitting each other is used to visualize a point where we can
- [00:00:53.670] used to visualize a point where we can
- [00:00:53.680] used to visualize a point where we can sync the audio. Where you hear that clap
- [00:00:57.110] sync the audio. Where you hear that clap
- [00:00:57.120] sync the audio. Where you hear that clap and the top hits the bottom, that is
- [00:00:59.910] and the top hits the bottom, that is
- [00:00:59.920] and the top hits the bottom, that is where you'll sync your sound and your
- [00:01:02.869] where you'll sync your sound and your
- [00:01:02.879] where you'll sync your sound and your video. So, it's good practice to, you
- [00:01:06.149] video. So, it's good practice to, you
- [00:01:06.159] video. So, it's good practice to, you know, even if you're filming with your
- [00:01:07.670] know, even if you're filming with your
- [00:01:07.680] know, even if you're filming with your phones and you don't have a
- [00:01:08.870] phones and you don't have a
- [00:01:08.880] phones and you don't have a clapperboard, it's good practice to put
- [00:01:11.030] clapperboard, it's good practice to put
- [00:01:11.040] clapperboard, it's good practice to put your hands in front of your camera and
- [00:01:14.310] your hands in front of your camera and
- [00:01:14.320] your hands in front of your camera and do a clap while you're recording your
- [00:01:16.390] do a clap while you're recording your
- [00:01:16.400] do a clap while you're recording your audio and your video. Um, obviously, if
- [00:01:19.590] audio and your video. Um, obviously, if
- [00:01:19.600] audio and your video. Um, obviously, if you have inbuilt sound recording that
- [00:01:21.830] you have inbuilt sound recording that
- [00:01:21.840] you have inbuilt sound recording that records directly to your phone, you
- [00:01:24.230] records directly to your phone, you
- [00:01:24.240] records directly to your phone, you won't need to clap to sync the sound.
- [00:01:26.230] won't need to clap to sync the sound.
- [00:01:26.240] won't need to clap to sync the sound. It'll automatically sync for you. This
- [00:01:28.230] It'll automatically sync for you. This
- [00:01:28.240] It'll automatically sync for you. This is if you are using techniques like
- [00:01:30.550] is if you are using techniques like
- [00:01:30.560] is if you are using techniques like having a second phone for audio as an
- [00:01:33.270] having a second phone for audio as an
- [00:01:33.280] having a second phone for audio as an external microphone so that you can
- [00:01:35.030] external microphone so that you can
- [00:01:35.040] external microphone so that you can bring your sound closer or even just
- [00:01:37.429] bring your sound closer or even just
- [00:01:37.439] bring your sound closer or even just having uh your microphone that you're
- [00:01:39.590] having uh your microphone that you're
- [00:01:39.600] having uh your microphone that you're using record to a separate device
- [00:01:41.749] using record to a separate device
- [00:01:41.759] using record to a separate device entirely. And then when you get to
- [00:01:43.749] entirely. And then when you get to
- [00:01:43.759] entirely. And then when you get to post-prouction, you'd take the little
- [00:01:47.910] post-prouction, you'd take the little
- [00:01:47.920] post-prouction, you'd take the little bit before after you've synced your
- [00:01:49.590] bit before after you've synced your
- [00:01:49.600] bit before after you've synced your sound and video, you'll take that little
- [00:01:51.670] sound and video, you'll take that little
- [00:01:51.680] sound and video, you'll take that little bit before of you clapping and, you
- [00:01:53.910] bit before of you clapping and, you
- [00:01:53.920] bit before of you clapping and, you know, action, all that stuff. Obviously,
- [00:01:56.149] know, action, all that stuff. Obviously,
- [00:01:56.159] know, action, all that stuff. Obviously, then you chop that off. You don't need
- [00:01:57.749] then you chop that off. You don't need
- [00:01:57.759] then you chop that off. You don't need people to see that. That is to help you
- [00:02:00.069] people to see that. That is to help you
- [00:02:00.079] people to see that. That is to help you when you get into the editing process to
- [00:02:02.149] when you get into the editing process to
- [00:02:02.159] when you get into the editing process to sync your sound and video. So, here's an
- [00:02:04.230] sync your sound and video. So, here's an
- [00:02:04.240] sync your sound and video. So, here's an example of, you know, what some footage
- [00:02:06.709] example of, you know, what some footage
- [00:02:06.719] example of, you know, what some footage looks like with a sound out of sync
- [00:02:08.790] looks like with a sound out of sync
- [00:02:08.800] looks like with a sound out of sync versus in sync. So, as you can hear,
- [00:02:12.070] versus in sync. So, as you can hear,
- [00:02:12.080] versus in sync. So, as you can hear, it's a bit jarring. My voice is
- [00:02:13.910] it's a bit jarring. My voice is
- [00:02:13.920] it's a bit jarring. My voice is currently out of sync. And, you know,
- [00:02:16.790] currently out of sync. And, you know,
- [00:02:16.800] currently out of sync. And, you know, it's difficult to, you know, watch what
- [00:02:19.830] it's difficult to, you know, watch what
- [00:02:19.840] it's difficult to, you know, watch what I'm saying when my lips and my voice is
- [00:02:22.070] I'm saying when my lips and my voice is
- [00:02:22.080] I'm saying when my lips and my voice is not matching. Let's fix that. Let me
- [00:02:24.309] not matching. Let's fix that. Let me
- [00:02:24.319] not matching. Let's fix that. Let me quickly do a clap. And
- [00:02:27.350] quickly do a clap. And
- [00:02:27.360] quickly do a clap. And now you should hear my voice be back in
- [00:02:29.670] now you should hear my voice be back in
- [00:02:29.680] now you should hear my voice be back in sync. It, you know, is not going to be
- [00:02:31.990] sync. It, you know, is not going to be
- [00:02:32.000] sync. It, you know, is not going to be all over the place and unmatching my
- [00:02:34.550] all over the place and unmatching my
- [00:02:34.560] all over the place and unmatching my lips and my voice. And it's much easier
- [00:02:36.470] lips and my voice. And it's much easier
- [00:02:36.480] lips and my voice. And it's much easier to watch. That's just a quick
- [00:02:38.070] to watch. That's just a quick
- [00:02:38.080] to watch. That's just a quick demonstration to show you how important
- [00:02:40.550] demonstration to show you how important
- [00:02:40.560] demonstration to show you how important syncing your sound actually is. So, we
- [00:02:43.190] syncing your sound actually is. So, we
- [00:02:43.200] syncing your sound actually is. So, we just covered, you know, sound syncing
- [00:02:45.190] just covered, you know, sound syncing
- [00:02:45.200] just covered, you know, sound syncing using clapper boards, you know, using
- [00:02:47.030] using clapper boards, you know, using
- [00:02:47.040] using clapper boards, you know, using clapper hand techniques, and, you know,
- [00:02:49.350] clapper hand techniques, and, you know,
- [00:02:49.360] clapper hand techniques, and, you know, why syncing your sound is important.
- [00:02:51.589] why syncing your sound is important.
- [00:02:51.599] why syncing your sound is important. Thank you guys and I'll see you in the
- [00:02:53.190] Thank you guys and I'll see you in the
- [00:02:53.200] Thank you guys and I'll see you in the next video.
Keyframes
- /workspace/academy/media/1aw_HUY6rNzVDCI64-SRN_VS443OLNc9Y/keyframes/last.jpg
- /workspace/academy/media/1aw_HUY6rNzVDCI64-SRN_VS443OLNc9Y/keyframes/t002.jpg
- /workspace/academy/media/1aw_HUY6rNzVDCI64-SRN_VS443OLNc9Y/keyframes/t003.jpg
- /workspace/academy/media/1aw_HUY6rNzVDCI64-SRN_VS443OLNc9Y/keyframes/t005.jpg
- /workspace/academy/media/1aw_HUY6rNzVDCI64-SRN_VS443OLNc9Y/keyframes/t007.jpg
- /workspace/academy/media/1aw_HUY6rNzVDCI64-SRN_VS443OLNc9Y/keyframes/t008.jpg
- /workspace/academy/media/1aw_HUY6rNzVDCI64-SRN_VS443OLNc9Y/keyframes/t010.jpg
- /workspace/academy/media/1aw_HUY6rNzVDCI64-SRN_VS443OLNc9Y/keyframes/t011.jpg
- /workspace/academy/media/1aw_HUY6rNzVDCI64-SRN_VS443OLNc9Y/keyframes/t013.jpg
- /workspace/academy/media/1aw_HUY6rNzVDCI64-SRN_VS443OLNc9Y/keyframes/t015.jpg
- /workspace/academy/media/1aw_HUY6rNzVDCI64-SRN_VS443OLNc9Y/keyframes/t016.jpg
- /workspace/academy/media/1aw_HUY6rNzVDCI64-SRN_VS443OLNc9Y/keyframes/t018.jpg
71. Music
- title: Music
- status: publish
- author: 0
- is_previewable: (empty)
- video_duration: 0h 2m 38s (raw {"hours":0,"minutes":2,"seconds":38})
- video_source_type: embedded
- drive_file_id:
1HdOjmOSb0VtZ3XbgT0PAT9Tu8vFhZK8E(source_ref; not a public link) - transcript pending / keyframes pending / presentation extract pending
- video_source_url: (Drive preview omitted as a public link; file id kept as source_ref)
(no lesson_content HTML in export — video-only or empty body; metadata above kept in full)
Drive extract
- file_id:
1HdOjmOSb0VtZ3XbgT0PAT9Tu8vFhZK8E - filename: VEST Section 6 Sound 6 Music.mp4
- kind: video
- local_path: /workspace/academy/media/1HdOjmOSb0VtZ3XbgT0PAT9Tu8vFhZK8E/VEST Section 6 Sound 6 Music.mp4
- source_ref: drive
1HdOjmOSb0VtZ3XbgT0PAT9Tu8vFhZK8E· content_length 243527571 · original https://drive.google.com/file/d/1HdOjmOSb0VtZ3XbgT0PAT9Tu8vFhZK8E/view - extract_status: done
- caption_source: drive_timedtext
- duration_s: 157.455011
- keyframe_count: 12
Transcript
- Hey guys, welcome back to the sound
- [00:00:02.149] Hey guys, welcome back to the sound
- [00:00:02.159] Hey guys, welcome back to the sound section. Today we're going to cover
- [00:00:03.750] section. Today we're going to cover
- [00:00:03.760] section. Today we're going to cover music. Music is a very important part
- [00:00:07.110] music. Music is a very important part
- [00:00:07.120] music. Music is a very important part of, you know, adding emotion to your
- [00:00:09.509] of, you know, adding emotion to your
- [00:00:09.519] of, you know, adding emotion to your content. It tells the audience what to
- [00:00:12.070] content. It tells the audience what to
- [00:00:12.080] content. It tells the audience what to feel when something's happening. It is
- [00:00:13.990] feel when something's happening. It is
- [00:00:14.000] feel when something's happening. It is very important to make sure that music
- [00:00:16.230] very important to make sure that music
- [00:00:16.240] very important to make sure that music fits your narrative, fits your intention
- [00:00:18.470] fits your narrative, fits your intention
- [00:00:18.480] fits your narrative, fits your intention of the video you're trying to make. The
- [00:00:21.029] of the video you're trying to make. The
- [00:00:21.039] of the video you're trying to make. The same scene, the exact same scene, can
- [00:00:23.429] same scene, the exact same scene, can
- [00:00:23.439] same scene, the exact same scene, can seem completely different with different
- [00:00:25.910] seem completely different with different
- [00:00:25.920] seem completely different with different music added on top of it. One can seem
- [00:00:28.550] music added on top of it. One can seem
- [00:00:28.560] music added on top of it. One can seem suspenseful and the exact same scene can
- [00:00:31.910] suspenseful and the exact same scene can
- [00:00:31.920] suspenseful and the exact same scene can seem uh romantical with just a music
- [00:00:35.270] seem uh romantical with just a music
- [00:00:35.280] seem uh romantical with just a music change. You can make a chase scene look
- [00:00:37.990] change. You can make a chase scene look
- [00:00:38.000] change. You can make a chase scene look funny or horrific, you know, thriller,
- [00:00:40.709] funny or horrific, you know, thriller,
- [00:00:40.719] funny or horrific, you know, thriller, give a sense of tension. Here is some
- [00:00:42.950] give a sense of tension. Here is some
- [00:00:42.960] give a sense of tension. Here is some examples of how music can change your
- [00:00:45.830] examples of how music can change your
- [00:00:45.840] examples of how music can change your scene.
- But Remember, when adding music to your
- [00:01:51.270] But Remember, when adding music to your
- [00:01:51.280] But Remember, when adding music to your content, you need to make sure that the
- [00:01:53.590] content, you need to make sure that the
- [00:01:53.600] content, you need to make sure that the levels are correct. You don't want the
- [00:01:55.190] levels are correct. You don't want the
- [00:01:55.200] levels are correct. You don't want the music to prevent audiences from hearing
- [00:01:57.749] music to prevent audiences from hearing
- [00:01:57.759] music to prevent audiences from hearing any dialogue spoken by, you know,
- [00:02:00.149] any dialogue spoken by, you know,
- [00:02:00.159] any dialogue spoken by, you know, characters in your in your footage or
- [00:02:03.030] characters in your in your footage or
- [00:02:03.040] characters in your in your footage or any voice over, even important sound
- [00:02:05.590] any voice over, even important sound
- [00:02:05.600] any voice over, even important sound effects that you have. The music
- [00:02:07.109] effects that you have. The music
- [00:02:07.119] effects that you have. The music shouldn't overwhelm those other sounds
- [00:02:09.029] shouldn't overwhelm those other sounds
- [00:02:09.039] shouldn't overwhelm those other sounds and hide them, you know. So, we just
- [00:02:11.190] and hide them, you know. So, we just
- [00:02:11.200] and hide them, you know. So, we just covered music and why it's important to
- [00:02:14.070] covered music and why it's important to
- [00:02:14.080] covered music and why it's important to the emotion and engagement of your
- [00:02:17.030] the emotion and engagement of your
- [00:02:17.040] the emotion and engagement of your audience, your viewers. Just remember,
- [00:02:19.510] audience, your viewers. Just remember,
- [00:02:19.520] audience, your viewers. Just remember, next time you're watching your favorite
- [00:02:21.110] next time you're watching your favorite
- [00:02:21.120] next time you're watching your favorite movies or even just content on social
- [00:02:23.430] movies or even just content on social
- [00:02:23.440] movies or even just content on social media, try and pay attention to the
- [00:02:25.670] media, try and pay attention to the
- [00:02:25.680] media, try and pay attention to the music. What is that music telling you to
- [00:02:28.070] music. What is that music telling you to
- [00:02:28.080] music. What is that music telling you to feel? And if you change that music,
- [00:02:30.309] feel? And if you change that music,
- [00:02:30.319] feel? And if you change that music, would the meaning of that content change
- [00:02:32.229] would the meaning of that content change
- [00:02:32.239] would the meaning of that content change for you? Thank you guys so much, and
- [00:02:34.309] for you? Thank you guys so much, and
- [00:02:34.319] for you? Thank you guys so much, and I'll see you in the next video.
Keyframes
- /workspace/academy/media/1HdOjmOSb0VtZ3XbgT0PAT9Tu8vFhZK8E/keyframes/last.jpg
- /workspace/academy/media/1HdOjmOSb0VtZ3XbgT0PAT9Tu8vFhZK8E/keyframes/t001.jpg
- /workspace/academy/media/1HdOjmOSb0VtZ3XbgT0PAT9Tu8vFhZK8E/keyframes/t003.jpg
- /workspace/academy/media/1HdOjmOSb0VtZ3XbgT0PAT9Tu8vFhZK8E/keyframes/t004.jpg
- /workspace/academy/media/1HdOjmOSb0VtZ3XbgT0PAT9Tu8vFhZK8E/keyframes/t006.jpg
- /workspace/academy/media/1HdOjmOSb0VtZ3XbgT0PAT9Tu8vFhZK8E/keyframes/t007.jpg
- /workspace/academy/media/1HdOjmOSb0VtZ3XbgT0PAT9Tu8vFhZK8E/keyframes/t009.jpg
- /workspace/academy/media/1HdOjmOSb0VtZ3XbgT0PAT9Tu8vFhZK8E/keyframes/t010.jpg
- /workspace/academy/media/1HdOjmOSb0VtZ3XbgT0PAT9Tu8vFhZK8E/keyframes/t012.jpg
- /workspace/academy/media/1HdOjmOSb0VtZ3XbgT0PAT9Tu8vFhZK8E/keyframes/t013.jpg
- /workspace/academy/media/1HdOjmOSb0VtZ3XbgT0PAT9Tu8vFhZK8E/keyframes/t015.jpg
- /workspace/academy/media/1HdOjmOSb0VtZ3XbgT0PAT9Tu8vFhZK8E/keyframes/t016.jpg
72. Sound Effects
- title: Sound Effects
- status: publish
- author: 0
- is_previewable: (empty)
- video_duration: 0h 2m 11s (raw {"hours":0,"minutes":2,"seconds":11})
- video_source_type: embedded
- drive_file_id:
1J7PgfMq4YWXbMhE_G8cSSMr02EsvvegQ(source_ref; not a public link) - transcript pending / keyframes pending / presentation extract pending
- video_source_url: (Drive preview omitted as a public link; file id kept as source_ref)
(no lesson_content HTML in export — video-only or empty body; metadata above kept in full)
Drive extract
- file_id:
1J7PgfMq4YWXbMhE_G8cSSMr02EsvvegQ - filename: VEST Section 6 Sound 7 Sound Effects and Ambience.mp4
- kind: video
- local_path: /workspace/academy/media/1J7PgfMq4YWXbMhE_G8cSSMr02EsvvegQ/VEST Section 6 Sound 7 Sound Effects and Ambience.mp4
- source_ref: drive
1J7PgfMq4YWXbMhE_G8cSSMr02EsvvegQ· content_length 201927475 · original https://drive.google.com/file/d/1J7PgfMq4YWXbMhE_G8cSSMr02EsvvegQ/view - extract_status: done
- caption_source: drive_timedtext
- duration_s: 131.355011
- keyframe_count: 12
Transcript
- Hey guys, uh welcome back to the sound
- [00:00:02.070] Hey guys, uh welcome back to the sound
- [00:00:02.080] Hey guys, uh welcome back to the sound section. Today we're going to cover
- [00:00:03.669] section. Today we're going to cover
- [00:00:03.679] section. Today we're going to cover sound effects and ambience. These are
- [00:00:05.990] sound effects and ambience. These are
- [00:00:06.000] sound effects and ambience. These are elements of your content that a lot of
- [00:00:07.829] elements of your content that a lot of
- [00:00:07.839] elements of your content that a lot of people don't realize are actually added
- [00:00:09.830] people don't realize are actually added
- [00:00:09.840] people don't realize are actually added after the fact or separate. If you've
- [00:00:12.070] after the fact or separate. If you've
- [00:00:12.080] after the fact or separate. If you've ever watched a film and you know, say
- [00:00:14.070] ever watched a film and you know, say
- [00:00:14.080] ever watched a film and you know, say someone's outside in a park and you hear
- [00:00:15.910] someone's outside in a park and you hear
- [00:00:15.920] someone's outside in a park and you hear the birds chirping, the children playing
- [00:00:18.630] the birds chirping, the children playing
- [00:00:18.640] the birds chirping, the children playing in the background, a bunch of crowds and
- [00:00:20.710] in the background, a bunch of crowds and
- [00:00:20.720] in the background, a bunch of crowds and stuff, people don't realize that when
- [00:00:23.189] stuff, people don't realize that when
- [00:00:23.199] stuff, people don't realize that when that scene was shot, there was dead
- [00:00:25.029] that scene was shot, there was dead
- [00:00:25.039] that scene was shot, there was dead silence from everyone around them. And
- [00:00:27.269] silence from everyone around them. And
- [00:00:27.279] silence from everyone around them. And that ambience was added after the fact.
- [00:00:29.589] that ambience was added after the fact.
- [00:00:29.599] that ambience was added after the fact. it was pre-recorded or recorded, you
- [00:00:32.549] it was pre-recorded or recorded, you
- [00:00:32.559] it was pre-recorded or recorded, you know, in isolation. So, having ambience
- [00:00:35.510] know, in isolation. So, having ambience
- [00:00:35.520] know, in isolation. So, having ambience separate is very important. And same
- [00:00:37.590] separate is very important. And same
- [00:00:37.600] separate is very important. And same goes for sound effects. If someone slaps
- [00:00:39.670] goes for sound effects. If someone slaps
- [00:00:39.680] goes for sound effects. If someone slaps a person with their head and it makes a
- [00:00:41.750] a person with their head and it makes a
- [00:00:41.760] a person with their head and it makes a big smack sound. You know, a lot of the
- [00:00:43.430] big smack sound. You know, a lot of the
- [00:00:43.440] big smack sound. You know, a lot of the times you don't actually slap someone
- [00:00:45.350] times you don't actually slap someone
- [00:00:45.360] times you don't actually slap someone for your content, you just make it look
- [00:00:47.270] for your content, you just make it look
- [00:00:47.280] for your content, you just make it look like you've slapped someone, so you need
- [00:00:48.709] like you've slapped someone, so you need
- [00:00:48.719] like you've slapped someone, so you need to add a sound effect. You can also add
- [00:00:50.709] to add a sound effect. You can also add
- [00:00:50.719] to add a sound effect. You can also add sound effects for things that aren't
- [00:00:52.950] sound effects for things that aren't
- [00:00:52.960] sound effects for things that aren't seen in the frame and it allows you to,
- [00:00:55.670] seen in the frame and it allows you to,
- [00:00:55.680] seen in the frame and it allows you to, you know, believe that there's something
- [00:00:58.069] you know, believe that there's something
- [00:00:58.079] you know, believe that there's something else going on. So, if I took the
- [00:01:00.549] else going on. So, if I took the
- [00:01:00.559] else going on. So, if I took the lighting that's lighting me up and I
- [00:01:02.389] lighting that's lighting me up and I
- [00:01:02.399] lighting that's lighting me up and I flickered that lighting to, you know,
- [00:01:04.390] flickered that lighting to, you know,
- [00:01:04.400] flickered that lighting to, you know, become warmer and cooler, dimmer and
- [00:01:06.630] become warmer and cooler, dimmer and
- [00:01:06.640] become warmer and cooler, dimmer and lighter, and then I added a sound effect
- [00:01:08.950] lighter, and then I added a sound effect
- [00:01:08.960] lighter, and then I added a sound effect of fire crackling, it would look like
- [00:01:11.670] of fire crackling, it would look like
- [00:01:11.680] of fire crackling, it would look like I'm sitting in front of a campfire.
- [00:01:13.510] I'm sitting in front of a campfire.
- [00:01:13.520] I'm sitting in front of a campfire. Sound effects also are great for
- [00:01:15.990] Sound effects also are great for
- [00:01:16.000] Sound effects also are great for creative transitions. If you're using a
- [00:01:18.230] creative transitions. If you're using a
- [00:01:18.240] creative transitions. If you're using a whip pan to create a transition and add
- [00:01:20.390] whip pan to create a transition and add
- [00:01:20.400] whip pan to create a transition and add a whoosh sound effect to it, it, you
- [00:01:22.710] a whoosh sound effect to it, it, you
- [00:01:22.720] a whoosh sound effect to it, it, you know, is becomes such a more interesting
- [00:01:24.870] know, is becomes such a more interesting
- [00:01:24.880] know, is becomes such a more interesting transition for short form content, um,
- [00:01:27.510] transition for short form content, um,
- [00:01:27.520] transition for short form content, um, it helps keep engagement. Another thing
- [00:01:29.990] it helps keep engagement. Another thing
- [00:01:30.000] it helps keep engagement. Another thing that people don't realize is taking a
- [00:01:32.390] that people don't realize is taking a
- [00:01:32.400] that people don't realize is taking a recording of silence. The silence of
- [00:01:35.190] recording of silence. The silence of
- [00:01:35.200] recording of silence. The silence of different rooms, different room tones,
- [00:01:37.510] different rooms, different room tones,
- [00:01:37.520] different rooms, different room tones, outdoors, indoor, it's actually slightly
- [00:01:39.990] outdoors, indoor, it's actually slightly
- [00:01:40.000] outdoors, indoor, it's actually slightly different wherever you go. If you
- [00:01:42.069] different wherever you go. If you
- [00:01:42.079] different wherever you go. If you recorded just the silence of a room and
- [00:01:45.109] recorded just the silence of a room and
- [00:01:45.119] recorded just the silence of a room and overlap that silence into a scene um
- [00:01:48.630] overlap that silence into a scene um
- [00:01:48.640] overlap that silence into a scene um that takes place outdoors, even if the
- [00:01:51.270] that takes place outdoors, even if the
- [00:01:51.280] that takes place outdoors, even if the outdoor place is silent itself, it it
- [00:01:54.069] outdoor place is silent itself, it it
- [00:01:54.079] outdoor place is silent itself, it it feels wrong. So, we just covered sound
- [00:01:56.230] feels wrong. So, we just covered sound
- [00:01:56.240] feels wrong. So, we just covered sound effects and ambience and why it's
- [00:01:58.630] effects and ambience and why it's
- [00:01:58.640] effects and ambience and why it's important to use them and use the
- [00:02:01.109] important to use them and use the
- [00:02:01.119] important to use them and use the correct ones to fit your narrative, how
- [00:02:03.350] correct ones to fit your narrative, how
- [00:02:03.360] correct ones to fit your narrative, how they can elevate your stories, your
- [00:02:05.910] they can elevate your stories, your
- [00:02:05.920] they can elevate your stories, your content. Thank you guys so much and I'll
- [00:02:08.070] content. Thank you guys so much and I'll
- [00:02:08.080] content. Thank you guys so much and I'll check you in the next video.
Keyframes
- /workspace/academy/media/1J7PgfMq4YWXbMhE_G8cSSMr02EsvvegQ/keyframes/last.jpg
- /workspace/academy/media/1J7PgfMq4YWXbMhE_G8cSSMr02EsvvegQ/keyframes/t001.jpg
- /workspace/academy/media/1J7PgfMq4YWXbMhE_G8cSSMr02EsvvegQ/keyframes/t002.jpg
- /workspace/academy/media/1J7PgfMq4YWXbMhE_G8cSSMr02EsvvegQ/keyframes/t004.jpg
- /workspace/academy/media/1J7PgfMq4YWXbMhE_G8cSSMr02EsvvegQ/keyframes/t005.jpg
- /workspace/academy/media/1J7PgfMq4YWXbMhE_G8cSSMr02EsvvegQ/keyframes/t006.jpg
- /workspace/academy/media/1J7PgfMq4YWXbMhE_G8cSSMr02EsvvegQ/keyframes/t007.jpg
- /workspace/academy/media/1J7PgfMq4YWXbMhE_G8cSSMr02EsvvegQ/keyframes/t008.jpg
- /workspace/academy/media/1J7PgfMq4YWXbMhE_G8cSSMr02EsvvegQ/keyframes/t009.jpg
- /workspace/academy/media/1J7PgfMq4YWXbMhE_G8cSSMr02EsvvegQ/keyframes/t011.jpg
- /workspace/academy/media/1J7PgfMq4YWXbMhE_G8cSSMr02EsvvegQ/keyframes/t012.jpg
- /workspace/academy/media/1J7PgfMq4YWXbMhE_G8cSSMr02EsvvegQ/keyframes/t013.jpg
73. Audio Levels
- title: Audio Levels
- status: publish
- author: 0
- is_previewable: (empty)
- video_duration: 0h 1m 4s (raw {"hours":0,"minutes":1,"seconds":4})
- video_source_type: embedded
- drive_file_id:
1cLTzGtrXZ3x7Jw6n8n9L46Odwx--leeK(source_ref; not a public link) - transcript pending / keyframes pending / presentation extract pending
- video_source_url: (Drive preview omitted as a public link; file id kept as source_ref)
(no lesson_content HTML in export — video-only or empty body; metadata above kept in full)
- quizzes_following_this_lesson: 1 (full text in Quizzes)
- Audio Quiz (9 questions)
Drive extract
- file_id:
1cLTzGtrXZ3x7Jw6n8n9L46Odwx--leeK - filename: VEST Section 6 Sound 8 Audio Levels.mp4
- kind: video
- local_path: /workspace/academy/media/1cLTzGtrXZ3x7Jw6n8n9L46Odwx--leeK/VEST Section 6 Sound 8 Audio Levels.mp4
- source_ref: drive
1cLTzGtrXZ3x7Jw6n8n9L46Odwx--leeK· content_length 98176598 · original https://drive.google.com/file/d/1cLTzGtrXZ3x7Jw6n8n9L46Odwx--leeK/view - extract_status: done
- caption_source: drive_timedtext
- duration_s: 63.970998
- keyframe_count: 7
Transcript
- Hey guys, um, welcome back to sound.
- [00:00:02.310] Hey guys, um, welcome back to sound.
- [00:00:02.320] Hey guys, um, welcome back to sound. Today we're going to cover levels. So,
- [00:00:04.150] Today we're going to cover levels. So,
- [00:00:04.160] Today we're going to cover levels. So, we've already covered recording your
- [00:00:05.829] we've already covered recording your
- [00:00:05.839] we've already covered recording your sound and making sure that audio is, you
- [00:00:07.990] sound and making sure that audio is, you
- [00:00:08.000] sound and making sure that audio is, you know, recorded cleanly and the dialogue,
- [00:00:10.150] know, recorded cleanly and the dialogue,
- [00:00:10.160] know, recorded cleanly and the dialogue, you know, can be heard properly. We've
- [00:00:11.910] you know, can be heard properly. We've
- [00:00:11.920] you know, can be heard properly. We've covered adding sound effects, adding
- [00:00:13.910] covered adding sound effects, adding
- [00:00:13.920] covered adding sound effects, adding music, adding ambience. But today, we're
- [00:00:16.390] music, adding ambience. But today, we're
- [00:00:16.400] music, adding ambience. But today, we're going to cover levels. Levels is taking
- [00:00:18.710] going to cover levels. Levels is taking
- [00:00:18.720] going to cover levels. Levels is taking all of those sounds and making sure they
- [00:00:21.189] all of those sounds and making sure they
- [00:00:21.199] all of those sounds and making sure they fit together in harmony. They elevate
- [00:00:24.310] fit together in harmony. They elevate
- [00:00:24.320] fit together in harmony. They elevate each other and they also make sure they
- [00:00:26.550] each other and they also make sure they
- [00:00:26.560] each other and they also make sure they fit the narrative you're trying to tell.
- [00:00:28.550] fit the narrative you're trying to tell.
- [00:00:28.560] fit the narrative you're trying to tell. In some instances, you might want to
- [00:00:30.230] In some instances, you might want to
- [00:00:30.240] In some instances, you might want to focus on the dialogue of what's being
- [00:00:31.990] focus on the dialogue of what's being
- [00:00:32.000] focus on the dialogue of what's being said. In others, the music part might be
- [00:00:34.470] said. In others, the music part might be
- [00:00:34.480] said. In others, the music part might be more important because you're trying to
- [00:00:35.910] more important because you're trying to
- [00:00:35.920] more important because you're trying to incite an emotional reaction from your
- [00:00:38.069] incite an emotional reaction from your
- [00:00:38.079] incite an emotional reaction from your audiences or the sound effects. If
- [00:00:40.150] audiences or the sound effects. If
- [00:00:40.160] audiences or the sound effects. If you're in like a chaotic war zone, you
- [00:00:42.790] you're in like a chaotic war zone, you
- [00:00:42.800] you're in like a chaotic war zone, you want the sound effects to be pretty
- [00:00:44.310] want the sound effects to be pretty
- [00:00:44.320] want the sound effects to be pretty loud. So, leveling is very important
- [00:00:46.709] loud. So, leveling is very important
- [00:00:46.719] loud. So, leveling is very important for, you know, not just making sure all
- [00:00:48.790] for, you know, not just making sure all
- [00:00:48.800] for, you know, not just making sure all your different sound elements fit
- [00:00:50.389] your different sound elements fit
- [00:00:50.399] your different sound elements fit together, but they also fit with the
- [00:00:52.709] together, but they also fit with the
- [00:00:52.719] together, but they also fit with the narrative of your content. So, we just
- [00:00:55.270] narrative of your content. So, we just
- [00:00:55.280] narrative of your content. So, we just covered leveling your sound. In the next
- [00:00:57.430] covered leveling your sound. In the next
- [00:00:57.440] covered leveling your sound. In the next section, we will cover post-production.
- [00:00:59.270] section, we will cover post-production.
- [00:00:59.280] section, we will cover post-production. But otherwise, thank you guys so much
- [00:01:00.869] But otherwise, thank you guys so much
- [00:01:00.879] But otherwise, thank you guys so much and I'll check you in the next section.
Keyframes
- /workspace/academy/media/1cLTzGtrXZ3x7Jw6n8n9L46Odwx--leeK/keyframes/last.jpg
- /workspace/academy/media/1cLTzGtrXZ3x7Jw6n8n9L46Odwx--leeK/keyframes/t001.jpg
- /workspace/academy/media/1cLTzGtrXZ3x7Jw6n8n9L46Odwx--leeK/keyframes/t002.jpg
- /workspace/academy/media/1cLTzGtrXZ3x7Jw6n8n9L46Odwx--leeK/keyframes/t003.jpg
- /workspace/academy/media/1cLTzGtrXZ3x7Jw6n8n9L46Odwx--leeK/keyframes/t004.jpg
- /workspace/academy/media/1cLTzGtrXZ3x7Jw6n8n9L46Odwx--leeK/keyframes/t005.jpg
- /workspace/academy/media/1cLTzGtrXZ3x7Jw6n8n9L46Odwx--leeK/keyframes/t006.jpg
74. Homework The Polish
- title: Homework The Polish
- status: publish
- author: 0
- is_previewable: (empty)
- video_duration: 0h 0m 0s (raw {"hours":0,"minutes":0,"seconds":0})
- video_source_type: (empty)
PRACTICAL: Lighting & Sound (The Polish)
Sections Covered: Lighting; Sound
Submission Instructions:
Complete this practical then submit via email to the instructor at info@ambitious.co.za or use the Academy portal.
Keep up the practical skills!
| Task | Requirements | Deliverables |
|---|---|---|
| Objective | Record two short identical speaking clips (10-15 seconds each) demonstrating the difference between good and bad technique. | Four (4) Raw Clips and One (1) Reflection. |
| Focus | Controlled Environment. | Clip A (Lighting): Subject in Harsh Midday sun. Clip B (Lighting): Subject in Golden Hour or soft Shade/Diffused window light (good). |
| Clip C (Audio): Subject recorded from 10 feet away with music playing in the background (bad). Clip D (Audio): Subject recorded close to the phone mic (or external mic) in a quiet space (good). Reflection: Identify which clips are "Good" and "Bad" and state the technical reason why. |
75. Sound Conclusion
- title: Sound Conclusion
- status: publish
- author: 0
- is_previewable: (empty)
- video_duration: 0h 0m 25s (raw {"hours":0,"minutes":0,"seconds":25})
- video_source_type: embedded
- drive_file_id:
1lJAym1cMTel3NVXv5wyy6Pn36g3fgqj8(source_ref; not a public link) - transcript pending / keyframes pending / presentation extract pending
- video_source_url: (Drive preview omitted as a public link; file id kept as source_ref)
(no lesson_content HTML in export — video-only or empty body; metadata above kept in full)
Drive extract
- file_id:
1lJAym1cMTel3NVXv5wyy6Pn36g3fgqj8 - filename: VEST Section 6 Sound 9 Outro.mp4
- kind: video
- local_path: /workspace/academy/media/1lJAym1cMTel3NVXv5wyy6Pn36g3fgqj8/VEST Section 6 Sound 9 Outro.mp4
- source_ref: drive
1lJAym1cMTel3NVXv5wyy6Pn36g3fgqj8· content_length 36848625 · original https://drive.google.com/file/d/1lJAym1cMTel3NVXv5wyy6Pn36g3fgqj8/view - extract_status: done
- caption_source: drive_timedtext
- duration_s: 24.52
- keyframe_count: 3
Transcript
- Hey guys, congratulations on completing
- [00:00:02.310] Hey guys, congratulations on completing
- [00:00:02.320] Hey guys, congratulations on completing the sound section of the Vest online
- [00:00:04.470] the sound section of the Vest online
- [00:00:04.480] the sound section of the Vest online course. We went through, you know, why
- [00:00:06.390] course. We went through, you know, why
- [00:00:06.400] course. We went through, you know, why it's important to have good sound, uh
- [00:00:08.790] it's important to have good sound, uh
- [00:00:08.800] it's important to have good sound, uh the different elements that we need to
- [00:00:10.390] the different elements that we need to
- [00:00:10.400] the different elements that we need to control, you know, background noise.
- [00:00:12.150] control, you know, background noise.
- [00:00:12.160] control, you know, background noise. We've gone through music, sound effects,
- [00:00:14.470] We've gone through music, sound effects,
- [00:00:14.480] We've gone through music, sound effects, ambience, and syncing your sound if
- [00:00:16.550] ambience, and syncing your sound if
- [00:00:16.560] ambience, and syncing your sound if you're using external microphones that
- [00:00:18.470] you're using external microphones that
- [00:00:18.480] you're using external microphones that record separately. Thank you guys so
- [00:00:20.470] record separately. Thank you guys so
- [00:00:20.480] record separately. Thank you guys so much, and I can't wait to check you in
- [00:00:21.990] much, and I can't wait to check you in
- [00:00:22.000] much, and I can't wait to check you in the next section.
Keyframes
- /workspace/academy/media/1lJAym1cMTel3NVXv5wyy6Pn36g3fgqj8/keyframes/last.jpg
- /workspace/academy/media/1lJAym1cMTel3NVXv5wyy6Pn36g3fgqj8/keyframes/t001.jpg
- /workspace/academy/media/1lJAym1cMTel3NVXv5wyy6Pn36g3fgqj8/keyframes/t002.jpg
76. Post-Production Intro
- title: Post-Production Intro
- status: publish
- author: 0
- is_previewable: (empty)
- video_duration: 0h 1m 4s (raw {"hours":0,"minutes":1,"seconds":4})
- video_source_type: embedded
- drive_file_id:
1cipmYj3rb2p_5SruLC3HQwtKCwdO2pGz(source_ref; not a public link) - transcript pending / keyframes pending / presentation extract pending
- video_source_url: (Drive preview omitted as a public link; file id kept as source_ref)
(no lesson_content HTML in export — video-only or empty body; metadata above kept in full)
Drive extract
- file_id:
1cipmYj3rb2p_5SruLC3HQwtKCwdO2pGz - filename: VEST Section 7 Post 1 intro.mp4
- kind: video
- local_path: /workspace/academy/media/1cipmYj3rb2p_5SruLC3HQwtKCwdO2pGz/VEST Section 7 Post 1 intro.mp4
- source_ref: drive
1cipmYj3rb2p_5SruLC3HQwtKCwdO2pGz· content_length 98728874 · original https://drive.google.com/file/d/1cipmYj3rb2p_5SruLC3HQwtKCwdO2pGz/view - extract_status: done
- caption_source: drive_timedtext
- duration_s: 63.576009
- keyframe_count: 7
Transcript
- Hey guys, welcome to the post-production
- [00:00:02.310] Hey guys, welcome to the post-production
- [00:00:02.320] Hey guys, welcome to the post-production section of the Vest online course. This
- [00:00:05.269] section of the Vest online course. This
- [00:00:05.279] section of the Vest online course. This section is a little bit different
- [00:00:06.630] section is a little bit different
- [00:00:06.640] section is a little bit different because the next few videos will focus
- [00:00:08.710] because the next few videos will focus
- [00:00:08.720] because the next few videos will focus on the software that we're using to, you
- [00:00:12.070] on the software that we're using to, you
- [00:00:12.080] on the software that we're using to, you know, edit and it's going to show you
- [00:00:13.669] know, edit and it's going to show you
- [00:00:13.679] know, edit and it's going to show you how to cut your footage. You know, how
- [00:00:15.910] how to cut your footage. You know, how
- [00:00:15.920] how to cut your footage. You know, how to sync your audio and your video, add
- [00:00:17.990] to sync your audio and your video, add
- [00:00:18.000] to sync your audio and your video, add effects, transitions, music, level, all
- [00:00:20.870] effects, transitions, music, level, all
- [00:00:20.880] effects, transitions, music, level, all your different sound elements. and it's
- [00:00:23.029] your different sound elements. and it's
- [00:00:23.039] your different sound elements. and it's going to combine everything you've
- [00:00:24.710] going to combine everything you've
- [00:00:24.720] going to combine everything you've learned so far um into, you know, what
- [00:00:27.670] learned so far um into, you know, what
- [00:00:27.680] learned so far um into, you know, what will eventually be your finished video,
- [00:00:29.910] will eventually be your finished video,
- [00:00:29.920] will eventually be your finished video, your end product. Um whether you're
- [00:00:32.229] your end product. Um whether you're
- [00:00:32.239] your end product. Um whether you're making, you know, some funny content, a
- [00:00:35.030] making, you know, some funny content, a
- [00:00:35.040] making, you know, some funny content, a short film, or making, you know,
- [00:00:36.790] short film, or making, you know,
- [00:00:36.800] short film, or making, you know, marketing material, you know,
- [00:00:38.310] marketing material, you know,
- [00:00:38.320] marketing material, you know, informative podcasting. Uh you know,
- [00:00:40.869] informative podcasting. Uh you know,
- [00:00:40.879] informative podcasting. Uh you know, what I'm doing right now is making a
- [00:00:43.750] what I'm doing right now is making a
- [00:00:43.760] what I'm doing right now is making a tutorial video. We're mainly going to be
- [00:00:45.830] tutorial video. We're mainly going to be
- [00:00:45.840] tutorial video. We're mainly going to be editing in Cap Cut. This is the software
- [00:00:47.990] editing in Cap Cut. This is the software
- [00:00:48.000] editing in Cap Cut. This is the software that we are using and it's a great
- [00:00:50.549] that we are using and it's a great
- [00:00:50.559] that we are using and it's a great software cuz it's free and you can use
- [00:00:52.630] software cuz it's free and you can use
- [00:00:52.640] software cuz it's free and you can use it on you know computers, laptops and
- [00:00:55.270] it on you know computers, laptops and
- [00:00:55.280] it on you know computers, laptops and your phones. But the techniques we're
- [00:00:57.189] your phones. But the techniques we're
- [00:00:57.199] your phones. But the techniques we're going to learn are also you know
- [00:00:58.709] going to learn are also you know
- [00:00:58.719] going to learn are also you know transferable to all other editing
- [00:01:00.869] transferable to all other editing
- [00:01:00.879] transferable to all other editing softwares out there. Let's dive in into
- [00:01:03.029] softwares out there. Let's dive in into
- [00:01:03.039] softwares out there. Let's dive in into editing.
Keyframes
- /workspace/academy/media/1cipmYj3rb2p_5SruLC3HQwtKCwdO2pGz/keyframes/last.jpg
- /workspace/academy/media/1cipmYj3rb2p_5SruLC3HQwtKCwdO2pGz/keyframes/t001.jpg
- /workspace/academy/media/1cipmYj3rb2p_5SruLC3HQwtKCwdO2pGz/keyframes/t002.jpg
- /workspace/academy/media/1cipmYj3rb2p_5SruLC3HQwtKCwdO2pGz/keyframes/t003.jpg
- /workspace/academy/media/1cipmYj3rb2p_5SruLC3HQwtKCwdO2pGz/keyframes/t004.jpg
- /workspace/academy/media/1cipmYj3rb2p_5SruLC3HQwtKCwdO2pGz/keyframes/t005.jpg
- /workspace/academy/media/1cipmYj3rb2p_5SruLC3HQwtKCwdO2pGz/keyframes/t006.jpg
77. Post Part 1
- title: Post Part 1
- status: publish
- author: 0
- is_previewable: (empty)
- video_duration: 0h 12m 50s (raw {"hours":0,"minutes":12,"seconds":50})
- video_source_type: embedded
- drive_file_id:
10WQZyego1GqNmaG-MfTD2AbhtzjKmp-n(source_ref; not a public link) - transcript pending / keyframes pending / presentation extract pending
- video_source_url: (Drive preview omitted as a public link; file id kept as source_ref)
(no lesson_content HTML in export — video-only or empty body; metadata above kept in full)
Drive extract
- file_id:
10WQZyego1GqNmaG-MfTD2AbhtzjKmp-n - filename: VEST Section 7 Post Part 1.mp4
- kind: video
- local_path: /workspace/academy/media/10WQZyego1GqNmaG-MfTD2AbhtzjKmp-n/VEST Section 7 Post Part 1.mp4
- source_ref: drive
10WQZyego1GqNmaG-MfTD2AbhtzjKmp-n· content_length 1181943728 · original https://drive.google.com/file/d/10WQZyego1GqNmaG-MfTD2AbhtzjKmp-n/view - extract_status: done
- caption_source: drive_timedtext
- duration_s: 769.672993
- keyframe_count: 24
Transcript
- Hey guys, welcome to the post-production
- [00:00:02.790] Hey guys, welcome to the post-production
- [00:00:02.800] Hey guys, welcome to the post-production video. Um, now we're going to go over
- [00:00:05.430] video. Um, now we're going to go over
- [00:00:05.440] video. Um, now we're going to go over our, you know, post-production. I'm
- [00:00:07.190] our, you know, post-production. I'm
- [00:00:07.200] our, you know, post-production. I'm going to show you guys how to edit, how
- [00:00:09.110] going to show you guys how to edit, how
- [00:00:09.120] going to show you guys how to edit, how to cut your clips, you know, the ins and
- [00:00:11.350] to cut your clips, you know, the ins and
- [00:00:11.360] to cut your clips, you know, the ins and outs of your editing software. We're
- [00:00:14.629] outs of your editing software. We're
- [00:00:14.639] outs of your editing software. We're going to use Cap Cut. There's many other
- [00:00:16.630] going to use Cap Cut. There's many other
- [00:00:16.640] going to use Cap Cut. There's many other options that you can use, but we're
- [00:00:19.189] options that you can use, but we're
- [00:00:19.199] options that you can use, but we're using Cap Cut cuz it's available on
- [00:00:22.070] using Cap Cut cuz it's available on
- [00:00:22.080] using Cap Cut cuz it's available on phones, uh, Android and Apple, as well
- [00:00:24.710] phones, uh, Android and Apple, as well
- [00:00:24.720] phones, uh, Android and Apple, as well as desktop PCs, Mac, all of that. I'm
- [00:00:28.310] as desktop PCs, Mac, all of that. I'm
- [00:00:28.320] as desktop PCs, Mac, all of that. I'm going to be using the desktop version,
- [00:00:30.550] going to be using the desktop version,
- [00:00:30.560] going to be using the desktop version, you know, because it gives you a little
- [00:00:31.750] you know, because it gives you a little
- [00:00:31.760] you know, because it gives you a little bit more control. So, first things
- [00:00:33.590] bit more control. So, first things
- [00:00:33.600] bit more control. So, first things first, let's get into our editing
- [00:00:36.069] first, let's get into our editing
- [00:00:36.079] first, let's get into our editing software. So, here we have Cap Cut. You
- [00:00:38.549] software. So, here we have Cap Cut. You
- [00:00:38.559] software. So, here we have Cap Cut. You can see a lot of my different files, uh,
- [00:00:40.630] can see a lot of my different files, uh,
- [00:00:40.640] can see a lot of my different files, uh, the different projects I've been working
- [00:00:42.229] the different projects I've been working
- [00:00:42.239] the different projects I've been working on. So, let's quickly create a new
- [00:00:45.030] on. So, let's quickly create a new
- [00:00:45.040] on. So, let's quickly create a new project. This is our empty Cap Cut file.
- [00:00:48.470] project. This is our empty Cap Cut file.
- [00:00:48.480] project. This is our empty Cap Cut file. Um, at the bottom we have our timeline.
- [00:00:50.470] Um, at the bottom we have our timeline.
- [00:00:50.480] Um, at the bottom we have our timeline. This is where the editing actually takes
- [00:00:53.189] This is where the editing actually takes
- [00:00:53.199] This is where the editing actually takes place, where we cut and trim and
- [00:00:54.950] place, where we cut and trim and
- [00:00:54.960] place, where we cut and trim and sequence our clips. Um, over here's our
- [00:00:57.510] sequence our clips. Um, over here's our
- [00:00:57.520] sequence our clips. Um, over here's our player. This is where we will see, you
- [00:00:59.990] player. This is where we will see, you
- [00:01:00.000] player. This is where we will see, you know, the selected clips that we're
- [00:01:01.670] know, the selected clips that we're
- [00:01:01.680] know, the selected clips that we're playing, where we'll be able to look at
- [00:01:03.910] playing, where we'll be able to look at
- [00:01:03.920] playing, where we'll be able to look at the file that we're currently editing.
- [00:01:07.030] the file that we're currently editing.
- [00:01:07.040] the file that we're currently editing. Over here is where we can import our
- [00:01:09.350] Over here is where we can import our
- [00:01:09.360] Over here is where we can import our different media, our video, audio, any
- [00:01:12.870] different media, our video, audio, any
- [00:01:12.880] different media, our video, audio, any title, sequences, uh, pictures, things
- [00:01:15.590] title, sequences, uh, pictures, things
- [00:01:15.600] title, sequences, uh, pictures, things like that you want to add. At the top,
- [00:01:17.190] like that you want to add. At the top,
- [00:01:17.200] like that you want to add. At the top, we can go to audio and look at some of
- [00:01:20.469] we can go to audio and look at some of
- [00:01:20.479] we can go to audio and look at some of Cap Cut's predetermined sound effects
- [00:01:23.190] Cap Cut's predetermined sound effects
- [00:01:23.200] Cap Cut's predetermined sound effects and music that they already have. Um,
- [00:01:26.230] and music that they already have. Um,
- [00:01:26.240] and music that they already have. Um, then we can go to text. This is where we
- [00:01:28.070] then we can go to text. This is where we
- [00:01:28.080] then we can go to text. This is where we can add some graphics, some titles.
- [00:01:30.630] can add some graphics, some titles.
- [00:01:30.640] can add some graphics, some titles. We've also got stickers where you can
- [00:01:32.310] We've also got stickers where you can
- [00:01:32.320] We've also got stickers where you can add little overlays like this. We've got
- [00:01:34.710] add little overlays like this. We've got
- [00:01:34.720] add little overlays like this. We've got effects where you can add different
- [00:01:36.789] effects where you can add different
- [00:01:36.799] effects where you can add different cinematic effects and, you know, things
- [00:01:39.270] cinematic effects and, you know, things
- [00:01:39.280] cinematic effects and, you know, things that are in Cap Cut to your footage and
- [00:01:41.510] that are in Cap Cut to your footage and
- [00:01:41.520] that are in Cap Cut to your footage and it can look pretty cool. Next to
- [00:01:43.350] it can look pretty cool. Next to
- [00:01:43.360] it can look pretty cool. Next to effects, we have transitions. These are
- [00:01:45.749] effects, we have transitions. These are
- [00:01:45.759] effects, we have transitions. These are some these are some insoftware
- [00:01:49.030] some these are some insoftware
- [00:01:49.040] some these are some insoftware transitions that are templates we can
- [00:01:51.670] transitions that are templates we can
- [00:01:51.680] transitions that are templates we can also add between files to you know give
- [00:01:54.310] also add between files to you know give
- [00:01:54.320] also add between files to you know give cool different transition effects. Next
- [00:01:56.550] cool different transition effects. Next
- [00:01:56.560] cool different transition effects. Next to that we have captions um specifically
- [00:01:59.590] to that we have captions um specifically
- [00:01:59.600] to that we have captions um specifically auto captions, auto lyrics. There's some
- [00:02:02.230] auto captions, auto lyrics. There's some
- [00:02:02.240] auto captions, auto lyrics. There's some templates and then you can manually add
- [00:02:04.389] templates and then you can manually add
- [00:02:04.399] templates and then you can manually add your captions as well. You know this is
- [00:02:06.630] your captions as well. You know this is
- [00:02:06.640] your captions as well. You know this is you know for subtitles captions. So when
- [00:02:08.869] you know for subtitles captions. So when
- [00:02:08.879] you know for subtitles captions. So when people are speaking you get the dialogue
- [00:02:10.550] people are speaking you get the dialogue
- [00:02:10.560] people are speaking you get the dialogue below and then we also have filters. Uh
- [00:02:14.150] below and then we also have filters. Uh
- [00:02:14.160] below and then we also have filters. Uh this is when we get into color grading.
- [00:02:16.070] this is when we get into color grading.
- [00:02:16.080] this is when we get into color grading. Filters are, you know, predetermined
- [00:02:18.949] Filters are, you know, predetermined
- [00:02:18.959] Filters are, you know, predetermined templates or as we like to call them,
- [00:02:20.869] templates or as we like to call them,
- [00:02:20.879] templates or as we like to call them, LUTs. Um and then there's adjustments.
- [00:02:24.390] LUTs. Um and then there's adjustments.
- [00:02:24.400] LUTs. Um and then there's adjustments. Adjustment. Adjustments allow you to
- [00:02:26.390] Adjustment. Adjustments allow you to
- [00:02:26.400] Adjustment. Adjustments allow you to make your own little template for color
- [00:02:29.510] make your own little template for color
- [00:02:29.520] make your own little template for color grading. Um on the right here, um we
- [00:02:33.589] grading. Um on the right here, um we
- [00:02:33.599] grading. Um on the right here, um we have details. But when we import a clip,
- [00:02:36.630] have details. But when we import a clip,
- [00:02:36.640] have details. But when we import a clip, so let's do that for now. So it's going
- [00:02:39.030] so let's do that for now. So it's going
- [00:02:39.040] so let's do that for now. So it's going to be saved under desktop uh test one
- [00:02:41.670] to be saved under desktop uh test one
- [00:02:41.680] to be saved under desktop uh test one footage. This is where I'm, you know,
- [00:02:43.030] footage. This is where I'm, you know,
- [00:02:43.040] footage. This is where I'm, you know, saved the uh files and videos that we
- [00:02:46.630] saved the uh files and videos that we
- [00:02:46.640] saved the uh files and videos that we recorded. Let's import all these
- [00:02:49.110] recorded. Let's import all these
- [00:02:49.120] recorded. Let's import all these different elements that we're going to
- [00:02:50.470] different elements that we're going to
- [00:02:50.480] different elements that we're going to be using. First, we need to position,
- [00:02:52.869] be using. First, we need to position,
- [00:02:52.879] be using. First, we need to position, you know, in our timeline. If we select
- [00:02:54.710] you know, in our timeline. If we select
- [00:02:54.720] you know, in our timeline. If we select a clip, um, we can trim it down here,
- [00:02:58.710] a clip, um, we can trim it down here,
- [00:02:58.720] a clip, um, we can trim it down here, and you'll see it play in the, uh,
- [00:03:01.589] and you'll see it play in the, uh,
- [00:03:01.599] and you'll see it play in the, uh, previewing the video. This, uh, our
- [00:03:03.430] previewing the video. This, uh, our
- [00:03:03.440] previewing the video. This, uh, our little media player at the top here.
- [00:03:05.430] little media player at the top here.
- [00:03:05.440] little media player at the top here. Once we drag it to our timeline, we can
- [00:03:08.070] Once we drag it to our timeline, we can
- [00:03:08.080] Once we drag it to our timeline, we can also, uh, edit it here. And then, you
- [00:03:11.509] also, uh, edit it here. And then, you
- [00:03:11.519] also, uh, edit it here. And then, you know, you can also choose your different
- [00:03:13.670] know, you can also choose your different
- [00:03:13.680] know, you can also choose your different sections there. But once we um click on
- [00:03:16.630] sections there. But once we um click on
- [00:03:16.640] sections there. But once we um click on the clip, you'll see the details folder
- [00:03:19.830] the clip, you'll see the details folder
- [00:03:19.840] the clip, you'll see the details folder changes to this little editing tab. This
- [00:03:22.470] changes to this little editing tab. This
- [00:03:22.480] changes to this little editing tab. This little editing tab allows us to, you
- [00:03:25.030] little editing tab allows us to, you
- [00:03:25.040] little editing tab allows us to, you know, customize a specific one clip at a
- [00:03:27.350] know, customize a specific one clip at a
- [00:03:27.360] know, customize a specific one clip at a time. So, we can, you know, change the
- [00:03:29.589] time. So, we can, you know, change the
- [00:03:29.599] time. So, we can, you know, change the scale. We can crop the image by zooming
- [00:03:31.589] scale. We can crop the image by zooming
- [00:03:31.599] scale. We can crop the image by zooming in in that way. We can, um, you know, do
- [00:03:34.710] in in that way. We can, um, you know, do
- [00:03:34.720] in in that way. We can, um, you know, do other transform things, you know, scale.
- [00:03:37.670] other transform things, you know, scale.
- [00:03:37.680] other transform things, you know, scale. Um, we can blend it. So if you ever want
- [00:03:39.670] Um, we can blend it. So if you ever want
- [00:03:39.680] Um, we can blend it. So if you ever want to overlay things and need to, you know,
- [00:03:41.990] to overlay things and need to, you know,
- [00:03:42.000] to overlay things and need to, you know, have a level of opacity, we can add
- [00:03:44.949] have a level of opacity, we can add
- [00:03:44.959] have a level of opacity, we can add different uh effects like stabilization,
- [00:03:47.990] different uh effects like stabilization,
- [00:03:48.000] different uh effects like stabilization, enhance the quality. Though these are
- [00:03:50.070] enhance the quality. Though these are
- [00:03:50.080] enhance the quality. Though these are pro features. If you see any features
- [00:03:52.229] pro features. If you see any features
- [00:03:52.239] pro features. If you see any features with a little diamond uh either a blue
- [00:03:54.949] with a little diamond uh either a blue
- [00:03:54.959] with a little diamond uh either a blue or purple diamond next to it, it means
- [00:03:57.190] or purple diamond next to it, it means
- [00:03:57.200] or purple diamond next to it, it means it's a paid feature. You have to pay for
- [00:03:59.030] it's a paid feature. You have to pay for
- [00:03:59.040] it's a paid feature. You have to pay for the premium and pro plans to have them.
- [00:04:01.990] the premium and pro plans to have them.
- [00:04:02.000] the premium and pro plans to have them. Um so but I do have them. So I will be
- [00:04:04.309] Um so but I do have them. So I will be
- [00:04:04.319] Um so but I do have them. So I will be able to also like show you, you know,
- [00:04:05.990] able to also like show you, you know,
- [00:04:06.000] able to also like show you, you know, some of those things. Um, if you just
- [00:04:08.229] some of those things. Um, if you just
- [00:04:08.239] some of those things. Um, if you just have regular Cap Cut and you're not
- [00:04:10.070] have regular Cap Cut and you're not
- [00:04:10.080] have regular Cap Cut and you're not paying for anything, it will allow you
- [00:04:12.710] paying for anything, it will allow you
- [00:04:12.720] paying for anything, it will allow you to use those features while editing. But
- [00:04:15.990] to use those features while editing. But
- [00:04:16.000] to use those features while editing. But once you want to export your finished
- [00:04:18.390] once you want to export your finished
- [00:04:18.400] once you want to export your finished video, it will prevent you from doing so
- [00:04:20.789] video, it will prevent you from doing so
- [00:04:20.799] video, it will prevent you from doing so unless you pay. Another thing that we
- [00:04:22.870] unless you pay. Another thing that we
- [00:04:22.880] unless you pay. Another thing that we have is under basic where we've had the
- [00:04:25.270] have is under basic where we've had the
- [00:04:25.280] have is under basic where we've had the transform, we have these different
- [00:04:26.550] transform, we have these different
- [00:04:26.560] transform, we have these different things. You also have remove BG which
- [00:04:28.950] things. You also have remove BG which
- [00:04:28.960] things. You also have remove BG which stands for remove background. Um, you've
- [00:04:31.350] stands for remove background. Um, you've
- [00:04:31.360] stands for remove background. Um, you've got the auto removal feature, which is a
- [00:04:34.150] got the auto removal feature, which is a
- [00:04:34.160] got the auto removal feature, which is a pro feature, and it'll cut out a person
- [00:04:36.550] pro feature, and it'll cut out a person
- [00:04:36.560] pro feature, and it'll cut out a person automatically for you. So, if I grab
- [00:04:39.749] automatically for you. So, if I grab
- [00:04:39.759] automatically for you. So, if I grab this one, you know, this footage here,
- [00:04:41.670] this one, you know, this footage here,
- [00:04:41.680] this one, you know, this footage here, and I click auto removal. So, as you can
- [00:04:44.150] and I click auto removal. So, as you can
- [00:04:44.160] and I click auto removal. So, as you can see, it's cut out the background. So, if
- [00:04:46.710] see, it's cut out the background. So, if
- [00:04:46.720] see, it's cut out the background. So, if we play the video, you see it's just,
- [00:04:49.270] we play the video, you see it's just,
- [00:04:49.280] we play the video, you see it's just, you know, me wandering around there, um,
- [00:04:51.909] you know, me wandering around there, um,
- [00:04:51.919] you know, me wandering around there, um, because it's cut out everything else. If
- [00:04:53.909] because it's cut out everything else. If
- [00:04:53.919] because it's cut out everything else. If I overlay this footage with some
- [00:04:56.790] I overlay this footage with some
- [00:04:56.800] I overlay this footage with some different footage is you'll see I get a
- [00:04:59.350] different footage is you'll see I get a
- [00:04:59.360] different footage is you'll see I get a cloning effect um because of removing
- [00:05:01.749] cloning effect um because of removing
- [00:05:01.759] cloning effect um because of removing the background and then I put it on top.
- [00:05:03.830] the background and then I put it on top.
- [00:05:03.840] the background and then I put it on top. So if I layer this footage when you
- [00:05:05.990] So if I layer this footage when you
- [00:05:06.000] So if I layer this footage when you layer footage the footage that has me
- [00:05:07.990] layer footage the footage that has me
- [00:05:08.000] layer footage the footage that has me here um you know that been cut out uh
- [00:05:11.270] here um you know that been cut out uh
- [00:05:11.280] here um you know that been cut out uh you want it on top. So if you want me on
- [00:05:13.909] you want it on top. So if you want me on
- [00:05:13.919] you want it on top. So if you want me on top of you know the other footage with
- [00:05:15.990] top of you know the other footage with
- [00:05:16.000] top of you know the other footage with me you need to put it on top in the
- [00:05:19.350] me you need to put it on top in the
- [00:05:19.360] me you need to put it on top in the timeline so you have those different
- [00:05:21.749] timeline so you have those different
- [00:05:21.759] timeline so you have those different layers. But there are other things we
- [00:05:23.909] layers. But there are other things we
- [00:05:23.919] layers. But there are other things we can use for um the removing of the
- [00:05:26.870] can use for um the removing of the
- [00:05:26.880] can use for um the removing of the background. Obviously the auto removal
- [00:05:29.350] background. Obviously the auto removal
- [00:05:29.360] background. Obviously the auto removal is a pro feature. Um but you can do a
- [00:05:33.189] is a pro feature. Um but you can do a
- [00:05:33.199] is a pro feature. Um but you can do a custom removal. However, custom removal
- [00:05:36.390] custom removal. However, custom removal
- [00:05:36.400] custom removal. However, custom removal um might need you to use key frames and
- [00:05:40.550] um might need you to use key frames and
- [00:05:40.560] um might need you to use key frames and you know masking and all of those
- [00:05:42.310] you know masking and all of those
- [00:05:42.320] you know masking and all of those different things. Um and manually remove
- [00:05:45.110] different things. Um and manually remove
- [00:05:45.120] different things. Um and manually remove things yourself. And that is something
- [00:05:47.510] things yourself. And that is something
- [00:05:47.520] things yourself. And that is something I'll go over key frames and masking um
- [00:05:51.189] I'll go over key frames and masking um
- [00:05:51.199] I'll go over key frames and masking um in a bit. But first, let's cover the
- [00:05:53.029] in a bit. But first, let's cover the
- [00:05:53.039] in a bit. But first, let's cover the chroma key. The chroma key is really
- [00:05:55.029] chroma key. The chroma key is really
- [00:05:55.039] chroma key. The chroma key is really nice because this is a simple way of you
- [00:05:58.310] nice because this is a simple way of you
- [00:05:58.320] nice because this is a simple way of you know removing like a green screen. So if
- [00:06:00.390] know removing like a green screen. So if
- [00:06:00.400] know removing like a green screen. So if you can see I have my laptop in the
- [00:06:01.990] you can see I have my laptop in the
- [00:06:02.000] you can see I have my laptop in the picture. I have this green image on the
- [00:06:04.309] picture. I have this green image on the
- [00:06:04.319] picture. I have this green image on the screen. So if I chose the color picker,
- [00:06:07.189] screen. So if I chose the color picker,
- [00:06:07.199] screen. So if I chose the color picker, it allows me to pick a single color to
- [00:06:09.909] it allows me to pick a single color to
- [00:06:09.919] it allows me to pick a single color to remove from an image. So, this is why
- [00:06:12.469] remove from an image. So, this is why
- [00:06:12.479] remove from an image. So, this is why it's usually a green or a blue screen
- [00:06:14.629] it's usually a green or a blue screen
- [00:06:14.639] it's usually a green or a blue screen cuz that bright color is not seen, you
- [00:06:16.710] cuz that bright color is not seen, you
- [00:06:16.720] cuz that bright color is not seen, you know, naturally in all environments. Cuz
- [00:06:18.790] know, naturally in all environments. Cuz
- [00:06:18.800] know, naturally in all environments. Cuz what'll happen is if I try to choose
- [00:06:20.550] what'll happen is if I try to choose
- [00:06:20.560] what'll happen is if I try to choose another color like the white for
- [00:06:22.070] another color like the white for
- [00:06:22.080] another color like the white for example, it removes like almost
- [00:06:23.990] example, it removes like almost
- [00:06:24.000] example, it removes like almost everything, even some of the white from
- [00:06:26.070] everything, even some of the white from
- [00:06:26.080] everything, even some of the white from the table. Um, so yeah, let's select the
- [00:06:28.629] the table. Um, so yeah, let's select the
- [00:06:28.639] the table. Um, so yeah, let's select the green. Make sure it's this part of the
- [00:06:31.590] green. Make sure it's this part of the
- [00:06:31.600] green. Make sure it's this part of the green at the end. So, let's zoom in very
- [00:06:34.230] green at the end. So, let's zoom in very
- [00:06:34.240] green at the end. So, let's zoom in very quickly.
- [00:06:35.510] quickly.
- [00:06:35.520] quickly. um this part here so that the whole
- [00:06:39.830] um this part here so that the whole
- [00:06:39.840] um this part here so that the whole green screen is gone and we don't have a
- [00:06:41.990] green screen is gone and we don't have a
- [00:06:42.000] green screen is gone and we don't have a little bit of a glow. There we go. So
- [00:06:44.870] little bit of a glow. There we go. So
- [00:06:44.880] little bit of a glow. There we go. So now that we've removed our, you know,
- [00:06:47.909] now that we've removed our, you know,
- [00:06:47.919] now that we've removed our, you know, green from the screen, any clip that we
- [00:06:50.629] green from the screen, any clip that we
- [00:06:50.639] green from the screen, any clip that we put behind that clip will end up on the
- [00:06:53.430] put behind that clip will end up on the
- [00:06:53.440] put behind that clip will end up on the screen here. But so you know, it's not
- [00:06:56.629] screen here. But so you know, it's not
- [00:06:56.639] screen here. But so you know, it's not going to put your image there exactly
- [00:06:58.390] going to put your image there exactly
- [00:06:58.400] going to put your image there exactly because obviously your image is still
- [00:06:59.830] because obviously your image is still
- [00:06:59.840] because obviously your image is still big if I, you know, hide that quick. So
- [00:07:02.790] big if I, you know, hide that quick. So
- [00:07:02.800] big if I, you know, hide that quick. So what you want to do is you want to you
- [00:07:04.230] what you want to do is you want to you
- [00:07:04.240] what you want to do is you want to you know make that image smaller so that it
- [00:07:06.550] know make that image smaller so that it
- [00:07:06.560] know make that image smaller so that it fits in your screen and that's how you
- [00:07:08.950] fits in your screen and that's how you
- [00:07:08.960] fits in your screen and that's how you can do a simple uh green screen
- [00:07:11.189] can do a simple uh green screen
- [00:07:11.199] can do a simple uh green screen replacement. So also here is our export
- [00:07:14.309] replacement. So also here is our export
- [00:07:14.319] replacement. So also here is our export button. The export button is you know
- [00:07:16.629] button. The export button is you know
- [00:07:16.639] button. The export button is you know once you're done editing your clip you
- [00:07:18.790] once you're done editing your clip you
- [00:07:18.800] once you're done editing your clip you will press export. So let's quickly put
- [00:07:20.710] will press export. So let's quickly put
- [00:07:20.720] will press export. So let's quickly put a clip here just to show you. You'll
- [00:07:22.790] a clip here just to show you. You'll
- [00:07:22.800] a clip here just to show you. You'll press export and you'll give your file a
- [00:07:25.749] press export and you'll give your file a
- [00:07:25.759] press export and you'll give your file a name. You'll choose a location for it to
- [00:07:29.350] name. You'll choose a location for it to
- [00:07:29.360] name. You'll choose a location for it to be saved to and then you'll want to
- [00:07:31.990] be saved to and then you'll want to
- [00:07:32.000] be saved to and then you'll want to check your video. Um, or if you want to
- [00:07:34.950] check your video. Um, or if you want to
- [00:07:34.960] check your video. Um, or if you want to export just the audio, you'll only check
- [00:07:37.270] export just the audio, you'll only check
- [00:07:37.280] export just the audio, you'll only check audio. If you want to export your video,
- [00:07:38.790] audio. If you want to export your video,
- [00:07:38.800] audio. If you want to export your video, you can just click video. You don't need
- [00:07:40.070] you can just click video. You don't need
- [00:07:40.080] you can just click video. You don't need to click audio unless you want those two
- [00:07:42.629] to click audio unless you want those two
- [00:07:42.639] to click audio unless you want those two things exported separately. So, you have
- [00:07:44.790] things exported separately. So, you have
- [00:07:44.800] things exported separately. So, you have a video and an audio file, but the video
- [00:07:47.270] a video and an audio file, but the video
- [00:07:47.280] a video and an audio file, but the video file will still create uh will still
- [00:07:49.350] file will still create uh will still
- [00:07:49.360] file will still create uh will still contain your audio, but you will also
- [00:07:51.430] contain your audio, but you will also
- [00:07:51.440] contain your audio, but you will also have a separate audio file. Um, and then
- [00:07:53.589] have a separate audio file. Um, and then
- [00:07:53.599] have a separate audio file. Um, and then you can also check copyright. So, if you
- [00:07:55.589] you can also check copyright. So, if you
- [00:07:55.599] you can also check copyright. So, if you used music, it'll check if you used any
- [00:07:58.070] used music, it'll check if you used any
- [00:07:58.080] used music, it'll check if you used any copyrighted music for YouTube or
- [00:08:00.629] copyrighted music for YouTube or
- [00:08:00.639] copyrighted music for YouTube or Instagram just to make sure that you
- [00:08:02.629] Instagram just to make sure that you
- [00:08:02.639] Instagram just to make sure that you don't get in trouble when you're posting
- [00:08:04.150] don't get in trouble when you're posting
- [00:08:04.160] don't get in trouble when you're posting things. So, first off, um you'd want to
- [00:08:06.950] things. So, first off, um you'd want to
- [00:08:06.960] things. So, first off, um you'd want to select your resolution. The best
- [00:08:08.790] select your resolution. The best
- [00:08:08.800] select your resolution. The best resolutions to select will be, you know,
- [00:08:10.869] resolutions to select will be, you know,
- [00:08:10.879] resolutions to select will be, you know, 1080p or 4K, but remember that also
- [00:08:13.749] 1080p or 4K, but remember that also
- [00:08:13.759] 1080p or 4K, but remember that also depends on the footage you filmed in.
- [00:08:15.749] depends on the footage you filmed in.
- [00:08:15.759] depends on the footage you filmed in. You can go downwards. So, if you filmed
- [00:08:17.589] You can go downwards. So, if you filmed
- [00:08:17.599] You can go downwards. So, if you filmed in 4K, you can export in anything less
- [00:08:21.350] in 4K, you can export in anything less
- [00:08:21.360] in 4K, you can export in anything less than 4K, but if you filmed in 1080p, you
- [00:08:24.390] than 4K, but if you filmed in 1080p, you
- [00:08:24.400] than 4K, but if you filmed in 1080p, you can't export in 4K. It'll make the
- [00:08:26.710] can't export in 4K. It'll make the
- [00:08:26.720] can't export in 4K. It'll make the quality of your footage not look as
- [00:08:28.390] quality of your footage not look as
- [00:08:28.400] quality of your footage not look as good. Uh, next is your codec. H.264 is
- [00:08:32.230] good. Uh, next is your codec. H.264 is
- [00:08:32.240] good. Uh, next is your codec. H.264 is the default. It is, you know, the best.
- [00:08:34.630] the default. It is, you know, the best.
- [00:08:34.640] the default. It is, you know, the best. Um, and then obviously you've got your
- [00:08:36.230] Um, and then obviously you've got your
- [00:08:36.240] Um, and then obviously you've got your format. Uh, next you have your frame
- [00:08:38.070] format. Uh, next you have your frame
- [00:08:38.080] format. Uh, next you have your frame rates. So, remember in our frame rate
- [00:08:40.709] rates. So, remember in our frame rate
- [00:08:40.719] rates. So, remember in our frame rate video, um, we talked about the different
- [00:08:43.350] video, um, we talked about the different
- [00:08:43.360] video, um, we talked about the different frame rates, 24, 30, and 60. Uh when you
- [00:08:47.350] frame rates, 24, 30, and 60. Uh when you
- [00:08:47.360] frame rates, 24, 30, and 60. Uh when you are exporting the only ones I recommend
- [00:08:49.750] are exporting the only ones I recommend
- [00:08:49.760] are exporting the only ones I recommend you use is 24 or 30. You don't want to
- [00:08:53.829] you use is 24 or 30. You don't want to
- [00:08:53.839] you use is 24 or 30. You don't want to use any of the others to export except
- [00:08:55.910] use any of the others to export except
- [00:08:55.920] use any of the others to export except for 60. That is if you are exporting
- [00:08:58.470] for 60. That is if you are exporting
- [00:08:58.480] for 60. That is if you are exporting gameplay footage. 30 is usually the best
- [00:09:01.350] gameplay footage. 30 is usually the best
- [00:09:01.360] gameplay footage. 30 is usually the best for static content like this which is
- [00:09:03.670] for static content like this which is
- [00:09:03.680] for static content like this which is for YouTube tutorials um social media.
- [00:09:07.190] for YouTube tutorials um social media.
- [00:09:07.200] for YouTube tutorials um social media. 24 is if you want to have something look
- [00:09:09.430] 24 is if you want to have something look
- [00:09:09.440] 24 is if you want to have something look more cinematic, have more motion blur,
- [00:09:12.310] more cinematic, have more motion blur,
- [00:09:12.320] more cinematic, have more motion blur, action, all that. Um but we'll keep it
- [00:09:14.949] action, all that. Um but we'll keep it
- [00:09:14.959] action, all that. Um but we'll keep it 30 for now. And then you can export. You
- [00:09:17.829] 30 for now. And then you can export. You
- [00:09:17.839] 30 for now. And then you can export. You just click it and it exports it to
- [00:09:20.150] just click it and it exports it to
- [00:09:20.160] just click it and it exports it to wherever you saved it. And whatever you
- [00:09:22.070] wherever you saved it. And whatever you
- [00:09:22.080] wherever you saved it. And whatever you saved it as. To trim the clips, you can
- [00:09:24.150] saved it as. To trim the clips, you can
- [00:09:24.160] saved it as. To trim the clips, you can trim them here in your import uh and
- [00:09:27.350] trim them here in your import uh and
- [00:09:27.360] trim them here in your import uh and your media, you know, little section. Or
- [00:09:29.670] your media, you know, little section. Or
- [00:09:29.680] your media, you know, little section. Or you can just drag and drop your clip and
- [00:09:32.710] you can just drag and drop your clip and
- [00:09:32.720] you can just drag and drop your clip and ex and trim it in the um in the
- [00:09:35.990] ex and trim it in the um in the
- [00:09:36.000] ex and trim it in the um in the timeline. Or you can use the um cutting
- [00:09:39.990] timeline. Or you can use the um cutting
- [00:09:40.000] timeline. Or you can use the um cutting tool. So if you check this little arrow
- [00:09:41.590] tool. So if you check this little arrow
- [00:09:41.600] tool. So if you check this little arrow here, we have our select, we have our
- [00:09:43.269] here, we have our select, we have our
- [00:09:43.279] here, we have our select, we have our split um and then you we have our
- [00:09:45.509] split um and then you we have our
- [00:09:45.519] split um and then you we have our different select, leftward, select,
- [00:09:47.030] different select, leftward, select,
- [00:09:47.040] different select, leftward, select, rightward tools. So if we click split,
- [00:09:50.070] rightward tools. So if we click split,
- [00:09:50.080] rightward tools. So if we click split, um the shortcut on keyboard would be B
- [00:09:52.790] um the shortcut on keyboard would be B
- [00:09:52.800] um the shortcut on keyboard would be B and the shortcut for select would be A.
- [00:09:55.110] and the shortcut for select would be A.
- [00:09:55.120] and the shortcut for select would be A. So I tend to press A and B instead of
- [00:09:57.509] So I tend to press A and B instead of
- [00:09:57.519] So I tend to press A and B instead of going to the drop-own menu. So if you
- [00:09:59.750] going to the drop-own menu. So if you
- [00:09:59.760] going to the drop-own menu. So if you want to press B, you can come here and
- [00:10:01.990] want to press B, you can come here and
- [00:10:02.000] want to press B, you can come here and you can split your tool. Um and then,
- [00:10:05.190] you can split your tool. Um and then,
- [00:10:05.200] you can split your tool. Um and then, you know, now it's two separate clips
- [00:10:06.870] you know, now it's two separate clips
- [00:10:06.880] you know, now it's two separate clips that we can, you know, drag apart and
- [00:10:08.870] that we can, you know, drag apart and
- [00:10:08.880] that we can, you know, drag apart and together. Once you get into one of your
- [00:10:10.790] together. Once you get into one of your
- [00:10:10.800] together. Once you get into one of your clips, you can zoom in and out of the
- [00:10:13.269] clips, you can zoom in and out of the
- [00:10:13.279] clips, you can zoom in and out of the timeline. So, zooming in and out lets
- [00:10:16.310] timeline. So, zooming in and out lets
- [00:10:16.320] timeline. So, zooming in and out lets you see things. You know, if this whole
- [00:10:18.630] you see things. You know, if this whole
- [00:10:18.640] you see things. You know, if this whole clip here is 2 minutes 54 seconds. So,
- [00:10:22.389] clip here is 2 minutes 54 seconds. So,
- [00:10:22.399] clip here is 2 minutes 54 seconds. So, if I zoom in, I can kind of expand those
- [00:10:26.389] if I zoom in, I can kind of expand those
- [00:10:26.399] if I zoom in, I can kind of expand those set uh those seconds to, you know, cut
- [00:10:29.750] set uh those seconds to, you know, cut
- [00:10:29.760] set uh those seconds to, you know, cut more exa exact. And once we zoom in all
- [00:10:32.310] more exa exact. And once we zoom in all
- [00:10:32.320] more exa exact. And once we zoom in all the way, we can now see frame by frame.
- [00:10:34.230] the way, we can now see frame by frame.
- [00:10:34.240] the way, we can now see frame by frame. You can see here's the 12th frame to the
- [00:10:36.310] You can see here's the 12th frame to the
- [00:10:36.320] You can see here's the 12th frame to the 13th frame, 14, uh, 15, 16. So, those
- [00:10:40.389] 13th frame, 14, uh, 15, 16. So, those
- [00:10:40.399] 13th frame, 14, uh, 15, 16. So, those are your different frames that you can,
- [00:10:41.990] are your different frames that you can,
- [00:10:42.000] are your different frames that you can, you know, look, uh, look at and then cut
- [00:10:44.150] you know, look, uh, look at and then cut
- [00:10:44.160] you know, look, uh, look at and then cut by frame by frame basis. Okay. So, let's
- [00:10:46.949] by frame by frame basis. Okay. So, let's
- [00:10:46.959] by frame by frame basis. Okay. So, let's get into, um, syncing our audio. So, um,
- [00:10:51.430] get into, um, syncing our audio. So, um,
- [00:10:51.440] get into, um, syncing our audio. So, um, I've got here some video and audio for a
- [00:10:55.750] I've got here some video and audio for a
- [00:10:55.760] I've got here some video and audio for a video we made. So, what I'll do is I'll
- [00:10:57.990] video we made. So, what I'll do is I'll
- [00:10:58.000] video we made. So, what I'll do is I'll grab the video and I'll grab the audio
- [00:11:00.150] grab the video and I'll grab the audio
- [00:11:00.160] grab the video and I'll grab the audio we recorded on a on a separate
- [00:11:03.829] we recorded on a on a separate
- [00:11:03.839] we recorded on a on a separate microphone. So, this microphone was a
- [00:11:06.310] microphone. So, this microphone was a
- [00:11:06.320] microphone. So, this microphone was a lot better, but I'll mute this quickly.
- [00:11:08.550] lot better, but I'll mute this quickly.
- [00:11:08.560] lot better, but I'll mute this quickly. If you can hear this transmitter, this
- [00:11:11.910] If you can hear this transmitter, this
- [00:11:11.920] If you can hear this transmitter, this transmitter
- [00:11:12.550] transmitter
- [00:11:12.560] transmitter that that's the sound of the phone's
- [00:11:15.190] that that's the sound of the phone's
- [00:11:15.200] that that's the sound of the phone's microphone. So, it's not as good as the
- [00:11:18.630] microphone. So, it's not as good as the
- [00:11:18.640] microphone. So, it's not as good as the um you know other microphone that we
- [00:11:20.550] um you know other microphone that we
- [00:11:20.560] um you know other microphone that we used.
- [00:11:21.030] used.
- [00:11:21.040] used. This is our receiver. And
- [00:11:22.710] This is our receiver. And
- [00:11:22.720] This is our receiver. And so, this other microphone we used is not
- [00:11:24.949] so, this other microphone we used is not
- [00:11:24.959] so, this other microphone we used is not peaking. It's not causing problems. It
- [00:11:27.269] peaking. It's not causing problems. It
- [00:11:27.279] peaking. It's not causing problems. It was our lapel mic that I was currently
- [00:11:29.910] was our lapel mic that I was currently
- [00:11:29.920] was our lapel mic that I was currently wearing while recording this video. So,
- [00:11:33.190] wearing while recording this video. So,
- [00:11:33.200] wearing while recording this video. So, what you want to do when syncing your
- [00:11:34.790] what you want to do when syncing your
- [00:11:34.800] what you want to do when syncing your audio and your video is we can mute this
- [00:11:37.110] audio and your video is we can mute this
- [00:11:37.120] audio and your video is we can mute this track here because, you know, that's our
- [00:11:39.350] track here because, you know, that's our
- [00:11:39.360] track here because, you know, that's our video file. We don't need the sound from
- [00:11:40.870] video file. We don't need the sound from
- [00:11:40.880] video file. We don't need the sound from it. So, on our audio file, we need to
- [00:11:43.590] it. So, on our audio file, we need to
- [00:11:43.600] it. So, on our audio file, we need to listen for our clap. Yeah. So,
- [00:11:49.030] listen for our clap. Yeah. So,
- [00:11:49.040] listen for our clap. Yeah. So, okay. Um,
- so here was our little clap. Did you
- [00:11:55.990] so here was our little clap. Did you
- [00:11:56.000] so here was our little clap. Did you hear?
- [00:11:57.990] hear?
- [00:11:58.000] hear? It was a little uh
- [00:12:02.470] It was a little uh
- [00:12:02.480] It was a little uh a little quiet cuz we've already
- [00:12:04.310] a little quiet cuz we've already
- [00:12:04.320] a little quiet cuz we've already improved the sound quality of this file.
- [00:12:07.269] improved the sound quality of this file.
- [00:12:07.279] improved the sound quality of this file. But over here, this little spike here is
- [00:12:09.030] But over here, this little spike here is
- [00:12:09.040] But over here, this little spike here is our clap. So, let's find the mo moment
- [00:12:11.350] our clap. So, let's find the mo moment
- [00:12:11.360] our clap. So, let's find the mo moment where our hands clap over here.
- [00:12:15.190] where our hands clap over here.
- [00:12:15.200] where our hands clap over here. And then let's find our little clap. So,
- [00:12:18.949] And then let's find our little clap. So,
- [00:12:18.959] And then let's find our little clap. So, let's turn that up so it's a little
- [00:12:21.110] let's turn that up so it's a little
- [00:12:21.120] let's turn that up so it's a little better.
- [00:12:23.430] better.
- [00:12:23.440] better. So, we need to line this up for when the
- [00:12:25.430] So, we need to line this up for when the
- [00:12:25.440] So, we need to line this up for when the clap happened. So, on the closing of the
- [00:12:28.470] clap happened. So, on the closing of the
- [00:12:28.480] clap happened. So, on the closing of the hands, that's where our clap needs to go
- [00:12:31.590] hands, that's where our clap needs to go
- [00:12:31.600] hands, that's where our clap needs to go right here.
- There we go. And then that's where our
- [00:12:38.710] There we go. And then that's where our
- [00:12:38.720] There we go. And then that's where our uh you know that's our audio is now
- [00:12:40.389] uh you know that's our audio is now
- [00:12:40.399] uh you know that's our audio is now synced. You can also always check by
- [00:12:43.670] synced. You can also always check by
- [00:12:43.680] synced. You can also always check by unmuting your audio. And if the voices
- [00:12:46.870] unmuting your audio. And if the voices
- [00:12:46.880] unmuting your audio. And if the voices line up, it means you synced your audio
- [00:12:49.110] line up, it means you synced your audio
- [00:12:49.120] line up, it means you synced your audio correctly.
Keyframes
- /workspace/academy/media/10WQZyego1GqNmaG-MfTD2AbhtzjKmp-n/keyframes/last.jpg
- /workspace/academy/media/10WQZyego1GqNmaG-MfTD2AbhtzjKmp-n/keyframes/t003.jpg
- /workspace/academy/media/10WQZyego1GqNmaG-MfTD2AbhtzjKmp-n/keyframes/t007.jpg
- /workspace/academy/media/10WQZyego1GqNmaG-MfTD2AbhtzjKmp-n/keyframes/t010.jpg
- /workspace/academy/media/10WQZyego1GqNmaG-MfTD2AbhtzjKmp-n/keyframes/t013.jpg
- /workspace/academy/media/10WQZyego1GqNmaG-MfTD2AbhtzjKmp-n/keyframes/t017.jpg
- /workspace/academy/media/10WQZyego1GqNmaG-MfTD2AbhtzjKmp-n/keyframes/t020.jpg
- /workspace/academy/media/10WQZyego1GqNmaG-MfTD2AbhtzjKmp-n/keyframes/t023.jpg
- /workspace/academy/media/10WQZyego1GqNmaG-MfTD2AbhtzjKmp-n/keyframes/t027.jpg
- /workspace/academy/media/10WQZyego1GqNmaG-MfTD2AbhtzjKmp-n/keyframes/t030.jpg
- /workspace/academy/media/10WQZyego1GqNmaG-MfTD2AbhtzjKmp-n/keyframes/t033.jpg
- /workspace/academy/media/10WQZyego1GqNmaG-MfTD2AbhtzjKmp-n/keyframes/t037.jpg
- /workspace/academy/media/10WQZyego1GqNmaG-MfTD2AbhtzjKmp-n/keyframes/t040.jpg
- /workspace/academy/media/10WQZyego1GqNmaG-MfTD2AbhtzjKmp-n/keyframes/t044.jpg
- /workspace/academy/media/10WQZyego1GqNmaG-MfTD2AbhtzjKmp-n/keyframes/t047.jpg
- /workspace/academy/media/10WQZyego1GqNmaG-MfTD2AbhtzjKmp-n/keyframes/t050.jpg
- /workspace/academy/media/10WQZyego1GqNmaG-MfTD2AbhtzjKmp-n/keyframes/t054.jpg
- /workspace/academy/media/10WQZyego1GqNmaG-MfTD2AbhtzjKmp-n/keyframes/t057.jpg
- /workspace/academy/media/10WQZyego1GqNmaG-MfTD2AbhtzjKmp-n/keyframes/t060.jpg
- /workspace/academy/media/10WQZyego1GqNmaG-MfTD2AbhtzjKmp-n/keyframes/t064.jpg
- /workspace/academy/media/10WQZyego1GqNmaG-MfTD2AbhtzjKmp-n/keyframes/t067.jpg
- /workspace/academy/media/10WQZyego1GqNmaG-MfTD2AbhtzjKmp-n/keyframes/t070.jpg
- /workspace/academy/media/10WQZyego1GqNmaG-MfTD2AbhtzjKmp-n/keyframes/t074.jpg
- /workspace/academy/media/10WQZyego1GqNmaG-MfTD2AbhtzjKmp-n/keyframes/t077.jpg
78. Post Part 2
- title: Post Part 2
- status: publish
- author: 0
- is_previewable: (empty)
- video_duration: 0h 4m 16s (raw {"hours":0,"minutes":4,"seconds":16})
- video_source_type: embedded
- drive_file_id:
1ke6nfQUjvmKfAXLZwJRtQ-XNJF5z-JM6(source_ref; not a public link) - transcript pending / keyframes pending / presentation extract pending
- video_source_url: (Drive preview omitted as a public link; file id kept as source_ref)
(no lesson_content HTML in export — video-only or empty body; metadata above kept in full)
Drive extract
- file_id:
1ke6nfQUjvmKfAXLZwJRtQ-XNJF5z-JM6 - filename: VEST Section 7 Post Part 2.mp4
- kind: video
- local_path: /workspace/academy/media/1ke6nfQUjvmKfAXLZwJRtQ-XNJF5z-JM6/VEST Section 7 Post Part 2.mp4
- source_ref: drive
1ke6nfQUjvmKfAXLZwJRtQ-XNJF5z-JM6· content_length 391957749 · original https://drive.google.com/file/d/1ke6nfQUjvmKfAXLZwJRtQ-XNJF5z-JM6/view - extract_status: done
- caption_source: drive_timedtext
- duration_s: 256.07
- keyframe_count: 24
Transcript
- Next, I'm going to show you how to add
- [00:00:01.990] Next, I'm going to show you how to add
- [00:00:02.000] Next, I'm going to show you how to add text and captions to a video. So, I'm
- [00:00:05.190] text and captions to a video. So, I'm
- [00:00:05.200] text and captions to a video. So, I'm going to, you know, just drop in my clip
- [00:00:06.869] going to, you know, just drop in my clip
- [00:00:06.879] going to, you know, just drop in my clip here. Um, let's quickly add our, you
- [00:00:10.709] here. Um, let's quickly add our, you
- [00:00:10.719] here. Um, let's quickly add our, you know, text, default text. Um, once we
- [00:00:14.549] know, text, default text. Um, once we
- [00:00:14.559] know, text, default text. Um, once we add our text, we'll be able to, you
- [00:00:16.950] add our text, we'll be able to, you
- [00:00:16.960] add our text, we'll be able to, you know, edit this text. Um, so let's drag
- [00:00:19.750] know, edit this text. Um, so let's drag
- [00:00:19.760] know, edit this text. Um, so let's drag it here, put it here, and then let's
- [00:00:21.910] it here, put it here, and then let's
- [00:00:21.920] it here, put it here, and then let's type here, um, hello, I guess. You know,
- [00:00:25.670] type here, um, hello, I guess. You know,
- [00:00:25.680] type here, um, hello, I guess. You know, just type any random thing there. Um,
- [00:00:27.990] just type any random thing there. Um,
- [00:00:28.000] just type any random thing there. Um, and then we've got our text here. And
- [00:00:29.910] and then we've got our text here. And
- [00:00:29.920] and then we've got our text here. And then we can choose its color. You know,
- [00:00:32.229] then we can choose its color. You know,
- [00:00:32.239] then we can choose its color. You know, we can, you know, adjust that to fit
- [00:00:34.310] we can, you know, adjust that to fit
- [00:00:34.320] we can, you know, adjust that to fit better, make it stand out more, can make
- [00:00:37.030] better, make it stand out more, can make
- [00:00:37.040] better, make it stand out more, can make it bold, make it underlined, give it
- [00:00:39.270] it bold, make it underlined, give it
- [00:00:39.280] it bold, make it underlined, give it italics. All the same things you could
- [00:00:41.270] italics. All the same things you could
- [00:00:41.280] italics. All the same things you could do in Microsoft Word. Change the size,
- [00:00:43.750] do in Microsoft Word. Change the size,
- [00:00:43.760] do in Microsoft Word. Change the size, move it around. Um, we have different
- [00:00:46.470] move it around. Um, we have different
- [00:00:46.480] move it around. Um, we have different presets that we can take advantage of as
- [00:00:48.630] presets that we can take advantage of as
- [00:00:48.640] presets that we can take advantage of as well. Um, if you go down more, we've got
- [00:00:50.950] well. Um, if you go down more, we've got
- [00:00:50.960] well. Um, if you go down more, we've got a few more different presets. Choose a
- [00:00:53.270] a few more different presets. Choose a
- [00:00:53.280] a few more different presets. Choose a nice looking one, you know. um adjust
- [00:00:55.830] nice looking one, you know. um adjust
- [00:00:55.840] nice looking one, you know. um adjust the scale, blend, stroke, thickness, you
- [00:00:58.869] the scale, blend, stroke, thickness, you
- [00:00:58.879] the scale, blend, stroke, thickness, you know, give it a outline, um give it a
- [00:01:01.990] know, give it a outline, um give it a
- [00:01:02.000] know, give it a outline, um give it a background,
- [00:01:03.510] background,
- [00:01:03.520] background, um glow, all those different things that
- [00:01:05.429] um glow, all those different things that
- [00:01:05.439] um glow, all those different things that you can, uh you know, make it, uh make
- [00:01:08.230] you can, uh you know, make it, uh make
- [00:01:08.240] you can, uh you know, make it, uh make use of in, you know, many different
- [00:01:10.310] use of in, you know, many different
- [00:01:10.320] use of in, you know, many different other software. And then what we can
- [00:01:12.310] other software. And then what we can
- [00:01:12.320] other software. And then what we can also do is we can, you know, give it a
- [00:01:15.350] also do is we can, you know, give it a
- [00:01:15.360] also do is we can, you know, give it a different effects. We've got these
- [00:01:17.030] different effects. We've got these
- [00:01:17.040] different effects. We've got these little uh, you know, bubbles that we can
- [00:01:19.990] little uh, you know, bubbles that we can
- [00:01:20.000] little uh, you know, bubbles that we can hold the text in, you know, so it looks
- [00:01:22.310] hold the text in, you know, so it looks
- [00:01:22.320] hold the text in, you know, so it looks like I'm saying that. Um, or we can, you
- [00:01:26.550] like I'm saying that. Um, or we can, you
- [00:01:26.560] like I'm saying that. Um, or we can, you know, add effects which will, um, you
- [00:01:30.310] know, add effects which will, um, you
- [00:01:30.320] know, add effects which will, um, you know, animate the art a little bit, give
- [00:01:31.990] know, animate the art a little bit, give
- [00:01:32.000] know, animate the art a little bit, give it, you know, these different
- [00:01:33.190] it, you know, these different
- [00:01:33.200] it, you know, these different predetermined. Here's some Halloween
- [00:01:34.789] predetermined. Here's some Halloween
- [00:01:34.799] predetermined. Here's some Halloween ones. But then obviously there are some
- [00:01:37.109] ones. But then obviously there are some
- [00:01:37.119] ones. But then obviously there are some pro ones that, you know, will require
- [00:01:39.429] pro ones that, you know, will require
- [00:01:39.439] pro ones that, you know, will require you to pay to export with them. Um, but
- [00:01:41.990] you to pay to export with them. Um, but
- [00:01:42.000] you to pay to export with them. Um, but then there are some free templates that
- [00:01:43.670] then there are some free templates that
- [00:01:43.680] then there are some free templates that you can make use of as well. You can
- [00:01:45.429] you can make use of as well. You can
- [00:01:45.439] you can make use of as well. You can then animate it so that it can come in,
- [00:01:48.310] then animate it so that it can come in,
- [00:01:48.320] then animate it so that it can come in, you know, in a nice shiny way when you
- [00:01:50.469] you know, in a nice shiny way when you
- [00:01:50.479] you know, in a nice shiny way when you let it come in. choose the different uh
- [00:01:52.950] let it come in. choose the different uh
- [00:01:52.960] let it come in. choose the different uh different styles and animations um to
- [00:01:55.830] different styles and animations um to
- [00:01:55.840] different styles and animations um to transition your text in. You can uh then
- [00:01:58.469] transition your text in. You can uh then
- [00:01:58.479] transition your text in. You can uh then also do text to speech. So if uh you are
- [00:02:02.469] also do text to speech. So if uh you are
- [00:02:02.479] also do text to speech. So if uh you are not as comfortable talking in front of a
- [00:02:04.709] not as comfortable talking in front of a
- [00:02:04.719] not as comfortable talking in front of a camera or giving voice over for
- [00:02:06.389] camera or giving voice over for
- [00:02:06.399] camera or giving voice over for something, you can always choose a you
- [00:02:09.109] something, you can always choose a you
- [00:02:09.119] something, you can always choose a you know different text to speech person to
- [00:02:11.190] know different text to speech person to
- [00:02:11.200] know different text to speech person to you know speak your text for you. Let's
- [00:02:12.949] you know speak your text for you. Let's
- [00:02:12.959] you know speak your text for you. Let's go with Jesse. Um and then let's say
- [00:02:15.910] go with Jesse. Um and then let's say
- [00:02:15.920] go with Jesse. Um and then let's say generate speech.
- [00:02:18.949] generate speech.
- [00:02:18.959] generate speech. But then you can obviously also remove
- [00:02:20.869] But then you can obviously also remove
- [00:02:20.879] But then you can obviously also remove your text and then the voice that was
- [00:02:23.830] your text and then the voice that was
- [00:02:23.840] your text and then the voice that was generated for that uh will stay.
- [00:02:26.470] generated for that uh will stay.
- [00:02:26.480] generated for that uh will stay. So you don't have to have both. If you
- [00:02:28.470] So you don't have to have both. If you
- [00:02:28.480] So you don't have to have both. If you just want to make voice over, you can
- [00:02:30.470] just want to make voice over, you can
- [00:02:30.480] just want to make voice over, you can type out your text, click the text to
- [00:02:32.869] type out your text, click the text to
- [00:02:32.879] type out your text, click the text to speech and you know let it translate for
- [00:02:35.110] speech and you know let it translate for
- [00:02:35.120] speech and you know let it translate for you. Next I can show you how to insert
- [00:02:38.070] you. Next I can show you how to insert
- [00:02:38.080] you. Next I can show you how to insert some auto captions. So let's quickly add
- [00:02:41.830] some auto captions. So let's quickly add
- [00:02:41.840] some auto captions. So let's quickly add a uh you know add some audio of me just
- [00:02:46.309] a uh you know add some audio of me just
- [00:02:46.319] a uh you know add some audio of me just you know talking. What we can do is we
- [00:02:48.470] you know talking. What we can do is we
- [00:02:48.480] you know talking. What we can do is we click on this clip for the you know for
- [00:02:50.630] click on this clip for the you know for
- [00:02:50.640] click on this clip for the you know for the voice and we click captions
- [00:02:54.309] the voice and we click captions
- [00:02:54.319] the voice and we click captions and we can then um click generate. So
- [00:02:58.630] and we can then um click generate. So
- [00:02:58.640] and we can then um click generate. So when we generate those captions you'll
- [00:03:01.110] when we generate those captions you'll
- [00:03:01.120] when we generate those captions you'll see they pop up at the bottom there. So
- [00:03:03.670] see they pop up at the bottom there. So
- [00:03:03.680] see they pop up at the bottom there. So yeah now that our captions have popped
- [00:03:05.910] yeah now that our captions have popped
- [00:03:05.920] yeah now that our captions have popped up you can see you know they they they
- [00:03:08.550] up you can see you know they they they
- [00:03:08.560] up you can see you know they they they pop up every time
- [00:03:10.390] pop up every time
- [00:03:10.400] pop up every time little mark. So you can see how it pops
- [00:03:13.270] little mark. So you can see how it pops
- [00:03:13.280] little mark. So you can see how it pops up. But uh you know obviously you can
- [00:03:16.470] up. But uh you know obviously you can
- [00:03:16.480] up. But uh you know obviously you can still edit them. So you know sometimes
- [00:03:19.110] still edit them. So you know sometimes
- [00:03:19.120] still edit them. So you know sometimes the text might be um a little bit wrong.
- [00:03:22.710] the text might be um a little bit wrong.
- [00:03:22.720] the text might be um a little bit wrong. It mishes what you are saying and
- [00:03:25.750] It mishes what you are saying and
- [00:03:25.760] It mishes what you are saying and incorrectly says you know what you're
- [00:03:27.910] incorrectly says you know what you're
- [00:03:27.920] incorrectly says you know what you're saying but then you can edit it. For
- [00:03:30.309] saying but then you can edit it. For
- [00:03:30.319] saying but then you can edit it. For example, I don't want the ums and rs
- [00:03:32.390] example, I don't want the ums and rs
- [00:03:32.400] example, I don't want the ums and rs that I make you know when speaking. So I
- [00:03:34.390] that I make you know when speaking. So I
- [00:03:34.400] that I make you know when speaking. So I can take that away. So that was our
- [00:03:36.470] can take that away. So that was our
- [00:03:36.480] can take that away. So that was our captions and text to speech. Um, you can
- [00:03:39.110] captions and text to speech. Um, you can
- [00:03:39.120] captions and text to speech. Um, you can also use your text and your captions and
- [00:03:42.070] also use your text and your captions and
- [00:03:42.080] also use your text and your captions and those different elements to create call
- [00:03:44.309] those different elements to create call
- [00:03:44.319] those different elements to create call to actions. So, you know, if you're
- [00:03:45.830] to actions. So, you know, if you're
- [00:03:45.840] to actions. So, you know, if you're selling a product, at the end of your
- [00:03:47.270] selling a product, at the end of your
- [00:03:47.280] selling a product, at the end of your video, you need to tell people to go buy
- [00:03:49.270] video, you need to tell people to go buy
- [00:03:49.280] video, you need to tell people to go buy your product. So, you'll add different
- [00:03:51.430] your product. So, you'll add different
- [00:03:51.440] your product. So, you'll add different links, different captions to say, you
- [00:03:53.670] links, different captions to say, you
- [00:03:53.680] links, different captions to say, you know, visit this website or contact me
- [00:03:56.229] know, visit this website or contact me
- [00:03:56.239] know, visit this website or contact me here. or even if it's your own personal
- [00:03:59.589] here. or even if it's your own personal
- [00:03:59.599] here. or even if it's your own personal content creation that you're just trying
- [00:04:01.270] content creation that you're just trying
- [00:04:01.280] content creation that you're just trying to make to get people to follow you for
- [00:04:03.030] to make to get people to follow you for
- [00:04:03.040] to make to get people to follow you for the content, you'll give a call to
- [00:04:05.350] the content, you'll give a call to
- [00:04:05.360] the content, you'll give a call to action like hit the like and subscribe
- [00:04:07.350] action like hit the like and subscribe
- [00:04:07.360] action like hit the like and subscribe button or follow me for more videos or
- [00:04:09.990] button or follow me for more videos or
- [00:04:10.000] button or follow me for more videos or you know something like that. You call
- [00:04:11.429] you know something like that. You call
- [00:04:11.439] you know something like that. You call your audience to action. You get them
- [00:04:13.110] your audience to action. You get them
- [00:04:13.120] your audience to action. You get them to, you know, do something now that
- [00:04:14.949] to, you know, do something now that
- [00:04:14.959] to, you know, do something now that they've watched your
Keyframes
- /workspace/academy/media/1ke6nfQUjvmKfAXLZwJRtQ-XNJF5z-JM6/keyframes/last.jpg
- /workspace/academy/media/1ke6nfQUjvmKfAXLZwJRtQ-XNJF5z-JM6/keyframes/t001.jpg
- /workspace/academy/media/1ke6nfQUjvmKfAXLZwJRtQ-XNJF5z-JM6/keyframes/t002.jpg
- /workspace/academy/media/1ke6nfQUjvmKfAXLZwJRtQ-XNJF5z-JM6/keyframes/t003.jpg
- /workspace/academy/media/1ke6nfQUjvmKfAXLZwJRtQ-XNJF5z-JM6/keyframes/t005.jpg
- /workspace/academy/media/1ke6nfQUjvmKfAXLZwJRtQ-XNJF5z-JM6/keyframes/t006.jpg
- /workspace/academy/media/1ke6nfQUjvmKfAXLZwJRtQ-XNJF5z-JM6/keyframes/t007.jpg
- /workspace/academy/media/1ke6nfQUjvmKfAXLZwJRtQ-XNJF5z-JM6/keyframes/t008.jpg
- /workspace/academy/media/1ke6nfQUjvmKfAXLZwJRtQ-XNJF5z-JM6/keyframes/t009.jpg
- /workspace/academy/media/1ke6nfQUjvmKfAXLZwJRtQ-XNJF5z-JM6/keyframes/t010.jpg
- /workspace/academy/media/1ke6nfQUjvmKfAXLZwJRtQ-XNJF5z-JM6/keyframes/t011.jpg
- /workspace/academy/media/1ke6nfQUjvmKfAXLZwJRtQ-XNJF5z-JM6/keyframes/t012.jpg
- /workspace/academy/media/1ke6nfQUjvmKfAXLZwJRtQ-XNJF5z-JM6/keyframes/t014.jpg
- /workspace/academy/media/1ke6nfQUjvmKfAXLZwJRtQ-XNJF5z-JM6/keyframes/t015.jpg
- /workspace/academy/media/1ke6nfQUjvmKfAXLZwJRtQ-XNJF5z-JM6/keyframes/t016.jpg
- /workspace/academy/media/1ke6nfQUjvmKfAXLZwJRtQ-XNJF5z-JM6/keyframes/t017.jpg
- /workspace/academy/media/1ke6nfQUjvmKfAXLZwJRtQ-XNJF5z-JM6/keyframes/t018.jpg
- /workspace/academy/media/1ke6nfQUjvmKfAXLZwJRtQ-XNJF5z-JM6/keyframes/t019.jpg
- /workspace/academy/media/1ke6nfQUjvmKfAXLZwJRtQ-XNJF5z-JM6/keyframes/t020.jpg
- /workspace/academy/media/1ke6nfQUjvmKfAXLZwJRtQ-XNJF5z-JM6/keyframes/t021.jpg
- /workspace/academy/media/1ke6nfQUjvmKfAXLZwJRtQ-XNJF5z-JM6/keyframes/t023.jpg
- /workspace/academy/media/1ke6nfQUjvmKfAXLZwJRtQ-XNJF5z-JM6/keyframes/t024.jpg
- /workspace/academy/media/1ke6nfQUjvmKfAXLZwJRtQ-XNJF5z-JM6/keyframes/t025.jpg
- /workspace/academy/media/1ke6nfQUjvmKfAXLZwJRtQ-XNJF5z-JM6/keyframes/t026.jpg
79. Post Part 3
- title: Post Part 3
- status: publish
- author: 0
- is_previewable: (empty)
- video_duration: 0h 9m 50s (raw {"hours":0,"minutes":9,"seconds":50})
- video_source_type: embedded
- drive_file_id:
1HcLApKaZ0tJBarvx-CxeMWmr76AjD8-t(source_ref; not a public link) - transcript pending / keyframes pending / presentation extract pending
- video_source_url: (Drive preview omitted as a public link; file id kept as source_ref)
(no lesson_content HTML in export — video-only or empty body; metadata above kept in full)
Drive extract
- file_id:
1HcLApKaZ0tJBarvx-CxeMWmr76AjD8-t - filename: VEST Section 7 Post Part 3.mp4
- kind: video
- local_path: /workspace/academy/media/1HcLApKaZ0tJBarvx-CxeMWmr76AjD8-t/VEST Section 7 Post Part 3.mp4
- source_ref: drive
1HcLApKaZ0tJBarvx-CxeMWmr76AjD8-t· content_length 908614152 · original https://drive.google.com/file/d/1HcLApKaZ0tJBarvx-CxeMWmr76AjD8-t/view - extract_status: done
- caption_source: drive_timedtext
- duration_s: 590.042993
- keyframe_count: 24
Transcript
- Let's go over color grading. So, you
- [00:00:02.950] Let's go over color grading. So, you
- [00:00:02.960] Let's go over color grading. So, you know, let's grab a little item of
- [00:00:04.470] know, let's grab a little item of
- [00:00:04.480] know, let's grab a little item of footage here. Um, you know, just here's
- [00:00:07.030] footage here. Um, you know, just here's
- [00:00:07.040] footage here. Um, you know, just here's this piece of footage here. Let me show
- [00:00:09.110] this piece of footage here. Let me show
- [00:00:09.120] this piece of footage here. Let me show you how to add, you know, some of the
- [00:00:11.030] you how to add, you know, some of the
- [00:00:11.040] you how to add, you know, some of the fixed filters. So, you can go here to
- [00:00:12.870] fixed filters. So, you can go here to
- [00:00:12.880] fixed filters. So, you can go here to the top. You've got your filters. Um,
- [00:00:15.509] the top. You've got your filters. Um,
- [00:00:15.519] the top. You've got your filters. Um, you can drag and drop, um, you know, the
- [00:00:17.670] you can drag and drop, um, you know, the
- [00:00:17.680] you can drag and drop, um, you know, the one you want to use, and then obviously
- [00:00:19.750] one you want to use, and then obviously
- [00:00:19.760] one you want to use, and then obviously you'll expand it to cover, you know, the
- [00:00:21.830] you'll expand it to cover, you know, the
- [00:00:21.840] you'll expand it to cover, you know, the footage. or instead of adding the
- [00:00:24.230] footage. or instead of adding the
- [00:00:24.240] footage. or instead of adding the filters as like an overlay to your
- [00:00:26.390] filters as like an overlay to your
- [00:00:26.400] filters as like an overlay to your entire, you know, all your clips here is
- [00:00:28.950] entire, you know, all your clips here is
- [00:00:28.960] entire, you know, all your clips here is adjust clip for clip by dragging it onto
- [00:00:31.429] adjust clip for clip by dragging it onto
- [00:00:31.439] adjust clip for clip by dragging it onto your clip. So then once you've dragged
- [00:00:33.190] your clip. So then once you've dragged
- [00:00:33.200] your clip. So then once you've dragged it onto your clip, um, you will, you
- [00:00:35.990] it onto your clip, um, you will, you
- [00:00:36.000] it onto your clip, um, you will, you know, it'll be a part of this clip here
- [00:00:38.229] know, it'll be a part of this clip here
- [00:00:38.239] know, it'll be a part of this clip here specifically, but not this clip here.
- [00:00:40.470] specifically, but not this clip here.
- [00:00:40.480] specifically, but not this clip here. Those are your LUTs, your, you know,
- [00:00:42.630] Those are your LUTs, your, you know,
- [00:00:42.640] Those are your LUTs, your, you know, different filters, the, you know,
- [00:00:44.630] different filters, the, you know,
- [00:00:44.640] different filters, the, you know, pre-selected templates of color grading
- [00:00:46.950] pre-selected templates of color grading
- [00:00:46.960] pre-selected templates of color grading that you can just add. But now, let me
- [00:00:48.709] that you can just add. But now, let me
- [00:00:48.719] that you can just add. But now, let me show you how to, you know, manually
- [00:00:51.110] show you how to, you know, manually
- [00:00:51.120] show you how to, you know, manually color grade your footage. So, if you
- [00:00:52.790] color grade your footage. So, if you
- [00:00:52.800] color grade your footage. So, if you select your clip, um, additionally, what
- [00:00:55.189] select your clip, um, additionally, what
- [00:00:55.199] select your clip, um, additionally, what you can do is you can go to your
- [00:00:56.709] you can do is you can go to your
- [00:00:56.719] you can do is you can go to your adjustments here and create a custom
- [00:00:58.549] adjustments here and create a custom
- [00:00:58.559] adjustments here and create a custom one. And that custom one will then be
- [00:01:01.270] one. And that custom one will then be
- [00:01:01.280] one. And that custom one will then be applied to all of your footage. Um, but
- [00:01:03.990] applied to all of your footage. Um, but
- [00:01:04.000] applied to all of your footage. Um, but let's go for a clip. Uh, let's go by a
- [00:01:05.830] let's go for a clip. Uh, let's go by a
- [00:01:05.840] let's go for a clip. Uh, let's go by a clip per clip basis for now. You'd click
- [00:01:08.550] clip per clip basis for now. You'd click
- [00:01:08.560] clip per clip basis for now. You'd click your clip. You'd go um from here at the
- [00:01:11.030] your clip. You'd go um from here at the
- [00:01:11.040] your clip. You'd go um from here at the top, we've got our video layer. You'd go
- [00:01:12.550] top, we've got our video layer. You'd go
- [00:01:12.560] top, we've got our video layer. You'd go to your adjustment layer. On the
- [00:01:14.630] to your adjustment layer. On the
- [00:01:14.640] to your adjustment layer. On the adjustment layer, you've got your pro
- [00:01:16.230] adjustment layer, you've got your pro
- [00:01:16.240] adjustment layer, you've got your pro features, your auto adjustment, color
- [00:01:17.990] features, your auto adjustment, color
- [00:01:18.000] features, your auto adjustment, color match, all of those different things.
- [00:01:19.510] match, all of those different things.
- [00:01:19.520] match, all of those different things. But under adjust, this is the free
- [00:01:21.830] But under adjust, this is the free
- [00:01:21.840] But under adjust, this is the free option. You can change the temperature.
- [00:01:23.990] option. You can change the temperature.
- [00:01:24.000] option. You can change the temperature. This is the temperature of the lighting.
- [00:01:25.270] This is the temperature of the lighting.
- [00:01:25.280] This is the temperature of the lighting. So you've got from cold to warm. Um you
- [00:01:28.149] So you've got from cold to warm. Um you
- [00:01:28.159] So you've got from cold to warm. Um you can adjust your tint from greens to um
- [00:01:31.590] can adjust your tint from greens to um
- [00:01:31.600] can adjust your tint from greens to um you know uh purples. Uh then you've got
- [00:01:34.310] you know uh purples. Uh then you've got
- [00:01:34.320] you know uh purples. Uh then you've got your saturation. So no color versus too
- [00:01:36.870] your saturation. So no color versus too
- [00:01:36.880] your saturation. So no color versus too much color. You know, it increases the
- [00:01:38.710] much color. You know, it increases the
- [00:01:38.720] much color. You know, it increases the color. So when you are color grading, it
- [00:01:41.350] color. So when you are color grading, it
- [00:01:41.360] color. So when you are color grading, it is important to get your subjects to
- [00:01:43.270] is important to get your subjects to
- [00:01:43.280] is important to get your subjects to stand out. That's the purpose of color
- [00:01:45.030] stand out. That's the purpose of color
- [00:01:45.040] stand out. That's the purpose of color grading to be noticeable and to make the
- [00:01:47.990] grading to be noticeable and to make the
- [00:01:48.000] grading to be noticeable and to make the image overall more interesting. So what
- [00:01:51.109] image overall more interesting. So what
- [00:01:51.119] image overall more interesting. So what else we have is we have our exposure.
- [00:01:53.190] else we have is we have our exposure.
- [00:01:53.200] else we have is we have our exposure. Here you can see high exposure versus
- [00:01:55.109] Here you can see high exposure versus
- [00:01:55.119] Here you can see high exposure versus low exposure. Next we have contrast.
- [00:01:57.429] low exposure. Next we have contrast.
- [00:01:57.439] low exposure. Next we have contrast. Here you can see high versus low
- [00:01:59.030] Here you can see high versus low
- [00:01:59.040] Here you can see high versus low contrast. Next is our highlights. This
- [00:02:01.990] contrast. Next is our highlights. This
- [00:02:02.000] contrast. Next is our highlights. This is the light and the whites in the
- [00:02:04.310] is the light and the whites in the
- [00:02:04.320] is the light and the whites in the space. So where light reflects in an
- [00:02:07.030] space. So where light reflects in an
- [00:02:07.040] space. So where light reflects in an image. Increasing that um is your
- [00:02:09.589] image. Increasing that um is your
- [00:02:09.599] image. Increasing that um is your highlights and you know decreasing is
- [00:02:11.510] highlights and you know decreasing is
- [00:02:11.520] highlights and you know decreasing is decreasing your highlights. Then shadows
- [00:02:13.510] decreasing your highlights. Then shadows
- [00:02:13.520] decreasing your highlights. Then shadows is obviously the opposite of highlights.
- [00:02:15.750] is obviously the opposite of highlights.
- [00:02:15.760] is obviously the opposite of highlights. Um where you have you know less shadows
- [00:02:18.949] Um where you have you know less shadows
- [00:02:18.959] Um where you have you know less shadows versus so so if we increase the uh
- [00:02:22.309] versus so so if we increase the uh
- [00:02:22.319] versus so so if we increase the uh shadow here it takes away shadows
- [00:02:24.150] shadow here it takes away shadows
- [00:02:24.160] shadow here it takes away shadows because obviously it's the opposite of
- [00:02:25.350] because obviously it's the opposite of
- [00:02:25.360] because obviously it's the opposite of highlights but then if we want to give
- [00:02:26.790] highlights but then if we want to give
- [00:02:26.800] highlights but then if we want to give it more shadows it makes it darker. Um
- [00:02:30.070] it more shadows it makes it darker. Um
- [00:02:30.080] it more shadows it makes it darker. Um whereas the whites is a similar thing
- [00:02:31.990] whereas the whites is a similar thing
- [00:02:32.000] whereas the whites is a similar thing but instead of where light reflects
- [00:02:35.110] but instead of where light reflects
- [00:02:35.120] but instead of where light reflects versus is overshadowed the whites is
- [00:02:37.670] versus is overshadowed the whites is
- [00:02:37.680] versus is overshadowed the whites is just the whites of the space increased.
- [00:02:39.750] just the whites of the space increased.
- [00:02:39.760] just the whites of the space increased. Um, and then you've got the blacks of
- [00:02:41.350] Um, and then you've got the blacks of
- [00:02:41.360] Um, and then you've got the blacks of the space get increased. Um, then you
- [00:02:44.150] the space get increased. Um, then you
- [00:02:44.160] the space get increased. Um, then you have your brilliance. This is, you know,
- [00:02:46.790] have your brilliance. This is, you know,
- [00:02:46.800] have your brilliance. This is, you know, a little bit more similar to saturation,
- [00:02:49.270] a little bit more similar to saturation,
- [00:02:49.280] a little bit more similar to saturation, except in instead of the color of a
- [00:02:51.430] except in instead of the color of a
- [00:02:51.440] except in instead of the color of a subject, it's the colors that reflect um
- [00:02:54.869] subject, it's the colors that reflect um
- [00:02:54.879] subject, it's the colors that reflect um the light. Next, we have some effects.
- [00:02:56.710] the light. Next, we have some effects.
- [00:02:56.720] the light. Next, we have some effects. So, you can sharpen your image to like
- [00:02:58.550] So, you can sharpen your image to like
- [00:02:58.560] So, you can sharpen your image to like make details stand out more clearly. Um,
- [00:03:01.270] make details stand out more clearly. Um,
- [00:03:01.280] make details stand out more clearly. Um, but obviously, if you oversharpen, it
- [00:03:03.190] but obviously, if you oversharpen, it
- [00:03:03.200] but obviously, if you oversharpen, it looks a little bit weird. Um, clarity,
- [00:03:05.750] looks a little bit weird. Um, clarity,
- [00:03:05.760] looks a little bit weird. Um, clarity, you know, similar is about removing any
- [00:03:07.910] you know, similar is about removing any
- [00:03:07.920] you know, similar is about removing any blur. Um but then you also have
- [00:03:10.710] blur. Um but then you also have
- [00:03:10.720] blur. Um but then you also have particles. So you know the particles uh
- [00:03:13.350] particles. So you know the particles uh
- [00:03:13.360] particles. So you know the particles uh in your image. Um you've got fade. This
- [00:03:16.390] in your image. Um you've got fade. This
- [00:03:16.400] in your image. Um you've got fade. This is like uh the gamma setting. It you
- [00:03:19.030] is like uh the gamma setting. It you
- [00:03:19.040] is like uh the gamma setting. It you know reduces the um you know the how
- [00:03:22.470] know reduces the um you know the how
- [00:03:22.480] know reduces the um you know the how much different things stand out. So if
- [00:03:25.030] much different things stand out. So if
- [00:03:25.040] much different things stand out. So if I'll increase that obviously my subject
- [00:03:27.350] I'll increase that obviously my subject
- [00:03:27.360] I'll increase that obviously my subject now blends more in with the background.
- [00:03:29.509] now blends more in with the background.
- [00:03:29.519] now blends more in with the background. And then vignette which is you know a
- [00:03:32.070] And then vignette which is you know a
- [00:03:32.080] And then vignette which is you know a you've got the white one and the black
- [00:03:33.509] you've got the white one and the black
- [00:03:33.519] you've got the white one and the black one. It's just this little you know
- [00:03:35.509] one. It's just this little you know
- [00:03:35.519] one. It's just this little you know eyeball effect that you can use to cover
- [00:03:37.509] eyeball effect that you can use to cover
- [00:03:37.519] eyeball effect that you can use to cover an image. So those are some of the
- [00:03:39.670] an image. So those are some of the
- [00:03:39.680] an image. So those are some of the basics. Next we've got our you know
- [00:03:43.110] basics. Next we've got our you know
- [00:03:43.120] basics. Next we've got our you know different colors. So if uh you want to
- [00:03:45.990] different colors. So if uh you want to
- [00:03:46.000] different colors. So if uh you want to increase or decrease the um or change a
- [00:03:49.589] increase or decrease the um or change a
- [00:03:49.599] increase or decrease the um or change a specific color in your environment. So
- [00:03:51.990] specific color in your environment. So
- [00:03:52.000] specific color in your environment. So if we want to find the reds in our
- [00:03:53.910] if we want to find the reds in our
- [00:03:53.920] if we want to find the reds in our environment, we can change the
- [00:03:55.830] environment, we can change the
- [00:03:55.840] environment, we can change the saturation which if you see my skin cuz
- [00:03:58.710] saturation which if you see my skin cuz
- [00:03:58.720] saturation which if you see my skin cuz you know everyone's skin has a little
- [00:04:00.149] you know everyone's skin has a little
- [00:04:00.159] you know everyone's skin has a little bit of red in it. Um we can make it more
- [00:04:02.550] bit of red in it. Um we can make it more
- [00:04:02.560] bit of red in it. Um we can make it more pink or we can make it more yellowy. Um,
- [00:04:05.030] pink or we can make it more yellowy. Um,
- [00:04:05.040] pink or we can make it more yellowy. Um, we can also increase, you know, how much
- [00:04:06.949] we can also increase, you know, how much
- [00:04:06.959] we can also increase, you know, how much it stands out, its saturation. So, um,
- [00:04:10.309] it stands out, its saturation. So, um,
- [00:04:10.319] it stands out, its saturation. So, um, you know, um, or we can increase its
- [00:04:12.550] you know, um, or we can increase its
- [00:04:12.560] you know, um, or we can increase its brightness, you know, how much light is
- [00:04:14.229] brightness, you know, how much light is
- [00:04:14.239] brightness, you know, how much light is on that specific color. And then you can
- [00:04:16.629] on that specific color. And then you can
- [00:04:16.639] on that specific color. And then you can also, you know, you've got your red,
- [00:04:18.310] also, you know, you've got your red,
- [00:04:18.320] also, you know, you've got your red, you've got your orange, your yellow,
- [00:04:20.229] you've got your orange, your yellow,
- [00:04:20.239] you've got your orange, your yellow, your green, your cyan, your blue, your
- [00:04:24.150] your green, your cyan, your blue, your
- [00:04:24.160] your green, your cyan, your blue, your purple, and your pink. Um, but you also
- [00:04:28.070] purple, and your pink. Um, but you also
- [00:04:28.080] purple, and your pink. Um, but you also have a color picker. So, you can pick a
- [00:04:30.710] have a color picker. So, you can pick a
- [00:04:30.720] have a color picker. So, you can pick a specific color in the scene. So if I
- [00:04:32.390] specific color in the scene. So if I
- [00:04:32.400] specific color in the scene. So if I want to select the cap that I'm wearing
- [00:04:34.629] want to select the cap that I'm wearing
- [00:04:34.639] want to select the cap that I'm wearing here, I can you know change the hue of
- [00:04:37.430] here, I can you know change the hue of
- [00:04:37.440] here, I can you know change the hue of just you know of that cap and anything
- [00:04:39.749] just you know of that cap and anything
- [00:04:39.759] just you know of that cap and anything that will have a similar color to that
- [00:04:41.590] that will have a similar color to that
- [00:04:41.600] that will have a similar color to that cap will also change. You know next you
- [00:04:43.909] cap will also change. You know next you
- [00:04:43.919] cap will also change. You know next you have your saturation and then you know
- [00:04:46.070] have your saturation and then you know
- [00:04:46.080] have your saturation and then you know your brightness and then you can change
- [00:04:47.510] your brightness and then you can change
- [00:04:47.520] your brightness and then you can change that color as well. Color grading is to
- [00:04:49.350] that color as well. Color grading is to
- [00:04:49.360] that color as well. Color grading is to make your subject stand out. What you
- [00:04:50.710] make your subject stand out. What you
- [00:04:50.720] make your subject stand out. What you can do is you add a mask. So when you
- [00:04:52.950] can do is you add a mask. So when you
- [00:04:52.960] can do is you add a mask. So when you add a mask it only applies the color
- [00:04:55.670] add a mask it only applies the color
- [00:04:55.680] add a mask it only applies the color grading to the specific area that that
- [00:04:59.030] grading to the specific area that that
- [00:04:59.040] grading to the specific area that that you choose. So if I select circle and I
- [00:05:01.830] you choose. So if I select circle and I
- [00:05:01.840] you choose. So if I select circle and I put this mask over me for example and I
- [00:05:06.710] put this mask over me for example and I
- [00:05:06.720] put this mask over me for example and I go back to basic. Let's now uh remove
- [00:05:10.150] go back to basic. Let's now uh remove
- [00:05:10.160] go back to basic. Let's now uh remove all saturation. If you see it only
- [00:05:13.350] all saturation. If you see it only
- [00:05:13.360] all saturation. If you see it only applies that uh color grade um to where
- [00:05:17.670] applies that uh color grade um to where
- [00:05:17.680] applies that uh color grade um to where I've put that mask. So um I move that
- [00:05:21.990] I've put that mask. So um I move that
- [00:05:22.000] I've put that mask. So um I move that mask around. Everything in the circle
- [00:05:24.390] mask around. Everything in the circle
- [00:05:24.400] mask around. Everything in the circle goes black and white. But obviously we
- [00:05:26.710] goes black and white. But obviously we
- [00:05:26.720] goes black and white. But obviously we want you know me and my phone here to
- [00:05:28.950] want you know me and my phone here to
- [00:05:28.960] want you know me and my phone here to stand out in this image. So what we'll
- [00:05:31.189] stand out in this image. So what we'll
- [00:05:31.199] stand out in this image. So what we'll do is we select this little button which
- [00:05:33.909] do is we select this little button which
- [00:05:33.919] do is we select this little button which reverses the mask. So it makes
- [00:05:35.749] reverses the mask. So it makes
- [00:05:35.759] reverses the mask. So it makes everything but um the circle have this
- [00:05:40.070] everything but um the circle have this
- [00:05:40.080] everything but um the circle have this color grade. So if we remove it,
- [00:05:41.830] color grade. So if we remove it,
- [00:05:41.840] color grade. So if we remove it, everything else now has that grade but
- [00:05:44.070] everything else now has that grade but
- [00:05:44.080] everything else now has that grade but me. So that's you know that's our mask.
- [00:05:46.310] me. So that's you know that's our mask.
- [00:05:46.320] me. So that's you know that's our mask. Obviously, it's not going to be as
- [00:05:47.749] Obviously, it's not going to be as
- [00:05:47.759] Obviously, it's not going to be as prominent. Um, you know, going to
- [00:05:49.670] prominent. Um, you know, going to
- [00:05:49.680] prominent. Um, you know, going to extremes to show you some of the color
- [00:05:51.510] extremes to show you some of the color
- [00:05:51.520] extremes to show you some of the color grading things and the differences, you
- [00:05:53.830] grading things and the differences, you
- [00:05:53.840] grading things and the differences, you know, and how they would look there. Um,
- [00:05:56.870] know, and how they would look there. Um,
- [00:05:56.880] know, and how they would look there. Um, so let's go more into detail about
- [00:05:59.590] so let's go more into detail about
- [00:05:59.600] so let's go more into detail about masks. So, masks allow you to cut out
- [00:06:02.469] masks. So, masks allow you to cut out
- [00:06:02.479] masks. So, masks allow you to cut out certain things. So, obviously in the
- [00:06:03.909] certain things. So, obviously in the
- [00:06:03.919] certain things. So, obviously in the adjustments, it's going to cut out the
- [00:06:05.430] adjustments, it's going to cut out the
- [00:06:05.440] adjustments, it's going to cut out the color grading, but if we go to video,
- [00:06:07.830] color grading, but if we go to video,
- [00:06:07.840] color grading, but if we go to video, it's going to cut out, you know, our
- [00:06:10.230] it's going to cut out, you know, our
- [00:06:10.240] it's going to cut out, you know, our entire video. So, if we add a mask in
- [00:06:12.070] entire video. So, if we add a mask in
- [00:06:12.080] entire video. So, if we add a mask in video, it's going to cut out everything
- [00:06:14.070] video, it's going to cut out everything
- [00:06:14.080] video, it's going to cut out everything but this square here. And then obviously
- [00:06:16.390] but this square here. And then obviously
- [00:06:16.400] but this square here. And then obviously you can reduce that or swap it around.
- [00:06:18.629] you can reduce that or swap it around.
- [00:06:18.639] you can reduce that or swap it around. Um but then how people would manually
- [00:06:20.870] Um but then how people would manually
- [00:06:20.880] Um but then how people would manually cut out a specific object. For example,
- [00:06:23.029] cut out a specific object. For example,
- [00:06:23.039] cut out a specific object. For example, say I want just the phone cut out. But
- [00:06:25.189] say I want just the phone cut out. But
- [00:06:25.199] say I want just the phone cut out. But then obviously it's a video so it's
- [00:06:26.870] then obviously it's a video so it's
- [00:06:26.880] then obviously it's a video so it's moving and playing and stuff like that.
- [00:06:28.870] moving and playing and stuff like that.
- [00:06:28.880] moving and playing and stuff like that. If I want to cut out that specific phone
- [00:06:30.710] If I want to cut out that specific phone
- [00:06:30.720] If I want to cut out that specific phone perhaps instead of a specific shape um
- [00:06:34.070] perhaps instead of a specific shape um
- [00:06:34.080] perhaps instead of a specific shape um I'd use the pen tool. So with the pen
- [00:06:36.950] I'd use the pen tool. So with the pen
- [00:06:36.960] I'd use the pen tool. So with the pen tool, I'd, you know, draw an outline
- [00:06:40.309] tool, I'd, you know, draw an outline
- [00:06:40.319] tool, I'd, you know, draw an outline around the phone and connect it and then
- [00:06:44.230] around the phone and connect it and then
- [00:06:44.240] around the phone and connect it and then just the phone's cut out. But then while
- [00:06:46.469] just the phone's cut out. But then while
- [00:06:46.479] just the phone's cut out. But then while the footage is moving, obviously the
- [00:06:48.070] the footage is moving, obviously the
- [00:06:48.080] the footage is moving, obviously the phone's moving. So then you'd have to
- [00:06:50.070] phone's moving. So then you'd have to
- [00:06:50.080] phone's moving. So then you'd have to use what is called a uh key frame. So
- [00:06:55.350] use what is called a uh key frame. So
- [00:06:55.360] use what is called a uh key frame. So key frames will track the changes you've
- [00:06:58.070] key frames will track the changes you've
- [00:06:58.080] key frames will track the changes you've made frame by frame. Um, so if I say add
- [00:07:02.710] made frame by frame. Um, so if I say add
- [00:07:02.720] made frame by frame. Um, so if I say add key frame and I go to the next frame
- [00:07:05.270] key frame and I go to the next frame
- [00:07:05.280] key frame and I go to the next frame where the phone's moved, I can move that
- [00:07:07.510] where the phone's moved, I can move that
- [00:07:07.520] where the phone's moved, I can move that up. If I go to the next few frames, I
- [00:07:09.990] up. If I go to the next few frames, I
- [00:07:10.000] up. If I go to the next few frames, I can move that, you know, to stay with
- [00:07:11.909] can move that, you know, to stay with
- [00:07:11.919] can move that, you know, to stay with the phone. Can move it to stay. So then
- [00:07:14.870] the phone. Can move it to stay. So then
- [00:07:14.880] the phone. Can move it to stay. So then when I play the video back, you see
- [00:07:16.469] when I play the video back, you see
- [00:07:16.479] when I play the video back, you see these little dots. Those are our key
- [00:07:18.150] these little dots. Those are our key
- [00:07:18.160] these little dots. Those are our key frames. So when I play the video back,
- [00:07:20.469] frames. So when I play the video back,
- [00:07:20.479] frames. So when I play the video back, the mask is moving, you know, along with
- [00:07:23.510] the mask is moving, you know, along with
- [00:07:23.520] the mask is moving, you know, along with where I've moved it at the different
- [00:07:25.029] where I've moved it at the different
- [00:07:25.039] where I've moved it at the different frames. So, if I wanted to move it, you
- [00:07:28.390] frames. So, if I wanted to move it, you
- [00:07:28.400] frames. So, if I wanted to move it, you know, in a regular fashion, say I wanted
- [00:07:30.629] know, in a regular fashion, say I wanted
- [00:07:30.639] know, in a regular fashion, say I wanted to move it from this button um and I
- [00:07:33.430] to move it from this button um and I
- [00:07:33.440] to move it from this button um and I wanted it to move to the corner if I but
- [00:07:36.230] wanted it to move to the corner if I but
- [00:07:36.240] wanted it to move to the corner if I but like over time. So, I'll put there and
- [00:07:38.390] like over time. So, I'll put there and
- [00:07:38.400] like over time. So, I'll put there and then where I've moved it on my timeline,
- [00:07:40.070] then where I've moved it on my timeline,
- [00:07:40.080] then where I've moved it on my timeline, if I move it to the corner and I go back
- [00:07:42.230] if I move it to the corner and I go back
- [00:07:42.240] if I move it to the corner and I go back to that key frame and play it, it will
- [00:07:44.469] to that key frame and play it, it will
- [00:07:44.479] to that key frame and play it, it will gradually move um you know, as it goes
- [00:07:47.909] gradually move um you know, as it goes
- [00:07:47.919] gradually move um you know, as it goes there. But then if I wanted it to move
- [00:07:50.309] there. But then if I wanted it to move
- [00:07:50.319] there. But then if I wanted it to move faster, move the key frame there. Um and
- [00:07:53.189] faster, move the key frame there. Um and
- [00:07:53.199] faster, move the key frame there. Um and that's how you'd use your key frames.
- [00:07:55.110] that's how you'd use your key frames.
- [00:07:55.120] that's how you'd use your key frames. You don't have to have each frame be its
- [00:07:57.510] You don't have to have each frame be its
- [00:07:57.520] You don't have to have each frame be its own specific one, but if you're tracking
- [00:07:59.990] own specific one, but if you're tracking
- [00:08:00.000] own specific one, but if you're tracking someone someone to know cut them out of
- [00:08:01.990] someone someone to know cut them out of
- [00:08:02.000] someone someone to know cut them out of the picture. Sometimes it is beneficial
- [00:08:03.990] the picture. Sometimes it is beneficial
- [00:08:04.000] the picture. Sometimes it is beneficial to, you know, have have them on each
- [00:08:06.950] to, you know, have have them on each
- [00:08:06.960] to, you know, have have them on each frame, but sometimes you can use them on
- [00:08:08.869] frame, but sometimes you can use them on
- [00:08:08.879] frame, but sometimes you can use them on different frames. And then obviously
- [00:08:10.390] different frames. And then obviously
- [00:08:10.400] different frames. And then obviously with key framing, um it's not just for
- [00:08:12.790] with key framing, um it's not just for
- [00:08:12.800] with key framing, um it's not just for masking out different things, cutting
- [00:08:15.270] masking out different things, cutting
- [00:08:15.280] masking out different things, cutting things out. You can use it to create
- [00:08:17.110] things out. You can use it to create
- [00:08:17.120] things out. You can use it to create your own transitions. So, if we go to um
- [00:08:20.230] your own transitions. So, if we go to um
- [00:08:20.240] your own transitions. So, if we go to um basic um we have our different
- [00:08:23.830] basic um we have our different
- [00:08:23.840] basic um we have our different transform. You can add key frames. All
- [00:08:26.309] transform. You can add key frames. All
- [00:08:26.319] transform. You can add key frames. All of these little diamonds on the side
- [00:08:27.589] of these little diamonds on the side
- [00:08:27.599] of these little diamonds on the side here allow you to do key frames. So, I
- [00:08:29.510] here allow you to do key frames. So, I
- [00:08:29.520] here allow you to do key frames. So, I can add a blend transition. So, if I
- [00:08:31.909] can add a blend transition. So, if I
- [00:08:31.919] can add a blend transition. So, if I open up blend, I put the image all the
- [00:08:33.750] open up blend, I put the image all the
- [00:08:33.760] open up blend, I put the image all the way to zero and I um add a key frame. I
- [00:08:37.350] way to zero and I um add a key frame. I
- [00:08:37.360] way to zero and I um add a key frame. I let the footage play for a little bit to
- [00:08:39.829] let the footage play for a little bit to
- [00:08:39.839] let the footage play for a little bit to let's say I want it to go till about
- [00:08:42.070] let's say I want it to go till about
- [00:08:42.080] let's say I want it to go till about here. Now, I'll increase the opacity
- [00:08:44.389] here. Now, I'll increase the opacity
- [00:08:44.399] here. Now, I'll increase the opacity back to 100%. And what that does is that
- [00:08:47.269] back to 100%. And what that does is that
- [00:08:47.279] back to 100%. And what that does is that gives us a gradual frame uh fade in of
- [00:08:50.870] gives us a gradual frame uh fade in of
- [00:08:50.880] gives us a gradual frame uh fade in of our you know little footage that we have
- [00:08:52.949] our you know little footage that we have
- [00:08:52.959] our you know little footage that we have here. That's using key frames to like
- [00:08:55.030] here. That's using key frames to like
- [00:08:55.040] here. That's using key frames to like create some transitions. So we covered
- [00:08:56.790] create some transitions. So we covered
- [00:08:56.800] create some transitions. So we covered how you can make transitions using uh
- [00:08:59.590] how you can make transitions using uh
- [00:08:59.600] how you can make transitions using uh you know your different key frames. But
- [00:09:01.509] you know your different key frames. But
- [00:09:01.519] you know your different key frames. But then there are pre-selected transitions
- [00:09:03.829] then there are pre-selected transitions
- [00:09:03.839] then there are pre-selected transitions you can use in Cap Cut. But these all
- [00:09:06.070] you can use in Cap Cut. But these all
- [00:09:06.080] you can use in Cap Cut. But these all these transitions they are part of the
- [00:09:07.590] these transitions they are part of the
- [00:09:07.600] these transitions they are part of the pro feature. So there might still be
- [00:09:10.310] pro feature. So there might still be
- [00:09:10.320] pro feature. So there might still be some free ones you can use. Um, but if
- [00:09:13.430] some free ones you can use. Um, but if
- [00:09:13.440] some free ones you can use. Um, but if you want to use uh a lot of the
- [00:09:15.030] you want to use uh a lot of the
- [00:09:15.040] you want to use uh a lot of the pre-selected transitions, they will be
- [00:09:16.949] pre-selected transitions, they will be
- [00:09:16.959] pre-selected transitions, they will be paid. But then obviously other
- [00:09:18.630] paid. But then obviously other
- [00:09:18.640] paid. But then obviously other softwares, if you have Premiere Pro, if
- [00:09:21.110] softwares, if you have Premiere Pro, if
- [00:09:21.120] softwares, if you have Premiere Pro, if you have different software, if you use
- [00:09:22.949] you have different software, if you use
- [00:09:22.959] you have different software, if you use Da Vinci Resolve, they have their own um
- [00:09:25.670] Da Vinci Resolve, they have their own um
- [00:09:25.680] Da Vinci Resolve, they have their own um transitions, their own, you know,
- [00:09:27.590] transitions, their own, you know,
- [00:09:27.600] transitions, their own, you know, different uh, you know, pre-selected
- [00:09:30.150] different uh, you know, pre-selected
- [00:09:30.160] different uh, you know, pre-selected things. They have their own tutorials on
- [00:09:31.990] things. They have their own tutorials on
- [00:09:32.000] things. They have their own tutorials on how to make your own things. It's
- [00:09:33.509] how to make your own things. It's
- [00:09:33.519] how to make your own things. It's something you can just play around with.
- [00:09:35.110] something you can just play around with.
- [00:09:35.120] something you can just play around with. Um, but if I can show you an example of,
- [00:09:37.750] Um, but if I can show you an example of,
- [00:09:37.760] Um, but if I can show you an example of, you know, some of these templates, I'll
- [00:09:40.230] you know, some of these templates, I'll
- [00:09:40.240] you know, some of these templates, I'll grab a basic. Let's grab a glitch one.
- [00:09:43.350] grab a basic. Let's grab a glitch one.
- [00:09:43.360] grab a basic. Let's grab a glitch one. Let's press play and our footage will
- [00:09:45.750] Let's press play and our footage will
- [00:09:45.760] Let's press play and our footage will transition. So yeah, that's our, you
- [00:09:48.630] transition. So yeah, that's our, you
- [00:09:48.640] transition. So yeah, that's our, you know, transitions.
Keyframes
- /workspace/academy/media/1HcLApKaZ0tJBarvx-CxeMWmr76AjD8-t/keyframes/last.jpg
- /workspace/academy/media/1HcLApKaZ0tJBarvx-CxeMWmr76AjD8-t/keyframes/t003.jpg
- /workspace/academy/media/1HcLApKaZ0tJBarvx-CxeMWmr76AjD8-t/keyframes/t005.jpg
- /workspace/academy/media/1HcLApKaZ0tJBarvx-CxeMWmr76AjD8-t/keyframes/t008.jpg
- /workspace/academy/media/1HcLApKaZ0tJBarvx-CxeMWmr76AjD8-t/keyframes/t010.jpg
- /workspace/academy/media/1HcLApKaZ0tJBarvx-CxeMWmr76AjD8-t/keyframes/t013.jpg
- /workspace/academy/media/1HcLApKaZ0tJBarvx-CxeMWmr76AjD8-t/keyframes/t015.jpg
- /workspace/academy/media/1HcLApKaZ0tJBarvx-CxeMWmr76AjD8-t/keyframes/t018.jpg
- /workspace/academy/media/1HcLApKaZ0tJBarvx-CxeMWmr76AjD8-t/keyframes/t021.jpg
- /workspace/academy/media/1HcLApKaZ0tJBarvx-CxeMWmr76AjD8-t/keyframes/t023.jpg
- /workspace/academy/media/1HcLApKaZ0tJBarvx-CxeMWmr76AjD8-t/keyframes/t026.jpg
- /workspace/academy/media/1HcLApKaZ0tJBarvx-CxeMWmr76AjD8-t/keyframes/t028.jpg
- /workspace/academy/media/1HcLApKaZ0tJBarvx-CxeMWmr76AjD8-t/keyframes/t031.jpg
- /workspace/academy/media/1HcLApKaZ0tJBarvx-CxeMWmr76AjD8-t/keyframes/t033.jpg
- /workspace/academy/media/1HcLApKaZ0tJBarvx-CxeMWmr76AjD8-t/keyframes/t036.jpg
- /workspace/academy/media/1HcLApKaZ0tJBarvx-CxeMWmr76AjD8-t/keyframes/t038.jpg
- /workspace/academy/media/1HcLApKaZ0tJBarvx-CxeMWmr76AjD8-t/keyframes/t041.jpg
- /workspace/academy/media/1HcLApKaZ0tJBarvx-CxeMWmr76AjD8-t/keyframes/t044.jpg
- /workspace/academy/media/1HcLApKaZ0tJBarvx-CxeMWmr76AjD8-t/keyframes/t046.jpg
- /workspace/academy/media/1HcLApKaZ0tJBarvx-CxeMWmr76AjD8-t/keyframes/t049.jpg
- /workspace/academy/media/1HcLApKaZ0tJBarvx-CxeMWmr76AjD8-t/keyframes/t051.jpg
- /workspace/academy/media/1HcLApKaZ0tJBarvx-CxeMWmr76AjD8-t/keyframes/t054.jpg
- /workspace/academy/media/1HcLApKaZ0tJBarvx-CxeMWmr76AjD8-t/keyframes/t056.jpg
- /workspace/academy/media/1HcLApKaZ0tJBarvx-CxeMWmr76AjD8-t/keyframes/t059.jpg
80. Post Part 4
- title: Post Part 4
- status: publish
- author: 0
- is_previewable: (empty)
- video_duration: 0h 2m 1s (raw {"hours":0,"minutes":2,"seconds":1})
- video_source_type: embedded
- drive_file_id:
1TYyr5zqeNW4dpl-tAjkPH_m1Sl6MlYPb(source_ref; not a public link) - transcript pending / keyframes pending / presentation extract pending
- video_source_url: (Drive preview omitted as a public link; file id kept as source_ref)
(no lesson_content HTML in export — video-only or empty body; metadata above kept in full)
Drive extract
- file_id:
1TYyr5zqeNW4dpl-tAjkPH_m1Sl6MlYPb - filename: VEST Section 7 Post Part 4.mp4
- kind: video
- local_path: /workspace/academy/media/1TYyr5zqeNW4dpl-tAjkPH_m1Sl6MlYPb/VEST Section 7 Post Part 4.mp4
- source_ref: drive
1TYyr5zqeNW4dpl-tAjkPH_m1Sl6MlYPb· content_length 184871136 · original https://drive.google.com/file/d/1TYyr5zqeNW4dpl-tAjkPH_m1Sl6MlYPb/view - extract_status: done
- caption_source: drive_timedtext
- duration_s: 120.441995
- keyframe_count: 12
Transcript
- Next, let me show you some online
- [00:00:02.230] Next, let me show you some online
- [00:00:02.240] Next, let me show you some online assets. So, one of the things that you
- [00:00:04.789] assets. So, one of the things that you
- [00:00:04.799] assets. So, one of the things that you might want to use when you know uh
- [00:00:07.430] might want to use when you know uh
- [00:00:07.440] might want to use when you know uh editing your videos is to add some stock
- [00:00:10.150] editing your videos is to add some stock
- [00:00:10.160] editing your videos is to add some stock footage. So, here is some stock footage
- [00:00:11.830] footage. So, here is some stock footage
- [00:00:11.840] footage. So, here is some stock footage I have taken from um
- [00:00:15.749] I have taken from um
- [00:00:15.759] I have taken from um uh from Pixels. That's one of the re
- [00:00:18.310] uh from Pixels. That's one of the re
- [00:00:18.320] uh from Pixels. That's one of the re resources we'll link you to to get stock
- [00:00:20.230] resources we'll link you to to get stock
- [00:00:20.240] resources we'll link you to to get stock footage and stuff. So, this different
- [00:00:21.830] footage and stuff. So, this different
- [00:00:21.840] footage and stuff. So, this different clip here, you know, adding that stock
- [00:00:23.830] clip here, you know, adding that stock
- [00:00:23.840] clip here, you know, adding that stock footage gives you a little bit of
- [00:00:25.349] footage gives you a little bit of
- [00:00:25.359] footage gives you a little bit of diversity in your edits. So you know if
- [00:00:28.390] diversity in your edits. So you know if
- [00:00:28.400] diversity in your edits. So you know if you need to say film someone standing at
- [00:00:30.950] you need to say film someone standing at
- [00:00:30.960] you need to say film someone standing at a train station but you don't want to go
- [00:00:33.350] a train station but you don't want to go
- [00:00:33.360] a train station but you don't want to go out and film that yourself you can add
- [00:00:35.030] out and film that yourself you can add
- [00:00:35.040] out and film that yourself you can add that in if you want to show that you
- [00:00:36.549] that in if you want to show that you
- [00:00:36.559] that in if you want to show that you have many different people a part of you
- [00:00:39.670] have many different people a part of you
- [00:00:39.680] have many different people a part of you know a video but you don't have all you
- [00:00:41.910] know a video but you don't have all you
- [00:00:41.920] know a video but you don't have all you know all those you know you don't have a
- [00:00:43.750] know all those you know you don't have a
- [00:00:43.760] know all those you know you don't have a lot of people to show in that video you
- [00:00:45.910] lot of people to show in that video you
- [00:00:45.920] lot of people to show in that video you can use stock footage make use of stock
- [00:00:47.670] can use stock footage make use of stock
- [00:00:47.680] can use stock footage make use of stock footage sound effects music all of these
- [00:00:50.310] footage sound effects music all of these
- [00:00:50.320] footage sound effects music all of these different elements add to your video and
- [00:00:52.389] different elements add to your video and
- [00:00:52.399] different elements add to your video and they help improve it. Um, as for sound
- [00:00:54.790] they help improve it. Um, as for sound
- [00:00:54.800] they help improve it. Um, as for sound effects here in Cap Cut, if you go to
- [00:00:57.270] effects here in Cap Cut, if you go to
- [00:00:57.280] effects here in Cap Cut, if you go to the audio tab, you can select sound
- [00:01:00.630] the audio tab, you can select sound
- [00:01:00.640] the audio tab, you can select sound effects, um, under the sound effects tab
- [00:01:04.549] effects, um, under the sound effects tab
- [00:01:04.559] effects, um, under the sound effects tab over here, you can search, uh, you know,
- [00:01:06.710] over here, you can search, uh, you know,
- [00:01:06.720] over here, you can search, uh, you know, whoosh sound effect or, um, ting or
- [00:01:10.390] whoosh sound effect or, um, ting or
- [00:01:10.400] whoosh sound effect or, um, ting or birds chirping, a clap, whatever. And
- [00:01:13.109] birds chirping, a clap, whatever. And
- [00:01:13.119] birds chirping, a clap, whatever. And then you can listen to the sound effects
- [00:01:15.350] then you can listen to the sound effects
- [00:01:15.360] then you can listen to the sound effects and then add them to your, you know,
- [00:01:17.830] and then add them to your, you know,
- [00:01:17.840] and then add them to your, you know, videos. Um, obviously if you're going to
- [00:01:19.990] videos. Um, obviously if you're going to
- [00:01:20.000] videos. Um, obviously if you're going to have a transition um that you've made,
- [00:01:23.429] have a transition um that you've made,
- [00:01:23.439] have a transition um that you've made, uh, sometimes having a sound effect, you
- [00:01:26.070] uh, sometimes having a sound effect, you
- [00:01:26.080] uh, sometimes having a sound effect, you know, under that transition can make it
- [00:01:28.149] know, under that transition can make it
- [00:01:28.159] know, under that transition can make it seem more effective, more natural. It's
- [00:01:30.870] seem more effective, more natural. It's
- [00:01:30.880] seem more effective, more natural. It's more interesting as well. Um, so yeah,
- [00:01:33.910] more interesting as well. Um, so yeah,
- [00:01:33.920] more interesting as well. Um, so yeah, no, that's a good practice to have. Then
- [00:01:36.149] no, that's a good practice to have. Then
- [00:01:36.159] no, that's a good practice to have. Then obviously you can hit your music and you
- [00:01:38.870] obviously you can hit your music and you
- [00:01:38.880] obviously you can hit your music and you can search, you know, lowfi beats or
- [00:01:41.749] can search, you know, lowfi beats or
- [00:01:41.759] can search, you know, lowfi beats or rock music and get some um, you know,
- [00:01:44.469] rock music and get some um, you know,
- [00:01:44.479] rock music and get some um, you know, copy free music. But this is in cap cut.
- [00:01:46.789] copy free music. But this is in cap cut.
- [00:01:46.799] copy free music. But this is in cap cut. There are other resources to use. You
- [00:01:48.870] There are other resources to use. You
- [00:01:48.880] There are other resources to use. You know, if you're using different software
- [00:01:50.230] know, if you're using different software
- [00:01:50.240] know, if you're using different software or if you don't want to use Cap Cuts
- [00:01:52.389] or if you don't want to use Cap Cuts
- [00:01:52.399] or if you don't want to use Cap Cuts libraries, you can go to some of the
- [00:01:56.469] libraries, you can go to some of the
- [00:01:56.479] libraries, you can go to some of the some of the external resources that we
- [00:01:58.870] some of the external resources that we
- [00:01:58.880] some of the external resources that we will uh link to
Keyframes
- /workspace/academy/media/1TYyr5zqeNW4dpl-tAjkPH_m1Sl6MlYPb/keyframes/last.jpg
- /workspace/academy/media/1TYyr5zqeNW4dpl-tAjkPH_m1Sl6MlYPb/keyframes/t001.jpg
- /workspace/academy/media/1TYyr5zqeNW4dpl-tAjkPH_m1Sl6MlYPb/keyframes/t002.jpg
- /workspace/academy/media/1TYyr5zqeNW4dpl-tAjkPH_m1Sl6MlYPb/keyframes/t003.jpg
- /workspace/academy/media/1TYyr5zqeNW4dpl-tAjkPH_m1Sl6MlYPb/keyframes/t004.jpg
- /workspace/academy/media/1TYyr5zqeNW4dpl-tAjkPH_m1Sl6MlYPb/keyframes/t005.jpg
- /workspace/academy/media/1TYyr5zqeNW4dpl-tAjkPH_m1Sl6MlYPb/keyframes/t007.jpg
- /workspace/academy/media/1TYyr5zqeNW4dpl-tAjkPH_m1Sl6MlYPb/keyframes/t008.jpg
- /workspace/academy/media/1TYyr5zqeNW4dpl-tAjkPH_m1Sl6MlYPb/keyframes/t009.jpg
- /workspace/academy/media/1TYyr5zqeNW4dpl-tAjkPH_m1Sl6MlYPb/keyframes/t010.jpg
- /workspace/academy/media/1TYyr5zqeNW4dpl-tAjkPH_m1Sl6MlYPb/keyframes/t011.jpg
- /workspace/academy/media/1TYyr5zqeNW4dpl-tAjkPH_m1Sl6MlYPb/keyframes/t012.jpg
81. Assets & Recources
- title: Assets & Recources
- status: publish
- author: 0
- is_previewable: (empty)
- video_duration: 0h 0m 0s (raw {"hours":0,"minutes":0,"seconds":0})
- video_source_type: (empty)
**

**
VEST Resource Toolkit: Websites for Students
Access to quality assets is essential for video production. Knowing where to find legal, high-quality music and sound effects saves endless trouble later on.
Here are lists of recommended online resources, separated by free and paid options, covering all the categories you requested.
A. Free Resources (Essentials for a Budget Filmmaker)
| Category | Resource (Website) | Description |
|---|---|---|
| Videos (Stock Footage) | Pexels (https://www.pexels.com/videos/https://www.pexels.com/videos/) | Huge library of high-quality, free-to-use stock videos (and photos) that require no attribution. Great for B-Roll. |
| Pixabay (https://pixabay.com/videos/https://pixabay.com/videos/) | Similar to Pexels, offering free HD and 4K video clips under a generous license. | |
| Music (Royalty-Free) | YouTube Audio Library (https://studio.youtube.com/channel/UC.../audiohttps://www.google.com/search?q=https://studio.youtube.com/channel/UC.../audio&authuser=2) | The absolute best place to start. Available inside the YouTube Studio. Provides thousands of tracks and SFX that are 100% free to use on YouTube (some require a simple attribution). |
| Freesound (https://freesound.org/https://freesound.org/) | Massive collaborative database of sounds. Requires setting up an account and always check the license (most require simple attribution/credit). | |
| Sound FX | YouTube Audio Library | Includes a large section of short, useful sound effects like clicks, whooshes, and ambiences. |
| Zapsplat (https://www.zapsplat.com/https://www.zapsplat.com/) | Offers thousands of high-quality sound effects for free with an easy-to-understand free license (and requires a simple credit/attribution). | |
| AI Audio Cleanup | Adobe Podcast Enhance (https://podcast.adobe.com/en/enhancehttps://podcast.adobe.com/en/enhance) | The number one tool for beginners. Uses powerful AI to make voice recordings sound like they were recorded in a professional studio. Completely free to use. |
| Voice Over | Your Own Voice! | The cheapest and most authentic way. Use your phone's built-in recorder or a simple external mic and clean up the file using Adobe Podcast Enhance. |
B. Paid Resources (Professional Upgrade Options)
These resources are subscription-based and are excellent once students are ready to invest in higher-quality, licensed assets for commercial or advanced work.
| Category | Resource (Website) | Description |
|---|---|---|
| Videos (Stock Footage) | Artgrid (https://artgrid.io/https://artgrid.io/) | Offers stunning, cinematic footage with a simple, universal license. Great for projects needing a premium, high-production look. |
| Storyblocks (https://www.storyblocks.com/https://www.storyblocks.com/) | A huge library of video, audio, and images for one monthly fee. Excellent for creators who produce a high volume of content. | |
| Music (Royalty-Free) | Epidemic Sound (https://www.epidemicsound.com/https://www.epidemicsound.com/) | The industry standard for YouTubers. Unlimited downloads, simple licensing, and excellent music catalog. Perfect for background music. |
| Soundstripe (https://www.soundstripe.com/https://www.soundstripe.com/) | Another popular subscription service offering high-quality music that can be filtered easily by mood, genre, and duration. | |
| Sound FX | Epidemic Sound (https://www.epidemicsound.com/sound-effects/https://www.epidemicsound.com/sound-effects/) | Their subscription also includes a large, professional library of sound effects, making it an excellent all-in-one resource. |
| Voice Over | Fiverr / Upwork (https://www.fiverr.com/https://www.fiverr.com/) | Freelance marketplaces where you can hire professional voice actors to record scripts for a reasonable price. Quality is typically very high. |
| AI Audio Cleanup | Descript (https://www.descript.com/https://www.descript.com/) | A powerful tool that not only cleans audio but allows you to edit video by editing the text transcript. Offers advanced, paid subscription tiers. |
82. Post Part 5
- title: Post Part 5
- status: publish
- author: 0
- is_previewable: (empty)
- video_duration: 0h 2m 29s (raw {"hours":0,"minutes":2,"seconds":29})
- video_source_type: embedded
- drive_file_id:
1gMAT_JU7UdwCre5_MwfLg0vkkVLJM66t(source_ref; not a public link) - transcript pending / keyframes pending / presentation extract pending
- video_source_url: (Drive preview omitted as a public link; file id kept as source_ref)
(no lesson_content HTML in export — video-only or empty body; metadata above kept in full)
Drive extract
- file_id:
1gMAT_JU7UdwCre5_MwfLg0vkkVLJM66t - filename: VEST Section 7 Post Part 5.mp4
- kind: video
- local_path: /workspace/academy/media/1gMAT_JU7UdwCre5_MwfLg0vkkVLJM66t/VEST Section 7 Post Part 5.mp4
- source_ref: drive
1gMAT_JU7UdwCre5_MwfLg0vkkVLJM66t· content_length 227634582 · original https://drive.google.com/file/d/1gMAT_JU7UdwCre5_MwfLg0vkkVLJM66t/view - extract_status: done
- caption_source: drive_timedtext
- duration_s: 149.235011
- keyframe_count: 12
Transcript
- So, let me show you a quick time lapse
- [00:00:02.389] So, let me show you a quick time lapse
- [00:00:02.399] So, let me show you a quick time lapse of me quickly editing a video from
- [00:00:05.829] of me quickly editing a video from
- [00:00:05.839] of me quickly editing a video from scratch um to show you, you know,
- [00:00:08.150] scratch um to show you, you know,
- [00:00:08.160] scratch um to show you, you know, something that you guys will be able to
- [00:00:09.910] something that you guys will be able to
- [00:00:09.920] something that you guys will be able to achieve uh in Cap Cut, you know. Let me
- [00:00:12.390] achieve uh in Cap Cut, you know. Let me
- [00:00:12.400] achieve uh in Cap Cut, you know. Let me add our footage and let's get started.
- So, here's a look at our, you know,
- [00:00:33.030] So, here's a look at our, you know,
- [00:00:33.040] So, here's a look at our, you know, finished product. As you can see, our
- [00:00:34.389] finished product. As you can see, our
- [00:00:34.399] finished product. As you can see, our timeline's got all our different audio
- [00:00:36.389] timeline's got all our different audio
- [00:00:36.399] timeline's got all our different audio tracks, our voice over, our music, some
- [00:00:39.190] tracks, our voice over, our music, some
- [00:00:39.200] tracks, our voice over, our music, some sound effects, um, inside these compound
- [00:00:42.310] sound effects, um, inside these compound
- [00:00:42.320] sound effects, um, inside these compound clips, um, where, you know, if you
- [00:00:44.709] clips, um, where, you know, if you
- [00:00:44.719] clips, um, where, you know, if you select all these different clips and you
- [00:00:47.110] select all these different clips and you
- [00:00:47.120] select all these different clips and you rightclick and say create compound clip,
- [00:00:49.590] rightclick and say create compound clip,
- [00:00:49.600] rightclick and say create compound clip, it puts it in a little sub project,
- [00:00:51.350] it puts it in a little sub project,
- [00:00:51.360] it puts it in a little sub project, which is great for organization. Um, and
- [00:00:54.470] which is great for organization. Um, and
- [00:00:54.480] which is great for organization. Um, and if you see here, um, this is, um, for
- [00:00:57.750] if you see here, um, this is, um, for
- [00:00:57.760] if you see here, um, this is, um, for the different effects that I've added
- [00:00:59.349] the different effects that I've added
- [00:00:59.359] the different effects that I've added to, you know, that specific section.
- [00:01:01.430] to, you know, that specific section.
- [00:01:01.440] to, you know, that specific section. Here I've got some of our stock footage
- [00:01:03.270] Here I've got some of our stock footage
- [00:01:03.280] Here I've got some of our stock footage and, you know, the transitions between
- [00:01:04.789] and, you know, the transitions between
- [00:01:04.799] and, you know, the transitions between that. So, let me give it a play and show
- [00:01:07.350] that. So, let me give it a play and show
- [00:01:07.360] that. So, let me give it a play and show you guys what our finished timeline
- [00:01:09.830] you guys what our finished timeline
- [00:01:09.840] you guys what our finished timeline looks like.
- [00:01:12.710] looks like.
- [00:01:12.720] looks like. How you doing? Uh, my name is Cameron
- [00:01:14.710] How you doing? Uh, my name is Cameron
- [00:01:14.720] How you doing? Uh, my name is Cameron Herren and welcome to the Vest online
- [00:01:17.670] Herren and welcome to the Vest online
- [00:01:17.680] Herren and welcome to the Vest online course.
- [00:01:19.990] course.
- [00:01:20.000] course. I will virtually guide you every step of
- [00:01:22.469] I will virtually guide you every step of
- [00:01:22.479] I will virtually guide you every step of the way from planning and basic setups
- [00:01:25.109] the way from planning and basic setups
- [00:01:25.119] the way from planning and basic setups to advanced post-prouction.
- [00:01:28.070] to advanced post-prouction.
- [00:01:28.080] to advanced post-prouction. Learn powerful skills like
- [00:01:30.070] Learn powerful skills like
- [00:01:30.080] Learn powerful skills like storyboarding, composition, lighting,
- [00:01:33.109] storyboarding, composition, lighting,
- [00:01:33.119] storyboarding, composition, lighting, sound, shooting techniques and more.
- [00:01:37.270] sound, shooting techniques and more.
- [00:01:37.280] sound, shooting techniques and more. Make highquality short form content with
- [00:01:40.310] Make highquality short form content with
- [00:01:40.320] Make highquality short form content with vest.
- [00:01:41.990] vest.
- [00:01:42.000] vest. Join our online course today and start
- [00:01:44.469] Join our online course today and start
- [00:01:44.479] Join our online course today and start creating scroll stopping short. So, that
- [00:01:47.190] creating scroll stopping short. So, that
- [00:01:47.200] creating scroll stopping short. So, that was a, you know, little quick tutorial
- [00:01:49.350] was a, you know, little quick tutorial
- [00:01:49.360] was a, you know, little quick tutorial of some of the, you know, different
- [00:01:51.109] of some of the, you know, different
- [00:01:51.119] of some of the, you know, different things you can expect. We've got some
- [00:01:52.870] things you can expect. We've got some
- [00:01:52.880] things you can expect. We've got some graphics. We've got, you know, our
- [00:01:54.870] graphics. We've got, you know, our
- [00:01:54.880] graphics. We've got, you know, our different effects. I've got this little
- [00:01:57.030] different effects. I've got this little
- [00:01:57.040] different effects. I've got this little double effect using the, you know,
- [00:01:59.910] double effect using the, you know,
- [00:01:59.920] double effect using the, you know, removing the background and cutting
- [00:02:01.510] removing the background and cutting
- [00:02:01.520] removing the background and cutting myself up, adding a effect to that, a
- [00:02:04.550] myself up, adding a effect to that, a
- [00:02:04.560] myself up, adding a effect to that, a little glitch effect, blending it so
- [00:02:06.149] little glitch effect, blending it so
- [00:02:06.159] little glitch effect, blending it so that the opacity is less and, you know,
- [00:02:09.109] that the opacity is less and, you know,
- [00:02:09.119] that the opacity is less and, you know, I look a little bit see-through. And
- [00:02:11.750] I look a little bit see-through. And
- [00:02:11.760] I look a little bit see-through. And yeah, that's, you know, that's a little
- [00:02:13.510] yeah, that's, you know, that's a little
- [00:02:13.520] yeah, that's, you know, that's a little uh example of something yet you can
- [00:02:15.510] uh example of something yet you can
- [00:02:15.520] uh example of something yet you can achieve when you practice a lot in your
- [00:02:17.670] achieve when you practice a lot in your
- [00:02:17.680] achieve when you practice a lot in your editing. So that's one thing we do very
- [00:02:19.589] editing. So that's one thing we do very
- [00:02:19.599] editing. So that's one thing we do very much encourage here at Vest is you've
- [00:02:22.150] much encourage here at Vest is you've
- [00:02:22.160] much encourage here at Vest is you've done your storyboarding, you've filmed,
- [00:02:24.790] done your storyboarding, you've filmed,
- [00:02:24.800] done your storyboarding, you've filmed, now you're in post. But in all those
- [00:02:26.630] now you're in post. But in all those
- [00:02:26.640] now you're in post. But in all those disciplines, you need to practice,
- [00:02:28.150] disciplines, you need to practice,
- [00:02:28.160] disciplines, you need to practice, practice, practice.
Keyframes
- /workspace/academy/media/1gMAT_JU7UdwCre5_MwfLg0vkkVLJM66t/keyframes/last.jpg
- /workspace/academy/media/1gMAT_JU7UdwCre5_MwfLg0vkkVLJM66t/keyframes/t001.jpg
- /workspace/academy/media/1gMAT_JU7UdwCre5_MwfLg0vkkVLJM66t/keyframes/t003.jpg
- /workspace/academy/media/1gMAT_JU7UdwCre5_MwfLg0vkkVLJM66t/keyframes/t004.jpg
- /workspace/academy/media/1gMAT_JU7UdwCre5_MwfLg0vkkVLJM66t/keyframes/t005.jpg
- /workspace/academy/media/1gMAT_JU7UdwCre5_MwfLg0vkkVLJM66t/keyframes/t007.jpg
- /workspace/academy/media/1gMAT_JU7UdwCre5_MwfLg0vkkVLJM66t/keyframes/t008.jpg
- /workspace/academy/media/1gMAT_JU7UdwCre5_MwfLg0vkkVLJM66t/keyframes/t010.jpg
- /workspace/academy/media/1gMAT_JU7UdwCre5_MwfLg0vkkVLJM66t/keyframes/t011.jpg
- /workspace/academy/media/1gMAT_JU7UdwCre5_MwfLg0vkkVLJM66t/keyframes/t012.jpg
- /workspace/academy/media/1gMAT_JU7UdwCre5_MwfLg0vkkVLJM66t/keyframes/t014.jpg
- /workspace/academy/media/1gMAT_JU7UdwCre5_MwfLg0vkkVLJM66t/keyframes/t015.jpg
83. Terminology Editing
- title: Terminology Editing
- status: publish
- author: 0
- is_previewable: (empty)
- video_duration: 0h 0m 0s (raw {"hours":0,"minutes":0,"seconds":0})
- video_source_type: (empty)
**
**
VEST Essential Terminology Glossary
Here is a list of the core generic terminology your VEST students will encounter throughout the course, along with brief, clear descriptions.
This glossary covers the non-software-specific terms used in the course, from concept to final export.
Editing (Post-Production)
| Term | Description |
|---|---|
| Timeline | The visual workspace in editing software where video clips, audio tracks, and effects are sequenced. |
| Trim | The action of shortening a clip by cutting off footage from its beginning or end. |
| Split | The action of cutting a single clip into two pieces at a specific point on the timeline. |
| Jump Cut | An abrupt cut between two shots of the same subject that have only a slight difference in composition, often used to eliminate filler words or pauses. |
| Transition | The method used to move from the end of one clip to the beginning of the next (e.g., a simple cut, a dissolve, a wipe). |
| J-Cut | An edit where the audio from the next clip starts playing before the visual cut occurs. |
| L-Cut | An edit where the visual cut occurs, but the audio from the previous clip continues to play over the new clip. |
84. Post-Production
- title: Post-Production
- status: publish
- author: 0
- is_previewable: (empty)
- video_duration: 0h 0m 0s (raw {"hours":0,"minutes":0,"seconds":0})
- video_source_type: (empty)
**

**
Essential Post-Production Workflow Tutorial
The software changes, but the core principles of editing are timeless. Mastering these is what makes a great video, no matter what app you use!
Here is a tutorial covering the essential steps and principles of a basic post-production workflow.
Post-production is the magic that transforms raw footage into a compelling story. It follows a predictable, logical process that works whether you're using CapCut, Premiere Pro, or iMovie.
Phase 1: The Assembly (Getting Organized)
The goal of this phase is to build the rough structure of your video.
| Step | Principle & Action | Why it's Important |
|---|---|---|
| 1. Import & Organization | Bring all your raw footage, audio, music, and graphics into your editing project. Label and organize your files. | You can't edit what you can't find. Organization prevents tedious searching later. |
| 2. Assembly/Rough Cut | Lay your best clips down on the timeline in the correct narrative order. Ignore precise timing for now; focus on the story flow. | This is the skeleton of your video. It establishes the sequence and pacing before you get bogged down in details. |
| 3. Sync External Audio | If you used a separate microphone, you must sync that high-quality audio with your low-quality camera audio. (Use the "hand clap" cue as your visual and audio starting point.) | Excellent audio is crucial for a professional feel. The final video will only use the clean, external audio track. |
Phase 2: The Refinement (Pacing and Polish)
This is where you make every second count. Most of your time will be spent here.
| Step | Principle & Action | Why it's Important |
|---|---|---|
| 4. The Fine Cut & Pacing | Trim the start and end of every clip precisely. Remove all unnecessary pauses, "ums," and "ahs." Use J-cuts and L-cuts (where the audio/video starts slightly before or after the cut) to smooth dialogue transitions. | This is how you control the viewer's attention. Tight editing keeps the energy high and prevents the audience from getting bored. Pro Tip: If a cut feels weird, it's often a sign that you need a B-Roll shot (supplementary footage) to cover it. |
| 5. Add Transitions | Insert cuts, dissolves, whips, and creative transitions to link scenes smoothly. Use them sparingly-a simple, clean cut is often the best transition. | Transitions help clarify the passage of time or a change in location without jarring the viewer. |
| 6. Layer B-Roll | Place all your supporting shots (e.g., footage of a product, landscape shots, text overlay) over the top of the primary footage (the talking head). | B-Roll reinforces your message, makes your video visually dynamic, and helps cover those rough jump cuts in your main footage. |
Phase 3: The Enhancement (Look and Sound)
The last steps to make your video shine and sound professional.
| Step | Principle & Action | Why it's Important |
|---|---|---|
| 7. Color Correction & Grading | First, Correct (fix mistakes): Adjust white balance to remove any unnatural blue/yellow/green tint. Then, Grade (apply a style): Add a creative filter or LUT to give the entire video a consistent, stylistic mood. | Consistency is key. The color ensures your video is visually appealing and that all scenes look like they belong together. |
| 8. Audio Mixing | Set your audio levels precisely. The primary rule: Dialogue must be the loudest element. Music and sound effects should sit underneath the dialogue, supporting it, never overpowering it. Aim for consistency across all dialogue clips. | Bad audio ruins a video faster than bad visuals. This step guarantees your audience can clearly understand what is being said. |
| 9. Final Polish (Titles/SFX) | Add lower thirds (text identifying speakers), titles, captions, and any necessary sound effects (like a "whoosh" for a fast transition or a simple click). | These elements add professional polish, improve accessibility, and provide context. |
Phase 4: Export (Sharing the Work)
The final action that delivers your creation to the world.
| Step | Principle & Action | Why it's Important |
|---|---|---|
| 10. Export Settings | Choose your final resolution (e.g., 1080p or 4K). Select an appropriate frame rate (it should match your source footage, typically 24fps or 30fps). | Using the correct settings ensures your video looks sharp and plays smoothly on platforms like YouTube or Instagram without excessive compression. |
| 11. Review & Upload | Watch the final exported file (not just the timeline preview!) one last time. Check for any errors and fix them. Upload to your chosen platform! | You'd be surprised how often a stray sound effect or a hidden clip remains in the final export. Always review the final product. |
- quizzes_following_this_lesson: 1 (full text in Quizzes)
- Post-Production Quiz (9 questions)
85. Homework The Edit Test
- title: Homework The Edit Test
- status: publish
- author: 0
- is_previewable: (empty)
- video_duration: 0h 0m 0s (raw {"hours":0,"minutes":0,"seconds":0})
- video_source_type: (empty)
PRACTICAL: Post-Production (The Edit Test)
Section Covered: Post-Production
Submission Instructions:
Complete this practical then submit via email to the instructor at info@ambitious.co.za or use the Academy portal.
Keep up the practical skills!
| Task | Requirements | Deliverables |
|---|---|---|
| Objective | Take a single raw clip and demonstrate mastery of basic editing principles. | One (1) Edited Clip (Max 20 seconds). |
| Focus | Precision and Consistency. | Action 1 (Trim/Split): Cut out a short, unnecessary 2-second pause from the middle of the clip (a classic jump cut). Action 2 (Color): Apply a basic color correction (or filter/LUT) to make the clip look warmer or cooler. Action 3 (Audio): Add a background music track and mix the audio levels so the music is noticeable but the dialogue is clear. |
86. Post-Production Conclusion
- title: Post-Production Conclusion
- status: publish
- author: 0
- is_previewable: (empty)
- video_duration: 0h 0m 45s (raw {"hours":0,"minutes":0,"seconds":45})
- video_source_type: embedded
- drive_file_id:
1h9eOf9x90XO2u3ughaGH6yngHLEEweFO(source_ref; not a public link) - transcript pending / keyframes pending / presentation extract pending
- video_source_url: (Drive preview omitted as a public link; file id kept as source_ref)
(no lesson_content HTML in export — video-only or empty body; metadata above kept in full)
Drive extract
- file_id:
1h9eOf9x90XO2u3ughaGH6yngHLEEweFO - filename: VEST Section 7 Post 8 Outro.mp4
- kind: video
- local_path: /workspace/academy/media/1h9eOf9x90XO2u3ughaGH6yngHLEEweFO/VEST Section 7 Post 8 Outro.mp4
- source_ref: drive
1h9eOf9x90XO2u3ughaGH6yngHLEEweFO· content_length 68051217 · original https://drive.google.com/file/d/1h9eOf9x90XO2u3ughaGH6yngHLEEweFO/view - extract_status: done
- caption_source: drive_timedtext
- duration_s: 44.907007
- keyframe_count: 5
Transcript
- Hey guys, congratulations on completing
- [00:00:02.230] Hey guys, congratulations on completing
- [00:00:02.240] Hey guys, congratulations on completing the post-production section of the vest
- [00:00:04.550] the post-production section of the vest
- [00:00:04.560] the post-production section of the vest online course. In this section, we
- [00:00:06.390] online course. In this section, we
- [00:00:06.400] online course. In this section, we covered editing, the principles of
- [00:00:08.390] covered editing, the principles of
- [00:00:08.400] covered editing, the principles of editing, cutting. We covered
- [00:00:10.070] editing, cutting. We covered
- [00:00:10.080] editing, cutting. We covered transitions, adding different elements
- [00:00:12.150] transitions, adding different elements
- [00:00:12.160] transitions, adding different elements like effects, music, color grading,
- [00:00:15.430] like effects, music, color grading,
- [00:00:15.440] like effects, music, color grading, sound effects, and know finishing our
- [00:00:18.230] sound effects, and know finishing our
- [00:00:18.240] sound effects, and know finishing our finished content to resemble what we
- [00:00:21.429] finished content to resemble what we
- [00:00:21.439] finished content to resemble what we planned in the beginning of this course.
- [00:00:23.269] planned in the beginning of this course.
- [00:00:23.279] planned in the beginning of this course. I look forward to, you know, seeing
- [00:00:25.590] I look forward to, you know, seeing
- [00:00:25.600] I look forward to, you know, seeing everything that you've made and keep
- [00:00:27.589] everything that you've made and keep
- [00:00:27.599] everything that you've made and keep making, keep creating. Uh, film as much
- [00:00:30.710] making, keep creating. Uh, film as much
- [00:00:30.720] making, keep creating. Uh, film as much as you can. Film short things, long
- [00:00:32.870] as you can. Film short things, long
- [00:00:32.880] as you can. Film short things, long things. Play around. I encourage you to,
- [00:00:35.910] things. Play around. I encourage you to,
- [00:00:35.920] things. Play around. I encourage you to, you know, keep writing, filming, and
- [00:00:38.549] you know, keep writing, filming, and
- [00:00:38.559] you know, keep writing, filming, and editing content. Thank you guys so much,
- [00:00:41.350] editing content. Thank you guys so much,
- [00:00:41.360] editing content. Thank you guys so much, and I'll check you soon.
Keyframes
- /workspace/academy/media/1h9eOf9x90XO2u3ughaGH6yngHLEEweFO/keyframes/last.jpg
- /workspace/academy/media/1h9eOf9x90XO2u3ughaGH6yngHLEEweFO/keyframes/t001.jpg
- /workspace/academy/media/1h9eOf9x90XO2u3ughaGH6yngHLEEweFO/keyframes/t002.jpg
- /workspace/academy/media/1h9eOf9x90XO2u3ughaGH6yngHLEEweFO/keyframes/t003.jpg
- /workspace/academy/media/1h9eOf9x90XO2u3ughaGH6yngHLEEweFO/keyframes/t004.jpg
87. After Video
- title: After Video
- status: publish
- author: 0
- is_previewable: (empty)
- video_duration: 0h 0m 0s (raw {"hours":0,"minutes":0,"seconds":0})
- video_source_type: (empty)
**

**
VEST Practical Assignments: The "Before & After" Challenge
This video will be a showcase of your skills after completing the VEST course, so do your best and show the world what you have learned.
You will be guided using a checklist / cheat sheet which will be very handy during you early days of content creation.
PRACTICAL: The "After" Video (Final Mastery)
Section Covered: After Video (Show of Improvement)
| Task | Requirements | Deliverables |
|---|---|---|
| Objective | Create a brand new, fully executed short video on a topic of your choosing, demonstrating the synthesis of all VEST concepts. This is the Final Project showing your improvement. | One (1) Final Video (Max 1:30) and Final Checklist. |
| Focus | Concept to Execution. You must follow a professional workflow: - - Pre-Production (Concept & Shot List) - - Production (Shooting) - - Post-Production (Editing). | Video Requirements: Must be edited (CapCut), use music, include text/titles, feature at least one camera movement, and maintain clean audio and consistent color/lighting. Final Checklist: Submit the cheat sheet (or a document explaining) where and how each major course concept was intentionally applied. |
Follow the link below for the Checklist / Cheat Sheet.
You can print it or use the digital version.
Upload: Name the video to your student's name or ID and After Video. (Student Name - After Video)
Submission Instructions:
Complete this practical then submit via email to the instructor at info@ambitious.co.za or use the Academy portal.
Keep up the practical skills!
88. VEST Certification Reminder
- title: VEST Certification Reminder
- status: publish
- author: 0
- is_previewable: (empty)
- video_duration: 0h 0m 0s (raw {"hours":0,"minutes":0,"seconds":0})
- video_source_type: (empty)
**

**
Reminder Message: Your Next Step
**

**
Get Certified!
You have successfully completed the entire VEST Course, aced the knowledge checks, and executed the practical After Video! You now possess the skills of a confident, competent mobile content creation.
Your final step to professional recognition is the External Certification Exam.
This exam will independently test your mastery through both a theory component and a practical assessment, proving your skills to the industry.
Ready to turn your new expertise into credentials?
Use the link below to register for the official certification exam:
Certification Exam Registration Link:
We are immensely proud of your hard work and know you are ready. Go get that certification!
https://ambitious.academy/course/vest-certification
89. VEST Review
- title: VEST Review
- status: publish
- author: 0
- is_previewable: (empty)
- video_duration: 0h 0m 0s (raw {"hours":0,"minutes":0,"seconds":0})
- video_source_type: (empty)
**

**
Congratulations! You\'ve Mastered VEST!
We are so proud of you for completing the VEST Course! You are now equipped with the essential skills to take on real-world of mobile content creation challenges.
Your Feedback is Our Fuel!
As you move forward and put your new skills to use, we kindly ask for a minute of your time to share your experience with others on Google.
Your honest review not only helps future students decide if this course is right for them, but it also helps us continue to improve our curriculum, refine the Demo Project, and ensure we\'re delivering the highest quality training in the vinyl cutting industry.
Did you find the course:
- Clear and easy to follow?
- Helpful in mobile videeo content creation?
Click the link below to leave your review and let us know about your journey from beginner to vinyl cutting pro!
https://g.page/r/CR2xnJEt_BjOEBM/review

Thank you again for choosing our course. We can\'t wait to see the incredible projects you create!
Happy Cutting!

The Ambitious Academy Team
90. VEST Conclusion
- title: VEST Conclusion
- status: publish
- author: 0
- is_previewable: (empty)
- video_duration: 0h 0m 34s (raw {"hours":0,"minutes":0,"seconds":34})
- video_source_type: embedded
- drive_file_id:
1nh6Bp_Mtkc4w2r5xhd33R_uwiU7-zgiV(source_ref; not a public link) - transcript pending / keyframes pending / presentation extract pending
- video_source_url: (Drive preview omitted as a public link; file id kept as source_ref)
(no lesson_content HTML in export — video-only or empty body; metadata above kept in full)
Drive extract
- file_id:
1nh6Bp_Mtkc4w2r5xhd33R_uwiU7-zgiV - filename: VEST Section 101 Concluding VEST.mp4
- kind: video
- local_path: /workspace/academy/media/1nh6Bp_Mtkc4w2r5xhd33R_uwiU7-zgiV/VEST Section 101 Concluding VEST.mp4
- source_ref: drive
1nh6Bp_Mtkc4w2r5xhd33R_uwiU7-zgiV· content_length 51709971 · original https://drive.google.com/file/d/1nh6Bp_Mtkc4w2r5xhd33R_uwiU7-zgiV/view - extract_status: done
- caption_source: drive_timedtext
- duration_s: 34.271995
- keyframe_count: 4
Transcript
- Hey guys, congratulations on completing
- [00:00:02.550] Hey guys, congratulations on completing
- [00:00:02.560] Hey guys, congratulations on completing the vest course. Um, you started with
- [00:00:05.190] the vest course. Um, you started with
- [00:00:05.200] the vest course. Um, you started with narrative, went all the way through to
- [00:00:07.909] narrative, went all the way through to
- [00:00:07.919] narrative, went all the way through to actually filming, setting up your gear,
- [00:00:10.870] actually filming, setting up your gear,
- [00:00:10.880] actually filming, setting up your gear, camera, camera settings, shot types,
- [00:00:13.509] camera, camera settings, shot types,
- [00:00:13.519] camera, camera settings, shot types, camera movement, all the way through to
- [00:00:15.990] camera movement, all the way through to
- [00:00:16.000] camera movement, all the way through to postp production and you've now made
- [00:00:18.710] postp production and you've now made
- [00:00:18.720] postp production and you've now made your complete videos. Keep practicing
- [00:00:20.790] your complete videos. Keep practicing
- [00:00:20.800] your complete videos. Keep practicing and applying the skills you've learned.
- [00:00:22.950] and applying the skills you've learned.
- [00:00:22.960] and applying the skills you've learned. And remember, even though this course
- [00:00:24.790] And remember, even though this course
- [00:00:24.800] And remember, even though this course has come to an end, your journey of
- [00:00:26.950] has come to an end, your journey of
- [00:00:26.960] has come to an end, your journey of creative growth continues. That's it
- [00:00:29.189] creative growth continues. That's it
- [00:00:29.199] creative growth continues. That's it from me guys. Enjoy and keep creating.
Keyframes
- /workspace/academy/media/1nh6Bp_Mtkc4w2r5xhd33R_uwiU7-zgiV/keyframes/last.jpg
- /workspace/academy/media/1nh6Bp_Mtkc4w2r5xhd33R_uwiU7-zgiV/keyframes/t001.jpg
- /workspace/academy/media/1nh6Bp_Mtkc4w2r5xhd33R_uwiU7-zgiV/keyframes/t002.jpg
- /workspace/academy/media/1nh6Bp_Mtkc4w2r5xhd33R_uwiU7-zgiV/keyframes/t003.jpg
Quizzes
11 quizzes in nest order, each under the lesson it followed. Every question and every answer is kept, including answer_is_correct.
After lesson: Scripts & Story
Quiz: Narrative Quiz
- follows_lesson: Scripts & Story
- quiz_content: Here are mini quizzes designed to test a student's basic understanding before they move on to the practical steps.
- quiz_time: 0
- quiz_time_unit: minutes
- quiz_hide_time: (empty)
- quiz_feedback_mode: retry
- quiz_passing_grade: 80
- quiz_max_attempts_allowed: 0
- quiz_questions_order: rand
- quiz_hide_question_number: (empty)
- quiz_questions_layout: (empty)
- quiz_explanation_enabled: (empty)
- quiz_skip_question_showing: (empty)
- question_count: 12
Question 1: Storyboard
- question_type: singleChoice
- question_points: 1.00
- question_status: publish
- question_display_points: 1
- question_answer_required: 1
- question_randomize: (empty)
- question_order: 0
- question_negative_score: 0.00
- question_content: What is the main benefit of creating a simple storyboard before shooting?
- question_explanation: (empty)
Answers (4):
-
- [incorrect] answer_is_correct=0 · view_format=text · A. It impresses potential sponsors.
-
- [incorrect] answer_is_correct=0 · view_format=text · B. It prevents you from using filters.
-
- [incorrect] answer_is_correct=0 · view_format=text · D. It automatically uploads the video.
-
- [CORRECT] answer_is_correct=1 · view_format=text · C. It helps you visualize the shots and transitions needed, saving time and retakes.
Question 2: Quick Energy
- question_type: singleChoice
- question_points: 1.00
- question_status: publish
- question_display_points: 1
- question_answer_required: 1
- question_randomize: (empty)
- question_order: 0
- question_negative_score: 0.00
- question_content: A video about "5 Quick Energy Hacks for Productivity" should generally have:
- question_explanation: (empty)
Answers (4):
-
- [CORRECT] answer_is_correct=1 · view_format=text · C. High energy, quick cuts, and an enthusiastic presenter.
-
- [incorrect] answer_is_correct=0 · view_format=text · D. No music and a monotone voice.
-
- [incorrect] answer_is_correct=0 · view_format=text · A. Slow, calming music and long, drawn-out shots.
-
- [incorrect] answer_is_correct=0 · view_format=text · B. A moderate, conversational pace.
Question 3: Content Intention
- question_type: singleChoice
- question_points: 1.00
- question_status: publish
- question_display_points: 1
- question_answer_required: 1
- question_randomize: (empty)
- question_order: 0
- question_negative_score: 0.00
- question_content: If your target audience is "Small business owners interested in tax deductions," which content intention is most appropriate?
- question_explanation: (empty)
Answers (4):
-
- [incorrect] answer_is_correct=0 · view_format=text · A. Pure entertainment
-
- [CORRECT] answer_is_correct=1 · view_format=text · B. To educate/provide value
-
- [incorrect] answer_is_correct=0 · view_format=text · D. To sell a high-end luxury car
-
- [incorrect] answer_is_correct=0 · view_format=text · C. To gossip about celebrities
Question 4: Functional Combination
- question_type: singleChoice
- question_points: 1.00
- question_status: publish
- question_display_points: 1
- question_answer_required: 1
- question_randomize: (empty)
- question_order: 0
- question_negative_score: 0.00
- question_content: A simple mobile storyboard might feature three columns. What is the most functional combination for a short-form video?
- question_explanation: (empty)
Answers (4):
-
- [CORRECT] answer_is_correct=1 · view_format=text · B. Visual (shot), Audio (dialogue/music), Time/Length (in seconds).
-
- [incorrect] answer_is_correct=0 · view_format=text · A. Camera model, lens type, filter used.
-
- [incorrect] answer_is_correct=0 · view_format=text · D. Title, Subtitle, Author.
-
- [incorrect] answer_is_correct=0 · view_format=text · C. Director name, Producer name, Editor name.
Question 5: Too Quick
- question_type: singleChoice
- question_points: 1.00
- question_status: publish
- question_display_points: 1
- question_answer_required: 1
- question_randomize: (empty)
- question_order: 0
- question_negative_score: 0.00
- question_content: What is the danger of having too many cuts that are too quick?
- question_explanation: (empty)
Answers (4):
-
- [incorrect] answer_is_correct=0 · view_format=text · B. It makes the subject sound robotic.
-
- [incorrect] answer_is_correct=0 · view_format=text · A. It confuses the algorithm.
-
- [incorrect] answer_is_correct=0 · view_format=text · D. Your phone storage fills up faster.
-
- [CORRECT] answer_is_correct=1 · view_format=text · C. The video can become jarring or confusing to the viewer.
Question 6: 5 Seconds
- question_type: singleChoice
- question_points: 1.00
- question_status: publish
- question_display_points: 1
- question_answer_required: 1
- question_randomize: (empty)
- question_order: 0
- question_negative_score: 0.00
- question_content: Why are the first 5 seconds of a short-form video the most critical?
- question_explanation: (empty)
Answers (4):
-
- [incorrect] answer_is_correct=0 · view_format=text · A. It's the maximum allowed time on most platforms.
-
- [incorrect] answer_is_correct=0 · view_format=text · B. It's when the best lighting happens.
-
- [incorrect] answer_is_correct=0 · view_format=text · D. It’s when you introduce all your gear.
-
- [CORRECT] answer_is_correct=1 · view_format=text · C. It's when the viewer decides if the video is worth watching (the scroll-stop moment).
Question 7: Important Question
- question_type: singleChoice
- question_points: 1.00
- question_status: publish
- question_display_points: 1
- question_answer_required: 1
- question_randomize: (empty)
- question_order: 0
- question_negative_score: 0.00
- question_content: Before pressing record, what is the single most important question you need to ask yourself about your content?
- question_explanation: (empty)
Answers (4):
-
- [incorrect] answer_is_correct=0 · view_format=text · C. What background music will I use?
-
- [incorrect] answer_is_correct=0 · view_format=text · A. What software will I use to edit it?
-
- [incorrect] answer_is_correct=0 · view_format=text · D. How many likes will it get?
-
- [CORRECT] answer_is_correct=1 · view_format=text · B. What is the video's intention (e.g., educate, entertain, sell)?
Question 8: Pacing
- question_type: singleChoice
- question_points: 1.00
- question_status: publish
- question_display_points: 1
- question_answer_required: 1
- question_randomize: (empty)
- question_order: 0
- question_negative_score: 0.00
- question_content: "Pacing" in a video mainly refers to:
- question_explanation: (empty)
Answers (4):
-
- [incorrect] answer_is_correct=0 · view_format=text · C. How many followers you gain during the video.
-
- [incorrect] answer_is_correct=0 · view_format=text · D. The time between filming and editing.
-
- [incorrect] answer_is_correct=0 · view_format=text · A. How fast the subject walks across the screen.
-
- [CORRECT] answer_is_correct=1 · view_format=text · B. The rhythm and speed created by the cuts, music, and subject's delivery.
Question 9: Intriguing Question
- question_type: singleChoice
- question_points: 1.00
- question_status: publish
- question_display_points: 1
- question_answer_required: 1
- question_randomize: (empty)
- question_order: 0
- question_negative_score: 0.00
- question_content: Which of the following is the best example of an effective Intriguing Question hook?
- question_explanation: (empty)
Answers (4):
-
- [incorrect] answer_is_correct=0 · view_format=text · D. "This is a great video."
-
- [incorrect] answer_is_correct=0 · view_format=text · A. "Hi, my name is Alex and I'm going to talk about budgeting."
-
- [incorrect] answer_is_correct=0 · view_format=text · C. "I woke up today and drank coffee."
-
- [CORRECT] answer_is_correct=1 · view_format=text · B. "Are you losing R20000 a year because of this one mistake?"
Question 10: Interesting Visual
- question_type: singleChoice
- question_points: 1.00
- question_status: publish
- question_display_points: 1
- question_answer_required: 1
- question_randomize: (empty)
- question_order: 0
- question_negative_score: 0.00
- question_content: True or False: An interesting visual hook must be high-budget and professionally shot.
- question_explanation: (empty)
Answers (2):
-
- [incorrect] answer_is_correct=0 · view_format=text · A. True
-
- [CORRECT] answer_is_correct=1 · view_format=text · B. False (It just needs to be unexpected or relevant).
Question 11: Target Audience
- question_type: trueFalse
- question_points: 1.00
- question_status: publish
- question_display_points: 1
- question_answer_required: 1
- question_randomize: (empty)
- question_order: 0
- question_negative_score: 0.00
- question_content: True or False: If you change your target audience, you should likely change your content's overall intention and tone.
- question_explanation: (empty)
Answers (2):
-
- [incorrect] answer_is_correct=0 · view_format=text · False
-
- [CORRECT] answer_is_correct=1 · view_format=text · True
Question 12: Script
- question_type: singleChoice
- question_points: 1.00
- question_status: publish
- question_display_points: 1
- question_answer_required: 1
- question_randomize: (empty)
- question_order: 0
- question_negative_score: 0.00
- question_content: For a short-form mobile video, a "script" should primarily be seen as:
- question_explanation: (empty)
Answers (4):
-
- [incorrect] answer_is_correct=0 · view_format=text · C. A highly detailed cinematic screenplay.
-
- [incorrect] answer_is_correct=0 · view_format=text · D. Something you only worry about in post-production.
-
- [incorrect] answer_is_correct=0 · view_format=text · A. A word-for-word document read off a teleprompter.
-
- [CORRECT] answer_is_correct=1 · view_format=text · B. A guide/structure containing key points and the call-to-action.
After lesson: Camera Settings Tutorial
Quiz: Settings Quiz
- follows_lesson: Camera Settings Tutorial
- quiz_content: Confirm the student understands the non-camera settings that prevent shoot interruptions and technical hiccups.
- quiz_time: 0
- quiz_time_unit: minutes
- quiz_hide_time: (empty)
- quiz_feedback_mode: retry
- quiz_passing_grade: 80
- quiz_max_attempts_allowed: 0
- quiz_questions_order: rand
- quiz_hide_question_number: (empty)
- quiz_questions_layout: (empty)
- quiz_explanation_enabled: (empty)
- quiz_skip_question_showing: (empty)
- question_count: 8
Question 1: Manual vs Auto
- question_type: singleChoice
- question_points: 1.00
- question_status: publish
- question_display_points: 1
- question_answer_required: 1
- question_randomize: (empty)
- question_order: 0
- question_negative_score: 0.00
- question_content: When should you switch from Auto to Manual camera settings for video?
- question_explanation: (empty)
Answers (4):
-
- [CORRECT] answer_is_correct=1 · view_format=text · B. When the lighting is complex and keeps changing in Auto mode.
-
- [incorrect] answer_is_correct=0 · view_format=text · C. Only when shooting landscapes.
-
- [incorrect] answer_is_correct=0 · view_format=text · A. Never—Auto is always better.
-
- [incorrect] answer_is_correct=0 · view_format=text · D. When your phone battery is low.
Question 2: Auto Locked
- question_type: singleChoice
- question_points: 1.00
- question_status: publish
- question_display_points: 1
- question_answer_required: 1
- question_randomize: (empty)
- question_order: 0
- question_negative_score: 0.00
- question_content: In an auto camera app, what action is typically used to lock the Focus and Exposure onto your subject before you start recording?
- question_explanation: (empty)
Answers (4):
-
- [incorrect] answer_is_correct=0 · view_format=text · A. Pressing the volume button.
-
- [CORRECT] answer_is_correct=1 · view_format=text · C. Tapping and holding the subject on the screen (AE/AF Lock).
-
- [incorrect] answer_is_correct=0 · view_format=text · B. Swiping left on the screen.
-
- [incorrect] answer_is_correct=0 · view_format=text · D. Restarting the camera app.
Question 3: Airplane
- question_type: singleChoice
- question_points: 1.00
- question_status: publish
- question_display_points: 1
- question_answer_required: 1
- question_randomize: (empty)
- question_order: 0
- question_negative_score: 0.00
- question_content: Why should you place your phone on Airplane Mode or Do Not Disturb while filming?
- question_explanation: (empty)
Answers (4):
-
- [incorrect] answer_is_correct=0 · view_format=text · D. It automatically locks the focus.
-
- [CORRECT] answer_is_correct=1 · view_format=text · B. It removes notifications and calls that would interrupt/ruin the audio.
-
- [incorrect] answer_is_correct=0 · view_format=text · C. It prevents the phone from overheating.
-
- [incorrect] answer_is_correct=0 · view_format=text · A. It saves battery life.
Question 4: Slow-Motion
- question_type: trueFalse
- question_points: 1.00
- question_status: publish
- question_display_points: 1
- question_answer_required: 1
- question_randomize: (empty)
- question_order: 0
- question_negative_score: 0.00
- question_content: If you want to shoot smooth slow-motion footage, you should generally film at a higher Frame Rate (e.g., 60 FPS or 120 FPS).
- question_explanation: (empty)
Answers (2):
-
- [CORRECT] answer_is_correct=1 · view_format=text · True
-
- [incorrect] answer_is_correct=0 · view_format=text · False
Question 5: Exposure Problem
- question_type: singleChoice
- question_points: 1.00
- question_status: publish
- question_display_points: 1
- question_answer_required: 1
- question_randomize: (empty)
- question_order: 0
- question_negative_score: 0.00
- question_content: What is the primary problem that occurs if your exposure is not locked and you move your phone to different areas of a room?
- question_explanation: (empty)
Answers (4):
-
- [incorrect] answer_is_correct=0 · view_format=text · A. The video file becomes corrupted.
-
- [incorrect] answer_is_correct=0 · view_format=text · D. The frame rate slows down.
-
- [incorrect] answer_is_correct=0 · view_format=text · B. The subject becomes blurry.
-
- [CORRECT] answer_is_correct=1 · view_format=text · C. The video's brightness/lightness will constantly change (pulse/pump).
Question 6: Storage
- question_type: singleChoice
- question_points: 1.00
- question_status: publish
- question_display_points: 1
- question_answer_required: 1
- question_randomize: (empty)
- question_order: 0
- question_negative_score: 0.00
- question_content: The most important reason to clear up storage before a shoot is to:
- question_explanation: (empty)
Answers (4):
-
- [CORRECT] answer_is_correct=1 · view_format=text · B. Ensure the phone doesn't stop recording mid-take.
-
- [incorrect] answer_is_correct=0 · view_format=text · A. Make your phone faster.
-
- [incorrect] answer_is_correct=0 · view_format=text · D. Free up space for the editing app.
-
- [incorrect] answer_is_correct=0 · view_format=text · C. Improve the camera's resolution.
Question 7: FPS
- question_type: singleChoice
- question_points: 1.00
- question_status: publish
- question_display_points: 1
- question_answer_required: 1
- question_randomize: (empty)
- question_order: 0
- question_negative_score: 0.00
- question_content: The standard Frame Rate (FPS) that gives video a smooth, yet realistic look and is widely used for short-form content is:
- question_explanation: (empty)
Answers (4):
-
- [incorrect] answer_is_correct=0 · view_format=text · A. 12 FPS
-
- [CORRECT] answer_is_correct=1 · view_format=text · C. 30 FPS
-
- [incorrect] answer_is_correct=0 · view_format=text · B. 24 FPS
-
- [incorrect] answer_is_correct=0 · view_format=text · D. 120 FPS
Question 8: Digital Zoom
- question_type: singleChoice
- question_points: 1.00
- question_status: publish
- question_display_points: 1
- question_answer_required: 1
- question_randomize: (empty)
- question_order: 0
- question_negative_score: 0.00
- question_content: True or False: You should use the digital zoom on your phone to get closer to a subject for better video quality.
- question_explanation: (empty)
Answers (2):
-
- [incorrect] answer_is_correct=0 · view_format=text · A. True
-
- [CORRECT] answer_is_correct=1 · view_format=text · B. False (Digital zoom dramatically lowers video quality).
After lesson: Microphones
Quiz: Essential Gear Quiz
- follows_lesson: Microphones
- quiz_content: Test the distinction between stabilization tools and the hierarchy of audio/visual improvements.
- quiz_time: 0
- quiz_time_unit: minutes
- quiz_hide_time: (empty)
- quiz_feedback_mode: retry
- quiz_passing_grade: 80
- quiz_max_attempts_allowed: 0
- quiz_questions_order: rand
- quiz_hide_question_number: (empty)
- quiz_questions_layout: (empty)
- quiz_explanation_enabled: (empty)
- quiz_skip_question_showing: (empty)
- question_count: 3
Question 1: Tripod vs Gimbal
- question_type: singleChoice
- question_points: 1.00
- question_status: publish
- question_display_points: 1
- question_answer_required: 1
- question_randomize: (empty)
- question_order: 0
- question_negative_score: 0.00
- question_content: What is the main difference between a Tripod and a Gimbal?
- question_explanation: (empty)
Answers (4):
-
- [incorrect] answer_is_correct=0 · view_format=text · C. Tripods are only for indoor use; Gimbals are only for outdoor use.
-
- [incorrect] answer_is_correct=0 · view_format=text · A. A Tripod is for photos; a Gimbal is for video.
-
- [incorrect] answer_is_correct=0 · view_format=text · D. They are the same thing, just different names.
-
- [CORRECT] answer_is_correct=1 · view_format=text · B. A Tripod holds the phone static; a Gimbal uses motors to keep the phone smooth while you move.
Question 2: Affordable Light
- question_type: singleChoice
- question_points: 1.00
- question_status: publish
- question_display_points: 1
- question_answer_required: 1
- question_randomize: (empty)
- question_order: 0
- question_negative_score: 0.00
- question_content: A small, affordable ring light or LED panel is primarily used to:
- question_explanation: (empty)
Answers (4):
-
- [CORRECT] answer_is_correct=1 · view_format=text · B. Provide front-facing, flattering light to eliminate shadows on the face.
-
- [incorrect] answer_is_correct=0 · view_format=text · D. Light up the background behind the subject.
-
- [incorrect] answer_is_correct=0 · view_format=text · C. Keep the phone cool.
-
- [incorrect] answer_is_correct=0 · view_format=text · A. Make the subject look like they are a celebrity.
Question 3: Talking-Head
- question_type: singleChoice
- question_points: 1.00
- question_status: publish
- question_display_points: 1
- question_answer_required: 1
- question_randomize: (empty)
- question_order: 0
- question_negative_score: 0.00
- question_content: For a talking-head video, what is generally the most important piece of gear to invest in after a tripod?
- question_explanation: (empty)
Answers (4):
-
- [CORRECT] answer_is_correct=1 · view_format=text · C. A good external microphone (like a lapel/lavalier mic).
-
- [incorrect] answer_is_correct=0 · view_format=text · D. A second phone for a different angle.
-
- [incorrect] answer_is_correct=0 · view_format=text · A. A brightly colored background.
-
- [incorrect] answer_is_correct=0 · view_format=text · B. A very expensive gimbal.
After lesson: Homework Composition
Quiz: Composition Quiz
- follows_lesson: Homework Composition
- quiz_content: Test the student's understanding of foundational visual rules that guide the viewer's eye.
- quiz_time: 0
- quiz_time_unit: minutes
- quiz_hide_time: (empty)
- quiz_feedback_mode: retry
- quiz_passing_grade: 80
- quiz_max_attempts_allowed: 0
- quiz_questions_order: rand
- quiz_hide_question_number: (empty)
- quiz_questions_layout: (empty)
- quiz_explanation_enabled: (empty)
- quiz_skip_question_showing: (empty)
- question_count: 4
Question 1: Rule-of-Thirds
- question_type: singleChoice
- question_points: 1.00
- question_status: publish
- question_display_points: 1
- question_answer_required: 1
- question_randomize: (empty)
- question_order: 0
- question_negative_score: 0.00
- question_content: The Rule-of-Thirds suggests placing your main subject:
- question_explanation: (empty)
Answers (4):
-
- [CORRECT] answer_is_correct=1 · view_format=text · B. Along the invisible grid lines or at the intersections where they cross.
-
- [incorrect] answer_is_correct=0 · view_format=text · A. Exactly in the center of the frame.
-
- [incorrect] answer_is_correct=0 · view_format=text · D. In the top-most corner of the screen.
-
- [incorrect] answer_is_correct=0 · view_format=text · C. As close to the edge of the frame as possible.
Question 2: Symmetry
- question_type: singleChoice
- question_points: 1.00
- question_status: publish
- question_display_points: 1
- question_answer_required: 1
- question_randomize: (empty)
- question_order: 0
- question_negative_score: 0.00
- question_content: True or False: Symmetry is a compositional technique where you intentionally make the shot feel unbalanced and chaotic.
- question_explanation: (empty)
Answers (2):
-
- [CORRECT] answer_is_correct=1 · view_format=text · B. False (Symmetry creates balance and a visually pleasing sense of order).
-
- [incorrect] answer_is_correct=0 · view_format=text · A. True
Question 3: Headroom
- question_type: singleChoice
- question_points: 1.00
- question_status: publish
- question_display_points: 1
- question_answer_required: 1
- question_randomize: (empty)
- question_order: 0
- question_negative_score: 0.00
- question_content: What is "Headroom" and why is it important?
- question_explanation: (empty)
Answers (4):
-
- [CORRECT] answer_is_correct=1 · view_format=text · C. The space between the top of the subject's head and the top of the frame. Too much or too little can distract the viewer.
-
- [incorrect] answer_is_correct=0 · view_format=text · A. The space to the left or right of the subject.
-
- [incorrect] answer_is_correct=0 · view_format=text · D. The amount of light on the subject's face.
-
- [incorrect] answer_is_correct=0 · view_format=text · B. The speed at which the camera pans.
Question 4: Leading Lines
- question_type: singleChoice
- question_points: 1.00
- question_status: publish
- question_display_points: 1
- question_answer_required: 1
- question_randomize: (empty)
- question_order: 0
- question_negative_score: 0.00
- question_content: Leading Lines (like a road, fence, or sidewalk) are used primarily to:
- question_explanation: (empty)
Answers (4):
-
- [incorrect] answer_is_correct=0 · view_format=text · C. Ensure the shot is perfectly level.
-
- [incorrect] answer_is_correct=0 · view_format=text · A. Make the video look busy.
-
- [CORRECT] answer_is_correct=1 · view_format=text · B. Guide the viewer's eye toward the main subject or point of interest in the frame.
-
- [incorrect] answer_is_correct=0 · view_format=text · D. Add a blue tint to the video.
After lesson: Homework Shot Types
Quiz: Shot Types Quiz
- follows_lesson: Homework Shot Types
- quiz_content: Test the ability to identify and understand the emotional/narrative purpose of different camera angles.
- quiz_time: 0
- quiz_time_unit: minutes
- quiz_hide_time: (empty)
- quiz_feedback_mode: retry
- quiz_passing_grade: 80
- quiz_max_attempts_allowed: 0
- quiz_questions_order: rand
- quiz_hide_question_number: (empty)
- quiz_questions_layout: (empty)
- quiz_explanation_enabled: (empty)
- quiz_skip_question_showing: (empty)
- question_count: 6
Question 1: OTS
- question_type: singleChoice
- question_points: 1.00
- question_status: publish
- question_display_points: 1
- question_answer_required: 1
- question_randomize: (empty)
- question_order: 0
- question_negative_score: 0.00
- question_content: The Over the Shoulder (OTS) shot is best used for:
- question_explanation: (empty)
Answers (4):
-
- [CORRECT] answer_is_correct=1 · view_format=text · B. Capturing an intimate two-person conversation or showing what a character is looking at/reacting to.
-
- [incorrect] answer_is_correct=0 · view_format=text · C. Running away from a moving car.
-
- [incorrect] answer_is_correct=0 · view_format=text · A. Vlogging solo in front of a landmark.
-
- [incorrect] answer_is_correct=0 · view_format=text · D. Filming a high-speed chase.
Question 2: Wide Shot
- question_type: singleChoice
- question_points: 1.00
- question_status: publish
- question_display_points: 1
- question_answer_required: 1
- question_randomize: (empty)
- question_order: 0
- question_negative_score: 0.00
- question_content: A Wide Shot (or establishing shot) is most effective for showing:
- question_explanation: (empty)
Answers (4):
-
- [CORRECT] answer_is_correct=1 · view_format=text · B. The subject's relationship to their environment (context).
-
- [incorrect] answer_is_correct=0 · view_format=text · C. Intense facial emotion.
-
- [incorrect] answer_is_correct=0 · view_format=text · A. A detailed product feature.
-
- [incorrect] answer_is_correct=0 · view_format=text · D. A secret being whispered.
Question 3: Dutch Angle
- question_type: singleChoice
- question_points: 1.00
- question_status: publish
- question_display_points: 1
- question_answer_required: 1
- question_randomize: (empty)
- question_order: 0
- question_negative_score: 0.00
- question_content: The Dutch Angle is a shot where the camera is deliberately tilted, often used to:
- question_explanation: (empty)
Answers (4):
-
- [incorrect] answer_is_correct=0 · view_format=text · C. Show the subject's entire outfit.
-
- [incorrect] answer_is_correct=0 · view_format=text · D. Get more light into the lens.
-
- [CORRECT] answer_is_correct=1 · view_format=text · B. Create a feeling of unease, tension, or disorientation in the viewer.
-
- [incorrect] answer_is_correct=0 · view_format=text · A. Save storage space.
Question 4: Emotions
- question_type: singleChoice
- question_points: 1.00
- question_status: publish
- question_display_points: 1
- question_answer_required: 1
- question_randomize: (empty)
- question_order: 0
- question_negative_score: 0.00
- question_content: Which shot type is best for showing a person's facial expressions and emotion clearly?
- question_explanation: (empty)
Answers (4):
-
- [incorrect] answer_is_correct=0 · view_format=text · D. Dutch Angle
-
- [CORRECT] answer_is_correct=1 · view_format=text · C. Close Up
-
- [incorrect] answer_is_correct=0 · view_format=text · B. Low Angle
-
- [incorrect] answer_is_correct=0 · view_format=text · A. Wide Shot
Question 5: Low Angle
- question_type: singleChoice
- question_points: 1.00
- question_status: publish
- question_display_points: 1
- question_answer_required: 1
- question_randomize: (empty)
- question_order: 0
- question_negative_score: 0.00
- question_content: What is the purpose of using a Low Angle shot (filming up at the subject)?
- question_explanation: (empty)
Answers (4):
-
- [CORRECT] answer_is_correct=1 · view_format=text · B. To make the subject appear more powerful, imposing, or heroic.
-
- [incorrect] answer_is_correct=0 · view_format=text · A. To make the subject look more vulnerable or small.
-
- [incorrect] answer_is_correct=0 · view_format=text · D. To correct for poor lighting.
-
- [incorrect] answer_is_correct=0 · view_format=text · C. To show the ground details.
Question 6: Eye Level
- question_type: singleChoice
- question_points: 1.00
- question_status: publish
- question_display_points: 1
- question_answer_required: 1
- question_randomize: (empty)
- question_order: 0
- question_negative_score: 0.00
- question_content: An Eye Level shot is the most common camera angle because it:
- question_explanation: (empty)
Answers (4):
-
- [incorrect] answer_is_correct=0 · view_format=text · A. Makes the subject look small and insignificant.
-
- [incorrect] answer_is_correct=0 · view_format=text · D. Requires a specialized gimbal.
-
- [CORRECT] answer_is_correct=1 · view_format=text · C. Mimics how people normally see each other, creating a neutral and engaging feel.
-
- [incorrect] answer_is_correct=0 · view_format=text · B. Is often used to make the viewer feel uneasy.
After lesson: Whip Pan
Quiz: Movement Quiz
- follows_lesson: Whip Pan
- quiz_content: Test the knowledge of camera movement fundamentals and their effect on the viewer.
- quiz_time: 0
- quiz_time_unit: minutes
- quiz_hide_time: (empty)
- quiz_feedback_mode: retry
- quiz_passing_grade: 80
- quiz_max_attempts_allowed: 0
- quiz_questions_order: rand
- quiz_hide_question_number: (empty)
- quiz_questions_layout: (empty)
- quiz_explanation_enabled: (empty)
- quiz_skip_question_showing: (empty)
- question_count: 5
Question 1: Push In and Pull Out
- question_type: singleChoice
- question_points: 1.00
- question_status: publish
- question_display_points: 1
- question_answer_required: 1
- question_randomize: (empty)
- question_order: 0
- question_negative_score: 0.00
- question_content: A Push In or Pull Out movement is primarily used to:
- question_explanation: (empty)
Answers (4):
-
- [incorrect] answer_is_correct=0 · view_format=text · A. Change the angle of the phone.
-
- [incorrect] answer_is_correct=0 · view_format=text · D. Save battery life.
-
- [incorrect] answer_is_correct=0 · view_format=text · C. Blur the background.
-
- [CORRECT] answer_is_correct=1 · view_format=text · B. Emphasize an object or emotion (Push In) or reveal a setting (Pull Out).
Question 2: Movement Forward
- question_type: singleChoice
- question_points: 1.00
- question_status: publish
- question_display_points: 1
- question_answer_required: 1
- question_randomize: (empty)
- question_order: 0
- question_negative_score: 0.00
- question_content: Which camera movement involves physically moving the phone and the camera operator forward toward the subject (usually on a dolly or with a gimbal)?
- question_explanation: (empty)
Answers (4):
-
- [CORRECT] answer_is_correct=1 · view_format=text · C. Tracking
-
- [incorrect] answer_is_correct=0 · view_format=text · D. Whip Pan
-
- [incorrect] answer_is_correct=0 · view_format=text · B. Tilting
-
- [incorrect] answer_is_correct=0 · view_format=text · A. Panning
Question 3: Whip Pan
- question_type: singleChoice
- question_points: 1.00
- question_status: publish
- question_display_points: 1
- question_answer_required: 1
- question_randomize: (empty)
- question_order: 0
- question_negative_score: 0.00
- question_content: A Whip Pan is a very fast, blurred pan often used to:
- question_explanation: (empty)
Answers (4):
-
- [incorrect] answer_is_correct=0 · view_format=text · A. Show the camera is broken.
-
- [incorrect] answer_is_correct=0 · view_format=text · B. Take a still photo.
-
- [incorrect] answer_is_correct=0 · view_format=text · D. Slow down the footage.
-
- [CORRECT] answer_is_correct=1 · view_format=text · C. Connect two different scenes or subjects in a dynamic way.
Question 4: Camera Movements
- question_type: singleChoice
- question_points: 1.00
- question_status: publish
- question_display_points: 1
- question_answer_required: 1
- question_randomize: (empty)
- question_order: 0
- question_negative_score: 0.00
- question_content: True or False: All camera movements (pan, tilt, track) must be performed slowly and deliberately to look smooth.
- question_explanation: (empty)
Answers (2):
-
- [incorrect] answer_is_correct=0 · view_format=text · A. True
-
- [CORRECT] answer_is_correct=1 · view_format=text · B. False (Whip Pans and quick reveal movements require speed.)
Question 5: Rotating
- question_type: singleChoice
- question_points: 1.00
- question_status: publish
- question_display_points: 1
- question_answer_required: 1
- question_randomize: (empty)
- question_order: 0
- question_negative_score: 0.00
- question_content: The movement of the camera rotating left or right on a fixed axis (like when following a person walking horizontally) is called:
- question_explanation: (empty)
Answers (4):
-
- [incorrect] answer_is_correct=0 · view_format=text · B. Tracking
-
- [incorrect] answer_is_correct=0 · view_format=text · D. Push In
-
- [incorrect] answer_is_correct=0 · view_format=text · A. Tilting
-
- [CORRECT] answer_is_correct=1 · view_format=text · C. Panning
After lesson: Creative Transitions
Quiz: Creative Transitions Quiz
- follows_lesson: Creative Transitions
- quiz_content: Test the understanding of how to use editing techniques to smoothly link two different shots.
- quiz_time: 0
- quiz_time_unit: minutes
- quiz_hide_time: (empty)
- quiz_feedback_mode: retry
- quiz_passing_grade: 80
- quiz_max_attempts_allowed: 0
- quiz_questions_order: rand
- quiz_hide_question_number: (empty)
- quiz_questions_layout: (empty)
- quiz_explanation_enabled: (empty)
- quiz_skip_question_showing: (empty)
- question_count: 5
Question 1: Audio Transition
- question_type: singleChoice
- question_points: 1.00
- question_status: publish
- question_display_points: 1
- question_answer_required: 1
- question_randomize: (empty)
- question_order: 0
- question_negative_score: 0.00
- question_content: The purpose of using an Audio Transition (e.g., a music beat drop or sound effect) is often to:
- question_explanation: (empty)
Answers (4):
-
- [incorrect] answer_is_correct=0 · view_format=text · D. Automatically correct the focus.
-
- [incorrect] answer_is_correct=0 · view_format=text · C. Fill silence.
-
- [incorrect] answer_is_correct=0 · view_format=text · A. Distract from bad visuals.
-
- [CORRECT] answer_is_correct=1 · view_format=text · B. Provide an energetic or emotional "cue" to the audience just as the visual cut happens.
Question 2: Transition by Color
- question_type: singleChoice
- question_points: 1.00
- question_status: publish
- question_display_points: 1
- question_answer_required: 1
- question_randomize: (empty)
- question_order: 0
- question_negative_score: 0.00
- question_content: A Transition by Color (e.g., matching a red shirt in the first clip with a red wall in the second clip) is primarily used to create:
- question_explanation: (empty)
Answers (4):
-
- [incorrect] answer_is_correct=0 · view_format=text · B. A sense of discord.
-
- [CORRECT] answer_is_correct=1 · view_format=text · C. A smooth, visually harmonious link between two different shots.
-
- [incorrect] answer_is_correct=0 · view_format=text · A. A confusing effect.
-
- [incorrect] answer_is_correct=0 · view_format=text · D. A longer video.
Question 3: Transition by Object
- question_type: singleChoice
- question_points: 1.00
- question_status: publish
- question_display_points: 1
- question_answer_required: 1
- question_randomize: (empty)
- question_order: 0
- question_negative_score: 0.00
- question_content: A "Transition by Object" means the first shot ends when a specific object fills the screen, and the second shot begins:
- question_explanation: (empty)
Answers (4):
-
- [incorrect] answer_is_correct=0 · view_format=text · C. With a sudden audio cue.
-
- [incorrect] answer_is_correct=0 · view_format=text · A. At a different location with a different object.
-
- [CORRECT] answer_is_correct=1 · view_format=text · B. With the same or very similar object clearing the screen to reveal the new location/scene.
-
- [incorrect] answer_is_correct=0 · view_format=text · D. By fading the color to blue.
Question 4: Whip Pan Transition
- question_type: singleChoice
- question_points: 1.00
- question_status: publish
- question_display_points: 1
- question_answer_required: 1
- question_randomize: (empty)
- question_order: 0
- question_negative_score: 0.00
- question_content: When editing, using a Whip Pan transition involves editing the end of the first clip and the start of the second clip to look like:
- question_explanation: (empty)
Answers (4):
-
- [incorrect] answer_is_correct=0 · view_format=text · D. A slow fade to black.
-
- [incorrect] answer_is_correct=0 · view_format=text · B. Two shots connected by a jump cut.
-
- [CORRECT] answer_is_correct=1 · view_format=text · C. One continuous, fast, blurred motion.
-
- [incorrect] answer_is_correct=0 · view_format=text · A. A sudden stop and start.
Question 5: Creative Movement
- question_type: singleChoice
- question_points: 1.00
- question_status: publish
- question_display_points: 1
- question_answer_required: 1
- question_randomize: (empty)
- question_order: 0
- question_negative_score: 0.00
- question_content: What is a key characteristic of a "Creative Transition by Movement" (like a gesture or a spin)?
- question_explanation: (empty)
Answers (4):
-
- [incorrect] answer_is_correct=0 · view_format=text · A. The camera must be stationary.
-
- [CORRECT] answer_is_correct=1 · view_format=text · B. The subject's movement is precisely matched and edited between the two clips to appear continuous.
-
- [incorrect] answer_is_correct=0 · view_format=text · C. It requires a high-end camera.
-
- [incorrect] answer_is_correct=0 · view_format=text · D. It must always be done outdoors.
After lesson: Three Point Lighting
Quiz: Three-Point Lighting Quiz
- follows_lesson: Three Point Lighting
- quiz_content: Test the student's knowledge of the standard, professional indoor lighting setup.
- quiz_time: 0
- quiz_time_unit: minutes
- quiz_hide_time: (empty)
- quiz_feedback_mode: retry
- quiz_passing_grade: 80
- quiz_max_attempts_allowed: 0
- quiz_questions_order: rand
- quiz_hide_question_number: (empty)
- quiz_questions_layout: (empty)
- quiz_explanation_enabled: (empty)
- quiz_skip_question_showing: (empty)
- question_count: 4
Question 1: Rim Light
- question_type: singleChoice
- question_points: 1.00
- question_status: publish
- question_display_points: 1
- question_answer_required: 1
- question_randomize: (empty)
- question_order: 0
- question_negative_score: 0.00
- question_content: The Backlight (or Rim Light) is essential because it:
- question_explanation: (empty)
Answers (4):
-
- [incorrect] answer_is_correct=0 · view_format=text · D. Is the only light source used.
-
- [CORRECT] answer_is_correct=1 · view_format=text · B. Separates the subject from the background, adding depth and dimension.
-
- [incorrect] answer_is_correct=0 · view_format=text · C. Lights the entire scene evenly.
-
- [incorrect] answer_is_correct=0 · view_format=text · A. Lights the floor.
Question 2: Key Light
- question_type: singleChoice
- question_points: 1.00
- question_status: publish
- question_display_points: 1
- question_answer_required: 1
- question_randomize: (empty)
- question_order: 0
- question_negative_score: 0.00
- question_content: In a Three-Point Lighting setup, the Key Light is:
- question_explanation: (empty)
Answers (4):
-
- [incorrect] answer_is_correct=0 · view_format=text · A. The light used only for the background.
-
- [CORRECT] answer_is_correct=1 · view_format=text · C. The primary, brightest light that establishes the overall look and mood.
-
- [incorrect] answer_is_correct=0 · view_format=text · D. The light placed directly behind the camera.
-
- [incorrect] answer_is_correct=0 · view_format=text · B. The softest light source.
Question 3: Fill Light
- question_type: singleChoice
- question_points: 1.00
- question_status: publish
- question_display_points: 1
- question_answer_required: 1
- question_randomize: (empty)
- question_order: 0
- question_negative_score: 0.00
- question_content: The function of the Fill Light is to:
- question_explanation: (empty)
Answers (4):
-
- [incorrect] answer_is_correct=0 · view_format=text · D. Add a blue color tint to the shot.
-
- [incorrect] answer_is_correct=0 · view_format=text · B. Be brighter than the Key Light.
-
- [incorrect] answer_is_correct=0 · view_format=text · A. Create a rim of light around the subject's head.
-
- [CORRECT] answer_is_correct=1 · view_format=text · C. Soften and reduce the harsh shadows created by the Key Light.
Question 4: Reflector
- question_type: singleChoice
- question_points: 1.00
- question_status: publish
- question_display_points: 1
- question_answer_required: 1
- question_randomize: (empty)
- question_order: 0
- question_negative_score: 0.00
- question_content: True or False: If you only have one light source, it should be treated as the Key Light, and you can often use a Reflector to act as a DIY Fill Light.
- question_explanation: (empty)
Answers (2):
-
- [CORRECT] answer_is_correct=1 · view_format=text · A. True
-
- [incorrect] answer_is_correct=0 · view_format=text · B. False (The Key Light is the foundation; a reflector can bounce light to fill shadows.)
After lesson: Terminology Camera Control & Lighting
Quiz: Natural Lighting Quiz
- follows_lesson: Terminology Camera Control & Lighting
- quiz_content: Test the ability to identify and use different natural light scenarios and basic light-shaping tools.
- quiz_time: 0
- quiz_time_unit: minutes
- quiz_hide_time: (empty)
- quiz_feedback_mode: retry
- quiz_passing_grade: 80
- quiz_max_attempts_allowed: 0
- quiz_questions_order: rand
- quiz_hide_question_number: (empty)
- quiz_questions_layout: (empty)
- quiz_explanation_enabled: (empty)
- quiz_skip_question_showing: (empty)
- question_count: 5
Question 1: Golden Hour
- question_type: singleChoice
- question_points: 1.00
- question_status: publish
- question_display_points: 1
- question_answer_required: 1
- question_randomize: (empty)
- question_order: 0
- question_negative_score: 0.00
- question_content: The "Golden Hour" is highly prized for shooting video because the light is:
- question_explanation: (empty)
Answers (4):
-
- [incorrect] answer_is_correct=0 · view_format=text · C. Vertical, overhead, and harsh.
-
- [incorrect] answer_is_correct=0 · view_format=text · D. Only available during the winter months.
-
- [CORRECT] answer_is_correct=1 · view_format=text · B. Soft, warm (yellow/orange), and directional, creating long, pleasing shadows.
-
- [incorrect] answer_is_correct=0 · view_format=text · A. Intense, blue, and flat.
Question 2: Bright Light Source
- question_type: singleChoice
- question_points: 1.00
- question_status: publish
- question_display_points: 1
- question_answer_required: 1
- question_randomize: (empty)
- question_order: 0
- question_negative_score: 0.00
- question_content: To soften a very bright light source (like the sun or a harsh LED) and make it more flattering, you should use a Diffuser (or Blocker). The diffuser is placed:
- question_explanation: (empty)
Answers (4):
-
- [CORRECT] answer_is_correct=1 · view_format=text · B. Between the light source and the subject.
-
- [incorrect] answer_is_correct=0 · view_format=text · D. On the ground next to the camera.
-
- [incorrect] answer_is_correct=0 · view_format=text · C. On the camera lens.
-
- [incorrect] answer_is_correct=0 · view_format=text · A. Behind the subject.
Question 3: Harsh Midday
- question_type: singleChoice
- question_points: 1.00
- question_status: publish
- question_display_points: 1
- question_answer_required: 1
- question_randomize: (empty)
- question_order: 0
- question_negative_score: 0.00
- question_content: The primary challenge with Harsh Midday sun (when the sun is directly overhead) is that it creates:
- question_explanation: (empty)
Answers (4):
-
- [incorrect] answer_is_correct=0 · view_format=text · A. Too much warmth.
-
- [incorrect] answer_is_correct=0 · view_format=text · D. A consistent color temperature.
-
- [incorrect] answer_is_correct=0 · view_format=text · B. Soft, flattering light.
-
- [CORRECT] answer_is_correct=1 · view_format=text · C. Dark, sharp, unflattering shadows (like "raccoon eyes") and high contrast.
Question 4: Shade & Clouded
- question_type: singleChoice
- question_points: 1.00
- question_status: publish
- question_display_points: 1
- question_answer_required: 1
- question_randomize: (empty)
- question_order: 0
- question_negative_score: 0.00
- question_content: When shooting outdoors in the Shade or on a Clouded Day, the light is generally:
- question_explanation: (empty)
Answers (4):
-
- [incorrect] answer_is_correct=0 · view_format=text · D. Extremely warm and yellow.
-
- [incorrect] answer_is_correct=0 · view_format=text · A. Too dark and unusable.
-
- [incorrect] answer_is_correct=0 · view_format=text · C. Best for creating high contrast action scenes.
-
- [CORRECT] answer_is_correct=1 · view_format=text · C. Natural, soft, and diffused, making it very flattering for portraits.
Question 5: Reflectors
- question_type: singleChoice
- question_points: 1.00
- question_status: publish
- question_display_points: 1
- question_answer_required: 1
- question_randomize: (empty)
- question_order: 0
- question_negative_score: 0.00
- question_content: A Reflector is used to:
- question_explanation: (empty)
Answers (4):
-
- [incorrect] answer_is_correct=0 · view_format=text · D. Turn the camera on and off.
-
- [incorrect] answer_is_correct=0 · view_format=text · C. Change the color of the light.
-
- [CORRECT] answer_is_correct=1 · view_format=text · B. Bounce existing light back onto the subject to fill in shadows.
-
- [incorrect] answer_is_correct=0 · view_format=text · A. Block light entirely.
After lesson: Audio Levels
Quiz: Audio Quiz
- follows_lesson: Audio Levels
- quiz_content: Audio is often called the "forgotten half of video," but it's arguably more important than the image for viewer engagement! A viewer will tolerate a slightly fuzzy picture, but they'll click away immediately from bad sound.
- quiz_time: 0
- quiz_time_unit: minutes
- quiz_hide_time: (empty)
- quiz_feedback_mode: retry
- quiz_passing_grade: 80
- quiz_max_attempts_allowed: 0
- quiz_questions_order: rand
- quiz_hide_question_number: (empty)
- quiz_questions_layout: (empty)
- quiz_explanation_enabled: (empty)
- quiz_skip_question_showing: (empty)
- question_count: 9
Question 1: Clean Audio
- question_type: singleChoice
- question_points: 1.00
- question_status: publish
- question_display_points: 1
- question_answer_required: 1
- question_randomize: (empty)
- question_order: 0
- question_negative_score: 0.00
- question_content: The most immediate and critical reason for ensuring clean audio (low background noise) is:
- question_explanation: (empty)
Answers (4):
-
- [incorrect] answer_is_correct=0 · view_format=text · A. It saves phone battery.
-
- [incorrect] answer_is_correct=0 · view_format=text · B. It makes the subject look better.
-
- [incorrect] answer_is_correct=0 · view_format=text · D. It allows for longer videos.
-
- [CORRECT] answer_is_correct=1 · view_format=text · C. Poor audio instantly makes a video feel cheap and unprofessional.
Question 2: Syncing
- question_type: singleChoice
- question_points: 1.00
- question_status: publish
- question_display_points: 1
- question_answer_required: 1
- question_randomize: (empty)
- question_order: 0
- question_negative_score: 0.00
- question_content: What is the best method to ensure your separately recorded audio file perfectly syncs with your video clip?
- question_explanation: (empty)
Answers (4):
-
- [incorrect] answer_is_correct=0 · view_format=text · D. Recording in slow motion.
-
- [incorrect] answer_is_correct=0 · view_format=text · C. Guessing in the edit.
-
- [CORRECT] answer_is_correct=1 · view_format=text · B. Using a hand clap at the start of the recording.
-
- [incorrect] answer_is_correct=0 · view_format=text · A. Counting to three.
Question 3: Music Influence
- question_type: singleChoice
- question_points: 1.00
- question_status: publish
- question_display_points: 1
- question_answer_required: 1
- question_randomize: (empty)
- question_order: 0
- question_negative_score: 0.00
- question_content: How does Music influence the viewer's experience?
- question_explanation: (empty)
Answers (4):
-
- [incorrect] answer_is_correct=0 · view_format=text · B. It forces the editor to use a certain font.
-
- [incorrect] answer_is_correct=0 · view_format=text · A. It dictates the camera angle.
-
- [CORRECT] answer_is_correct=1 · view_format=text · C. It sets the immediate mood and emotional tone for the scene or overall video.
-
- [incorrect] answer_is_correct=0 · view_format=text · D. It is only necessary for silent films.
Question 4: AI Tools
- question_type: trueFalse
- question_points: 1.00
- question_status: publish
- question_display_points: 1
- question_answer_required: 1
- question_randomize: (empty)
- question_order: 0
- question_negative_score: 0.00
- question_content: True or False: AI Tools for cleaning up audio are often used in post-production to successfully remove minor background hums and room noise.
- question_explanation: (empty)
Answers (2):
-
- [incorrect] answer_is_correct=0 · view_format=text · False
-
- [CORRECT] answer_is_correct=1 · view_format=text · True
Question 5: Final Mix
- question_type: singleChoice
- question_points: 1.00
- question_status: publish
- question_display_points: 1
- question_answer_required: 1
- question_randomize: (empty)
- question_order: 0
- question_negative_score: 0.00
- question_content: If your final mix has the music track too loud and the dialogue too quiet, you need to adjust your:
- question_explanation: (empty)
Answers (3):
-
- [incorrect] answer_is_correct=0 · view_format=text · A. White balance.
-
- [incorrect] answer_is_correct=0 · view_format=text · B. Composition.
-
- [CORRECT] answer_is_correct=1 · view_format=text · C. Audio Levels (or mixing).
Question 6: SFX
- question_type: singleChoice
- question_points: 1.00
- question_status: publish
- question_display_points: 1
- question_answer_required: 1
- question_randomize: (empty)
- question_order: 0
- question_negative_score: 0.00
- question_content: Sound Effects (SFX) are most often used in editing to:
- question_explanation: (empty)
Answers (4):
-
- [incorrect] answer_is_correct=0 · view_format=text · A. Replace bad dialogue.
-
- [incorrect] answer_is_correct=0 · view_format=text · C. Cover up the main character's lines.
-
- [incorrect] answer_is_correct=0 · view_format=text · D. Fill up the entire video timeline.
-
- [CORRECT] answer_is_correct=1 · view_format=text · B. Heighten realism or emphasize a visual element (e.g., a "whoosh" sound for a transition).
Question 7: Music
- question_type: singleChoice
- question_points: 1.00
- question_status: publish
- question_display_points: 1
- question_answer_required: 1
- question_randomize: (empty)
- question_order: 0
- question_negative_score: 0.00
- question_content: Using music with a fast tempo and minor key primarily creates a sense of:
- question_explanation: (empty)
Answers (4):
-
- [incorrect] answer_is_correct=0 · view_format=text · B. Happiness and stability.
-
- [incorrect] answer_is_correct=0 · view_format=text · D. A slow fade out.
-
- [CORRECT] answer_is_correct=1 · view_format=text · C. Tension, excitement, or impending drama.
-
- [incorrect] answer_is_correct=0 · view_format=text · A. Peace and calm.
Question 8: Reverb
- question_type: singleChoice
- question_points: 1.00
- question_status: publish
- question_display_points: 1
- question_answer_required: 1
- question_randomize: (empty)
- question_order: 0
- question_negative_score: 0.00
- question_content: Reverb (the sound bouncing off walls) is a sign that your audio was recorded in a space that is:
- question_explanation: (empty)
Answers (4):
-
- [incorrect] answer_is_correct=0 · view_format=text · D. Too close to the subject.
-
- [incorrect] answer_is_correct=0 · view_format=text · A. Outdoors and windy.
-
- [CORRECT] answer_is_correct=1 · view_format=text · B. Too large and empty (like a gym or hard-floored room).
-
- [incorrect] answer_is_correct=0 · view_format=text · C. Perfectly sound-treated.
Question 9: Close Microphone
- question_type: singleChoice
- question_points: 1.00
- question_status: publish
- question_display_points: 1
- question_answer_required: 1
- question_randomize: (empty)
- question_order: 0
- question_negative_score: 0.00
- question_content: When a microphone is placed "Close" to the subject (like a lapel mic), the resulting audio is generally:
- question_explanation: (empty)
Answers (4):
-
- [incorrect] answer_is_correct=0 · view_format=text · D. Only useful for music.
-
- [incorrect] answer_is_correct=0 · view_format=text · C. Quieter than a far mic.
-
- [incorrect] answer_is_correct=0 · view_format=text · A. Reverb-heavy and unclear.
-
- [CORRECT] answer_is_correct=1 · view_format=text · B. Clearer, louder, and isolated from background noise.
After lesson: Post-Production
Quiz: Post-Production Quiz
- follows_lesson: Post-Production
- quiz_content: Post-Production in CapCut! This is where all those great shots, movements, and lighting choices finally get pieced together into a complete story.
Here are the quizzes for Chapter 7, focusing on the practical editing skills your students learned in CapCut. - quiz_time: 0
- quiz_time_unit: minutes
- quiz_hide_time: (empty)
- quiz_feedback_mode: retry
- quiz_passing_grade: 80
- quiz_max_attempts_allowed: 0
- quiz_questions_order: rand
- quiz_hide_question_number: (empty)
- quiz_questions_layout: (empty)
- quiz_explanation_enabled: (empty)
- quiz_skip_question_showing: (empty)
- question_count: 9
Question 1: Shadow or Background
- question_type: singleChoice
- question_points: 1.00
- question_status: publish
- question_display_points: 1
- question_answer_required: 1
- question_randomize: (empty)
- question_order: 0
- question_negative_score: 0.00
- question_content: When adding Text to a video, why is it important to ensure the text has a solid shadow or background?
- question_explanation: (empty)
Answers (4):
-
- [incorrect] answer_is_correct=0 · view_format=text · A. To make it animated.
-
- [incorrect] answer_is_correct=0 · view_format=text · B. To make it invisible.
-
- [incorrect] answer_is_correct=0 · view_format=text · D. To make the clip shorter.
-
- [CORRECT] answer_is_correct=1 · view_format=text · C. To ensure it is readable against a busy or bright video background.
Question 2: Order
- question_type: singleChoice
- question_points: 1.00
- question_status: publish
- question_display_points: 1
- question_answer_required: 1
- question_randomize: (empty)
- question_order: 0
- question_negative_score: 0.00
- question_content: To quickly change the order of clips or move a sound effect in the CapCut timeline, you must use the action known as:
- question_explanation: (empty)
Answers (4):
-
- [incorrect] answer_is_correct=0 · view_format=text · A. Splitting
-
- [incorrect] answer_is_correct=0 · view_format=text · D. Exporting
-
- [CORRECT] answer_is_correct=1 · view_format=text · C. Clicking and Dragging
-
- [incorrect] answer_is_correct=0 · view_format=text · B. Filtering
Question 3: Adjustment
- question_type: singleChoice
- question_points: 1.00
- question_status: publish
- question_display_points: 1
- question_answer_required: 1
- question_randomize: (empty)
- question_order: 0
- question_negative_score: 0.00
- question_content: If you need to fix footage that looks too blue or too yellow, which adjustment tool should you primarily use in CapCut?
- question_explanation: (empty)
Answers (4):
-
- [CORRECT] answer_is_correct=1 · view_format=text · C. Color Correction/White Balance
-
- [incorrect] answer_is_correct=0 · view_format=text · D. Sticker Effects
-
- [incorrect] answer_is_correct=0 · view_format=text · B. Speed
-
- [incorrect] answer_is_correct=0 · view_format=text · A. Volume
Question 4: Fundamental Editing
- question_type: singleChoice
- question_points: 1.00
- question_status: publish
- question_display_points: 1
- question_answer_required: 1
- question_randomize: (empty)
- question_order: 0
- question_negative_score: 0.00
- question_content: The most fundamental editing action, which involves cutting the beginning or end off a clip to define its start and stop point, is called:
- question_explanation: (empty)
Answers (4):
-
- [incorrect] answer_is_correct=0 · view_format=text · C. Layering
-
- [CORRECT] answer_is_correct=1 · view_format=text · D. Trimming
-
- [incorrect] answer_is_correct=0 · view_format=text · B. Splitting
-
- [incorrect] answer_is_correct=0 · view_format=text · A. Syncing
Question 5: Interface
- question_type: singleChoice
- question_points: 1.00
- question_status: publish
- question_display_points: 1
- question_answer_required: 1
- question_randomize: (empty)
- question_order: 0
- question_negative_score: 0.00
- question_content: What part of the CapCut interface displays the sequence of your clips, audio tracks, and transitions?
- question_explanation: (empty)
Answers (4):
-
- [incorrect] answer_is_correct=0 · view_format=text · B. The Export Menu
-
- [CORRECT] answer_is_correct=1 · view_format=text · C. The Timeline
-
- [incorrect] answer_is_correct=0 · view_format=text · D. The Effects Tab
-
- [incorrect] answer_is_correct=0 · view_format=text · A. The Media Bin
Question 6: Final Step
- question_type: singleChoice
- question_points: 1.00
- question_status: publish
- question_display_points: 1
- question_answer_required: 1
- question_randomize: (empty)
- question_order: 0
- question_negative_score: 0.00
- question_content: The final step in CapCut after all edits are complete, which turns your project file into a viewable video file, is called:
- question_explanation: (empty)
Answers (4):
-
- [CORRECT] answer_is_correct=1 · view_format=text · C. Exporting (or Rendering)
-
- [incorrect] answer_is_correct=0 · view_format=text · A. Splitting
-
- [incorrect] answer_is_correct=0 · view_format=text · B. Importing
-
- [incorrect] answer_is_correct=0 · view_format=text · D. Filtering
Question 7: Keyframes
- question_type: trueFalse
- question_points: 1.00
- question_status: publish
- question_display_points: 1
- question_answer_required: 1
- question_randomize: (empty)
- question_order: 0
- question_negative_score: 0.00
- question_content: True or False: Keyframes are a basic tool used to create simple movements or changes (like making an object move across the screen or fade in) over time.
- question_explanation: (empty)
Answers (2):
-
- [CORRECT] answer_is_correct=1 · view_format=text · True
-
- [incorrect] answer_is_correct=0 · view_format=text · False
Question 8: Split
- question_type: singleChoice
- question_points: 1.00
- question_status: publish
- question_display_points: 1
- question_answer_required: 1
- question_randomize: (empty)
- question_order: 0
- question_negative_score: 0.00
- question_content: When you Split a clip in CapCut, what does it create?
- question_explanation: (empty)
Answers (4):
-
- [incorrect] answer_is_correct=0 · view_format=text · D. A new folder in your phone gallery.
-
- [incorrect] answer_is_correct=0 · view_format=text · C. A blurry transition.
-
- [incorrect] answer_is_correct=0 · view_format=text · A. A duplicate of the entire clip.
-
- [CORRECT] answer_is_correct=1 · view_format=text · B. Two separate, editable clips from a single original clip at the split point.
Question 9: Overall Look
- question_type: singleChoice
- question_points: 1.00
- question_status: publish
- question_display_points: 1
- question_answer_required: 1
- question_randomize: (empty)
- question_order: 0
- question_negative_score: 0.00
- question_content: To enhance the overall look and mood of your video footage in one quick step, you would typically apply a:
- question_explanation: (empty)
Answers (4):
-
- [incorrect] answer_is_correct=0 · view_format=text · C. Whip Pan.
-
- [incorrect] answer_is_correct=0 · view_format=text · D. Over-the-Shoulder shot.
-
- [incorrect] answer_is_correct=0 · view_format=text · A. New audio track.
-
- [CORRECT] answer_is_correct=1 · view_format=text · B. Filter or LUT (Look-Up Table).
Sources
- source_url: https://ambitious.academy/course/vest-online
- source_ref: academy.jsonl (dumps-check; public catalog dump)
- source_ref: nested Course export b72d7de272f4c30d9f4c6640d2ac20ff9ac8aa6376479e9601dcfd04593de203.csv
- source_ref: drive_file_id list (extract pending — this pass did not download Drive files)
1qJN92Wl5hlHSFg-5yazho9rBqQVu7qba— extract done · /workspace/academy/media/1qJN92Wl5hlHSFg-5yazho9rBqQVu7qba/11prNSMwu-OVcbOLPqhVR-LwEAEnoVejT— extract done · /workspace/academy/media/11prNSMwu-OVcbOLPqhVR-LwEAEnoVejT/1GtJNdHh8v9PfPVQBPodCPicsrcXY_re-— extract done · /workspace/academy/media/1GtJNdHh8v9PfPVQBPodCPicsrcXY_re-/1yRuZJQ1n8qFEQk7YR8axyaCZZzrWjv8a— extract done · /workspace/academy/media/1yRuZJQ1n8qFEQk7YR8axyaCZZzrWjv8a/1dXxdefhB07pdVoxkYoOCvnn06y8dcZzP— extract done · /workspace/academy/media/1dXxdefhB07pdVoxkYoOCvnn06y8dcZzP/1jaeJm6PR76p9nvB2Gb3z9w2Ni_DPAIJw— extract done · /workspace/academy/media/1jaeJm6PR76p9nvB2Gb3z9w2Ni_DPAIJw/12bUkDI2Jr3VxVRFej463cX5SGaUc2Vbc— extract done · /workspace/academy/media/12bUkDI2Jr3VxVRFej463cX5SGaUc2Vbc/1ffWtoKFM3dsbxz04R6ozobD4l5fNjiM2— extract done · /workspace/academy/media/1ffWtoKFM3dsbxz04R6ozobD4l5fNjiM2/18-3rWNphgPnB73sgfuKg8GCZ9vMW6SZR— extract done · /workspace/academy/media/18-3rWNphgPnB73sgfuKg8GCZ9vMW6SZR/19gYq_jtMlCPrWgRyPC6yQLFYwB6Jc7Gl— extract done · /workspace/academy/media/19gYq_jtMlCPrWgRyPC6yQLFYwB6Jc7Gl/1bkE-G-jRlM9OCfBw4TOkRiIV6_tjnCX3— extract done · /workspace/academy/media/1bkE-G-jRlM9OCfBw4TOkRiIV6_tjnCX3/1AFy0q0bFbRv8-yb1OZqa6g2SqEsq1nyF— extract done · /workspace/academy/media/1AFy0q0bFbRv8-yb1OZqa6g2SqEsq1nyF/177FfqixT5u5tUaszXYm4JJHop9VTnW2w— extract done · /workspace/academy/media/177FfqixT5u5tUaszXYm4JJHop9VTnW2w/1yB6SORj6J5CJ-RAZi9F9dYLgKfh5oppS— extract done · /workspace/academy/media/1yB6SORj6J5CJ-RAZi9F9dYLgKfh5oppS/1SgPq4ZLZVaO3MMiPb1agu4-o70pi5hkO— extract done · /workspace/academy/media/1SgPq4ZLZVaO3MMiPb1agu4-o70pi5hkO/1_0dQwGq66kMGG5Eh_7jvrAa9c7yl8GRS— extract done · /workspace/academy/media/1_0dQwGq66kMGG5Eh_7jvrAa9c7yl8GRS/16QTuEd7ooxZdMt0xwwjGS2kS8_zzQIeH— extract done · /workspace/academy/media/16QTuEd7ooxZdMt0xwwjGS2kS8_zzQIeH/1NsMA8VEM4WsSxXJYF8vMtOGIRTkEtJrX— extract done · /workspace/academy/media/1NsMA8VEM4WsSxXJYF8vMtOGIRTkEtJrX/1YtRnm0oZuZU61QOPrx_px3kyI6rBHu1m— extract done · /workspace/academy/media/1YtRnm0oZuZU61QOPrx_px3kyI6rBHu1m/1YShJLeA6VcYDIfJsFit-ZmqXOzP5e9SF— extract done · /workspace/academy/media/1YShJLeA6VcYDIfJsFit-ZmqXOzP5e9SF/1wi7HLmtCIXXWh1Zxp9nefscUK9vEH9Q3— extract done · /workspace/academy/media/1wi7HLmtCIXXWh1Zxp9nefscUK9vEH9Q3/1J5BIWys0NPmynFRivTi5luS_cKy9wOe8— extract done · /workspace/academy/media/1J5BIWys0NPmynFRivTi5luS_cKy9wOe8/1_7hIgnqAOXn_HhFktNgPf08u3YvnNGRe— extract done · /workspace/academy/media/1_7hIgnqAOXn_HhFktNgPf08u3YvnNGRe/1fgJPc6oUZYJIF8GVG_C_tyHupM7Eb498— extract done · /workspace/academy/media/1fgJPc6oUZYJIF8GVG_C_tyHupM7Eb498/1-0a1HI9ek-H_ECyR15w2sC1KQuGfBglO— extract done · /workspace/academy/media/1-0a1HI9ek-H_ECyR15w2sC1KQuGfBglO/1Cr_IFnOdxJlo_d7T-XyFgM2WFnq-sNht— extract done · /workspace/academy/media/1Cr_IFnOdxJlo_d7T-XyFgM2WFnq-sNht/1e16yBEHK4SgoJRVUMcFLSst6SiGqfKIT— extract done · /workspace/academy/media/1e16yBEHK4SgoJRVUMcFLSst6SiGqfKIT/1v3fylcqSbqcKYwzDtzJzu4uopu5yMpmr— extract done · /workspace/academy/media/1v3fylcqSbqcKYwzDtzJzu4uopu5yMpmr/1FmtlXQ5x0jxn5pbEyq5pcssXoeOFBca8— extract done · /workspace/academy/media/1FmtlXQ5x0jxn5pbEyq5pcssXoeOFBca8/1tldJnvftqJYMDmCLHGat0uByvDfhoU7U— extract done · /workspace/academy/media/1tldJnvftqJYMDmCLHGat0uByvDfhoU7U/1wv2EJUcCOHzGTjxndSCS1CiUSTDgkg91— extract done · /workspace/academy/media/1wv2EJUcCOHzGTjxndSCS1CiUSTDgkg91/1kZTB5sX6PHkRB6Te4CnlqnLIdEW-cPf7— extract done · /workspace/academy/media/1kZTB5sX6PHkRB6Te4CnlqnLIdEW-cPf7/1akd743gsvmZsmFE2i6lKOefXd6SMJNIJ— extract done · /workspace/academy/media/1akd743gsvmZsmFE2i6lKOefXd6SMJNIJ/1_eH0OVRmYQ43Ajc2n8GVV6O-ebNiA765— extract done · /workspace/academy/media/1_eH0OVRmYQ43Ajc2n8GVV6O-ebNiA765/1w9bRzmOVjvsB5VzRY2Z0pCo7EloWgZ9Z— extract done · /workspace/academy/media/1w9bRzmOVjvsB5VzRY2Z0pCo7EloWgZ9Z/1BpPsF5aQQqz24Y5x7DjGmDyHXRyaemjm— extract done · /workspace/academy/media/1BpPsF5aQQqz24Y5x7DjGmDyHXRyaemjm/1un3f9GJqVHfY4aI6YtpB5xia50m4RITY— extract done · /workspace/academy/media/1un3f9GJqVHfY4aI6YtpB5xia50m4RITY/1PQM_c4fKzW3L6fcFBEzMXNxHm-bAnqd4— extract done · /workspace/academy/media/1PQM_c4fKzW3L6fcFBEzMXNxHm-bAnqd4/1_H-pQSETspmHSqJd2s2EADQjAZXGRCEL— extract done · /workspace/academy/media/1_H-pQSETspmHSqJd2s2EADQjAZXGRCEL/1-sJdO8NShfttY1SYd9mshWqRcSzzIU3P— extract done · /workspace/academy/media/1-sJdO8NShfttY1SYd9mshWqRcSzzIU3P/1RuOUVvad7Nb8lgtvaUwwJd_B9qlLM_ao— extract done · /workspace/academy/media/1RuOUVvad7Nb8lgtvaUwwJd_B9qlLM_ao/1EsWYJIj5iaMTw_QSfof1mgi7avfkefLZ— extract done · /workspace/academy/media/1EsWYJIj5iaMTw_QSfof1mgi7avfkefLZ/1NZh6XZm5O3YkTyJAnfdXU8XqeD8DlkW8— extract done · /workspace/academy/media/1NZh6XZm5O3YkTyJAnfdXU8XqeD8DlkW8/1d95k8kr5SqHkEpd1bdI4vV-FjyHluA1s— extract done · /workspace/academy/media/1d95k8kr5SqHkEpd1bdI4vV-FjyHluA1s/1GPIpE2H35BV2GNGKoNjL_v1-RmFKE_an— extract done · /workspace/academy/media/1GPIpE2H35BV2GNGKoNjL_v1-RmFKE_an/1FxHxBIAMWxQHq_Q_9lESAceMhMCADXaI— extract done · /workspace/academy/media/1FxHxBIAMWxQHq_Q_9lESAceMhMCADXaI/1OxQD8EF9fnTkYSF_dcGFZMRzJmXMeYXS— extract done · /workspace/academy/media/1OxQD8EF9fnTkYSF_dcGFZMRzJmXMeYXS/1-BoNYyR32TS-lvh8sfRQ1aZPyITVmvx9— extract done · /workspace/academy/media/1-BoNYyR32TS-lvh8sfRQ1aZPyITVmvx9/15kQcpettXHn6ZETHIHYLx_pQOKvFNcHg— extract done · /workspace/academy/media/15kQcpettXHn6ZETHIHYLx_pQOKvFNcHg/10tM9njbdKSe8UA-9lULk2etWNIQE-LzS— extract done · /workspace/academy/media/10tM9njbdKSe8UA-9lULk2etWNIQE-LzS/1iP-6AwG_IESR4O2F5iDjO1DMDfJE2Vuc— extract done · /workspace/academy/media/1iP-6AwG_IESR4O2F5iDjO1DMDfJE2Vuc/1HgOOYjjXIriRudRHK_X6-rc7tCUDI9wo— extract done · /workspace/academy/media/1HgOOYjjXIriRudRHK_X6-rc7tCUDI9wo/1mq9rrb9xAL361FiS8RUzm_ZFxg28qbd9— extract done · /workspace/academy/media/1mq9rrb9xAL361FiS8RUzm_ZFxg28qbd9/1aw_HUY6rNzVDCI64-SRN_VS443OLNc9Y— extract done · /workspace/academy/media/1aw_HUY6rNzVDCI64-SRN_VS443OLNc9Y/1HdOjmOSb0VtZ3XbgT0PAT9Tu8vFhZK8E— extract done · /workspace/academy/media/1HdOjmOSb0VtZ3XbgT0PAT9Tu8vFhZK8E/1J7PgfMq4YWXbMhE_G8cSSMr02EsvvegQ— extract done · /workspace/academy/media/1J7PgfMq4YWXbMhE_G8cSSMr02EsvvegQ/1cLTzGtrXZ3x7Jw6n8n9L46Odwx--leeK— extract done · /workspace/academy/media/1cLTzGtrXZ3x7Jw6n8n9L46Odwx--leeK/1lJAym1cMTel3NVXv5wyy6Pn36g3fgqj8— extract done · /workspace/academy/media/1lJAym1cMTel3NVXv5wyy6Pn36g3fgqj8/1cipmYj3rb2p_5SruLC3HQwtKCwdO2pGz— extract done · /workspace/academy/media/1cipmYj3rb2p_5SruLC3HQwtKCwdO2pGz/10WQZyego1GqNmaG-MfTD2AbhtzjKmp-n— extract done · /workspace/academy/media/10WQZyego1GqNmaG-MfTD2AbhtzjKmp-n/1ke6nfQUjvmKfAXLZwJRtQ-XNJF5z-JM6— extract done · /workspace/academy/media/1ke6nfQUjvmKfAXLZwJRtQ-XNJF5z-JM6/1HcLApKaZ0tJBarvx-CxeMWmr76AjD8-t— extract done · /workspace/academy/media/1HcLApKaZ0tJBarvx-CxeMWmr76AjD8-t/1TYyr5zqeNW4dpl-tAjkPH_m1Sl6MlYPb— extract done · /workspace/academy/media/1TYyr5zqeNW4dpl-tAjkPH_m1Sl6MlYPb/1gMAT_JU7UdwCre5_MwfLg0vkkVLJM66t— extract done · /workspace/academy/media/1gMAT_JU7UdwCre5_MwfLg0vkkVLJM66t/1h9eOf9x90XO2u3ughaGH6yngHLEEweFO— extract done · /workspace/academy/media/1h9eOf9x90XO2u3ughaGH6yngHLEEweFO/1nh6Bp_Mtkc4w2r5xhd33R_uwiU7-zgiV— extract done · /workspace/academy/media/1nh6Bp_Mtkc4w2r5xhd33R_uwiU7-zgiV/- timestamp: 2026-08-21 SAST
- dest (do not write from this pass): T:\V\sources\academy\vest-online.md