

Vinyl Cutting Course - Online
Course
- source_url: https://ambitious.academy/course/vinyl-cutting-course
- dump Date: 2026-08-21 (academy.jsonl Last-Modified Fri, 21 Aug 2026 09:25:14 GMT; fetched_at_utc 2026-08-21T10:42:48Z = 12:42 SAST)
- export post_date: 2025-09-30 11:32:46
- post_author: 28
- post_status: publish
- post_excerpt: (empty)
- post_parent: 0
- comment_status: open
- comment_count: 2
- course_expire_enrollment: 0
- course_type: paid
- course_product_id: 0
- course_download_id: 0
- course_max_students: 0
- course_language: English
- course_difficulty_level: all_levels
- course_benefits: (empty)
- course_requirements: (empty)
- course_audience: (empty)
- course_materials: (empty)
- is_enabled_course_qa: 1
- is_enabled_course_announcements: 1
- course_certificate_id: 2471
- is_disabled_course_review: (empty)
- rcp_membership_levels: []
- course_enable_certificate: 1
- edd_price: 0
- regular_price: 0
- sale_price: 0
- course_duration: 7 hours, 0 minutes, 0 seconds (raw [7,0,0])
- course_intro_video kind: youtube
- course_intro_video raw: ["youtube","https:\/\/youtu.be\/UeWR3jaamjI?si=1yH5lIOsUvxCoGK7"]
- catalog Title: Vinyl Cutting Course - Online
- catalog url: https://ambitious.academy/course/vinyl-cutting-course
- content merge: export HTML and jsonl catalog text differ — academy.jsonl dump (2026-08-21) is newer than export post_date; both kept in full. Older export kept as history below; catalog kept as dump text.
Curriculum
Curriculum sections (from course_curriculum):
- section: Introduction
- section: Machines
- section: Software
- section: Workflows
- section: Material & Tools
- section: Applications
- section: Demo Project
- section: Bonus Things
Curriculum topics (id / name / type) in export order:
- id 23 · lesson · Introduction
- id 173 · lesson · About Academy
- id 72 · lesson · Certification and Setting Expectations
- id 43 · lesson · How To Follow Along
- id 24 · lesson · Machines-Overview
- id 38 · lesson · Stand Assembly
- id 4215 · quiz · Stand Assembly
- id 39 · lesson · Parts
- id 4220 · quiz · Parts
- id 40 · lesson · Operations
- id 4221 · quiz · Operation
- id 41 · lesson · Safety
- id 4223 · quiz · Safety
- id 42 · lesson · Controls
- id 4224 · quiz · Controls
- id 22 · lesson · Maintenance
- id 4225 · quiz · Maintenance
- id 411 · lesson · Homework - Machine
- id 25 · lesson · Machines-Conclusion
- id 26 · lesson · Software-Overview
- id 50 · lesson · VinylCut 5 - Setup
- id 4249 · quiz · Setup
- id 51 · lesson · User Interface - Part1
- id 4251 · quiz · UI Part 1
- id 52 · lesson · User Interface - Part2
- id 4252 · quiz · UI Part 2
- id 53 · lesson · Cutters
- id 4253 · quiz · Cutter
- id 54 · lesson · Projects
- id 4254 · quiz · Projects
- id 55 · lesson · Features
- id 4256 · quiz · Features
- id 56 · lesson · Understanding
- id 4257 · quiz · Understanding
- id 57 · lesson · Design Principles
- id 4258 · quiz · Design Principles
- id 412 · lesson · Homework - Software
- id 27 · lesson · Software-Conclusion
- id 28 · lesson · Workflows-Overview
- id 45 · lesson · Requirements
- id 4426 · quiz · Requirements
- id 46 · lesson · Setup
- id 4427 · quiz · Setup
- id 47 · lesson · Standard Cutting
- id 4428 · quiz · Standard Cutting
- id 48 · lesson · Contour Cutting
- id 4429 · quiz · Contour Cutting
- id 49 · lesson · Workflow Checklist
- id 413 · lesson · Homework - Workflows
- id 29 · lesson · Workflows-Conclusion
- id 30 · lesson · Materials-Overview
- id 59 · lesson · Material Types
- id 4430 · quiz · Material Types
- id 60 · lesson · Tool Types
- id 4431 · quiz · Tool Types
- id 414 · lesson · Homework - Materials
- id 31 · lesson · Materials-Conclusion
- id 32 · lesson · Application-Overview
- id 61 · lesson · Application Process
- id 4432 · quiz · Application Process
- id 70 · lesson · Application Checklist
- id 62 · lesson · Multicolored Vinyl Application
- id 63 · lesson · Vehicle Wrap Application
- id 64 · lesson · Vehicle Vinyl Application
- id 65 · lesson · Glass Application - Wet
- id 66 · lesson · Wall Application
- id 67 · lesson · Wall and Window Application
- id 68 · lesson · Wood Application
- id 69 · lesson · ABS Sheeting Application
- id 415 · lesson · Homework - Applications
- id 33 · lesson · Application-Conclusion
- id 34 · lesson · Demo-Overview
- id 416 · lesson · Demo Project
- id 35 · lesson · Demo-Conclusion
- id 36 · lesson · Bonus-Overview
- id 533 · lesson · Course Bonus Section
- id 71 · lesson · Course Review
- id 73 · lesson · Certification Reminder
- id 528 · lesson · Custom Cut Staring Point for Shapes
- id 37 · lesson · Course-Conclusion
Raw course_curriculum (export, kept in full):
[{"title":"Introduction","content":"","topics":[{"id":23,"name":"Introduction","type":"lesson"},{"id":173,"name":"About Academy","type":"lesson"},{"id":72,"name":"Certification and Setting Expectations","type":"lesson"},{"id":43,"name":"How To Follow Along","type":"lesson"}]},{"title":"Machines","content":"About vinyl cutting machines and how to correctly operate them.","topics":[{"id":24,"name":"Machines-Overview","type":"lesson"},{"id":38,"name":"Stand Assembly","type":"lesson"},{"id":4215,"name":"Stand Assembly","type":"quiz"},{"id":39,"name":"Parts","type":"lesson"},{"id":4220,"name":"Parts","type":"quiz"},{"id":40,"name":"Operations","type":"lesson"},{"id":4221,"name":"Operation","type":"quiz"},{"id":41,"name":"Safety","type":"lesson"},{"id":4223,"name":"Safety","type":"quiz"},{"id":42,"name":"Controls","type":"lesson"},{"id":4224,"name":"Controls","type":"quiz"},{"id":22,"name":"Maintenance","type":"lesson"},{"id":4225,"name":"Maintenance","type":"quiz"},{"id":411,"name":"Homework - Machine","type":"lesson"},{"id":25,"name":"Machines-Conclusion","type":"lesson"}]},{"title":"Software","content":"","topics":[{"id":26,"name":"Software-Overview","type":"lesson"},{"id":50,"name":"VinylCut 5 - Setup","type":"lesson"},{"id":4249,"name":"Setup","type":"quiz"},{"id":51,"name":"User Interface - Part1","type":"lesson"},{"id":4251,"name":"UI Part 1","type":"quiz"},{"id":52,"name":"User Interface - Part2","type":"lesson"},{"id":4252,"name":"UI Part 2","type":"quiz"},{"id":53,"name":"Cutters","type":"lesson"},{"id":4253,"name":"Cutter","type":"quiz"},{"id":54,"name":"Projects","type":"lesson"},{"id":4254,"name":"Projects","type":"quiz"},{"id":55,"name":"Features","type":"lesson"},{"id":4256,"name":"Features","type":"quiz"},{"id":56,"name":"Understanding","type":"lesson"},{"id":4257,"name":"Understanding","type":"quiz"},{"id":57,"name":"Design Principles","type":"lesson"},{"id":4258,"name":"Design Principles","type":"quiz"},{"id":412,"name":"Homework - Software","type":"lesson"},{"id":27,"name":"Software-Conclusion","type":"lesson"}]},{"title":"Workflows","content":"","topics":[{"id":28,"name":"Workflows-Overview","type":"lesson"},{"id":45,"name":"Requirements","type":"lesson"},{"id":4426,"name":"Requirements","type":"quiz"},{"id":46,"name":"Setup","type":"lesson"},{"id":4427,"name":"Setup","type":"quiz"},{"id":47,"name":"Standard Cutting","type":"lesson"},{"id":4428,"name":"Standard Cutting","type":"quiz"},{"id":48,"name":"Contour Cutting","type":"lesson"},{"id":4429,"name":"Contour Cutting","type":"quiz"},{"id":49,"name":"Workflow Checklist","type":"lesson"},{"id":413,"name":"Homework - Workflows","type":"lesson"},{"id":29,"name":"Workflows-Conclusion","type":"lesson"}]},{"title":"Material & Tools","content":"","topics":[{"id":30,"name":"Materials-Overview","type":"lesson"},{"id":59,"name":"Material Types","type":"lesson"},{"id":4430,"name":"Material Types","type":"quiz"},{"id":60,"name":"Tool Types","type":"lesson"},{"id":4431,"name":"Tool Types","type":"quiz"},{"id":414,"name":"Homework - Materials","type":"lesson"},{"id":31,"name":"Materials-Conclusion","type":"lesson"}]},{"title":"Applications","content":"","topics":[{"id":32,"name":"Application-Overview","type":"lesson"},{"id":61,"name":"Application Process","type":"lesson"},{"id":4432,"name":"Application Process","type":"quiz"},{"id":70,"name":"Application Checklist","type":"lesson"},{"name":"Application Example Videos","type":"sub-curriculum","id":3,"topics":[{"id":62,"name":"Multicolored Vinyl Application","type":"lesson"},{"id":63,"name":"Vehicle Wrap Application","type":"lesson"},{"id":64,"name":"Vehicle Vinyl Application","type":"lesson"},{"id":65,"name":"Glass Application - Wet","type":"lesson"},{"id":66,"name":"Wall Application","type":"lesson"},{"id":67,"name":"Wall and Window Application","type":"lesson"},{"id":68,"name":"Wood Application","type":"lesson"},{"id":69,"name":"ABS Sheeting Application","type":"lesson"}]},{"id":415,"name":"Homework - Applications","type":"lesson"},{"id":33,"name":"Application-Conclusion","type":"lesson"}]},{"title":"Demo Project","content":"","topics":[{"id":34,"name":"Demo-Overview","type":"lesson"},{"id":416,"name":"Demo Project","type":"lesson"},{"id":35,"name":"Demo-Conclusion","type":"lesson"}]},{"title":"Bonus Things","content":"","topics":[{"id":36,"name":"Bonus-Overview","type":"lesson"},{"id":533,"name":"Course Bonus Section","type":"lesson"},{"id":71,"name":"Course Review","type":"lesson"},{"id":73,"name":"Certification Reminder","type":"lesson"},{"id":528,"name":"Custom Cut Staring Point for Shapes","type":"lesson"},{"id":37,"name":"Course-Conclusion","type":"lesson"}]}]
Course content (academy.jsonl catalog)
dump Date 2026-08-21 (academy.jsonl Last-Modified Fri, 21 Aug 2026 09:25:14 GMT; fetched_at_utc 2026-08-21T10:42:48Z = 12:42 SAST). Public visit link is source_url (paywall).
Dive into the world of vinyl cutting and transform your creative ideas into professional-quality decals, signage and more. This course guides you step by step—from understanding the machine, designing in software to developing efficient workflows, selecting materials, and completing a real-world demo project. You’ll also gain insight into the vinyl cutting industry’s best practices, empowering you to turn a hobby into a business or level up your current production setup.
-
What You’ll Learn How to evaluate and operate vinyl cutting machines Key features of design and cutting software Streamlined workflows for design, cutting, weeding, and transfer Selection of vinyl types, tools, and accessories for different applications Hands-on experience through a start-to-finish demo project Industry insights -
Who This Course Is For Hobbyists who want to create custom decals, signage and more Small-business owners looking to add vinyl cutting services Craft instructors and makers seeking structured lesson plans Designers aiming to expand into physical product production Anyone curious about the vinyl cutting process from concept to finished piece -
Prerequisites A Vinyl Cutter Material Weeding Utensils (Available at Buythis.co.za) A basic familiarity with computers Interest in graphic design or hands-on crafting No prior vinyl cutting or software experience required - Certification
Important note : this course does not include the certification exam, but only preparation for the exam and industry level skills development.
-
If you would like to get Certification for the Vinyl Cutting Course, follow the link below.
Vinyl Cutting Course Exam .
Course content (export post_content)
History from export post_date 2025-09-30 11:32:46. Full HTML converted; nothing summarized.
Dive into the world of vinyl cutting and transform your creative ideas into professional-quality decals, signage and more. This course guides you step by step—from understanding the machine, designing in software to developing efficient workflows, selecting materials, and completing a real-world demo project. You’ll also gain insight into the vinyl cutting industry’s best practices, empowering you to turn a hobby into a business or level up your current production setup.
-
What You’ll Learn
- How to evaluate and operate vinyl cutting machines
- Key features of design and cutting software
- Streamlined workflows for design, cutting, weeding, and transfer
- Selection of vinyl types, tools, and accessories for different applications
- Hands-on experience through a start-to-finish demo project
- Industry insights
-
Who This Course Is For
- Hobbyists who want to create custom decals, signage and more
- Small-business owners looking to add vinyl cutting services
- Craft instructors and makers seeking structured lesson plans
- Designers aiming to expand into physical product production
- Anyone curious about the vinyl cutting process from concept to finished piece
-
Prerequisites
- A Vinyl Cutter & Material
- Weeding Utensils (Available at Buythis.co.za)
- A basic familiarity with computers
- Interest in graphic design or hands-on crafting
- No prior vinyl cutting or software experience required
-
Certification
Important note: this course does not include the certification exam, but only preparation for the exam and industry level skills development.
-
If you would like to get Certification for the Vinyl Cutting Course, follow the link below.
Lessons
Nest order. 59 lessons. Overlapping titles kept as separate lessons. HTML converted in full, not summarized.
1. Introduction
- title: Introduction
- status: publish
- author: 0
- is_previewable: 1
- video_duration: 0h 3m 17s (raw {"hours":0,"minutes":3,"seconds":17})
- video_source_type: embedded
- drive_file_id:
1D9bmY-A_IvJs1csSvE65jNbRjV91ZjPJ(source_ref; not a public link) - transcript pending / keyframes pending / presentation extract pending
- video_source_url: (Drive preview omitted as a public link; file id kept as source_ref)
(no lesson_content HTML in export — video-only or empty body; metadata above kept in full)
Drive extract
- file_id:
1D9bmY-A_IvJs1csSvE65jNbRjV91ZjPJ - filename: 01 - About.mp4
- kind: video
- local_path: /workspace/academy/media/1D9bmY-A_IvJs1csSvE65jNbRjV91ZjPJ/01 - About.mp4
- source_ref: drive
1D9bmY-A_IvJs1csSvE65jNbRjV91ZjPJ· content_length 239632365 · original https://drive.google.com/file/d/1D9bmY-A_IvJs1csSvE65jNbRjV91ZjPJ/view - extract_status: done
- caption_source: drive_timedtext
- duration_s: 196.440998
- keyframe_count: 21
Transcript
- Hi there guys, welcome you to our
- [00:00:02.550] Hi there guys, welcome you to our
- [00:00:02.560] Hi there guys, welcome you to our ambitious academy course. This one will
- [00:00:04.550] ambitious academy course. This one will
- [00:00:04.560] ambitious academy course. This one will be on vinyl cutting and the basic
- [00:00:06.950] be on vinyl cutting and the basic
- [00:00:06.960] be on vinyl cutting and the basic process. So I'm Yeshua and I'll be your
- [00:00:10.310] process. So I'm Yeshua and I'll be your
- [00:00:10.320] process. So I'm Yeshua and I'll be your lecturer and guide you through this
- [00:00:12.310] lecturer and guide you through this
- [00:00:12.320] lecturer and guide you through this course. So in this course we're going to
- [00:00:14.950] course. So in this course we're going to
- [00:00:14.960] course. So in this course we're going to dive into the world of vinyl cutting.
- [00:00:17.189] dive into the world of vinyl cutting.
- [00:00:17.199] dive into the world of vinyl cutting. We're going to see how to take your
- [00:00:18.710] We're going to see how to take your
- [00:00:18.720] We're going to see how to take your ideas and transform into professional
- [00:00:21.269] ideas and transform into professional
- [00:00:21.279] ideas and transform into professional vinyls, decals and more. Okay. Now when
- [00:00:24.550] vinyls, decals and more. Okay. Now when
- [00:00:24.560] vinyls, decals and more. Okay. Now when it comes to the actual content that
- [00:00:26.390] it comes to the actual content that
- [00:00:26.400] it comes to the actual content that we're going to be covering in this
- [00:00:27.349] we're going to be covering in this
- [00:00:27.359] we're going to be covering in this course. So we're going to be starting
- [00:00:28.630] course. So we're going to be starting
- [00:00:28.640] course. So we're going to be starting with machines. So how to operate them,
- [00:00:32.310] with machines. So how to operate them,
- [00:00:32.320] with machines. So how to operate them, what the parts are and so forth. Then we
- [00:00:34.870] what the parts are and so forth. Then we
- [00:00:34.880] what the parts are and so forth. Then we can go over to software like what is
- [00:00:37.030] can go over to software like what is
- [00:00:37.040] can go over to software like what is basic workflows that is important for
- [00:00:39.030] basic workflows that is important for
- [00:00:39.040] basic workflows that is important for that basic principles and basically just
- [00:00:41.990] that basic principles and basically just
- [00:00:42.000] that basic principles and basically just how to work the programs. After that,
- [00:00:44.470] how to work the programs. After that,
- [00:00:44.480] how to work the programs. After that, we're going to cut over to then the
- [00:00:46.310] we're going to cut over to then the
- [00:00:46.320] we're going to cut over to then the actual workflows. And this is going to
- [00:00:47.910] actual workflows. And this is going to
- [00:00:47.920] actual workflows. And this is going to combine some machine and software. And
- [00:00:52.150] combine some machine and software. And
- [00:00:52.160] combine some machine and software. And then depending depending also on what
- [00:00:54.069] then depending depending also on what
- [00:00:54.079] then depending depending also on what you want to achieve like in the
- [00:00:56.150] you want to achieve like in the
- [00:00:56.160] you want to achieve like in the industry, the workflows are going to
- [00:00:57.510] industry, the workflows are going to
- [00:00:57.520] industry, the workflows are going to vary a bit. We're not going to cover
- [00:00:59.029] vary a bit. We're not going to cover
- [00:00:59.039] vary a bit. We're not going to cover everything out there because obviously
- [00:01:01.430] everything out there because obviously
- [00:01:01.440] everything out there because obviously there's just too many topics to cover,
- [00:01:03.029] there's just too many topics to cover,
- [00:01:03.039] there's just too many topics to cover, but we'll cover the core essential ones
- [00:01:05.509] but we'll cover the core essential ones
- [00:01:05.519] but we'll cover the core essential ones to get you up and started. Then after
- [00:01:08.469] to get you up and started. Then after
- [00:01:08.479] to get you up and started. Then after that, we're going to be looking at some
- [00:01:09.830] that, we're going to be looking at some
- [00:01:09.840] that, we're going to be looking at some materials and tools required. So, when
- [00:01:13.030] materials and tools required. So, when
- [00:01:13.040] materials and tools required. So, when you actually want to apply the vinyl and
- [00:01:14.870] you actually want to apply the vinyl and
- [00:01:14.880] you actually want to apply the vinyl and so forth. And then after we've looked at
- [00:01:17.030] so forth. And then after we've looked at
- [00:01:17.040] so forth. And then after we've looked at that, we're going to be looking at
- [00:01:18.710] that, we're going to be looking at
- [00:01:18.720] that, we're going to be looking at application. So, a few different
- [00:01:21.109] application. So, a few different
- [00:01:21.119] application. So, a few different applications. What's the difference?
- [00:01:23.270] applications. What's the difference?
- [00:01:23.280] applications. What's the difference? Maybe applying a vinyl to a wall versus
- [00:01:25.910] Maybe applying a vinyl to a wall versus
- [00:01:25.920] Maybe applying a vinyl to a wall versus a window. Just so you can get an idea of
- [00:01:29.429] a window. Just so you can get an idea of
- [00:01:29.439] a window. Just so you can get an idea of the actual um process required in that
- [00:01:32.550] the actual um process required in that
- [00:01:32.560] the actual um process required in that or the requirements. Then after that,
- [00:01:34.870] or the requirements. Then after that,
- [00:01:34.880] or the requirements. Then after that, like I mentioned, we're going to go into
- [00:01:35.990] like I mentioned, we're going to go into
- [00:01:36.000] like I mentioned, we're going to go into the demo project. And that is where you
- [00:01:38.230] the demo project. And that is where you
- [00:01:38.240] the demo project. And that is where you can kind of try follow along where we go
- [00:01:40.789] can kind of try follow along where we go
- [00:01:40.799] can kind of try follow along where we go from start to finish using everything
- [00:01:42.789] from start to finish using everything
- [00:01:42.799] from start to finish using everything we've learned. Okay. So, who is this
- [00:01:45.429] we've learned. Okay. So, who is this
- [00:01:45.439] we've learned. Okay. So, who is this course for? Well, I would say we start
- [00:01:47.429] course for? Well, I would say we start
- [00:01:47.439] course for? Well, I would say we start by hobbyists. Maybe you want to get into
- [00:01:48.950] by hobbyists. Maybe you want to get into
- [00:01:48.960] by hobbyists. Maybe you want to get into the industry. You want to make some, you
- [00:01:50.870] the industry. You want to make some, you
- [00:01:50.880] the industry. You want to make some, you know, cool little graphics and so forth.
- [00:01:52.950] know, cool little graphics and so forth.
- [00:01:52.960] know, cool little graphics and so forth. It's a good place to start. Then maybe
- [00:01:54.789] It's a good place to start. Then maybe
- [00:01:54.799] It's a good place to start. Then maybe you business and you want to offer a new
- [00:01:57.190] you business and you want to offer a new
- [00:01:57.200] you business and you want to offer a new service. Maybe uh a shop fitting uh for
- [00:02:00.870] service. Maybe uh a shop fitting uh for
- [00:02:00.880] service. Maybe uh a shop fitting uh for the windows or car wrappings or whatever
- [00:02:04.550] the windows or car wrappings or whatever
- [00:02:04.560] the windows or car wrappings or whatever like that. There's another service you
- [00:02:06.630] like that. There's another service you
- [00:02:06.640] like that. There's another service you can look into. And then we also have
- [00:02:09.109] can look into. And then we also have
- [00:02:09.119] can look into. And then we also have maybe you're a designer and you want to
- [00:02:11.589] maybe you're a designer and you want to
- [00:02:11.599] maybe you're a designer and you want to start getting into the physical
- [00:02:13.110] start getting into the physical
- [00:02:13.120] start getting into the physical production of your things, then this is
- [00:02:14.949] production of your things, then this is
- [00:02:14.959] production of your things, then this is also a good one. So you can actually
- [00:02:16.470] also a good one. So you can actually
- [00:02:16.480] also a good one. So you can actually work from the design all the way to the
- [00:02:18.630] work from the design all the way to the
- [00:02:18.640] work from the design all the way to the product. And then overall I would say
- [00:02:21.110] product. And then overall I would say
- [00:02:21.120] product. And then overall I would say maybe just for anyone interested in the
- [00:02:23.350] maybe just for anyone interested in the
- [00:02:23.360] maybe just for anyone interested in the vinyl cutting industry and you want to
- [00:02:25.030] vinyl cutting industry and you want to
- [00:02:25.040] vinyl cutting industry and you want to understand it better then uh this course
- [00:02:26.869] understand it better then uh this course
- [00:02:26.879] understand it better then uh this course will definitely be for you. Okay. When
- [00:02:28.949] will definitely be for you. Okay. When
- [00:02:28.959] will definitely be for you. Okay. When it comes to the prerequisites, I would
- [00:02:31.110] it comes to the prerequisites, I would
- [00:02:31.120] it comes to the prerequisites, I would say there's three main ones that we need
- [00:02:33.990] say there's three main ones that we need
- [00:02:34.000] say there's three main ones that we need to cover. So the first one is ideally if
- [00:02:36.869] to cover. So the first one is ideally if
- [00:02:36.879] to cover. So the first one is ideally if you have a vinyl cutter with vinyl so
- [00:02:38.390] you have a vinyl cutter with vinyl so
- [00:02:38.400] you have a vinyl cutter with vinyl so you can actually follow along. It's
- [00:02:39.509] you can actually follow along. It's
- [00:02:39.519] you can actually follow along. It's going to be quite important. Then also
- [00:02:41.910] going to be quite important. Then also
- [00:02:41.920] going to be quite important. Then also some basic computer understanding or
- [00:02:44.790] some basic computer understanding or
- [00:02:44.800] some basic computer understanding or computer experience. It doesn't have to
- [00:02:46.470] computer experience. It doesn't have to
- [00:02:46.480] computer experience. It doesn't have to be advanced just you know enough so you
- [00:02:48.949] be advanced just you know enough so you
- [00:02:48.959] be advanced just you know enough so you can follow along. Then when it comes to
- [00:02:51.430] can follow along. Then when it comes to
- [00:02:51.440] can follow along. Then when it comes to the third one this is where um it helps
- [00:02:54.070] the third one this is where um it helps
- [00:02:54.080] the third one this is where um it helps to have interest in graphics design and
- [00:02:56.390] to have interest in graphics design and
- [00:02:56.400] to have interest in graphics design and maybe hands-on crafts. It will
- [00:02:57.750] maybe hands-on crafts. It will
- [00:02:57.760] maybe hands-on crafts. It will definitely be a bonus. And then uh you
- [00:03:01.110] definitely be a bonus. And then uh you
- [00:03:01.120] definitely be a bonus. And then uh you know when it comes to the actual vinyl
- [00:03:02.949] know when it comes to the actual vinyl
- [00:03:02.959] know when it comes to the actual vinyl cutters and the software, you don't have
- [00:03:04.229] cutters and the software, you don't have
- [00:03:04.239] cutters and the software, you don't have to worry too much because we're going to
- [00:03:05.589] to worry too much because we're going to
- [00:03:05.599] to worry too much because we're going to be covering that. But yeah, otherwise I
- [00:03:07.670] be covering that. But yeah, otherwise I
- [00:03:07.680] be covering that. But yeah, otherwise I hope you guys enjoy and then I'll catch
- [00:03:09.270] hope you guys enjoy and then I'll catch
- [00:03:09.280] hope you guys enjoy and then I'll catch you guys on the next video. Cheers.
Keyframes
- /workspace/academy/media/1D9bmY-A_IvJs1csSvE65jNbRjV91ZjPJ/keyframes/last.jpg
- /workspace/academy/media/1D9bmY-A_IvJs1csSvE65jNbRjV91ZjPJ/keyframes/t001.jpg
- /workspace/academy/media/1D9bmY-A_IvJs1csSvE65jNbRjV91ZjPJ/keyframes/t002.jpg
- /workspace/academy/media/1D9bmY-A_IvJs1csSvE65jNbRjV91ZjPJ/keyframes/t003.jpg
- /workspace/academy/media/1D9bmY-A_IvJs1csSvE65jNbRjV91ZjPJ/keyframes/t004.jpg
- /workspace/academy/media/1D9bmY-A_IvJs1csSvE65jNbRjV91ZjPJ/keyframes/t005.jpg
- /workspace/academy/media/1D9bmY-A_IvJs1csSvE65jNbRjV91ZjPJ/keyframes/t006.jpg
- /workspace/academy/media/1D9bmY-A_IvJs1csSvE65jNbRjV91ZjPJ/keyframes/t007.jpg
- /workspace/academy/media/1D9bmY-A_IvJs1csSvE65jNbRjV91ZjPJ/keyframes/t008.jpg
- /workspace/academy/media/1D9bmY-A_IvJs1csSvE65jNbRjV91ZjPJ/keyframes/t009.jpg
- /workspace/academy/media/1D9bmY-A_IvJs1csSvE65jNbRjV91ZjPJ/keyframes/t010.jpg
- /workspace/academy/media/1D9bmY-A_IvJs1csSvE65jNbRjV91ZjPJ/keyframes/t011.jpg
- /workspace/academy/media/1D9bmY-A_IvJs1csSvE65jNbRjV91ZjPJ/keyframes/t012.jpg
- /workspace/academy/media/1D9bmY-A_IvJs1csSvE65jNbRjV91ZjPJ/keyframes/t013.jpg
- /workspace/academy/media/1D9bmY-A_IvJs1csSvE65jNbRjV91ZjPJ/keyframes/t014.jpg
- /workspace/academy/media/1D9bmY-A_IvJs1csSvE65jNbRjV91ZjPJ/keyframes/t015.jpg
- /workspace/academy/media/1D9bmY-A_IvJs1csSvE65jNbRjV91ZjPJ/keyframes/t016.jpg
- /workspace/academy/media/1D9bmY-A_IvJs1csSvE65jNbRjV91ZjPJ/keyframes/t017.jpg
- /workspace/academy/media/1D9bmY-A_IvJs1csSvE65jNbRjV91ZjPJ/keyframes/t018.jpg
- /workspace/academy/media/1D9bmY-A_IvJs1csSvE65jNbRjV91ZjPJ/keyframes/t019.jpg
- /workspace/academy/media/1D9bmY-A_IvJs1csSvE65jNbRjV91ZjPJ/keyframes/t020.jpg
2. About Academy
- title: About Academy
- status: publish
- author: 0
- is_previewable: (empty)
- video_duration: 0h 0m 0s (raw {"hours":0,"minutes":0,"seconds":0})
- video_source_type: (empty)
About Ambitious Academy

Ambitious Academy is your gateway to the future of manufacturing.
We are an education facility dedicated to empowering individuals and business owners in the advanced machinery industry, with a primary focus on CNC machining.
Our courses are designed with a practical approach to bridge the gap between theoretical knowledge and real-world application, ensuring you gain the hands-on skills necessary to excel in today's competitive landscape.
Ready to Build Your Career?
| Detail | Information |
|---|---|
| Our Focus | CNC Machining, Advanced Machinery, & Industry 4.0 Skills |
| Training Location | State-of-the-art facility at 2 Makro Place, Sunnyrock, Germiston. And Online Courses |
| Contact Us | WhatsApp: 0680 777 777 | Email: info@ambitious.co.zamailto:info@ambitious.co.za |
Explore All Our Courses & Enrol Today Online-courses - Ambitious Academy
3. Certification and Setting Expectations
- title: Certification and Setting Expectations
- status: publish
- author: 0
- is_previewable: 1
- video_duration: 0h 0m 0s (raw {"hours":0,"minutes":0,"seconds":0})
- video_source_type: (empty)
**

**
Certification & Setting Expectations
**

**
** Important: Course Completion vs. Professional Certification**
Welcome to the Vinyl Cutting Course! We're thrilled to have you here.
Before you dive in, we want to clarify the goal of this training:
This course is designed to be your essential foundational training platform. It rigorously prepares you with the theoretical knowledge, software expertise (VinylCut 5), workflow proficiency, and practical skills necessary to succeed in the vinyl cutting industry.
However, this course itself does not grant a professional industry certification.
Instead, our comprehensive curriculum and hands-on projects (like the Demo Project) are your preparation for a separate, external professional certification exam. You will be fully equipped to pass that exam after completing our course, but you must register and complete the external test to receive your official credentials.
We are focused on providing you with the practical expertise needed to earn that industry-recognized certification!
4. How To Follow Along
- title: How To Follow Along
- status: publish
- author: 0
- is_previewable: 1
- video_duration: 0h 0m 0s (raw {"hours":0,"minutes":0,"seconds":0})
- video_source_type: (empty)
In this section we will be looking at some important things for a student to bear in mind throughout the course.
Progression
- If it is your first time doing the course, we would recommend that you follow along from start to finish without skipping content.
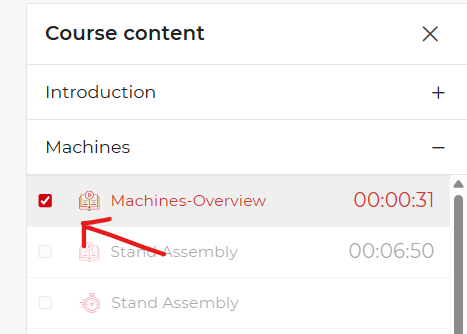
- If you have completed a lesson and it was not automatically marked as complete, you will have to mark it manually as completed.

Quizzes
- After important lessons we have added quizzes, these will help you better retain the lessons learned within that topic.
- The quizzes have no limit in regard to the number of attempts.
Q&A
- If you have any questions that need answers, please leave them below each lesson in the Q&A section.
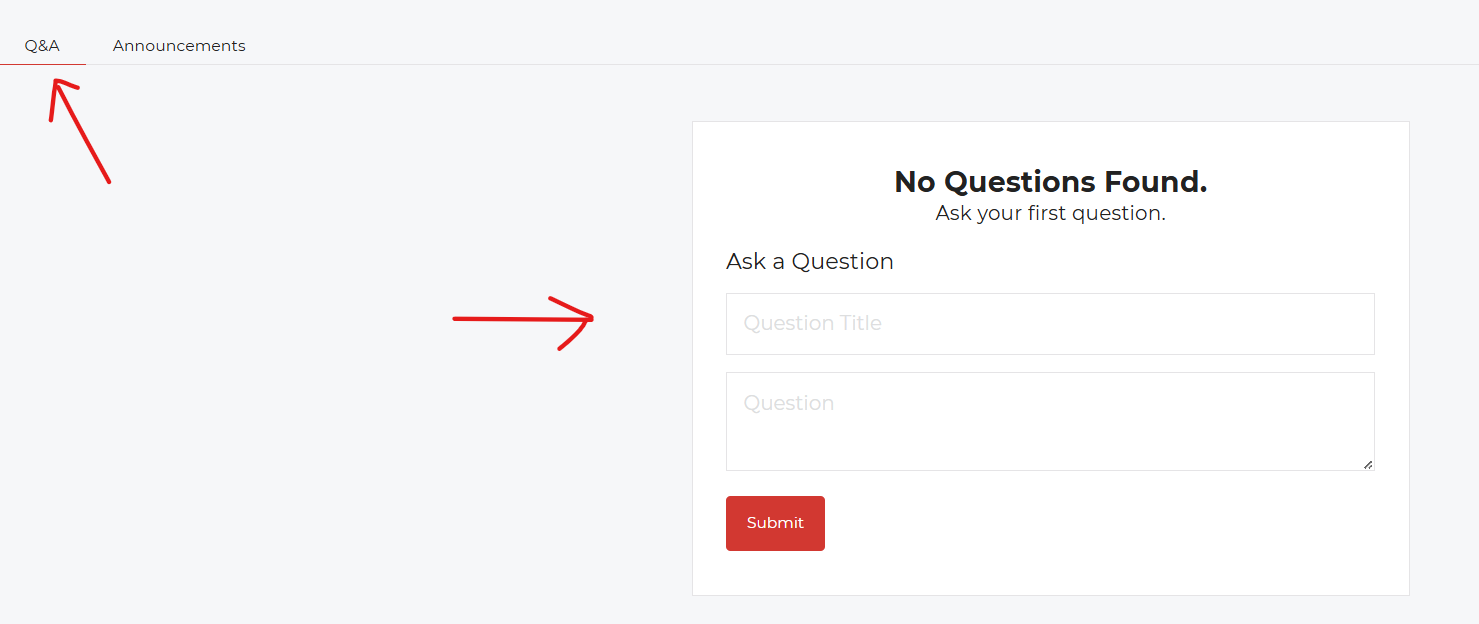
- Keep questions relevant to the lesson at hand.
- Before leaving a question, ensure that a similar question has not been asked and answered already.
Practise
- Theory without practice is not as effective as practising what you've learned.
- The more you practise what has been shown in these lessons, the more value this course will have for you.
Bonus Things
- At the end of the course we have a section called Bonus Things; this section will be used to add any content and lessons that we did not cover throughout the course.
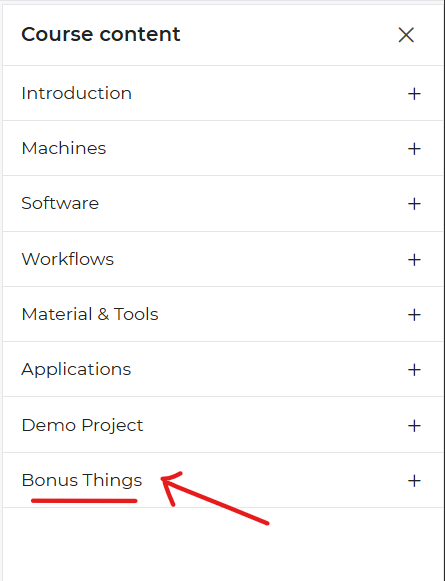
- This section will also grow overtime, so make sure to come and look for updates from time to time.
- If you have any suggestions for content to cover on Vinyl Cutting, feel free to leave your suggestions within the Q&A section for the Bonus Things.
5. Machines-Overview
- title: Machines-Overview
- status: publish
- author: 0
- is_previewable: (empty)
- video_duration: 0h 0m 31s (raw {"hours":0,"minutes":0,"seconds":31})
- video_source_type: embedded
- drive_file_id:
1xdNqPjBBRpM8a2ur6rS7YNmSO17VJ9k5(source_ref; not a public link) - transcript pending / keyframes pending / presentation extract pending
- video_source_url: (Drive preview omitted as a public link; file id kept as source_ref)
Overview of the machines section of the course.
Drive extract
- file_id:
1xdNqPjBBRpM8a2ur6rS7YNmSO17VJ9k5 - filename: 02 - Machines Intro.mp4
- kind: video
- local_path: /workspace/academy/media/1xdNqPjBBRpM8a2ur6rS7YNmSO17VJ9k5/02 - Machines Intro.mp4
- source_ref: drive
1xdNqPjBBRpM8a2ur6rS7YNmSO17VJ9k5· content_length 35501422 · original https://drive.google.com/file/d/1xdNqPjBBRpM8a2ur6rS7YNmSO17VJ9k5/view - extract_status: done
- caption_source: drive_timedtext
- duration_s: 31.3
- keyframe_count: 4
Transcript
- Howdy guys. Welcome to this first
- [00:00:01.829] Howdy guys. Welcome to this first
- [00:00:01.839] Howdy guys. Welcome to this first section of the course which we'll be
- [00:00:03.990] section of the course which we'll be
- [00:00:04.000] section of the course which we'll be covering the actual machines or the
- [00:00:06.150] covering the actual machines or the
- [00:00:06.160] covering the actual machines or the vinyl cutters as we say it. So in this
- [00:00:08.950] vinyl cutters as we say it. So in this
- [00:00:08.960] vinyl cutters as we say it. So in this section we're going to be looking at
- [00:00:10.230] section we're going to be looking at
- [00:00:10.240] section we're going to be looking at like basic assembly part names also
- [00:00:13.509] like basic assembly part names also
- [00:00:13.519] like basic assembly part names also safety what's good safety precautions.
- [00:00:15.910] safety what's good safety precautions.
- [00:00:15.920] safety what's good safety precautions. Then we're going to go over to some
- [00:00:17.269] Then we're going to go over to some
- [00:00:17.279] Then we're going to go over to some controls some basic operations of the
- [00:00:19.750] controls some basic operations of the
- [00:00:19.760] controls some basic operations of the actual machine and then also some good
- [00:00:22.470] actual machine and then also some good
- [00:00:22.480] actual machine and then also some good maintenance practices. But yeah
- [00:00:24.790] maintenance practices. But yeah
- [00:00:24.800] maintenance practices. But yeah otherwise I hope you guys enjoy this
- [00:00:26.470] otherwise I hope you guys enjoy this
- [00:00:26.480] otherwise I hope you guys enjoy this section.
Keyframes
- /workspace/academy/media/1xdNqPjBBRpM8a2ur6rS7YNmSO17VJ9k5/keyframes/last.jpg
- /workspace/academy/media/1xdNqPjBBRpM8a2ur6rS7YNmSO17VJ9k5/keyframes/t001.jpg
- /workspace/academy/media/1xdNqPjBBRpM8a2ur6rS7YNmSO17VJ9k5/keyframes/t002.jpg
- /workspace/academy/media/1xdNqPjBBRpM8a2ur6rS7YNmSO17VJ9k5/keyframes/t003.jpg
6. Stand Assembly
- title: Stand Assembly
- status: publish
- author: 0
- is_previewable: (empty)
- video_duration: 0h 6m 50s (raw {"hours":0,"minutes":6,"seconds":50})
- video_source_type: embedded
- drive_file_id:
1zRle_W_EMEp51CV3fupxTjxSWIdo5yaO(source_ref; not a public link) - transcript pending / keyframes pending / presentation extract pending
- video_source_url: (Drive preview omitted as a public link; file id kept as source_ref)
In this video we will be looking at how to assemble a vinyl cutter stand.
- quizzes_following_this_lesson: 1 (full text in Quizzes)
- Stand Assembly (6 questions)
Drive extract
- file_id:
1zRle_W_EMEp51CV3fupxTjxSWIdo5yaO - filename: 01 - MA - Stand.mp4
- kind: video
- local_path: /workspace/academy/media/1zRle_W_EMEp51CV3fupxTjxSWIdo5yaO/01 - MA - Stand.mp4
- source_ref: drive
1zRle_W_EMEp51CV3fupxTjxSWIdo5yaO· content_length 164428230 · original https://drive.google.com/file/d/1zRle_W_EMEp51CV3fupxTjxSWIdo5yaO/view - extract_status: done
- caption_source: drive_timedtext
- duration_s: 410.877007
- keyframe_count: 24
Transcript
- Howdy guys. This is Sheshwanal from
- [00:00:03.110] Howdy guys. This is Sheshwanal from
- [00:00:03.120] Howdy guys. This is Sheshwanal from Ambitious Academy and uh in today's
- [00:00:06.390] Ambitious Academy and uh in today's
- [00:00:06.400] Ambitious Academy and uh in today's video we're going to be looking at the
- [00:00:08.629] video we're going to be looking at the
- [00:00:08.639] video we're going to be looking at the basic assembly of a stand for the vinyl
- [00:00:10.790] basic assembly of a stand for the vinyl
- [00:00:10.800] basic assembly of a stand for the vinyl cutter. Now keep in mind the process
- [00:00:13.030] cutter. Now keep in mind the process
- [00:00:13.040] cutter. Now keep in mind the process might vary a bit depending on the
- [00:00:14.470] might vary a bit depending on the
- [00:00:14.480] might vary a bit depending on the machine you've got but overall uh the
- [00:00:17.349] machine you've got but overall uh the
- [00:00:17.359] machine you've got but overall uh the process should be very similar. Should
- [00:00:19.109] process should be very similar. Should
- [00:00:19.119] process should be very similar. Should give you a general idea of how to do it.
- [00:00:22.150] give you a general idea of how to do it.
- [00:00:22.160] give you a general idea of how to do it. Okay. So I would say we start off by
- [00:00:24.150] Okay. So I would say we start off by
- [00:00:24.160] Okay. So I would say we start off by names. It's always good to identify
- [00:00:26.070] names. It's always good to identify
- [00:00:26.080] names. It's always good to identify things before we carry on. So, first of
- [00:00:28.710] things before we carry on. So, first of
- [00:00:28.720] things before we carry on. So, first of all, we have the feet here as you can
- [00:00:30.790] all, we have the feet here as you can
- [00:00:30.800] all, we have the feet here as you can see. Then we've got the legs. Now,
- [00:00:34.310] see. Then we've got the legs. Now,
- [00:00:34.320] see. Then we've got the legs. Now, obviously, these two is going to be the
- [00:00:36.389] obviously, these two is going to be the
- [00:00:36.399] obviously, these two is going to be the one of the core foundations of your
- [00:00:38.549] one of the core foundations of your
- [00:00:38.559] one of the core foundations of your machine. So, the feet is for stability.
- [00:00:41.430] machine. So, the feet is for stability.
- [00:00:41.440] machine. So, the feet is for stability. The legs you're going to be able to use
- [00:00:43.030] The legs you're going to be able to use
- [00:00:43.040] The legs you're going to be able to use to tie extra um arms onto it and stuff
- [00:00:46.470] to tie extra um arms onto it and stuff
- [00:00:46.480] to tie extra um arms onto it and stuff like that. Different attachments. Then
- [00:00:48.549] like that. Different attachments. Then
- [00:00:48.559] like that. Different attachments. Then also what we have here next to that is
- [00:00:50.709] also what we have here next to that is
- [00:00:50.719] also what we have here next to that is we have the actual crosssection. This is
- [00:00:53.350] we have the actual crosssection. This is
- [00:00:53.360] we have the actual crosssection. This is going to keep the two legs together once
- [00:00:55.189] going to keep the two legs together once
- [00:00:55.199] going to keep the two legs together once they're assembled and stable. cut the
- [00:00:57.510] they're assembled and stable. cut the
- [00:00:57.520] they're assembled and stable. cut the attachment arm or the roller attachment.
- [00:01:00.229] attachment arm or the roller attachment.
- [00:01:00.239] attachment arm or the roller attachment. Then we have the rollers. This will be
- [00:01:02.069] Then we have the rollers. This will be
- [00:01:02.079] Then we have the rollers. This will be for the material um to guide it and keep
- [00:01:05.670] for the material um to guide it and keep
- [00:01:05.680] for the material um to guide it and keep it stable throughout the cutting
- [00:01:07.990] it stable throughout the cutting
- [00:01:08.000] it stable throughout the cutting process. Then we've got the base plate
- [00:01:10.789] process. Then we've got the base plate
- [00:01:10.799] process. Then we've got the base plate and these ones will be used to keep the
- [00:01:13.030] and these ones will be used to keep the
- [00:01:13.040] and these ones will be used to keep the actual machine attached to the legs or
- [00:01:15.990] actual machine attached to the legs or
- [00:01:16.000] actual machine attached to the legs or to the stand should I say. And then we
- [00:01:19.429] to the stand should I say. And then we
- [00:01:19.439] to the stand should I say. And then we obviously have the vinyl cutter. And
- [00:01:22.149] obviously have the vinyl cutter. And
- [00:01:22.159] obviously have the vinyl cutter. And then we also have this cool little box
- [00:01:24.630] then we also have this cool little box
- [00:01:24.640] then we also have this cool little box with um yeah, different things that
- [00:01:26.710] with um yeah, different things that
- [00:01:26.720] with um yeah, different things that comes with. So, let's have a look
- [00:01:27.910] comes with. So, let's have a look
- [00:01:27.920] comes with. So, let's have a look inside. Now, like I said, keep in mind
- [00:01:29.830] inside. Now, like I said, keep in mind
- [00:01:29.840] inside. Now, like I said, keep in mind this might vary depending on the machine
- [00:01:31.510] this might vary depending on the machine
- [00:01:31.520] this might vary depending on the machine you've got, but uh this should give you
- [00:01:33.830] you've got, but uh this should give you
- [00:01:33.840] you've got, but uh this should give you a general idea.
- [00:01:36.230] a general idea.
- [00:01:36.240] a general idea. Okay. Now, inside the box, we'll start
- [00:01:38.469] Okay. Now, inside the box, we'll start
- [00:01:38.479] Okay. Now, inside the box, we'll start off with a squeegee. Now, this is very
- [00:01:40.950] off with a squeegee. Now, this is very
- [00:01:40.960] off with a squeegee. Now, this is very handy if you want to actually apply the
- [00:01:43.270] handy if you want to actually apply the
- [00:01:43.280] handy if you want to actually apply the vinyl application. So, this will help
- [00:01:45.910] vinyl application. So, this will help
- [00:01:45.920] vinyl application. So, this will help for um taking out air bubbles and so
- [00:01:48.310] for um taking out air bubbles and so
- [00:01:48.320] for um taking out air bubbles and so forth. But don't worry, we'll cover all
- [00:01:49.749] forth. But don't worry, we'll cover all
- [00:01:49.759] forth. But don't worry, we'll cover all of this later in more depth. We're just
- [00:01:52.550] of this later in more depth. We're just
- [00:01:52.560] of this later in more depth. We're just looking at names now mostly and a basic
- [00:01:55.670] looking at names now mostly and a basic
- [00:01:55.680] looking at names now mostly and a basic idea of their function.
- [00:01:58.469] idea of their function.
- [00:01:58.479] idea of their function. Then uh we also have a level adjusters.
- [00:02:01.429] Then uh we also have a level adjusters.
- [00:02:01.439] Then uh we also have a level adjusters. This is very important to make sure your
- [00:02:03.109] This is very important to make sure your
- [00:02:03.119] This is very important to make sure your machine is level cuz obviously we don't
- [00:02:05.190] machine is level cuz obviously we don't
- [00:02:05.200] machine is level cuz obviously we don't all have perfectly leveled floors. So
- [00:02:07.670] all have perfectly leveled floors. So
- [00:02:07.680] all have perfectly leveled floors. So this will help the machine um not get
- [00:02:10.229] this will help the machine um not get
- [00:02:10.239] this will help the machine um not get too much vibration or run around and
- [00:02:12.550] too much vibration or run around and
- [00:02:12.560] too much vibration or run around and stuff like that while it's busy cutting.
- [00:02:15.270] stuff like that while it's busy cutting.
- [00:02:15.280] stuff like that while it's busy cutting. Then we also have some cutting blades
- [00:02:17.910] Then we also have some cutting blades
- [00:02:17.920] Then we also have some cutting blades that will come with a actual cutter.
- [00:02:21.030] that will come with a actual cutter.
- [00:02:21.040] that will come with a actual cutter. We've got a plotter pen which is very
- [00:02:23.670] We've got a plotter pen which is very
- [00:02:23.680] We've got a plotter pen which is very handy if you want to maybe map out
- [00:02:26.150] handy if you want to maybe map out
- [00:02:26.160] handy if you want to maybe map out technical drawings or something like
- [00:02:28.070] technical drawings or something like
- [00:02:28.080] technical drawings or something like that. Some even use it as like a test.
- [00:02:31.030] that. Some even use it as like a test.
- [00:02:31.040] that. Some even use it as like a test. So you go on the back of the material,
- [00:02:32.710] So you go on the back of the material,
- [00:02:32.720] So you go on the back of the material, you do a little plot of your actual um
- [00:02:35.750] you do a little plot of your actual um
- [00:02:35.760] you do a little plot of your actual um cut. So to if you want to ensure maybe
- [00:02:37.910] cut. So to if you want to ensure maybe
- [00:02:37.920] cut. So to if you want to ensure maybe your measurements are correct or
- [00:02:39.670] your measurements are correct or
- [00:02:39.680] your measurements are correct or anything like that, then it comes in
- [00:02:42.070] anything like that, then it comes in
- [00:02:42.080] anything like that, then it comes in quite handy. On top of that, we have our
- [00:02:45.350] quite handy. On top of that, we have our
- [00:02:45.360] quite handy. On top of that, we have our cables. So, we have a COM cable. This is
- [00:02:48.630] cables. So, we have a COM cable. This is
- [00:02:48.640] cables. So, we have a COM cable. This is a little bit more, I guess, old school.
- [00:02:51.030] a little bit more, I guess, old school.
- [00:02:51.040] a little bit more, I guess, old school. And then to the right of that, we have
- [00:02:52.630] And then to the right of that, we have
- [00:02:52.640] And then to the right of that, we have the USB cable or like the printer cable,
- [00:02:55.110] the USB cable or like the printer cable,
- [00:02:55.120] the USB cable or like the printer cable, which is quite common. That's mostly
- [00:02:57.990] which is quite common. That's mostly
- [00:02:58.000] which is quite common. That's mostly what we'll be using. Um, but yeah, some
- [00:03:01.030] what we'll be using. Um, but yeah, some
- [00:03:01.040] what we'll be using. Um, but yeah, some machines have different options, but
- [00:03:03.589] machines have different options, but
- [00:03:03.599] machines have different options, but this is the general uh common options we
- [00:03:07.110] this is the general uh common options we
- [00:03:07.120] this is the general uh common options we have. We also have a power cable to
- [00:03:10.070] have. We also have a power cable to
- [00:03:10.080] have. We also have a power cable to power it. And then we have the screws.
- [00:03:12.949] power it. And then we have the screws.
- [00:03:12.959] power it. And then we have the screws. Now the screws are going to be very
- [00:03:14.229] Now the screws are going to be very
- [00:03:14.239] Now the screws are going to be very important for the actual assembly as you
- [00:03:16.710] important for the actual assembly as you
- [00:03:16.720] important for the actual assembly as you will see in a moment. Now next up we'll
- [00:03:19.990] will see in a moment. Now next up we'll
- [00:03:20.000] will see in a moment. Now next up we'll be looking at the assembly order. We'll
- [00:03:22.630] be looking at the assembly order. We'll
- [00:03:22.640] be looking at the assembly order. We'll start with getting some screws out.
- [00:03:24.550] start with getting some screws out.
- [00:03:24.560] start with getting some screws out. We're going to grab our feet and then we
- [00:03:27.030] We're going to grab our feet and then we
- [00:03:27.040] We're going to grab our feet and then we want to attach that to the actual legs.
- [00:03:29.589] want to attach that to the actual legs.
- [00:03:29.599] want to attach that to the actual legs. Now you will see that there's different
- [00:03:31.509] Now you will see that there's different
- [00:03:31.519] Now you will see that there's different lengths of screws. We'll be going for
- [00:03:33.430] lengths of screws. We'll be going for
- [00:03:33.440] lengths of screws. We'll be going for some longer screws. Then we first hand
- [00:03:35.670] some longer screws. Then we first hand
- [00:03:35.680] some longer screws. Then we first hand screw that and then afterwards you come
- [00:03:38.070] screw that and then afterwards you come
- [00:03:38.080] screw that and then afterwards you come in with a screwdriver. It just makes the
- [00:03:39.670] in with a screwdriver. It just makes the
- [00:03:39.680] in with a screwdriver. It just makes the alignment slightly easier. And to make
- [00:03:41.509] alignment slightly easier. And to make
- [00:03:41.519] alignment slightly easier. And to make sure you don't cross thread your actual
- [00:03:43.750] sure you don't cross thread your actual
- [00:03:43.760] sure you don't cross thread your actual screws, make sure you obviously do both
- [00:03:46.229] screws, make sure you obviously do both
- [00:03:46.239] screws, make sure you obviously do both of them. And then what you want to do is
- [00:03:47.910] of them. And then what you want to do is
- [00:03:47.920] of them. And then what you want to do is add your level adjusters. You'll see
- [00:03:50.630] add your level adjusters. You'll see
- [00:03:50.640] add your level adjusters. You'll see they simply screw in from the bottom. I
- [00:03:53.030] they simply screw in from the bottom. I
- [00:03:53.040] they simply screw in from the bottom. I would say just put them all at a similar
- [00:03:55.589] would say just put them all at a similar
- [00:03:55.599] would say just put them all at a similar level cuz we'll come to leveling later
- [00:03:58.070] level cuz we'll come to leveling later
- [00:03:58.080] level cuz we'll come to leveling later when it comes to the leveling process.
- [00:04:00.149] when it comes to the leveling process.
- [00:04:00.159] when it comes to the leveling process. Okay. Then next up, what we want to do
- [00:04:01.509] Okay. Then next up, what we want to do
- [00:04:01.519] Okay. Then next up, what we want to do is we want to actually add the roller
- [00:04:03.910] is we want to actually add the roller
- [00:04:03.920] is we want to actually add the roller attachments or the arm attachments. And
- [00:04:06.309] attachments or the arm attachments. And
- [00:04:06.319] attachments or the arm attachments. And this will be going or attaching to the
- [00:04:08.550] this will be going or attaching to the
- [00:04:08.560] this will be going or attaching to the actual legs. A key note, make sure that
- [00:04:11.509] actual legs. A key note, make sure that
- [00:04:11.519] actual legs. A key note, make sure that the actual cutaways are facing upwards
- [00:04:14.869] the actual cutaways are facing upwards
- [00:04:14.879] the actual cutaways are facing upwards and that they are both on both legs
- [00:04:17.430] and that they are both on both legs
- [00:04:17.440] and that they are both on both legs similar so that when the legs come
- [00:04:18.870] similar so that when the legs come
- [00:04:18.880] similar so that when the legs come attach that they will facing to the
- [00:04:21.189] attach that they will facing to the
- [00:04:21.199] attach that they will facing to the inside and the rollers can actually fit
- [00:04:23.350] inside and the rollers can actually fit
- [00:04:23.360] inside and the rollers can actually fit into those cutouts.
- [00:04:25.670] into those cutouts.
- [00:04:25.680] into those cutouts. And then uh also what you want to do is
- [00:04:27.510] And then uh also what you want to do is
- [00:04:27.520] And then uh also what you want to do is handtighten the screws. And then
- [00:04:29.189] handtighten the screws. And then
- [00:04:29.199] handtighten the screws. And then afterwards come in and tighten it. Then
- [00:04:31.590] afterwards come in and tighten it. Then
- [00:04:31.600] afterwards come in and tighten it. Then after we are done with attaching the arm
- [00:04:33.430] after we are done with attaching the arm
- [00:04:33.440] after we are done with attaching the arm attachments or the roller attachments,
- [00:04:34.710] attachments or the roller attachments,
- [00:04:34.720] attachments or the roller attachments, we want to add the base plates. Now,
- [00:04:36.469] we want to add the base plates. Now,
- [00:04:36.479] we want to add the base plates. Now, like I mentioned before, these will be
- [00:04:37.749] like I mentioned before, these will be
- [00:04:37.759] like I mentioned before, these will be used so that you can actually attach the
- [00:04:39.990] used so that you can actually attach the
- [00:04:40.000] used so that you can actually attach the vinyl cutter to the stand. You'll see
- [00:04:42.150] vinyl cutter to the stand. You'll see
- [00:04:42.160] vinyl cutter to the stand. You'll see we've got some flat screws or there
- [00:04:44.230] we've got some flat screws or there
- [00:04:44.240] we've got some flat screws or there should be screws with flat heads. And
- [00:04:46.070] should be screws with flat heads. And
- [00:04:46.080] should be screws with flat heads. And I'm not talking about a flat
- [00:04:47.189] I'm not talking about a flat
- [00:04:47.199] I'm not talking about a flat screwdriver, but like the head is flush.
- [00:04:49.590] screwdriver, but like the head is flush.
- [00:04:49.600] screwdriver, but like the head is flush. This is so it doesn't extrude out too
- [00:04:51.510] This is so it doesn't extrude out too
- [00:04:51.520] This is so it doesn't extrude out too far. So when you put the actual cutter
- [00:04:53.350] far. So when you put the actual cutter
- [00:04:53.360] far. So when you put the actual cutter on, it doesn't actually ride into the
- [00:04:55.510] on, it doesn't actually ride into the
- [00:04:55.520] on, it doesn't actually ride into the body and make it unstable. Now, when it
- [00:04:57.909] body and make it unstable. Now, when it
- [00:04:57.919] body and make it unstable. Now, when it comes to these, make sure also they face
- [00:04:59.749] comes to these, make sure also they face
- [00:04:59.759] comes to these, make sure also they face to the outside of the arm. Okay. Next
- [00:05:03.510] to the outside of the arm. Okay. Next
- [00:05:03.520] to the outside of the arm. Okay. Next up, what we want to do is bring some
- [00:05:05.189] up, what we want to do is bring some
- [00:05:05.199] up, what we want to do is bring some stability to these two arms. This is
- [00:05:07.350] stability to these two arms. This is
- [00:05:07.360] stability to these two arms. This is going to be our crosssection. It's
- [00:05:09.430] going to be our crosssection. It's
- [00:05:09.440] going to be our crosssection. It's probably one of the most important part
- [00:05:11.110] probably one of the most important part
- [00:05:11.120] probably one of the most important part to bring more stability to the overall
- [00:05:13.830] to bring more stability to the overall
- [00:05:13.840] to bring more stability to the overall structure. Now, this thing can be a bit
- [00:05:15.830] structure. Now, this thing can be a bit
- [00:05:15.840] structure. Now, this thing can be a bit tricky to put on seeing that um you know
- [00:05:18.310] tricky to put on seeing that um you know
- [00:05:18.320] tricky to put on seeing that um you know its length. Obviously, a bigger the
- [00:05:19.749] its length. Obviously, a bigger the
- [00:05:19.759] its length. Obviously, a bigger the cutter, the more tricky. The general
- [00:05:21.270] cutter, the more tricky. The general
- [00:05:21.280] cutter, the more tricky. The general rule is you can also just kind of align
- [00:05:23.510] rule is you can also just kind of align
- [00:05:23.520] rule is you can also just kind of align it and then you turn it into a form of
- [00:05:25.590] it and then you turn it into a form of
- [00:05:25.600] it and then you turn it into a form of T-pose and then afterwards you come in
- [00:05:27.670] T-pose and then afterwards you come in
- [00:05:27.680] T-pose and then afterwards you come in with a screwdriver. You will also notice
- [00:05:29.909] with a screwdriver. You will also notice
- [00:05:29.919] with a screwdriver. You will also notice that there's nice little lock washers on
- [00:05:32.469] that there's nice little lock washers on
- [00:05:32.479] that there's nice little lock washers on here and this will help. So after some
- [00:05:35.350] here and this will help. So after some
- [00:05:35.360] here and this will help. So after some vibration the actual stand will stay
- [00:05:39.189] vibration the actual stand will stay
- [00:05:39.199] vibration the actual stand will stay intact. Then once all of that is
- [00:05:41.430] intact. Then once all of that is
- [00:05:41.440] intact. Then once all of that is attached we want to add our rollers.
- [00:05:43.270] attached we want to add our rollers.
- [00:05:43.280] attached we want to add our rollers. This is pretty simple but keeping in
- [00:05:45.029] This is pretty simple but keeping in
- [00:05:45.039] This is pretty simple but keeping in mind your machine might only have one
- [00:05:46.390] mind your machine might only have one
- [00:05:46.400] mind your machine might only have one roller, two rollers depending on the
- [00:05:48.790] roller, two rollers depending on the
- [00:05:48.800] roller, two rollers depending on the size of it. In our case here, we've got
- [00:05:50.550] size of it. In our case here, we've got
- [00:05:50.560] size of it. In our case here, we've got two rollers. So, we actually want to
- [00:05:52.710] two rollers. So, we actually want to
- [00:05:52.720] two rollers. So, we actually want to leave a bit of a gap between the two
- [00:05:54.469] leave a bit of a gap between the two
- [00:05:54.479] leave a bit of a gap between the two rollers. We'll add one and then we add
- [00:05:56.950] rollers. We'll add one and then we add
- [00:05:56.960] rollers. We'll add one and then we add the other one with a bit of a gap. You
- [00:05:58.950] the other one with a bit of a gap. You
- [00:05:58.960] the other one with a bit of a gap. You can also test them out and see that roll
- [00:06:01.189] can also test them out and see that roll
- [00:06:01.199] can also test them out and see that roll quite freely. And like I said, for
- [00:06:02.950] quite freely. And like I said, for
- [00:06:02.960] quite freely. And like I said, for bigger jobs when you're using vinyl
- [00:06:04.629] bigger jobs when you're using vinyl
- [00:06:04.639] bigger jobs when you're using vinyl rolls, this is going to be very
- [00:06:06.469] rolls, this is going to be very
- [00:06:06.479] rolls, this is going to be very important to have a nice consistent um
- [00:06:08.950] important to have a nice consistent um
- [00:06:08.960] important to have a nice consistent um how can I say accuracy over long
- [00:06:10.629] how can I say accuracy over long
- [00:06:10.639] how can I say accuracy over long distances. Okay. So, the basic process,
- [00:06:13.590] distances. Okay. So, the basic process,
- [00:06:13.600] distances. Okay. So, the basic process, you want to flip your stand around and
- [00:06:15.990] you want to flip your stand around and
- [00:06:16.000] you want to flip your stand around and then come in from the back with the
- [00:06:17.749] then come in from the back with the
- [00:06:17.759] then come in from the back with the actual viner cutter. So you'll be
- [00:06:19.350] actual viner cutter. So you'll be
- [00:06:19.360] actual viner cutter. So you'll be picking that up, the display face and
- [00:06:21.909] picking that up, the display face and
- [00:06:21.919] picking that up, the display face and all of that facing away from you. And
- [00:06:23.990] all of that facing away from you. And
- [00:06:24.000] all of that facing away from you. And then you want to walk in from the roller
- [00:06:26.070] then you want to walk in from the roller
- [00:06:26.080] then you want to walk in from the roller side. Now, when it comes to these base
- [00:06:28.469] side. Now, when it comes to these base
- [00:06:28.479] side. Now, when it comes to these base plates, there is something to keep in
- [00:06:29.830] plates, there is something to keep in
- [00:06:29.840] plates, there is something to keep in mind. So what it comes down to is you
- [00:06:31.270] mind. So what it comes down to is you
- [00:06:31.280] mind. So what it comes down to is you don't want to use screws that's too long
- [00:06:32.710] don't want to use screws that's too long
- [00:06:32.720] don't want to use screws that's too long because if it goes right through, you
- [00:06:34.150] because if it goes right through, you
- [00:06:34.160] because if it goes right through, you can actually damage the motherboard. So
- [00:06:35.749] can actually damage the motherboard. So
- [00:06:35.759] can actually damage the motherboard. So I would say just stick to the default
- [00:06:37.749] I would say just stick to the default
- [00:06:37.759] I would say just stick to the default ones, the ones that come with a machine,
- [00:06:39.590] ones, the ones that come with a machine,
- [00:06:39.600] ones, the ones that come with a machine, shorter ones, and then you should be
- [00:06:41.189] shorter ones, and then you should be
- [00:06:41.199] shorter ones, and then you should be fine. Okay. Yeah. And otherwise, that is
- [00:06:43.990] fine. Okay. Yeah. And otherwise, that is
- [00:06:44.000] fine. Okay. Yeah. And otherwise, that is it on the assembly of the vinyl cutter
- [00:06:46.309] it on the assembly of the vinyl cutter
- [00:06:46.319] it on the assembly of the vinyl cutter stand. And yeah, thanks for watching.
- [00:06:49.350] stand. And yeah, thanks for watching.
- [00:06:49.360] stand. And yeah, thanks for watching. Catch you guys in the next one.
Keyframes
- /workspace/academy/media/1zRle_W_EMEp51CV3fupxTjxSWIdo5yaO/keyframes/last.jpg
- /workspace/academy/media/1zRle_W_EMEp51CV3fupxTjxSWIdo5yaO/keyframes/t002.jpg
- /workspace/academy/media/1zRle_W_EMEp51CV3fupxTjxSWIdo5yaO/keyframes/t004.jpg
- /workspace/academy/media/1zRle_W_EMEp51CV3fupxTjxSWIdo5yaO/keyframes/t005.jpg
- /workspace/academy/media/1zRle_W_EMEp51CV3fupxTjxSWIdo5yaO/keyframes/t007.jpg
- /workspace/academy/media/1zRle_W_EMEp51CV3fupxTjxSWIdo5yaO/keyframes/t009.jpg
- /workspace/academy/media/1zRle_W_EMEp51CV3fupxTjxSWIdo5yaO/keyframes/t011.jpg
- /workspace/academy/media/1zRle_W_EMEp51CV3fupxTjxSWIdo5yaO/keyframes/t012.jpg
- /workspace/academy/media/1zRle_W_EMEp51CV3fupxTjxSWIdo5yaO/keyframes/t014.jpg
- /workspace/academy/media/1zRle_W_EMEp51CV3fupxTjxSWIdo5yaO/keyframes/t016.jpg
- /workspace/academy/media/1zRle_W_EMEp51CV3fupxTjxSWIdo5yaO/keyframes/t018.jpg
- /workspace/academy/media/1zRle_W_EMEp51CV3fupxTjxSWIdo5yaO/keyframes/t020.jpg
- /workspace/academy/media/1zRle_W_EMEp51CV3fupxTjxSWIdo5yaO/keyframes/t021.jpg
- /workspace/academy/media/1zRle_W_EMEp51CV3fupxTjxSWIdo5yaO/keyframes/t023.jpg
- /workspace/academy/media/1zRle_W_EMEp51CV3fupxTjxSWIdo5yaO/keyframes/t025.jpg
- /workspace/academy/media/1zRle_W_EMEp51CV3fupxTjxSWIdo5yaO/keyframes/t027.jpg
- /workspace/academy/media/1zRle_W_EMEp51CV3fupxTjxSWIdo5yaO/keyframes/t029.jpg
- /workspace/academy/media/1zRle_W_EMEp51CV3fupxTjxSWIdo5yaO/keyframes/t030.jpg
- /workspace/academy/media/1zRle_W_EMEp51CV3fupxTjxSWIdo5yaO/keyframes/t032.jpg
- /workspace/academy/media/1zRle_W_EMEp51CV3fupxTjxSWIdo5yaO/keyframes/t034.jpg
- /workspace/academy/media/1zRle_W_EMEp51CV3fupxTjxSWIdo5yaO/keyframes/t036.jpg
- /workspace/academy/media/1zRle_W_EMEp51CV3fupxTjxSWIdo5yaO/keyframes/t037.jpg
- /workspace/academy/media/1zRle_W_EMEp51CV3fupxTjxSWIdo5yaO/keyframes/t039.jpg
- /workspace/academy/media/1zRle_W_EMEp51CV3fupxTjxSWIdo5yaO/keyframes/t041.jpg
7. Parts
- title: Parts
- status: publish
- author: 0
- is_previewable: (empty)
- video_duration: 0h 6m 24s (raw {"hours":0,"minutes":6,"seconds":24})
- video_source_type: embedded
- drive_file_id:
1bDurZXPoL5Q3QvWME2lbph0QSEyNdiLL(source_ref; not a public link) - transcript pending / keyframes pending / presentation extract pending
- video_source_url: (Drive preview omitted as a public link; file id kept as source_ref)
In this video we will be looking at the main parts of a vinyl cutter.
- quizzes_following_this_lesson: 1 (full text in Quizzes)
- Parts (2 questions)
Drive extract
- file_id:
1bDurZXPoL5Q3QvWME2lbph0QSEyNdiLL - filename: 02 - MA - Cutter.mp4
- kind: video
- local_path: /workspace/academy/media/1bDurZXPoL5Q3QvWME2lbph0QSEyNdiLL/02 - MA - Cutter.mp4
- source_ref: drive
1bDurZXPoL5Q3QvWME2lbph0QSEyNdiLL· content_length 209004543 · original https://drive.google.com/file/d/1bDurZXPoL5Q3QvWME2lbph0QSEyNdiLL/view - extract_status: done
- caption_source: drive_timedtext
- duration_s: 384.382993
- keyframe_count: 24
Transcript
- Howy guys. Today's video we're going to
- [00:00:02.790] Howy guys. Today's video we're going to
- [00:00:02.800] Howy guys. Today's video we're going to be looking at the actual viner cutter.
- [00:00:05.030] be looking at the actual viner cutter.
- [00:00:05.040] be looking at the actual viner cutter. Now, um, keep in mind this is going to
- [00:00:07.829] Now, um, keep in mind this is going to
- [00:00:07.839] Now, um, keep in mind this is going to vary depending on the cutter you've got.
- [00:00:10.070] vary depending on the cutter you've got.
- [00:00:10.080] vary depending on the cutter you've got. We have a number of different cutters
- [00:00:12.070] We have a number of different cutters
- [00:00:12.080] We have a number of different cutters from flatbeds, um, small cutters, ones
- [00:00:15.190] from flatbeds, um, small cutters, ones
- [00:00:15.200] from flatbeds, um, small cutters, ones that do phone screens, got new ones,
- [00:00:17.750] that do phone screens, got new ones,
- [00:00:17.760] that do phone screens, got new ones, we've got old ones, and then we have
- [00:00:19.670] we've got old ones, and then we have
- [00:00:19.680] we've got old ones, and then we have ones that can go wireless and ones only
- [00:00:21.990] ones that can go wireless and ones only
- [00:00:22.000] ones that can go wireless and ones only wired. So, and so forth. So, just keep
- [00:00:24.550] wired. So, and so forth. So, just keep
- [00:00:24.560] wired. So, and so forth. So, just keep that in mind while we go through this
- [00:00:25.750] that in mind while we go through this
- [00:00:25.760] that in mind while we go through this process. The general idea is pretty
- [00:00:28.070] process. The general idea is pretty
- [00:00:28.080] process. The general idea is pretty similar. So, we're going to be covering
- [00:00:30.070] similar. So, we're going to be covering
- [00:00:30.080] similar. So, we're going to be covering the main parts and then um yeah, in a
- [00:00:33.430] the main parts and then um yeah, in a
- [00:00:33.440] the main parts and then um yeah, in a later video, we'll go into the actual
- [00:00:35.110] later video, we'll go into the actual
- [00:00:35.120] later video, we'll go into the actual operation, how to use those things, but
- [00:00:37.510] operation, how to use those things, but
- [00:00:37.520] operation, how to use those things, but this will just be a general guide. Okay,
- [00:00:40.470] this will just be a general guide. Okay,
- [00:00:40.480] this will just be a general guide. Okay, so in today's video, like I said, we're
- [00:00:41.990] so in today's video, like I said, we're
- [00:00:42.000] so in today's video, like I said, we're going to be sticking to one model. We've
- [00:00:43.910] going to be sticking to one model. We've
- [00:00:43.920] going to be sticking to one model. We've got more mid-range one here, which is
- [00:00:46.310] got more mid-range one here, which is
- [00:00:46.320] got more mid-range one here, which is quite popular. Then, we're going to jump
- [00:00:47.990] quite popular. Then, we're going to jump
- [00:00:48.000] quite popular. Then, we're going to jump through from different cutters, but I
- [00:00:49.910] through from different cutters, but I
- [00:00:49.920] through from different cutters, but I just kind of want you guys to see the
- [00:00:51.670] just kind of want you guys to see the
- [00:00:51.680] just kind of want you guys to see the general idea is pretty much the same.
- [00:00:53.590] general idea is pretty much the same.
- [00:00:53.600] general idea is pretty much the same. So, you know, it could be intimidating
- [00:00:55.189] So, you know, it could be intimidating
- [00:00:55.199] So, you know, it could be intimidating if yours looks different, but yeah, you
- [00:00:57.910] if yours looks different, but yeah, you
- [00:00:57.920] if yours looks different, but yeah, you should kind of get the idea. Now, what
- [00:01:00.229] should kind of get the idea. Now, what
- [00:01:00.239] should kind of get the idea. Now, what we have here is a few different things.
- [00:01:02.549] we have here is a few different things.
- [00:01:02.559] we have here is a few different things. So, we have first off the control panel
- [00:01:05.350] So, we have first off the control panel
- [00:01:05.360] So, we have first off the control panel here on the right. This will be used to
- [00:01:08.070] here on the right. This will be used to
- [00:01:08.080] here on the right. This will be used to control vinyl. Depending on your
- [00:01:10.070] control vinyl. Depending on your
- [00:01:10.080] control vinyl. Depending on your machine, some come with buttons and a
- [00:01:12.789] machine, some come with buttons and a
- [00:01:12.799] machine, some come with buttons and a screen, but some of those screens are
- [00:01:15.750] screen, but some of those screens are
- [00:01:15.760] screen, but some of those screens are actually touch. So, you can have just
- [00:01:17.749] actually touch. So, you can have just
- [00:01:17.759] actually touch. So, you can have just the buttons with a display screen, and
- [00:01:19.990] the buttons with a display screen, and
- [00:01:20.000] the buttons with a display screen, and then you have buttons with a touchcreen
- [00:01:21.590] then you have buttons with a touchcreen
- [00:01:21.600] then you have buttons with a touchcreen as well, which is pretty nice. So you
- [00:01:22.950] as well, which is pretty nice. So you
- [00:01:22.960] as well, which is pretty nice. So you can like navigate between the two. Then
- [00:01:25.510] can like navigate between the two. Then
- [00:01:25.520] can like navigate between the two. Then we also have some ports on both sides or
- [00:01:28.469] we also have some ports on both sides or
- [00:01:28.479] we also have some ports on both sides or um plugs and so forth. One side is
- [00:01:30.469] um plugs and so forth. One side is
- [00:01:30.479] um plugs and so forth. One side is normally a power intake or power plug.
- [00:01:33.990] normally a power intake or power plug.
- [00:01:34.000] normally a power intake or power plug. Then it will have on and off switch,
- [00:01:36.789] Then it will have on and off switch,
- [00:01:36.799] Then it will have on and off switch, which is also very common. And in some
- [00:01:38.469] which is also very common. And in some
- [00:01:38.479] which is also very common. And in some cases, you get one with a fuse. It's
- [00:01:40.950] cases, you get one with a fuse. It's
- [00:01:40.960] cases, you get one with a fuse. It's very handy, but not all of them come
- [00:01:42.310] very handy, but not all of them come
- [00:01:42.320] very handy, but not all of them come with a fuse. So just keep that in mind.
- [00:01:44.230] with a fuse. So just keep that in mind.
- [00:01:44.240] with a fuse. So just keep that in mind. If yours doesn't have a fuse, it doesn't
- [00:01:45.830] If yours doesn't have a fuse, it doesn't
- [00:01:45.840] If yours doesn't have a fuse, it doesn't really matter too much. Then on the
- [00:01:48.069] really matter too much. Then on the
- [00:01:48.079] really matter too much. Then on the other side, we tend to have a U disc as
- [00:01:51.030] other side, we tend to have a U disc as
- [00:01:51.040] other side, we tend to have a U disc as they call it. This is for flash drives.
- [00:01:53.030] they call it. This is for flash drives.
- [00:01:53.040] they call it. This is for flash drives. We have the USB. This is your printer
- [00:01:55.030] We have the USB. This is your printer
- [00:01:55.040] We have the USB. This is your printer cable. And then we have a COM cable. So
- [00:01:57.270] cable. And then we have a COM cable. So
- [00:01:57.280] cable. And then we have a COM cable. So if you're going for the more old school,
- [00:01:59.030] if you're going for the more old school,
- [00:01:59.040] if you're going for the more old school, you'll go COM. Your standard um cable
- [00:02:01.910] you'll go COM. Your standard um cable
- [00:02:01.920] you'll go COM. Your standard um cable these days for most PCs is just a USB
- [00:02:04.469] these days for most PCs is just a USB
- [00:02:04.479] these days for most PCs is just a USB printer cable. And then we have the
- [00:02:06.230] printer cable. And then we have the
- [00:02:06.240] printer cable. And then we have the flash drive. That's if you want to maybe
- [00:02:07.990] flash drive. That's if you want to maybe
- [00:02:08.000] flash drive. That's if you want to maybe do operations apart from a computer or
- [00:02:10.710] do operations apart from a computer or
- [00:02:10.720] do operations apart from a computer or anything like that. So in some cases,
- [00:02:12.869] anything like that. So in some cases,
- [00:02:12.879] anything like that. So in some cases, you actually have a wireless option like
- [00:02:15.190] you actually have a wireless option like
- [00:02:15.200] you actually have a wireless option like you can see with this one. So then you
- [00:02:17.190] you can see with this one. So then you
- [00:02:17.200] you can see with this one. So then you can actually cut over a wireless network
- [00:02:20.309] can actually cut over a wireless network
- [00:02:20.319] can actually cut over a wireless network which can be very handy if you're scared
- [00:02:21.990] which can be very handy if you're scared
- [00:02:22.000] which can be very handy if you're scared you're going to wear out your ports or
- [00:02:23.910] you're going to wear out your ports or
- [00:02:23.920] you're going to wear out your ports or anything like that or maybe it's just
- [00:02:25.190] anything like that or maybe it's just
- [00:02:25.200] anything like that or maybe it's just the way the setup is set in your current
- [00:02:28.070] the way the setup is set in your current
- [00:02:28.080] the way the setup is set in your current workflow. Now next up here we have the
- [00:02:30.470] workflow. Now next up here we have the
- [00:02:30.480] workflow. Now next up here we have the actual cutting head or cutting block.
- [00:02:33.110] actual cutting head or cutting block.
- [00:02:33.120] actual cutting head or cutting block. I'm not sure what to call it. This is
- [00:02:34.470] I'm not sure what to call it. This is
- [00:02:34.480] I'm not sure what to call it. This is where all your main components are
- [00:02:37.030] where all your main components are
- [00:02:37.040] where all your main components are gathered for the actual cutting process.
- [00:02:39.910] gathered for the actual cutting process.
- [00:02:39.920] gathered for the actual cutting process. Now on the right here you can see we
- [00:02:41.430] Now on the right here you can see we
- [00:02:41.440] Now on the right here you can see we have the area where the actual blade or
- [00:02:43.110] have the area where the actual blade or
- [00:02:43.120] have the area where the actual blade or the plotter pen goes into. Over here you
- [00:02:46.229] the plotter pen goes into. Over here you
- [00:02:46.239] the plotter pen goes into. Over here you can see we've got the blade case. This
- [00:02:48.229] can see we've got the blade case. This
- [00:02:48.239] can see we've got the blade case. This will be what houses your actual blade
- [00:02:51.190] will be what houses your actual blade
- [00:02:51.200] will be what houses your actual blade that you'll be using. Keep in mind these
- [00:02:53.750] that you'll be using. Keep in mind these
- [00:02:53.760] that you'll be using. Keep in mind these things can get sharp. So just watch out.
- [00:02:56.470] things can get sharp. So just watch out.
- [00:02:56.480] things can get sharp. So just watch out. Then like I mentioned before, we have
- [00:02:57.990] Then like I mentioned before, we have
- [00:02:58.000] Then like I mentioned before, we have the actual plotter pen. So this is very
- [00:03:00.710] the actual plotter pen. So this is very
- [00:03:00.720] the actual plotter pen. So this is very similar to the blade in the way it is
- [00:03:02.550] similar to the blade in the way it is
- [00:03:02.560] similar to the blade in the way it is shaped, but obviously you can use this
- [00:03:04.070] shaped, but obviously you can use this
- [00:03:04.080] shaped, but obviously you can use this for like technical drawings and so
- [00:03:05.750] for like technical drawings and so
- [00:03:05.760] for like technical drawings and so forth. It also the way it goes in is
- [00:03:08.309] forth. It also the way it goes in is
- [00:03:08.319] forth. It also the way it goes in is very similar to the other one. Also on
- [00:03:10.790] very similar to the other one. Also on
- [00:03:10.800] very similar to the other one. Also on this whole cutting head, cutting block,
- [00:03:12.550] this whole cutting head, cutting block,
- [00:03:12.560] this whole cutting head, cutting block, you'll see in some models we'll have a
- [00:03:14.710] you'll see in some models we'll have a
- [00:03:14.720] you'll see in some models we'll have a laser eye and this will be used for
- [00:03:17.830] laser eye and this will be used for
- [00:03:17.840] laser eye and this will be used for obviously contour cutting. So let's say
- [00:03:20.470] obviously contour cutting. So let's say
- [00:03:20.480] obviously contour cutting. So let's say you're making a sticker or something
- [00:03:22.229] you're making a sticker or something
- [00:03:22.239] you're making a sticker or something like that. There's obviously multiple
- [00:03:24.070] like that. There's obviously multiple
- [00:03:24.080] like that. There's obviously multiple different avenues to use it, but in
- [00:03:26.869] different avenues to use it, but in
- [00:03:26.879] different avenues to use it, but in general it will be located over here.
- [00:03:29.350] general it will be located over here.
- [00:03:29.360] general it will be located over here. You also get two different options like
- [00:03:31.190] You also get two different options like
- [00:03:31.200] You also get two different options like automatic and a manual, but we'll cover
- [00:03:33.190] automatic and a manual, but we'll cover
- [00:03:33.200] automatic and a manual, but we'll cover that later on how to use it and what's
- [00:03:35.350] that later on how to use it and what's
- [00:03:35.360] that later on how to use it and what's the main differences there. And over
- [00:03:37.110] the main differences there. And over
- [00:03:37.120] the main differences there. And over here you can actually see the laser in
- [00:03:38.789] here you can actually see the laser in
- [00:03:38.799] here you can actually see the laser in action with some registration marks.
- [00:03:40.789] action with some registration marks.
- [00:03:40.799] action with some registration marks. Also we have our rollers. So we've got
- [00:03:44.630] Also we have our rollers. So we've got
- [00:03:44.640] Also we have our rollers. So we've got two sides to that. We've got the actual
- [00:03:46.710] two sides to that. We've got the actual
- [00:03:46.720] two sides to that. We've got the actual bottom which is the mechanical part
- [00:03:48.949] bottom which is the mechanical part
- [00:03:48.959] bottom which is the mechanical part which will be rolling the material. And
- [00:03:51.350] which will be rolling the material. And
- [00:03:51.360] which will be rolling the material. And then we have the top rollers which works
- [00:03:54.710] then we have the top rollers which works
- [00:03:54.720] then we have the top rollers which works more as a actual guide and a clamper.
- [00:03:58.149] more as a actual guide and a clamper.
- [00:03:58.159] more as a actual guide and a clamper. Then on the back of these pinch rollers
- [00:04:00.070] Then on the back of these pinch rollers
- [00:04:00.080] Then on the back of these pinch rollers you will see we also have some tensioner
- [00:04:02.309] you will see we also have some tensioner
- [00:04:02.319] you will see we also have some tensioner options. So later when we get to our
- [00:04:04.710] options. So later when we get to our
- [00:04:04.720] options. So later when we get to our maintenance and that, we'll run through
- [00:04:06.630] maintenance and that, we'll run through
- [00:04:06.640] maintenance and that, we'll run through how to set these up correctly. You'll
- [00:04:09.110] how to set these up correctly. You'll
- [00:04:09.120] how to set these up correctly. You'll also notice we've got some roller guides
- [00:04:11.270] also notice we've got some roller guides
- [00:04:11.280] also notice we've got some roller guides for loading your material. And then we
- [00:04:13.509] for loading your material. And then we
- [00:04:13.519] for loading your material. And then we have a ruler here at the bottom, which
- [00:04:15.750] have a ruler here at the bottom, which
- [00:04:15.760] have a ruler here at the bottom, which is going to be very handy.
- [00:04:18.069] is going to be very handy.
- [00:04:18.079] is going to be very handy. And another thing we also have here is a
- [00:04:19.990] And another thing we also have here is a
- [00:04:20.000] And another thing we also have here is a cutting strip. And this will help
- [00:04:21.590] cutting strip. And this will help
- [00:04:21.600] cutting strip. And this will help prevent your blade from going into your
- [00:04:23.590] prevent your blade from going into your
- [00:04:23.600] prevent your blade from going into your machine and also make its life slightly
- [00:04:26.550] machine and also make its life slightly
- [00:04:26.560] machine and also make its life slightly longer.
- [00:04:28.390] longer.
- [00:04:28.400] longer. Okay. Next up, I would say let's look at
- [00:04:30.070] Okay. Next up, I would say let's look at
- [00:04:30.080] Okay. Next up, I would say let's look at a few variations that we'll find when it
- [00:04:33.030] a few variations that we'll find when it
- [00:04:33.040] a few variations that we'll find when it comes to the flatbed cutter. Now, for
- [00:04:35.990] comes to the flatbed cutter. Now, for
- [00:04:36.000] comes to the flatbed cutter. Now, for one, you'll find that this thing
- [00:04:37.830] one, you'll find that this thing
- [00:04:37.840] one, you'll find that this thing actually has two heads in there or two I
- [00:04:40.870] actually has two heads in there or two I
- [00:04:40.880] actually has two heads in there or two I don't want to call them cutting blades
- [00:04:42.710] don't want to call them cutting blades
- [00:04:42.720] don't want to call them cutting blades would look like cutting blades, but they
- [00:04:44.230] would look like cutting blades, but they
- [00:04:44.240] would look like cutting blades, but they are actually not two. So, what we have,
- [00:04:45.909] are actually not two. So, what we have,
- [00:04:45.919] are actually not two. So, what we have, we have a cutting blade and the other
- [00:04:47.430] we have a cutting blade and the other
- [00:04:47.440] we have a cutting blade and the other one is actually a form of a folder or
- [00:04:49.590] one is actually a form of a folder or
- [00:04:49.600] one is actually a form of a folder or like a guide. So what will happen is
- [00:04:52.469] like a guide. So what will happen is
- [00:04:52.479] like a guide. So what will happen is this one will press down by all the
- [00:04:54.469] this one will press down by all the
- [00:04:54.479] this one will press down by all the areas where you're let's say you're
- [00:04:55.749] areas where you're let's say you're
- [00:04:55.759] areas where you're let's say you're making a box and you cut it out and then
- [00:04:58.550] making a box and you cut it out and then
- [00:04:58.560] making a box and you cut it out and then every area where it needs to fold this
- [00:05:00.710] every area where it needs to fold this
- [00:05:00.720] every area where it needs to fold this thing will put pressure so help you
- [00:05:02.870] thing will put pressure so help you
- [00:05:02.880] thing will put pressure so help you afterwards to fold which can be very
- [00:05:04.950] afterwards to fold which can be very
- [00:05:04.960] afterwards to fold which can be very handy but that's one variation.
- [00:05:07.749] handy but that's one variation.
- [00:05:07.759] handy but that's one variation. Then if we look at the actual front
- [00:05:09.590] Then if we look at the actual front
- [00:05:09.600] Then if we look at the actual front there you will notice we've got actual
- [00:05:12.469] there you will notice we've got actual
- [00:05:12.479] there you will notice we've got actual bed that's where the material will be
- [00:05:15.270] bed that's where the material will be
- [00:05:15.280] bed that's where the material will be laying on. Then in front of that we have
- [00:05:17.830] laying on. Then in front of that we have
- [00:05:17.840] laying on. Then in front of that we have a material catcher or can you say maybe
- [00:05:21.110] a material catcher or can you say maybe
- [00:05:21.120] a material catcher or can you say maybe a product catcher but it's just so stuff
- [00:05:22.950] a product catcher but it's just so stuff
- [00:05:22.960] a product catcher but it's just so stuff doesn't fall on the ground once it rolls
- [00:05:24.550] doesn't fall on the ground once it rolls
- [00:05:24.560] doesn't fall on the ground once it rolls off. Then beneath that usually also
- [00:05:27.189] off. Then beneath that usually also
- [00:05:27.199] off. Then beneath that usually also there's a form of suction. So this will
- [00:05:30.070] there's a form of suction. So this will
- [00:05:30.080] there's a form of suction. So this will keep your material in place so you don't
- [00:05:32.310] keep your material in place so you don't
- [00:05:32.320] keep your material in place so you don't have to worry about it moving around
- [00:05:33.670] have to worry about it moving around
- [00:05:33.680] have to worry about it moving around while you're cutting it.
- [00:05:36.390] while you're cutting it.
- [00:05:36.400] while you're cutting it. Then to the back of that you can see
- [00:05:37.749] Then to the back of that you can see
- [00:05:37.759] Then to the back of that you can see we've got a clamper here that was to
- [00:05:40.469] we've got a clamper here that was to
- [00:05:40.479] we've got a clamper here that was to clamp your material down. Then we also
- [00:05:43.029] clamp your material down. Then we also
- [00:05:43.039] clamp your material down. Then we also have rollers on this one to make sure
- [00:05:44.469] have rollers on this one to make sure
- [00:05:44.479] have rollers on this one to make sure your material stays nice and straight.
- [00:05:47.430] your material stays nice and straight.
- [00:05:47.440] your material stays nice and straight. And then we have a form of roller
- [00:05:49.830] And then we have a form of roller
- [00:05:49.840] And then we have a form of roller clamper. This will also help keep your
- [00:05:51.909] clamper. This will also help keep your
- [00:05:51.919] clamper. This will also help keep your material leveled while it's feeding it
- [00:05:54.070] material leveled while it's feeding it
- [00:05:54.080] material leveled while it's feeding it so it doesn't start bubbling from the
- [00:05:55.830] so it doesn't start bubbling from the
- [00:05:55.840] so it doesn't start bubbling from the back. We also have a control panel, but
- [00:05:59.029] back. We also have a control panel, but
- [00:05:59.039] back. We also have a control panel, but this one, especially on this model, was
- [00:06:01.189] this one, especially on this model, was
- [00:06:01.199] this one, especially on this model, was quite a bit different in only looks. So
- [00:06:04.309] quite a bit different in only looks. So
- [00:06:04.319] quite a bit different in only looks. So like the other one you saw, we had a
- [00:06:05.990] like the other one you saw, we had a
- [00:06:06.000] like the other one you saw, we had a control panel with buttons and a
- [00:06:08.390] control panel with buttons and a
- [00:06:08.400] control panel with buttons and a touchcreen. With this one, again, the
- [00:06:10.710] touchcreen. With this one, again, the
- [00:06:10.720] touchcreen. With this one, again, the majority of it is just going to be
- [00:06:12.390] majority of it is just going to be
- [00:06:12.400] majority of it is just going to be touchscreen. We have a nice emergency
- [00:06:14.150] touchscreen. We have a nice emergency
- [00:06:14.160] touchscreen. We have a nice emergency stop. Other than that, all of it happens
- [00:06:16.230] stop. Other than that, all of it happens
- [00:06:16.240] stop. Other than that, all of it happens there on the actual touch screen.
- [00:06:18.870] there on the actual touch screen.
- [00:06:18.880] there on the actual touch screen. But yeah, otherwise that is it on the
- [00:06:20.309] But yeah, otherwise that is it on the
- [00:06:20.319] But yeah, otherwise that is it on the vinyl cutter. Thanks guys for watching
- [00:06:21.909] vinyl cutter. Thanks guys for watching
- [00:06:21.919] vinyl cutter. Thanks guys for watching and I'll catch you guys on the next one.
- [00:06:23.510] and I'll catch you guys on the next one.
- [00:06:23.520] and I'll catch you guys on the next one. Cheers.
Keyframes
- /workspace/academy/media/1bDurZXPoL5Q3QvWME2lbph0QSEyNdiLL/keyframes/last.jpg
- /workspace/academy/media/1bDurZXPoL5Q3QvWME2lbph0QSEyNdiLL/keyframes/t002.jpg
- /workspace/academy/media/1bDurZXPoL5Q3QvWME2lbph0QSEyNdiLL/keyframes/t003.jpg
- /workspace/academy/media/1bDurZXPoL5Q3QvWME2lbph0QSEyNdiLL/keyframes/t005.jpg
- /workspace/academy/media/1bDurZXPoL5Q3QvWME2lbph0QSEyNdiLL/keyframes/t007.jpg
- /workspace/academy/media/1bDurZXPoL5Q3QvWME2lbph0QSEyNdiLL/keyframes/t008.jpg
- /workspace/academy/media/1bDurZXPoL5Q3QvWME2lbph0QSEyNdiLL/keyframes/t010.jpg
- /workspace/academy/media/1bDurZXPoL5Q3QvWME2lbph0QSEyNdiLL/keyframes/t012.jpg
- /workspace/academy/media/1bDurZXPoL5Q3QvWME2lbph0QSEyNdiLL/keyframes/t013.jpg
- /workspace/academy/media/1bDurZXPoL5Q3QvWME2lbph0QSEyNdiLL/keyframes/t015.jpg
- /workspace/academy/media/1bDurZXPoL5Q3QvWME2lbph0QSEyNdiLL/keyframes/t017.jpg
- /workspace/academy/media/1bDurZXPoL5Q3QvWME2lbph0QSEyNdiLL/keyframes/t018.jpg
- /workspace/academy/media/1bDurZXPoL5Q3QvWME2lbph0QSEyNdiLL/keyframes/t020.jpg
- /workspace/academy/media/1bDurZXPoL5Q3QvWME2lbph0QSEyNdiLL/keyframes/t021.jpg
- /workspace/academy/media/1bDurZXPoL5Q3QvWME2lbph0QSEyNdiLL/keyframes/t023.jpg
- /workspace/academy/media/1bDurZXPoL5Q3QvWME2lbph0QSEyNdiLL/keyframes/t025.jpg
- /workspace/academy/media/1bDurZXPoL5Q3QvWME2lbph0QSEyNdiLL/keyframes/t026.jpg
- /workspace/academy/media/1bDurZXPoL5Q3QvWME2lbph0QSEyNdiLL/keyframes/t028.jpg
- /workspace/academy/media/1bDurZXPoL5Q3QvWME2lbph0QSEyNdiLL/keyframes/t030.jpg
- /workspace/academy/media/1bDurZXPoL5Q3QvWME2lbph0QSEyNdiLL/keyframes/t031.jpg
- /workspace/academy/media/1bDurZXPoL5Q3QvWME2lbph0QSEyNdiLL/keyframes/t033.jpg
- /workspace/academy/media/1bDurZXPoL5Q3QvWME2lbph0QSEyNdiLL/keyframes/t035.jpg
- /workspace/academy/media/1bDurZXPoL5Q3QvWME2lbph0QSEyNdiLL/keyframes/t036.jpg
- /workspace/academy/media/1bDurZXPoL5Q3QvWME2lbph0QSEyNdiLL/keyframes/t038.jpg
8. Operations
- title: Operations
- status: publish
- author: 0
- is_previewable: (empty)
- video_duration: 0h 15m 27s (raw {"hours":0,"minutes":15,"seconds":27})
- video_source_type: embedded
- drive_file_id:
1kn5Yl5PHB505qbH6JAKlJwIeIxN6WJ7e(source_ref; not a public link) - transcript pending / keyframes pending / presentation extract pending
- video_source_url: (Drive preview omitted as a public link; file id kept as source_ref)
In this video we will be looking at the vinyl cutter operations.
- quizzes_following_this_lesson: 1 (full text in Quizzes)
- Operation (9 questions)
Drive extract
- file_id:
1kn5Yl5PHB505qbH6JAKlJwIeIxN6WJ7e - filename: 03 - MA - Operation.mp4
- kind: video
- local_path: /workspace/academy/media/1kn5Yl5PHB505qbH6JAKlJwIeIxN6WJ7e/03 - MA - Operation.mp4
- source_ref: drive
1kn5Yl5PHB505qbH6JAKlJwIeIxN6WJ7e· content_length 464459016 · original https://drive.google.com/file/d/1kn5Yl5PHB505qbH6JAKlJwIeIxN6WJ7e/view - extract_status: done
- caption_source: drive_timedtext
- duration_s: 987.01
- keyframe_count: 24
Transcript
- Howdy, guys. In today's video, we're
- [00:00:02.550] Howdy, guys. In today's video, we're
- [00:00:02.560] Howdy, guys. In today's video, we're going to be looking at the cutter
- [00:00:04.230] going to be looking at the cutter
- [00:00:04.240] going to be looking at the cutter operations.
- [00:00:06.390] operations.
- [00:00:06.400] operations. Now, keep in mind once again, like I
- [00:00:07.990] Now, keep in mind once again, like I
- [00:00:08.000] Now, keep in mind once again, like I said before, um we're going to be
- [00:00:10.230] said before, um we're going to be
- [00:00:10.240] said before, um we're going to be running through a generic model. So, the
- [00:00:13.110] running through a generic model. So, the
- [00:00:13.120] running through a generic model. So, the process might vary a bit with yours, but
- [00:00:15.990] process might vary a bit with yours, but
- [00:00:16.000] process might vary a bit with yours, but we'll give a kind of overview of how the
- [00:00:18.950] we'll give a kind of overview of how the
- [00:00:18.960] we'll give a kind of overview of how the other ones will work as well. Okay. So,
- [00:00:21.510] other ones will work as well. Okay. So,
- [00:00:21.520] other ones will work as well. Okay. So, first of all, what we're going to be
- [00:00:22.550] first of all, what we're going to be
- [00:00:22.560] first of all, what we're going to be looking at is leveling. Now, if you're
- [00:00:25.830] looking at is leveling. Now, if you're
- [00:00:25.840] looking at is leveling. Now, if you're working with big machines become
- [00:00:27.189] working with big machines become
- [00:00:27.199] working with big machines become slightly more important than small ones,
- [00:00:29.509] slightly more important than small ones,
- [00:00:29.519] slightly more important than small ones, but either way, it's a good habit and a
- [00:00:31.269] but either way, it's a good habit and a
- [00:00:31.279] but either way, it's a good habit and a good practice. So, to do the leveling,
- [00:00:33.910] good practice. So, to do the leveling,
- [00:00:33.920] good practice. So, to do the leveling, what you want to do is you can tilt the
- [00:00:35.430] what you want to do is you can tilt the
- [00:00:35.440] what you want to do is you can tilt the machine. You can simply turn these feet
- [00:00:37.750] machine. You can simply turn these feet
- [00:00:37.760] machine. You can simply turn these feet in and out. So, obviously, the one way
- [00:00:40.549] in and out. So, obviously, the one way
- [00:00:40.559] in and out. So, obviously, the one way will make it higher, other way lower.
- [00:00:42.630] will make it higher, other way lower.
- [00:00:42.640] will make it higher, other way lower. So, then what you can do at the same
- [00:00:43.910] So, then what you can do at the same
- [00:00:43.920] So, then what you can do at the same time is put a spirit leveler or
- [00:00:45.750] time is put a spirit leveler or
- [00:00:45.760] time is put a spirit leveler or something on top of it, adjust it, then
- [00:00:48.869] something on top of it, adjust it, then
- [00:00:48.879] something on top of it, adjust it, then um look at the leveler, readjust until
- [00:00:50.950] um look at the leveler, readjust until
- [00:00:50.960] um look at the leveler, readjust until you get a nice leveled machine. Now,
- [00:00:53.590] you get a nice leveled machine. Now,
- [00:00:53.600] you get a nice leveled machine. Now, this is going to avoid stuff like
- [00:00:54.950] this is going to avoid stuff like
- [00:00:54.960] this is going to avoid stuff like vibrations or your machine walking
- [00:00:56.790] vibrations or your machine walking
- [00:00:56.800] vibrations or your machine walking around and especially when you're
- [00:00:58.310] around and especially when you're
- [00:00:58.320] around and especially when you're working on larger formats. And then,
- [00:01:00.549] working on larger formats. And then,
- [00:01:00.559] working on larger formats. And then, like I said, this becomes quite an
- [00:01:01.990] like I said, this becomes quite an
- [00:01:02.000] like I said, this becomes quite an important step. Okay. Then after that,
- [00:01:04.149] important step. Okay. Then after that,
- [00:01:04.159] important step. Okay. Then after that, we're going to be looking at some
- [00:01:05.429] we're going to be looking at some
- [00:01:05.439] we're going to be looking at some blades. Now, in order to get your blade
- [00:01:08.310] blades. Now, in order to get your blade
- [00:01:08.320] blades. Now, in order to get your blade holder out, we want to simply loose that
- [00:01:10.149] holder out, we want to simply loose that
- [00:01:10.159] holder out, we want to simply loose that little thumb screw and then it should
- [00:01:12.789] little thumb screw and then it should
- [00:01:12.799] little thumb screw and then it should slide out. Now, when it comes to actual
- [00:01:14.550] slide out. Now, when it comes to actual
- [00:01:14.560] slide out. Now, when it comes to actual cases, there's a number of different
- [00:01:17.190] cases, there's a number of different
- [00:01:17.200] cases, there's a number of different ones, but the general process will be
- [00:01:19.670] ones, but the general process will be
- [00:01:19.680] ones, but the general process will be very similar. The older ones you might
- [00:01:21.590] very similar. The older ones you might
- [00:01:21.600] very similar. The older ones you might have to unscrew where the newer ones you
- [00:01:23.990] have to unscrew where the newer ones you
- [00:01:24.000] have to unscrew where the newer ones you can simply just slide it out. So what
- [00:01:26.950] can simply just slide it out. So what
- [00:01:26.960] can simply just slide it out. So what you want to do is you simply want to
- [00:01:28.070] you want to do is you simply want to
- [00:01:28.080] you want to do is you simply want to press that back thumb shaft and you'll
- [00:01:29.830] press that back thumb shaft and you'll
- [00:01:29.840] press that back thumb shaft and you'll see that will allow you to pull the
- [00:01:31.749] see that will allow you to pull the
- [00:01:31.759] see that will allow you to pull the blade out. Now just keep in mind these
- [00:01:34.230] blade out. Now just keep in mind these
- [00:01:34.240] blade out. Now just keep in mind these blades can be sharp. So just practice
- [00:01:36.149] blades can be sharp. So just practice
- [00:01:36.159] blades can be sharp. So just practice some caution. Now when it comes to the
- [00:01:39.190] some caution. Now when it comes to the
- [00:01:39.200] some caution. Now when it comes to the blades that uh we normally use, there's
- [00:01:41.590] blades that uh we normally use, there's
- [00:01:41.600] blades that uh we normally use, there's the three common ones or three different
- [00:01:43.510] the three common ones or three different
- [00:01:43.520] the three common ones or three different ones. You've got the 30°, 45° and the
- [00:01:47.350] ones. You've got the 30°, 45° and the
- [00:01:47.360] ones. You've got the 30°, 45° and the 60°.
- [00:01:48.950] 60°.
- [00:01:48.960] 60°. Now the 30 degree this one is great for
- [00:01:51.270] Now the 30 degree this one is great for
- [00:01:51.280] Now the 30 degree this one is great for if you want to go for let's say thinner
- [00:01:54.469] if you want to go for let's say thinner
- [00:01:54.479] if you want to go for let's say thinner material maybe softer material as the
- [00:01:56.469] material maybe softer material as the
- [00:01:56.479] material maybe softer material as the blade is way sharper. Well another
- [00:01:59.270] blade is way sharper. Well another
- [00:01:59.280] blade is way sharper. Well another reason why you want to use a 30° angle
- [00:02:01.190] reason why you want to use a 30° angle
- [00:02:01.200] reason why you want to use a 30° angle is for smaller pieces and more detailed
- [00:02:03.910] is for smaller pieces and more detailed
- [00:02:03.920] is for smaller pieces and more detailed pieces as this edge will give you
- [00:02:06.469] pieces as this edge will give you
- [00:02:06.479] pieces as this edge will give you cleaner corners seeing that it can get
- [00:02:09.589] cleaner corners seeing that it can get
- [00:02:09.599] cleaner corners seeing that it can get closer to the edge of the actual corner.
- [00:02:13.990] closer to the edge of the actual corner.
- [00:02:14.000] closer to the edge of the actual corner. Then the 45°
- [00:02:16.390] Then the 45°
- [00:02:16.400] Then the 45° this is more for common use. So, you'll
- [00:02:19.430] this is more for common use. So, you'll
- [00:02:19.440] this is more for common use. So, you'll be using this throughout most materials.
- [00:02:21.830] be using this throughout most materials.
- [00:02:21.840] be using this throughout most materials. If you're not sure which one to use, you
- [00:02:23.750] If you're not sure which one to use, you
- [00:02:23.760] If you're not sure which one to use, you can just go to the 45 and you should be
- [00:02:25.990] can just go to the 45 and you should be
- [00:02:26.000] can just go to the 45 and you should be fine. Then lastly, we have the 60°. Now,
- [00:02:30.070] fine. Then lastly, we have the 60°. Now,
- [00:02:30.080] fine. Then lastly, we have the 60°. Now, this one is mostly aimed at thick
- [00:02:32.229] this one is mostly aimed at thick
- [00:02:32.239] this one is mostly aimed at thick materials, tough materials. So, you
- [00:02:34.710] materials, tough materials. So, you
- [00:02:34.720] materials, tough materials. So, you know, it is better for those type of
- [00:02:36.390] know, it is better for those type of
- [00:02:36.400] know, it is better for those type of cuts and um yeah, but like I said, fail
- [00:02:39.589] cuts and um yeah, but like I said, fail
- [00:02:39.599] cuts and um yeah, but like I said, fail safe 45 and then you are good. Another
- [00:02:43.110] safe 45 and then you are good. Another
- [00:02:43.120] safe 45 and then you are good. Another thing to keep in mind with these blades
- [00:02:44.470] thing to keep in mind with these blades
- [00:02:44.480] thing to keep in mind with these blades is for instance the skinny one or should
- [00:02:46.150] is for instance the skinny one or should
- [00:02:46.160] is for instance the skinny one or should I say the 30°ree one the one with the
- [00:02:47.670] I say the 30°ree one the one with the
- [00:02:47.680] I say the 30°ree one the one with the sharper angle that one has more drag. So
- [00:02:52.550] sharper angle that one has more drag. So
- [00:02:52.560] sharper angle that one has more drag. So something to keep in mind and the 45 has
- [00:02:54.630] something to keep in mind and the 45 has
- [00:02:54.640] something to keep in mind and the 45 has about average. And then when it comes to
- [00:02:56.630] about average. And then when it comes to
- [00:02:56.640] about average. And then when it comes to the 60° that one has the least amount of
- [00:03:00.070] the 60° that one has the least amount of
- [00:03:00.080] the 60° that one has the least amount of drag. Now to put the blade back in
- [00:03:02.630] drag. Now to put the blade back in
- [00:03:02.640] drag. Now to put the blade back in simply you can just drop it into the
- [00:03:03.990] simply you can just drop it into the
- [00:03:04.000] simply you can just drop it into the hole and then the magnet will take over.
- [00:03:06.949] hole and then the magnet will take over.
- [00:03:06.959] hole and then the magnet will take over. Okay. Now, let's have a closer look at
- [00:03:08.470] Okay. Now, let's have a closer look at
- [00:03:08.480] Okay. Now, let's have a closer look at how to actually change a blade or add a
- [00:03:10.309] how to actually change a blade or add a
- [00:03:10.319] how to actually change a blade or add a new one if it's maybe your first time.
- [00:03:12.869] new one if it's maybe your first time.
- [00:03:12.879] new one if it's maybe your first time. So, then what you first want to do is
- [00:03:14.309] So, then what you first want to do is
- [00:03:14.319] So, then what you first want to do is locate your actual blades in the box.
- [00:03:17.509] locate your actual blades in the box.
- [00:03:17.519] locate your actual blades in the box. Now, you'll see they come with these
- [00:03:18.790] Now, you'll see they come with these
- [00:03:18.800] Now, you'll see they come with these little blue covers. It's a form of
- [00:03:20.949] little blue covers. It's a form of
- [00:03:20.959] little blue covers. It's a form of safety cover. So, number one, you don't
- [00:03:23.430] safety cover. So, number one, you don't
- [00:03:23.440] safety cover. So, number one, you don't damage yourself, and number two, the
- [00:03:24.949] damage yourself, and number two, the
- [00:03:24.959] damage yourself, and number two, the blade doesn't get damaged just randomly.
- [00:03:27.910] blade doesn't get damaged just randomly.
- [00:03:27.920] blade doesn't get damaged just randomly. So, what you want to do is you simply
- [00:03:29.190] So, what you want to do is you simply
- [00:03:29.200] So, what you want to do is you simply pull this little thing off. You simply
- [00:03:31.110] pull this little thing off. You simply
- [00:03:31.120] pull this little thing off. You simply slide this into the front of the holder.
- [00:03:34.149] slide this into the front of the holder.
- [00:03:34.159] slide this into the front of the holder. And like I said, it should flip in and
- [00:03:36.309] And like I said, it should flip in and
- [00:03:36.319] And like I said, it should flip in and be nice and magnetized within that.
- [00:03:40.390] be nice and magnetized within that.
- [00:03:40.400] be nice and magnetized within that. Now, in order to adjust the blade, what
- [00:03:42.550] Now, in order to adjust the blade, what
- [00:03:42.560] Now, in order to adjust the blade, what we want to do is simply loosen this lock
- [00:03:44.710] we want to do is simply loosen this lock
- [00:03:44.720] we want to do is simply loosen this lock nut, the uh middle one.
- Then we adjust the blade depth with the
- [00:03:53.030] Then we adjust the blade depth with the
- [00:03:53.040] Then we adjust the blade depth with the bottom nut. And then when we more or
- [00:03:55.670] bottom nut. And then when we more or
- [00:03:55.680] bottom nut. And then when we more or less happy, we can tighten the top lock
- [00:03:57.990] less happy, we can tighten the top lock
- [00:03:58.000] less happy, we can tighten the top lock nut again just to make sure to keep it
- [00:04:00.149] nut again just to make sure to keep it
- [00:04:00.159] nut again just to make sure to keep it in place. Now, there's a few things to
- [00:04:02.550] in place. Now, there's a few things to
- [00:04:02.560] in place. Now, there's a few things to keep in mind with adjusting the blade.
- [00:04:04.390] keep in mind with adjusting the blade.
- [00:04:04.400] keep in mind with adjusting the blade. You have the blade just just extrude out
- [00:04:06.949] You have the blade just just extrude out
- [00:04:06.959] You have the blade just just extrude out for a little bit more control. So, then
- [00:04:09.030] for a little bit more control. So, then
- [00:04:09.040] for a little bit more control. So, then you will adjust your pressure and you
- [00:04:10.869] you will adjust your pressure and you
- [00:04:10.879] you will adjust your pressure and you know your cutting is going to be quite
- [00:04:12.309] know your cutting is going to be quite
- [00:04:12.319] know your cutting is going to be quite consistent. Now, if we look at some
- [00:04:14.149] consistent. Now, if we look at some
- [00:04:14.159] consistent. Now, if we look at some samples here, so the first one is what
- [00:04:16.390] samples here, so the first one is what
- [00:04:16.400] samples here, so the first one is what it will look like if your blade is
- [00:04:18.550] it will look like if your blade is
- [00:04:18.560] it will look like if your blade is either extruding out too far or your
- [00:04:21.270] either extruding out too far or your
- [00:04:21.280] either extruding out too far or your pressure is set too high. Then what will
- [00:04:23.350] pressure is set too high. Then what will
- [00:04:23.360] pressure is set too high. Then what will happen? It will cut right through your
- [00:04:24.950] happen? It will cut right through your
- [00:04:24.960] happen? It will cut right through your material. So through the vinyl and the
- [00:04:27.430] material. So through the vinyl and the
- [00:04:27.440] material. So through the vinyl and the backing and this is what will be
- [00:04:29.189] backing and this is what will be
- [00:04:29.199] backing and this is what will be damaging your cutting strip. Then an
- [00:04:31.670] damaging your cutting strip. Then an
- [00:04:31.680] damaging your cutting strip. Then an example here. This is if you're doing it
- [00:04:33.430] example here. This is if you're doing it
- [00:04:33.440] example here. This is if you're doing it correct. So you can see here we're only
- [00:04:35.909] correct. So you can see here we're only
- [00:04:35.919] correct. So you can see here we're only cutting through the vinyl but not the
- [00:04:38.150] cutting through the vinyl but not the
- [00:04:38.160] cutting through the vinyl but not the backing. So this then should also peel
- [00:04:40.870] backing. So this then should also peel
- [00:04:40.880] backing. So this then should also peel off easily. Then this last little
- [00:04:43.030] off easily. Then this last little
- [00:04:43.040] off easily. Then this last little sample. This is what happens if you're
- [00:04:44.710] sample. This is what happens if you're
- [00:04:44.720] sample. This is what happens if you're not cutting deep enough. So perhaps your
- [00:04:46.469] not cutting deep enough. So perhaps your
- [00:04:46.479] not cutting deep enough. So perhaps your blade is not set out far enough or your
- [00:04:48.790] blade is not set out far enough or your
- [00:04:48.800] blade is not set out far enough or your pressure is too low. then it will
- [00:04:51.350] pressure is too low. then it will
- [00:04:51.360] pressure is too low. then it will actually not even cut through the top
- [00:04:53.110] actually not even cut through the top
- [00:04:53.120] actually not even cut through the top vinyl which will mean it will be
- [00:04:55.270] vinyl which will mean it will be
- [00:04:55.280] vinyl which will mean it will be impossible to peel this thing off or at
- [00:04:58.390] impossible to peel this thing off or at
- [00:04:58.400] impossible to peel this thing off or at least the design that's been cut. So now
- [00:05:01.510] least the design that's been cut. So now
- [00:05:01.520] least the design that's been cut. So now what we can do to get like a standard
- [00:05:03.749] what we can do to get like a standard
- [00:05:03.759] what we can do to get like a standard depth. This will be a great starting
- [00:05:05.590] depth. This will be a great starting
- [00:05:05.600] depth. This will be a great starting point and that is what we do is we take
- [00:05:08.150] point and that is what we do is we take
- [00:05:08.160] point and that is what we do is we take our actual blade cover out with our
- [00:05:09.990] our actual blade cover out with our
- [00:05:10.000] our actual blade cover out with our blade set to the depth we think it's
- [00:05:12.790] blade set to the depth we think it's
- [00:05:12.800] blade set to the depth we think it's going to be or should be. Then what we
- [00:05:14.790] going to be or should be. Then what we
- [00:05:14.800] going to be or should be. Then what we can do is simply on a piece of offcut
- [00:05:16.629] can do is simply on a piece of offcut
- [00:05:16.639] can do is simply on a piece of offcut material we draw a simple hash keeping
- [00:05:19.990] material we draw a simple hash keeping
- [00:05:20.000] material we draw a simple hash keeping equal pressure and then we can see if
- [00:05:22.870] equal pressure and then we can see if
- [00:05:22.880] equal pressure and then we can see if that can peel out. You'll see it makes a
- [00:05:24.870] that can peel out. You'll see it makes a
- [00:05:24.880] that can peel out. You'll see it makes a nice little cube there in the center and
- [00:05:27.749] nice little cube there in the center and
- [00:05:27.759] nice little cube there in the center and then um you can adjust accordingly and
- [00:05:30.390] then um you can adjust accordingly and
- [00:05:30.400] then um you can adjust accordingly and try this again till you get a nice
- [00:05:31.909] try this again till you get a nice
- [00:05:31.919] try this again till you get a nice standard. Then once you're happy then
- [00:05:34.390] standard. Then once you're happy then
- [00:05:34.400] standard. Then once you're happy then you can adjust the pressure and that on
- [00:05:35.909] you can adjust the pressure and that on
- [00:05:35.919] you can adjust the pressure and that on the machine for uh more refinement.
- [00:05:40.310] the machine for uh more refinement.
- [00:05:40.320] the machine for uh more refinement. Now, like I mentioned before, you get a
- [00:05:42.870] Now, like I mentioned before, you get a
- [00:05:42.880] Now, like I mentioned before, you get a few different type of holders. Like some
- [00:05:45.270] few different type of holders. Like some
- [00:05:45.280] few different type of holders. Like some of them, like this one has nice numbers,
- [00:05:47.029] of them, like this one has nice numbers,
- [00:05:47.039] of them, like this one has nice numbers, so you can actually adjust. And then
- [00:05:48.629] so you can actually adjust. And then
- [00:05:48.639] so you can actually adjust. And then maybe if you're doing different jobs,
- [00:05:49.749] maybe if you're doing different jobs,
- [00:05:49.759] maybe if you're doing different jobs, you know, okay, we're just adjusting
- [00:05:51.029] you know, okay, we're just adjusting
- [00:05:51.039] you know, okay, we're just adjusting this one maybe to number two or number
- [00:05:53.189] this one maybe to number two or number
- [00:05:53.199] this one maybe to number two or number three and so forth. And you get some
- [00:05:55.189] three and so forth. And you get some
- [00:05:55.199] three and so forth. And you get some older ones as well, which works slightly
- [00:05:57.350] older ones as well, which works slightly
- [00:05:57.360] older ones as well, which works slightly different, but the general method will
- [00:06:00.230] different, but the general method will
- [00:06:00.240] different, but the general method will be the same. So just keep that in mind.
- [00:06:01.749] be the same. So just keep that in mind.
- [00:06:01.759] be the same. So just keep that in mind. So when depending on the machine you've
- [00:06:03.590] So when depending on the machine you've
- [00:06:03.600] So when depending on the machine you've got and you're doing this process, then
- [00:06:06.230] got and you're doing this process, then
- [00:06:06.240] got and you're doing this process, then we also have the plotter pen. Now, this
- [00:06:09.670] we also have the plotter pen. Now, this
- [00:06:09.680] we also have the plotter pen. Now, this one, like I mentioned before, it can be
- [00:06:11.990] one, like I mentioned before, it can be
- [00:06:12.000] one, like I mentioned before, it can be quite convenient if you want to maybe do
- [00:06:13.670] quite convenient if you want to maybe do
- [00:06:13.680] quite convenient if you want to maybe do blueprints or some more technical
- [00:06:15.990] blueprints or some more technical
- [00:06:16.000] blueprints or some more technical drawings. Sometimes what you can even do
- [00:06:17.909] drawings. Sometimes what you can even do
- [00:06:17.919] drawings. Sometimes what you can even do is you use this on the back of the
- [00:06:20.469] is you use this on the back of the
- [00:06:20.479] is you use this on the back of the vinyl. So, you do a mock cut using a pen
- [00:06:23.749] vinyl. So, you do a mock cut using a pen
- [00:06:23.759] vinyl. So, you do a mock cut using a pen and then you can make sure your
- [00:06:24.870] and then you can make sure your
- [00:06:24.880] and then you can make sure your measurements are right and so forth.
- [00:06:27.189] measurements are right and so forth.
- [00:06:27.199] measurements are right and so forth. Now, to put it in and out, similar to
- [00:06:29.350] Now, to put it in and out, similar to
- [00:06:29.360] Now, to put it in and out, similar to the cutter, but obviously you can only
- [00:06:30.870] the cutter, but obviously you can only
- [00:06:30.880] the cutter, but obviously you can only have one at a time, so keep that in
- [00:06:32.390] have one at a time, so keep that in
- [00:06:32.400] have one at a time, so keep that in mind. Okay, next up, we're going to be
- [00:06:34.710] mind. Okay, next up, we're going to be
- [00:06:34.720] mind. Okay, next up, we're going to be looking at loading your material.
- [00:06:37.510] looking at loading your material.
- [00:06:37.520] looking at loading your material. Now, there's how can I say three
- [00:06:39.830] Now, there's how can I say three
- [00:06:39.840] Now, there's how can I say three different types of approaches. The one
- [00:06:42.150] different types of approaches. The one
- [00:06:42.160] different types of approaches. The one is you're using smaller materials, maybe
- [00:06:44.629] is you're using smaller materials, maybe
- [00:06:44.639] is you're using smaller materials, maybe like offcuts and so forth, but it's
- [00:06:46.629] like offcuts and so forth, but it's
- [00:06:46.639] like offcuts and so forth, but it's still large enough to fit nicely within
- [00:06:48.150] still large enough to fit nicely within
- [00:06:48.160] still large enough to fit nicely within the machine. Another one is we've got
- [00:06:50.070] the machine. Another one is we've got
- [00:06:50.080] the machine. Another one is we've got rolls. So, if you're working on large
- [00:06:51.909] rolls. So, if you're working on large
- [00:06:51.919] rolls. So, if you're working on large format and so forth, you'll be probably
- [00:06:53.990] format and so forth, you'll be probably
- [00:06:54.000] format and so forth, you'll be probably using rolls. And then we have ones where
- [00:06:56.550] using rolls. And then we have ones where
- [00:06:56.560] using rolls. And then we have ones where it's even smaller and then you might
- [00:06:57.990] it's even smaller and then you might
- [00:06:58.000] it's even smaller and then you might want to use something like a cutting
- [00:06:59.189] want to use something like a cutting
- [00:06:59.199] want to use something like a cutting mat. But yeah, let's have a quick
- [00:07:00.710] mat. But yeah, let's have a quick
- [00:07:00.720] mat. But yeah, let's have a quick overview of them so you have an idea of
- [00:07:02.629] overview of them so you have an idea of
- [00:07:02.639] overview of them so you have an idea of how to go about it. So, one thing that's
- [00:07:05.350] how to go about it. So, one thing that's
- [00:07:05.360] how to go about it. So, one thing that's important to note is on these color
- [00:07:07.110] important to note is on these color
- [00:07:07.120] important to note is on these color machines, you'll see these little black
- [00:07:08.550] machines, you'll see these little black
- [00:07:08.560] machines, you'll see these little black tape or sometimes the tape will vary in
- [00:07:10.390] tape or sometimes the tape will vary in
- [00:07:10.400] tape or sometimes the tape will vary in color, but what it comes down to, it's a
- [00:07:12.309] color, but what it comes down to, it's a
- [00:07:12.319] color, but what it comes down to, it's a form of alignment to show you where the
- [00:07:14.550] form of alignment to show you where the
- [00:07:14.560] form of alignment to show you where the rollers are. Cuz obviously once you put
- [00:07:16.390] rollers are. Cuz obviously once you put
- [00:07:16.400] rollers are. Cuz obviously once you put the material in, you can no longer see
- [00:07:17.830] the material in, you can no longer see
- [00:07:17.840] the material in, you can no longer see the rollers at the bottom. And if your
- [00:07:19.990] the rollers at the bottom. And if your
- [00:07:20.000] the rollers at the bottom. And if your top roller clamp is not aligned, it's
- [00:07:22.550] top roller clamp is not aligned, it's
- [00:07:22.560] top roller clamp is not aligned, it's going to, you know, your your it's not
- [00:07:23.909] going to, you know, your your it's not
- [00:07:23.919] going to, you know, your your it's not going to feed your material properly.
- [00:07:25.990] going to feed your material properly.
- [00:07:26.000] going to feed your material properly. So, just keep that in mind. Those little
- [00:07:28.070] So, just keep that in mind. Those little
- [00:07:28.080] So, just keep that in mind. Those little marks on top shows you where the actual
- [00:07:30.230] marks on top shows you where the actual
- [00:07:30.240] marks on top shows you where the actual rollers are. Then when it comes to the
- [00:07:32.629] rollers are. Then when it comes to the
- [00:07:32.639] rollers are. Then when it comes to the roller clamp, you can see it's got nice
- [00:07:34.710] roller clamp, you can see it's got nice
- [00:07:34.720] roller clamp, you can see it's got nice little rubber feet. So this will grip
- [00:07:36.309] little rubber feet. So this will grip
- [00:07:36.319] little rubber feet. So this will grip your material. Then on the back of the
- [00:07:38.629] your material. Then on the back of the
- [00:07:38.639] your material. Then on the back of the actual machine with the roller clamps,
- [00:07:40.629] actual machine with the roller clamps,
- [00:07:40.639] actual machine with the roller clamps, you'll see we've got a little clamp
- [00:07:42.309] you'll see we've got a little clamp
- [00:07:42.319] you'll see we've got a little clamp lever there that we can pull up or down
- [00:07:44.469] lever there that we can pull up or down
- [00:07:44.479] lever there that we can pull up or down that will um clamp the material down.
- [00:07:46.309] that will um clamp the material down.
- [00:07:46.319] that will um clamp the material down. Just keep in mind when this clamp is
- [00:07:48.150] Just keep in mind when this clamp is
- [00:07:48.160] Just keep in mind when this clamp is normally up, it means it is clamped. And
- [00:07:50.629] normally up, it means it is clamped. And
- [00:07:50.639] normally up, it means it is clamped. And when you pull it down, it loosens. So it
- [00:07:52.870] when you pull it down, it loosens. So it
- [00:07:52.880] when you pull it down, it loosens. So it is something to keep in mind is because
- [00:07:54.309] is something to keep in mind is because
- [00:07:54.319] is something to keep in mind is because of the springs, the way it works. But
- [00:07:56.150] of the springs, the way it works. But
- [00:07:56.160] of the springs, the way it works. But what you can simply do is just clamp it
- [00:07:57.670] what you can simply do is just clamp it
- [00:07:57.680] what you can simply do is just clamp it one way. See if it can move. move. If it
- [00:07:59.189] one way. See if it can move. move. If it
- [00:07:59.199] one way. See if it can move. move. If it can move, then you know obviously it is
- [00:08:00.710] can move, then you know obviously it is
- [00:08:00.720] can move, then you know obviously it is not clamped. Now, you'll also notice
- [00:08:03.029] not clamped. Now, you'll also notice
- [00:08:03.039] not clamped. Now, you'll also notice these roller clamps. Depending on the
- [00:08:04.710] these roller clamps. Depending on the
- [00:08:04.720] these roller clamps. Depending on the machine, it might look slightly
- [00:08:05.909] machine, it might look slightly
- [00:08:05.919] machine, it might look slightly different, but they have these little
- [00:08:07.830] different, but they have these little
- [00:08:07.840] different, but they have these little pressure adjusters or the amount of
- [00:08:10.390] pressure adjusters or the amount of
- [00:08:10.400] pressure adjusters or the amount of tension that the clamp has. Now, this is
- [00:08:13.110] tension that the clamp has. Now, this is
- [00:08:13.120] tension that the clamp has. Now, this is going to become later important once we
- [00:08:15.430] going to become later important once we
- [00:08:15.440] going to become later important once we want to do the actual material pressure
- [00:08:18.309] want to do the actual material pressure
- [00:08:18.319] want to do the actual material pressure because if we don't, then we can get
- [00:08:19.830] because if we don't, then we can get
- [00:08:19.840] because if we don't, then we can get some weird outcomes and it's good to
- [00:08:21.670] some weird outcomes and it's good to
- [00:08:21.680] some weird outcomes and it's good to know what could be the cause of it. As
- [00:08:24.150] know what could be the cause of it. As
- [00:08:24.160] know what could be the cause of it. As we turn this, you can see how it adjusts
- [00:08:26.150] we turn this, you can see how it adjusts
- [00:08:26.160] we turn this, you can see how it adjusts the actual spring. Okay, so here's just
- [00:08:28.629] the actual spring. Okay, so here's just
- [00:08:28.639] the actual spring. Okay, so here's just another view where we can see how the
- [00:08:30.309] another view where we can see how the
- [00:08:30.319] another view where we can see how the actual roller guides are different
- [00:08:33.269] actual roller guides are different
- [00:08:33.279] actual roller guides are different color. So they're not black, they're
- [00:08:34.630] color. So they're not black, they're
- [00:08:34.640] color. So they're not black, they're blue over here. So keep that in mind.
- [00:08:36.630] blue over here. So keep that in mind.
- [00:08:36.640] blue over here. So keep that in mind. And this will once again show you where
- [00:08:38.550] And this will once again show you where
- [00:08:38.560] And this will once again show you where the actual roller is. So when you're
- [00:08:40.389] the actual roller is. So when you're
- [00:08:40.399] the actual roller is. So when you're aligning the roller clamp at the back,
- [00:08:43.430] aligning the roller clamp at the back,
- [00:08:43.440] aligning the roller clamp at the back, then you know where to put it. Now, when
- [00:08:45.910] then you know where to put it. Now, when
- [00:08:45.920] then you know where to put it. Now, when it comes to loading material, another
- [00:08:47.750] it comes to loading material, another
- [00:08:47.760] it comes to loading material, another important point is the correct width. So
- [00:08:51.350] important point is the correct width. So
- [00:08:51.360] important point is the correct width. So what that comes down to is your roller
- [00:08:53.269] what that comes down to is your roller
- [00:08:53.279] what that comes down to is your roller might have, let's say, five of these
- [00:08:55.590] might have, let's say, five of these
- [00:08:55.600] might have, let's say, five of these roller clamps. You'll notice they're not
- [00:08:57.990] roller clamps. You'll notice they're not
- [00:08:58.000] roller clamps. You'll notice they're not equally spaced. Some is closer, some is
- [00:08:59.990] equally spaced. Some is closer, some is
- [00:09:00.000] equally spaced. Some is closer, some is further. What that comes down to is if
- [00:09:02.389] further. What that comes down to is if
- [00:09:02.399] further. What that comes down to is if you've got a small piece of uh vinyl.
- [00:09:05.509] you've got a small piece of uh vinyl.
- [00:09:05.519] you've got a small piece of uh vinyl. You want to make sure you align it
- [00:09:06.870] You want to make sure you align it
- [00:09:06.880] You want to make sure you align it between ones that's closer together
- [00:09:08.470] between ones that's closer together
- [00:09:08.480] between ones that's closer together where the vinyl fits in where if it
- [00:09:11.110] where the vinyl fits in where if it
- [00:09:11.120] where the vinyl fits in where if it obviously doesn't fit in, your vinyl is
- [00:09:12.710] obviously doesn't fit in, your vinyl is
- [00:09:12.720] obviously doesn't fit in, your vinyl is going to run skew and then it's going to
- [00:09:14.230] going to run skew and then it's going to
- [00:09:14.240] going to run skew and then it's going to mess up your whole design or when it
- [00:09:16.150] mess up your whole design or when it
- [00:09:16.160] mess up your whole design or when it comes to big rolls. In general, you
- [00:09:17.750] comes to big rolls. In general, you
- [00:09:17.760] comes to big rolls. In general, you don't have to be too worried cuz most of
- [00:09:19.110] don't have to be too worried cuz most of
- [00:09:19.120] don't have to be too worried cuz most of the clamps will be aligning. So now what
- [00:09:21.590] the clamps will be aligning. So now what
- [00:09:21.600] the clamps will be aligning. So now what you do is once you've learned your
- [00:09:22.630] you do is once you've learned your
- [00:09:22.640] you do is once you've learned your vinyl, make sure that it's properly
- [00:09:24.389] vinyl, make sure that it's properly
- [00:09:24.399] vinyl, make sure that it's properly aligned. What can also sometimes help is
- [00:09:27.670] aligned. What can also sometimes help is
- [00:09:27.680] aligned. What can also sometimes help is you'll clamp, let's say you've got using
- [00:09:29.590] you'll clamp, let's say you've got using
- [00:09:29.600] you'll clamp, let's say you've got using two clamps. You clamp the one and then
- [00:09:32.630] two clamps. You clamp the one and then
- [00:09:32.640] two clamps. You clamp the one and then you slowly adjust the vinyl on the other
- [00:09:34.550] you slowly adjust the vinyl on the other
- [00:09:34.560] you slowly adjust the vinyl on the other side till it's aligned with some form of
- [00:09:36.630] side till it's aligned with some form of
- [00:09:36.640] side till it's aligned with some form of guide. Then you clamp that one. But make
- [00:09:39.030] guide. Then you clamp that one. But make
- [00:09:39.040] guide. Then you clamp that one. But make sure you keep your alignment. This is
- [00:09:40.949] sure you keep your alignment. This is
- [00:09:40.959] sure you keep your alignment. This is some easy way to align it when you're
- [00:09:42.870] some easy way to align it when you're
- [00:09:42.880] some easy way to align it when you're using loose pieces. So now when it comes
- [00:09:45.509] using loose pieces. So now when it comes
- [00:09:45.519] using loose pieces. So now when it comes to slack on the material, it is very
- [00:09:47.509] to slack on the material, it is very
- [00:09:47.519] to slack on the material, it is very important to remove this especially if
- [00:09:49.590] important to remove this especially if
- [00:09:49.600] important to remove this especially if you're working over large surfaces. This
- [00:09:51.990] you're working over large surfaces. This
- [00:09:52.000] you're working over large surfaces. This will prevent your material from going
- [00:09:53.430] will prevent your material from going
- [00:09:53.440] will prevent your material from going skew and also from the cutting case or
- [00:09:55.990] skew and also from the cutting case or
- [00:09:56.000] skew and also from the cutting case or the blade hooking and damaging your
- [00:09:57.670] the blade hooking and damaging your
- [00:09:57.680] the blade hooking and damaging your material. So now in order to do that,
- [00:10:00.550] material. So now in order to do that,
- [00:10:00.560] material. So now in order to do that, we're going to simply pinch down the
- [00:10:02.949] we're going to simply pinch down the
- [00:10:02.959] we're going to simply pinch down the pinch roller closest to the control
- [00:10:04.870] pinch roller closest to the control
- [00:10:04.880] pinch roller closest to the control panel. In our case at least, then you're
- [00:10:07.509] panel. In our case at least, then you're
- [00:10:07.519] panel. In our case at least, then you're going to simply wipe out any slack. Now,
- [00:10:09.990] going to simply wipe out any slack. Now,
- [00:10:10.000] going to simply wipe out any slack. Now, make sure while you do this, you keep
- [00:10:11.590] make sure while you do this, you keep
- [00:10:11.600] make sure while you do this, you keep tension so you don't give slack back.
- [00:10:13.990] tension so you don't give slack back.
- [00:10:14.000] tension so you don't give slack back. And then when you get to the edge of the
- [00:10:15.430] And then when you get to the edge of the
- [00:10:15.440] And then when you get to the edge of the material, keep the tension. Ensure that
- [00:10:18.389] material, keep the tension. Ensure that
- [00:10:18.399] material, keep the tension. Ensure that your edge of your material is still
- [00:10:20.230] your edge of your material is still
- [00:10:20.240] your edge of your material is still aligned. and then clamp that pinch
- [00:10:22.790] aligned. and then clamp that pinch
- [00:10:22.800] aligned. and then clamp that pinch roller. Then after that, what we can do
- [00:10:25.030] roller. Then after that, what we can do
- [00:10:25.040] roller. Then after that, what we can do is clamp down the center rollers.
- [00:10:29.350] is clamp down the center rollers.
- [00:10:29.360] is clamp down the center rollers. Okay, next up, let's look at actually
- [00:10:31.110] Okay, next up, let's look at actually
- [00:10:31.120] Okay, next up, let's look at actually adding a vinyl roll to a machine. Now,
- [00:10:34.069] adding a vinyl roll to a machine. Now,
- [00:10:34.079] adding a vinyl roll to a machine. Now, depending on the size of the machine,
- [00:10:35.990] depending on the size of the machine,
- [00:10:36.000] depending on the size of the machine, you're probably going to have two
- [00:10:37.110] you're probably going to have two
- [00:10:37.120] you're probably going to have two different options. The one is if you
- [00:10:39.750] different options. The one is if you
- [00:10:39.760] different options. The one is if you have a single roll, then it's going to
- [00:10:41.750] have a single roll, then it's going to
- [00:10:41.760] have a single roll, then it's going to be sliding on or a single roller, should
- [00:10:44.870] be sliding on or a single roller, should
- [00:10:44.880] be sliding on or a single roller, should I rather say. where some of the larger
- [00:10:47.110] I rather say. where some of the larger
- [00:10:47.120] I rather say. where some of the larger ones that use larger um vinyls as well
- [00:10:49.750] ones that use larger um vinyls as well
- [00:10:49.760] ones that use larger um vinyls as well will have a dual roller. So the
- [00:10:53.269] will have a dual roller. So the
- [00:10:53.279] will have a dual roller. So the difference is with a single roller
- [00:10:54.870] difference is with a single roller
- [00:10:54.880] difference is with a single roller you're going to be putting the roller
- [00:10:56.310] you're going to be putting the roller
- [00:10:56.320] you're going to be putting the roller through the vinyl and with a double one
- [00:10:58.710] through the vinyl and with a double one
- [00:10:58.720] through the vinyl and with a double one you'll be having the vinyl lay on the
- [00:11:00.630] you'll be having the vinyl lay on the
- [00:11:00.640] you'll be having the vinyl lay on the rollers. Okay. Now to actually load a
- [00:11:03.430] rollers. Okay. Now to actually load a
- [00:11:03.440] rollers. Okay. Now to actually load a vinyl roll obviously do it from the
- [00:11:05.269] vinyl roll obviously do it from the
- [00:11:05.279] vinyl roll obviously do it from the back. Make sure your clamps are loose.
- [00:11:07.990] back. Make sure your clamps are loose.
- [00:11:08.000] back. Make sure your clamps are loose. Then you feed the roller in from the
- [00:11:10.069] Then you feed the roller in from the
- [00:11:10.079] Then you feed the roller in from the back and have ideally someone if it's
- [00:11:12.310] back and have ideally someone if it's
- [00:11:12.320] back and have ideally someone if it's big go from the front and guide it. And
- [00:11:15.670] big go from the front and guide it. And
- [00:11:15.680] big go from the front and guide it. And then try keep tension on both sides so
- [00:11:18.310] then try keep tension on both sides so
- [00:11:18.320] then try keep tension on both sides so you don't start bubbling it. This way
- [00:11:20.389] you don't start bubbling it. This way
- [00:11:20.399] you don't start bubbling it. This way you just know it's going to be more
- [00:11:21.430] you just know it's going to be more
- [00:11:21.440] you just know it's going to be more accurate once you're cutting. Then what
- [00:11:23.430] accurate once you're cutting. Then what
- [00:11:23.440] accurate once you're cutting. Then what you can do is start clamping them down
- [00:11:25.430] you can do is start clamping them down
- [00:11:25.440] you can do is start clamping them down and then you should be good to go.
- [00:11:28.550] and then you should be good to go.
- [00:11:28.560] and then you should be good to go. Now here we can see a nice example of a
- [00:11:30.550] Now here we can see a nice example of a
- [00:11:30.560] Now here we can see a nice example of a vinyl roll loaded correctly. You can see
- [00:11:33.190] vinyl roll loaded correctly. You can see
- [00:11:33.200] vinyl roll loaded correctly. You can see there's nice tension right through the
- [00:11:34.949] there's nice tension right through the
- [00:11:34.959] there's nice tension right through the material which means it's going to have
- [00:11:36.870] material which means it's going to have
- [00:11:36.880] material which means it's going to have a nice smooth cut and potentially a even
- [00:11:40.069] a nice smooth cut and potentially a even
- [00:11:40.079] a nice smooth cut and potentially a even feed. Now when it comes to removing your
- [00:11:41.990] feed. Now when it comes to removing your
- [00:11:42.000] feed. Now when it comes to removing your vinyl, let's say you're done cutting and
- [00:11:43.269] vinyl, let's say you're done cutting and
- [00:11:43.279] vinyl, let's say you're done cutting and you want to roll it back up. It's
- [00:11:44.790] you want to roll it back up. It's
- [00:11:44.800] you want to roll it back up. It's important to keep some tension on the
- [00:11:46.230] important to keep some tension on the
- [00:11:46.240] important to keep some tension on the front and then you loosen your actual
- [00:11:48.310] front and then you loosen your actual
- [00:11:48.320] front and then you loosen your actual roller clamps. That way it doesn't just
- [00:11:50.949] roller clamps. That way it doesn't just
- [00:11:50.959] roller clamps. That way it doesn't just slide out and fall on the ground and
- [00:11:52.630] slide out and fall on the ground and
- [00:11:52.640] slide out and fall on the ground and maybe damage your material or start
- [00:11:54.389] maybe damage your material or start
- [00:11:54.399] maybe damage your material or start unrolling on the actual vinyl roll. Then
- [00:11:57.269] unrolling on the actual vinyl roll. Then
- [00:11:57.279] unrolling on the actual vinyl roll. Then what you want to do is you slowly start
- [00:11:58.630] what you want to do is you slowly start
- [00:11:58.640] what you want to do is you slowly start turning this one while keeping tension.
- [00:12:01.590] turning this one while keeping tension.
- [00:12:01.600] turning this one while keeping tension. You might have to readjust once you get
- [00:12:03.670] You might have to readjust once you get
- [00:12:03.680] You might have to readjust once you get close to the end and then feed it
- [00:12:06.150] close to the end and then feed it
- [00:12:06.160] close to the end and then feed it through. And on the other side you roll
- [00:12:09.110] through. And on the other side you roll
- [00:12:09.120] through. And on the other side you roll it up nicely. And what you can do is use
- [00:12:11.269] it up nicely. And what you can do is use
- [00:12:11.279] it up nicely. And what you can do is use something like masking tape and you just
- [00:12:12.790] something like masking tape and you just
- [00:12:12.800] something like masking tape and you just tape those two together so that when
- [00:12:14.310] tape those two together so that when
- [00:12:14.320] tape those two together so that when you're storing it, it doesn't start
- [00:12:15.590] you're storing it, it doesn't start
- [00:12:15.600] you're storing it, it doesn't start unrolling itself cuz that's going to be
- [00:12:17.030] unrolling itself cuz that's going to be
- [00:12:17.040] unrolling itself cuz that's going to be a nightmare later. So when it comes to
- [00:12:19.509] a nightmare later. So when it comes to
- [00:12:19.519] a nightmare later. So when it comes to these vinyl rolls, it is quite important
- [00:12:21.430] these vinyl rolls, it is quite important
- [00:12:21.440] these vinyl rolls, it is quite important to know the correct way of storing
- [00:12:22.949] to know the correct way of storing
- [00:12:22.959] to know the correct way of storing these. What it comes down to is you want
- [00:12:24.870] these. What it comes down to is you want
- [00:12:24.880] these. What it comes down to is you want to make sure you always store these
- [00:12:26.310] to make sure you always store these
- [00:12:26.320] to make sure you always store these rolls on their sides because if you do
- [00:12:28.870] rolls on their sides because if you do
- [00:12:28.880] rolls on their sides because if you do not, what will end up happening is you
- [00:12:30.470] not, what will end up happening is you
- [00:12:30.480] not, what will end up happening is you store them, let's say, upright, then the
- [00:12:33.030] store them, let's say, upright, then the
- [00:12:33.040] store them, let's say, upright, then the actual vinyl will with time slowly start
- [00:12:35.750] actual vinyl will with time slowly start
- [00:12:35.760] actual vinyl will with time slowly start sinking down and basically gathering on
- [00:12:37.910] sinking down and basically gathering on
- [00:12:37.920] sinking down and basically gathering on one side. Then what happens is when you
- [00:12:40.230] one side. Then what happens is when you
- [00:12:40.240] one side. Then what happens is when you finally feed in your machine once again
- [00:12:41.910] finally feed in your machine once again
- [00:12:41.920] finally feed in your machine once again the vinyl is going to be going skew and
- [00:12:43.910] the vinyl is going to be going skew and
- [00:12:43.920] the vinyl is going to be going skew and you might then try adjust let's say the
- [00:12:46.150] you might then try adjust let's say the
- [00:12:46.160] you might then try adjust let's say the pinch rollers and it does not correct
- [00:12:48.470] pinch rollers and it does not correct
- [00:12:48.480] pinch rollers and it does not correct it. It's because you've actually stored
- [00:12:50.069] it. It's because you've actually stored
- [00:12:50.079] it. It's because you've actually stored the vinyl wrong. So just keep that in
- [00:12:51.590] the vinyl wrong. So just keep that in
- [00:12:51.600] the vinyl wrong. So just keep that in mind. It's very handy to know. Okay.
- [00:12:54.389] mind. It's very handy to know. Okay.
- [00:12:54.399] mind. It's very handy to know. Okay. Next up now if we had to look at our
- [00:12:57.110] Next up now if we had to look at our
- [00:12:57.120] Next up now if we had to look at our cutting mat I mean there's multiple
- [00:12:59.190] cutting mat I mean there's multiple
- [00:12:59.200] cutting mat I mean there's multiple reason why you might want to use a
- [00:13:00.710] reason why you might want to use a
- [00:13:00.720] reason why you might want to use a cutting mat but in most cases let's say
- [00:13:02.870] cutting mat but in most cases let's say
- [00:13:02.880] cutting mat but in most cases let's say your piece is too small then um or you
- [00:13:05.350] your piece is too small then um or you
- [00:13:05.360] your piece is too small then um or you need something very accurate and very
- [00:13:07.030] need something very accurate and very
- [00:13:07.040] need something very accurate and very straight. Then what we'll do is we use
- [00:13:09.590] straight. Then what we'll do is we use
- [00:13:09.600] straight. Then what we'll do is we use our cutting mat. Now in order to use a
- [00:13:12.629] our cutting mat. Now in order to use a
- [00:13:12.639] our cutting mat. Now in order to use a cutting mat, we have to peel off the
- [00:13:14.389] cutting mat, we have to peel off the
- [00:13:14.399] cutting mat, we have to peel off the adhesive cover. Now just keep in mind
- [00:13:17.350] adhesive cover. Now just keep in mind
- [00:13:17.360] adhesive cover. Now just keep in mind you want to store this cuz we want to
- [00:13:18.790] you want to store this cuz we want to
- [00:13:18.800] you want to store this cuz we want to put it back on afterwards so it keeps
- [00:13:21.030] put it back on afterwards so it keeps
- [00:13:21.040] put it back on afterwards so it keeps the sticky side of the cutting mat for
- [00:13:23.670] the sticky side of the cutting mat for
- [00:13:23.680] the sticky side of the cutting mat for as long as possible.
- [00:13:26.069] as long as possible.
- [00:13:26.079] as long as possible. Then what we can do is we place this
- [00:13:27.670] Then what we can do is we place this
- [00:13:27.680] Then what we can do is we place this with the sticky side up and then we put
- [00:13:30.389] with the sticky side up and then we put
- [00:13:30.399] with the sticky side up and then we put our actual vinyl on the back of that.
- [00:13:33.829] our actual vinyl on the back of that.
- [00:13:33.839] our actual vinyl on the back of that. But you can kind of roll it from the
- [00:13:35.829] But you can kind of roll it from the
- [00:13:35.839] But you can kind of roll it from the center out just so we don't we prevent
- [00:13:38.629] center out just so we don't we prevent
- [00:13:38.639] center out just so we don't we prevent any air bubbles and so forth. Okay. But
- [00:13:41.269] any air bubbles and so forth. Okay. But
- [00:13:41.279] any air bubbles and so forth. Okay. But important as well is don't put too much
- [00:13:43.110] important as well is don't put too much
- [00:13:43.120] important as well is don't put too much pressure when you apply this because it
- [00:13:45.430] pressure when you apply this because it
- [00:13:45.440] pressure when you apply this because it will stick your vinyl down a little bit
- [00:13:47.110] will stick your vinyl down a little bit
- [00:13:47.120] will stick your vinyl down a little bit too hard. Maybe when you want to use a
- [00:13:48.550] too hard. Maybe when you want to use a
- [00:13:48.560] too hard. Maybe when you want to use a transfer paper afterwards it's hard or
- [00:13:51.190] transfer paper afterwards it's hard or
- [00:13:51.200] transfer paper afterwards it's hard or what's going to end up happening is
- [00:13:52.550] what's going to end up happening is
- [00:13:52.560] what's going to end up happening is you're going to wear out your adhesive
- [00:13:53.990] you're going to wear out your adhesive
- [00:13:54.000] you're going to wear out your adhesive on the vinyl mat and then you're going
- [00:13:56.310] on the vinyl mat and then you're going
- [00:13:56.320] on the vinyl mat and then you're going to have to replace it sooner than later.
- [00:13:58.710] to have to replace it sooner than later.
- [00:13:58.720] to have to replace it sooner than later. You can just give it a gentle rub. Make
- [00:14:01.030] You can just give it a gentle rub. Make
- [00:14:01.040] You can just give it a gentle rub. Make sure it is sticking.
- [00:14:03.670] sure it is sticking.
- [00:14:03.680] sure it is sticking. Then to load it into your vinyl machine,
- [00:14:05.750] Then to load it into your vinyl machine,
- [00:14:05.760] Then to load it into your vinyl machine, it's pretty straightforward. Once again,
- [00:14:07.430] it's pretty straightforward. Once again,
- [00:14:07.440] it's pretty straightforward. Once again, you just loosen the clamps, you feed it
- [00:14:09.750] you just loosen the clamps, you feed it
- [00:14:09.760] you just loosen the clamps, you feed it in. When you're working with this size,
- [00:14:12.389] in. When you're working with this size,
- [00:14:12.399] in. When you're working with this size, obviously, also make sure it fits
- [00:14:14.069] obviously, also make sure it fits
- [00:14:14.079] obviously, also make sure it fits between the actual right clamps where if
- [00:14:16.949] between the actual right clamps where if
- [00:14:16.959] between the actual right clamps where if the size is too big, it's going to feed
- [00:14:18.470] the size is too big, it's going to feed
- [00:14:18.480] the size is too big, it's going to feed it off, which is going to be a problem.
- [00:14:20.310] it off, which is going to be a problem.
- [00:14:20.320] it off, which is going to be a problem. When you're happy, you clamp it on and
- [00:14:21.910] When you're happy, you clamp it on and
- [00:14:21.920] When you're happy, you clamp it on and then you are ready to go. Okay, next up,
- [00:14:24.310] then you are ready to go. Okay, next up,
- [00:14:24.320] then you are ready to go. Okay, next up, we're going to be looking at some ports
- [00:14:25.829] we're going to be looking at some ports
- [00:14:25.839] we're going to be looking at some ports on the actual machine. Now, like I said,
- [00:14:29.670] on the actual machine. Now, like I said,
- [00:14:29.680] on the actual machine. Now, like I said, keep in mind this might vary slightly
- [00:14:31.829] keep in mind this might vary slightly
- [00:14:31.839] keep in mind this might vary slightly depending on your machine, but in
- [00:14:33.430] depending on your machine, but in
- [00:14:33.440] depending on your machine, but in general, it's relatively the same. So,
- [00:14:35.670] general, it's relatively the same. So,
- [00:14:35.680] general, it's relatively the same. So, you might have one or two things not
- [00:14:37.110] you might have one or two things not
- [00:14:37.120] you might have one or two things not there, or you might have one or two
- [00:14:38.550] there, or you might have one or two
- [00:14:38.560] there, or you might have one or two things there that this video doesn't
- [00:14:40.230] things there that this video doesn't
- [00:14:40.240] things there that this video doesn't have, but the general workflow will be
- [00:14:42.550] have, but the general workflow will be
- [00:14:42.560] have, but the general workflow will be the same. So, now on the one side here
- [00:14:45.269] the same. So, now on the one side here
- [00:14:45.279] the same. So, now on the one side here on this machine will be the left side.
- [00:14:47.030] on this machine will be the left side.
- [00:14:47.040] on this machine will be the left side. You can see here we've got a power port,
- [00:14:49.590] You can see here we've got a power port,
- [00:14:49.600] You can see here we've got a power port, we've got a fuse, and onoff switch. Now,
- [00:14:52.470] we've got a fuse, and onoff switch. Now,
- [00:14:52.480] we've got a fuse, and onoff switch. Now, in most machines, you're not going to
- [00:14:53.670] in most machines, you're not going to
- [00:14:53.680] in most machines, you're not going to have the fuse. This is a luxury feature
- [00:14:56.949] have the fuse. This is a luxury feature
- [00:14:56.959] have the fuse. This is a luxury feature and it is handy to have. But yeah, most
- [00:14:59.269] and it is handy to have. But yeah, most
- [00:14:59.279] and it is handy to have. But yeah, most of the time, you know, you can get away
- [00:15:01.350] of the time, you know, you can get away
- [00:15:01.360] of the time, you know, you can get away without a fuse, but we'll show you later
- [00:15:03.350] without a fuse, but we'll show you later
- [00:15:03.360] without a fuse, but we'll show you later on the maintenance section how to go
- [00:15:05.670] on the maintenance section how to go
- [00:15:05.680] on the maintenance section how to go about that.
- [00:15:07.590] about that.
- [00:15:07.600] about that. Now, when you put in your power cable,
- [00:15:09.189] Now, when you put in your power cable,
- [00:15:09.199] Now, when you put in your power cable, make sure it sits in there nicely and
- [00:15:10.629] make sure it sits in there nicely and
- [00:15:10.639] make sure it sits in there nicely and it's not loose, cuz that can create
- [00:15:12.470] it's not loose, cuz that can create
- [00:15:12.480] it's not loose, cuz that can create problems later on, especially when the
- [00:15:14.069] problems later on, especially when the
- [00:15:14.079] problems later on, especially when the machine starts moving. We want to also
- [00:15:15.990] machine starts moving. We want to also
- [00:15:16.000] machine starts moving. We want to also make sure we switch the machine on. Now,
- [00:15:18.389] make sure we switch the machine on. Now,
- [00:15:18.399] make sure we switch the machine on. Now, obviously, if your machine doesn't power
- [00:15:19.670] obviously, if your machine doesn't power
- [00:15:19.680] obviously, if your machine doesn't power on, you need to put it on by the wall as
- [00:15:21.590] on, you need to put it on by the wall as
- [00:15:21.600] on, you need to put it on by the wall as well. On the other side of the machine,
- [00:15:24.230] well. On the other side of the machine,
- [00:15:24.240] well. On the other side of the machine, you can see we've got three different
- [00:15:25.590] you can see we've got three different
- [00:15:25.600] you can see we've got three different ports. In general, we have the UDIS,
- [00:15:28.470] ports. In general, we have the UDIS,
- [00:15:28.480] ports. In general, we have the UDIS, which is for flash drives. We have the
- [00:15:30.710] which is for flash drives. We have the
- [00:15:30.720] which is for flash drives. We have the USB, which is a printer cable. And then
- [00:15:33.750] USB, which is a printer cable. And then
- [00:15:33.760] USB, which is a printer cable. And then we have the comp port, which is a little
- [00:15:35.829] we have the comp port, which is a little
- [00:15:35.839] we have the comp port, which is a little bit more old school, but there's still
- [00:15:37.509] bit more old school, but there's still
- [00:15:37.519] bit more old school, but there's still places where you might want to use that
- [00:15:39.030] places where you might want to use that
- [00:15:39.040] places where you might want to use that instead.
- [00:15:40.710] instead.
- [00:15:40.720] instead. Now, when it comes to actual USB printer
- [00:15:42.550] Now, when it comes to actual USB printer
- [00:15:42.560] Now, when it comes to actual USB printer cable, you just simply plug that in and
- [00:15:45.350] cable, you just simply plug that in and
- [00:15:45.360] cable, you just simply plug that in and then you go to your computer and plug it
- [00:15:47.110] then you go to your computer and plug it
- [00:15:47.120] then you go to your computer and plug it in on the other side. Later on, we'll
- [00:15:50.230] in on the other side. Later on, we'll
- [00:15:50.240] in on the other side. Later on, we'll test to make sure we've got a nice clean
- [00:15:51.990] test to make sure we've got a nice clean
- [00:15:52.000] test to make sure we've got a nice clean connection. But that's it. When it comes
- [00:15:54.230] connection. But that's it. When it comes
- [00:15:54.240] connection. But that's it. When it comes to the comp port, likewise, simply plug
- [00:15:57.189] to the comp port, likewise, simply plug
- [00:15:57.199] to the comp port, likewise, simply plug it in. And don't forget to tighten those
- [00:15:59.749] it in. And don't forget to tighten those
- [00:15:59.759] it in. And don't forget to tighten those little screws so it cannot come in and
- [00:16:02.629] little screws so it cannot come in and
- [00:16:02.639] little screws so it cannot come in and out by accident.
- [00:16:05.030] out by accident.
- [00:16:05.040] out by accident. Then the USB, same thing. You just flip
- [00:16:07.670] Then the USB, same thing. You just flip
- [00:16:07.680] Then the USB, same thing. You just flip it. Make sure the USB is the right way
- [00:16:09.670] it. Make sure the USB is the right way
- [00:16:09.680] it. Make sure the USB is the right way up. And then we slide it in there. And
- [00:16:13.189] up. And then we slide it in there. And
- [00:16:13.199] up. And then we slide it in there. And then obviously on some models you will
- [00:16:15.030] then obviously on some models you will
- [00:16:15.040] then obviously on some models you will get the one that's actually wireless so
- [00:16:16.710] get the one that's actually wireless so
- [00:16:16.720] get the one that's actually wireless so you can cut over a network which is
- [00:16:18.790] you can cut over a network which is
- [00:16:18.800] you can cut over a network which is pretty handy. Okay, thanks guys. That's
- [00:16:21.269] pretty handy. Okay, thanks guys. That's
- [00:16:21.279] pretty handy. Okay, thanks guys. That's it on the machine operation and I'll see
- [00:16:23.189] it on the machine operation and I'll see
- [00:16:23.199] it on the machine operation and I'll see you guys in the next video. Cheers.
Keyframes
- /workspace/academy/media/1kn5Yl5PHB505qbH6JAKlJwIeIxN6WJ7e/keyframes/last.jpg
- /workspace/academy/media/1kn5Yl5PHB505qbH6JAKlJwIeIxN6WJ7e/keyframes/t004.jpg
- /workspace/academy/media/1kn5Yl5PHB505qbH6JAKlJwIeIxN6WJ7e/keyframes/t009.jpg
- /workspace/academy/media/1kn5Yl5PHB505qbH6JAKlJwIeIxN6WJ7e/keyframes/t013.jpg
- /workspace/academy/media/1kn5Yl5PHB505qbH6JAKlJwIeIxN6WJ7e/keyframes/t017.jpg
- /workspace/academy/media/1kn5Yl5PHB505qbH6JAKlJwIeIxN6WJ7e/keyframes/t022.jpg
- /workspace/academy/media/1kn5Yl5PHB505qbH6JAKlJwIeIxN6WJ7e/keyframes/t026.jpg
- /workspace/academy/media/1kn5Yl5PHB505qbH6JAKlJwIeIxN6WJ7e/keyframes/t030.jpg
- /workspace/academy/media/1kn5Yl5PHB505qbH6JAKlJwIeIxN6WJ7e/keyframes/t034.jpg
- /workspace/academy/media/1kn5Yl5PHB505qbH6JAKlJwIeIxN6WJ7e/keyframes/t039.jpg
- /workspace/academy/media/1kn5Yl5PHB505qbH6JAKlJwIeIxN6WJ7e/keyframes/t043.jpg
- /workspace/academy/media/1kn5Yl5PHB505qbH6JAKlJwIeIxN6WJ7e/keyframes/t047.jpg
- /workspace/academy/media/1kn5Yl5PHB505qbH6JAKlJwIeIxN6WJ7e/keyframes/t052.jpg
- /workspace/academy/media/1kn5Yl5PHB505qbH6JAKlJwIeIxN6WJ7e/keyframes/t056.jpg
- /workspace/academy/media/1kn5Yl5PHB505qbH6JAKlJwIeIxN6WJ7e/keyframes/t060.jpg
- /workspace/academy/media/1kn5Yl5PHB505qbH6JAKlJwIeIxN6WJ7e/keyframes/t065.jpg
- /workspace/academy/media/1kn5Yl5PHB505qbH6JAKlJwIeIxN6WJ7e/keyframes/t069.jpg
- /workspace/academy/media/1kn5Yl5PHB505qbH6JAKlJwIeIxN6WJ7e/keyframes/t073.jpg
- /workspace/academy/media/1kn5Yl5PHB505qbH6JAKlJwIeIxN6WJ7e/keyframes/t077.jpg
- /workspace/academy/media/1kn5Yl5PHB505qbH6JAKlJwIeIxN6WJ7e/keyframes/t082.jpg
- /workspace/academy/media/1kn5Yl5PHB505qbH6JAKlJwIeIxN6WJ7e/keyframes/t086.jpg
- /workspace/academy/media/1kn5Yl5PHB505qbH6JAKlJwIeIxN6WJ7e/keyframes/t090.jpg
- /workspace/academy/media/1kn5Yl5PHB505qbH6JAKlJwIeIxN6WJ7e/keyframes/t095.jpg
- /workspace/academy/media/1kn5Yl5PHB505qbH6JAKlJwIeIxN6WJ7e/keyframes/t099.jpg
9. Safety
- title: Safety
- status: publish
- author: 0
- is_previewable: (empty)
- video_duration: 0h 2m 13s (raw {"hours":0,"minutes":2,"seconds":13})
- video_source_type: embedded
- drive_file_id:
1XMyqe07SGAebU9FJEcV1YA3kgST3yu3u(source_ref; not a public link) - transcript pending / keyframes pending / presentation extract pending
- video_source_url: (Drive preview omitted as a public link; file id kept as source_ref)
In this video we will be covering some vinyl cutter safety practises.
- quizzes_following_this_lesson: 1 (full text in Quizzes)
- Safety (2 questions)
Drive extract
- file_id:
1XMyqe07SGAebU9FJEcV1YA3kgST3yu3u - filename: 04 - MA - Safety.mp4
- kind: video
- local_path: /workspace/academy/media/1XMyqe07SGAebU9FJEcV1YA3kgST3yu3u/04 - MA - Safety.mp4
- source_ref: drive
1XMyqe07SGAebU9FJEcV1YA3kgST3yu3u· content_length 45753944 · original https://drive.google.com/file/d/1XMyqe07SGAebU9FJEcV1YA3kgST3yu3u/view - extract_status: done
- caption_source: drive_timedtext
- duration_s: 133.886009
- keyframe_count: 12
Transcript
- Howdy, guys. In today's video, we're
- [00:00:02.230] Howdy, guys. In today's video, we're
- [00:00:02.240] Howdy, guys. In today's video, we're going to be looking at some basic safety
- [00:00:04.550] going to be looking at some basic safety
- [00:00:04.560] going to be looking at some basic safety for the vinyl cutter machines.
- [00:00:08.070] for the vinyl cutter machines.
- [00:00:08.080] for the vinyl cutter machines. First off, we'll be looking at moving
- [00:00:10.390] First off, we'll be looking at moving
- [00:00:10.400] First off, we'll be looking at moving parts. So, this is going to be our first
- [00:00:11.990] parts. So, this is going to be our first
- [00:00:12.000] parts. So, this is going to be our first section that we want to look out for.
- [00:00:14.789] section that we want to look out for.
- [00:00:14.799] section that we want to look out for. And it's probably also the most, I can
- [00:00:16.390] And it's probably also the most, I can
- [00:00:16.400] And it's probably also the most, I can kind of say, dangerous part if you're
- [00:00:18.070] kind of say, dangerous part if you're
- [00:00:18.080] kind of say, dangerous part if you're not careful of what you're doing. So,
- [00:00:20.470] not careful of what you're doing. So,
- [00:00:20.480] not careful of what you're doing. So, now the cutting head, as we can see
- [00:00:21.990] now the cutting head, as we can see
- [00:00:22.000] now the cutting head, as we can see here, moves sideways the whole time. and
- [00:00:25.109] here, moves sideways the whole time. and
- [00:00:25.119] here, moves sideways the whole time. and it is driven by motors which means if
- [00:00:27.429] it is driven by motors which means if
- [00:00:27.439] it is driven by motors which means if you get something stuck in between there
- [00:00:29.029] you get something stuck in between there
- [00:00:29.039] you get something stuck in between there it might damage the machine or very
- [00:00:31.429] it might damage the machine or very
- [00:00:31.439] it might damage the machine or very likely hurt you. So I would say this is
- [00:00:33.670] likely hurt you. So I would say this is
- [00:00:33.680] likely hurt you. So I would say this is one of the biggest parts that you must
- [00:00:35.030] one of the biggest parts that you must
- [00:00:35.040] one of the biggest parts that you must watch out for and that is why you never
- [00:00:37.030] watch out for and that is why you never
- [00:00:37.040] watch out for and that is why you never play with these things while the
- [00:00:38.150] play with these things while the
- [00:00:38.160] play with these things while the machine's operating. If you have to you
- [00:00:40.150] machine's operating. If you have to you
- [00:00:40.160] machine's operating. If you have to you push the pause button or you stop your
- [00:00:42.310] push the pause button or you stop your
- [00:00:42.320] push the pause button or you stop your actual operation.
- [00:00:44.709] actual operation.
- [00:00:44.719] actual operation. Then the next up we have blades.
- [00:00:48.069] Then the next up we have blades.
- [00:00:48.079] Then the next up we have blades. Now I know I've mentioned it a few times
- [00:00:50.310] Now I know I've mentioned it a few times
- [00:00:50.320] Now I know I've mentioned it a few times but keep in mind these little guys are
- [00:00:51.990] but keep in mind these little guys are
- [00:00:52.000] but keep in mind these little guys are sharp. So, in other words, just practice
- [00:00:54.549] sharp. So, in other words, just practice
- [00:00:54.559] sharp. So, in other words, just practice some caution. We're doing your actual
- [00:00:57.189] some caution. We're doing your actual
- [00:00:57.199] some caution. We're doing your actual blade changes and so forth. Next up,
- [00:01:00.389] blade changes and so forth. Next up,
- [00:01:00.399] blade changes and so forth. Next up, we're going to be looking at what you do
- [00:01:01.590] we're going to be looking at what you do
- [00:01:01.600] we're going to be looking at what you do in case of an emergency. Now, let's say
- [00:01:04.549] in case of an emergency. Now, let's say
- [00:01:04.559] in case of an emergency. Now, let's say you are cutting a job and it starts
- [00:01:06.550] you are cutting a job and it starts
- [00:01:06.560] you are cutting a job and it starts messing up. Sometimes you're lucky and
- [00:01:08.469] messing up. Sometimes you're lucky and
- [00:01:08.479] messing up. Sometimes you're lucky and you can click maybe pause, but you know
- [00:01:11.670] you can click maybe pause, but you know
- [00:01:11.680] you can click maybe pause, but you know the fail safe is you head to the side of
- [00:01:14.710] the fail safe is you head to the side of
- [00:01:14.720] the fail safe is you head to the side of the machine and you hit the power down
- [00:01:17.030] the machine and you hit the power down
- [00:01:17.040] the machine and you hit the power down because if you have a material getting
- [00:01:18.630] because if you have a material getting
- [00:01:18.640] because if you have a material getting stuck or something like that, it can
- [00:01:20.870] stuck or something like that, it can
- [00:01:20.880] stuck or something like that, it can really start damaging uh actual
- [00:01:22.870] really start damaging uh actual
- [00:01:22.880] really start damaging uh actual components by trying to move things when
- [00:01:25.190] components by trying to move things when
- [00:01:25.200] components by trying to move things when they stuck and that will damage your
- [00:01:27.109] they stuck and that will damage your
- [00:01:27.119] they stuck and that will damage your machine in the long run or potentially
- [00:01:29.030] machine in the long run or potentially
- [00:01:29.040] machine in the long run or potentially right there. So, like I mentioned, you
- [00:01:31.190] right there. So, like I mentioned, you
- [00:01:31.200] right there. So, like I mentioned, you go to the side, you simply just hit off,
- [00:01:34.069] go to the side, you simply just hit off,
- [00:01:34.079] go to the side, you simply just hit off, and in worst case, if nothing happens,
- [00:01:36.469] and in worst case, if nothing happens,
- [00:01:36.479] and in worst case, if nothing happens, you make sure you pull out that power
- [00:01:38.149] you make sure you pull out that power
- [00:01:38.159] you make sure you pull out that power plug. But yeah, so just a few final
- [00:01:41.030] plug. But yeah, so just a few final
- [00:01:41.040] plug. But yeah, so just a few final notes on safety.
- [00:01:43.270] notes on safety.
- [00:01:43.280] notes on safety. A general good rule is never leave the
- [00:01:46.069] A general good rule is never leave the
- [00:01:46.079] A general good rule is never leave the machine unattended while it's operating
- [00:01:48.630] machine unattended while it's operating
- [00:01:48.640] machine unattended while it's operating because obviously if an accident
- [00:01:50.310] because obviously if an accident
- [00:01:50.320] because obviously if an accident happens, you want to be able to attend
- [00:01:51.830] happens, you want to be able to attend
- [00:01:51.840] happens, you want to be able to attend to it as quick as possible. In general,
- [00:01:54.230] to it as quick as possible. In general,
- [00:01:54.240] to it as quick as possible. In general, I would say always supervise the
- [00:01:55.910] I would say always supervise the
- [00:01:55.920] I would say always supervise the machine. If you need to do something in
- [00:01:57.670] machine. If you need to do something in
- [00:01:57.680] machine. If you need to do something in emergency, just hit the pause button,
- [00:02:00.069] emergency, just hit the pause button,
- [00:02:00.079] emergency, just hit the pause button, come back, carry on. Otherwise, that is
- [00:02:02.709] come back, carry on. Otherwise, that is
- [00:02:02.719] come back, carry on. Otherwise, that is it on general safety. Always practice
- [00:02:04.870] it on general safety. Always practice
- [00:02:04.880] it on general safety. Always practice safety, but I would say vinyl cutters in
- [00:02:07.030] safety, but I would say vinyl cutters in
- [00:02:07.040] safety, but I would say vinyl cutters in general is it's not one of the scarier
- [00:02:09.190] general is it's not one of the scarier
- [00:02:09.200] general is it's not one of the scarier CNC machines. Thanks for watching and
- [00:02:11.750] CNC machines. Thanks for watching and
- [00:02:11.760] CNC machines. Thanks for watching and I'll catch you guys on the next one.
- [00:02:13.190] I'll catch you guys on the next one.
- [00:02:13.200] I'll catch you guys on the next one. Chess.
Keyframes
- /workspace/academy/media/1XMyqe07SGAebU9FJEcV1YA3kgST3yu3u/keyframes/last.jpg
- /workspace/academy/media/1XMyqe07SGAebU9FJEcV1YA3kgST3yu3u/keyframes/t001.jpg
- /workspace/academy/media/1XMyqe07SGAebU9FJEcV1YA3kgST3yu3u/keyframes/t002.jpg
- /workspace/academy/media/1XMyqe07SGAebU9FJEcV1YA3kgST3yu3u/keyframes/t004.jpg
- /workspace/academy/media/1XMyqe07SGAebU9FJEcV1YA3kgST3yu3u/keyframes/t005.jpg
- /workspace/academy/media/1XMyqe07SGAebU9FJEcV1YA3kgST3yu3u/keyframes/t006.jpg
- /workspace/academy/media/1XMyqe07SGAebU9FJEcV1YA3kgST3yu3u/keyframes/t007.jpg
- /workspace/academy/media/1XMyqe07SGAebU9FJEcV1YA3kgST3yu3u/keyframes/t008.jpg
- /workspace/academy/media/1XMyqe07SGAebU9FJEcV1YA3kgST3yu3u/keyframes/t009.jpg
- /workspace/academy/media/1XMyqe07SGAebU9FJEcV1YA3kgST3yu3u/keyframes/t011.jpg
- /workspace/academy/media/1XMyqe07SGAebU9FJEcV1YA3kgST3yu3u/keyframes/t012.jpg
- /workspace/academy/media/1XMyqe07SGAebU9FJEcV1YA3kgST3yu3u/keyframes/t013.jpg
10. Controls
- title: Controls
- status: publish
- author: 0
- is_previewable: (empty)
- video_duration: 0h 13m 9s (raw {"hours":0,"minutes":13,"seconds":9})
- video_source_type: embedded
- drive_file_id:
1fs3Yyu27k_hCI1KHnTggmAJBSmohatDO(source_ref; not a public link) - transcript pending / keyframes pending / presentation extract pending
- video_source_url: (Drive preview omitted as a public link; file id kept as source_ref)
In this video we will be looking at the vinyl cutter controls.
- quizzes_following_this_lesson: 1 (full text in Quizzes)
- Controls (10 questions)
Drive extract
- file_id:
1fs3Yyu27k_hCI1KHnTggmAJBSmohatDO - filename: 05 - MA - Controls.mp4
- kind: video
- local_path: /workspace/academy/media/1fs3Yyu27k_hCI1KHnTggmAJBSmohatDO/05 - MA - Controls.mp4
- source_ref: drive
1fs3Yyu27k_hCI1KHnTggmAJBSmohatDO· content_length 362087162 · original https://drive.google.com/file/d/1fs3Yyu27k_hCI1KHnTggmAJBSmohatDO/view - extract_status: done
- caption_source: drive_timedtext
- duration_s: 789.037007
- keyframe_count: 24
Transcript
- Howdy guys. In this video, we're going
- [00:00:02.629] Howdy guys. In this video, we're going
- [00:00:02.639] Howdy guys. In this video, we're going to be looking at some vinyl cutter
- [00:00:04.390] to be looking at some vinyl cutter
- [00:00:04.400] to be looking at some vinyl cutter controls.
- [00:00:06.390] controls.
- [00:00:06.400] controls. Now, when it comes to the controls,
- [00:00:08.070] Now, when it comes to the controls,
- [00:00:08.080] Now, when it comes to the controls, there's a few things we want to keep in
- [00:00:09.589] there's a few things we want to keep in
- [00:00:09.599] there's a few things we want to keep in mind. There is a number of different
- [00:00:12.310] mind. There is a number of different
- [00:00:12.320] mind. There is a number of different types, variations depending if you got
- [00:00:14.629] types, variations depending if you got
- [00:00:14.639] types, variations depending if you got an old machine, new machine. Yeah. So,
- [00:00:17.590] an old machine, new machine. Yeah. So,
- [00:00:17.600] an old machine, new machine. Yeah. So, keep that in mind. We will be following
- [00:00:19.109] keep that in mind. We will be following
- [00:00:19.119] keep that in mind. We will be following once again a general direction.
- [00:00:22.070] once again a general direction.
- [00:00:22.080] once again a general direction. Afterwards, we'll be looking at a few
- [00:00:23.509] Afterwards, we'll be looking at a few
- [00:00:23.519] Afterwards, we'll be looking at a few variations between these ones. But if
- [00:00:26.150] variations between these ones. But if
- [00:00:26.160] variations between these ones. But if you catch this, I think the general
- [00:00:27.990] you catch this, I think the general
- [00:00:28.000] you catch this, I think the general workflow will stay similar to you. Might
- [00:00:30.310] workflow will stay similar to you. Might
- [00:00:30.320] workflow will stay similar to you. Might just have to figure out one or two
- [00:00:31.589] just have to figure out one or two
- [00:00:31.599] just have to figure out one or two things, but like I said, I think you'll
- [00:00:33.270] things, but like I said, I think you'll
- [00:00:33.280] things, but like I said, I think you'll be fine. So, welcome to just follow
- [00:00:35.830] be fine. So, welcome to just follow
- [00:00:35.840] be fine. So, welcome to just follow along even if your machine is not the
- [00:00:37.670] along even if your machine is not the
- [00:00:37.680] along even if your machine is not the same.
- [00:00:39.510] same.
- [00:00:39.520] same. Okay. So, what we have here is a kind of
- [00:00:41.190] Okay. So, what we have here is a kind of
- [00:00:41.200] Okay. So, what we have here is a kind of a universal type control panel. But
- [00:00:44.470] a universal type control panel. But
- [00:00:44.480] a universal type control panel. But there's a few things we need to note on
- [00:00:45.990] there's a few things we need to note on
- [00:00:46.000] there's a few things we need to note on this. So, on top here, you will see we
- [00:00:48.069] this. So, on top here, you will see we
- [00:00:48.079] this. So, on top here, you will see we have some LED lights that will indicate
- [00:00:49.910] have some LED lights that will indicate
- [00:00:49.920] have some LED lights that will indicate different things depending what we're
- [00:00:51.430] different things depending what we're
- [00:00:51.440] different things depending what we're doing. sometimes when you're resetting a
- [00:00:53.189] doing. sometimes when you're resetting a
- [00:00:53.199] doing. sometimes when you're resetting a machine, powering on, stuff like that.
- [00:00:56.470] machine, powering on, stuff like that.
- [00:00:56.480] machine, powering on, stuff like that. Then we also have some buttons. We'll be
- [00:01:00.389] Then we also have some buttons. We'll be
- [00:01:00.399] Then we also have some buttons. We'll be using this to operating the machine,
- [00:01:02.150] using this to operating the machine,
- [00:01:02.160] using this to operating the machine, moving it around, and so forth. And this
- [00:01:04.149] moving it around, and so forth. And this
- [00:01:04.159] moving it around, and so forth. And this once again is quite universal between
- [00:01:06.070] once again is quite universal between
- [00:01:06.080] once again is quite universal between the other machines. What makes this one
- [00:01:08.149] the other machines. What makes this one
- [00:01:08.159] the other machines. What makes this one unique is the actual display
- [00:01:11.030] unique is the actual display
- [00:01:11.040] unique is the actual display is touch. So on some models, you'll can
- [00:01:14.310] is touch. So on some models, you'll can
- [00:01:14.320] is touch. So on some models, you'll can only navigate these settings via the
- [00:01:16.070] only navigate these settings via the
- [00:01:16.080] only navigate these settings via the buttons at the bottom, but in this case,
- [00:01:18.070] buttons at the bottom, but in this case,
- [00:01:18.080] buttons at the bottom, but in this case, we can actually directly touch on the
- [00:01:19.910] we can actually directly touch on the
- [00:01:19.920] we can actually directly touch on the screen and change things. So, that is
- [00:01:21.590] screen and change things. So, that is
- [00:01:21.600] screen and change things. So, that is quite handy, especially in the long run.
- [00:01:24.390] quite handy, especially in the long run.
- [00:01:24.400] quite handy, especially in the long run. Maybe your buttons wear out and then you
- [00:01:26.230] Maybe your buttons wear out and then you
- [00:01:26.240] Maybe your buttons wear out and then you can actually still operate the machine
- [00:01:27.749] can actually still operate the machine
- [00:01:27.759] can actually still operate the machine via touch, which is very cool. Okay, so
- [00:01:30.390] via touch, which is very cool. Okay, so
- [00:01:30.400] via touch, which is very cool. Okay, so next up, we're going to be looking at
- [00:01:31.429] next up, we're going to be looking at
- [00:01:31.439] next up, we're going to be looking at some of these buttons and what they do.
- [00:01:34.069] some of these buttons and what they do.
- [00:01:34.079] some of these buttons and what they do. First of all, we have the reset.
- [00:01:37.749] First of all, we have the reset.
- [00:01:37.759] First of all, we have the reset. Now, the reset you might want to use for
- [00:01:40.630] Now, the reset you might want to use for
- [00:01:40.640] Now, the reset you might want to use for multiple reasons. Most common one is
- [00:01:43.190] multiple reasons. Most common one is
- [00:01:43.200] multiple reasons. Most common one is maybe you just want to let's say you've
- [00:01:45.270] maybe you just want to let's say you've
- [00:01:45.280] maybe you just want to let's say you've cut all day, you want a fresh start,
- [00:01:47.670] cut all day, you want a fresh start,
- [00:01:47.680] cut all day, you want a fresh start, maybe things aren't quite operating the
- [00:01:49.190] maybe things aren't quite operating the
- [00:01:49.200] maybe things aren't quite operating the way it should, and then you simply press
- [00:01:51.109] way it should, and then you simply press
- [00:01:51.119] way it should, and then you simply press the reset button. And another handy
- [00:01:53.910] the reset button. And another handy
- [00:01:53.920] the reset button. And another handy thing of the reset is if you press it
- [00:01:55.510] thing of the reset is if you press it
- [00:01:55.520] thing of the reset is if you press it and you wait a bit, once it starts back
- [00:01:57.670] and you wait a bit, once it starts back
- [00:01:57.680] and you wait a bit, once it starts back up, you can actually use that to see
- [00:01:59.190] up, you can actually use that to see
- [00:01:59.200] up, you can actually use that to see some information about your machine. So
- [00:02:00.950] some information about your machine. So
- [00:02:00.960] some information about your machine. So the model and so forth. Okay, so next
- [00:02:04.630] the model and so forth. Okay, so next
- [00:02:04.640] the model and so forth. Okay, so next up, we're going to be looking at the
- [00:02:06.069] up, we're going to be looking at the
- [00:02:06.079] up, we're going to be looking at the pause button.
- [00:02:08.229] pause button.
- [00:02:08.239] pause button. Now when it comes to the pause button
- [00:02:09.669] Now when it comes to the pause button
- [00:02:09.679] Now when it comes to the pause button like I mentioned before let's say you're
- [00:02:11.190] like I mentioned before let's say you're
- [00:02:11.200] like I mentioned before let's say you're doing the operation either you maybe
- [00:02:13.270] doing the operation either you maybe
- [00:02:13.280] doing the operation either you maybe want to adjust some values and uh and so
- [00:02:15.830] want to adjust some values and uh and so
- [00:02:15.840] want to adjust some values and uh and so forth maybe the pressure the force you
- [00:02:17.270] forth maybe the pressure the force you
- [00:02:17.280] forth maybe the pressure the force you want to do it while it's going you can
- [00:02:19.110] want to do it while it's going you can
- [00:02:19.120] want to do it while it's going you can pause adjust it unps
- [00:02:22.630] pause adjust it unps
- [00:02:22.640] pause adjust it unps you need to go somewhere while your
- [00:02:23.830] you need to go somewhere while your
- [00:02:23.840] you need to go somewhere while your machine is cutting and you want to make
- [00:02:25.270] machine is cutting and you want to make
- [00:02:25.280] machine is cutting and you want to make sure this job comes out well you want to
- [00:02:27.270] sure this job comes out well you want to
- [00:02:27.280] sure this job comes out well you want to make sure there's overview and so forth
- [00:02:29.110] make sure there's overview and so forth
- [00:02:29.120] make sure there's overview and so forth then you simply hit the pause button
- [00:02:31.589] then you simply hit the pause button
- [00:02:31.599] then you simply hit the pause button come back and then unpause it when you
- [00:02:34.309] come back and then unpause it when you
- [00:02:34.319] come back and then unpause it when you are ready. Okay, next up we're going to
- [00:02:37.030] are ready. Okay, next up we're going to
- [00:02:37.040] are ready. Okay, next up we're going to be looking at force and velocity. This
- [00:02:39.430] be looking at force and velocity. This
- [00:02:39.440] be looking at force and velocity. This is probably one of the things you might
- [00:02:40.550] is probably one of the things you might
- [00:02:40.560] is probably one of the things you might be setting the most, but it's a good
- [00:02:42.949] be setting the most, but it's a good
- [00:02:42.959] be setting the most, but it's a good idea to get comfortable with this
- [00:02:44.150] idea to get comfortable with this
- [00:02:44.160] idea to get comfortable with this because some jobs you might find there's
- [00:02:46.150] because some jobs you might find there's
- [00:02:46.160] because some jobs you might find there's like a happy medium, a go-to that you do
- [00:02:49.190] like a happy medium, a go-to that you do
- [00:02:49.200] like a happy medium, a go-to that you do depending on the actual uh length of
- [00:02:51.830] depending on the actual uh length of
- [00:02:51.840] depending on the actual uh length of your blade and so forth. Now, also the
- [00:02:54.550] your blade and so forth. Now, also the
- [00:02:54.560] your blade and so forth. Now, also the general rule is force that's for cutting
- [00:02:57.030] general rule is force that's for cutting
- [00:02:57.040] general rule is force that's for cutting through thicker material, velocity,
- [00:02:59.830] through thicker material, velocity,
- [00:02:59.840] through thicker material, velocity, speed, so it's goes faster. So thicker
- [00:03:02.790] speed, so it's goes faster. So thicker
- [00:03:02.800] speed, so it's goes faster. So thicker material, you probably want to take your
- [00:03:03.830] material, you probably want to take your
- [00:03:03.840] material, you probably want to take your velocity down where skinnier material,
- [00:03:06.309] velocity down where skinnier material,
- [00:03:06.319] velocity down where skinnier material, you can go take it out. And another
- [00:03:07.670] you can go take it out. And another
- [00:03:07.680] you can go take it out. And another thing to keep in mind is also the final
- [00:03:10.229] thing to keep in mind is also the final
- [00:03:10.239] thing to keep in mind is also the final product. So let's say you just cutting
- [00:03:12.869] product. So let's say you just cutting
- [00:03:12.879] product. So let's say you just cutting generic shapes and they're not that
- [00:03:14.630] generic shapes and they're not that
- [00:03:14.640] generic shapes and they're not that important, then you can do a higher
- [00:03:16.710] important, then you can do a higher
- [00:03:16.720] important, then you can do a higher velocity. But why don't you want to
- [00:03:18.710] velocity. But why don't you want to
- [00:03:18.720] velocity. But why don't you want to start getting into detail? Then it's
- [00:03:20.869] start getting into detail? Then it's
- [00:03:20.879] start getting into detail? Then it's important to lower your velocity. Take
- [00:03:22.630] important to lower your velocity. Take
- [00:03:22.640] important to lower your velocity. Take it slow. Have the machine do all of that
- [00:03:25.110] it slow. Have the machine do all of that
- [00:03:25.120] it slow. Have the machine do all of that correctly. Now to adjust the actual
- [00:03:27.430] correctly. Now to adjust the actual
- [00:03:27.440] correctly. Now to adjust the actual force and velocity, it's important that
- [00:03:29.190] force and velocity, it's important that
- [00:03:29.200] force and velocity, it's important that we press the menu button. If we see it
- [00:03:31.910] we press the menu button. If we see it
- [00:03:31.920] we press the menu button. If we see it says the X and Y, that means we're going
- [00:03:34.630] says the X and Y, that means we're going
- [00:03:34.640] says the X and Y, that means we're going to be setting the actual location of the
- [00:03:37.030] to be setting the actual location of the
- [00:03:37.040] to be setting the actual location of the cutter head and the material. So then
- [00:03:39.589] cutter head and the material. So then
- [00:03:39.599] cutter head and the material. So then what we want to do is we press menu once
- [00:03:42.630] what we want to do is we press menu once
- [00:03:42.640] what we want to do is we press menu once and then you'll see it changes from F to
- [00:03:45.270] and then you'll see it changes from F to
- [00:03:45.280] and then you'll see it changes from F to V. So we know now we've got force and
- [00:03:48.149] V. So we know now we've got force and
- [00:03:48.159] V. So we know now we've got force and velocity.
- [00:03:49.910] velocity.
- [00:03:49.920] velocity. Over there we can see the current
- [00:03:51.430] Over there we can see the current
- [00:03:51.440] Over there we can see the current readings with that at 90 and 175.
- [00:03:55.350] readings with that at 90 and 175.
- [00:03:55.360] readings with that at 90 and 175. Now to adjust that we can either use
- [00:03:57.270] Now to adjust that we can either use
- [00:03:57.280] Now to adjust that we can either use this these arrows here on the actual
- [00:03:59.270] this these arrows here on the actual
- [00:03:59.280] this these arrows here on the actual control panel or we can directly go on
- [00:04:01.589] control panel or we can directly go on
- [00:04:01.599] control panel or we can directly go on the screen and increase and decrease
- [00:04:03.589] the screen and increase and decrease
- [00:04:03.599] the screen and increase and decrease these values.
- [00:04:05.830] these values.
- [00:04:05.840] these values. Now keep in mind one direction like
- [00:04:08.390] Now keep in mind one direction like
- [00:04:08.400] Now keep in mind one direction like vertical adjust one of the values
- [00:04:12.470] vertical adjust one of the values
- [00:04:12.480] vertical adjust one of the values in our case will be velocity and then
- [00:04:14.949] in our case will be velocity and then
- [00:04:14.959] in our case will be velocity and then the sideways arrows will adjust the
- [00:04:17.909] the sideways arrows will adjust the
- [00:04:17.919] the sideways arrows will adjust the actual force.
- Now, when you're happy with the
- [00:04:22.469] Now, when you're happy with the
- [00:04:22.479] Now, when you're happy with the settings, you can simply just press
- [00:04:23.830] settings, you can simply just press
- [00:04:23.840] settings, you can simply just press menu, go out of that, and then it should
- [00:04:26.870] menu, go out of that, and then it should
- [00:04:26.880] menu, go out of that, and then it should be set. Okay. Next up, we're going to be
- [00:04:29.830] be set. Okay. Next up, we're going to be
- [00:04:29.840] be set. Okay. Next up, we're going to be looking at location and origin. So now,
- [00:04:33.189] looking at location and origin. So now,
- [00:04:33.199] looking at location and origin. So now, like we looked at previously with the
- [00:04:34.469] like we looked at previously with the
- [00:04:34.479] like we looked at previously with the force and velocity. Now, if we are out
- [00:04:37.110] force and velocity. Now, if we are out
- [00:04:37.120] force and velocity. Now, if we are out the menu, you'll see we see the X and Y.
- [00:04:39.990] the menu, you'll see we see the X and Y.
- [00:04:40.000] the menu, you'll see we see the X and Y. So, that's the X location and the Y
- [00:04:42.230] So, that's the X location and the Y
- [00:04:42.240] So, that's the X location and the Y location. So the X will be adjusting the
- [00:04:46.150] location. So the X will be adjusting the
- [00:04:46.160] location. So the X will be adjusting the actual cutter head and that will be
- [00:04:48.550] actual cutter head and that will be
- [00:04:48.560] actual cutter head and that will be doing by the control panel as well or on
- [00:04:50.629] doing by the control panel as well or on
- [00:04:50.639] doing by the control panel as well or on the screen but I prefer this one with a
- [00:04:52.870] the screen but I prefer this one with a
- [00:04:52.880] the screen but I prefer this one with a control panel. So that will be the
- [00:04:55.110] control panel. So that will be the
- [00:04:55.120] control panel. So that will be the sideways arrows. And then if we want to
- [00:04:56.950] sideways arrows. And then if we want to
- [00:04:56.960] sideways arrows. And then if we want to set the actual Y,
- [00:04:59.590] set the actual Y,
- [00:04:59.600] set the actual Y, we'll be using the up and down arrows
- [00:05:01.590] we'll be using the up and down arrows
- [00:05:01.600] we'll be using the up and down arrows and this will be moving your material up
- [00:05:03.749] and this will be moving your material up
- [00:05:03.759] and this will be moving your material up or down. So depending on where you need
- [00:05:06.629] or down. So depending on where you need
- [00:05:06.639] or down. So depending on where you need to get your cutter head to.
- [00:05:10.469] to get your cutter head to.
- [00:05:10.479] to get your cutter head to. As we adjust these, you can see how the
- [00:05:12.550] As we adjust these, you can see how the
- [00:05:12.560] As we adjust these, you can see how the values increase or decrease. Now, the
- [00:05:15.590] values increase or decrease. Now, the
- [00:05:15.600] values increase or decrease. Now, the next thing is, let's say we've adjusted
- [00:05:17.350] next thing is, let's say we've adjusted
- [00:05:17.360] next thing is, let's say we've adjusted our vinyl to the right place. And we
- [00:05:20.070] our vinyl to the right place. And we
- [00:05:20.080] our vinyl to the right place. And we want to set a new origin. It basically
- [00:05:22.710] want to set a new origin. It basically
- [00:05:22.720] want to set a new origin. It basically gives you a new fake zero where you're
- [00:05:25.590] gives you a new fake zero where you're
- [00:05:25.600] gives you a new fake zero where you're going to be working from. So, as you can
- [00:05:27.510] going to be working from. So, as you can
- [00:05:27.520] going to be working from. So, as you can see, currently our X and Y is on zero
- [00:05:29.110] see, currently our X and Y is on zero
- [00:05:29.120] see, currently our X and Y is on zero there. So, let's say we want to make
- [00:05:30.950] there. So, let's say we want to make
- [00:05:30.960] there. So, let's say we want to make this registration mark our new origin or
- [00:05:33.830] this registration mark our new origin or
- [00:05:33.840] this registration mark our new origin or our new zero. So then what we want to do
- [00:05:36.629] our new zero. So then what we want to do
- [00:05:36.639] our new zero. So then what we want to do is we want to use our cutter head and
- [00:05:39.510] is we want to use our cutter head and
- [00:05:39.520] is we want to use our cutter head and our actual um well our actual rollers
- [00:05:42.230] our actual um well our actual rollers
- [00:05:42.240] our actual um well our actual rollers and adjust this till we have our cutting
- [00:05:44.390] and adjust this till we have our cutting
- [00:05:44.400] and adjust this till we have our cutting blade close to that registration mark.
- [00:05:48.390] blade close to that registration mark.
- [00:05:48.400] blade close to that registration mark. Then if we go back to the machine here
- [00:05:49.830] Then if we go back to the machine here
- [00:05:49.840] Then if we go back to the machine here you can see we've got new values is no
- [00:05:51.430] you can see we've got new values is no
- [00:05:51.440] you can see we've got new values is no longer zero. And if you're happy with
- [00:05:53.270] longer zero. And if you're happy with
- [00:05:53.280] longer zero. And if you're happy with that, what you want to do is press that
- [00:05:54.790] that, what you want to do is press that
- [00:05:54.800] that, what you want to do is press that little middle button,
- middle red button, and you will see it
- [00:06:00.629] middle red button, and you will see it
- [00:06:00.639] middle red button, and you will see it resets it to 0 0. So now the machine
- [00:06:03.110] resets it to 0 0. So now the machine
- [00:06:03.120] resets it to 0 0. So now the machine sees that new point as the starting
- [00:06:06.070] sees that new point as the starting
- [00:06:06.080] sees that new point as the starting point.
- [00:06:08.309] point.
- [00:06:08.319] point. Okay. Next up, we're going to be looking
- [00:06:09.670] Okay. Next up, we're going to be looking
- [00:06:09.680] Okay. Next up, we're going to be looking at the repeat button. Now this is handy
- [00:06:13.110] at the repeat button. Now this is handy
- [00:06:13.120] at the repeat button. Now this is handy if you're doing let's say mass
- [00:06:15.029] if you're doing let's say mass
- [00:06:15.039] if you're doing let's say mass production or you're doing the same
- [00:06:16.469] production or you're doing the same
- [00:06:16.479] production or you're doing the same product over and over. Then it becomes
- [00:06:19.430] product over and over. Then it becomes
- [00:06:19.440] product over and over. Then it becomes quite handy. It has different features
- [00:06:21.110] quite handy. It has different features
- [00:06:21.120] quite handy. It has different features as well, which we're going to be looking
- [00:06:22.390] as well, which we're going to be looking
- [00:06:22.400] as well, which we're going to be looking at now. Now, when it comes to this
- [00:06:24.710] at now. Now, when it comes to this
- [00:06:24.720] at now. Now, when it comes to this button, it's got two main features. So
- [00:06:28.230] button, it's got two main features. So
- [00:06:28.240] button, it's got two main features. So if you press it once versus pressing it
- [00:06:30.469] if you press it once versus pressing it
- [00:06:30.479] if you press it once versus pressing it twice.
- [00:06:32.309] twice.
- [00:06:32.319] twice. So let's say we just did a job, we just
- [00:06:34.710] So let's say we just did a job, we just
- [00:06:34.720] So let's say we just did a job, we just cut something, then what we can do is we
- [00:06:37.430] cut something, then what we can do is we
- [00:06:37.440] cut something, then what we can do is we press it once, it's going to bring up
- [00:06:39.350] press it once, it's going to bring up
- [00:06:39.360] press it once, it's going to bring up our last job, show us what the name and
- [00:06:42.150] our last job, show us what the name and
- [00:06:42.160] our last job, show us what the name and so forth. And then what we can simply do
- [00:06:44.629] so forth. And then what we can simply do
- [00:06:44.639] so forth. And then what we can simply do is press the enter button. Then it will
- [00:06:47.110] is press the enter button. Then it will
- [00:06:47.120] is press the enter button. Then it will repeat our previous job we just did. So
- [00:06:49.670] repeat our previous job we just did. So
- [00:06:49.680] repeat our previous job we just did. So that way you don't have to go cut it
- [00:06:51.270] that way you don't have to go cut it
- [00:06:51.280] that way you don't have to go cut it every time manually. You just go repeat,
- [00:06:53.590] every time manually. You just go repeat,
- [00:06:53.600] every time manually. You just go repeat, enter, and then it'll cut it again once
- [00:06:56.469] enter, and then it'll cut it again once
- [00:06:56.479] enter, and then it'll cut it again once you've loaded the new vanel or move to a
- [00:06:58.309] you've loaded the new vanel or move to a
- [00:06:58.319] you've loaded the new vanel or move to a new point.
- [00:07:00.070] new point.
- [00:07:00.080] new point. So let's say next up we've got a flash
- [00:07:02.070] So let's say next up we've got a flash
- [00:07:02.080] So let's say next up we've got a flash drive in with a work file. Then what you
- [00:07:04.230] drive in with a work file. Then what you
- [00:07:04.240] drive in with a work file. Then what you want to do is making sure you're outside
- [00:07:05.990] want to do is making sure you're outside
- [00:07:06.000] want to do is making sure you're outside the menu. It shows a X and Y. Then you
- [00:07:08.309] the menu. It shows a X and Y. Then you
- [00:07:08.319] the menu. It shows a X and Y. Then you want to do is we want to press it twice.
- [00:07:10.469] want to do is we want to press it twice.
- [00:07:10.479] want to do is we want to press it twice. So once we repeat the previous one, the
- [00:07:12.230] So once we repeat the previous one, the
- [00:07:12.240] So once we repeat the previous one, the next one will be the UISK. Now we can
- [00:07:15.029] next one will be the UISK. Now we can
- [00:07:15.039] next one will be the UISK. Now we can simply navigate to the work file that's
- [00:07:16.710] simply navigate to the work file that's
- [00:07:16.720] simply navigate to the work file that's located on that UISK. When we're happy,
- [00:07:18.950] located on that UISK. When we're happy,
- [00:07:18.960] located on that UISK. When we're happy, we press enter and it will cut it from
- [00:07:21.749] we press enter and it will cut it from
- [00:07:21.759] we press enter and it will cut it from the actual flash drive. It is important
- [00:07:24.550] the actual flash drive. It is important
- [00:07:24.560] the actual flash drive. It is important though, keep in mind that your flash
- [00:07:26.070] though, keep in mind that your flash
- [00:07:26.080] though, keep in mind that your flash drive has to be FAT 32,
- [00:07:29.029] drive has to be FAT 32,
- [00:07:29.039] drive has to be FAT 32, which we will still get into. And then
- [00:07:31.270] which we will still get into. And then
- [00:07:31.280] which we will still get into. And then the format is PLT for the actual vinyl
- [00:07:35.350] the format is PLT for the actual vinyl
- [00:07:35.360] the format is PLT for the actual vinyl cutting.
- [00:07:36.870] cutting.
- [00:07:36.880] cutting. Okay. Now, let's say you have a flash
- [00:07:38.870] Okay. Now, let's say you have a flash
- [00:07:38.880] Okay. Now, let's say you have a flash drive. You want to make sure it is ready
- [00:07:40.629] drive. You want to make sure it is ready
- [00:07:40.639] drive. You want to make sure it is ready for vinyl cutting. If it's not FAT32,
- [00:07:43.670] for vinyl cutting. If it's not FAT32,
- [00:07:43.680] for vinyl cutting. If it's not FAT32, then what you want to do is locate it in
- [00:07:45.189] then what you want to do is locate it in
- [00:07:45.199] then what you want to do is locate it in your actual operating system.
- [00:07:47.589] your actual operating system.
- [00:07:47.599] your actual operating system. It's normally just under my PC.
- [00:07:50.390] It's normally just under my PC.
- [00:07:50.400] It's normally just under my PC. Then we want to right click it. Then we
- [00:07:52.550] Then we want to right click it. Then we
- [00:07:52.560] Then we want to right click it. Then we head to format.
- [00:07:55.270] head to format.
- [00:07:55.280] head to format. Under the format there, we want to set
- [00:07:56.950] Under the format there, we want to set
- [00:07:56.960] Under the format there, we want to set this setting or make sure it's FAT32. If
- [00:07:59.110] this setting or make sure it's FAT32. If
- [00:07:59.120] this setting or make sure it's FAT32. If it is not, let's say it is NTFS or
- [00:08:02.230] it is not, let's say it is NTFS or
- [00:08:02.240] it is not, let's say it is NTFS or something else. Then what we want to do
- [00:08:04.070] something else. Then what we want to do
- [00:08:04.080] something else. Then what we want to do is select FAT32
- [00:08:06.469] is select FAT32
- [00:08:06.479] is select FAT32 and uh we'll just keep all saying as is.
- [00:08:08.869] and uh we'll just keep all saying as is.
- [00:08:08.879] and uh we'll just keep all saying as is. And we say start. Just keep in mind this
- [00:08:11.510] And we say start. Just keep in mind this
- [00:08:11.520] And we say start. Just keep in mind this is obviously going to make you lose
- [00:08:13.029] is obviously going to make you lose
- [00:08:13.039] is obviously going to make you lose everything that was on there because
- [00:08:14.309] everything that was on there because
- [00:08:14.319] everything that was on there because it's going to format it. So, I would
- [00:08:15.749] it's going to format it. So, I would
- [00:08:15.759] it's going to format it. So, I would recommend before doing this, maybe make
- [00:08:18.309] recommend before doing this, maybe make
- [00:08:18.319] recommend before doing this, maybe make a backup of your files if it is
- [00:08:19.990] a backup of your files if it is
- [00:08:20.000] a backup of your files if it is important.
- [00:08:22.390] important.
- [00:08:22.400] important. Okay. Next up, we're going to be looking
- [00:08:23.830] Okay. Next up, we're going to be looking
- [00:08:23.840] Okay. Next up, we're going to be looking at the test button. Okay. Now, this is
- [00:08:27.029] at the test button. Okay. Now, this is
- [00:08:27.039] at the test button. Okay. Now, this is very nice and very handy if for you to
- [00:08:29.589] very nice and very handy if for you to
- [00:08:29.599] very nice and very handy if for you to adjust your force and maybe speed, but
- [00:08:32.310] adjust your force and maybe speed, but
- [00:08:32.320] adjust your force and maybe speed, but mostly for force before you commit to
- [00:08:34.709] mostly for force before you commit to
- [00:08:34.719] mostly for force before you commit to your job. So, what you would normally do
- [00:08:36.630] your job. So, what you would normally do
- [00:08:36.640] your job. So, what you would normally do is you first navigate to a clean spot
- [00:08:38.469] is you first navigate to a clean spot
- [00:08:38.479] is you first navigate to a clean spot where you're not going to be cutting.
- [00:08:40.310] where you're not going to be cutting.
- [00:08:40.320] where you're not going to be cutting. Then you simply press the test button
- [00:08:42.149] Then you simply press the test button
- [00:08:42.159] Then you simply press the test button and it will cut you a little rectangle
- [00:08:45.190] and it will cut you a little rectangle
- [00:08:45.200] and it will cut you a little rectangle at your paper.
- [00:08:47.430] at your paper.
- [00:08:47.440] at your paper. Then if we had to bend the vinyl here,
- [00:08:49.190] Then if we had to bend the vinyl here,
- [00:08:49.200] Then if we had to bend the vinyl here, you will see we've got a nice little
- [00:08:51.350] you will see we've got a nice little
- [00:08:51.360] you will see we've got a nice little vinyl cut. Now if this thing for some
- [00:08:53.990] vinyl cut. Now if this thing for some
- [00:08:54.000] vinyl cut. Now if this thing for some reason does not peel out
- [00:08:56.870] reason does not peel out
- [00:08:56.880] reason does not peel out like maybe it's peeling and then the
- [00:08:59.110] like maybe it's peeling and then the
- [00:08:59.120] like maybe it's peeling and then the adhesive is still stuck then what
- [00:09:01.190] adhesive is still stuck then what
- [00:09:01.200] adhesive is still stuck then what happens is you've cut too shallow. So
- [00:09:02.870] happens is you've cut too shallow. So
- [00:09:02.880] happens is you've cut too shallow. So your force is too low.
- [00:09:05.430] your force is too low.
- [00:09:05.440] your force is too low. To adjust that you will obviously
- [00:09:08.070] To adjust that you will obviously
- [00:09:08.080] To adjust that you will obviously increase it. But how you can also see as
- [00:09:10.230] increase it. But how you can also see as
- [00:09:10.240] increase it. But how you can also see as a good gauge is you look at the back of
- [00:09:11.829] a good gauge is you look at the back of
- [00:09:11.839] a good gauge is you look at the back of your vinyl and if you can see a strong
- [00:09:14.470] your vinyl and if you can see a strong
- [00:09:14.480] your vinyl and if you can see a strong indent then chances are it is cutting
- [00:09:17.350] indent then chances are it is cutting
- [00:09:17.360] indent then chances are it is cutting too hard because it can also cut right
- [00:09:19.990] too hard because it can also cut right
- [00:09:20.000] too hard because it can also cut right through the vinyl and cuts it out. So
- [00:09:21.590] through the vinyl and cuts it out. So
- [00:09:21.600] through the vinyl and cuts it out. So what you want to get is that perfect
- [00:09:22.790] what you want to get is that perfect
- [00:09:22.800] what you want to get is that perfect balance where it's just a slight indent
- [00:09:25.829] balance where it's just a slight indent
- [00:09:25.839] balance where it's just a slight indent but you can easily peel the vinyl off
- [00:09:27.750] but you can easily peel the vinyl off
- [00:09:27.760] but you can easily peel the vinyl off and it can still stick on things. So
- [00:09:30.310] and it can still stick on things. So
- [00:09:30.320] and it can still stick on things. So what you'll do is once again you'll do a
- [00:09:31.990] what you'll do is once again you'll do a
- [00:09:32.000] what you'll do is once again you'll do a test cut. You'll look at the back.
- [00:09:34.150] test cut. You'll look at the back.
- [00:09:34.160] test cut. You'll look at the back. You'll look at the indent. If the indent
- [00:09:36.070] You'll look at the indent. If the indent
- [00:09:36.080] You'll look at the indent. If the indent is too much, you'll decrease the force.
- [00:09:39.430] is too much, you'll decrease the force.
- [00:09:39.440] is too much, you'll decrease the force. If it is not enough and doesn't want to
- [00:09:41.110] If it is not enough and doesn't want to
- [00:09:41.120] If it is not enough and doesn't want to peel off and then you'll slowly increase
- [00:09:43.910] peel off and then you'll slowly increase
- [00:09:43.920] peel off and then you'll slowly increase it. Then you do another test, another
- [00:09:45.350] it. Then you do another test, another
- [00:09:45.360] it. Then you do another test, another test till you find a nice medium where
- [00:09:48.310] test till you find a nice medium where
- [00:09:48.320] test till you find a nice medium where it's going to work for you. And you want
- [00:09:49.990] it's going to work for you. And you want
- [00:09:50.000] it's going to work for you. And you want to know this obviously before you do
- [00:09:51.509] to know this obviously before you do
- [00:09:51.519] to know this obviously before you do your actual job cuz otherwise, you know,
- [00:09:53.829] your actual job cuz otherwise, you know,
- [00:09:53.839] your actual job cuz otherwise, you know, you might mess up the whole vinyl.
- [00:09:56.070] you might mess up the whole vinyl.
- [00:09:56.080] you might mess up the whole vinyl. Either doing too much force or too
- [00:09:57.750] Either doing too much force or too
- [00:09:57.760] Either doing too much force or too little force.
- [00:09:59.750] little force.
- [00:09:59.760] little force. Okay, so next up we're going to be
- [00:10:01.110] Okay, so next up we're going to be
- [00:10:01.120] Okay, so next up we're going to be looking at the menu button. This one
- [00:10:03.829] looking at the menu button. This one
- [00:10:03.839] looking at the menu button. This one you'll probably be playing the least
- [00:10:05.110] you'll probably be playing the least
- [00:10:05.120] you'll probably be playing the least with, but it is good to know that is
- [00:10:06.949] with, but it is good to know that is
- [00:10:06.959] with, but it is good to know that is there.
- [00:10:08.710] there.
- [00:10:08.720] there. So, first of all, if we press it once,
- [00:10:10.790] So, first of all, if we press it once,
- [00:10:10.800] So, first of all, if we press it once, you will see we go from our X and Y to
- [00:10:13.190] you will see we go from our X and Y to
- [00:10:13.200] you will see we go from our X and Y to our force and velocity, which we already
- [00:10:15.030] our force and velocity, which we already
- [00:10:15.040] our force and velocity, which we already covered. And then if we press our origin
- [00:10:18.150] covered. And then if we press our origin
- [00:10:18.160] covered. And then if we press our origin button, you will see we can navigate
- [00:10:19.910] button, you will see we can navigate
- [00:10:19.920] button, you will see we can navigate through different menus. So, we've got
- [00:10:21.750] through different menus. So, we've got
- [00:10:21.760] through different menus. So, we've got some language.
- [00:10:23.590] some language.
- [00:10:23.600] some language. And then to adjust that, we press the
- [00:10:25.670] And then to adjust that, we press the
- [00:10:25.680] And then to adjust that, we press the left and right or the up and down.
- And then there's a few other settings,
- [00:10:32.550] And then there's a few other settings,
- [00:10:32.560] And then there's a few other settings, but I'd recommend most of these things
- [00:10:34.389] but I'd recommend most of these things
- [00:10:34.399] but I'd recommend most of these things just leave the way it is. There's no
- [00:10:36.470] just leave the way it is. There's no
- [00:10:36.480] just leave the way it is. There's no need to adjust them unless you're an
- [00:10:38.069] need to adjust them unless you're an
- [00:10:38.079] need to adjust them unless you're an advanced user.
- Like some of these, like over here, you
- [00:10:43.829] Like some of these, like over here, you
- [00:10:43.839] Like some of these, like over here, you can kind of calibrate things if you're
- [00:10:45.910] can kind of calibrate things if you're
- [00:10:45.920] can kind of calibrate things if you're happy with it. And then you press enter,
- [00:10:47.829] happy with it. And then you press enter,
- [00:10:47.839] happy with it. And then you press enter, it will confirm it for you. But I'm just
- [00:10:49.990] it will confirm it for you. But I'm just
- [00:10:50.000] it will confirm it for you. But I'm just going to cancel that and press menu. And
- [00:10:52.150] going to cancel that and press menu. And
- [00:10:52.160] going to cancel that and press menu. And then you can go out the main menu again.
- [00:10:55.030] then you can go out the main menu again.
- [00:10:55.040] then you can go out the main menu again. Okay. Next up, let's just look at a few
- [00:10:56.790] Okay. Next up, let's just look at a few
- [00:10:56.800] Okay. Next up, let's just look at a few variations when it comes to the flatbed.
- [00:10:59.670] variations when it comes to the flatbed.
- [00:10:59.680] variations when it comes to the flatbed. Okay. You know, if we go to this one's
- [00:11:00.949] Okay. You know, if we go to this one's
- [00:11:00.959] Okay. You know, if we go to this one's control panel, you might notice that
- [00:11:02.389] control panel, you might notice that
- [00:11:02.399] control panel, you might notice that there's hardly any buttons. So, the
- [00:11:05.350] there's hardly any buttons. So, the
- [00:11:05.360] there's hardly any buttons. So, the whole thing is touch on this model. So,
- [00:11:08.389] whole thing is touch on this model. So,
- [00:11:08.399] whole thing is touch on this model. So, just keep that in mind. Now, once we're
- [00:11:10.550] just keep that in mind. Now, once we're
- [00:11:10.560] just keep that in mind. Now, once we're in, you will notice also most of the
- [00:11:12.389] in, you will notice also most of the
- [00:11:12.399] in, you will notice also most of the things are actually pretty similar. So,
- [00:11:13.910] things are actually pretty similar. So,
- [00:11:13.920] things are actually pretty similar. So, if you get comfortable with the one, you
- [00:11:15.829] if you get comfortable with the one, you
- [00:11:15.839] if you get comfortable with the one, you should be able to figure it out
- [00:11:17.670] should be able to figure it out
- [00:11:17.680] should be able to figure it out relatively easy.
- [00:11:20.389] relatively easy.
- [00:11:20.399] relatively easy. We can move the head around.
- And then this one does have a few
- [00:11:27.509] And then this one does have a few
- [00:11:27.519] And then this one does have a few different features like you can see it's
- [00:11:29.110] different features like you can see it's
- [00:11:29.120] different features like you can see it's got a vacuum. It's got a clamp. So that
- [00:11:31.750] got a vacuum. It's got a clamp. So that
- [00:11:31.760] got a vacuum. It's got a clamp. So that will actually clamp your material down
- [00:11:33.990] will actually clamp your material down
- [00:11:34.000] will actually clamp your material down or vacuum it down depending on what
- [00:11:35.670] or vacuum it down depending on what
- [00:11:35.680] or vacuum it down depending on what you're going for.
- [00:11:37.910] you're going for.
- [00:11:37.920] you're going for. Then we also have more options here
- [00:11:40.069] Then we also have more options here
- [00:11:40.079] Then we also have more options here under the function
- [00:11:42.150] under the function
- [00:11:42.160] under the function which we can do some scaling and so
- [00:11:44.069] which we can do some scaling and so
- [00:11:44.079] which we can do some scaling and so forth. But once again leave most of
- [00:11:45.670] forth. But once again leave most of
- [00:11:45.680] forth. But once again leave most of these settings for advanced users.
- [00:11:48.230] these settings for advanced users.
- [00:11:48.240] these settings for advanced users. Now if we go here by force you can see
- [00:11:50.069] Now if we go here by force you can see
- [00:11:50.079] Now if we go here by force you can see like before we can set the speed the
- [00:11:51.750] like before we can set the speed the
- [00:11:51.760] like before we can set the speed the force but because this one's got two
- [00:11:53.829] force but because this one's got two
- [00:11:53.839] force but because this one's got two heads you can also adjust them
- [00:11:55.670] heads you can also adjust them
- [00:11:55.680] heads you can also adjust them individually.
- [00:11:58.230] individually.
- [00:11:58.240] individually. Then we also have the UI disk which
- [00:12:00.230] Then we also have the UI disk which
- [00:12:00.240] Then we also have the UI disk which obviously is your flash drive and then
- [00:12:01.829] obviously is your flash drive and then
- [00:12:01.839] obviously is your flash drive and then you can just navigate select the right
- [00:12:03.750] you can just navigate select the right
- [00:12:03.760] you can just navigate select the right options or the right files and then
- [00:12:06.230] options or the right files and then
- [00:12:06.240] options or the right files and then you're good to go. Then if we press this
- [00:12:08.790] you're good to go. Then if we press this
- [00:12:08.800] you're good to go. Then if we press this middle button, which would normally be
- [00:12:10.710] middle button, which would normally be
- [00:12:10.720] middle button, which would normally be for setting the origin on most machines
- [00:12:13.430] for setting the origin on most machines
- [00:12:13.440] for setting the origin on most machines here, you can see we can fine-tune some
- [00:12:15.509] here, you can see we can fine-tune some
- [00:12:15.519] here, you can see we can fine-tune some more settings, but um we can also switch
- [00:12:18.949] more settings, but um we can also switch
- [00:12:18.959] more settings, but um we can also switch on the vacuum, the blow, and stuff like
- [00:12:21.190] on the vacuum, the blow, and stuff like
- [00:12:21.200] on the vacuum, the blow, and stuff like that. But once again, most of the stuff
- [00:12:22.949] that. But once again, most of the stuff
- [00:12:22.959] that. But once again, most of the stuff won't be relevant for you to set. But
- [00:12:25.269] won't be relevant for you to set. But
- [00:12:25.279] won't be relevant for you to set. But yeah, otherwise that is it. It's pretty
- [00:12:26.710] yeah, otherwise that is it. It's pretty
- [00:12:26.720] yeah, otherwise that is it. It's pretty straightforward. What does make a
- [00:12:28.150] straightforward. What does make a
- [00:12:28.160] straightforward. What does make a difference is we have a nice emergency
- [00:12:30.870] difference is we have a nice emergency
- [00:12:30.880] difference is we have a nice emergency stop here which you don't see on the
- [00:12:32.389] stop here which you don't see on the
- [00:12:32.399] stop here which you don't see on the little ones but it's also because the
- [00:12:34.550] little ones but it's also because the
- [00:12:34.560] little ones but it's also because the danger factor rises with these type of
- [00:12:36.790] danger factor rises with these type of
- [00:12:36.800] danger factor rises with these type of machines and then yeah so we can simply
- [00:12:39.750] machines and then yeah so we can simply
- [00:12:39.760] machines and then yeah so we can simply just in a case of emergency we tap this
- [00:12:41.829] just in a case of emergency we tap this
- [00:12:41.839] just in a case of emergency we tap this thing and it will shut everything off
- [00:12:43.350] thing and it will shut everything off
- [00:12:43.360] thing and it will shut everything off for us as we can see display is gone all
- [00:12:45.269] for us as we can see display is gone all
- [00:12:45.279] for us as we can see display is gone all of that then we turn that and then it
- [00:12:47.430] of that then we turn that and then it
- [00:12:47.440] of that then we turn that and then it will restart the machine. You also have
- [00:12:50.150] will restart the machine. You also have
- [00:12:50.160] will restart the machine. You also have a little reset button like before like
- [00:12:52.870] a little reset button like before like
- [00:12:52.880] a little reset button like before like in case you need to reset after a long
- [00:12:55.269] in case you need to reset after a long
- [00:12:55.279] in case you need to reset after a long day of work. But yeah, otherwise that is
- [00:12:58.069] day of work. But yeah, otherwise that is
- [00:12:58.079] day of work. But yeah, otherwise that is it on the machine controls. Pretty
- [00:13:00.310] it on the machine controls. Pretty
- [00:13:00.320] it on the machine controls. Pretty straightforward. Play with them, get
- [00:13:01.750] straightforward. Play with them, get
- [00:13:01.760] straightforward. Play with them, get comfortable. That is obviously the best
- [00:13:04.150] comfortable. That is obviously the best
- [00:13:04.160] comfortable. That is obviously the best way forward. But yeah, thanks guys for
- [00:13:06.069] way forward. But yeah, thanks guys for
- [00:13:06.079] way forward. But yeah, thanks guys for watching and check you guys on the next
- [00:13:07.430] watching and check you guys on the next
- [00:13:07.440] watching and check you guys on the next one. Cheers.
Keyframes
- /workspace/academy/media/1fs3Yyu27k_hCI1KHnTggmAJBSmohatDO/keyframes/last.jpg
- /workspace/academy/media/1fs3Yyu27k_hCI1KHnTggmAJBSmohatDO/keyframes/t003.jpg
- /workspace/academy/media/1fs3Yyu27k_hCI1KHnTggmAJBSmohatDO/keyframes/t007.jpg
- /workspace/academy/media/1fs3Yyu27k_hCI1KHnTggmAJBSmohatDO/keyframes/t010.jpg
- /workspace/academy/media/1fs3Yyu27k_hCI1KHnTggmAJBSmohatDO/keyframes/t014.jpg
- /workspace/academy/media/1fs3Yyu27k_hCI1KHnTggmAJBSmohatDO/keyframes/t017.jpg
- /workspace/academy/media/1fs3Yyu27k_hCI1KHnTggmAJBSmohatDO/keyframes/t021.jpg
- /workspace/academy/media/1fs3Yyu27k_hCI1KHnTggmAJBSmohatDO/keyframes/t024.jpg
- /workspace/academy/media/1fs3Yyu27k_hCI1KHnTggmAJBSmohatDO/keyframes/t027.jpg
- /workspace/academy/media/1fs3Yyu27k_hCI1KHnTggmAJBSmohatDO/keyframes/t031.jpg
- /workspace/academy/media/1fs3Yyu27k_hCI1KHnTggmAJBSmohatDO/keyframes/t034.jpg
- /workspace/academy/media/1fs3Yyu27k_hCI1KHnTggmAJBSmohatDO/keyframes/t038.jpg
- /workspace/academy/media/1fs3Yyu27k_hCI1KHnTggmAJBSmohatDO/keyframes/t041.jpg
- /workspace/academy/media/1fs3Yyu27k_hCI1KHnTggmAJBSmohatDO/keyframes/t045.jpg
- /workspace/academy/media/1fs3Yyu27k_hCI1KHnTggmAJBSmohatDO/keyframes/t048.jpg
- /workspace/academy/media/1fs3Yyu27k_hCI1KHnTggmAJBSmohatDO/keyframes/t052.jpg
- /workspace/academy/media/1fs3Yyu27k_hCI1KHnTggmAJBSmohatDO/keyframes/t055.jpg
- /workspace/academy/media/1fs3Yyu27k_hCI1KHnTggmAJBSmohatDO/keyframes/t058.jpg
- /workspace/academy/media/1fs3Yyu27k_hCI1KHnTggmAJBSmohatDO/keyframes/t062.jpg
- /workspace/academy/media/1fs3Yyu27k_hCI1KHnTggmAJBSmohatDO/keyframes/t065.jpg
- /workspace/academy/media/1fs3Yyu27k_hCI1KHnTggmAJBSmohatDO/keyframes/t069.jpg
- /workspace/academy/media/1fs3Yyu27k_hCI1KHnTggmAJBSmohatDO/keyframes/t072.jpg
- /workspace/academy/media/1fs3Yyu27k_hCI1KHnTggmAJBSmohatDO/keyframes/t076.jpg
- /workspace/academy/media/1fs3Yyu27k_hCI1KHnTggmAJBSmohatDO/keyframes/t079.jpg
11. Maintenance
- title: Maintenance
- status: publish
- author: 0
- is_previewable: (empty)
- video_duration: 0h 17m 43s (raw {"hours":0,"minutes":17,"seconds":43})
- video_source_type: embedded
- drive_file_id:
1NHFZ8RnfeEFVUvx6MWlXdqirMsZmdSFt(source_ref; not a public link) - transcript pending / keyframes pending / presentation extract pending
- video_source_url: (Drive preview omitted as a public link; file id kept as source_ref)
In this video we will be looking at some maintenance for vinyl cutters.
- quizzes_following_this_lesson: 1 (full text in Quizzes)
- Maintenance (6 questions)
Drive extract
- file_id:
1NHFZ8RnfeEFVUvx6MWlXdqirMsZmdSFt - filename: 06 - MA - Maintanance.mp4
- kind: video
- local_path: /workspace/academy/media/1NHFZ8RnfeEFVUvx6MWlXdqirMsZmdSFt/06 - MA - Maintanance.mp4
- source_ref: drive
1NHFZ8RnfeEFVUvx6MWlXdqirMsZmdSFt· content_length 480146630 · original https://drive.google.com/file/d/1NHFZ8RnfeEFVUvx6MWlXdqirMsZmdSFt/view - extract_status: done
- caption_source: drive_timedtext
- duration_s: 1063.310998
- keyframe_count: 24
Transcript
- Howy guys. In today's video, we're going
- [00:00:02.550] Howy guys. In today's video, we're going
- [00:00:02.560] Howy guys. In today's video, we're going to be looking at some troubleshooting
- [00:00:04.630] to be looking at some troubleshooting
- [00:00:04.640] to be looking at some troubleshooting and maintenance.
- [00:00:07.190] and maintenance.
- [00:00:07.200] and maintenance. Now, first off, let's look at if your
- [00:00:10.070] Now, first off, let's look at if your
- [00:00:10.080] Now, first off, let's look at if your vinyl is getting damaged while cutting.
- [00:00:12.390] vinyl is getting damaged while cutting.
- [00:00:12.400] vinyl is getting damaged while cutting. Maybe something similar to this sample.
- [00:00:14.709] Maybe something similar to this sample.
- [00:00:14.719] Maybe something similar to this sample. Then, there's two main causes of what it
- [00:00:16.790] Then, there's two main causes of what it
- [00:00:16.800] Then, there's two main causes of what it could be. It's possibly either your
- [00:00:19.910] could be. It's possibly either your
- [00:00:19.920] could be. It's possibly either your cutting strip or your actual cutting
- [00:00:23.109] cutting strip or your actual cutting
- [00:00:23.119] cutting strip or your actual cutting blade.
- [00:00:24.710] blade.
- [00:00:24.720] blade. Now, if it is the cutting strip, chances
- [00:00:26.790] Now, if it is the cutting strip, chances
- [00:00:26.800] Now, if it is the cutting strip, chances are that it is worn out. Maybe you've
- [00:00:29.269] are that it is worn out. Maybe you've
- [00:00:29.279] are that it is worn out. Maybe you've been cutting with too high pressure and
- [00:00:31.189] been cutting with too high pressure and
- [00:00:31.199] been cutting with too high pressure and it's actually damaged the strip itself
- [00:00:33.990] it's actually damaged the strip itself
- [00:00:34.000] it's actually damaged the strip itself and now it struggles to do accurate cuts
- [00:00:36.229] and now it struggles to do accurate cuts
- [00:00:36.239] and now it struggles to do accurate cuts and maybe gets hooked. Then if it is the
- [00:00:39.270] and maybe gets hooked. Then if it is the
- [00:00:39.280] and maybe gets hooked. Then if it is the blade and chances are blade is probably
- [00:00:41.590] blade and chances are blade is probably
- [00:00:41.600] blade and chances are blade is probably blunt, so you'll have to replace it. Now
- [00:00:44.470] blunt, so you'll have to replace it. Now
- [00:00:44.480] blunt, so you'll have to replace it. Now if you do not have any blades in your
- [00:00:47.430] if you do not have any blades in your
- [00:00:47.440] if you do not have any blades in your actual box, maybe you've used all of
- [00:00:49.029] actual box, maybe you've used all of
- [00:00:49.039] actual box, maybe you've used all of them, the ones that came with, then
- [00:00:50.229] them, the ones that came with, then
- [00:00:50.239] them, the ones that came with, then you're going to have to obviously buy
- [00:00:51.190] you're going to have to obviously buy
- [00:00:51.200] you're going to have to obviously buy new ones. And same with this cutting
- [00:00:52.630] new ones. And same with this cutting
- [00:00:52.640] new ones. And same with this cutting strip, you're going to have to also
- [00:00:55.110] strip, you're going to have to also
- [00:00:55.120] strip, you're going to have to also replace that by buying a new one. So now
- [00:00:58.229] replace that by buying a new one. So now
- [00:00:58.239] replace that by buying a new one. So now next up we're going to look at where can
- [00:00:59.670] next up we're going to look at where can
- [00:00:59.680] next up we're going to look at where can you actually buy the cutting strip or
- [00:01:02.150] you actually buy the cutting strip or
- [00:01:02.160] you actually buy the cutting strip or blades. So now we'll start with the
- [00:01:04.630] blades. So now we'll start with the
- [00:01:04.640] blades. So now we'll start with the cutting strip. Now simply just Google
- [00:01:07.350] cutting strip. Now simply just Google
- [00:01:07.360] cutting strip. Now simply just Google buy this search and then it should be
- [00:01:09.990] buy this search and then it should be
- [00:01:10.000] buy this search and then it should be one of the top ones or alternatively you
- [00:01:13.190] one of the top ones or alternatively you
- [00:01:13.200] one of the top ones or alternatively you can just type in your URL buy
- [00:01:14.950] can just type in your URL buy
- [00:01:14.960] can just type in your URL buy this.co.za.
- [00:01:16.870] this.co.za.
- [00:01:16.880] this.co.za. This will take you to the actual buy
- [00:01:18.230] This will take you to the actual buy
- [00:01:18.240] This will take you to the actual buy this website. Then um we can locate it
- [00:01:21.350] this website. Then um we can locate it
- [00:01:21.360] this website. Then um we can locate it from here. Now there's two options. We
- [00:01:23.350] from here. Now there's two options. We
- [00:01:23.360] from here. Now there's two options. We either go on search on top or what we do
- [00:01:26.469] either go on search on top or what we do
- [00:01:26.479] either go on search on top or what we do is on the sidebar here. We want to go
- [00:01:28.390] is on the sidebar here. We want to go
- [00:01:28.400] is on the sidebar here. We want to go down to
- [00:01:30.630] down to
- [00:01:30.640] down to consumables. We expand that. Go to the
- [00:01:34.390] consumables. We expand that. Go to the
- [00:01:34.400] consumables. We expand that. Go to the actual things we're looking for in the
- [00:01:35.910] actual things we're looking for in the
- [00:01:35.920] actual things we're looking for in the sense of vinyl cutter consumables. And
- [00:01:38.950] sense of vinyl cutter consumables. And
- [00:01:38.960] sense of vinyl cutter consumables. And then when we scroll down here, you can
- [00:01:40.310] then when we scroll down here, you can
- [00:01:40.320] then when we scroll down here, you can see we've got some cutting strips here.
- [00:01:43.109] see we've got some cutting strips here.
- [00:01:43.119] see we've got some cutting strips here. Just make sure these are obviously right
- [00:01:44.710] Just make sure these are obviously right
- [00:01:44.720] Just make sure these are obviously right for your machine. Obviously, you can
- [00:01:47.109] for your machine. Obviously, you can
- [00:01:47.119] for your machine. Obviously, you can just contact support to find out which
- [00:01:49.270] just contact support to find out which
- [00:01:49.280] just contact support to find out which machine you have and then when you find
- [00:01:51.109] machine you have and then when you find
- [00:01:51.119] machine you have and then when you find the one you are looking for, you can
- [00:01:53.030] the one you are looking for, you can
- [00:01:53.040] the one you are looking for, you can simply click that, add it to your cart
- [00:01:55.910] simply click that, add it to your cart
- [00:01:55.920] simply click that, add it to your cart like usual.
- [00:01:57.910] like usual.
- [00:01:57.920] like usual. Now, when it comes to the actual process
- [00:01:59.510] Now, when it comes to the actual process
- [00:01:59.520] Now, when it comes to the actual process of replacing your actual cutting strip,
- [00:02:02.469] of replacing your actual cutting strip,
- [00:02:02.479] of replacing your actual cutting strip, you will should get in a roll. I think
- [00:02:04.389] you will should get in a roll. I think
- [00:02:04.399] you will should get in a roll. I think you can normally buy it per meter. So,
- [00:02:06.069] you can normally buy it per meter. So,
- [00:02:06.079] you can normally buy it per meter. So, just buy the relevant amount. You might
- [00:02:07.670] just buy the relevant amount. You might
- [00:02:07.680] just buy the relevant amount. You might have to buy a little bit over. Then,
- [00:02:09.990] have to buy a little bit over. Then,
- [00:02:10.000] have to buy a little bit over. Then, what you want to do is you measure it
- [00:02:11.510] what you want to do is you measure it
- [00:02:11.520] what you want to do is you measure it and you cut it to the right length.
- [00:02:14.309] and you cut it to the right length.
- [00:02:14.319] and you cut it to the right length. Then after that, what you're going to
- [00:02:15.750] Then after that, what you're going to
- [00:02:15.760] Then after that, what you're going to want to do is take out the old one. You
- [00:02:17.350] want to do is take out the old one. You
- [00:02:17.360] want to do is take out the old one. You can simply take a flat screwdriver,
- [00:02:19.589] can simply take a flat screwdriver,
- [00:02:19.599] can simply take a flat screwdriver, wedge it in the side, and pop it out.
- [00:02:22.790] wedge it in the side, and pop it out.
- [00:02:22.800] wedge it in the side, and pop it out. This will allow you to simply pull this
- [00:02:24.790] This will allow you to simply pull this
- [00:02:24.800] This will allow you to simply pull this out like so. Now, keep in mind, some of
- [00:02:28.070] out like so. Now, keep in mind, some of
- [00:02:28.080] out like so. Now, keep in mind, some of the older models, you might have to have
- [00:02:29.910] the older models, you might have to have
- [00:02:29.920] the older models, you might have to have some form of adhesive tape, but most of
- [00:02:33.270] some form of adhesive tape, but most of
- [00:02:33.280] some form of adhesive tape, but most of the new models, they simply just slot
- [00:02:35.270] the new models, they simply just slot
- [00:02:35.280] the new models, they simply just slot in. Then you're good to go.
- [00:02:38.550] in. Then you're good to go.
- [00:02:38.560] in. Then you're good to go. Okay. Okay. So now after we've taken out
- [00:02:40.309] Okay. Okay. So now after we've taken out
- [00:02:40.319] Okay. Okay. So now after we've taken out the old one, what we want to do is take
- [00:02:41.830] the old one, what we want to do is take
- [00:02:41.840] the old one, what we want to do is take the new one and actually line the one
- [00:02:45.270] the new one and actually line the one
- [00:02:45.280] the new one and actually line the one edge to the edge of your cutter in line
- [00:02:48.150] edge to the edge of your cutter in line
- [00:02:48.160] edge to the edge of your cutter in line with the actual groove. Next up, what
- [00:02:51.030] with the actual groove. Next up, what
- [00:02:51.040] with the actual groove. Next up, what we're going to do is with something like
- [00:02:52.470] we're going to do is with something like
- [00:02:52.480] we're going to do is with something like a back of a screwdriver, which works
- [00:02:54.309] a back of a screwdriver, which works
- [00:02:54.319] a back of a screwdriver, which works pretty well, is we want to push this new
- [00:02:56.949] pretty well, is we want to push this new
- [00:02:56.959] pretty well, is we want to push this new strip in the groove. And then with some
- [00:03:00.710] strip in the groove. And then with some
- [00:03:00.720] strip in the groove. And then with some force and pressure, you simply want it
- [00:03:02.869] force and pressure, you simply want it
- [00:03:02.879] force and pressure, you simply want it to start going in. Once it goes in, you
- [00:03:04.869] to start going in. Once it goes in, you
- [00:03:04.879] to start going in. Once it goes in, you can just repeat the motion and kind of
- [00:03:07.430] can just repeat the motion and kind of
- [00:03:07.440] can just repeat the motion and kind of rub it rub it as it goes in. Now, the
- [00:03:09.830] rub it rub it as it goes in. Now, the
- [00:03:09.840] rub it rub it as it goes in. Now, the sample here has a old one, so you can
- [00:03:11.430] sample here has a old one, so you can
- [00:03:11.440] sample here has a old one, so you can see it's dirty, but your new one should
- [00:03:14.309] see it's dirty, but your new one should
- [00:03:14.319] see it's dirty, but your new one should look better. And then once it's in, you
- [00:03:15.830] look better. And then once it's in, you
- [00:03:15.840] look better. And then once it's in, you can simply start rolling it from one
- [00:03:18.390] can simply start rolling it from one
- [00:03:18.400] can simply start rolling it from one side to the other.
- [00:03:21.670] side to the other.
- [00:03:21.680] side to the other. Okay. Now, when your new vinyl strip is
- [00:03:23.750] Okay. Now, when your new vinyl strip is
- [00:03:23.760] Okay. Now, when your new vinyl strip is in, it should be nice and flush. Make
- [00:03:25.430] in, it should be nice and flush. Make
- [00:03:25.440] in, it should be nice and flush. Make sure there's no bubbles. If there's
- [00:03:27.589] sure there's no bubbles. If there's
- [00:03:27.599] sure there's no bubbles. If there's bubbles, you just have to make sure you
- [00:03:28.790] bubbles, you just have to make sure you
- [00:03:28.800] bubbles, you just have to make sure you rub them out as that will affect your
- [00:03:30.550] rub them out as that will affect your
- [00:03:30.560] rub them out as that will affect your actual cutting.
- [00:03:32.550] actual cutting.
- [00:03:32.560] actual cutting. Okay, so next up we're going to be
- [00:03:34.229] Okay, so next up we're going to be
- [00:03:34.239] Okay, so next up we're going to be looking at actual blades. So now what
- [00:03:37.030] looking at actual blades. So now what
- [00:03:37.040] looking at actual blades. So now what you want to do is if you have blades
- [00:03:39.270] you want to do is if you have blades
- [00:03:39.280] you want to do is if you have blades already, you simply just want to take
- [00:03:41.190] already, you simply just want to take
- [00:03:41.200] already, you simply just want to take this one out. Then um put it somewhere
- [00:03:44.229] this one out. Then um put it somewhere
- [00:03:44.239] this one out. Then um put it somewhere safe or discard it in a safe way and
- [00:03:47.910] safe or discard it in a safe way and
- [00:03:47.920] safe or discard it in a safe way and then locate your new case, take out a
- [00:03:50.229] then locate your new case, take out a
- [00:03:50.239] then locate your new case, take out a new blade, remove the safety cover, slip
- [00:03:53.750] new blade, remove the safety cover, slip
- [00:03:53.760] new blade, remove the safety cover, slip it in there, and then you should be good
- [00:03:56.550] it in there, and then you should be good
- [00:03:56.560] it in there, and then you should be good to go. Just make sure you obviously
- [00:03:58.550] to go. Just make sure you obviously
- [00:03:58.560] to go. Just make sure you obviously rejust your actual depth.
- [00:04:01.910] rejust your actual depth.
- [00:04:01.920] rejust your actual depth. which is a important note as well. Now,
- [00:04:05.190] which is a important note as well. Now,
- [00:04:05.200] which is a important note as well. Now, just a side note on the blade covers,
- [00:04:07.589] just a side note on the blade covers,
- [00:04:07.599] just a side note on the blade covers, remember that if you running one of the
- [00:04:09.750] remember that if you running one of the
- [00:04:09.760] remember that if you running one of the plastic ones, it's very possible that
- [00:04:12.869] plastic ones, it's very possible that
- [00:04:12.879] plastic ones, it's very possible that that thing is also going to be wearing
- [00:04:14.630] that thing is also going to be wearing
- [00:04:14.640] that thing is also going to be wearing out with time as there's friction with
- [00:04:17.110] out with time as there's friction with
- [00:04:17.120] out with time as there's friction with the case. So, with time, just make sure
- [00:04:19.189] the case. So, with time, just make sure
- [00:04:19.199] the case. So, with time, just make sure you obviously either readjust your depth
- [00:04:22.310] you obviously either readjust your depth
- [00:04:22.320] you obviously either readjust your depth or uh replace this. Also, when it comes
- [00:04:25.749] or uh replace this. Also, when it comes
- [00:04:25.759] or uh replace this. Also, when it comes to these blade holders, another thing
- [00:04:27.350] to these blade holders, another thing
- [00:04:27.360] to these blade holders, another thing that's important is from time to time
- [00:04:29.510] that's important is from time to time
- [00:04:29.520] that's important is from time to time you want to make sure you clean the
- [00:04:30.950] you want to make sure you clean the
- [00:04:30.960] you want to make sure you clean the adhesive glue off it, just using
- [00:04:33.510] adhesive glue off it, just using
- [00:04:33.520] adhesive glue off it, just using something like thinners or alcohol.
- [00:04:36.390] something like thinners or alcohol.
- [00:04:36.400] something like thinners or alcohol. Alcohol works better on the plastic, but
- [00:04:38.150] Alcohol works better on the plastic, but
- [00:04:38.160] Alcohol works better on the plastic, but thinners in general gets the actual glue
- [00:04:40.390] thinners in general gets the actual glue
- [00:04:40.400] thinners in general gets the actual glue off better. Then, let's say you are out
- [00:04:44.230] off better. Then, let's say you are out
- [00:04:44.240] off better. Then, let's say you are out of blades, then like with the actual
- [00:04:46.390] of blades, then like with the actual
- [00:04:46.400] of blades, then like with the actual cutting strip, you can simply go to buy
- [00:04:48.230] cutting strip, you can simply go to buy
- [00:04:48.240] cutting strip, you can simply go to buy this.co.za.
- [00:04:49.749] this.co.za.
- [00:04:49.759] this.co.za. Then, we want to go to vinyl cutter
- [00:04:51.350] Then, we want to go to vinyl cutter
- [00:04:51.360] Then, we want to go to vinyl cutter consumables.
- [00:04:53.510] consumables.
- [00:04:53.520] consumables. And then you'll see we actually have a
- [00:04:55.110] And then you'll see we actually have a
- [00:04:55.120] And then you'll see we actually have a option here called blades. So if we
- [00:04:58.550] option here called blades. So if we
- [00:04:58.560] option here called blades. So if we select that, then we're going to go down
- [00:05:00.230] select that, then we're going to go down
- [00:05:00.240] select that, then we're going to go down and just make sure we select the correct
- [00:05:02.070] and just make sure we select the correct
- [00:05:02.080] and just make sure we select the correct blades for the correct cutter. But like
- [00:05:04.070] blades for the correct cutter. But like
- [00:05:04.080] blades for the correct cutter. But like I said, if you're not sure, um you can
- [00:05:06.310] I said, if you're not sure, um you can
- [00:05:06.320] I said, if you're not sure, um you can just contact support and let them know
- [00:05:08.310] just contact support and let them know
- [00:05:08.320] just contact support and let them know which cutter you've got and which blades
- [00:05:10.629] which cutter you've got and which blades
- [00:05:10.639] which cutter you've got and which blades do you need.
- [00:05:12.710] do you need.
- [00:05:12.720] do you need. Okay. Well, next up we're going to be
- [00:05:14.150] Okay. Well, next up we're going to be
- [00:05:14.160] Okay. Well, next up we're going to be looking at dust.
- [00:05:16.629] looking at dust.
- [00:05:16.639] looking at dust. Now dust can be a very real thing for
- [00:05:19.189] Now dust can be a very real thing for
- [00:05:19.199] Now dust can be a very real thing for some people. Let's say you're in a work
- [00:05:21.029] some people. Let's say you're in a work
- [00:05:21.039] some people. Let's say you're in a work environment where you may be using some
- [00:05:23.189] environment where you may be using some
- [00:05:23.199] environment where you may be using some routers and other machines to create
- [00:05:25.029] routers and other machines to create
- [00:05:25.039] routers and other machines to create your projects. Then the dust is
- [00:05:27.110] your projects. Then the dust is
- [00:05:27.120] your projects. Then the dust is definitely going to affect the
- [00:05:28.070] definitely going to affect the
- [00:05:28.080] definitely going to affect the performance and longevity of your actual
- [00:05:30.150] performance and longevity of your actual
- [00:05:30.160] performance and longevity of your actual machine. So then it's a good idea to
- [00:05:32.870] machine. So then it's a good idea to
- [00:05:32.880] machine. So then it's a good idea to consider getting a dust cover. Now when
- [00:05:35.590] consider getting a dust cover. Now when
- [00:05:35.600] consider getting a dust cover. Now when it comes to these dust covers, you don't
- [00:05:36.950] it comes to these dust covers, you don't
- [00:05:36.960] it comes to these dust covers, you don't have to go too fancy. There's a few
- [00:05:38.390] have to go too fancy. There's a few
- [00:05:38.400] have to go too fancy. There's a few things you could grab that will work
- [00:05:40.150] things you could grab that will work
- [00:05:40.160] things you could grab that will work very well. So one is maybe something
- [00:05:43.189] very well. So one is maybe something
- [00:05:43.199] very well. So one is maybe something like a old sheet or something like that.
- [00:05:45.350] like a old sheet or something like that.
- [00:05:45.360] like a old sheet or something like that. Put that over. It's going to help with
- [00:05:46.629] Put that over. It's going to help with
- [00:05:46.639] Put that over. It's going to help with the majority of the dust. But if you're
- [00:05:48.870] the majority of the dust. But if you're
- [00:05:48.880] the majority of the dust. But if you're in a proper dusty environment,
- [00:05:51.350] in a proper dusty environment,
- [00:05:51.360] in a proper dusty environment, especially when it comes to finer dust
- [00:05:52.870] especially when it comes to finer dust
- [00:05:52.880] especially when it comes to finer dust and stuff like that, then what I would
- [00:05:54.150] and stuff like that, then what I would
- [00:05:54.160] and stuff like that, then what I would recommend is you either go to some
- [00:05:56.150] recommend is you either go to some
- [00:05:56.160] recommend is you either go to some hardware store, you get a drop sheet,
- [00:05:57.990] hardware store, you get a drop sheet,
- [00:05:58.000] hardware store, you get a drop sheet, but get the heavy duty one, or what you
- [00:06:00.710] but get the heavy duty one, or what you
- [00:06:00.720] but get the heavy duty one, or what you can do is just simply get something like
- [00:06:02.150] can do is just simply get something like
- [00:06:02.160] can do is just simply get something like a bike sale. Now, depending on your
- [00:06:04.390] a bike sale. Now, depending on your
- [00:06:04.400] a bike sale. Now, depending on your machine size, you might also want to
- [00:06:07.189] machine size, you might also want to
- [00:06:07.199] machine size, you might also want to obviously get a bigger sale, but on
- [00:06:10.150] obviously get a bigger sale, but on
- [00:06:10.160] obviously get a bigger sale, but on average, one of these three will
- [00:06:12.390] average, one of these three will
- [00:06:12.400] average, one of these three will definitely work.
- [00:06:15.270] definitely work.
- [00:06:15.280] definitely work. And one of the big reasons why you want
- [00:06:17.590] And one of the big reasons why you want
- [00:06:17.600] And one of the big reasons why you want to prevent dust is what can happen is
- [00:06:19.749] to prevent dust is what can happen is
- [00:06:19.759] to prevent dust is what can happen is over time the dust actually gets inside
- [00:06:22.790] over time the dust actually gets inside
- [00:06:22.800] over time the dust actually gets inside the machine. So then it can start
- [00:06:25.670] the machine. So then it can start
- [00:06:25.680] the machine. So then it can start affecting things like your motherboard
- [00:06:28.150] affecting things like your motherboard
- [00:06:28.160] affecting things like your motherboard or even your power supply and it can
- [00:06:30.309] or even your power supply and it can
- [00:06:30.319] or even your power supply and it can actually short out your entire machine
- [00:06:32.629] actually short out your entire machine
- [00:06:32.639] actually short out your entire machine which can be a very big problem. Now if
- [00:06:35.189] which can be a very big problem. Now if
- [00:06:35.199] which can be a very big problem. Now if you're comfortable opening things
- [00:06:36.550] you're comfortable opening things
- [00:06:36.560] you're comfortable opening things obviously you know do it with caution.
- [00:06:38.710] obviously you know do it with caution.
- [00:06:38.720] obviously you know do it with caution. Make sure you know where the right
- [00:06:39.909] Make sure you know where the right
- [00:06:39.919] Make sure you know where the right screws goes and so forth. And then what
- [00:06:42.150] screws goes and so forth. And then what
- [00:06:42.160] screws goes and so forth. And then what you can do is obviously clean that out
- [00:06:44.150] you can do is obviously clean that out
- [00:06:44.160] you can do is obviously clean that out with some form of air. So now the three
- [00:06:47.670] with some form of air. So now the three
- [00:06:47.680] with some form of air. So now the three main ways people normally go with it.
- [00:06:49.749] main ways people normally go with it.
- [00:06:49.759] main ways people normally go with it. The one is a compressor. So if you got a
- [00:06:51.590] The one is a compressor. So if you got a
- [00:06:51.600] The one is a compressor. So if you got a compressor with like a spray paint head,
- [00:06:54.150] compressor with like a spray paint head,
- [00:06:54.160] compressor with like a spray paint head, this one's very popular to blow out the
- [00:06:56.070] this one's very popular to blow out the
- [00:06:56.080] this one's very popular to blow out the air. You can also use something like a
- [00:06:57.590] air. You can also use something like a
- [00:06:57.600] air. You can also use something like a leaf blower if you have one laying
- [00:06:59.029] leaf blower if you have one laying
- [00:06:59.039] leaf blower if you have one laying around. And then in some cases you can
- [00:07:01.430] around. And then in some cases you can
- [00:07:01.440] around. And then in some cases you can even have a vacuum that you can set from
- [00:07:05.189] even have a vacuum that you can set from
- [00:07:05.199] even have a vacuum that you can set from suck to blow. So that is also a very
- [00:07:08.309] suck to blow. So that is also a very
- [00:07:08.319] suck to blow. So that is also a very nice option. And then you simply blow
- [00:07:10.629] nice option. And then you simply blow
- [00:07:10.639] nice option. And then you simply blow that out if you have a proper dust
- [00:07:12.230] that out if you have a proper dust
- [00:07:12.240] that out if you have a proper dust problem. And then like I said, make sure
- [00:07:15.189] problem. And then like I said, make sure
- [00:07:15.199] problem. And then like I said, make sure then you get a cover to prevent anything
- [00:07:18.710] then you get a cover to prevent anything
- [00:07:18.720] then you get a cover to prevent anything in there from shorting out.
- [00:07:22.390] in there from shorting out.
- [00:07:22.400] in there from shorting out. Okay. So, next up, we're going to be
- [00:07:23.749] Okay. So, next up, we're going to be
- [00:07:23.759] Okay. So, next up, we're going to be looking at some good practices when it
- [00:07:25.589] looking at some good practices when it
- [00:07:25.599] looking at some good practices when it comes to your connection port,
- [00:07:27.589] comes to your connection port,
- [00:07:27.599] comes to your connection port, especially the USB printer one.
- [00:07:30.790] especially the USB printer one.
- [00:07:30.800] especially the USB printer one. Now, what tends to happen is this little
- [00:07:33.670] Now, what tends to happen is this little
- [00:07:33.680] Now, what tends to happen is this little USB connector on your actual
- [00:07:35.670] USB connector on your actual
- [00:07:35.680] USB connector on your actual motherboard, if you're not careful and
- [00:07:38.070] motherboard, if you're not careful and
- [00:07:38.080] motherboard, if you're not careful and you plug this thing in, out, in, out,
- [00:07:39.990] you plug this thing in, out, in, out,
- [00:07:40.000] you plug this thing in, out, in, out, in, out, you're going to damage that
- [00:07:41.430] in, out, you're going to damage that
- [00:07:41.440] in, out, you're going to damage that motherboard. And I can warn you now, the
- [00:07:43.830] motherboard. And I can warn you now, the
- [00:07:43.840] motherboard. And I can warn you now, the motherboard's going to be very expensive
- [00:07:45.270] motherboard's going to be very expensive
- [00:07:45.280] motherboard's going to be very expensive to replace. So, the best practice is
- [00:07:48.550] to replace. So, the best practice is
- [00:07:48.560] to replace. So, the best practice is plug it into your machine and then you
- [00:07:51.350] plug it into your machine and then you
- [00:07:51.360] plug it into your machine and then you plug it in and out, in and out on your
- [00:07:53.270] plug it in and out, in and out on your
- [00:07:53.280] plug it in and out, in and out on your PC rather than the actual machine. Now,
- [00:07:56.790] PC rather than the actual machine. Now,
- [00:07:56.800] PC rather than the actual machine. Now, what's popular things as well if you're
- [00:07:58.469] what's popular things as well if you're
- [00:07:58.479] what's popular things as well if you're scared you're going to start wearing out
- [00:07:59.670] scared you're going to start wearing out
- [00:07:59.680] scared you're going to start wearing out your actual computer's USB plug is you
- [00:08:02.869] your actual computer's USB plug is you
- [00:08:02.879] your actual computer's USB plug is you just simply get one of these adapters.
- [00:08:04.710] just simply get one of these adapters.
- [00:08:04.720] just simply get one of these adapters. So, it's like a USB adapter. You plug it
- [00:08:06.550] So, it's like a USB adapter. You plug it
- [00:08:06.560] So, it's like a USB adapter. You plug it into your PC. It's going to be way more
- [00:08:08.869] into your PC. It's going to be way more
- [00:08:08.879] into your PC. It's going to be way more affordable replacing that than replacing
- [00:08:11.029] affordable replacing that than replacing
- [00:08:11.039] affordable replacing that than replacing your machine's motherboard.
- [00:08:13.350] your machine's motherboard.
- [00:08:13.360] your machine's motherboard. Okay. So, next up, we're going to be
- [00:08:14.869] Okay. So, next up, we're going to be
- [00:08:14.879] Okay. So, next up, we're going to be looking at some good practices when it
- [00:08:16.629] looking at some good practices when it
- [00:08:16.639] looking at some good practices when it comes to the cutting block and the
- [00:08:18.869] comes to the cutting block and the
- [00:08:18.879] comes to the cutting block and the actual blade depth. Now, one thing you
- [00:08:22.790] actual blade depth. Now, one thing you
- [00:08:22.800] actual blade depth. Now, one thing you also want to be aware of when you're
- [00:08:24.390] also want to be aware of when you're
- [00:08:24.400] also want to be aware of when you're actually working with uh high pressures
- [00:08:27.909] actually working with uh high pressures
- [00:08:27.919] actually working with uh high pressures is that obviously if you increase the
- [00:08:29.670] is that obviously if you increase the
- [00:08:29.680] is that obviously if you increase the pressure too high for too long, you
- [00:08:31.589] pressure too high for too long, you
- [00:08:31.599] pressure too high for too long, you could damage some internal parts. So, it
- [00:08:34.310] could damage some internal parts. So, it
- [00:08:34.320] could damage some internal parts. So, it is better just to have some good
- [00:08:35.750] is better just to have some good
- [00:08:35.760] is better just to have some good practices in regards to the blade depth.
- [00:08:39.750] practices in regards to the blade depth.
- [00:08:39.760] practices in regards to the blade depth. Now, what I would always recommend is
- [00:08:41.670] Now, what I would always recommend is
- [00:08:41.680] Now, what I would always recommend is you make sure you have a blade that
- [00:08:44.149] you make sure you have a blade that
- [00:08:44.159] you make sure you have a blade that extrudes just enough so it cuts through
- [00:08:46.310] extrudes just enough so it cuts through
- [00:08:46.320] extrudes just enough so it cuts through the top layer of your actual uh vinyl
- [00:08:49.509] the top layer of your actual uh vinyl
- [00:08:49.519] the top layer of your actual uh vinyl and not through the entire material. And
- [00:08:52.230] and not through the entire material. And
- [00:08:52.240] and not through the entire material. And then what we do is we just set the
- [00:08:54.310] then what we do is we just set the
- [00:08:54.320] then what we do is we just set the pressure in accordance where if you
- [00:08:57.110] pressure in accordance where if you
- [00:08:57.120] pressure in accordance where if you start pumping that pressure up and it's
- [00:08:59.430] start pumping that pressure up and it's
- [00:08:59.440] start pumping that pressure up and it's still not cutting through then uh rather
- [00:09:01.990] still not cutting through then uh rather
- [00:09:02.000] still not cutting through then uh rather back off on the pressure and adjust the
- [00:09:03.750] back off on the pressure and adjust the
- [00:09:03.760] back off on the pressure and adjust the blade out a little bit more cuz the last
- [00:09:06.230] blade out a little bit more cuz the last
- [00:09:06.240] blade out a little bit more cuz the last thing you want to be doing is going max
- [00:09:07.910] thing you want to be doing is going max
- [00:09:07.920] thing you want to be doing is going max pressure and it's not cutting cuz then
- [00:09:09.590] pressure and it's not cutting cuz then
- [00:09:09.600] pressure and it's not cutting cuz then that would mean your blade is not
- [00:09:11.670] that would mean your blade is not
- [00:09:11.680] that would mean your blade is not extruding out far enough which means no
- [00:09:15.030] extruding out far enough which means no
- [00:09:15.040] extruding out far enough which means no matter how high you set that pressure
- [00:09:16.710] matter how high you set that pressure
- [00:09:16.720] matter how high you set that pressure it's not going to cut. It's just going
- [00:09:18.230] it's not going to cut. It's just going
- [00:09:18.240] it's not going to cut. It's just going to start creating damage on your
- [00:09:19.990] to start creating damage on your
- [00:09:20.000] to start creating damage on your machine. Now let's look at a standard
- [00:09:22.150] machine. Now let's look at a standard
- [00:09:22.160] machine. Now let's look at a standard type of way to get a nice blade depth.
- [00:09:25.190] type of way to get a nice blade depth.
- [00:09:25.200] type of way to get a nice blade depth. Now keep in mind this is going to vary
- [00:09:27.190] Now keep in mind this is going to vary
- [00:09:27.200] Now keep in mind this is going to vary and this is uh going to depend also on
- [00:09:29.590] and this is uh going to depend also on
- [00:09:29.600] and this is uh going to depend also on the thickness of your material and so
- [00:09:31.910] the thickness of your material and so
- [00:09:31.920] the thickness of your material and so forth. But this should give you a good
- [00:09:33.509] forth. But this should give you a good
- [00:09:33.519] forth. But this should give you a good guide of how to test it.
- [00:09:36.310] guide of how to test it.
- [00:09:36.320] guide of how to test it. So what we want to do is first of all we
- [00:09:37.990] So what we want to do is first of all we
- [00:09:38.000] So what we want to do is first of all we want to set this blade so we can feel
- [00:09:39.990] want to set this blade so we can feel
- [00:09:40.000] want to set this blade so we can feel it's just just scraping our finger but
- [00:09:43.269] it's just just scraping our finger but
- [00:09:43.279] it's just just scraping our finger but not cutting us. Then with offcut piece
- [00:09:46.550] not cutting us. Then with offcut piece
- [00:09:46.560] not cutting us. Then with offcut piece of vinyl, we can simply make a hash mark
- [00:09:49.190] of vinyl, we can simply make a hash mark
- [00:09:49.200] of vinyl, we can simply make a hash mark on there as we scrape this over. And
- [00:09:52.150] on there as we scrape this over. And
- [00:09:52.160] on there as we scrape this over. And then look how deep is that. So we doing
- [00:09:54.070] then look how deep is that. So we doing
- [00:09:54.080] then look how deep is that. So we doing this all by hand. The machine's not
- [00:09:55.590] this all by hand. The machine's not
- [00:09:55.600] this all by hand. The machine's not doing it. Then we can see if this thing
- [00:09:57.750] doing it. Then we can see if this thing
- [00:09:57.760] doing it. Then we can see if this thing is actually cutting the right depth.
- [00:09:59.350] is actually cutting the right depth.
- [00:09:59.360] is actually cutting the right depth. Then we'll adjust that until we are
- [00:10:01.990] Then we'll adjust that until we are
- [00:10:02.000] Then we'll adjust that until we are happy. Just make sure to tighten your
- [00:10:03.750] happy. Just make sure to tighten your
- [00:10:03.760] happy. Just make sure to tighten your lock nuts. Again, then once you're happy
- [00:10:06.310] lock nuts. Again, then once you're happy
- [00:10:06.320] lock nuts. Again, then once you're happy with that, you put it in your machine
- [00:10:07.990] with that, you put it in your machine
- [00:10:08.000] with that, you put it in your machine and then you can adjust your pressure
- [00:10:10.230] and then you can adjust your pressure
- [00:10:10.240] and then you can adjust your pressure accordingly. Just keep in mind over time
- [00:10:13.190] accordingly. Just keep in mind over time
- [00:10:13.200] accordingly. Just keep in mind over time as you're cutting a lot of material,
- [00:10:14.710] as you're cutting a lot of material,
- [00:10:14.720] as you're cutting a lot of material, your blade is going to be wearing down.
- [00:10:17.430] your blade is going to be wearing down.
- [00:10:17.440] your blade is going to be wearing down. And then that means you're going to have
- [00:10:18.550] And then that means you're going to have
- [00:10:18.560] And then that means you're going to have to start readjusting your depth. And
- [00:10:20.470] to start readjusting your depth. And
- [00:10:20.480] to start readjusting your depth. And that is where a lot of people make the
- [00:10:21.829] that is where a lot of people make the
- [00:10:21.839] that is where a lot of people make the problem where they'll now just up the
- [00:10:23.750] problem where they'll now just up the
- [00:10:23.760] problem where they'll now just up the pressure, up the pressure. Eventually,
- [00:10:25.190] pressure, up the pressure. Eventually,
- [00:10:25.200] pressure, up the pressure. Eventually, that blade is hardly cutting and you put
- [00:10:28.630] that blade is hardly cutting and you put
- [00:10:28.640] that blade is hardly cutting and you put too much pressure on the actual cutter
- [00:10:30.310] too much pressure on the actual cutter
- [00:10:30.320] too much pressure on the actual cutter head, which like I said, it's going to
- [00:10:32.389] head, which like I said, it's going to
- [00:10:32.399] head, which like I said, it's going to cause damage and it's way cheaper just
- [00:10:34.230] cause damage and it's way cheaper just
- [00:10:34.240] cause damage and it's way cheaper just replacing either a case or blade than
- [00:10:37.430] replacing either a case or blade than
- [00:10:37.440] replacing either a case or blade than the actual cutter head. Okay, so next up
- [00:10:40.790] the actual cutter head. Okay, so next up
- [00:10:40.800] the actual cutter head. Okay, so next up we're going to be looking at how to
- [00:10:42.310] we're going to be looking at how to
- [00:10:42.320] we're going to be looking at how to address vinyl or material that's running
- [00:10:45.269] address vinyl or material that's running
- [00:10:45.279] address vinyl or material that's running skew in your cutter.
- [00:10:48.389] skew in your cutter.
- [00:10:48.399] skew in your cutter. Now, when it comes to material running
- [00:10:50.630] Now, when it comes to material running
- [00:10:50.640] Now, when it comes to material running skew, there's a few things that could be
- [00:10:53.750] skew, there's a few things that could be
- [00:10:53.760] skew, there's a few things that could be and uh unfortunately some of it, you
- [00:10:56.150] and uh unfortunately some of it, you
- [00:10:56.160] and uh unfortunately some of it, you know, it's just bad practice on the user
- [00:10:58.389] know, it's just bad practice on the user
- [00:10:58.399] know, it's just bad practice on the user side and other ones is just poor setup.
- [00:11:01.990] side and other ones is just poor setup.
- [00:11:02.000] side and other ones is just poor setup. So first of all, let's just have a quick
- [00:11:03.670] So first of all, let's just have a quick
- [00:11:03.680] So first of all, let's just have a quick overview of let's say poor practice and
- [00:11:07.030] overview of let's say poor practice and
- [00:11:07.040] overview of let's say poor practice and that is like we covered before the
- [00:11:08.870] that is like we covered before the
- [00:11:08.880] that is like we covered before the material storage. So if you're going to
- [00:11:11.509] material storage. So if you're going to
- [00:11:11.519] material storage. So if you're going to be storing this material upright and not
- [00:11:13.750] be storing this material upright and not
- [00:11:13.760] be storing this material upright and not on its side, then what's going to happen
- [00:11:15.910] on its side, then what's going to happen
- [00:11:15.920] on its side, then what's going to happen is the material is going to with time
- [00:11:17.430] is the material is going to with time
- [00:11:17.440] is the material is going to with time slowly start uh rolling down and down
- [00:11:20.630] slowly start uh rolling down and down
- [00:11:20.640] slowly start uh rolling down and down then what's going to happen? One side of
- [00:11:21.829] then what's going to happen? One side of
- [00:11:21.839] then what's going to happen? One side of your material is going to have more
- [00:11:23.509] your material is going to have more
- [00:11:23.519] your material is going to have more tension versus the other side. So when
- [00:11:25.670] tension versus the other side. So when
- [00:11:25.680] tension versus the other side. So when you especially on big jobs when you're
- [00:11:27.509] you especially on big jobs when you're
- [00:11:27.519] you especially on big jobs when you're rolling down that roll it's going to
- [00:11:29.750] rolling down that roll it's going to
- [00:11:29.760] rolling down that roll it's going to start running skew and then you're going
- [00:11:31.110] start running skew and then you're going
- [00:11:31.120] start running skew and then you're going to think there's a problem by the setup
- [00:11:32.870] to think there's a problem by the setup
- [00:11:32.880] to think there's a problem by the setup or the machine where it's actually just
- [00:11:35.190] or the machine where it's actually just
- [00:11:35.200] or the machine where it's actually just the material.
- [00:11:37.190] the material.
- [00:11:37.200] the material. So that like I said unfortunately you
- [00:11:39.030] So that like I said unfortunately you
- [00:11:39.040] So that like I said unfortunately you can only fix by good practice and that's
- [00:11:41.670] can only fix by good practice and that's
- [00:11:41.680] can only fix by good practice and that's by storing your actual material
- [00:11:43.509] by storing your actual material
- [00:11:43.519] by storing your actual material correctly.
- [00:11:45.030] correctly.
- [00:11:45.040] correctly. Now let's say the actual rollers are
- [00:11:48.150] Now let's say the actual rollers are
- [00:11:48.160] Now let's say the actual rollers are making your machine or your material go
- [00:11:49.990] making your machine or your material go
- [00:11:50.000] making your machine or your material go skew. You can see this on smaller pieces
- [00:11:52.470] skew. You can see this on smaller pieces
- [00:11:52.480] skew. You can see this on smaller pieces more prominently,
- [00:11:54.550] more prominently,
- [00:11:54.560] more prominently, but either way, it might also be a
- [00:11:56.710] but either way, it might also be a
- [00:11:56.720] but either way, it might also be a problem on a big piece. And then you can
- [00:11:58.550] problem on a big piece. And then you can
- [00:11:58.560] problem on a big piece. And then you can try adjust this. So, what that comes
- [00:12:01.110] try adjust this. So, what that comes
- [00:12:01.120] try adjust this. So, what that comes down to is if your tension is not set
- [00:12:04.550] down to is if your tension is not set
- [00:12:04.560] down to is if your tension is not set equal across all your rollers, then some
- [00:12:08.069] equal across all your rollers, then some
- [00:12:08.079] equal across all your rollers, then some rollers are going to grip more than
- [00:12:09.430] rollers are going to grip more than
- [00:12:09.440] rollers are going to grip more than others, and then that's going to make
- [00:12:11.269] others, and then that's going to make
- [00:12:11.279] others, and then that's going to make your material sort going skew.
- [00:12:13.990] your material sort going skew.
- [00:12:14.000] your material sort going skew. Okay. So, on these rollers at the back,
- [00:12:15.910] Okay. So, on these rollers at the back,
- [00:12:15.920] Okay. So, on these rollers at the back, you will see we have some tension knobs.
- [00:12:18.550] you will see we have some tension knobs.
- [00:12:18.560] you will see we have some tension knobs. So now on some of the newer models, it
- [00:12:19.990] So now on some of the newer models, it
- [00:12:20.000] So now on some of the newer models, it will adjust both springs with one knob
- [00:12:22.389] will adjust both springs with one knob
- [00:12:22.399] will adjust both springs with one knob where some of the older ones you'll have
- [00:12:23.829] where some of the older ones you'll have
- [00:12:23.839] where some of the older ones you'll have to adjust the springs individually. When
- [00:12:26.230] to adjust the springs individually. When
- [00:12:26.240] to adjust the springs individually. When it comes to ones, adjust them
- [00:12:27.590] it comes to ones, adjust them
- [00:12:27.600] it comes to ones, adjust them individually. Just make sure you adjust
- [00:12:29.269] individually. Just make sure you adjust
- [00:12:29.279] individually. Just make sure you adjust them in accordance with each other. So
- [00:12:31.670] them in accordance with each other. So
- [00:12:31.680] them in accordance with each other. So you don't want one long, one short,
- [00:12:33.670] you don't want one long, one short,
- [00:12:33.680] you don't want one long, one short, because then once again, it's also going
- [00:12:34.870] because then once again, it's also going
- [00:12:34.880] because then once again, it's also going to measure the actual tension.
- [00:12:37.269] to measure the actual tension.
- [00:12:37.279] to measure the actual tension. So now, let's say you want to test to
- [00:12:38.710] So now, let's say you want to test to
- [00:12:38.720] So now, let's say you want to test to see if it's actually your tension. Then
- [00:12:40.949] see if it's actually your tension. Then
- [00:12:40.959] see if it's actually your tension. Then what you can do is you put a piece of
- [00:12:42.550] what you can do is you put a piece of
- [00:12:42.560] what you can do is you put a piece of vinyl in. You can either do all the
- [00:12:44.790] vinyl in. You can either do all the
- [00:12:44.800] vinyl in. You can either do all the clamps or one clamp at a time. And then
- [00:12:47.509] clamps or one clamp at a time. And then
- [00:12:47.519] clamps or one clamp at a time. And then with a material clamped down, you want
- [00:12:49.269] with a material clamped down, you want
- [00:12:49.279] with a material clamped down, you want to have a slight tug on the front. And
- [00:12:51.670] to have a slight tug on the front. And
- [00:12:51.680] to have a slight tug on the front. And if that material can move, then you know
- [00:12:53.670] if that material can move, then you know
- [00:12:53.680] if that material can move, then you know your tension is set to soft. So then
- [00:12:56.949] your tension is set to soft. So then
- [00:12:56.959] your tension is set to soft. So then what you can do is simply adjust that
- [00:12:59.190] what you can do is simply adjust that
- [00:12:59.200] what you can do is simply adjust that until you see the actual material does
- [00:13:01.829] until you see the actual material does
- [00:13:01.839] until you see the actual material does not move. Now keep in mind you want to
- [00:13:04.710] not move. Now keep in mind you want to
- [00:13:04.720] not move. Now keep in mind you want to have this set like I said in accordance
- [00:13:06.870] have this set like I said in accordance
- [00:13:06.880] have this set like I said in accordance to the different rollers as well. So
- [00:13:08.710] to the different rollers as well. So
- [00:13:08.720] to the different rollers as well. So have it a similar pressure otherwise
- [00:13:11.030] have it a similar pressure otherwise
- [00:13:11.040] have it a similar pressure otherwise over long areas one might be softer than
- [00:13:13.430] over long areas one might be softer than
- [00:13:13.440] over long areas one might be softer than the rest and then you have a problem.
- [00:13:16.069] the rest and then you have a problem.
- [00:13:16.079] the rest and then you have a problem. The general rule is you can rather have
- [00:13:17.590] The general rule is you can rather have
- [00:13:17.600] The general rule is you can rather have it too tight than too loose. But keep in
- [00:13:20.949] it too tight than too loose. But keep in
- [00:13:20.959] it too tight than too loose. But keep in mind that's going to come with a cost of
- [00:13:22.629] mind that's going to come with a cost of
- [00:13:22.639] mind that's going to come with a cost of potential surface uh damage to your
- [00:13:26.470] potential surface uh damage to your
- [00:13:26.480] potential surface uh damage to your material. And ideally play with it till
- [00:13:28.710] material. And ideally play with it till
- [00:13:28.720] material. And ideally play with it till you find a good level. But also keep in
- [00:13:30.150] you find a good level. But also keep in
- [00:13:30.160] you find a good level. But also keep in mind if you're going to be jumping from
- [00:13:32.310] mind if you're going to be jumping from
- [00:13:32.320] mind if you're going to be jumping from different thickness and types of
- [00:13:34.150] different thickness and types of
- [00:13:34.160] different thickness and types of materials, you might have to readjust
- [00:13:36.069] materials, you might have to readjust
- [00:13:36.079] materials, you might have to readjust this if you notice that things are not
- [00:13:38.550] this if you notice that things are not
- [00:13:38.560] this if you notice that things are not running correctly. Now let's say you've
- [00:13:40.870] running correctly. Now let's say you've
- [00:13:40.880] running correctly. Now let's say you've set your tension and you're still having
- [00:13:42.550] set your tension and you're still having
- [00:13:42.560] set your tension and you're still having a problem. Then another thing you might
- [00:13:44.470] a problem. Then another thing you might
- [00:13:44.480] a problem. Then another thing you might have to consider is perhaps your actual
- [00:13:46.710] have to consider is perhaps your actual
- [00:13:46.720] have to consider is perhaps your actual rubber rollers on the pinch rollers are
- [00:13:49.350] rubber rollers on the pinch rollers are
- [00:13:49.360] rubber rollers on the pinch rollers are worn out. So maybe assess that, have a
- [00:13:52.710] worn out. So maybe assess that, have a
- [00:13:52.720] worn out. So maybe assess that, have a closer look to see if they are correct.
- [00:13:55.190] closer look to see if they are correct.
- [00:13:55.200] closer look to see if they are correct. And if they are worn out, luckily these
- [00:13:57.430] And if they are worn out, luckily these
- [00:13:57.440] And if they are worn out, luckily these ones you can also go locate and buy on
- [00:13:59.829] ones you can also go locate and buy on
- [00:13:59.839] ones you can also go locate and buy on buy this. So you can just go to buy
- [00:14:02.310] buy this. So you can just go to buy
- [00:14:02.320] buy this. So you can just go to buy this. You go to the site category. We'll
- [00:14:04.470] this. You go to the site category. We'll
- [00:14:04.480] this. You go to the site category. We'll go to consumables.
- [00:14:07.189] go to consumables.
- [00:14:07.199] go to consumables. And under that you'll see we've got the
- [00:14:08.710] And under that you'll see we've got the
- [00:14:08.720] And under that you'll see we've got the spare parts. We click that. And then you
- [00:14:11.030] spare parts. We click that. And then you
- [00:14:11.040] spare parts. We click that. And then you want to go down until you find the
- [00:14:12.949] want to go down until you find the
- [00:14:12.959] want to go down until you find the actual rollers. Now, once again, if
- [00:14:16.230] actual rollers. Now, once again, if
- [00:14:16.240] actual rollers. Now, once again, if you're not sure about your model and
- [00:14:17.350] you're not sure about your model and
- [00:14:17.360] you're not sure about your model and that, you always contact support and
- [00:14:18.790] that, you always contact support and
- [00:14:18.800] that, you always contact support and just find out for my model which rollers
- [00:14:20.790] just find out for my model which rollers
- [00:14:20.800] just find out for my model which rollers are relevant. But a lot of times I
- [00:14:22.949] are relevant. But a lot of times I
- [00:14:22.959] are relevant. But a lot of times I should say there by the names.
- [00:14:26.069] should say there by the names.
- [00:14:26.079] should say there by the names. Okay. So, next up, we're going to be
- [00:14:27.670] Okay. So, next up, we're going to be
- [00:14:27.680] Okay. So, next up, we're going to be looking at if your machine is perhaps
- [00:14:29.509] looking at if your machine is perhaps
- [00:14:29.519] looking at if your machine is perhaps not powering on. Now, when it comes to
- [00:14:32.629] not powering on. Now, when it comes to
- [00:14:32.639] not powering on. Now, when it comes to this, there's a few different things
- [00:14:34.150] this, there's a few different things
- [00:14:34.160] this, there's a few different things that could be. Some we can try address
- [00:14:36.629] that could be. Some we can try address
- [00:14:36.639] that could be. Some we can try address ourselves and other ones unfortunately
- [00:14:38.389] ourselves and other ones unfortunately
- [00:14:38.399] ourselves and other ones unfortunately we'll have to send it in to have some
- [00:14:40.870] we'll have to send it in to have some
- [00:14:40.880] we'll have to send it in to have some support or some uh technician look at
- [00:14:43.430] support or some uh technician look at
- [00:14:43.440] support or some uh technician look at it.
- [00:14:45.590] it.
- [00:14:45.600] it. Now I know this might sound silly but
- [00:14:47.590] Now I know this might sound silly but
- [00:14:47.600] Now I know this might sound silly but first off make sure your actual power
- [00:14:49.350] first off make sure your actual power
- [00:14:49.360] first off make sure your actual power cables plugged into the machine and
- [00:14:51.430] cables plugged into the machine and
- [00:14:51.440] cables plugged into the machine and plugged in by the wall socket. Then that
- [00:14:53.990] plugged in by the wall socket. Then that
- [00:14:54.000] plugged in by the wall socket. Then that your actual power switch is switched on.
- [00:14:56.949] your actual power switch is switched on.
- [00:14:56.959] your actual power switch is switched on. If there's still no power then go to
- [00:14:59.189] If there's still no power then go to
- [00:14:59.199] If there's still no power then go to your power plug on the wall unit. Make
- [00:15:01.430] your power plug on the wall unit. Make
- [00:15:01.440] your power plug on the wall unit. Make sure that one is switched on. And if
- [00:15:04.389] sure that one is switched on. And if
- [00:15:04.399] sure that one is switched on. And if you're not sure, you can always plug in
- [00:15:06.069] you're not sure, you can always plug in
- [00:15:06.079] you're not sure, you can always plug in some other uh utensil, maybe like a
- [00:15:09.269] some other uh utensil, maybe like a
- [00:15:09.279] some other uh utensil, maybe like a drill, like a power tool or something
- [00:15:11.350] drill, like a power tool or something
- [00:15:11.360] drill, like a power tool or something like that, and make sure that that
- [00:15:12.870] like that, and make sure that that
- [00:15:12.880] like that, and make sure that that actual port is supplying power. On some
- [00:15:16.069] actual port is supplying power. On some
- [00:15:16.079] actual port is supplying power. On some models, obviously, it could be your
- [00:15:17.670] models, obviously, it could be your
- [00:15:17.680] models, obviously, it could be your fuse. So, if your model comes with a
- [00:15:19.670] fuse. So, if your model comes with a
- [00:15:19.680] fuse. So, if your model comes with a fuse, you can consider looking at that,
- [00:15:21.750] fuse, you can consider looking at that,
- [00:15:21.760] fuse, you can consider looking at that, seeing if the fuse is uh blown or not.
- [00:15:25.670] seeing if the fuse is uh blown or not.
- [00:15:25.680] seeing if the fuse is uh blown or not. Now another thing which could happen
- [00:15:27.189] Now another thing which could happen
- [00:15:27.199] Now another thing which could happen which is a little bit more serious and
- [00:15:29.509] which is a little bit more serious and
- [00:15:29.519] which is a little bit more serious and that is if you get like a power spike or
- [00:15:32.069] that is if you get like a power spike or
- [00:15:32.079] that is if you get like a power spike or something on that line it can actually
- [00:15:33.509] something on that line it can actually
- [00:15:33.519] something on that line it can actually burn out the actual power supply within
- [00:15:36.389] burn out the actual power supply within
- [00:15:36.399] burn out the actual power supply within the machine. Then also like for instance
- [00:15:38.629] the machine. Then also like for instance
- [00:15:38.639] the machine. Then also like for instance here in South Africa the other thing to
- [00:15:40.230] here in South Africa the other thing to
- [00:15:40.240] here in South Africa the other thing to consider is your quality of your power.
- [00:15:43.430] consider is your quality of your power.
- [00:15:43.440] consider is your quality of your power. Unfortunately out power can be quite
- [00:15:45.269] Unfortunately out power can be quite
- [00:15:45.279] Unfortunately out power can be quite inconsistent here. Maybe you have a
- [00:15:47.269] inconsistent here. Maybe you have a
- [00:15:47.279] inconsistent here. Maybe you have a spike or you'll get some load shedding
- [00:15:49.110] spike or you'll get some load shedding
- [00:15:49.120] spike or you'll get some load shedding and it cuts off. So then you want to do
- [00:15:51.430] and it cuts off. So then you want to do
- [00:15:51.440] and it cuts off. So then you want to do is make sure also you have a stable
- [00:15:53.269] is make sure also you have a stable
- [00:15:53.279] is make sure also you have a stable power source. Now if you're worried
- [00:15:55.590] power source. Now if you're worried
- [00:15:55.600] power source. Now if you're worried about spike like power spikes, you can
- [00:15:58.069] about spike like power spikes, you can
- [00:15:58.079] about spike like power spikes, you can always consider getting something like a
- [00:15:59.590] always consider getting something like a
- [00:15:59.600] always consider getting something like a surge protector where once it gets
- [00:16:02.150] surge protector where once it gets
- [00:16:02.160] surge protector where once it gets spiked too high, it will simply just cut
- [00:16:04.550] spiked too high, it will simply just cut
- [00:16:04.560] spiked too high, it will simply just cut the power and prevent your machine from
- [00:16:07.030] the power and prevent your machine from
- [00:16:07.040] the power and prevent your machine from getting damaged.
- [00:16:09.030] getting damaged.
- [00:16:09.040] getting damaged. Now, if it did actually surge off, you
- [00:16:11.430] Now, if it did actually surge off, you
- [00:16:11.440] Now, if it did actually surge off, you can always go look at the actual plug
- [00:16:13.110] can always go look at the actual plug
- [00:16:13.120] can always go look at the actual plug and then it should have a a setup guide
- [00:16:15.910] and then it should have a a setup guide
- [00:16:15.920] and then it should have a a setup guide on which lights means what. And then you
- [00:16:18.790] on which lights means what. And then you
- [00:16:18.800] on which lights means what. And then you might have to reset that guide to have
- [00:16:20.790] might have to reset that guide to have
- [00:16:20.800] might have to reset that guide to have it working again.
- [00:16:22.870] it working again.
- [00:16:22.880] it working again. Okay. So, one way to make sure you've
- [00:16:24.629] Okay. So, one way to make sure you've
- [00:16:24.639] Okay. So, one way to make sure you've got the most consistent power source, so
- [00:16:26.629] got the most consistent power source, so
- [00:16:26.639] got the most consistent power source, so there's no spikes and so forth, is
- [00:16:29.110] there's no spikes and so forth, is
- [00:16:29.120] there's no spikes and so forth, is getting one of these power regulators or
- [00:16:31.749] getting one of these power regulators or
- [00:16:31.759] getting one of these power regulators or voltage regulators from buy this.co.
- [00:16:35.430] voltage regulators from buy this.co.
- [00:16:35.440] voltage regulators from buy this.co. You simply go to buy this.coza ZA and
- [00:16:37.749] You simply go to buy this.coza ZA and
- [00:16:37.759] You simply go to buy this.coza ZA and then you go to machines and under there
- [00:16:40.550] then you go to machines and under there
- [00:16:40.560] then you go to machines and under there you go to power equipment and then from
- [00:16:43.590] you go to power equipment and then from
- [00:16:43.600] you go to power equipment and then from the power equipment you'll see this one.
- [00:16:45.749] the power equipment you'll see this one.
- [00:16:45.759] the power equipment you'll see this one. It's a voltage regulator. This is
- [00:16:47.990] It's a voltage regulator. This is
- [00:16:48.000] It's a voltage regulator. This is definitely your best way to go if
- [00:16:50.389] definitely your best way to go if
- [00:16:50.399] definitely your best way to go if there's any spikes or so forth in your
- [00:16:53.350] there's any spikes or so forth in your
- [00:16:53.360] there's any spikes or so forth in your electricity that it will control it.
- [00:16:56.550] electricity that it will control it.
- [00:16:56.560] electricity that it will control it. Another thing that could be worthwhile,
- [00:16:58.470] Another thing that could be worthwhile,
- [00:16:58.480] Another thing that could be worthwhile, especially us with load shedding, is
- [00:17:01.269] especially us with load shedding, is
- [00:17:01.279] especially us with load shedding, is maybe something in the line of a UPS,
- [00:17:04.949] maybe something in the line of a UPS,
- [00:17:04.959] maybe something in the line of a UPS, something running off batteries. And
- [00:17:07.110] something running off batteries. And
- [00:17:07.120] something running off batteries. And then um you're also going to have a very
- [00:17:08.789] then um you're also going to have a very
- [00:17:08.799] then um you're also going to have a very similar outcome. But then if the power
- [00:17:11.429] similar outcome. But then if the power
- [00:17:11.439] similar outcome. But then if the power suddenly trips, you might be able to
- [00:17:12.789] suddenly trips, you might be able to
- [00:17:12.799] suddenly trips, you might be able to have enough time to kind of save the job
- [00:17:15.990] have enough time to kind of save the job
- [00:17:16.000] have enough time to kind of save the job and so forth.
- [00:17:18.309] and so forth.
- [00:17:18.319] and so forth. But yeah, otherwise that is it on
- [00:17:20.150] But yeah, otherwise that is it on
- [00:17:20.160] But yeah, otherwise that is it on troubleshooting and maintenance.
- [00:17:22.789] troubleshooting and maintenance.
- [00:17:22.799] troubleshooting and maintenance. If there's anything extra that comes
- [00:17:24.549] If there's anything extra that comes
- [00:17:24.559] If there's anything extra that comes along, we'll add it in the bonus things
- [00:17:26.710] along, we'll add it in the bonus things
- [00:17:26.720] along, we'll add it in the bonus things or the bonus section at the end of this
- [00:17:28.549] or the bonus section at the end of this
- [00:17:28.559] or the bonus section at the end of this course for stuff we didn't cover early
- [00:17:30.870] course for stuff we didn't cover early
- [00:17:30.880] course for stuff we didn't cover early on. So, make sure you check that out
- [00:17:32.789] on. So, make sure you check that out
- [00:17:32.799] on. So, make sure you check that out later. But, you know, maybe don't skip
- [00:17:34.950] later. But, you know, maybe don't skip
- [00:17:34.960] later. But, you know, maybe don't skip there until you've actually gone through
- [00:17:36.390] there until you've actually gone through
- [00:17:36.400] there until you've actually gone through the proper content. Otherwise, thanks
- [00:17:39.190] the proper content. Otherwise, thanks
- [00:17:39.200] the proper content. Otherwise, thanks guys for joining me on this section and
- [00:17:40.470] guys for joining me on this section and
- [00:17:40.480] guys for joining me on this section and I'll see you in the next one. Cheers.
Keyframes
- /workspace/academy/media/1NHFZ8RnfeEFVUvx6MWlXdqirMsZmdSFt/keyframes/last.jpg
- /workspace/academy/media/1NHFZ8RnfeEFVUvx6MWlXdqirMsZmdSFt/keyframes/t005.jpg
- /workspace/academy/media/1NHFZ8RnfeEFVUvx6MWlXdqirMsZmdSFt/keyframes/t009.jpg
- /workspace/academy/media/1NHFZ8RnfeEFVUvx6MWlXdqirMsZmdSFt/keyframes/t014.jpg
- /workspace/academy/media/1NHFZ8RnfeEFVUvx6MWlXdqirMsZmdSFt/keyframes/t018.jpg
- /workspace/academy/media/1NHFZ8RnfeEFVUvx6MWlXdqirMsZmdSFt/keyframes/t023.jpg
- /workspace/academy/media/1NHFZ8RnfeEFVUvx6MWlXdqirMsZmdSFt/keyframes/t028.jpg
- /workspace/academy/media/1NHFZ8RnfeEFVUvx6MWlXdqirMsZmdSFt/keyframes/t032.jpg
- /workspace/academy/media/1NHFZ8RnfeEFVUvx6MWlXdqirMsZmdSFt/keyframes/t037.jpg
- /workspace/academy/media/1NHFZ8RnfeEFVUvx6MWlXdqirMsZmdSFt/keyframes/t041.jpg
- /workspace/academy/media/1NHFZ8RnfeEFVUvx6MWlXdqirMsZmdSFt/keyframes/t046.jpg
- /workspace/academy/media/1NHFZ8RnfeEFVUvx6MWlXdqirMsZmdSFt/keyframes/t051.jpg
- /workspace/academy/media/1NHFZ8RnfeEFVUvx6MWlXdqirMsZmdSFt/keyframes/t055.jpg
- /workspace/academy/media/1NHFZ8RnfeEFVUvx6MWlXdqirMsZmdSFt/keyframes/t060.jpg
- /workspace/academy/media/1NHFZ8RnfeEFVUvx6MWlXdqirMsZmdSFt/keyframes/t065.jpg
- /workspace/academy/media/1NHFZ8RnfeEFVUvx6MWlXdqirMsZmdSFt/keyframes/t069.jpg
- /workspace/academy/media/1NHFZ8RnfeEFVUvx6MWlXdqirMsZmdSFt/keyframes/t074.jpg
- /workspace/academy/media/1NHFZ8RnfeEFVUvx6MWlXdqirMsZmdSFt/keyframes/t078.jpg
- /workspace/academy/media/1NHFZ8RnfeEFVUvx6MWlXdqirMsZmdSFt/keyframes/t083.jpg
- /workspace/academy/media/1NHFZ8RnfeEFVUvx6MWlXdqirMsZmdSFt/keyframes/t088.jpg
- /workspace/academy/media/1NHFZ8RnfeEFVUvx6MWlXdqirMsZmdSFt/keyframes/t092.jpg
- /workspace/academy/media/1NHFZ8RnfeEFVUvx6MWlXdqirMsZmdSFt/keyframes/t097.jpg
- /workspace/academy/media/1NHFZ8RnfeEFVUvx6MWlXdqirMsZmdSFt/keyframes/t101.jpg
- /workspace/academy/media/1NHFZ8RnfeEFVUvx6MWlXdqirMsZmdSFt/keyframes/t106.jpg
12. Homework - Machine
- title: Homework - Machine
- status: publish
- author: 0
- is_previewable: (empty)
- video_duration: 0h 0m 0s (raw {"hours":0,"minutes":0,"seconds":0})
- video_source_type: (empty)
**Homework 1: Machine Proficiency & Calibration **
Goal: Master the physical machine setup and achieve the perfect \cut depth.\"
Assignment
- Blade Height Setup: Using the # method covered in the course, set your blade to a generic height suitable for cutting adhesive vinyl.
- Test Cut Routine:
- Load a small piece of scrap adhesive vinyl into your machine.
- Perform a small test cut using the test button.
- Examine the cut: Did it cut the vinyl but leave the backing paper intact?
- If the cut was imperfect, adjust the machine force (pressure) on the machine and repeat the test cut in a new location until you achieve the perfect “kiss cut” (perfect cut).
- Large Material Prep: Load a roll of vinyl, ensuring the pinch rollers have the correct tension and all slack is removed, verifying the machine\'s ability to track long material straight.
Submission
Submit two photos:
Photo 1
Show your successful test cut square cleanly weeded from the scrap material, leaving the backing paper intact.
Photo 2
Back of the backing paper where the test cut square was made, showing the intensity of the force.
Submission Instructions:
Complete this practical then submit via email to the instructor at info@ambitious.co.za.
Keep up the practical skills!
"
13. Machines-Conclusion
- title: Machines-Conclusion
- status: publish
- author: 0
- is_previewable: (empty)
- video_duration: 0h 0m 19s (raw {"hours":0,"minutes":0,"seconds":19})
- video_source_type: embedded
- drive_file_id:
1F2ZJiE4MxH-gHFwFMzAofqLPRCyrzR6U(source_ref; not a public link) - transcript pending / keyframes pending / presentation extract pending
- video_source_url: (Drive preview omitted as a public link; file id kept as source_ref)
(no lesson_content HTML in export — video-only or empty body; metadata above kept in full)
Drive extract
- file_id:
1F2ZJiE4MxH-gHFwFMzAofqLPRCyrzR6U - filename: 02 - Machines Outro.mp4
- kind: video
- local_path: /workspace/academy/media/1F2ZJiE4MxH-gHFwFMzAofqLPRCyrzR6U/02 - Machines Outro.mp4
- source_ref: drive
1F2ZJiE4MxH-gHFwFMzAofqLPRCyrzR6U· content_length 22294946 · original https://drive.google.com/file/d/1F2ZJiE4MxH-gHFwFMzAofqLPRCyrzR6U/view - extract_status: done
- caption_source: drive_timedtext_asr_srt
- duration_s: 19.202993
- keyframe_count: 3
Transcript
- [00:00:00.000] Righty guys. Okay, that concludes our
- [00:00:02.879] actual machine part of this course. So,
- [00:00:05.680] we looked at a various amount of things.
- [00:00:08.080] We have some quizzes to challenge you on
- [00:00:10.000] those topics. Next up, we move over to
- [00:00:12.400] software. But yeah, otherwise I'll see
- [00:00:14.719] you guys in the next section.
Keyframes
- /workspace/academy/media/1F2ZJiE4MxH-gHFwFMzAofqLPRCyrzR6U/keyframes/last.jpg
- /workspace/academy/media/1F2ZJiE4MxH-gHFwFMzAofqLPRCyrzR6U/keyframes/t001.jpg
- /workspace/academy/media/1F2ZJiE4MxH-gHFwFMzAofqLPRCyrzR6U/keyframes/t002.jpg
14. Software-Overview
- title: Software-Overview
- status: publish
- author: 0
- is_previewable: (empty)
- video_duration: 0h 1m 18s (raw {"hours":0,"minutes":1,"seconds":18})
- video_source_type: embedded
- drive_file_id:
1QHZ5_TmuGcjTPN0IDWB8PqGnLhunxS_0(source_ref; not a public link) - transcript pending / keyframes pending / presentation extract pending
- video_source_url: (Drive preview omitted as a public link; file id kept as source_ref)
In this video we will have an overview of the software section.
Drive extract
- file_id:
1QHZ5_TmuGcjTPN0IDWB8PqGnLhunxS_0 - filename: 03 - Software Intro.mp4
- kind: video
- local_path: /workspace/academy/media/1QHZ5_TmuGcjTPN0IDWB8PqGnLhunxS_0/03 - Software Intro.mp4
- source_ref: drive
1QHZ5_TmuGcjTPN0IDWB8PqGnLhunxS_0· content_length 79036009 · original https://drive.google.com/file/d/1QHZ5_TmuGcjTPN0IDWB8PqGnLhunxS_0/view - extract_status: done
- caption_source: drive_timedtext
- duration_s: 66.386009
- keyframe_count: 8
Transcript
- Hey guys, welcome to the software
- [00:00:01.990] Hey guys, welcome to the software
- [00:00:02.000] Hey guys, welcome to the software section. We just completed the machine.
- [00:00:03.909] section. We just completed the machine.
- [00:00:03.919] section. We just completed the machine. So now we're going to head over into the
- [00:00:05.670] So now we're going to head over into the
- [00:00:05.680] So now we're going to head over into the different programs we're going to be
- [00:00:06.789] different programs we're going to be
- [00:00:06.799] different programs we're going to be using to actually produce our designs
- [00:00:09.589] using to actually produce our designs
- [00:00:09.599] using to actually produce our designs and send it out for the cutter. Now
- [00:00:12.470] and send it out for the cutter. Now
- [00:00:12.480] and send it out for the cutter. Now we're going to be focusing on Final Cut
- [00:00:13.990] we're going to be focusing on Final Cut
- [00:00:14.000] we're going to be focusing on Final Cut 5 and then yeah, so what we're going to
- [00:00:16.070] 5 and then yeah, so what we're going to
- [00:00:16.080] 5 and then yeah, so what we're going to be covering in this section is we'll
- [00:00:17.750] be covering in this section is we'll
- [00:00:17.760] be covering in this section is we'll start off with basic setup like how to
- [00:00:20.070] start off with basic setup like how to
- [00:00:20.080] start off with basic setup like how to get the program up and running. Then
- [00:00:22.230] get the program up and running. Then
- [00:00:22.240] get the program up and running. Then some UI like what's located where and
- [00:00:25.269] some UI like what's located where and
- [00:00:25.279] some UI like what's located where and then we'll go into some more how can I
- [00:00:27.189] then we'll go into some more how can I
- [00:00:27.199] then we'll go into some more how can I say important workflow. So what is the
- [00:00:30.470] say important workflow. So what is the
- [00:00:30.480] say important workflow. So what is the key things you need to know in order to
- [00:00:32.549] key things you need to know in order to
- [00:00:32.559] key things you need to know in order to operate the program? Then we'll maybe
- [00:00:35.510] operate the program? Then we'll maybe
- [00:00:35.520] operate the program? Then we'll maybe fine-tune and we'll go into some more
- [00:00:37.590] fine-tune and we'll go into some more
- [00:00:37.600] fine-tune and we'll go into some more unique uh aspects. So maybe you in a
- [00:00:40.950] unique uh aspects. So maybe you in a
- [00:00:40.960] unique uh aspects. So maybe you in a certain field and it's relevant to you.
- [00:00:42.950] certain field and it's relevant to you.
- [00:00:42.960] certain field and it's relevant to you. We're not going to go into too many.
- [00:00:45.270] We're not going to go into too many.
- [00:00:45.280] We're not going to go into too many. We're going to keep it quite generic
- [00:00:47.029] We're going to keep it quite generic
- [00:00:47.039] We're going to keep it quite generic because obviously there's too much to
- [00:00:48.470] because obviously there's too much to
- [00:00:48.480] because obviously there's too much to cover. But we also do have a lot of this
- [00:00:51.270] cover. But we also do have a lot of this
- [00:00:51.280] cover. But we also do have a lot of this content on software training.co.za.
- [00:00:54.150] content on software training.co.za.
- [00:00:54.160] content on software training.co.za. So if we don't cover it here, you can
- [00:00:55.670] So if we don't cover it here, you can
- [00:00:55.680] So if we don't cover it here, you can always deep dive there a little bit
- [00:00:57.350] always deep dive there a little bit
- [00:00:57.360] always deep dive there a little bit more. But yeah, otherwise I'll take you
- [00:00:59.590] more. But yeah, otherwise I'll take you
- [00:00:59.600] more. But yeah, otherwise I'll take you guys in the next video and enjoy.
Keyframes
- /workspace/academy/media/1QHZ5_TmuGcjTPN0IDWB8PqGnLhunxS_0/keyframes/last.jpg
- /workspace/academy/media/1QHZ5_TmuGcjTPN0IDWB8PqGnLhunxS_0/keyframes/t001.jpg
- /workspace/academy/media/1QHZ5_TmuGcjTPN0IDWB8PqGnLhunxS_0/keyframes/t002.jpg
- /workspace/academy/media/1QHZ5_TmuGcjTPN0IDWB8PqGnLhunxS_0/keyframes/t003.jpg
- /workspace/academy/media/1QHZ5_TmuGcjTPN0IDWB8PqGnLhunxS_0/keyframes/t004.jpg
- /workspace/academy/media/1QHZ5_TmuGcjTPN0IDWB8PqGnLhunxS_0/keyframes/t005.jpg
- /workspace/academy/media/1QHZ5_TmuGcjTPN0IDWB8PqGnLhunxS_0/keyframes/t006.jpg
- /workspace/academy/media/1QHZ5_TmuGcjTPN0IDWB8PqGnLhunxS_0/keyframes/t007.jpg
15. VinylCut 5 - Setup
- title: VinylCut 5 - Setup
- status: publish
- author: 0
- is_previewable: (empty)
- video_duration: 0h 11m 45s (raw {"hours":0,"minutes":11,"seconds":45})
- video_source_type: embedded
- drive_file_id:
1nMNpiQwz6c_SIu1lYaqD43AkKFqikPXR(source_ref; not a public link) - transcript pending / keyframes pending / presentation extract pending
- video_source_url: (Drive preview omitted as a public link; file id kept as source_ref)
In today's lesson we going to be looking at setting up VinylCut 5.
- quizzes_following_this_lesson: 1 (full text in Quizzes)
- Setup (3 questions)
Drive extract
- file_id:
1nMNpiQwz6c_SIu1lYaqD43AkKFqikPXR - filename: 01 - SWVC - Setup.mp4
- kind: video
- local_path: /workspace/academy/media/1nMNpiQwz6c_SIu1lYaqD43AkKFqikPXR/01 - SWVC - Setup.mp4
- source_ref: drive
1nMNpiQwz6c_SIu1lYaqD43AkKFqikPXR· content_length 102229169 · original https://drive.google.com/file/d/1nMNpiQwz6c_SIu1lYaqD43AkKFqikPXR/view - extract_status: done
- caption_source: drive_timedtext
- duration_s: 705.306009
- keyframe_count: 24
Transcript
- Howy guys. Okay, in today's video, we're
- [00:00:02.950] Howy guys. Okay, in today's video, we're
- [00:00:02.960] Howy guys. Okay, in today's video, we're going to be looking at setting up vinyl
- [00:00:05.190] going to be looking at setting up vinyl
- [00:00:05.200] going to be looking at setting up vinyl cut and the different processes
- [00:00:07.590] cut and the different processes
- [00:00:07.600] cut and the different processes involved.
- [00:00:10.470] involved.
- [00:00:10.480] involved. Okay, now first of what is vinyl cut?
- [00:00:12.709] Okay, now first of what is vinyl cut?
- [00:00:12.719] Okay, now first of what is vinyl cut? Now, this is a program one of the two we
- [00:00:15.030] Now, this is a program one of the two we
- [00:00:15.040] Now, this is a program one of the two we can be using or we can be using for
- [00:00:17.510] can be using or we can be using for
- [00:00:17.520] can be using or we can be using for cutting our vinyl. What it comes down to
- [00:00:19.990] cutting our vinyl. What it comes down to
- [00:00:20.000] cutting our vinyl. What it comes down to is this is kind of a bridge between the
- [00:00:22.070] is this is kind of a bridge between the
- [00:00:22.080] is this is kind of a bridge between the actual design and the cutter. Which
- [00:00:24.870] actual design and the cutter. Which
- [00:00:24.880] actual design and the cutter. Which means um you can design in this yes but
- [00:00:28.230] means um you can design in this yes but
- [00:00:28.240] means um you can design in this yes but you can also design in a third party
- [00:00:29.910] you can also design in a third party
- [00:00:29.920] you can also design in a third party program and then import it into here and
- [00:00:33.030] program and then import it into here and
- [00:00:33.040] program and then import it into here and then this program will be able to
- [00:00:35.110] then this program will be able to
- [00:00:35.120] then this program will be able to communicate with the cutter correctly so
- [00:00:37.510] communicate with the cutter correctly so
- [00:00:37.520] communicate with the cutter correctly so that your final products come out cut
- [00:00:39.750] that your final products come out cut
- [00:00:39.760] that your final products come out cut right now when it comes to the program's
- [00:00:42.150] right now when it comes to the program's
- [00:00:42.160] right now when it comes to the program's a few cool features uh I'm just going to
- [00:00:44.630] a few cool features uh I'm just going to
- [00:00:44.640] a few cool features uh I'm just going to be covering so you get an idea of what
- [00:00:46.549] be covering so you get an idea of what
- [00:00:46.559] be covering so you get an idea of what it can do. So now it has the ability to
- [00:00:50.389] it can do. So now it has the ability to
- [00:00:50.399] it can do. So now it has the ability to do some advanced contour cutting which
- [00:00:52.389] do some advanced contour cutting which
- [00:00:52.399] do some advanced contour cutting which is very nice. Then you can also work on
- [00:00:55.189] is very nice. Then you can also work on
- [00:00:55.199] is very nice. Then you can also work on multiple projects at the same time. And
- [00:00:57.430] multiple projects at the same time. And
- [00:00:57.440] multiple projects at the same time. And you'll even notice some projects have
- [00:00:59.110] you'll even notice some projects have
- [00:00:59.120] you'll even notice some projects have multiple pages which is very nice to see
- [00:01:01.990] multiple pages which is very nice to see
- [00:01:02.000] multiple pages which is very nice to see in one of these programs. Then we also
- [00:01:04.390] in one of these programs. Then we also
- [00:01:04.400] in one of these programs. Then we also have a QR code generator which we'll be
- [00:01:06.469] have a QR code generator which we'll be
- [00:01:06.479] have a QR code generator which we'll be covering later. Very handy for products
- [00:01:08.469] covering later. Very handy for products
- [00:01:08.479] covering later. Very handy for products if you want people to find you
- [00:01:09.830] if you want people to find you
- [00:01:09.840] if you want people to find you afterwards or so forth. Then the program
- [00:01:12.710] afterwards or so forth. Then the program
- [00:01:12.720] afterwards or so forth. Then the program also supports quite a number of file
- [00:01:15.350] also supports quite a number of file
- [00:01:15.360] also supports quite a number of file formats which um is very handy when you
- [00:01:18.230] formats which um is very handy when you
- [00:01:18.240] formats which um is very handy when you working between multiple programs. Then
- [00:01:20.950] working between multiple programs. Then
- [00:01:20.960] working between multiple programs. Then also we have some nice alignment tools
- [00:01:23.109] also we have some nice alignment tools
- [00:01:23.119] also we have some nice alignment tools and we have advanced nesting. So when
- [00:01:25.910] and we have advanced nesting. So when
- [00:01:25.920] and we have advanced nesting. So when you're looking at saving actual
- [00:01:27.590] you're looking at saving actual
- [00:01:27.600] you're looking at saving actual material, this is a great way to go.
- [00:01:31.030] material, this is a great way to go.
- [00:01:31.040] material, this is a great way to go. Then when it comes to the trace tool,
- [00:01:33.590] Then when it comes to the trace tool,
- [00:01:33.600] Then when it comes to the trace tool, which we use a lot, we've got some nice
- [00:01:36.069] which we use a lot, we've got some nice
- [00:01:36.079] which we use a lot, we've got some nice improved masks to remove backgrounds,
- [00:01:38.950] improved masks to remove backgrounds,
- [00:01:38.960] improved masks to remove backgrounds, which is going to be very handy as well.
- [00:01:41.510] which is going to be very handy as well.
- [00:01:41.520] which is going to be very handy as well. Now, there's also a few other things
- [00:01:42.789] Now, there's also a few other things
- [00:01:42.799] Now, there's also a few other things that's very handy, but just some uh
- [00:01:45.109] that's very handy, but just some uh
- [00:01:45.119] that's very handy, but just some uh worthwhile ones also. If you're doing
- [00:01:46.870] worthwhile ones also. If you're doing
- [00:01:46.880] worthwhile ones also. If you're doing symmetrical or mirror type designs, it's
- [00:01:49.109] symmetrical or mirror type designs, it's
- [00:01:49.119] symmetrical or mirror type designs, it's h quite well suited for that. And then
- [00:01:51.510] h quite well suited for that. And then
- [00:01:51.520] h quite well suited for that. And then we also have some nice options if we
- [00:01:53.910] we also have some nice options if we
- [00:01:53.920] we also have some nice options if we want to do maybe a little bit less
- [00:01:55.590] want to do maybe a little bit less
- [00:01:55.600] want to do maybe a little bit less destructive editing. So let's say we're
- [00:01:57.749] destructive editing. So let's say we're
- [00:01:57.759] destructive editing. So let's say we're joining shapes and so forth. Then we
- [00:01:59.590] joining shapes and so forth. Then we
- [00:01:59.600] joining shapes and so forth. Then we have some nice welding options which
- [00:02:01.350] have some nice welding options which
- [00:02:01.360] have some nice welding options which will help us with those uh features.
- [00:02:05.190] will help us with those uh features.
- [00:02:05.200] will help us with those uh features. Okay. Now next up, let's look at where
- [00:02:07.109] Okay. Now next up, let's look at where
- [00:02:07.119] Okay. Now next up, let's look at where we can actually find the program and
- [00:02:09.029] we can actually find the program and
- [00:02:09.039] we can actually find the program and download it. So, in order to do that, we
- [00:02:10.949] download it. So, in order to do that, we
- [00:02:10.959] download it. So, in order to do that, we simply want to go to a web browser and
- [00:02:13.510] simply want to go to a web browser and
- [00:02:13.520] simply want to go to a web browser and then we can type in in the URL on top or
- [00:02:15.990] then we can type in in the URL on top or
- [00:02:16.000] then we can type in in the URL on top or you can just Google search it as well.
- [00:02:17.750] you can just Google search it as well.
- [00:02:17.760] you can just Google search it as well. But I'm going to go vinyl cut.co.za
- [00:02:21.830] But I'm going to go vinyl cut.co.za
- [00:02:21.840] But I'm going to go vinyl cut.co.za and this will take us to the actual
- [00:02:23.270] and this will take us to the actual
- [00:02:23.280] and this will take us to the actual vinyl cut website. Now, like I
- [00:02:25.990] vinyl cut website. Now, like I
- [00:02:26.000] vinyl cut website. Now, like I mentioned, you can also get it on actual
- [00:02:28.630] mentioned, you can also get it on actual
- [00:02:28.640] mentioned, you can also get it on actual the AM site. So, if you're familiar with
- [00:02:30.710] the AM site. So, if you're familiar with
- [00:02:30.720] the AM site. So, if you're familiar with that, you can go to that route. So, you
- [00:02:32.710] that, you can go to that route. So, you
- [00:02:32.720] that, you can go to that route. So, you just simply go am.co.za.
- [00:02:36.070] just simply go am.co.za.
- [00:02:36.080] just simply go am.co.za. Then under the actual website, we want
- [00:02:38.070] Then under the actual website, we want
- [00:02:38.080] Then under the actual website, we want to go to machines. Then we go down to
- [00:02:40.710] to go to machines. Then we go down to
- [00:02:40.720] to go to machines. Then we go down to software and drivers. And then you can
- [00:02:42.949] software and drivers. And then you can
- [00:02:42.959] software and drivers. And then you can see we've got vinyl cut. Now it's nice.
- [00:02:46.630] see we've got vinyl cut. Now it's nice.
- [00:02:46.640] see we've got vinyl cut. Now it's nice. Also, you can see the version we've got
- [00:02:48.390] Also, you can see the version we've got
- [00:02:48.400] Also, you can see the version we've got and the date. So you know it's the
- [00:02:49.750] and the date. So you know it's the
- [00:02:49.760] and the date. So you know it's the latest one. And you can some simply just
- [00:02:51.830] latest one. And you can some simply just
- [00:02:51.840] latest one. And you can some simply just go here to get files.
- [00:02:54.630] go here to get files.
- [00:02:54.640] go here to get files. We scroll down and then make sure you
- [00:02:57.670] We scroll down and then make sure you
- [00:02:57.680] We scroll down and then make sure you actually scroll down right to the
- [00:02:59.430] actually scroll down right to the
- [00:02:59.440] actually scroll down right to the bottom. Normally the latest version will
- [00:03:01.190] bottom. Normally the latest version will
- [00:03:01.200] bottom. Normally the latest version will be at the bottom. So you can see we've
- [00:03:02.470] be at the bottom. So you can see we've
- [00:03:02.480] be at the bottom. So you can see we've got some wild cut 4 and then it goes to
- [00:03:04.309] got some wild cut 4 and then it goes to
- [00:03:04.319] got some wild cut 4 and then it goes to one cut 5.
- [00:03:05.990] one cut 5.
- [00:03:06.000] one cut 5. So over here you can make sure you
- [00:03:07.750] So over here you can make sure you
- [00:03:07.760] So over here you can make sure you download the latest version of vinyl
- [00:03:10.869] download the latest version of vinyl
- [00:03:10.879] download the latest version of vinyl cut. Now when it comes to actual vinyl
- [00:03:13.509] cut. Now when it comes to actual vinyl
- [00:03:13.519] cut. Now when it comes to actual vinyl cut website um this is very handy also a
- [00:03:17.350] cut website um this is very handy also a
- [00:03:17.360] cut website um this is very handy also a place where you can get a serial number
- [00:03:19.190] place where you can get a serial number
- [00:03:19.200] place where you can get a serial number and so forth if you need but this thing
- [00:03:21.830] and so forth if you need but this thing
- [00:03:21.840] and so forth if you need but this thing does also come with a trial so you can
- [00:03:23.589] does also come with a trial so you can
- [00:03:23.599] does also come with a trial so you can first test it to make sure you like it.
- [00:03:26.470] first test it to make sure you like it.
- [00:03:26.480] first test it to make sure you like it. Now once again here we can go but now
- [00:03:28.229] Now once again here we can go but now
- [00:03:28.239] Now once again here we can go but now you can see the latest version here is
- [00:03:29.910] you can see the latest version here is
- [00:03:29.920] you can see the latest version here is on top. Keep that in mind and then
- [00:03:31.589] on top. Keep that in mind and then
- [00:03:31.599] on top. Keep that in mind and then you've got some different options. So,
- [00:03:33.589] you've got some different options. So,
- [00:03:33.599] you've got some different options. So, we're going to go for the Windows 64bit,
- [00:03:35.509] we're going to go for the Windows 64bit,
- [00:03:35.519] we're going to go for the Windows 64bit, but you also get the 32 and the one for
- [00:03:37.990] but you also get the 32 and the one for
- [00:03:38.000] but you also get the 32 and the one for Mac.
- [00:03:39.509] Mac.
- [00:03:39.519] Mac. So, uh, good to know if you're on a Mac,
- [00:03:41.990] So, uh, good to know if you're on a Mac,
- [00:03:42.000] So, uh, good to know if you're on a Mac, you can also use it. Very handy. Now,
- [00:03:44.550] you can also use it. Very handy. Now,
- [00:03:44.560] you can also use it. Very handy. Now, the 32-bit, that's opted for older
- [00:03:46.390] the 32-bit, that's opted for older
- [00:03:46.400] the 32-bit, that's opted for older systems and the 64 for modded ones.
- [00:03:50.630] systems and the 64 for modded ones.
- [00:03:50.640] systems and the 64 for modded ones. Now, if I had to go here to the download
- [00:03:52.149] Now, if I had to go here to the download
- [00:03:52.159] Now, if I had to go here to the download folder, you can see we've got the actual
- [00:03:54.149] folder, you can see we've got the actual
- [00:03:54.159] folder, you can see we've got the actual file over here. So, we know, okay, it is
- [00:03:57.270] file over here. So, we know, okay, it is
- [00:03:57.280] file over here. So, we know, okay, it is correct and it is ready for
- [00:03:58.869] correct and it is ready for
- [00:03:58.879] correct and it is ready for installation.
- [00:04:01.589] installation.
- [00:04:01.599] installation. Okay, so next up we're going to be
- [00:04:03.110] Okay, so next up we're going to be
- [00:04:03.120] Okay, so next up we're going to be looking at how to install Final Cut. And
- [00:04:06.229] looking at how to install Final Cut. And
- [00:04:06.239] looking at how to install Final Cut. And uh yeah, pretty straightforward, but
- [00:04:07.750] uh yeah, pretty straightforward, but
- [00:04:07.760] uh yeah, pretty straightforward, but let's dive into that.
- [00:04:10.149] let's dive into that.
- [00:04:10.159] let's dive into that. Okay, so when it comes to installation
- [00:04:11.670] Okay, so when it comes to installation
- [00:04:11.680] Okay, so when it comes to installation process, what we want to do is first
- [00:04:13.110] process, what we want to do is first
- [00:04:13.120] process, what we want to do is first locate the file we downloaded.
- [00:04:15.990] locate the file we downloaded.
- [00:04:16.000] locate the file we downloaded. Normally it's probably just be in your
- [00:04:17.349] Normally it's probably just be in your
- [00:04:17.359] Normally it's probably just be in your downloads folder, but in my case, I
- [00:04:18.949] downloads folder, but in my case, I
- [00:04:18.959] downloads folder, but in my case, I moved it just for sake of the tutorial.
- [00:04:20.870] moved it just for sake of the tutorial.
- [00:04:20.880] moved it just for sake of the tutorial. Then what we're going to do is simply
- [00:04:22.150] Then what we're going to do is simply
- [00:04:22.160] Then what we're going to do is simply double click that. Then it's going to
- [00:04:24.550] double click that. Then it's going to
- [00:04:24.560] double click that. Then it's going to ask us which language we want to do this
- [00:04:26.790] ask us which language we want to do this
- [00:04:26.800] ask us which language we want to do this in. I'm simply going to select English.
- [00:04:29.909] in. I'm simply going to select English.
- [00:04:29.919] in. I'm simply going to select English. say okay and then it's going to have a
- [00:04:31.590] say okay and then it's going to have a
- [00:04:31.600] say okay and then it's going to have a license agreement. Now you can obviously
- [00:04:34.150] license agreement. Now you can obviously
- [00:04:34.160] license agreement. Now you can obviously read through this um if you want first
- [00:04:38.150] read through this um if you want first
- [00:04:38.160] read through this um if you want first I'm just going to say here I accept the
- [00:04:39.909] I'm just going to say here I accept the
- [00:04:39.919] I'm just going to say here I accept the agreement and click next and say next.
- [00:04:43.590] agreement and click next and say next.
- [00:04:43.600] agreement and click next and say next. Then it's going to ask us our actual
- [00:04:45.030] Then it's going to ask us our actual
- [00:04:45.040] Then it's going to ask us our actual location you want to install this to.
- [00:04:47.110] location you want to install this to.
- [00:04:47.120] location you want to install this to. I'm just going to leave mine at the
- [00:04:48.390] I'm just going to leave mine at the
- [00:04:48.400] I'm just going to leave mine at the default but if you have to you can
- [00:04:50.550] default but if you have to you can
- [00:04:50.560] default but if you have to you can obviously install this at a different
- [00:04:52.150] obviously install this at a different
- [00:04:52.160] obviously install this at a different location. Maybe you have your programs
- [00:04:53.909] location. Maybe you have your programs
- [00:04:53.919] location. Maybe you have your programs or something on another drive then you
- [00:04:56.150] or something on another drive then you
- [00:04:56.160] or something on another drive then you also can do that. And then underneath
- [00:04:58.710] also can do that. And then underneath
- [00:04:58.720] also can do that. And then underneath that we can see how big a file is which
- [00:05:00.469] that we can see how big a file is which
- [00:05:00.479] that we can see how big a file is which is pretty small. Okay. Here now if we
- [00:05:03.189] is pretty small. Okay. Here now if we
- [00:05:03.199] is pretty small. Okay. Here now if we click next now we've got a selected
- [00:05:05.990] click next now we've got a selected
- [00:05:06.000] click next now we've got a selected additional task. So this is pretty much
- [00:05:08.870] additional task. So this is pretty much
- [00:05:08.880] additional task. So this is pretty much just if we want a shortcut on a desktop
- [00:05:11.110] just if we want a shortcut on a desktop
- [00:05:11.120] just if we want a shortcut on a desktop or if we want um any VC file five files
- [00:05:16.390] or if we want um any VC file five files
- [00:05:16.400] or if we want um any VC file five files associated. So that means anything with
- [00:05:18.870] associated. So that means anything with
- [00:05:18.880] associated. So that means anything with that extension the program will
- [00:05:20.310] that extension the program will
- [00:05:20.320] that extension the program will automatically open it. Next up we have
- [00:05:23.029] automatically open it. Next up we have
- [00:05:23.039] automatically open it. Next up we have here is our confirmation. again I'm just
- [00:05:24.950] here is our confirmation. again I'm just
- [00:05:24.960] here is our confirmation. again I'm just going to say next for install. Yeah,
- [00:05:28.629] going to say next for install. Yeah,
- [00:05:28.639] going to say next for install. Yeah, then we are done. I'm just going to
- [00:05:30.150] then we are done. I'm just going to
- [00:05:30.160] then we are done. I'm just going to click that and then say finish. And then
- [00:05:32.710] click that and then say finish. And then
- [00:05:32.720] click that and then say finish. And then what that will do is it should start
- [00:05:34.310] what that will do is it should start
- [00:05:34.320] what that will do is it should start vinyl cut for us.
- [00:05:37.029] vinyl cut for us.
- [00:05:37.039] vinyl cut for us. Then um yeah, pretty straightforward.
- [00:05:39.510] Then um yeah, pretty straightforward.
- [00:05:39.520] Then um yeah, pretty straightforward. Now you will see here like I mentioned
- [00:05:41.270] Now you will see here like I mentioned
- [00:05:41.280] Now you will see here like I mentioned before we have
- [00:05:43.830] before we have
- [00:05:43.840] before we have a option to license it or we can try a
- [00:05:46.790] a option to license it or we can try a
- [00:05:46.800] a option to license it or we can try a demo. So we can see there while cut will
- [00:05:48.870] demo. So we can see there while cut will
- [00:05:48.880] demo. So we can see there while cut will be running demo mode. Pretty much what
- [00:05:51.189] be running demo mode. Pretty much what
- [00:05:51.199] be running demo mode. Pretty much what it comes down to is going to be cutting
- [00:05:52.710] it comes down to is going to be cutting
- [00:05:52.720] it comes down to is going to be cutting horizontal lines through your design. So
- [00:05:55.110] horizontal lines through your design. So
- [00:05:55.120] horizontal lines through your design. So when you actually want to cut, it's
- [00:05:56.710] when you actually want to cut, it's
- [00:05:56.720] when you actually want to cut, it's obviously not good for that. But for
- [00:05:58.870] obviously not good for that. But for
- [00:05:58.880] obviously not good for that. But for now, for designing and understanding the
- [00:06:00.390] now, for designing and understanding the
- [00:06:00.400] now, for designing and understanding the program, that's fine. I'm going to say
- [00:06:02.150] program, that's fine. I'm going to say
- [00:06:02.160] program, that's fine. I'm going to say okay. And then we are met with this
- [00:06:04.150] okay. And then we are met with this
- [00:06:04.160] okay. And then we are met with this welcome screen. So now you can obviously
- [00:06:06.550] welcome screen. So now you can obviously
- [00:06:06.560] welcome screen. So now you can obviously play around and uh try to get
- [00:06:08.469] play around and uh try to get
- [00:06:08.479] play around and uh try to get comfortable. But we are going to be
- [00:06:09.990] comfortable. But we are going to be
- [00:06:10.000] comfortable. But we are going to be running through the user interface and
- [00:06:11.590] running through the user interface and
- [00:06:11.600] running through the user interface and all of that throughout these tutorials.
- [00:06:13.990] all of that throughout these tutorials.
- [00:06:14.000] all of that throughout these tutorials. Okay. In this next section, we're going
- [00:06:15.670] Okay. In this next section, we're going
- [00:06:15.680] Okay. In this next section, we're going to be looking at if you want to actually
- [00:06:17.430] to be looking at if you want to actually
- [00:06:17.440] to be looking at if you want to actually buy the program or get a serial key for
- [00:06:20.230] buy the program or get a serial key for
- [00:06:20.240] buy the program or get a serial key for it. So, in order to do that, what you
- [00:06:22.550] it. So, in order to do that, what you
- [00:06:22.560] it. So, in order to do that, what you want to do is go to the vinyl cut.co.za
- [00:06:25.270] want to do is go to the vinyl cut.co.za
- [00:06:25.280] want to do is go to the vinyl cut.co.za website. So, once again, either just in
- [00:06:27.430] website. So, once again, either just in
- [00:06:27.440] website. So, once again, either just in your web browser, you can type that in
- [00:06:29.189] your web browser, you can type that in
- [00:06:29.199] your web browser, you can type that in URL or you can Google it. Then, once
- [00:06:32.070] URL or you can Google it. Then, once
- [00:06:32.080] URL or you can Google it. Then, once we're on the website, you can see we
- [00:06:34.390] we're on the website, you can see we
- [00:06:34.400] we're on the website, you can see we have um or should I say we go to the
- [00:06:36.150] have um or should I say we go to the
- [00:06:36.160] have um or should I say we go to the homepage and you'll see here we have the
- [00:06:37.990] homepage and you'll see here we have the
- [00:06:38.000] homepage and you'll see here we have the option to buy vinyl cut. Now, if I click
- [00:06:41.830] option to buy vinyl cut. Now, if I click
- [00:06:41.840] option to buy vinyl cut. Now, if I click that, you'll see it takes us to buy
- [00:06:43.350] that, you'll see it takes us to buy
- [00:06:43.360] that, you'll see it takes us to buy this.co. coza and here we have the
- [00:06:45.350] this.co. coza and here we have the
- [00:06:45.360] this.co. coza and here we have the actual program. So you can read up about
- [00:06:48.309] actual program. So you can read up about
- [00:06:48.319] actual program. So you can read up about it if you want and then you can also see
- [00:06:50.309] it if you want and then you can also see
- [00:06:50.319] it if you want and then you can also see the price there. So often times they're
- [00:06:52.070] the price there. So often times they're
- [00:06:52.080] the price there. So often times they're running specials but the process pretty
- [00:06:54.469] running specials but the process pretty
- [00:06:54.479] running specials but the process pretty simple. You just buy it and what happens
- [00:06:56.870] simple. You just buy it and what happens
- [00:06:56.880] simple. You just buy it and what happens is they will email you your serial keys
- [00:06:59.270] is they will email you your serial keys
- [00:06:59.280] is they will email you your serial keys and stuff like that which you can use to
- [00:07:01.270] and stuff like that which you can use to
- [00:07:01.280] and stuff like that which you can use to activate your program which we will also
- [00:07:03.189] activate your program which we will also
- [00:07:03.199] activate your program which we will also be looking at a bit later. Okay, next up
- [00:07:07.189] be looking at a bit later. Okay, next up
- [00:07:07.199] be looking at a bit later. Okay, next up we're going to be looking at how to
- [00:07:08.790] we're going to be looking at how to
- [00:07:08.800] we're going to be looking at how to activate your vinyl cut. And once again,
- [00:07:11.189] activate your vinyl cut. And once again,
- [00:07:11.199] activate your vinyl cut. And once again, if you start up your program and you are
- [00:07:13.029] if you start up your program and you are
- [00:07:13.039] if you start up your program and you are met with this message for the demo mode,
- [00:07:15.749] met with this message for the demo mode,
- [00:07:15.759] met with this message for the demo mode, then over here, we can actually activate
- [00:07:17.830] then over here, we can actually activate
- [00:07:17.840] then over here, we can actually activate the program. Now, what we want to do is
- [00:07:19.990] the program. Now, what we want to do is
- [00:07:20.000] the program. Now, what we want to do is go to activate.
- [00:07:21.990] go to activate.
- [00:07:22.000] go to activate. And then here you'll see it asks us for
- [00:07:23.990] And then here you'll see it asks us for
- [00:07:24.000] And then here you'll see it asks us for our name and our serial. So, whatever
- [00:07:26.870] our name and our serial. So, whatever
- [00:07:26.880] our name and our serial. So, whatever you registered it with, they should send
- [00:07:28.550] you registered it with, they should send
- [00:07:28.560] you registered it with, they should send you these details. So, what I want to
- [00:07:30.550] you these details. So, what I want to
- [00:07:30.560] you these details. So, what I want to do, I'm just going to block out these
- [00:07:32.150] do, I'm just going to block out these
- [00:07:32.160] do, I'm just going to block out these ones so that not everybody starts using
- [00:07:34.629] ones so that not everybody starts using
- [00:07:34.639] ones so that not everybody starts using my vinyl cut. And then put in my name.
- [00:07:38.309] my vinyl cut. And then put in my name.
- [00:07:38.319] my vinyl cut. And then put in my name. And I'll paste in my serial number here.
- [00:07:40.950] And I'll paste in my serial number here.
- [00:07:40.960] And I'll paste in my serial number here. And then what you can do once you're
- [00:07:42.710] And then what you can do once you're
- [00:07:42.720] And then what you can do once you're happy with that. Simply click okay. And
- [00:07:45.589] happy with that. Simply click okay. And
- [00:07:45.599] happy with that. Simply click okay. And then here it will tell us that the
- [00:07:48.070] then here it will tell us that the
- [00:07:48.080] then here it will tell us that the software has successfully basically
- [00:07:49.830] software has successfully basically
- [00:07:49.840] software has successfully basically registered it. So now we get to use a
- [00:07:52.150] registered it. So now we get to use a
- [00:07:52.160] registered it. So now we get to use a program as an actual paid version. Now
- [00:07:55.189] program as an actual paid version. Now
- [00:07:55.199] program as an actual paid version. Now it's going to tell you some things about
- [00:07:56.790] it's going to tell you some things about
- [00:07:56.800] it's going to tell you some things about uninstalling and deactivation, which is
- [00:07:59.589] uninstalling and deactivation, which is
- [00:07:59.599] uninstalling and deactivation, which is important, but we're also going to be
- [00:08:01.189] important, but we're also going to be
- [00:08:01.199] important, but we're also going to be covering that a little bit later.
- [00:08:03.830] covering that a little bit later.
- [00:08:03.840] covering that a little bit later. Okay. So, next up, we're going to be
- [00:08:05.189] Okay. So, next up, we're going to be
- [00:08:05.199] Okay. So, next up, we're going to be looking at automatically deactivating
- [00:08:07.350] looking at automatically deactivating
- [00:08:07.360] looking at automatically deactivating the program and why you might want to do
- [00:08:10.950] the program and why you might want to do
- [00:08:10.960] the program and why you might want to do this. Okay, so when it comes to actually
- [00:08:13.589] this. Okay, so when it comes to actually
- [00:08:13.599] this. Okay, so when it comes to actually deactivating the program, there's a a
- [00:08:15.510] deactivating the program, there's a a
- [00:08:15.520] deactivating the program, there's a a few reasons why you would want to do
- [00:08:16.710] few reasons why you would want to do
- [00:08:16.720] few reasons why you would want to do this. Now, when it comes to vinyl cut,
- [00:08:18.869] this. Now, when it comes to vinyl cut,
- [00:08:18.879] this. Now, when it comes to vinyl cut, this can only run on one operating
- [00:08:20.869] this can only run on one operating
- [00:08:20.879] this can only run on one operating system at a time, which means if you
- [00:08:23.510] system at a time, which means if you
- [00:08:23.520] system at a time, which means if you want to be using it on a different
- [00:08:25.029] want to be using it on a different
- [00:08:25.039] want to be using it on a different computer or something in that line, then
- [00:08:26.950] computer or something in that line, then
- [00:08:26.960] computer or something in that line, then you're first going to have to deactivate
- [00:08:28.309] you're first going to have to deactivate
- [00:08:28.319] you're first going to have to deactivate it on the current machine and then
- [00:08:30.869] it on the current machine and then
- [00:08:30.879] it on the current machine and then reactivate it on the next one. Now there
- [00:08:33.509] reactivate it on the next one. Now there
- [00:08:33.519] reactivate it on the next one. Now there is two methods we can go about
- [00:08:34.870] is two methods we can go about
- [00:08:34.880] is two methods we can go about deactivating the auto or the automatic
- [00:08:36.949] deactivating the auto or the automatic
- [00:08:36.959] deactivating the auto or the automatic one and the manual one. We'll cover the
- [00:08:39.350] one and the manual one. We'll cover the
- [00:08:39.360] one and the manual one. We'll cover the manual one after this which is a little
- [00:08:41.110] manual one after this which is a little
- [00:08:41.120] manual one after this which is a little bit more of a process. But if you're not
- [00:08:44.230] bit more of a process. But if you're not
- [00:08:44.240] bit more of a process. But if you're not able to do the automatic, you'll have to
- [00:08:45.990] able to do the automatic, you'll have to
- [00:08:46.000] able to do the automatic, you'll have to do the manual. Now also keep in mind it
- [00:08:48.870] do the manual. Now also keep in mind it
- [00:08:48.880] do the manual. Now also keep in mind it is very important to disable this if you
- [00:08:50.870] is very important to disable this if you
- [00:08:50.880] is very important to disable this if you want to use it on another computer
- [00:08:52.230] want to use it on another computer
- [00:08:52.240] want to use it on another computer because if you do not then the other
- [00:08:54.389] because if you do not then the other
- [00:08:54.399] because if you do not then the other computer will actually tell you or the
- [00:08:55.829] computer will actually tell you or the
- [00:08:55.839] computer will actually tell you or the software on another computer that your
- [00:08:58.310] software on another computer that your
- [00:08:58.320] software on another computer that your license is already active on another
- [00:09:00.630] license is already active on another
- [00:09:00.640] license is already active on another computer which means will render that
- [00:09:02.710] computer which means will render that
- [00:09:02.720] computer which means will render that software unusable on that system.
- [00:09:07.670] software unusable on that system.
- [00:09:07.680] software unusable on that system. Okay. Now so in order to actually
- [00:09:09.350] Okay. Now so in order to actually
- [00:09:09.360] Okay. Now so in order to actually deactivate what we want to do is go to
- [00:09:11.110] deactivate what we want to do is go to
- [00:09:11.120] deactivate what we want to do is go to our main menu on top. We're going to
- [00:09:13.670] our main menu on top. We're going to
- [00:09:13.680] our main menu on top. We're going to click the help
- [00:09:16.070] click the help
- [00:09:16.080] click the help and then we want to navigate down to
- [00:09:17.829] and then we want to navigate down to
- [00:09:17.839] and then we want to navigate down to deactivate. Now once we click this,
- [00:09:19.829] deactivate. Now once we click this,
- [00:09:19.839] deactivate. Now once we click this, it'll pop us up a little message asking
- [00:09:22.550] it'll pop us up a little message asking
- [00:09:22.560] it'll pop us up a little message asking us, are you sure you want to deactivate
- [00:09:24.070] us, are you sure you want to deactivate
- [00:09:24.080] us, are you sure you want to deactivate the software? Deactivating will also
- [00:09:26.389] the software? Deactivating will also
- [00:09:26.399] the software? Deactivating will also allow you to reinstall on a different
- [00:09:27.670] allow you to reinstall on a different
- [00:09:27.680] allow you to reinstall on a different computer. Requires an internet
- [00:09:29.750] computer. Requires an internet
- [00:09:29.760] computer. Requires an internet connection. So in other words, you need
- [00:09:32.470] connection. So in other words, you need
- [00:09:32.480] connection. So in other words, you need to be online in order to reconnected on
- [00:09:35.269] to be online in order to reconnected on
- [00:09:35.279] to be online in order to reconnected on the other computer. Yeah. And then what
- [00:09:37.990] the other computer. Yeah. And then what
- [00:09:38.000] the other computer. Yeah. And then what you can do is you simply click yes and
- [00:09:40.389] you can do is you simply click yes and
- [00:09:40.399] you can do is you simply click yes and then the program will be deactivated on
- [00:09:42.470] then the program will be deactivated on
- [00:09:42.480] then the program will be deactivated on your computer or the current machine.
- [00:09:45.750] your computer or the current machine.
- [00:09:45.760] your computer or the current machine. Okay. So next up we're going to be
- [00:09:47.430] Okay. So next up we're going to be
- [00:09:47.440] Okay. So next up we're going to be looking at manual deactivation and why
- [00:09:49.910] looking at manual deactivation and why
- [00:09:49.920] looking at manual deactivation and why you might want to do this.
- [00:09:52.389] you might want to do this.
- [00:09:52.399] you might want to do this. Now when it comes to manual deactivation
- [00:09:55.190] Now when it comes to manual deactivation
- [00:09:55.200] Now when it comes to manual deactivation um this is not something you want to do
- [00:09:56.870] um this is not something you want to do
- [00:09:56.880] um this is not something you want to do very often. I think you have a limit on
- [00:09:59.350] very often. I think you have a limit on
- [00:09:59.360] very often. I think you have a limit on it. So I would not mess around and just
- [00:10:01.190] it. So I would not mess around and just
- [00:10:01.200] it. So I would not mess around and just do this for the fun of it. Where this
- [00:10:03.350] do this for the fun of it. Where this
- [00:10:03.360] do this for the fun of it. Where this comes in useful or when you need to use
- [00:10:06.310] comes in useful or when you need to use
- [00:10:06.320] comes in useful or when you need to use this is if you cannot automatically
- [00:10:08.150] this is if you cannot automatically
- [00:10:08.160] this is if you cannot automatically deactivate it on the other computer. So
- [00:10:11.190] deactivate it on the other computer. So
- [00:10:11.200] deactivate it on the other computer. So let's say maybe your computer got stolen
- [00:10:13.750] let's say maybe your computer got stolen
- [00:10:13.760] let's say maybe your computer got stolen or it broke and you cannot start into
- [00:10:15.910] or it broke and you cannot start into
- [00:10:15.920] or it broke and you cannot start into the system, then you're pretty much
- [00:10:17.910] the system, then you're pretty much
- [00:10:17.920] the system, then you're pretty much going to be locked out of your software
- [00:10:19.750] going to be locked out of your software
- [00:10:19.760] going to be locked out of your software if you reinstall it anywhere else. And
- [00:10:21.990] if you reinstall it anywhere else. And
- [00:10:22.000] if you reinstall it anywhere else. And that is where the actual manual
- [00:10:23.750] that is where the actual manual
- [00:10:23.760] that is where the actual manual deactivation will come in handy.
- [00:10:27.030] deactivation will come in handy.
- [00:10:27.040] deactivation will come in handy. Okay. So, in order to manually activate
- [00:10:29.350] Okay. So, in order to manually activate
- [00:10:29.360] Okay. So, in order to manually activate it, what we're going to do is we're
- [00:10:30.710] it, what we're going to do is we're
- [00:10:30.720] it, what we're going to do is we're going to go to vinyl cut.co.za,
- [00:10:34.069] going to go to vinyl cut.co.za,
- [00:10:34.079] going to go to vinyl cut.co.za, same place we went to buy it and
- [00:10:35.910] same place we went to buy it and
- [00:10:35.920] same place we went to buy it and download it. Then, we want to navigate
- [00:10:38.790] download it. Then, we want to navigate
- [00:10:38.800] download it. Then, we want to navigate to the actual license page. And then,
- [00:10:42.790] to the actual license page. And then,
- [00:10:42.800] to the actual license page. And then, you'll see here we've got the activation
- [00:10:45.110] you'll see here we've got the activation
- [00:10:45.120] you'll see here we've got the activation and basically deactivation here. It's
- [00:10:47.190] and basically deactivation here. It's
- [00:10:47.200] and basically deactivation here. It's like a form of manual. Now, we want to
- [00:10:50.630] like a form of manual. Now, we want to
- [00:10:50.640] like a form of manual. Now, we want to scroll down till we find this offline
- [00:10:52.550] scroll down till we find this offline
- [00:10:52.560] scroll down till we find this offline deactivation.
- [00:10:54.710] deactivation.
- [00:10:54.720] deactivation. And then if you want to, you can
- [00:10:55.990] And then if you want to, you can
- [00:10:56.000] And then if you want to, you can obviously zoom in here. You can just
- [00:10:57.509] obviously zoom in here. You can just
- [00:10:57.519] obviously zoom in here. You can just follow the prompts, follow the link, and
- [00:10:59.750] follow the prompts, follow the link, and
- [00:10:59.760] follow the prompts, follow the link, and then there's a nice little article on
- [00:11:01.430] then there's a nice little article on
- [00:11:01.440] then there's a nice little article on how to do that. So what I'm going to do
- [00:11:04.150] how to do that. So what I'm going to do
- [00:11:04.160] how to do that. So what I'm going to do is just click here on the offline
- [00:11:05.750] is just click here on the offline
- [00:11:05.760] is just click here on the offline deactivation button. And then this will
- [00:11:08.630] deactivation button. And then this will
- [00:11:08.640] deactivation button. And then this will take us to this page. And now we're
- [00:11:11.590] take us to this page. And now we're
- [00:11:11.600] take us to this page. And now we're going to be covering the first section
- [00:11:12.949] going to be covering the first section
- [00:11:12.959] going to be covering the first section here. As you can see, offline
- [00:11:14.069] here. As you can see, offline
- [00:11:14.079] here. As you can see, offline deactivation. And then it's going to ask
- [00:11:16.150] deactivation. And then it's going to ask
- [00:11:16.160] deactivation. And then it's going to ask us for some information. Obviously, make
- [00:11:19.110] us for some information. Obviously, make
- [00:11:19.120] us for some information. Obviously, make sure this is relevant or in line with
- [00:11:21.829] sure this is relevant or in line with
- [00:11:21.839] sure this is relevant or in line with what you registered it with. Otherwise
- [00:11:24.630] what you registered it with. Otherwise
- [00:11:24.640] what you registered it with. Otherwise you might have difficulty deactivating
- [00:11:26.630] you might have difficulty deactivating
- [00:11:26.640] you might have difficulty deactivating it. So go look at your details that you
- [00:11:29.990] it. So go look at your details that you
- [00:11:30.000] it. So go look at your details that you registered or bought the license key
- [00:11:32.230] registered or bought the license key
- [00:11:32.240] registered or bought the license key with. Then once you are done with that
- [00:11:35.030] with. Then once you are done with that
- [00:11:35.040] with. Then once you are done with that you can simply complete it and then
- [00:11:37.269] you can simply complete it and then
- [00:11:37.279] you can simply complete it and then it'll take a little while and then it
- [00:11:38.870] it'll take a little while and then it
- [00:11:38.880] it'll take a little while and then it should be deactivated.
Keyframes
- /workspace/academy/media/1nMNpiQwz6c_SIu1lYaqD43AkKFqikPXR/keyframes/last.jpg
- /workspace/academy/media/1nMNpiQwz6c_SIu1lYaqD43AkKFqikPXR/keyframes/t003.jpg
- /workspace/academy/media/1nMNpiQwz6c_SIu1lYaqD43AkKFqikPXR/keyframes/t006.jpg
- /workspace/academy/media/1nMNpiQwz6c_SIu1lYaqD43AkKFqikPXR/keyframes/t009.jpg
- /workspace/academy/media/1nMNpiQwz6c_SIu1lYaqD43AkKFqikPXR/keyframes/t012.jpg
- /workspace/academy/media/1nMNpiQwz6c_SIu1lYaqD43AkKFqikPXR/keyframes/t015.jpg
- /workspace/academy/media/1nMNpiQwz6c_SIu1lYaqD43AkKFqikPXR/keyframes/t019.jpg
- /workspace/academy/media/1nMNpiQwz6c_SIu1lYaqD43AkKFqikPXR/keyframes/t022.jpg
- /workspace/academy/media/1nMNpiQwz6c_SIu1lYaqD43AkKFqikPXR/keyframes/t025.jpg
- /workspace/academy/media/1nMNpiQwz6c_SIu1lYaqD43AkKFqikPXR/keyframes/t028.jpg
- /workspace/academy/media/1nMNpiQwz6c_SIu1lYaqD43AkKFqikPXR/keyframes/t031.jpg
- /workspace/academy/media/1nMNpiQwz6c_SIu1lYaqD43AkKFqikPXR/keyframes/t034.jpg
- /workspace/academy/media/1nMNpiQwz6c_SIu1lYaqD43AkKFqikPXR/keyframes/t037.jpg
- /workspace/academy/media/1nMNpiQwz6c_SIu1lYaqD43AkKFqikPXR/keyframes/t040.jpg
- /workspace/academy/media/1nMNpiQwz6c_SIu1lYaqD43AkKFqikPXR/keyframes/t043.jpg
- /workspace/academy/media/1nMNpiQwz6c_SIu1lYaqD43AkKFqikPXR/keyframes/t046.jpg
- /workspace/academy/media/1nMNpiQwz6c_SIu1lYaqD43AkKFqikPXR/keyframes/t049.jpg
- /workspace/academy/media/1nMNpiQwz6c_SIu1lYaqD43AkKFqikPXR/keyframes/t052.jpg
- /workspace/academy/media/1nMNpiQwz6c_SIu1lYaqD43AkKFqikPXR/keyframes/t056.jpg
- /workspace/academy/media/1nMNpiQwz6c_SIu1lYaqD43AkKFqikPXR/keyframes/t059.jpg
- /workspace/academy/media/1nMNpiQwz6c_SIu1lYaqD43AkKFqikPXR/keyframes/t062.jpg
- /workspace/academy/media/1nMNpiQwz6c_SIu1lYaqD43AkKFqikPXR/keyframes/t065.jpg
- /workspace/academy/media/1nMNpiQwz6c_SIu1lYaqD43AkKFqikPXR/keyframes/t068.jpg
- /workspace/academy/media/1nMNpiQwz6c_SIu1lYaqD43AkKFqikPXR/keyframes/t071.jpg
16. User Interface - Part1
- title: User Interface - Part1
- status: publish
- author: 0
- is_previewable: (empty)
- video_duration: 0h 16m 3s (raw {"hours":0,"minutes":16,"seconds":3})
- video_source_type: embedded
- drive_file_id:
1oaUOYzkcg9xor1_7opLHGx3Rxwf__T1d(source_ref; not a public link) - transcript pending / keyframes pending / presentation extract pending
- video_source_url: (Drive preview omitted as a public link; file id kept as source_ref)
In this lesson we will be looking at the first part of VinylCut 5 User Interface (UI).
- quizzes_following_this_lesson: 1 (full text in Quizzes)
- UI Part 1 (6 questions)
Drive extract
- file_id:
1oaUOYzkcg9xor1_7opLHGx3Rxwf__T1d - filename: 02 - SWVC - UI P1.mp4
- kind: video
- local_path: /workspace/academy/media/1oaUOYzkcg9xor1_7opLHGx3Rxwf__T1d/02 - SWVC - UI P1.mp4
- source_ref: drive
1oaUOYzkcg9xor1_7opLHGx3Rxwf__T1d· content_length 133733209 · original https://drive.google.com/file/d/1oaUOYzkcg9xor1_7opLHGx3Rxwf__T1d/view - extract_status: done
- caption_source: drive_timedtext
- duration_s: 962.467007
- keyframe_count: 24
Transcript
- Howy guys. Okay, in today's video, we're
- [00:00:02.710] Howy guys. Okay, in today's video, we're
- [00:00:02.720] Howy guys. Okay, in today's video, we're going to be looking at Final Cut's user
- [00:00:04.789] going to be looking at Final Cut's user
- [00:00:04.799] going to be looking at Final Cut's user interface. And this will be part one.
- [00:00:09.350] interface. And this will be part one.
- [00:00:09.360] interface. And this will be part one. Now, I always recommend when you start
- [00:00:11.030] Now, I always recommend when you start
- [00:00:11.040] Now, I always recommend when you start with a program, this is a great place to
- [00:00:13.110] with a program, this is a great place to
- [00:00:13.120] with a program, this is a great place to start. It's a bit like getting in a car
- [00:00:15.589] start. It's a bit like getting in a car
- [00:00:15.599] start. It's a bit like getting in a car and first getting comfortable with
- [00:00:17.029] and first getting comfortable with
- [00:00:17.039] and first getting comfortable with what's where. So, you know, where's your
- [00:00:18.470] what's where. So, you know, where's your
- [00:00:18.480] what's where. So, you know, where's your mirrors, where's your gears, where's
- [00:00:19.750] mirrors, where's your gears, where's
- [00:00:19.760] mirrors, where's your gears, where's your steering wheel, and so forth. Then
- [00:00:22.070] your steering wheel, and so forth. Then
- [00:00:22.080] your steering wheel, and so forth. Then after that to navigate more complex
- [00:00:24.550] after that to navigate more complex
- [00:00:24.560] after that to navigate more complex topics or complex maneuvers is more easy
- [00:00:27.429] topics or complex maneuvers is more easy
- [00:00:27.439] topics or complex maneuvers is more easy because you understand where the basic
- [00:00:29.029] because you understand where the basic
- [00:00:29.039] because you understand where the basic layout is. Okay. Now first we're just
- [00:00:31.189] layout is. Okay. Now first we're just
- [00:00:31.199] layout is. Okay. Now first we're just going to have a quick overview of the
- [00:00:32.950] going to have a quick overview of the
- [00:00:32.960] going to have a quick overview of the actual layout of the program.
- [00:00:36.470] actual layout of the program.
- [00:00:36.480] actual layout of the program. So now what it comes down to is we have
- [00:00:38.310] So now what it comes down to is we have
- [00:00:38.320] So now what it comes down to is we have a few different sections that we like to
- [00:00:41.190] a few different sections that we like to
- [00:00:41.200] a few different sections that we like to categorize or put in categories so that
- [00:00:43.590] categorize or put in categories so that
- [00:00:43.600] categorize or put in categories so that way when we're working with it it's
- [00:00:44.869] way when we're working with it it's
- [00:00:44.879] way when we're working with it it's easier to follow along. So right on top
- [00:00:47.830] easier to follow along. So right on top
- [00:00:47.840] easier to follow along. So right on top here we've got our main menu. Now this
- [00:00:51.110] here we've got our main menu. Now this
- [00:00:51.120] here we've got our main menu. Now this is a place where any extra options or
- [00:00:54.229] is a place where any extra options or
- [00:00:54.239] is a place where any extra options or should I say most of your options will
- [00:00:56.229] should I say most of your options will
- [00:00:56.239] should I say most of your options will be stored but this can also get very
- [00:00:59.189] be stored but this can also get very
- [00:00:59.199] be stored but this can also get very cluttered because most of the stuff
- [00:01:00.869] cluttered because most of the stuff
- [00:01:00.879] cluttered because most of the stuff you're probably not going to be using
- [00:01:02.470] you're probably not going to be using
- [00:01:02.480] you're probably not going to be using but it is good to know if you have to
- [00:01:04.469] but it is good to know if you have to
- [00:01:04.479] but it is good to know if you have to locate it where to try find it. Then
- [00:01:07.830] locate it where to try find it. Then
- [00:01:07.840] locate it where to try find it. Then just below that we have kind of the main
- [00:01:10.310] just below that we have kind of the main
- [00:01:10.320] just below that we have kind of the main features bar as you can call it. uh
- [00:01:13.429] features bar as you can call it. uh
- [00:01:13.439] features bar as you can call it. uh depending on program it might change a
- [00:01:15.270] depending on program it might change a
- [00:01:15.280] depending on program it might change a bit but what this comes down to is your
- [00:01:17.429] bit but what this comes down to is your
- [00:01:17.439] bit but what this comes down to is your main features or your main operators
- [00:01:19.510] main features or your main operators
- [00:01:19.520] main features or your main operators they'll be located here so kind of make
- [00:01:21.830] they'll be located here so kind of make
- [00:01:21.840] they'll be located here so kind of make your life easy so you um don't have to
- [00:01:24.550] your life easy so you um don't have to
- [00:01:24.560] your life easy so you um don't have to go look for them under menus and this is
- [00:01:26.710] go look for them under menus and this is
- [00:01:26.720] go look for them under menus and this is normally stuff that obviously you'll be
- [00:01:28.310] normally stuff that obviously you'll be
- [00:01:28.320] normally stuff that obviously you'll be using very often then to the left of the
- [00:01:31.749] using very often then to the left of the
- [00:01:31.759] using very often then to the left of the program here we have our toolbar so this
- [00:01:35.350] program here we have our toolbar so this
- [00:01:35.360] program here we have our toolbar so this in many ways is kind of like your
- [00:01:36.870] in many ways is kind of like your
- [00:01:36.880] in many ways is kind of like your toolbox where uh most of the tools that
- [00:01:39.749] toolbox where uh most of the tools that
- [00:01:39.759] toolbox where uh most of the tools that you'll be using for different operations
- [00:01:41.910] you'll be using for different operations
- [00:01:41.920] you'll be using for different operations um will be found over here. And now
- [00:01:44.310] um will be found over here. And now
- [00:01:44.320] um will be found over here. And now there is something to keep in mind with
- [00:01:45.429] there is something to keep in mind with
- [00:01:45.439] there is something to keep in mind with this toolbar as well. Depending on what
- [00:01:47.590] this toolbar as well. Depending on what
- [00:01:47.600] this toolbar as well. Depending on what you've got selected, you'll see this is
- [00:01:49.429] you've got selected, you'll see this is
- [00:01:49.439] you've got selected, you'll see this is extra little properties that open. So as
- [00:01:51.590] extra little properties that open. So as
- [00:01:51.600] extra little properties that open. So as I select a new tool, I have new options.
- [00:01:54.389] I select a new tool, I have new options.
- [00:01:54.399] I select a new tool, I have new options. So that's just something to keep in mind
- [00:01:56.389] So that's just something to keep in mind
- [00:01:56.399] So that's just something to keep in mind while working with it. Then over here
- [00:01:59.270] while working with it. Then over here
- [00:01:59.280] while working with it. Then over here we've got our main working area and our
- [00:02:01.510] we've got our main working area and our
- [00:02:01.520] we've got our main working area and our cutting mat. So all the designing and
- [00:02:04.069] cutting mat. So all the designing and
- [00:02:04.079] cutting mat. So all the designing and stuff will be happening there. And to
- [00:02:06.389] stuff will be happening there. And to
- [00:02:06.399] stuff will be happening there. And to the top and the left of that, we've got
- [00:02:08.309] the top and the left of that, we've got
- [00:02:08.319] the top and the left of that, we've got our rulers or like a form of
- [00:02:10.710] our rulers or like a form of
- [00:02:10.720] our rulers or like a form of measurement. So this becomes important
- [00:02:12.790] measurement. So this becomes important
- [00:02:12.800] measurement. So this becomes important if you're working with strict design
- [00:02:14.630] if you're working with strict design
- [00:02:14.640] if you're working with strict design requirements. Then it's great to follow
- [00:02:16.550] requirements. Then it's great to follow
- [00:02:16.560] requirements. Then it's great to follow along and you can also use this kind of
- [00:02:18.070] along and you can also use this kind of
- [00:02:18.080] along and you can also use this kind of as a gauge to see how big your design is
- [00:02:20.470] as a gauge to see how big your design is
- [00:02:20.480] as a gauge to see how big your design is or your cutting match. Then to the top
- [00:02:23.190] or your cutting match. Then to the top
- [00:02:23.200] or your cutting match. Then to the top of that we have our actual project tabs.
- [00:02:26.229] of that we have our actual project tabs.
- [00:02:26.239] of that we have our actual project tabs. So now depending on how many projects
- [00:02:28.309] So now depending on how many projects
- [00:02:28.319] So now depending on how many projects you have open you'll see more here. So
- [00:02:30.309] you have open you'll see more here. So
- [00:02:30.319] you have open you'll see more here. So maybe you're working on multiple clients
- [00:02:32.869] maybe you're working on multiple clients
- [00:02:32.879] maybe you're working on multiple clients then you could also have different
- [00:02:34.790] then you could also have different
- [00:02:34.800] then you could also have different projects open at the same time. Then to
- [00:02:37.830] projects open at the same time. Then to
- [00:02:37.840] projects open at the same time. Then to the bottom of that we have actual page
- [00:02:40.869] the bottom of that we have actual page
- [00:02:40.879] the bottom of that we have actual page tabs. Now what this comes down to is
- [00:02:43.270] tabs. Now what this comes down to is
- [00:02:43.280] tabs. Now what this comes down to is every project open can have multiple
- [00:02:45.270] every project open can have multiple
- [00:02:45.280] every project open can have multiple tabs or multiple pages. So if you maybe
- [00:02:49.030] tabs or multiple pages. So if you maybe
- [00:02:49.040] tabs or multiple pages. So if you maybe working on a variation of one or you
- [00:02:50.949] working on a variation of one or you
- [00:02:50.959] working on a variation of one or you want to make a backup and keep it in the
- [00:02:52.710] want to make a backup and keep it in the
- [00:02:52.720] want to make a backup and keep it in the same file, this is also a nice way to go
- [00:02:55.270] same file, this is also a nice way to go
- [00:02:55.280] same file, this is also a nice way to go about it. Now keep in mind obviously
- [00:02:58.150] about it. Now keep in mind obviously
- [00:02:58.160] about it. Now keep in mind obviously this is relevant to the project. So if
- [00:03:00.630] this is relevant to the project. So if
- [00:03:00.640] this is relevant to the project. So if we had to change the project we have
- [00:03:02.550] we had to change the project we have
- [00:03:02.560] we had to change the project we have open, these will also change on your
- [00:03:04.710] open, these will also change on your
- [00:03:04.720] open, these will also change on your actual job. Okay. Then to the right of
- [00:03:07.990] actual job. Okay. Then to the right of
- [00:03:08.000] actual job. Okay. Then to the right of that, now this in vinyl cut I like to
- [00:03:11.270] that, now this in vinyl cut I like to
- [00:03:11.280] that, now this in vinyl cut I like to call kind of like a control panel. Now I
- [00:03:13.750] call kind of like a control panel. Now I
- [00:03:13.760] call kind of like a control panel. Now I do call it unfortunately different
- [00:03:15.589] do call it unfortunately different
- [00:03:15.599] do call it unfortunately different things at times because depending on
- [00:03:18.070] things at times because depending on
- [00:03:18.080] things at times because depending on what you have selected, you will also
- [00:03:19.910] what you have selected, you will also
- [00:03:19.920] what you have selected, you will also have different options here. But most of
- [00:03:22.470] have different options here. But most of
- [00:03:22.480] have different options here. But most of your main controls for your um tools and
- [00:03:25.430] your main controls for your um tools and
- [00:03:25.440] your main controls for your um tools and so forth and uh key features you'll find
- [00:03:28.470] so forth and uh key features you'll find
- [00:03:28.480] so forth and uh key features you'll find here. And there's a few different
- [00:03:30.470] here. And there's a few different
- [00:03:30.480] here. And there's a few different operators which we'll be covering as
- [00:03:32.390] operators which we'll be covering as
- [00:03:32.400] operators which we'll be covering as well. Now also something to keep in mind
- [00:03:34.710] well. Now also something to keep in mind
- [00:03:34.720] well. Now also something to keep in mind with this is you get two different views
- [00:03:36.390] with this is you get two different views
- [00:03:36.400] with this is you get two different views for this. So if I had to go on top here
- [00:03:39.110] for this. So if I had to go on top here
- [00:03:39.120] for this. So if I had to go on top here to window then we go to workspace you'll
- [00:03:41.430] to window then we go to workspace you'll
- [00:03:41.440] to window then we go to workspace you'll see here we've got a basic and advanc.
- [00:03:44.470] see here we've got a basic and advanc.
- [00:03:44.480] see here we've got a basic and advanc. Now pretty much what this comes down to
- [00:03:45.910] Now pretty much what this comes down to
- [00:03:45.920] Now pretty much what this comes down to if I go basic
- [00:03:48.309] if I go basic
- [00:03:48.319] if I go basic then all those uh tools you only display
- [00:03:51.589] then all those uh tools you only display
- [00:03:51.599] then all those uh tools you only display one of these control panels or these
- [00:03:53.509] one of these control panels or these
- [00:03:53.519] one of these control panels or these panels at a time. Now if we had to go to
- [00:03:55.830] panels at a time. Now if we had to go to
- [00:03:55.840] panels at a time. Now if we had to go to advanc now you can see we can have
- [00:03:58.309] advanc now you can see we can have
- [00:03:58.319] advanc now you can see we can have multiple panels open at the same time.
- [00:04:01.110] multiple panels open at the same time.
- [00:04:01.120] multiple panels open at the same time. So I can for instance have the document
- [00:04:03.190] So I can for instance have the document
- [00:04:03.200] So I can for instance have the document properties and the layers at the bottom
- [00:04:06.550] properties and the layers at the bottom
- [00:04:06.560] properties and the layers at the bottom as we navigate through. So we can kind
- [00:04:08.470] as we navigate through. So we can kind
- [00:04:08.480] as we navigate through. So we can kind of keep track of different things while
- [00:04:09.990] of keep track of different things while
- [00:04:10.000] of keep track of different things while editing. Now for most users I would say
- [00:04:12.630] editing. Now for most users I would say
- [00:04:12.640] editing. Now for most users I would say just keep it on the basic. It's pretty
- [00:04:14.309] just keep it on the basic. It's pretty
- [00:04:14.319] just keep it on the basic. It's pretty straightforward and it sometimes it can
- [00:04:16.710] straightforward and it sometimes it can
- [00:04:16.720] straightforward and it sometimes it can also make the program run a little bit
- [00:04:18.390] also make the program run a little bit
- [00:04:18.400] also make the program run a little bit smoother. Now to the bottom here we have
- [00:04:21.110] smoother. Now to the bottom here we have
- [00:04:21.120] smoother. Now to the bottom here we have another nice little feature and that is
- [00:04:23.510] another nice little feature and that is
- [00:04:23.520] another nice little feature and that is the library. So what that comes down to
- [00:04:26.550] the library. So what that comes down to
- [00:04:26.560] the library. So what that comes down to is we have different things stored
- [00:04:28.469] is we have different things stored
- [00:04:28.479] is we have different things stored within here. So, we've got some basic
- [00:04:30.469] within here. So, we've got some basic
- [00:04:30.479] within here. So, we've got some basic shapes, some fonts,
- [00:04:32.950] shapes, some fonts,
- [00:04:32.960] shapes, some fonts, and some presets we can make, but we
- [00:04:35.510] and some presets we can make, but we
- [00:04:35.520] and some presets we can make, but we will cover that or all of these things a
- [00:04:37.749] will cover that or all of these things a
- [00:04:37.759] will cover that or all of these things a little bit later in more depth. Now, if
- [00:04:40.150] little bit later in more depth. Now, if
- [00:04:40.160] little bit later in more depth. Now, if you do not have your library open, you
- [00:04:41.749] you do not have your library open, you
- [00:04:41.759] you do not have your library open, you can always go here to the top features
- [00:04:43.590] can always go here to the top features
- [00:04:43.600] can always go here to the top features panel and then you see there we've got
- [00:04:45.670] panel and then you see there we've got
- [00:04:45.680] panel and then you see there we've got the little library icon. Just click that
- [00:04:48.550] the little library icon. Just click that
- [00:04:48.560] the little library icon. Just click that and it will open it for you. Now,
- [00:04:51.110] and it will open it for you. Now,
- [00:04:51.120] and it will open it for you. Now, another thing we have is a form of
- [00:04:52.550] another thing we have is a form of
- [00:04:52.560] another thing we have is a form of information panel right at the bottom
- [00:04:54.390] information panel right at the bottom
- [00:04:54.400] information panel right at the bottom here of the program. Now, this is a
- [00:04:56.150] here of the program. Now, this is a
- [00:04:56.160] here of the program. Now, this is a great place where you can find what's
- [00:04:57.270] great place where you can find what's
- [00:04:57.280] great place where you can find what's your current zoom level and some general
- [00:05:00.390] your current zoom level and some general
- [00:05:00.400] your current zoom level and some general uh information on your location of your
- [00:05:02.390] uh information on your location of your
- [00:05:02.400] uh information on your location of your crosshair or your cursor. Now, you can
- [00:05:04.950] crosshair or your cursor. Now, you can
- [00:05:04.960] crosshair or your cursor. Now, you can see as we change these, it will change
- [00:05:06.710] see as we change these, it will change
- [00:05:06.720] see as we change these, it will change the zoom level level as well. Now,
- [00:05:08.469] the zoom level level as well. Now,
- [00:05:08.479] the zoom level level as well. Now, there's other ways we can change the
- [00:05:09.830] there's other ways we can change the
- [00:05:09.840] there's other ways we can change the zoom, but this is just also a nice way
- [00:05:12.390] zoom, but this is just also a nice way
- [00:05:12.400] zoom, but this is just also a nice way to kind of keep an eye on it. Okay, next
- [00:05:15.350] to kind of keep an eye on it. Okay, next
- [00:05:15.360] to kind of keep an eye on it. Okay, next up, we're going to go into a little bit
- [00:05:16.550] up, we're going to go into a little bit
- [00:05:16.560] up, we're going to go into a little bit more depth on the main menu. Now, like I
- [00:05:19.990] more depth on the main menu. Now, like I
- [00:05:20.000] more depth on the main menu. Now, like I mentioned, there's a lot of features
- [00:05:21.350] mentioned, there's a lot of features
- [00:05:21.360] mentioned, there's a lot of features under here, but there's a few key ones
- [00:05:23.990] under here, but there's a few key ones
- [00:05:24.000] under here, but there's a few key ones which we're going to be pointing out
- [00:05:25.830] which we're going to be pointing out
- [00:05:25.840] which we're going to be pointing out which you more likely to use than
- [00:05:27.590] which you more likely to use than
- [00:05:27.600] which you more likely to use than others. Now, obviously, play around
- [00:05:29.590] others. Now, obviously, play around
- [00:05:29.600] others. Now, obviously, play around here. You can explore. Maybe there's
- [00:05:31.430] here. You can explore. Maybe there's
- [00:05:31.440] here. You can explore. Maybe there's some things more relevant to you, but
- [00:05:33.430] some things more relevant to you, but
- [00:05:33.440] some things more relevant to you, but I'm just going to cover, like I said,
- [00:05:34.870] I'm just going to cover, like I said,
- [00:05:34.880] I'm just going to cover, like I said, the more generic things that most people
- [00:05:36.629] the more generic things that most people
- [00:05:36.639] the more generic things that most people might want to use. Okay. Now, when it
- [00:05:38.870] might want to use. Okay. Now, when it
- [00:05:38.880] might want to use. Okay. Now, when it comes to the main menu, there is
- [00:05:40.150] comes to the main menu, there is
- [00:05:40.160] comes to the main menu, there is something to keep in mind, which is good
- [00:05:42.070] something to keep in mind, which is good
- [00:05:42.080] something to keep in mind, which is good to know. So if we go here under file and
- [00:05:43.990] to know. So if we go here under file and
- [00:05:44.000] to know. So if we go here under file and we see new project and we go to the
- [00:05:45.830] we see new project and we go to the
- [00:05:45.840] we see new project and we go to the right of it, you can actually see it
- [00:05:48.230] right of it, you can actually see it
- [00:05:48.240] right of it, you can actually see it shows us the shortcut key to create a
- [00:05:51.110] shows us the shortcut key to create a
- [00:05:51.120] shows us the shortcut key to create a new file. So that's something to keep in
- [00:05:53.749] new file. So that's something to keep in
- [00:05:53.759] new file. So that's something to keep in mind. Also with the main menu, it is
- [00:05:55.590] mind. Also with the main menu, it is
- [00:05:55.600] mind. Also with the main menu, it is very handy to source shortcut keys for
- [00:05:58.469] very handy to source shortcut keys for
- [00:05:58.479] very handy to source shortcut keys for different um functions and that. Now
- [00:06:01.510] different um functions and that. Now
- [00:06:01.520] different um functions and that. Now obviously not all of them have keys or
- [00:06:03.270] obviously not all of them have keys or
- [00:06:03.280] obviously not all of them have keys or shortcut keys for it, but this is a
- [00:06:05.830] shortcut keys for it, but this is a
- [00:06:05.840] shortcut keys for it, but this is a place where you can find it. And trust
- [00:06:07.270] place where you can find it. And trust
- [00:06:07.280] place where you can find it. And trust me, learning to work with shortcut keys
- [00:06:09.029] me, learning to work with shortcut keys
- [00:06:09.039] me, learning to work with shortcut keys is way faster than just doing everything
- [00:06:11.270] is way faster than just doing everything
- [00:06:11.280] is way faster than just doing everything manually by clicking on it. Now, like I
- [00:06:15.189] manually by clicking on it. Now, like I
- [00:06:15.199] manually by clicking on it. Now, like I mentioned, most of these features or
- [00:06:17.909] mentioned, most of these features or
- [00:06:17.919] mentioned, most of these features or main features you can find under these
- [00:06:19.350] main features you can find under these
- [00:06:19.360] main features you can find under these menus as all. Now, another thing that
- [00:06:21.110] menus as all. Now, another thing that
- [00:06:21.120] menus as all. Now, another thing that sets the main menu apart is the fact
- [00:06:23.510] sets the main menu apart is the fact
- [00:06:23.520] sets the main menu apart is the fact that you can set more advanced options
- [00:06:26.870] that you can set more advanced options
- [00:06:26.880] that you can set more advanced options for the program. So, for instance, if we
- [00:06:29.029] for the program. So, for instance, if we
- [00:06:29.039] for the program. So, for instance, if we had to go here to edit and then we go
- [00:06:31.430] had to go here to edit and then we go
- [00:06:31.440] had to go here to edit and then we go all the way to the bottom, you'll see
- [00:06:32.790] all the way to the bottom, you'll see
- [00:06:32.800] all the way to the bottom, you'll see there's a option called preferences.
- [00:06:35.430] there's a option called preferences.
- [00:06:35.440] there's a option called preferences. Now under year we can change a few
- [00:06:37.909] Now under year we can change a few
- [00:06:37.919] Now under year we can change a few habits or controls of the program which
- [00:06:41.029] habits or controls of the program which
- [00:06:41.039] habits or controls of the program which is uh very handy. So you can always find
- [00:06:42.790] is uh very handy. So you can always find
- [00:06:42.800] is uh very handy. So you can always find that there if you want to look at it.
- [00:06:44.469] that there if you want to look at it.
- [00:06:44.479] that there if you want to look at it. But keep in mind some of these things
- [00:06:45.670] But keep in mind some of these things
- [00:06:45.680] But keep in mind some of these things can like kind of mess your workflow. So
- [00:06:48.390] can like kind of mess your workflow. So
- [00:06:48.400] can like kind of mess your workflow. So then your program doesn't quite work the
- [00:06:50.230] then your program doesn't quite work the
- [00:06:50.240] then your program doesn't quite work the same as a stock standard which might
- [00:06:53.029] same as a stock standard which might
- [00:06:53.039] same as a stock standard which might confuse you a bit especially if you're
- [00:06:54.390] confuse you a bit especially if you're
- [00:06:54.400] confuse you a bit especially if you're looking for help from support and
- [00:06:56.150] looking for help from support and
- [00:06:56.160] looking for help from support and suddenly things don't make sense
- [00:06:57.430] suddenly things don't make sense
- [00:06:57.440] suddenly things don't make sense anymore. Now under object there's a few
- [00:07:00.790] anymore. Now under object there's a few
- [00:07:00.800] anymore. Now under object there's a few things that is important which uh to be
- [00:07:03.430] things that is important which uh to be
- [00:07:03.440] things that is important which uh to be aware of.
- [00:07:04.950] aware of.
- [00:07:04.960] aware of. And that is grouping and ungrouping.
- [00:07:07.749] And that is grouping and ungrouping.
- [00:07:07.759] And that is grouping and ungrouping. That is a very handy feature. Under
- [00:07:10.150] That is a very handy feature. Under
- [00:07:10.160] That is a very handy feature. Under paths, most of these is going to be very
- [00:07:12.309] paths, most of these is going to be very
- [00:07:12.319] paths, most of these is going to be very helpful, but especially these top ones.
- [00:07:14.309] helpful, but especially these top ones.
- [00:07:14.319] helpful, but especially these top ones. You might be using them a lot. But like
- [00:07:16.710] You might be using them a lot. But like
- [00:07:16.720] You might be using them a lot. But like I said, we're going to cover all of this
- [00:07:17.990] I said, we're going to cover all of this
- [00:07:18.000] I said, we're going to cover all of this later on how to actually use these
- [00:07:19.670] later on how to actually use these
- [00:07:19.680] later on how to actually use these things. Then under layers here, you can
- [00:07:22.950] things. Then under layers here, you can
- [00:07:22.960] things. Then under layers here, you can also arrange things and so forth, but
- [00:07:25.189] also arrange things and so forth, but
- [00:07:25.199] also arrange things and so forth, but most of this we'll be doing under the
- [00:07:26.790] most of this we'll be doing under the
- [00:07:26.800] most of this we'll be doing under the actual layer tab. Then effects, there's
- [00:07:30.390] actual layer tab. Then effects, there's
- [00:07:30.400] actual layer tab. Then effects, there's only a few effects that's important. So
- [00:07:32.150] only a few effects that's important. So
- [00:07:32.160] only a few effects that's important. So we've got nesting. And this is basically
- [00:07:34.309] we've got nesting. And this is basically
- [00:07:34.319] we've got nesting. And this is basically a nice way to sort saving space. We've
- [00:07:36.469] a nice way to sort saving space. We've
- [00:07:36.479] a nice way to sort saving space. We've got a QR code. So we'll be looking at
- [00:07:38.870] got a QR code. So we'll be looking at
- [00:07:38.880] got a QR code. So we'll be looking at how to set that up. Then we also have
- [00:07:41.350] how to set that up. Then we also have
- [00:07:41.360] how to set that up. Then we also have the shadow layer contour cut which is
- [00:07:43.589] the shadow layer contour cut which is
- [00:07:43.599] the shadow layer contour cut which is quite an important one. Now we have a
- [00:07:45.749] quite an important one. Now we have a
- [00:07:45.759] quite an important one. Now we have a number of other ones here as which you
- [00:07:47.270] number of other ones here as which you
- [00:07:47.280] number of other ones here as which you can play with. Maybe with your workflow
- [00:07:48.790] can play with. Maybe with your workflow
- [00:07:48.800] can play with. Maybe with your workflow this is more relevant or one of them is
- [00:07:50.950] this is more relevant or one of them is
- [00:07:50.960] this is more relevant or one of them is more relevant but most of the times
- [00:07:53.270] more relevant but most of the times
- [00:07:53.280] more relevant but most of the times those three is the ones you're going to
- [00:07:54.710] those three is the ones you're going to
- [00:07:54.720] those three is the ones you're going to be using the most. Then if we had to go
- [00:07:57.270] be using the most. Then if we had to go
- [00:07:57.280] be using the most. Then if we had to go under text now here we can adjust the
- [00:07:59.589] under text now here we can adjust the
- [00:07:59.599] under text now here we can adjust the various things for your text tool. So
- [00:08:02.230] various things for your text tool. So
- [00:08:02.240] various things for your text tool. So your font and so forth. We can also
- [00:08:05.270] your font and so forth. We can also
- [00:08:05.280] your font and so forth. We can also obviously adjust that on your control
- [00:08:06.629] obviously adjust that on your control
- [00:08:06.639] obviously adjust that on your control panel. But over here you can also
- [00:08:09.029] panel. But over here you can also
- [00:08:09.039] panel. But over here you can also quickly just adjust things straight from
- [00:08:10.869] quickly just adjust things straight from
- [00:08:10.879] quickly just adjust things straight from the menu. Then under view a few
- [00:08:13.830] the menu. Then under view a few
- [00:08:13.840] the menu. Then under view a few important things here is going to be the
- [00:08:16.070] important things here is going to be the
- [00:08:16.080] important things here is going to be the fit to window. And if we look at the
- [00:08:18.390] fit to window. And if we look at the
- [00:08:18.400] fit to window. And if we look at the shortcut key there it's control F. So
- [00:08:20.629] shortcut key there it's control F. So
- [00:08:20.639] shortcut key there it's control F. So that's going to be handy if you maybe
- [00:08:22.070] that's going to be handy if you maybe
- [00:08:22.080] that's going to be handy if you maybe zoomed in very close and you want to
- [00:08:23.749] zoomed in very close and you want to
- [00:08:23.759] zoomed in very close and you want to have an overview then you can simply hit
- [00:08:25.830] have an overview then you can simply hit
- [00:08:25.840] have an overview then you can simply hit Ctrl+ F and then have a nice overview of
- [00:08:28.790] Ctrl+ F and then have a nice overview of
- [00:08:28.800] Ctrl+ F and then have a nice overview of that. Now, we also have the option for
- [00:08:31.350] that. Now, we also have the option for
- [00:08:31.360] that. Now, we also have the option for show outlines only where sometimes bit
- [00:08:33.990] show outlines only where sometimes bit
- [00:08:34.000] show outlines only where sometimes bit get a bit messy with all the shapes and
- [00:08:36.070] get a bit messy with all the shapes and
- [00:08:36.080] get a bit messy with all the shapes and solids and so forth. And that's also a
- [00:08:38.469] solids and so forth. And that's also a
- [00:08:38.479] solids and so forth. And that's also a nice feature under the view to be aware
- [00:08:40.230] nice feature under the view to be aware
- [00:08:40.240] nice feature under the view to be aware of. Then a few other things we're going
- [00:08:42.310] of. Then a few other things we're going
- [00:08:42.320] of. Then a few other things we're going to be looking at later which can be
- [00:08:43.670] to be looking at later which can be
- [00:08:43.680] to be looking at later which can be handy is the snap or the snap to
- [00:08:46.790] handy is the snap or the snap to
- [00:08:46.800] handy is the snap or the snap to feature. And this is also where you'll
- [00:08:49.110] feature. And this is also where you'll
- [00:08:49.120] feature. And this is also where you'll be able to do things like show the grid
- [00:08:51.750] be able to do things like show the grid
- [00:08:51.760] be able to do things like show the grid and set the unit size and so forth. Now
- [00:08:55.269] and set the unit size and so forth. Now
- [00:08:55.279] and set the unit size and so forth. Now the guidelines is also found here. And
- [00:08:58.230] the guidelines is also found here. And
- [00:08:58.240] the guidelines is also found here. And once again, a lot of these tools though,
- [00:08:59.990] once again, a lot of these tools though,
- [00:09:00.000] once again, a lot of these tools though, it's going to become very important if
- [00:09:01.590] it's going to become very important if
- [00:09:01.600] it's going to become very important if you have, like I said, strict design
- [00:09:03.750] you have, like I said, strict design
- [00:09:03.760] you have, like I said, strict design requirements because then you have to
- [00:09:05.910] requirements because then you have to
- [00:09:05.920] requirements because then you have to make sure you stick within those
- [00:09:07.190] make sure you stick within those
- [00:09:07.200] make sure you stick within those limitations that the client gave you.
- [00:09:10.389] limitations that the client gave you.
- [00:09:10.399] limitations that the client gave you. Okay. Now, another important menu is the
- [00:09:13.350] Okay. Now, another important menu is the
- [00:09:13.360] Okay. Now, another important menu is the cutter. Now, you can set some basic
- [00:09:15.910] cutter. Now, you can set some basic
- [00:09:15.920] cutter. Now, you can set some basic things here like mat size, orientation,
- [00:09:18.870] things here like mat size, orientation,
- [00:09:18.880] things here like mat size, orientation, but more importantly, this is where
- [00:09:20.790] but more importantly, this is where
- [00:09:20.800] but more importantly, this is where we're going to get to our cutter
- [00:09:22.230] we're going to get to our cutter
- [00:09:22.240] we're going to get to our cutter settings and so forth, which is very
- [00:09:24.150] settings and so forth, which is very
- [00:09:24.160] settings and so forth, which is very important. Then next up we've got
- [00:09:26.550] important. Then next up we've got
- [00:09:26.560] important. Then next up we've got window. Now what's important under the
- [00:09:29.030] window. Now what's important under the
- [00:09:29.040] window. Now what's important under the window menu is like your project info.
- [00:09:32.070] window menu is like your project info.
- [00:09:32.080] window menu is like your project info. Like if you're quite neat and you want
- [00:09:33.430] Like if you're quite neat and you want
- [00:09:33.440] Like if you're quite neat and you want to know the information, you can always
- [00:09:34.949] to know the information, you can always
- [00:09:34.959] to know the information, you can always use this. And under that we also have
- [00:09:37.350] use this. And under that we also have
- [00:09:37.360] use this. And under that we also have the workspace which we kind of looked
- [00:09:38.790] the workspace which we kind of looked
- [00:09:38.800] the workspace which we kind of looked at. But a nice thing is you can actually
- [00:09:40.470] at. But a nice thing is you can actually
- [00:09:40.480] at. But a nice thing is you can actually even save custom workspaces depending on
- [00:09:42.630] even save custom workspaces depending on
- [00:09:42.640] even save custom workspaces depending on your work environment.
- [00:09:45.430] your work environment.
- [00:09:45.440] your work environment. Then if we had to go to the actual help
- [00:09:47.829] Then if we had to go to the actual help
- [00:09:47.839] Then if we had to go to the actual help menu. Now this is where you're going to
- [00:09:49.750] menu. Now this is where you're going to
- [00:09:49.760] menu. Now this is where you're going to find important things about your actual
- [00:09:52.470] find important things about your actual
- [00:09:52.480] find important things about your actual software. So if we go here like you can
- [00:09:54.790] software. So if we go here like you can
- [00:09:54.800] software. So if we go here like you can see over here we can find the software
- [00:09:56.230] see over here we can find the software
- [00:09:56.240] see over here we can find the software version. So if you want to make sure you
- [00:09:58.470] version. So if you want to make sure you
- [00:09:58.480] version. So if you want to make sure you are up to the latest version and also
- [00:10:00.630] are up to the latest version and also
- [00:10:00.640] are up to the latest version and also you can get some licensing information
- [00:10:02.949] you can get some licensing information
- [00:10:02.959] you can get some licensing information over here if you need that.
- [00:10:05.509] over here if you need that.
- [00:10:05.519] over here if you need that. Then another important thing here is we
- [00:10:07.590] Then another important thing here is we
- [00:10:07.600] Then another important thing here is we can obviously go to the purchase license
- [00:10:10.630] can obviously go to the purchase license
- [00:10:10.640] can obviously go to the purchase license or activation.
- [00:10:12.710] or activation.
- [00:10:12.720] or activation. So if you have border activation code
- [00:10:14.550] So if you have border activation code
- [00:10:14.560] So if you have border activation code you can always do it here. But this is
- [00:10:15.829] you can always do it here. But this is
- [00:10:15.839] you can always do it here. But this is also the place where if you remember
- [00:10:17.269] also the place where if you remember
- [00:10:17.279] also the place where if you remember from the previous videos where to
- [00:10:19.269] from the previous videos where to
- [00:10:19.279] from the previous videos where to deactivate.
- [00:10:21.430] deactivate.
- [00:10:21.440] deactivate. Okay. Next up, we're going to be looking
- [00:10:23.030] Okay. Next up, we're going to be looking
- [00:10:23.040] Okay. Next up, we're going to be looking at some main operators, stuff that
- [00:10:25.269] at some main operators, stuff that
- [00:10:25.279] at some main operators, stuff that you're going to be using very often.
- [00:10:28.630] you're going to be using very often.
- [00:10:28.640] you're going to be using very often. Okay. Now, on the main features toolbar
- [00:10:31.350] Okay. Now, on the main features toolbar
- [00:10:31.360] Okay. Now, on the main features toolbar on top here, we've got the new project,
- [00:10:33.509] on top here, we've got the new project,
- [00:10:33.519] on top here, we've got the new project, your basic ones, and open and save. Now,
- [00:10:35.750] your basic ones, and open and save. Now,
- [00:10:35.760] your basic ones, and open and save. Now, the save from all of these ones, we're
- [00:10:37.350] the save from all of these ones, we're
- [00:10:37.360] the save from all of these ones, we're going to be using the most. It's a good
- [00:10:39.590] going to be using the most. It's a good
- [00:10:39.600] going to be using the most. It's a good habit to uh get into saving your project
- [00:10:42.389] habit to uh get into saving your project
- [00:10:42.399] habit to uh get into saving your project often. Then, we've got some more basic
- [00:10:44.790] often. Then, we've got some more basic
- [00:10:44.800] often. Then, we've got some more basic ones like cut, copy, paste. And then we
- [00:10:47.910] ones like cut, copy, paste. And then we
- [00:10:47.920] ones like cut, copy, paste. And then we have undo and redo which I believe you
- [00:10:50.470] have undo and redo which I believe you
- [00:10:50.480] have undo and redo which I believe you guys all familiar with. I'm not going to
- [00:10:52.069] guys all familiar with. I'm not going to
- [00:10:52.079] guys all familiar with. I'm not going to go into depth on those ones as they are
- [00:10:54.550] go into depth on those ones as they are
- [00:10:54.560] go into depth on those ones as they are quite universal throughout different
- [00:10:56.230] quite universal throughout different
- [00:10:56.240] quite universal throughout different programs. Then an important one here is
- [00:10:58.710] programs. Then an important one here is
- [00:10:58.720] programs. Then an important one here is the import. Now this is how we're going
- [00:11:00.870] the import. Now this is how we're going
- [00:11:00.880] the import. Now this is how we're going to get most of our graphics into the
- [00:11:02.949] to get most of our graphics into the
- [00:11:02.959] to get most of our graphics into the program. The navigation is pretty uh
- [00:11:06.470] program. The navigation is pretty uh
- [00:11:06.480] program. The navigation is pretty uh self-explanatory. On the right there we
- [00:11:09.030] self-explanatory. On the right there we
- [00:11:09.040] self-explanatory. On the right there we have our preview. So whatever file
- [00:11:10.630] have our preview. So whatever file
- [00:11:10.640] have our preview. So whatever file you've selected and then another
- [00:11:12.630] you've selected and then another
- [00:11:12.640] you've selected and then another important things is our file types. So
- [00:11:14.790] important things is our file types. So
- [00:11:14.800] important things is our file types. So over here you can go down the list and
- [00:11:16.470] over here you can go down the list and
- [00:11:16.480] over here you can go down the list and look at things that we can actually
- [00:11:17.829] look at things that we can actually
- [00:11:17.839] look at things that we can actually import
- [00:11:19.350] import
- [00:11:19.360] import and uh that includes stuff like After
- [00:11:22.470] and uh that includes stuff like After
- [00:11:22.480] and uh that includes stuff like After Effects files, PDFs, SVGs, PGs, stuff
- [00:11:25.910] Effects files, PDFs, SVGs, PGs, stuff
- [00:11:25.920] Effects files, PDFs, SVGs, PGs, stuff like that. So most of your graphics
- [00:11:27.910] like that. So most of your graphics
- [00:11:27.920] like that. So most of your graphics you're going to be pulling in through
- [00:11:29.750] you're going to be pulling in through
- [00:11:29.760] you're going to be pulling in through import.
- [00:11:31.430] import.
- [00:11:31.440] import. Now in some workflows, especially when
- [00:11:33.190] Now in some workflows, especially when
- [00:11:33.200] Now in some workflows, especially when it comes to stuff like uh contour
- [00:11:35.750] it comes to stuff like uh contour
- [00:11:35.760] it comes to stuff like uh contour cutting prints and so forth, we're going
- [00:11:37.509] cutting prints and so forth, we're going
- [00:11:37.519] cutting prints and so forth, we're going to be using the trace image feature.
- [00:11:40.389] to be using the trace image feature.
- [00:11:40.399] to be using the trace image feature. Now, like I mentioned earlier, keep in
- [00:11:41.990] Now, like I mentioned earlier, keep in
- [00:11:42.000] Now, like I mentioned earlier, keep in mind a lot of these things we're going
- [00:11:43.269] mind a lot of these things we're going
- [00:11:43.279] mind a lot of these things we're going to go through in depth later, but right
- [00:11:45.750] to go through in depth later, but right
- [00:11:45.760] to go through in depth later, but right now we just want to give you an overview
- [00:11:47.430] now we just want to give you an overview
- [00:11:47.440] now we just want to give you an overview of what's what and where's it located.
- [00:11:49.750] of what's what and where's it located.
- [00:11:49.760] of what's what and where's it located. Now, this tool is going to be great
- [00:11:51.030] Now, this tool is going to be great
- [00:11:51.040] Now, this tool is going to be great where you can actually put, like I say,
- [00:11:52.949] where you can actually put, like I say,
- [00:11:52.959] where you can actually put, like I say, pull images in raster type images and
- [00:11:56.470] pull images in raster type images and
- [00:11:56.480] pull images in raster type images and then we can create outline or a cut for
- [00:11:59.509] then we can create outline or a cut for
- [00:11:59.519] then we can create outline or a cut for that. And then we've got a number of
- [00:12:01.750] that. And then we've got a number of
- [00:12:01.760] that. And then we've got a number of other settings we can set here to get it
- [00:12:03.509] other settings we can set here to get it
- [00:12:03.519] other settings we can set here to get it to our preferred preference for the job
- [00:12:06.470] to our preferred preference for the job
- [00:12:06.480] to our preferred preference for the job at hand.
- [00:12:08.150] at hand.
- [00:12:08.160] at hand. Then to the right there, we've got
- [00:12:09.590] Then to the right there, we've got
- [00:12:09.600] Then to the right there, we've got another very important one, and that is
- [00:12:11.829] another very important one, and that is
- [00:12:11.839] another very important one, and that is our preview function. So now, what that
- [00:12:15.190] our preview function. So now, what that
- [00:12:15.200] our preview function. So now, what that means is before we ever commit to a cut,
- [00:12:18.629] means is before we ever commit to a cut,
- [00:12:18.639] means is before we ever commit to a cut, and we want to make sure the thing's
- [00:12:19.829] and we want to make sure the thing's
- [00:12:19.839] and we want to make sure the thing's going to be cutting correctly, we'll be
- [00:12:21.509] going to be cutting correctly, we'll be
- [00:12:21.519] going to be cutting correctly, we'll be using the preview one. So for instance,
- [00:12:23.590] using the preview one. So for instance,
- [00:12:23.600] using the preview one. So for instance, let's say we've got these shapes. And
- [00:12:25.990] let's say we've got these shapes. And
- [00:12:26.000] let's say we've got these shapes. And for example, if you take these two
- [00:12:28.629] for example, if you take these two
- [00:12:28.639] for example, if you take these two shapes that we've got here on the
- [00:12:29.910] shapes that we've got here on the
- [00:12:29.920] shapes that we've got here on the cutting mat, because they're the same
- [00:12:31.670] cutting mat, because they're the same
- [00:12:31.680] cutting mat, because they're the same color, it's very hard to tell where the
- [00:12:33.590] color, it's very hard to tell where the
- [00:12:33.600] color, it's very hard to tell where the cutting lines are. So, we might think
- [00:12:35.910] cutting lines are. So, we might think
- [00:12:35.920] cutting lines are. So, we might think it's going to cut a nice outline of
- [00:12:37.990] it's going to cut a nice outline of
- [00:12:38.000] it's going to cut a nice outline of these shapes, but then if we had to go
- [00:12:40.150] these shapes, but then if we had to go
- [00:12:40.160] these shapes, but then if we had to go to the actual preview button, you can
- [00:12:42.389] to the actual preview button, you can
- [00:12:42.399] to the actual preview button, you can see currently these two shapes are going
- [00:12:44.150] see currently these two shapes are going
- [00:12:44.160] see currently these two shapes are going to be cutting through each other. So,
- [00:12:46.230] to be cutting through each other. So,
- [00:12:46.240] to be cutting through each other. So, that's obviously going to make a mess of
- [00:12:47.670] that's obviously going to make a mess of
- [00:12:47.680] that's obviously going to make a mess of your final vinyl and then um yeah, which
- [00:12:51.350] your final vinyl and then um yeah, which
- [00:12:51.360] your final vinyl and then um yeah, which going to be a problem obviously. So,
- [00:12:52.470] going to be a problem obviously. So,
- [00:12:52.480] going to be a problem obviously. So, this is where you can preview before you
- [00:12:54.389] this is where you can preview before you
- [00:12:54.399] this is where you can preview before you actually commit to a job and maybe waste
- [00:12:56.790] actually commit to a job and maybe waste
- [00:12:56.800] actually commit to a job and maybe waste some of your vinyl. Now, in the case of
- [00:12:59.670] some of your vinyl. Now, in the case of
- [00:12:59.680] some of your vinyl. Now, in the case of this example, now we saw okay, it was
- [00:13:01.350] this example, now we saw okay, it was
- [00:13:01.360] this example, now we saw okay, it was cutting wrong. So now let's say we
- [00:13:02.629] cutting wrong. So now let's say we
- [00:13:02.639] cutting wrong. So now let's say we select this. We go to paths and we go
- [00:13:04.550] select this. We go to paths and we go
- [00:13:04.560] select this. We go to paths and we go union. Now we go back to preview now. So
- [00:13:07.269] union. Now we go back to preview now. So
- [00:13:07.279] union. Now we go back to preview now. So you can say okay now it's cutting it
- [00:13:09.110] you can say okay now it's cutting it
- [00:13:09.120] you can say okay now it's cutting it right. So this feature also has a few
- [00:13:10.949] right. So this feature also has a few
- [00:13:10.959] right. So this feature also has a few other options you can switch on and off
- [00:13:12.310] other options you can switch on and off
- [00:13:12.320] other options you can switch on and off here for stuff that's printable drawable
- [00:13:14.629] here for stuff that's printable drawable
- [00:13:14.639] here for stuff that's printable drawable and so forth. But for now it's just good
- [00:13:16.790] and so forth. But for now it's just good
- [00:13:16.800] and so forth. But for now it's just good to be aware that this feature is there.
- [00:13:19.590] to be aware that this feature is there.
- [00:13:19.600] to be aware that this feature is there. Okay. And then lastly right on the right
- [00:13:22.150] Okay. And then lastly right on the right
- [00:13:22.160] Okay. And then lastly right on the right here is our cutter feature. And this
- [00:13:24.470] here is our cutter feature. And this
- [00:13:24.480] here is our cutter feature. And this we're going to be mostly using for
- [00:13:25.910] we're going to be mostly using for
- [00:13:25.920] we're going to be mostly using for cutting. But if you do not have a cutter
- [00:13:28.150] cutting. But if you do not have a cutter
- [00:13:28.160] cutting. But if you do not have a cutter set up, this will actually prompt you to
- [00:13:29.829] set up, this will actually prompt you to
- [00:13:29.839] set up, this will actually prompt you to add a cutter. So, we can also use this
- [00:13:31.750] add a cutter. So, we can also use this
- [00:13:31.760] add a cutter. So, we can also use this to quickly add a cutter if we do not
- [00:13:33.509] to quickly add a cutter if we do not
- [00:13:33.519] to quickly add a cutter if we do not have one yet. But yeah, otherwise that
- [00:13:35.910] have one yet. But yeah, otherwise that
- [00:13:35.920] have one yet. But yeah, otherwise that is it on our main features bar. Like I
- [00:13:38.470] is it on our main features bar. Like I
- [00:13:38.480] is it on our main features bar. Like I said, most of these operators you're
- [00:13:39.829] said, most of these operators you're
- [00:13:39.839] said, most of these operators you're going to be using often, and that's why
- [00:13:41.910] going to be using often, and that's why
- [00:13:41.920] going to be using often, and that's why they made it big, bold, and easy for you
- [00:13:43.990] they made it big, bold, and easy for you
- [00:13:44.000] they made it big, bold, and easy for you to locate. Okay, next up, we're going to
- [00:13:46.949] to locate. Okay, next up, we're going to
- [00:13:46.959] to locate. Okay, next up, we're going to be looking at Vinyl Cut's toolbar. Now,
- [00:13:50.230] be looking at Vinyl Cut's toolbar. Now,
- [00:13:50.240] be looking at Vinyl Cut's toolbar. Now, when it comes to the toolbar, like I
- [00:13:51.670] when it comes to the toolbar, like I
- [00:13:51.680] when it comes to the toolbar, like I mentioned before, this is kind of like
- [00:13:53.110] mentioned before, this is kind of like
- [00:13:53.120] mentioned before, this is kind of like your toolbox. So, a lot of these
- [00:13:55.509] your toolbox. So, a lot of these
- [00:13:55.519] your toolbox. So, a lot of these features you're going to be using to
- [00:13:57.350] features you're going to be using to
- [00:13:57.360] features you're going to be using to manipulate different things from shapes
- [00:13:59.509] manipulate different things from shapes
- [00:13:59.519] manipulate different things from shapes to text to just selection and so forth.
- [00:14:02.710] to text to just selection and so forth.
- [00:14:02.720] to text to just selection and so forth. Okay. Now, I'm not going to run through
- [00:14:04.310] Okay. Now, I'm not going to run through
- [00:14:04.320] Okay. Now, I'm not going to run through every single one of these tools. I'm
- [00:14:06.870] every single one of these tools. I'm
- [00:14:06.880] every single one of these tools. I'm only going to be covering the most
- [00:14:08.389] only going to be covering the most
- [00:14:08.399] only going to be covering the most relevant ones for what we're going to be
- [00:14:09.990] relevant ones for what we're going to be
- [00:14:10.000] relevant ones for what we're going to be doing because, you know, this is going
- [00:14:12.150] doing because, you know, this is going
- [00:14:12.160] doing because, you know, this is going to vary depending on your workflow. But
- [00:14:13.910] to vary depending on your workflow. But
- [00:14:13.920] to vary depending on your workflow. But some of these ones you probably going to
- [00:14:15.269] some of these ones you probably going to
- [00:14:15.279] some of these ones you probably going to be using over and over. So, first off,
- [00:14:17.030] be using over and over. So, first off,
- [00:14:17.040] be using over and over. So, first off, right on top, we have the selection
- [00:14:19.110] right on top, we have the selection
- [00:14:19.120] right on top, we have the selection tool. So, let's say I've got a few
- [00:14:21.189] tool. So, let's say I've got a few
- [00:14:21.199] tool. So, let's say I've got a few shapes here. What happens if we have the
- [00:14:23.030] shapes here. What happens if we have the
- [00:14:23.040] shapes here. What happens if we have the selection tool selected? As I click on
- [00:14:25.030] selection tool selected? As I click on
- [00:14:25.040] selection tool selected? As I click on these things, you'll see it selects the
- [00:14:26.790] these things, you'll see it selects the
- [00:14:26.800] these things, you'll see it selects the shape. So then obviously as a shape is
- [00:14:29.750] shape. So then obviously as a shape is
- [00:14:29.760] shape. So then obviously as a shape is selected, we'll be able to edit its
- [00:14:32.389] selected, we'll be able to edit its
- [00:14:32.399] selected, we'll be able to edit its properties or manipulate it how we want.
- [00:14:35.189] properties or manipulate it how we want.
- [00:14:35.199] properties or manipulate it how we want. Then another thing we can do is we
- [00:14:36.790] Then another thing we can do is we
- [00:14:36.800] Then another thing we can do is we leftclick and hold our mouse in and drag
- [00:14:39.350] leftclick and hold our mouse in and drag
- [00:14:39.360] leftclick and hold our mouse in and drag a selection. You can see that it makes
- [00:14:41.990] a selection. You can see that it makes
- [00:14:42.000] a selection. You can see that it makes this little cube. But something to keep
- [00:14:44.470] this little cube. But something to keep
- [00:14:44.480] this little cube. But something to keep in mind, if you don't enclose the shape
- [00:14:46.230] in mind, if you don't enclose the shape
- [00:14:46.240] in mind, if you don't enclose the shape completely with your selection tool, it
- [00:14:48.069] completely with your selection tool, it
- [00:14:48.079] completely with your selection tool, it will not actually select that shape. So
- [00:14:50.629] will not actually select that shape. So
- [00:14:50.639] will not actually select that shape. So you can see here we have to actually
- [00:14:52.230] you can see here we have to actually
- [00:14:52.240] you can see here we have to actually draw a selection over both these shapes
- [00:14:54.870] draw a selection over both these shapes
- [00:14:54.880] draw a selection over both these shapes and then they are only selected. If I
- [00:14:56.870] and then they are only selected. If I
- [00:14:56.880] and then they are only selected. If I only select one and partially touch the
- [00:14:59.990] only select one and partially touch the
- [00:15:00.000] only select one and partially touch the other one it won't select both. Now you
- [00:15:02.550] other one it won't select both. Now you
- [00:15:02.560] other one it won't select both. Now you can obviously also use stuff like shift
- [00:15:04.389] can obviously also use stuff like shift
- [00:15:04.399] can obviously also use stuff like shift to select multiple and so forth but yeah
- [00:15:07.829] to select multiple and so forth but yeah
- [00:15:07.839] to select multiple and so forth but yeah so just keep that in mind. Then another
- [00:15:10.069] so just keep that in mind. Then another
- [00:15:10.079] so just keep that in mind. Then another thing to keep in mind with the toolbar
- [00:15:11.509] thing to keep in mind with the toolbar
- [00:15:11.519] thing to keep in mind with the toolbar which is important. So if we go here to
- [00:15:13.269] which is important. So if we go here to
- [00:15:13.279] which is important. So if we go here to the text and we see that little black
- [00:15:14.870] the text and we see that little black
- [00:15:14.880] the text and we see that little black arrow at the bottom that means there's
- [00:15:17.509] arrow at the bottom that means there's
- [00:15:17.519] arrow at the bottom that means there's more items under this tool. So if I had
- [00:15:20.230] more items under this tool. So if I had
- [00:15:20.240] more items under this tool. So if I had to hold in click and then you'll see it
- [00:15:23.350] to hold in click and then you'll see it
- [00:15:23.360] to hold in click and then you'll see it pops up some more options and then you
- [00:15:25.829] pops up some more options and then you
- [00:15:25.839] pops up some more options and then you simply hover to the one you like and
- [00:15:27.750] simply hover to the one you like and
- [00:15:27.760] simply hover to the one you like and release then it will have that tool
- [00:15:30.310] release then it will have that tool
- [00:15:30.320] release then it will have that tool selected. So if any icon has a little
- [00:15:33.030] selected. So if any icon has a little
- [00:15:33.040] selected. So if any icon has a little arrow like that keep in mind that means
- [00:15:34.790] arrow like that keep in mind that means
- [00:15:34.800] arrow like that keep in mind that means there's more options under there as we
- [00:15:37.110] there's more options under there as we
- [00:15:37.120] there's more options under there as we can see here with the actual different
- [00:15:38.470] can see here with the actual different
- [00:15:38.480] can see here with the actual different shapes. Then another important tool here
- [00:15:41.110] shapes. Then another important tool here
- [00:15:41.120] shapes. Then another important tool here if we go down is the actual ruler. Now
- [00:15:43.430] if we go down is the actual ruler. Now
- [00:15:43.440] if we go down is the actual ruler. Now once again if you're working with strict
- [00:15:44.629] once again if you're working with strict
- [00:15:44.639] once again if you're working with strict design requirements then the ruler is
- [00:15:46.310] design requirements then the ruler is
- [00:15:46.320] design requirements then the ruler is going to become quite important. as this
- [00:15:48.870] going to become quite important. as this
- [00:15:48.880] going to become quite important. as this will allow you to make sure your
- [00:15:50.150] will allow you to make sure your
- [00:15:50.160] will allow you to make sure your measurements are accurate.
- [00:15:53.030] measurements are accurate.
- [00:15:53.040] measurements are accurate. But yeah, otherwise guys, that is it on
- [00:15:55.350] But yeah, otherwise guys, that is it on
- [00:15:55.360] But yeah, otherwise guys, that is it on part one of our UI. Then uh in the
- [00:15:58.629] part one of our UI. Then uh in the
- [00:15:58.639] part one of our UI. Then uh in the second part, we're going to be looking
- [00:15:59.509] second part, we're going to be looking
- [00:15:59.519] second part, we're going to be looking at some layers and so forth.
Keyframes
- /workspace/academy/media/1oaUOYzkcg9xor1_7opLHGx3Rxwf__T1d/keyframes/last.jpg
- /workspace/academy/media/1oaUOYzkcg9xor1_7opLHGx3Rxwf__T1d/keyframes/t004.jpg
- /workspace/academy/media/1oaUOYzkcg9xor1_7opLHGx3Rxwf__T1d/keyframes/t008.jpg
- /workspace/academy/media/1oaUOYzkcg9xor1_7opLHGx3Rxwf__T1d/keyframes/t013.jpg
- /workspace/academy/media/1oaUOYzkcg9xor1_7opLHGx3Rxwf__T1d/keyframes/t017.jpg
- /workspace/academy/media/1oaUOYzkcg9xor1_7opLHGx3Rxwf__T1d/keyframes/t021.jpg
- /workspace/academy/media/1oaUOYzkcg9xor1_7opLHGx3Rxwf__T1d/keyframes/t025.jpg
- /workspace/academy/media/1oaUOYzkcg9xor1_7opLHGx3Rxwf__T1d/keyframes/t029.jpg
- /workspace/academy/media/1oaUOYzkcg9xor1_7opLHGx3Rxwf__T1d/keyframes/t033.jpg
- /workspace/academy/media/1oaUOYzkcg9xor1_7opLHGx3Rxwf__T1d/keyframes/t038.jpg
- /workspace/academy/media/1oaUOYzkcg9xor1_7opLHGx3Rxwf__T1d/keyframes/t042.jpg
- /workspace/academy/media/1oaUOYzkcg9xor1_7opLHGx3Rxwf__T1d/keyframes/t046.jpg
- /workspace/academy/media/1oaUOYzkcg9xor1_7opLHGx3Rxwf__T1d/keyframes/t050.jpg
- /workspace/academy/media/1oaUOYzkcg9xor1_7opLHGx3Rxwf__T1d/keyframes/t054.jpg
- /workspace/academy/media/1oaUOYzkcg9xor1_7opLHGx3Rxwf__T1d/keyframes/t058.jpg
- /workspace/academy/media/1oaUOYzkcg9xor1_7opLHGx3Rxwf__T1d/keyframes/t063.jpg
- /workspace/academy/media/1oaUOYzkcg9xor1_7opLHGx3Rxwf__T1d/keyframes/t067.jpg
- /workspace/academy/media/1oaUOYzkcg9xor1_7opLHGx3Rxwf__T1d/keyframes/t071.jpg
- /workspace/academy/media/1oaUOYzkcg9xor1_7opLHGx3Rxwf__T1d/keyframes/t075.jpg
- /workspace/academy/media/1oaUOYzkcg9xor1_7opLHGx3Rxwf__T1d/keyframes/t079.jpg
- /workspace/academy/media/1oaUOYzkcg9xor1_7opLHGx3Rxwf__T1d/keyframes/t083.jpg
- /workspace/academy/media/1oaUOYzkcg9xor1_7opLHGx3Rxwf__T1d/keyframes/t088.jpg
- /workspace/academy/media/1oaUOYzkcg9xor1_7opLHGx3Rxwf__T1d/keyframes/t092.jpg
- /workspace/academy/media/1oaUOYzkcg9xor1_7opLHGx3Rxwf__T1d/keyframes/t096.jpg
17. User Interface - Part2
- title: User Interface - Part2
- status: publish
- author: 0
- is_previewable: (empty)
- video_duration: 0h 14m 21s (raw {"hours":0,"minutes":14,"seconds":21})
- video_source_type: embedded
- drive_file_id:
1rphoKaEb-YC8z98m3ceG-qQ4ziGie65e(source_ref; not a public link) - transcript pending / keyframes pending / presentation extract pending
- video_source_url: (Drive preview omitted as a public link; file id kept as source_ref)
In today\'s lesson we will be looking at the second part of the User Interface.
- quizzes_following_this_lesson: 1 (full text in Quizzes)
- UI Part 2 (7 questions)
Drive extract
- file_id:
1rphoKaEb-YC8z98m3ceG-qQ4ziGie65e - filename: 02 - SWVC - UI P2.mp4
- kind: video
- local_path: /workspace/academy/media/1rphoKaEb-YC8z98m3ceG-qQ4ziGie65e/02 - SWVC - UI P2.mp4
- source_ref: drive
1rphoKaEb-YC8z98m3ceG-qQ4ziGie65e· content_length 113606734 · original https://drive.google.com/file/d/1rphoKaEb-YC8z98m3ceG-qQ4ziGie65e/view - extract_status: done
- caption_source: drive_timedtext
- duration_s: 861.413991
- keyframe_count: 24
Transcript
- Howdy guys. Okay, welcome to this next
- [00:00:02.710] Howdy guys. Okay, welcome to this next
- [00:00:02.720] Howdy guys. Okay, welcome to this next video where we'll be looking at the UI
- [00:00:06.390] video where we'll be looking at the UI
- [00:00:06.400] video where we'll be looking at the UI or user interface part two.
- [00:00:10.629] or user interface part two.
- [00:00:10.639] or user interface part two. So, first up, we're going to be looking
- [00:00:12.230] So, first up, we're going to be looking
- [00:00:12.240] So, first up, we're going to be looking at the control panel. So, now this is a
- [00:00:15.030] at the control panel. So, now this is a
- [00:00:15.040] at the control panel. So, now this is a nice place where you can find extra
- [00:00:16.470] nice place where you can find extra
- [00:00:16.480] nice place where you can find extra options and settings for different tools
- [00:00:18.950] options and settings for different tools
- [00:00:18.960] options and settings for different tools and features. It'll be found here on the
- [00:00:21.910] and features. It'll be found here on the
- [00:00:21.920] and features. It'll be found here on the right and we can see we've got a few
- [00:00:23.990] right and we can see we've got a few
- [00:00:24.000] right and we can see we've got a few different tabs. So, the first tab, this
- [00:00:26.470] different tabs. So, the first tab, this
- [00:00:26.480] different tabs. So, the first tab, this will be about Final Cut.co.za. ZA. So we
- [00:00:30.230] will be about Final Cut.co.za. ZA. So we
- [00:00:30.240] will be about Final Cut.co.za. ZA. So we can find the relevant information there,
- [00:00:32.229] can find the relevant information there,
- [00:00:32.239] can find the relevant information there, some training videos and so forth. So
- [00:00:34.069] some training videos and so forth. So
- [00:00:34.079] some training videos and so forth. So it's worth well check this out. Then on
- [00:00:36.870] it's worth well check this out. Then on
- [00:00:36.880] it's worth well check this out. Then on top here on these panels, this is where
- [00:00:38.630] top here on these panels, this is where
- [00:00:38.640] top here on these panels, this is where you can actually find the name of the
- [00:00:40.069] you can actually find the name of the
- [00:00:40.079] you can actually find the name of the panel. So if we had to go to the second
- [00:00:41.670] panel. So if we had to go to the second
- [00:00:41.680] panel. So if we had to go to the second panel, click there. You can see it says
- [00:00:44.310] panel, click there. You can see it says
- [00:00:44.320] panel, click there. You can see it says document. So now this is obviously
- [00:00:47.510] document. So now this is obviously
- [00:00:47.520] document. So now this is obviously everything related to our documents, our
- [00:00:49.270] everything related to our documents, our
- [00:00:49.280] everything related to our documents, our scale, our measurements, layout, and so
- [00:00:51.670] scale, our measurements, layout, and so
- [00:00:51.680] scale, our measurements, layout, and so forth. We also have some nice grid
- [00:00:54.389] forth. We also have some nice grid
- [00:00:54.399] forth. We also have some nice grid options. And then if we're working with
- [00:00:56.150] options. And then if we're working with
- [00:00:56.160] options. And then if we're working with registration marks and so forth, that's
- [00:00:57.910] registration marks and so forth, that's
- [00:00:57.920] registration marks and so forth, that's also going to become important. Then
- [00:01:00.310] also going to become important. Then
- [00:01:00.320] also going to become important. Then next up, we've got our position and
- [00:01:01.670] next up, we've got our position and
- [00:01:01.680] next up, we've got our position and size. So if we just put a shape here,
- [00:01:03.590] size. So if we just put a shape here,
- [00:01:03.600] size. So if we just put a shape here, I'm going to quickly select it. Then um
- [00:01:06.469] I'm going to quickly select it. Then um
- [00:01:06.479] I'm going to quickly select it. Then um as you can see there's nothing selected.
- [00:01:08.070] as you can see there's nothing selected.
- [00:01:08.080] as you can see there's nothing selected. So once I select it, we have options we
- [00:01:09.990] So once I select it, we have options we
- [00:01:10.000] So once I select it, we have options we can adjust. So this is relevant to
- [00:01:11.670] can adjust. So this is relevant to
- [00:01:11.680] can adjust. So this is relevant to whatever is selected.
- [00:01:13.990] whatever is selected.
- [00:01:14.000] whatever is selected. Then if we move it, you can see it
- [00:01:15.590] Then if we move it, you can see it
- [00:01:15.600] Then if we move it, you can see it adjusted the movement on top. But you
- [00:01:17.030] adjusted the movement on top. But you
- [00:01:17.040] adjusted the movement on top. But you can also manually adjust it. So if you
- [00:01:18.630] can also manually adjust it. So if you
- [00:01:18.640] can also manually adjust it. So if you need like a precise layout and so forth.
- [00:01:22.310] need like a precise layout and so forth.
- [00:01:22.320] need like a precise layout and so forth. Then to the right of that we've got a
- [00:01:23.749] Then to the right of that we've got a
- [00:01:23.759] Then to the right of that we've got a form of origin or like a I'm going to
- [00:01:26.149] form of origin or like a I'm going to
- [00:01:26.159] form of origin or like a I'm going to say a point of reference to edit around.
- [00:01:28.630] say a point of reference to edit around.
- [00:01:28.640] say a point of reference to edit around. So if we do want to do the location
- [00:01:31.109] So if we do want to do the location
- [00:01:31.119] So if we do want to do the location based off the top left corner or maybe
- [00:01:33.429] based off the top left corner or maybe
- [00:01:33.439] based off the top left corner or maybe the center then this is how we'll do
- [00:01:35.749] the center then this is how we'll do
- [00:01:35.759] the center then this is how we'll do that. We'll adjust it there. Then under
- [00:01:38.230] that. We'll adjust it there. Then under
- [00:01:38.240] that. We'll adjust it there. Then under that we've got some alignment and
- [00:01:40.630] that we've got some alignment and
- [00:01:40.640] that we've got some alignment and nudging tools. We can set the size and
- [00:01:42.950] nudging tools. We can set the size and
- [00:01:42.960] nudging tools. We can set the size and then we've got some nice rotation and
- [00:01:44.630] then we've got some nice rotation and
- [00:01:44.640] then we've got some nice rotation and flipping tools under that.
- [00:01:47.109] flipping tools under that.
- [00:01:47.119] flipping tools under that. Then the next tab here is our fill and
- [00:01:50.469] Then the next tab here is our fill and
- [00:01:50.479] Then the next tab here is our fill and style.
- [00:01:51.990] style.
- [00:01:52.000] style. Now, when it comes to this one, if
- [00:01:53.510] Now, when it comes to this one, if
- [00:01:53.520] Now, when it comes to this one, if you're working with base vinyls that
- [00:01:55.670] you're working with base vinyls that
- [00:01:55.680] you're working with base vinyls that you're going to be cutting out that's
- [00:01:56.710] you're going to be cutting out that's
- [00:01:56.720] you're going to be cutting out that's already colored and you're not actually
- [00:01:58.069] already colored and you're not actually
- [00:01:58.079] already colored and you're not actually printing, then this will be mostly just
- [00:02:00.230] printing, then this will be mostly just
- [00:02:00.240] printing, then this will be mostly just for a visual reference to keep track of
- [00:02:02.389] for a visual reference to keep track of
- [00:02:02.399] for a visual reference to keep track of what's happening. But if you're going to
- [00:02:04.550] what's happening. But if you're going to
- [00:02:04.560] what's happening. But if you're going to be actually printing it, then the colors
- [00:02:06.310] be actually printing it, then the colors
- [00:02:06.320] be actually printing it, then the colors are important.
- [00:02:08.469] are important.
- [00:02:08.479] are important. Now, under here, you can see we've got
- [00:02:10.150] Now, under here, you can see we've got
- [00:02:10.160] Now, under here, you can see we've got fill. And under the fill option, we have
- [00:02:12.309] fill. And under the fill option, we have
- [00:02:12.319] fill. And under the fill option, we have a few different options here. We've got
- [00:02:14.550] a few different options here. We've got
- [00:02:14.560] a few different options here. We've got obviously none. We've got color,
- [00:02:16.390] obviously none. We've got color,
- [00:02:16.400] obviously none. We've got color, pattern, and gradient. So, we can
- [00:02:19.190] pattern, and gradient. So, we can
- [00:02:19.200] pattern, and gradient. So, we can actually adjust that. If you want to
- [00:02:20.390] actually adjust that. If you want to
- [00:02:20.400] actually adjust that. If you want to adjust the color, we simply click on
- [00:02:21.830] adjust the color, we simply click on
- [00:02:21.840] adjust the color, we simply click on that box, adjust it, and then you'll see
- [00:02:23.750] that box, adjust it, and then you'll see
- [00:02:23.760] that box, adjust it, and then you'll see it updates it. Under that, we have
- [00:02:26.229] it updates it. Under that, we have
- [00:02:26.239] it updates it. Under that, we have opacity. So, if you basically want to be
- [00:02:27.910] opacity. So, if you basically want to be
- [00:02:27.920] opacity. So, if you basically want to be able to see through the shape, makes
- [00:02:30.150] able to see through the shape, makes
- [00:02:30.160] able to see through the shape, makes designing symbols a bit easier.
- [00:02:32.790] designing symbols a bit easier.
- [00:02:32.800] designing symbols a bit easier. Then, under that, we've got stroke.
- [00:02:34.550] Then, under that, we've got stroke.
- [00:02:34.560] Then, under that, we've got stroke. Stroke has a color and a pen, but we're
- [00:02:37.750] Stroke has a color and a pen, but we're
- [00:02:37.760] Stroke has a color and a pen, but we're not going to cover the pen. So, we're
- [00:02:38.869] not going to cover the pen. So, we're
- [00:02:38.879] not going to cover the pen. So, we're just going to look at the base color.
- [00:02:41.030] just going to look at the base color.
- [00:02:41.040] just going to look at the base color. Let's set a different color for that.
- [00:02:44.630] Let's set a different color for that.
- [00:02:44.640] Let's set a different color for that. say okay.
- [00:02:46.390] say okay.
- [00:02:46.400] say okay. And then over here we can adjust the
- [00:02:47.830] And then over here we can adjust the
- [00:02:47.840] And then over here we can adjust the width. So now you can kind of see the
- [00:02:49.509] width. So now you can kind of see the
- [00:02:49.519] width. So now you can kind of see the stroke more. We've got some different uh
- [00:02:52.150] stroke more. We've got some different uh
- [00:02:52.160] stroke more. We've got some different uh corner types. So whether it's round or
- [00:02:54.229] corner types. So whether it's round or
- [00:02:54.239] corner types. So whether it's round or sharp and then a few other settings we
- [00:02:56.869] sharp and then a few other settings we
- [00:02:56.879] sharp and then a few other settings we can adjust.
- [00:02:58.790] can adjust.
- [00:02:58.800] can adjust. Now you can also obviously set this to
- [00:03:00.869] Now you can also obviously set this to
- [00:03:00.879] Now you can also obviously set this to none. So sometimes you want it just with
- [00:03:03.270] none. So sometimes you want it just with
- [00:03:03.280] none. So sometimes you want it just with strokes and other times just with false.
- [00:03:05.830] strokes and other times just with false.
- [00:03:05.840] strokes and other times just with false. So both of them you can set to none.
- [00:03:09.509] So both of them you can set to none.
- [00:03:09.519] So both of them you can set to none. Then if we go to the next tab here, this
- [00:03:11.830] Then if we go to the next tab here, this
- [00:03:11.840] Then if we go to the next tab here, this will be the actual style tab. Like under
- [00:03:14.869] will be the actual style tab. Like under
- [00:03:14.879] will be the actual style tab. Like under the style, we have a few different
- [00:03:16.070] the style, we have a few different
- [00:03:16.080] the style, we have a few different options which obviously you can play
- [00:03:17.509] options which obviously you can play
- [00:03:17.519] options which obviously you can play around with. An important one here at
- [00:03:19.509] around with. An important one here at
- [00:03:19.519] around with. An important one here at the bottom is the cut type, but we'll be
- [00:03:22.630] the bottom is the cut type, but we'll be
- [00:03:22.640] the bottom is the cut type, but we'll be playing with that later where you can
- [00:03:23.750] playing with that later where you can
- [00:03:23.760] playing with that later where you can actually see how shapes react
- [00:03:25.830] actually see how shapes react
- [00:03:25.840] actually see how shapes react differently inside the program. Then we
- [00:03:28.710] differently inside the program. Then we
- [00:03:28.720] differently inside the program. Then we also have things like the wild option.
- [00:03:32.070] also have things like the wild option.
- [00:03:32.080] also have things like the wild option. Okay, next up, if we have to add some
- [00:03:33.990] Okay, next up, if we have to add some
- [00:03:34.000] Okay, next up, if we have to add some textbook,
- [00:03:36.390] textbook,
- [00:03:36.400] textbook, I'm going to scale this up.
- [00:03:39.030] I'm going to scale this up.
- [00:03:39.040] I'm going to scale this up. And then we move to the text tab or
- [00:03:41.190] And then we move to the text tab or
- [00:03:41.200] And then we move to the text tab or control panel. Now this is where we can
- [00:03:43.750] control panel. Now this is where we can
- [00:03:43.760] control panel. Now this is where we can now fine adjust the text. Now most of
- [00:03:45.990] now fine adjust the text. Now most of
- [00:03:46.000] now fine adjust the text. Now most of these settings obviously if you're used
- [00:03:48.229] these settings obviously if you're used
- [00:03:48.239] these settings obviously if you're used to a form of document editor or so
- [00:03:50.229] to a form of document editor or so
- [00:03:50.239] to a form of document editor or so forth, you'll very quickly get what it's
- [00:03:52.630] forth, you'll very quickly get what it's
- [00:03:52.640] forth, you'll very quickly get what it's about.
- [00:03:54.309] about.
- [00:03:54.319] about. So here we've got obviously the font. We
- [00:03:57.190] So here we've got obviously the font. We
- [00:03:57.200] So here we've got obviously the font. We can go through we've got some basic font
- [00:03:58.869] can go through we've got some basic font
- [00:03:58.879] can go through we've got some basic font settings, some tracking, some width,
- [00:04:00.869] settings, some tracking, some width,
- [00:04:00.879] settings, some tracking, some width, rotation, and so forth. Now, another
- [00:04:04.070] rotation, and so forth. Now, another
- [00:04:04.080] rotation, and so forth. Now, another thing that's important when working with
- [00:04:05.750] thing that's important when working with
- [00:04:05.760] thing that's important when working with text, especially when it comes to its
- [00:04:07.509] text, especially when it comes to its
- [00:04:07.519] text, especially when it comes to its size. So, let's add another text here.
- [00:04:10.550] size. So, let's add another text here.
- [00:04:10.560] size. So, let's add another text here. I'm just going to call it size.
- [00:04:13.509] I'm just going to call it size.
- [00:04:13.519] I'm just going to call it size. Let's copy and paste that, make a
- [00:04:15.190] Let's copy and paste that, make a
- [00:04:15.200] Let's copy and paste that, make a duplicate, so we know they are exactly
- [00:04:16.870] duplicate, so we know they are exactly
- [00:04:16.880] duplicate, so we know they are exactly the same. So, now if we grab this bottom
- [00:04:19.749] the same. So, now if we grab this bottom
- [00:04:19.759] the same. So, now if we grab this bottom one and we scale it with the actual
- [00:04:22.069] one and we scale it with the actual
- [00:04:22.079] one and we scale it with the actual transform widget,
- [00:04:25.189] transform widget,
- [00:04:25.199] transform widget, we get it to a general size.
- [00:04:29.749] we get it to a general size.
- [00:04:29.759] we get it to a general size. And then we take the top one and we're
- [00:04:31.430] And then we take the top one and we're
- [00:04:31.440] And then we take the top one and we're going to now take this size and we're
- [00:04:32.629] going to now take this size and we're
- [00:04:32.639] going to now take this size and we're going to scale this up till we can find
- [00:04:33.990] going to scale this up till we can find
- [00:04:34.000] going to scale this up till we can find something similar.
- [00:04:36.150] something similar.
- [00:04:36.160] something similar. So let's just adjust that.
- [00:04:39.909] So let's just adjust that.
- [00:04:39.919] So let's just adjust that. So this is more or less similar size.
- [00:04:42.950] So this is more or less similar size.
- [00:04:42.960] So this is more or less similar size. Now a very important thing to keep in
- [00:04:44.550] Now a very important thing to keep in
- [00:04:44.560] Now a very important thing to keep in mind especially like I said if you're
- [00:04:45.749] mind especially like I said if you're
- [00:04:45.759] mind especially like I said if you're working with strict design rules maybe
- [00:04:47.670] working with strict design rules maybe
- [00:04:47.680] working with strict design rules maybe the client says he wants something a
- [00:04:49.670] the client says he wants something a
- [00:04:49.680] the client says he wants something a certain size and so forth.
- [00:04:52.230] certain size and so forth.
- [00:04:52.240] certain size and so forth. Then if we had to now select the top one
- [00:04:54.230] Then if we had to now select the top one
- [00:04:54.240] Then if we had to now select the top one we can see the size there for the
- [00:04:56.469] we can see the size there for the
- [00:04:56.479] we can see the size there for the character it is 37. We select the bottom
- [00:04:59.670] character it is 37. We select the bottom
- [00:04:59.680] character it is 37. We select the bottom one and we zoom. You can see here it
- [00:05:02.310] one and we zoom. You can see here it
- [00:05:02.320] one and we zoom. You can see here it says 25.4.
- [00:05:04.710] says 25.4.
- [00:05:04.720] says 25.4. So if we actually going to be scaling
- [00:05:06.550] So if we actually going to be scaling
- [00:05:06.560] So if we actually going to be scaling this with a transformation node or
- [00:05:09.350] this with a transformation node or
- [00:05:09.360] this with a transformation node or transformation widget, it's important to
- [00:05:11.990] transformation widget, it's important to
- [00:05:12.000] transformation widget, it's important to understand if you going to scale it with
- [00:05:13.510] understand if you going to scale it with
- [00:05:13.520] understand if you going to scale it with that, it is not going to be relevant on
- [00:05:15.670] that, it is not going to be relevant on
- [00:05:15.680] that, it is not going to be relevant on the actual text control panel. So
- [00:05:18.390] the actual text control panel. So
- [00:05:18.400] the actual text control panel. So general rule is if you have characters
- [00:05:20.310] general rule is if you have characters
- [00:05:20.320] general rule is if you have characters that to be exactly a certain size or
- [00:05:22.070] that to be exactly a certain size or
- [00:05:22.080] that to be exactly a certain size or rather scale it on your text panel and
- [00:05:24.310] rather scale it on your text panel and
- [00:05:24.320] rather scale it on your text panel and then if it's more free form and you're
- [00:05:26.070] then if it's more free form and you're
- [00:05:26.080] then if it's more free form and you're just doing the overall size of the shape
- [00:05:27.670] just doing the overall size of the shape
- [00:05:27.680] just doing the overall size of the shape then you can always do that just with a
- [00:05:29.350] then you can always do that just with a
- [00:05:29.360] then you can always do that just with a normal transformation.
- [00:05:31.189] normal transformation.
- [00:05:31.199] normal transformation. Okay, next up we've got our layers
- [00:05:33.749] Okay, next up we've got our layers
- [00:05:33.759] Okay, next up we've got our layers panel. Now this is one of those places
- [00:05:36.469] panel. Now this is one of those places
- [00:05:36.479] panel. Now this is one of those places where most people are very intimidated
- [00:05:37.990] where most people are very intimidated
- [00:05:38.000] where most people are very intimidated to use but it is very powerful and very
- [00:05:41.270] to use but it is very powerful and very
- [00:05:41.280] to use but it is very powerful and very handy. And you know if you look at it
- [00:05:43.670] handy. And you know if you look at it
- [00:05:43.680] handy. And you know if you look at it closely you'll realize it's actually
- [00:05:45.189] closely you'll realize it's actually
- [00:05:45.199] closely you'll realize it's actually quite a simple process which is quite
- [00:05:47.029] quite a simple process which is quite
- [00:05:47.039] quite a simple process which is quite natural to understand. So first of all
- [00:05:49.590] natural to understand. So first of all
- [00:05:49.600] natural to understand. So first of all here we've got our actual layers. We've
- [00:05:52.790] here we've got our actual layers. We've
- [00:05:52.800] here we've got our actual layers. We've got a little eye. We can show and hide
- [00:05:55.430] got a little eye. We can show and hide
- [00:05:55.440] got a little eye. We can show and hide layers. Now if we remove all of these
- [00:05:58.230] layers. Now if we remove all of these
- [00:05:58.240] layers. Now if we remove all of these I'm going to make example. Let's drag a
- [00:06:00.390] I'm going to make example. Let's drag a
- [00:06:00.400] I'm going to make example. Let's drag a few rectangles on here.
- [00:06:04.550] few rectangles on here.
- [00:06:04.560] few rectangles on here. And we're going to do is just quickly
- [00:06:05.590] And we're going to do is just quickly
- [00:06:05.600] And we're going to do is just quickly change the color so it's just a little
- [00:06:06.790] change the color so it's just a little
- [00:06:06.800] change the color so it's just a little bit more easy to understand what's
- [00:06:08.230] bit more easy to understand what's
- [00:06:08.240] bit more easy to understand what's happening.
- Now imagine these are like form of
- [00:06:17.270] Now imagine these are like form of
- [00:06:17.280] Now imagine these are like form of papers or something like that on your
- [00:06:18.870] papers or something like that on your
- [00:06:18.880] papers or something like that on your desk. So then um just to make it a
- [00:06:21.990] desk. So then um just to make it a
- [00:06:22.000] desk. So then um just to make it a little bit easier to understand. So
- [00:06:23.110] little bit easier to understand. So
- [00:06:23.120] little bit easier to understand. So currently we can see we've got the blue
- [00:06:25.909] currently we can see we've got the blue
- [00:06:25.919] currently we can see we've got the blue on top, the green one in the middle and
- [00:06:27.990] on top, the green one in the middle and
- [00:06:28.000] on top, the green one in the middle and the orange one at the back. Now if we go
- [00:06:30.629] the orange one at the back. Now if we go
- [00:06:30.639] the orange one at the back. Now if we go to our layers panels, we can see it's
- [00:06:33.350] to our layers panels, we can see it's
- [00:06:33.360] to our layers panels, we can see it's got the same order. So, we've got the
- [00:06:36.070] got the same order. So, we've got the
- [00:06:36.080] got the same order. So, we've got the blue on top, green in the middle, and
- [00:06:38.230] blue on top, green in the middle, and
- [00:06:38.240] blue on top, green in the middle, and the actual orange or yellow at the back.
- [00:06:42.550] the actual orange or yellow at the back.
- [00:06:42.560] the actual orange or yellow at the back. Now, what we can do is we can obviously
- [00:06:44.790] Now, what we can do is we can obviously
- [00:06:44.800] Now, what we can do is we can obviously adjust the location of these. So, let's
- [00:06:48.070] adjust the location of these. So, let's
- [00:06:48.080] adjust the location of these. So, let's take the orange one and we drag it to
- [00:06:49.670] take the orange one and we drag it to
- [00:06:49.680] take the orange one and we drag it to the top. We simply left click, hold in,
- [00:06:52.230] the top. We simply left click, hold in,
- [00:06:52.240] the top. We simply left click, hold in, and drag it up. Now, you can see on our
- [00:06:55.350] and drag it up. Now, you can see on our
- [00:06:55.360] and drag it up. Now, you can see on our actual canvas or our cutting mat, it has
- [00:06:57.510] actual canvas or our cutting mat, it has
- [00:06:57.520] actual canvas or our cutting mat, it has changed the order. Now, that one is on
- [00:06:59.270] changed the order. Now, that one is on
- [00:06:59.280] changed the order. Now, that one is on top. Blue one's in the middle and the
- [00:07:01.990] top. Blue one's in the middle and the
- [00:07:02.000] top. Blue one's in the middle and the green one at the bottom. Now if we move
- [00:07:03.350] green one at the bottom. Now if we move
- [00:07:03.360] green one at the bottom. Now if we move the blue one to the back, you can see it
- [00:07:05.830] the blue one to the back, you can see it
- [00:07:05.840] the blue one to the back, you can see it has moved it to the back or we can move
- [00:07:08.950] has moved it to the back or we can move
- [00:07:08.960] has moved it to the back or we can move it to the top and then it will adjust
- [00:07:10.790] it to the top and then it will adjust
- [00:07:10.800] it to the top and then it will adjust for us. So it is pretty straightforward
- [00:07:12.950] for us. So it is pretty straightforward
- [00:07:12.960] for us. So it is pretty straightforward if you kind of view it as papers being
- [00:07:14.629] if you kind of view it as papers being
- [00:07:14.639] if you kind of view it as papers being stacked and then your layers tab will be
- [00:07:17.990] stacked and then your layers tab will be
- [00:07:18.000] stacked and then your layers tab will be the orders obviously from the bottom up.
- [00:07:20.710] the orders obviously from the bottom up.
- [00:07:20.720] the orders obviously from the bottom up. So the layer that's the lowest is going
- [00:07:22.230] So the layer that's the lowest is going
- [00:07:22.240] So the layer that's the lowest is going to be the lowest on your actual design.
- [00:07:25.189] to be the lowest on your actual design.
- [00:07:25.199] to be the lowest on your actual design. Now we can also do this by right
- [00:07:27.110] Now we can also do this by right
- [00:07:27.120] Now we can also do this by right clicking. We go to arrange and then we
- [00:07:29.270] clicking. We go to arrange and then we
- [00:07:29.280] clicking. We go to arrange and then we can go send forward,
- [00:07:32.150] can go send forward,
- [00:07:32.160] can go send forward, send to front, send backwards, send to
- [00:07:34.710] send to front, send backwards, send to
- [00:07:34.720] send to front, send backwards, send to back. What that comes down to is the
- [00:07:37.270] back. What that comes down to is the
- [00:07:37.280] back. What that comes down to is the send to back or send this layer all the
- [00:07:39.749] send to back or send this layer all the
- [00:07:39.759] send to back or send this layer all the way to the back. Where something like
- [00:07:41.350] way to the back. Where something like
- [00:07:41.360] way to the back. Where something like the send back or the bring forward will
- [00:07:44.230] the send back or the bring forward will
- [00:07:44.240] the send back or the bring forward will only take it one layer at a time. So if
- [00:07:46.710] only take it one layer at a time. So if
- [00:07:46.720] only take it one layer at a time. So if you don't want to take it all the way to
- [00:07:47.749] you don't want to take it all the way to
- [00:07:47.759] you don't want to take it all the way to the back, all the way to the front, you
- [00:07:49.110] the back, all the way to the front, you
- [00:07:49.120] the back, all the way to the front, you just go one of those. I personally
- [00:07:51.990] just go one of those. I personally
- [00:07:52.000] just go one of those. I personally prefer using layers as um it kind of
- [00:07:54.790] prefer using layers as um it kind of
- [00:07:54.800] prefer using layers as um it kind of makes more sense and it's easy for me to
- [00:07:57.510] makes more sense and it's easy for me to
- [00:07:57.520] makes more sense and it's easy for me to monitor what the order is of them. So
- [00:08:01.350] monitor what the order is of them. So
- [00:08:01.360] monitor what the order is of them. So now if we had to go here on the far
- [00:08:02.950] now if we had to go here on the far
- [00:08:02.960] now if we had to go here on the far right and we double click, we can
- [00:08:04.710] right and we double click, we can
- [00:08:04.720] right and we double click, we can actually set up a few different options,
- [00:08:06.869] actually set up a few different options,
- [00:08:06.879] actually set up a few different options, but some of it you can just set up
- [00:08:08.869] but some of it you can just set up
- [00:08:08.879] but some of it you can just set up straight from the actual layer without
- [00:08:10.550] straight from the actual layer without
- [00:08:10.560] straight from the actual layer without going to the properties. Like if we had
- [00:08:12.629] going to the properties. Like if we had
- [00:08:12.639] going to the properties. Like if we had to click the lock here, you can see now
- [00:08:14.150] to click the lock here, you can see now
- [00:08:14.160] to click the lock here, you can see now that green layer is going to be locked
- [00:08:15.990] that green layer is going to be locked
- [00:08:16.000] that green layer is going to be locked and we actually cannot select it or move
- [00:08:18.230] and we actually cannot select it or move
- [00:08:18.240] and we actually cannot select it or move it, which is very nice. If you have a
- [00:08:19.909] it, which is very nice. If you have a
- [00:08:19.919] it, which is very nice. If you have a piece of design, maybe you need to keep
- [00:08:21.749] piece of design, maybe you need to keep
- [00:08:21.759] piece of design, maybe you need to keep at a certain place or maybe it's some
- [00:08:24.070] at a certain place or maybe it's some
- [00:08:24.080] at a certain place or maybe it's some guides or templates. You can just lock
- [00:08:25.830] guides or templates. You can just lock
- [00:08:25.840] guides or templates. You can just lock that and you know you cannot
- [00:08:27.110] that and you know you cannot
- [00:08:27.120] that and you know you cannot accidentally edit them or move them.
- [00:08:30.070] accidentally edit them or move them.
- [00:08:30.080] accidentally edit them or move them. But then let's double click again. So
- [00:08:31.670] But then let's double click again. So
- [00:08:31.680] But then let's double click again. So now let's look at some other options. So
- [00:08:33.750] now let's look at some other options. So
- [00:08:33.760] now let's look at some other options. So now this is a great place where we can
- [00:08:35.509] now this is a great place where we can
- [00:08:35.519] now this is a great place where we can name our layer. So we call it let's say
- [00:08:37.509] name our layer. So we call it let's say
- [00:08:37.519] name our layer. So we call it let's say green. And I would encourage people
- [00:08:39.029] green. And I would encourage people
- [00:08:39.039] green. And I would encourage people always when you're working with layers,
- [00:08:40.790] always when you're working with layers,
- [00:08:40.800] always when you're working with layers, it's very important to get a good naming
- [00:08:42.630] it's very important to get a good naming
- [00:08:42.640] it's very important to get a good naming order going because it can get quite
- [00:08:44.949] order going because it can get quite
- [00:08:44.959] order going because it can get quite messy if you start getting a lot of
- [00:08:46.790] messy if you start getting a lot of
- [00:08:46.800] messy if you start getting a lot of layers. Then obviously also there's a
- [00:08:48.949] layers. Then obviously also there's a
- [00:08:48.959] layers. Then obviously also there's a little bin button at the bottom where if
- [00:08:50.550] little bin button at the bottom where if
- [00:08:50.560] little bin button at the bottom where if you want to delete the layer. Okay.
- [00:08:52.630] you want to delete the layer. Okay.
- [00:08:52.640] you want to delete the layer. Okay. Well, next up if we go here to the
- [00:08:54.790] Well, next up if we go here to the
- [00:08:54.800] Well, next up if we go here to the actual last panel which is hints. Now
- [00:08:57.590] actual last panel which is hints. Now
- [00:08:57.600] actual last panel which is hints. Now here you can get some basic quick hints
- [00:08:59.590] here you can get some basic quick hints
- [00:08:59.600] here you can get some basic quick hints on different things like tools and so
- [00:09:01.509] on different things like tools and so
- [00:09:01.519] on different things like tools and so forth and you can simply just hit
- [00:09:03.350] forth and you can simply just hit
- [00:09:03.360] forth and you can simply just hit sideways and uh go through the different
- [00:09:06.310] sideways and uh go through the different
- [00:09:06.320] sideways and uh go through the different hints. Okay, so next up we're going to
- [00:09:08.710] hints. Okay, so next up we're going to
- [00:09:08.720] hints. Okay, so next up we're going to be looking at some basic navigation.
- [00:09:11.750] be looking at some basic navigation.
- [00:09:11.760] be looking at some basic navigation. So now when it comes to the program and
- [00:09:13.350] So now when it comes to the program and
- [00:09:13.360] So now when it comes to the program and we want to manipulate the graphics, move
- [00:09:15.509] we want to manipulate the graphics, move
- [00:09:15.519] we want to manipulate the graphics, move around and edit, it's going to be
- [00:09:17.910] around and edit, it's going to be
- [00:09:17.920] around and edit, it's going to be important to understand some of these
- [00:09:19.829] important to understand some of these
- [00:09:19.839] important to understand some of these features or functions as it's going to
- [00:09:22.870] features or functions as it's going to
- [00:09:22.880] features or functions as it's going to make your life way more simple. So first
- [00:09:25.269] make your life way more simple. So first
- [00:09:25.279] make your life way more simple. So first of all, we have the zoom. So if we
- [00:09:27.509] of all, we have the zoom. So if we
- [00:09:27.519] of all, we have the zoom. So if we select the tool here, you can see on top
- [00:09:28.949] select the tool here, you can see on top
- [00:09:28.959] select the tool here, you can see on top we have a few different options. We've
- [00:09:30.949] we have a few different options. We've
- [00:09:30.959] we have a few different options. We've got the basic zoom in and zoom out. Then
- [00:09:33.190] got the basic zoom in and zoom out. Then
- [00:09:33.200] got the basic zoom in and zoom out. Then we've got two other ones. So the one is
- [00:09:34.949] we've got two other ones. So the one is
- [00:09:34.959] we've got two other ones. So the one is a fit to selection
- [00:09:38.310] a fit to selection
- [00:09:38.320] a fit to selection f selection. You'll see whatever is
- [00:09:39.910] f selection. You'll see whatever is
- [00:09:39.920] f selection. You'll see whatever is selected it's going to make it the focal
- [00:09:41.509] selected it's going to make it the focal
- [00:09:41.519] selected it's going to make it the focal point. And then to the right of that we
- [00:09:43.910] point. And then to the right of that we
- [00:09:43.920] point. And then to the right of that we have the zoom to page. So if we click
- [00:09:46.790] have the zoom to page. So if we click
- [00:09:46.800] have the zoom to page. So if we click that or go to the actual canvas or the
- [00:09:49.509] that or go to the actual canvas or the
- [00:09:49.519] that or go to the actual canvas or the cutting mat size and then we can easily
- [00:09:52.150] cutting mat size and then we can easily
- [00:09:52.160] cutting mat size and then we can easily see our entire design. To the right of
- [00:09:54.710] see our entire design. To the right of
- [00:09:54.720] see our entire design. To the right of that we've got a zoom percentage bar. So
- [00:09:57.350] that we've got a zoom percentage bar. So
- [00:09:57.360] that we've got a zoom percentage bar. So if we want to do a custom zoom amount we
- [00:09:59.990] if we want to do a custom zoom amount we
- [00:10:00.000] if we want to do a custom zoom amount we can do that as well.
- [00:10:02.470] can do that as well.
- [00:10:02.480] can do that as well. Okay. So now another way we can also uh
- [00:10:04.870] Okay. So now another way we can also uh
- [00:10:04.880] Okay. So now another way we can also uh navigate this is if we have our zoom
- [00:10:06.870] navigate this is if we have our zoom
- [00:10:06.880] navigate this is if we have our zoom tool selected and we left click or zoom
- [00:10:09.430] tool selected and we left click or zoom
- [00:10:09.440] tool selected and we left click or zoom in and if we could keep shifting and we
- [00:10:12.550] in and if we could keep shifting and we
- [00:10:12.560] in and if we could keep shifting and we left click or zoom out. So we can easily
- [00:10:15.110] left click or zoom out. So we can easily
- [00:10:15.120] left click or zoom out. So we can easily click zoom in and out like that.
- [00:10:19.030] click zoom in and out like that.
- [00:10:19.040] click zoom in and out like that. Now another way we can do let's say we
- [00:10:20.870] Now another way we can do let's say we
- [00:10:20.880] Now another way we can do let's say we don't actually have our zoom tool
- [00:10:22.470] don't actually have our zoom tool
- [00:10:22.480] don't actually have our zoom tool selected at all. Now this is my
- [00:10:24.949] selected at all. Now this is my
- [00:10:24.959] selected at all. Now this is my preferred way but there's a little trick
- [00:10:26.710] preferred way but there's a little trick
- [00:10:26.720] preferred way but there's a little trick to it. with your mouse on the actual
- [00:10:29.190] to it. with your mouse on the actual
- [00:10:29.200] to it. with your mouse on the actual cutting mat. And what you can do is you
- [00:10:32.069] cutting mat. And what you can do is you
- [00:10:32.079] cutting mat. And what you can do is you keep your alt in and then your mouse
- [00:10:34.870] keep your alt in and then your mouse
- [00:10:34.880] keep your alt in and then your mouse wheel up to zoom in and mouse wheel down
- [00:10:37.750] wheel up to zoom in and mouse wheel down
- [00:10:37.760] wheel up to zoom in and mouse wheel down to zoom out.
- [00:10:40.790] to zoom out.
- [00:10:40.800] to zoom out. But keeping in mind when you're pressing
- [00:10:42.710] But keeping in mind when you're pressing
- [00:10:42.720] But keeping in mind when you're pressing alt, it activates your actual top menu.
- [00:10:45.910] alt, it activates your actual top menu.
- [00:10:45.920] alt, it activates your actual top menu. So now this can be tricky when you're
- [00:10:48.230] So now this can be tricky when you're
- [00:10:48.240] So now this can be tricky when you're combining stuff with actual stuff like
- [00:10:50.310] combining stuff with actual stuff like
- [00:10:50.320] combining stuff with actual stuff like panning because if you had to say let's
- [00:10:54.230] panning because if you had to say let's
- [00:10:54.240] panning because if you had to say let's say alt and you zoom in and out and then
- [00:10:56.389] say alt and you zoom in and out and then
- [00:10:56.399] say alt and you zoom in and out and then you press spacebar you can see it opens
- [00:10:58.550] you press spacebar you can see it opens
- [00:10:58.560] you press spacebar you can see it opens that menu. So just keep that in mind.
- [00:11:01.190] that menu. So just keep that in mind.
- [00:11:01.200] that menu. So just keep that in mind. You're going to have to first click
- [00:11:02.630] You're going to have to first click
- [00:11:02.640] You're going to have to first click somewhere to deactivate that menu and
- [00:11:05.670] somewhere to deactivate that menu and
- [00:11:05.680] somewhere to deactivate that menu and then you can do that. Okay. So then next
- [00:11:08.550] then you can do that. Okay. So then next
- [00:11:08.560] then you can do that. Okay. So then next up let's look at actual panning. So
- [00:11:10.550] up let's look at actual panning. So
- [00:11:10.560] up let's look at actual panning. So let's say you are zoomed in close and
- [00:11:12.069] let's say you are zoomed in close and
- [00:11:12.079] let's say you are zoomed in close and you want to move around on the actual
- [00:11:13.430] you want to move around on the actual
- [00:11:13.440] you want to move around on the actual design to see what's happening or work
- [00:11:15.030] design to see what's happening or work
- [00:11:15.040] design to see what's happening or work on different spot. And what you can do
- [00:11:17.269] on different spot. And what you can do
- [00:11:17.279] on different spot. And what you can do is use these scroll bars. You'll find
- [00:11:19.350] is use these scroll bars. You'll find
- [00:11:19.360] is use these scroll bars. You'll find one here at the bottom or one on the
- [00:11:20.790] one here at the bottom or one on the
- [00:11:20.800] one here at the bottom or one on the right. Just see far right. This will do
- [00:11:23.030] right. Just see far right. This will do
- [00:11:23.040] right. Just see far right. This will do the control panel. So use the one on the
- [00:11:25.350] the control panel. So use the one on the
- [00:11:25.360] the control panel. So use the one on the left. So let's say we've got a T
- [00:11:27.430] left. So let's say we've got a T
- [00:11:27.440] left. So let's say we've got a T selected and then we want to focus on
- [00:11:29.430] selected and then we want to focus on
- [00:11:29.440] selected and then we want to focus on that. Then we can simply use the scroll
- [00:11:32.310] that. Then we can simply use the scroll
- [00:11:32.320] that. Then we can simply use the scroll bar. Now we can also use the little hand
- [00:11:35.509] bar. Now we can also use the little hand
- [00:11:35.519] bar. Now we can also use the little hand here at the bottom actual tool. So if we
- [00:11:38.389] here at the bottom actual tool. So if we
- [00:11:38.399] here at the bottom actual tool. So if we select that and then we can simply click
- [00:11:41.269] select that and then we can simply click
- [00:11:41.279] select that and then we can simply click anywhere and pan around. And this is
- [00:11:45.110] anywhere and pan around. And this is
- [00:11:45.120] anywhere and pan around. And this is especially helpful if you zoomed in
- [00:11:46.630] especially helpful if you zoomed in
- [00:11:46.640] especially helpful if you zoomed in quite close.
- [00:11:48.870] quite close.
- [00:11:48.880] quite close. Now another way we can do this, let's
- [00:11:50.870] Now another way we can do this, let's
- [00:11:50.880] Now another way we can do this, let's deselect the actual pan tool. Like you
- [00:11:53.110] deselect the actual pan tool. Like you
- [00:11:53.120] deselect the actual pan tool. Like you can see we have the selection tool. So
- [00:11:55.430] can see we have the selection tool. So
- [00:11:55.440] can see we have the selection tool. So now what we can do is we can zoom in
- [00:11:56.870] now what we can do is we can zoom in
- [00:11:56.880] now what we can do is we can zoom in with alt. Then if we keep spacebar then
- [00:12:00.710] with alt. Then if we keep spacebar then
- [00:12:00.720] with alt. Then if we keep spacebar then we can actually pan in. So while we hold
- [00:12:02.470] we can actually pan in. So while we hold
- [00:12:02.480] we can actually pan in. So while we hold it in you can see there we can pan. But
- [00:12:04.870] it in you can see there we can pan. But
- [00:12:04.880] it in you can see there we can pan. But like I said, keep in mind when you use
- [00:12:06.150] like I said, keep in mind when you use
- [00:12:06.160] like I said, keep in mind when you use alt, it's going to activate the top
- [00:12:07.350] alt, it's going to activate the top
- [00:12:07.360] alt, it's going to activate the top menu. So just click off after you've
- [00:12:10.470] menu. So just click off after you've
- [00:12:10.480] menu. So just click off after you've zoomed and then use spacebar. It's a bit
- [00:12:12.629] zoomed and then use spacebar. It's a bit
- [00:12:12.639] zoomed and then use spacebar. It's a bit of a workflow to get used to, but um I
- [00:12:15.990] of a workflow to get used to, but um I
- [00:12:16.000] of a workflow to get used to, but um I still prefer this as it's way quicker
- [00:12:17.509] still prefer this as it's way quicker
- [00:12:17.519] still prefer this as it's way quicker for me than um switching manually to the
- [00:12:20.389] for me than um switching manually to the
- [00:12:20.399] for me than um switching manually to the different tools.
- [00:12:22.949] different tools.
- [00:12:22.959] different tools. As you can see here, it's very handy
- [00:12:24.310] As you can see here, it's very handy
- [00:12:24.320] As you can see here, it's very handy when you close.
- [00:12:27.030] when you close.
- [00:12:27.040] when you close. Okay, next up, we're going to be looking
- [00:12:28.710] Okay, next up, we're going to be looking
- [00:12:28.720] Okay, next up, we're going to be looking at the library feature.
- [00:12:31.829] at the library feature.
- [00:12:31.839] at the library feature. So now to open it, what we want to do is
- [00:12:34.389] So now to open it, what we want to do is
- [00:12:34.399] So now to open it, what we want to do is go to the top bar here on our top main
- [00:12:36.629] go to the top bar here on our top main
- [00:12:36.639] go to the top bar here on our top main features bar and click the library. So
- [00:12:39.030] features bar and click the library. So
- [00:12:39.040] features bar and click the library. So if it's not open, you can do that. Just
- [00:12:41.269] if it's not open, you can do that. Just
- [00:12:41.279] if it's not open, you can do that. Just scale this bigger. Now this is a great
- [00:12:43.910] scale this bigger. Now this is a great
- [00:12:43.920] scale this bigger. Now this is a great place where you can find like uh
- [00:12:46.949] place where you can find like uh
- [00:12:46.959] place where you can find like uh pre-made shapes and logos and stuff like
- [00:12:50.150] pre-made shapes and logos and stuff like
- [00:12:50.160] pre-made shapes and logos and stuff like that. So it's kind of like a form of
- [00:12:52.069] that. So it's kind of like a form of
- [00:12:52.079] that. So it's kind of like a form of database or that's what call it
- [00:12:53.750] database or that's what call it
- [00:12:53.760] database or that's what call it obviously a library. So it can also be a
- [00:12:56.470] obviously a library. So it can also be a
- [00:12:56.480] obviously a library. So it can also be a very nice starting point.
- [00:12:59.269] very nice starting point.
- [00:12:59.279] very nice starting point. Now there's three tabs here. So we've
- [00:13:00.870] Now there's three tabs here. So we've
- [00:13:00.880] Now there's three tabs here. So we've got shapes, fonts, and projects.
- [00:13:03.670] got shapes, fonts, and projects.
- [00:13:03.680] got shapes, fonts, and projects. So obviously the shapes will be shapes,
- [00:13:05.509] So obviously the shapes will be shapes,
- [00:13:05.519] So obviously the shapes will be shapes, fonts will be anything text related. So
- [00:13:07.430] fonts will be anything text related. So
- [00:13:07.440] fonts will be anything text related. So that's also where you can pull in
- [00:13:08.629] that's also where you can pull in
- [00:13:08.639] that's also where you can pull in special characters and so forth, which
- [00:13:11.590] special characters and so forth, which
- [00:13:11.600] special characters and so forth, which is handy. And projects, you can actually
- [00:13:13.190] is handy. And projects, you can actually
- [00:13:13.200] is handy. And projects, you can actually save a form of template or come here and
- [00:13:15.350] save a form of template or come here and
- [00:13:15.360] save a form of template or come here and open your projects and drag them in
- [00:13:16.870] open your projects and drag them in
- [00:13:16.880] open your projects and drag them in here. We're just going to be focusing on
- [00:13:18.550] here. We're just going to be focusing on
- [00:13:18.560] here. We're just going to be focusing on shape. So let's say you have a custom
- [00:13:20.150] shape. So let's say you have a custom
- [00:13:20.160] shape. So let's say you have a custom shape saved here or a logo which you use
- [00:13:22.310] shape saved here or a logo which you use
- [00:13:22.320] shape saved here or a logo which you use a lot on your designs. Then you can
- [00:13:23.990] a lot on your designs. Then you can
- [00:13:24.000] a lot on your designs. Then you can simply come to the library and just put
- [00:13:25.750] simply come to the library and just put
- [00:13:25.760] simply come to the library and just put it in.
- [00:13:27.509] it in.
- [00:13:27.519] it in. You simply click on it and it will put
- [00:13:29.509] You simply click on it and it will put
- [00:13:29.519] You simply click on it and it will put it in. and then you scale it to the size
- [00:13:31.350] it in. and then you scale it to the size
- [00:13:31.360] it in. and then you scale it to the size you need.
- Now if we open the layers here, you can
- [00:13:36.470] Now if we open the layers here, you can
- [00:13:36.480] Now if we open the layers here, you can see the shape actually consists of three
- [00:13:38.230] see the shape actually consists of three
- [00:13:38.240] see the shape actually consists of three different layers. So the actual library
- [00:13:41.990] different layers. So the actual library
- [00:13:42.000] different layers. So the actual library can save like multiple shapes into one
- [00:13:44.710] can save like multiple shapes into one
- [00:13:44.720] can save like multiple shapes into one group.
- [00:13:46.470] group.
- [00:13:46.480] group. Now also like I said this is a great
- [00:13:48.870] Now also like I said this is a great
- [00:13:48.880] Now also like I said this is a great place as a starting point. So maybe you
- [00:13:50.550] place as a starting point. So maybe you
- [00:13:50.560] place as a starting point. So maybe you want to put in some unique shapes and
- [00:13:53.269] want to put in some unique shapes and
- [00:13:53.279] want to put in some unique shapes and then you can build upon that.
- [00:13:56.389] then you can build upon that.
- [00:13:56.399] then you can build upon that. Then another nice one is let's say
- [00:13:58.069] Then another nice one is let's say
- [00:13:58.079] Then another nice one is let's say there's a shape or a type of thing you
- [00:13:59.990] there's a shape or a type of thing you
- [00:14:00.000] there's a shape or a type of thing you use often like I said a logo then if you
- [00:14:02.230] use often like I said a logo then if you
- [00:14:02.240] use often like I said a logo then if you locate it you simply right click it and
- [00:14:04.230] locate it you simply right click it and
- [00:14:04.240] locate it you simply right click it and you can add it to your favorites. Then
- [00:14:06.470] you can add it to your favorites. Then
- [00:14:06.480] you can add it to your favorites. Then if you go to your favorites you can see
- [00:14:07.910] if you go to your favorites you can see
- [00:14:07.920] if you go to your favorites you can see it's there. Just click it normal left
- [00:14:10.550] it's there. Just click it normal left
- [00:14:10.560] it's there. Just click it normal left click and that will put it in your
- [00:14:12.790] click and that will put it in your
- [00:14:12.800] click and that will put it in your actual project.
- [00:14:15.910] actual project.
- [00:14:15.920] actual project. Okay. Well that concludes the basic UI.
- [00:14:18.230] Okay. Well that concludes the basic UI.
- [00:14:18.240] Okay. Well that concludes the basic UI. I hope you guys enjoyed and I'll check
- [00:14:19.430] I hope you guys enjoyed and I'll check
- [00:14:19.440] I hope you guys enjoyed and I'll check you guys in the next one.
Keyframes
- /workspace/academy/media/1rphoKaEb-YC8z98m3ceG-qQ4ziGie65e/keyframes/last.jpg
- /workspace/academy/media/1rphoKaEb-YC8z98m3ceG-qQ4ziGie65e/keyframes/t004.jpg
- /workspace/academy/media/1rphoKaEb-YC8z98m3ceG-qQ4ziGie65e/keyframes/t007.jpg
- /workspace/academy/media/1rphoKaEb-YC8z98m3ceG-qQ4ziGie65e/keyframes/t011.jpg
- /workspace/academy/media/1rphoKaEb-YC8z98m3ceG-qQ4ziGie65e/keyframes/t015.jpg
- /workspace/academy/media/1rphoKaEb-YC8z98m3ceG-qQ4ziGie65e/keyframes/t019.jpg
- /workspace/academy/media/1rphoKaEb-YC8z98m3ceG-qQ4ziGie65e/keyframes/t022.jpg
- /workspace/academy/media/1rphoKaEb-YC8z98m3ceG-qQ4ziGie65e/keyframes/t026.jpg
- /workspace/academy/media/1rphoKaEb-YC8z98m3ceG-qQ4ziGie65e/keyframes/t030.jpg
- /workspace/academy/media/1rphoKaEb-YC8z98m3ceG-qQ4ziGie65e/keyframes/t034.jpg
- /workspace/academy/media/1rphoKaEb-YC8z98m3ceG-qQ4ziGie65e/keyframes/t037.jpg
- /workspace/academy/media/1rphoKaEb-YC8z98m3ceG-qQ4ziGie65e/keyframes/t041.jpg
- /workspace/academy/media/1rphoKaEb-YC8z98m3ceG-qQ4ziGie65e/keyframes/t045.jpg
- /workspace/academy/media/1rphoKaEb-YC8z98m3ceG-qQ4ziGie65e/keyframes/t049.jpg
- /workspace/academy/media/1rphoKaEb-YC8z98m3ceG-qQ4ziGie65e/keyframes/t052.jpg
- /workspace/academy/media/1rphoKaEb-YC8z98m3ceG-qQ4ziGie65e/keyframes/t056.jpg
- /workspace/academy/media/1rphoKaEb-YC8z98m3ceG-qQ4ziGie65e/keyframes/t060.jpg
- /workspace/academy/media/1rphoKaEb-YC8z98m3ceG-qQ4ziGie65e/keyframes/t064.jpg
- /workspace/academy/media/1rphoKaEb-YC8z98m3ceG-qQ4ziGie65e/keyframes/t067.jpg
- /workspace/academy/media/1rphoKaEb-YC8z98m3ceG-qQ4ziGie65e/keyframes/t071.jpg
- /workspace/academy/media/1rphoKaEb-YC8z98m3ceG-qQ4ziGie65e/keyframes/t075.jpg
- /workspace/academy/media/1rphoKaEb-YC8z98m3ceG-qQ4ziGie65e/keyframes/t079.jpg
- /workspace/academy/media/1rphoKaEb-YC8z98m3ceG-qQ4ziGie65e/keyframes/t082.jpg
- /workspace/academy/media/1rphoKaEb-YC8z98m3ceG-qQ4ziGie65e/keyframes/t086.jpg
18. Cutters
- title: Cutters
- status: publish
- author: 0
- is_previewable: (empty)
- video_duration: 0h 13m 14s (raw {"hours":0,"minutes":13,"seconds":14})
- video_source_type: embedded
- drive_file_id:
1gTyUEYzHetLNWvNCvatBjrupVskh4v5Z(source_ref; not a public link) - transcript pending / keyframes pending / presentation extract pending
- video_source_url: (Drive preview omitted as a public link; file id kept as source_ref)
In this lesson we going to be looking at cutters within VinylCut 5.
- quizzes_following_this_lesson: 1 (full text in Quizzes)
- Cutter (8 questions)
Drive extract
- file_id:
1gTyUEYzHetLNWvNCvatBjrupVskh4v5Z - filename: 03 - SWVC - Cutters.mp4
- kind: video
- local_path: /workspace/academy/media/1gTyUEYzHetLNWvNCvatBjrupVskh4v5Z/03 - SWVC - Cutters.mp4
- source_ref: drive
1gTyUEYzHetLNWvNCvatBjrupVskh4v5Z· content_length 140709366 · original https://drive.google.com/file/d/1gTyUEYzHetLNWvNCvatBjrupVskh4v5Z/view - extract_status: done
- caption_source: drive_timedtext
- duration_s: 793.703991
- keyframe_count: 24
Transcript
- Howdy guys. Okay, this next topic we're
- [00:00:02.470] Howdy guys. Okay, this next topic we're
- [00:00:02.480] Howdy guys. Okay, this next topic we're going to be looking at stuff related to
- [00:00:04.550] going to be looking at stuff related to
- [00:00:04.560] going to be looking at stuff related to cutters within the software.
- [00:00:07.990] cutters within the software.
- [00:00:08.000] cutters within the software. So, first of all, we're going to be
- [00:00:09.350] So, first of all, we're going to be
- [00:00:09.360] So, first of all, we're going to be looking at how to add a vinyl cutter to
- [00:00:11.830] looking at how to add a vinyl cutter to
- [00:00:11.840] looking at how to add a vinyl cutter to vinyl cut.
- [00:00:13.749] vinyl cut.
- [00:00:13.759] vinyl cut. Now, something that's important to
- [00:00:15.430] Now, something that's important to
- [00:00:15.440] Now, something that's important to understand when we want to add a cutter
- [00:00:17.510] understand when we want to add a cutter
- [00:00:17.520] understand when we want to add a cutter to vinyl cut is we need to know what
- [00:00:19.670] to vinyl cut is we need to know what
- [00:00:19.680] to vinyl cut is we need to know what vinyl cutter we have and what model that
- [00:00:22.310] vinyl cutter we have and what model that
- [00:00:22.320] vinyl cutter we have and what model that is.
- [00:00:23.990] is.
- [00:00:24.000] is. Now what we can do is we don't have a
- [00:00:26.070] Now what we can do is we don't have a
- [00:00:26.080] Now what we can do is we don't have a cutter yet added. We can just simply go
- [00:00:27.910] cutter yet added. We can just simply go
- [00:00:27.920] cutter yet added. We can just simply go here on our main features bar and click
- [00:00:30.710] here on our main features bar and click
- [00:00:30.720] here on our main features bar and click on the cutter. And this will give us an
- [00:00:32.870] on the cutter. And this will give us an
- [00:00:32.880] on the cutter. And this will give us an option to add a new cutter. But let's
- [00:00:35.350] option to add a new cutter. But let's
- [00:00:35.360] option to add a new cutter. But let's say you already have a cutter added but
- [00:00:37.190] say you already have a cutter added but
- [00:00:37.200] say you already have a cutter added but you want to add another one. Then what
- [00:00:38.950] you want to add another one. Then what
- [00:00:38.960] you want to add another one. Then what you want to do is you want to go to the
- [00:00:40.069] you want to do is you want to go to the
- [00:00:40.079] you want to do is you want to go to the main menu on top go to cutter. Then we
- [00:00:42.630] main menu on top go to cutter. Then we
- [00:00:42.640] main menu on top go to cutter. Then we go to my cutter and say manage cutter or
- [00:00:46.150] go to my cutter and say manage cutter or
- [00:00:46.160] go to my cutter and say manage cutter or manage cutters. Then we'll be able to
- [00:00:48.790] manage cutters. Then we'll be able to
- [00:00:48.800] manage cutters. Then we'll be able to add another cutter. Now it is important
- [00:00:51.670] add another cutter. Now it is important
- [00:00:51.680] add another cutter. Now it is important to go here under brands and then what we
- [00:00:53.910] to go here under brands and then what we
- [00:00:53.920] to go here under brands and then what we do is we select our cutter in question
- [00:00:56.549] do is we select our cutter in question
- [00:00:56.559] do is we select our cutter in question or the brand. Okay. Now to get the name
- [00:00:59.430] or the brand. Okay. Now to get the name
- [00:00:59.440] or the brand. Okay. Now to get the name and model of the cutter there's a few
- [00:01:01.110] and model of the cutter there's a few
- [00:01:01.120] and model of the cutter there's a few ways we can go about it. Some cutter
- [00:01:02.869] ways we can go about it. Some cutter
- [00:01:02.879] ways we can go about it. Some cutter models you can actually use the LED
- [00:01:04.869] models you can actually use the LED
- [00:01:04.879] models you can actually use the LED display to see what it is and other ones
- [00:01:07.670] display to see what it is and other ones
- [00:01:07.680] display to see what it is and other ones you might have to hear by support or
- [00:01:09.429] you might have to hear by support or
- [00:01:09.439] you might have to hear by support or look at your invoice and see what you
- [00:01:11.190] look at your invoice and see what you
- [00:01:11.200] look at your invoice and see what you bought. Now on this model we can see it
- [00:01:13.510] bought. Now on this model we can see it
- [00:01:13.520] bought. Now on this model we can see it on LCD. So what we're going to do is
- [00:01:15.030] on LCD. So what we're going to do is
- [00:01:15.040] on LCD. So what we're going to do is we're going to go to our actual cutter.
- [00:01:17.670] we're going to go to our actual cutter.
- [00:01:17.680] we're going to go to our actual cutter. Then we're going to simply hit the reset
- [00:01:19.429] Then we're going to simply hit the reset
- [00:01:19.439] Then we're going to simply hit the reset button as you guys might remember from
- [00:01:21.749] button as you guys might remember from
- [00:01:21.759] button as you guys might remember from the previous section.
- [00:01:23.749] the previous section.
- [00:01:23.759] the previous section. And then it might help if you maybe
- [00:01:25.670] And then it might help if you maybe
- [00:01:25.680] And then it might help if you maybe record this so afterwards you can pause
- [00:01:27.590] record this so afterwards you can pause
- [00:01:27.600] record this so afterwards you can pause it in case it goes past too fast. Then
- [00:01:30.390] it in case it goes past too fast. Then
- [00:01:30.400] it in case it goes past too fast. Then you can actually monitor what you have.
- [00:01:33.190] you can actually monitor what you have.
- [00:01:33.200] you can actually monitor what you have. So in our case I'm going to go press
- [00:01:34.630] So in our case I'm going to go press
- [00:01:34.640] So in our case I'm going to go press reset and you'll see it's going to pop
- [00:01:36.870] reset and you'll see it's going to pop
- [00:01:36.880] reset and you'll see it's going to pop up there with the model. If we pause
- [00:01:39.190] up there with the model. If we pause
- [00:01:39.200] up there with the model. If we pause here you can see we've got the model
- [00:01:40.789] here you can see we've got the model
- [00:01:40.799] here you can see we've got the model there and so forth.
- [00:01:44.230] there and so forth.
- [00:01:44.240] there and so forth. So now this is going to give us good
- [00:01:45.670] So now this is going to give us good
- [00:01:45.680] So now this is going to give us good information. So when we actually go, so
- [00:01:47.830] information. So when we actually go, so
- [00:01:47.840] information. So when we actually go, so we can see there we've got the am.co.za,
- [00:01:51.350] we can see there we've got the am.co.za,
- [00:01:51.360] we can see there we've got the am.co.za, then we've got the V3 + 1350.
- [00:01:57.270] then we've got the V3 + 1350.
- [00:01:57.280] then we've got the V3 + 1350. So maybe write that down somewhere. So
- [00:01:59.109] So maybe write that down somewhere. So
- [00:01:59.119] So maybe write that down somewhere. So then at least you know what it is. So
- [00:02:01.270] then at least you know what it is. So
- [00:02:01.280] then at least you know what it is. So now if we had to head into the program
- [00:02:03.030] now if we had to head into the program
- [00:02:03.040] now if we had to head into the program here, we know, okay, it was a AM. C.ZA.
- [00:02:07.190] here, we know, okay, it was a AM. C.ZA.
- [00:02:07.200] here, we know, okay, it was a AM. C.ZA. So we'll go to that one for the model.
- [00:02:10.150] So we'll go to that one for the model.
- [00:02:10.160] So we'll go to that one for the model. Now we had the V3 Plus. I'm just going
- [00:02:12.229] Now we had the V3 Plus. I'm just going
- [00:02:12.239] Now we had the V3 Plus. I'm just going to add the V360 as we going to run a few
- [00:02:15.990] to add the V360 as we going to run a few
- [00:02:16.000] to add the V360 as we going to run a few different samples. So I'm just going to
- [00:02:18.630] different samples. So I'm just going to
- [00:02:18.640] different samples. So I'm just going to click here add cut add to list. This is
- [00:02:20.949] click here add cut add to list. This is
- [00:02:20.959] click here add cut add to list. This is important otherwise it's not going to
- [00:02:22.630] important otherwise it's not going to
- [00:02:22.640] important otherwise it's not going to actually commit it. And how you know
- [00:02:24.790] actually commit it. And how you know
- [00:02:24.800] actually commit it. And how you know that you actually have a cut added is
- [00:02:26.710] that you actually have a cut added is
- [00:02:26.720] that you actually have a cut added is you'll see our blue outline on our
- [00:02:29.270] you'll see our blue outline on our
- [00:02:29.280] you'll see our blue outline on our cutting mat will change to dark gray.
- [00:02:32.710] cutting mat will change to dark gray.
- [00:02:32.720] cutting mat will change to dark gray. Then now if we had to click on the
- [00:02:34.309] Then now if we had to click on the
- [00:02:34.319] Then now if we had to click on the cutter you will see suddenly we have new
- [00:02:36.550] cutter you will see suddenly we have new
- [00:02:36.560] cutter you will see suddenly we have new options. It doesn't prompt us anymore to
- [00:02:38.390] options. It doesn't prompt us anymore to
- [00:02:38.400] options. It doesn't prompt us anymore to add a cutter, but now we actually set up
- [00:02:40.470] add a cutter, but now we actually set up
- [00:02:40.480] add a cutter, but now we actually set up this cutter, how it's going to be
- [00:02:41.750] this cutter, how it's going to be
- [00:02:41.760] this cutter, how it's going to be operating.
- [00:02:43.350] operating.
- [00:02:43.360] operating. But yeah, I'm going to cancel this. And
- [00:02:44.790] But yeah, I'm going to cancel this. And
- [00:02:44.800] But yeah, I'm going to cancel this. And then in the next one, we're going to go
- [00:02:46.070] then in the next one, we're going to go
- [00:02:46.080] then in the next one, we're going to go into some more depth on the actual
- [00:02:47.990] into some more depth on the actual
- [00:02:48.000] into some more depth on the actual settings relevant.
- [00:02:50.309] settings relevant.
- [00:02:50.319] settings relevant. Okay. So now in this next section, we're
- [00:02:52.070] Okay. So now in this next section, we're
- [00:02:52.080] Okay. So now in this next section, we're going to be looking at some cut
- [00:02:53.589] going to be looking at some cut
- [00:02:53.599] going to be looking at some cut settings, some handy ones that it's good
- [00:02:56.309] settings, some handy ones that it's good
- [00:02:56.319] settings, some handy ones that it's good to be aware of.
- [00:02:58.550] to be aware of.
- [00:02:58.560] to be aware of. So now, first of all, we have our design
- [00:03:00.070] So now, first of all, we have our design
- [00:03:00.080] So now, first of all, we have our design here. So if I go here to the cutter
- [00:03:02.550] here. So if I go here to the cutter
- [00:03:02.560] here. So if I go here to the cutter feature
- [00:03:04.070] feature
- [00:03:04.080] feature and then you where we met by this
- [00:03:06.869] and then you where we met by this
- [00:03:06.879] and then you where we met by this window, I'm just going to scale it a bit
- [00:03:08.070] window, I'm just going to scale it a bit
- [00:03:08.080] window, I'm just going to scale it a bit bigger so you can see more things. Now
- [00:03:11.190] bigger so you can see more things. Now
- [00:03:11.200] bigger so you can see more things. Now right off the top here, we've got a few
- [00:03:13.190] right off the top here, we've got a few
- [00:03:13.200] right off the top here, we've got a few different tabs with different options
- [00:03:15.110] different tabs with different options
- [00:03:15.120] different tabs with different options under each one. Now under the general
- [00:03:17.990] under each one. Now under the general
- [00:03:18.000] under each one. Now under the general one, what is important here is your
- [00:03:19.910] one, what is important here is your
- [00:03:19.920] one, what is important here is your cutter model. Now this should be right
- [00:03:22.229] cutter model. Now this should be right
- [00:03:22.239] cutter model. Now this should be right or correct if you did set it up, but
- [00:03:23.910] or correct if you did set it up, but
- [00:03:23.920] or correct if you did set it up, but let's say you've got multiple cutters
- [00:03:25.190] let's say you've got multiple cutters
- [00:03:25.200] let's say you've got multiple cutters running, then you might want to change
- [00:03:26.309] running, then you might want to change
- [00:03:26.319] running, then you might want to change it here. Then next up we've got the
- [00:03:29.030] it here. Then next up we've got the
- [00:03:29.040] it here. Then next up we've got the connection. So this will be selecting
- [00:03:31.190] connection. So this will be selecting
- [00:03:31.200] connection. So this will be selecting which type of connection are we using
- [00:03:33.350] which type of connection are we using
- [00:03:33.360] which type of connection are we using whether it's a com and so forth. But
- [00:03:35.430] whether it's a com and so forth. But
- [00:03:35.440] whether it's a com and so forth. But we're just going to go with USB.
- [00:03:38.070] we're just going to go with USB.
- [00:03:38.080] we're just going to go with USB. Then another important thing here is the
- [00:03:40.229] Then another important thing here is the
- [00:03:40.239] Then another important thing here is the test connection. But in order to do that
- [00:03:42.710] test connection. But in order to do that
- [00:03:42.720] test connection. But in order to do that you obviously want to make sure your
- [00:03:44.070] you obviously want to make sure your
- [00:03:44.080] you obviously want to make sure your printer is properly plugged in.
- [00:03:46.070] printer is properly plugged in.
- [00:03:46.080] printer is properly plugged in. Otherwise this will not work on both
- [00:03:48.229] Otherwise this will not work on both
- [00:03:48.239] Otherwise this will not work on both your machine and the computer. Then if
- [00:03:51.350] your machine and the computer. Then if
- [00:03:51.360] your machine and the computer. Then if we had to click this test connection, we
- [00:03:53.750] we had to click this test connection, we
- [00:03:53.760] we had to click this test connection, we will see our machine do some form of
- [00:03:56.390] will see our machine do some form of
- [00:03:56.400] will see our machine do some form of response to let us know that it is
- [00:03:58.789] response to let us know that it is
- [00:03:58.799] response to let us know that it is actually connected. It makes a little
- [00:04:02.550] actually connected. It makes a little
- [00:04:02.560] actually connected. It makes a little jitter and then we know okay cool they
- [00:04:05.509] jitter and then we know okay cool they
- [00:04:05.519] jitter and then we know okay cool they have a good connection and that is a
- [00:04:07.030] have a good connection and that is a
- [00:04:07.040] have a good connection and that is a very important one because doesn't help
- [00:04:09.509] very important one because doesn't help
- [00:04:09.519] very important one because doesn't help you try cut and nothing's happening and
- [00:04:11.910] you try cut and nothing's happening and
- [00:04:11.920] you try cut and nothing's happening and you did not test if you're actually
- [00:04:13.670] you did not test if you're actually
- [00:04:13.680] you did not test if you're actually communicating with each other the
- [00:04:15.110] communicating with each other the
- [00:04:15.120] communicating with each other the machine and the computer. Another
- [00:04:17.509] machine and the computer. Another
- [00:04:17.519] machine and the computer. Another important thing which we need to look at
- [00:04:19.110] important thing which we need to look at
- [00:04:19.120] important thing which we need to look at and we'll cover in more depth later is
- [00:04:20.789] and we'll cover in more depth later is
- [00:04:20.799] and we'll cover in more depth later is the cut settings where the origin or cut
- [00:04:23.510] the cut settings where the origin or cut
- [00:04:23.520] the cut settings where the origin or cut mode.
- [00:04:25.110] mode.
- [00:04:25.120] mode. So we have a few different options here.
- [00:04:26.790] So we have a few different options here.
- [00:04:26.800] So we have a few different options here. We have the what you see is what you
- [00:04:28.629] We have the what you see is what you
- [00:04:28.639] We have the what you see is what you get. So that's pretty much going to cut
- [00:04:30.310] get. So that's pretty much going to cut
- [00:04:30.320] get. So that's pretty much going to cut depending on the size of your material
- [00:04:32.310] depending on the size of your material
- [00:04:32.320] depending on the size of your material and your cutting mat. And then under
- [00:04:34.790] and your cutting mat. And then under
- [00:04:34.800] and your cutting mat. And then under there for more specialized we've got the
- [00:04:36.950] there for more specialized we've got the
- [00:04:36.960] there for more specialized we've got the origin point. And this is going to
- [00:04:39.510] origin point. And this is going to
- [00:04:39.520] origin point. And this is going to assign your graphics that you're cutting
- [00:04:41.030] assign your graphics that you're cutting
- [00:04:41.040] assign your graphics that you're cutting to the set origin point. Now, keep in
- [00:04:44.550] to the set origin point. Now, keep in
- [00:04:44.560] to the set origin point. Now, keep in mind this might vary depending on what
- [00:04:46.230] mind this might vary depending on what
- [00:04:46.240] mind this might vary depending on what you've set it on your actual machine,
- [00:04:48.310] you've set it on your actual machine,
- [00:04:48.320] you've set it on your actual machine, but like I mentioned, don't worry too
- [00:04:49.830] but like I mentioned, don't worry too
- [00:04:49.840] but like I mentioned, don't worry too much. We're going to be covering this
- [00:04:50.870] much. We're going to be covering this
- [00:04:50.880] much. We're going to be covering this later. Now, another important feature
- [00:04:53.189] later. Now, another important feature
- [00:04:53.199] later. Now, another important feature here is the cut selection only. So, let
- [00:04:56.550] here is the cut selection only. So, let
- [00:04:56.560] here is the cut selection only. So, let me just cancel here. Let's say we've got
- [00:04:58.150] me just cancel here. Let's say we've got
- [00:04:58.160] me just cancel here. Let's say we've got multiple shapes
- [00:05:00.550] multiple shapes
- [00:05:00.560] multiple shapes and we maybe only want to cut one at a
- [00:05:02.550] and we maybe only want to cut one at a
- [00:05:02.560] and we maybe only want to cut one at a time. Maybe it's different colors we're
- [00:05:03.749] time. Maybe it's different colors we're
- [00:05:03.759] time. Maybe it's different colors we're cutting. Then, what we can do is with
- [00:05:06.629] cutting. Then, what we can do is with
- [00:05:06.639] cutting. Then, what we can do is with that shape selected, you'll see at the
- [00:05:08.790] that shape selected, you'll see at the
- [00:05:08.800] that shape selected, you'll see at the moment we can see both. But as soon as I
- [00:05:11.510] moment we can see both. But as soon as I
- [00:05:11.520] moment we can see both. But as soon as I come and click this cut selection only,
- [00:05:13.510] come and click this cut selection only,
- [00:05:13.520] come and click this cut selection only, it's only going to cut that gray block.
- [00:05:16.150] it's only going to cut that gray block.
- [00:05:16.160] it's only going to cut that gray block. So that's a nice little feature if you
- [00:05:17.670] So that's a nice little feature if you
- [00:05:17.680] So that's a nice little feature if you want to isolate what you want to cut and
- [00:05:19.189] want to isolate what you want to cut and
- [00:05:19.199] want to isolate what you want to cut and what not. For now, we'll just check that
- [00:05:22.070] what not. For now, we'll just check that
- [00:05:22.080] what not. For now, we'll just check that off. And then another nice one here is
- [00:05:23.990] off. And then another nice one here is
- [00:05:24.000] off. And then another nice one here is the mirror options. Now, the main reason
- [00:05:26.870] the mirror options. Now, the main reason
- [00:05:26.880] the mirror options. Now, the main reason why you might want to use something like
- [00:05:28.230] why you might want to use something like
- [00:05:28.240] why you might want to use something like this is depending on your application
- [00:05:30.790] this is depending on your application
- [00:05:30.800] this is depending on your application type or application workflow. So let's
- [00:05:33.029] type or application workflow. So let's
- [00:05:33.039] type or application workflow. So let's say you're going to be sticking vinyls
- [00:05:34.469] say you're going to be sticking vinyls
- [00:05:34.479] say you're going to be sticking vinyls in the inside of a window. Then
- [00:05:36.710] in the inside of a window. Then
- [00:05:36.720] in the inside of a window. Then obviously you need to make sure the
- [00:05:37.990] obviously you need to make sure the
- [00:05:38.000] obviously you need to make sure the sticky side is on the window. So that is
- [00:05:40.550] sticky side is on the window. So that is
- [00:05:40.560] sticky side is on the window. So that is where you'll come and you'll flip this
- [00:05:42.310] where you'll come and you'll flip this
- [00:05:42.320] where you'll come and you'll flip this depending on what you're going for. Then
- [00:05:45.270] depending on what you're going for. Then
- [00:05:45.280] depending on what you're going for. Then most of the other settings will pretty
- [00:05:46.629] most of the other settings will pretty
- [00:05:46.639] most of the other settings will pretty much just be leaving as it is. That is
- [00:05:49.029] much just be leaving as it is. That is
- [00:05:49.039] much just be leaving as it is. That is more for advanced users. Like I said,
- [00:05:50.710] more for advanced users. Like I said,
- [00:05:50.720] more for advanced users. Like I said, we're only going to be looking at what
- [00:05:51.990] we're only going to be looking at what
- [00:05:52.000] we're only going to be looking at what is most relevant for most applications.
- [00:05:55.670] is most relevant for most applications.
- [00:05:55.680] is most relevant for most applications. Then if you're cutting, let's say,
- [00:05:57.350] Then if you're cutting, let's say,
- [00:05:57.360] Then if you're cutting, let's say, single colored vinyls and so forth,
- [00:05:59.590] single colored vinyls and so forth,
- [00:05:59.600] single colored vinyls and so forth, we'll simply just be using the cut
- [00:06:01.350] we'll simply just be using the cut
- [00:06:01.360] we'll simply just be using the cut feature here on the right. Then another
- [00:06:04.390] feature here on the right. Then another
- [00:06:04.400] feature here on the right. Then another option we have here to the left of that
- [00:06:06.629] option we have here to the left of that
- [00:06:06.639] option we have here to the left of that is save to file. So this is if you want
- [00:06:08.870] is save to file. So this is if you want
- [00:06:08.880] is save to file. So this is if you want to maybe do a job based off a flash
- [00:06:11.350] to maybe do a job based off a flash
- [00:06:11.360] to maybe do a job based off a flash drive. So maybe you prepare your job,
- [00:06:13.990] drive. So maybe you prepare your job,
- [00:06:14.000] drive. So maybe you prepare your job, put on a flash drive, give it to a
- [00:06:15.430] put on a flash drive, give it to a
- [00:06:15.440] put on a flash drive, give it to a client that's got a machine and he cuts
- [00:06:17.029] client that's got a machine and he cuts
- [00:06:17.039] client that's got a machine and he cuts it or your workflow is just set up in a
- [00:06:19.430] it or your workflow is just set up in a
- [00:06:19.440] it or your workflow is just set up in a way that you're using flash drives
- [00:06:20.710] way that you're using flash drives
- [00:06:20.720] way that you're using flash drives instead. And then to the left of that is
- [00:06:24.150] instead. And then to the left of that is
- [00:06:24.160] instead. And then to the left of that is our print plus cut. And now that doesn't
- [00:06:26.790] our print plus cut. And now that doesn't
- [00:06:26.800] our print plus cut. And now that doesn't necessarily mean it's going to print it
- [00:06:28.070] necessarily mean it's going to print it
- [00:06:28.080] necessarily mean it's going to print it straight out of your program and cut,
- [00:06:30.309] straight out of your program and cut,
- [00:06:30.319] straight out of your program and cut, but this is for if you're working with
- [00:06:32.150] but this is for if you're working with
- [00:06:32.160] but this is for if you're working with cases where you're using registration
- [00:06:34.070] cases where you're using registration
- [00:06:34.080] cases where you're using registration marks. So like a lot of stickers and so
- [00:06:36.950] marks. So like a lot of stickers and so
- [00:06:36.960] marks. So like a lot of stickers and so forth work like this. So then you can
- [00:06:38.550] forth work like this. So then you can
- [00:06:38.560] forth work like this. So then you can actually have a design of like a photo
- [00:06:40.629] actually have a design of like a photo
- [00:06:40.639] actually have a design of like a photo or something like a raster and then you
- [00:06:43.110] or something like a raster and then you
- [00:06:43.120] or something like a raster and then you make a cut line around it as a form of
- [00:06:47.350] make a cut line around it as a form of
- [00:06:47.360] make a cut line around it as a form of contour or outline.
- [00:06:49.670] contour or outline.
- [00:06:49.680] contour or outline. And then you'll use this feature. You
- [00:06:51.430] And then you'll use this feature. You
- [00:06:51.440] And then you'll use this feature. You will align registration marks and so
- [00:06:53.510] will align registration marks and so
- [00:06:53.520] will align registration marks and so forth. But don't worry, we're going to
- [00:06:55.350] forth. But don't worry, we're going to
- [00:06:55.360] forth. But don't worry, we're going to be covering this in depth as well. Okay,
- [00:06:57.990] be covering this in depth as well. Okay,
- [00:06:58.000] be covering this in depth as well. Okay, next up, we're going to be looking at if
- [00:06:59.589] next up, we're going to be looking at if
- [00:06:59.599] next up, we're going to be looking at if you want to cut by color.
- [00:07:02.550] you want to cut by color.
- [00:07:02.560] you want to cut by color. Now, where the cut by color becomes very
- [00:07:05.189] Now, where the cut by color becomes very
- [00:07:05.199] Now, where the cut by color becomes very useful or needed is when you're working
- [00:07:08.230] useful or needed is when you're working
- [00:07:08.240] useful or needed is when you're working on single colored vinyls. So, in some
- [00:07:12.390] on single colored vinyls. So, in some
- [00:07:12.400] on single colored vinyls. So, in some workflows, you'll be using prints. So,
- [00:07:14.150] workflows, you'll be using prints. So,
- [00:07:14.160] workflows, you'll be using prints. So, you'll be printing like a form of a
- [00:07:16.070] you'll be printing like a form of a
- [00:07:16.080] you'll be printing like a form of a raster type image where other workflows
- [00:07:18.790] raster type image where other workflows
- [00:07:18.800] raster type image where other workflows again you're going to be cutting each
- [00:07:20.790] again you're going to be cutting each
- [00:07:20.800] again you're going to be cutting each shape based off its color. So let's take
- [00:07:24.070] shape based off its color. So let's take
- [00:07:24.080] shape based off its color. So let's take this example. You can see here we've got
- [00:07:26.390] this example. You can see here we've got
- [00:07:26.400] this example. You can see here we've got three different shapes all being three
- [00:07:28.390] three different shapes all being three
- [00:07:28.400] three different shapes all being three different greens. And let's say I've
- [00:07:30.629] different greens. And let's say I've
- [00:07:30.639] different greens. And let's say I've sourced these type of green vinyls and I
- [00:07:33.350] sourced these type of green vinyls and I
- [00:07:33.360] sourced these type of green vinyls and I want to cut each one of these on their
- [00:07:34.790] want to cut each one of these on their
- [00:07:34.800] want to cut each one of these on their own layer or on their own vinyl. Then if
- [00:07:37.589] own layer or on their own vinyl. Then if
- [00:07:37.599] own layer or on their own vinyl. Then if we're just going to be doing the normal
- [00:07:38.950] we're just going to be doing the normal
- [00:07:38.960] we're just going to be doing the normal cut process, what's going to happen is
- [00:07:40.710] cut process, what's going to happen is
- [00:07:40.720] cut process, what's going to happen is it's going to cut them all on the one
- [00:07:43.189] it's going to cut them all on the one
- [00:07:43.199] it's going to cut them all on the one vinyl. Then we're going to put in the
- [00:07:44.469] vinyl. Then we're going to put in the
- [00:07:44.479] vinyl. Then we're going to put in the next one. It's going to cut all the
- [00:07:45.510] next one. It's going to cut all the
- [00:07:45.520] next one. It's going to cut all the shapes on that vinyl. So it's, you know,
- [00:07:47.110] shapes on that vinyl. So it's, you know,
- [00:07:47.120] shapes on that vinyl. So it's, you know, it's wasting. It's not the best
- [00:07:48.870] it's wasting. It's not the best
- [00:07:48.880] it's wasting. It's not the best workflow. Then what we want to do is we
- [00:07:50.870] workflow. Then what we want to do is we
- [00:07:50.880] workflow. Then what we want to do is we want to go here, cut by color.
- [00:07:53.110] want to go here, cut by color.
- [00:07:53.120] want to go here, cut by color. Now it is important that this is shapes.
- [00:07:56.550] Now it is important that this is shapes.
- [00:07:56.560] Now it is important that this is shapes. It's not like a raster image which we'll
- [00:07:58.629] It's not like a raster image which we'll
- [00:07:58.639] It's not like a raster image which we'll be covering later the difference between
- [00:08:00.629] be covering later the difference between
- [00:08:00.639] be covering later the difference between vector and raster. But what that comes
- [00:08:03.189] vector and raster. But what that comes
- [00:08:03.199] vector and raster. But what that comes down to is it is each shape as its own
- [00:08:05.830] down to is it is each shape as its own
- [00:08:05.840] down to is it is each shape as its own color. Then here under cut by color you
- [00:08:07.990] color. Then here under cut by color you
- [00:08:08.000] color. Then here under cut by color you can see we've got those three shapes. So
- [00:08:10.869] can see we've got those three shapes. So
- [00:08:10.879] can see we've got those three shapes. So um we can now easily isolate them. Now
- [00:08:14.070] um we can now easily isolate them. Now
- [00:08:14.080] um we can now easily isolate them. Now we also have some options here. The one
- [00:08:16.230] we also have some options here. The one
- [00:08:16.240] we also have some options here. The one is um cut each color separately or
- [00:08:20.070] is um cut each color separately or
- [00:08:20.080] is um cut each color separately or separate jobs. And then we have one cut
- [00:08:23.110] separate jobs. And then we have one cut
- [00:08:23.120] separate jobs. And then we have one cut all colors single job. This is pretty
- [00:08:26.070] all colors single job. This is pretty
- [00:08:26.080] all colors single job. This is pretty much just going to allow you to control
- [00:08:27.350] much just going to allow you to control
- [00:08:27.360] much just going to allow you to control what happens between these cuts.
- [00:08:30.790] what happens between these cuts.
- [00:08:30.800] what happens between these cuts. Now a safe workflow, what you can do is
- [00:08:33.350] Now a safe workflow, what you can do is
- [00:08:33.360] Now a safe workflow, what you can do is you simply on these side icons. You'll
- [00:08:35.589] you simply on these side icons. You'll
- [00:08:35.599] you simply on these side icons. You'll see it's got a cut all icon. So what
- [00:08:37.670] see it's got a cut all icon. So what
- [00:08:37.680] see it's got a cut all icon. So what you'll do is you'll disable the ones
- [00:08:40.070] you'll do is you'll disable the ones
- [00:08:40.080] you'll do is you'll disable the ones that you don't want to cut, load that
- [00:08:42.230] that you don't want to cut, load that
- [00:08:42.240] that you don't want to cut, load that vinyl color, and then you press cut.
- [00:08:44.790] vinyl color, and then you press cut.
- [00:08:44.800] vinyl color, and then you press cut. Then when you're ready for the next one,
- [00:08:46.230] Then when you're ready for the next one,
- [00:08:46.240] Then when you're ready for the next one, you change the vinyl, only show that
- [00:08:48.630] you change the vinyl, only show that
- [00:08:48.640] you change the vinyl, only show that one. Cut. And then you do the same with
- [00:08:51.030] one. Cut. And then you do the same with
- [00:08:51.040] one. Cut. And then you do the same with the last one. So that way it's only
- [00:08:53.030] the last one. So that way it's only
- [00:08:53.040] the last one. So that way it's only going to be cutting one at a time. You
- [00:08:54.949] going to be cutting one at a time. You
- [00:08:54.959] going to be cutting one at a time. You know, it's not going to be accidentally
- [00:08:56.150] know, it's not going to be accidentally
- [00:08:56.160] know, it's not going to be accidentally cutting another layer over the wrong
- [00:08:57.990] cutting another layer over the wrong
- [00:08:58.000] cutting another layer over the wrong vinyl. Now, there is another way we can
- [00:09:00.550] vinyl. Now, there is another way we can
- [00:09:00.560] vinyl. Now, there is another way we can go about this. Maybe a little bit more
- [00:09:01.829] go about this. Maybe a little bit more
- [00:09:01.839] go about this. Maybe a little bit more messy, but sometimes knowing this
- [00:09:03.750] messy, but sometimes knowing this
- [00:09:03.760] messy, but sometimes knowing this workflow is going to be handy in
- [00:09:05.670] workflow is going to be handy in
- [00:09:05.680] workflow is going to be handy in different scenarios.
- [00:09:07.829] different scenarios.
- [00:09:07.839] different scenarios. So, if I had to select these shapes and
- [00:09:10.389] So, if I had to select these shapes and
- [00:09:10.399] So, if I had to select these shapes and we had to go under the styles panel, we
- [00:09:13.030] we had to go under the styles panel, we
- [00:09:13.040] we had to go under the styles panel, we actually have options here to set these
- [00:09:16.150] actually have options here to set these
- [00:09:16.160] actually have options here to set these individually. So here you can see we
- [00:09:18.070] individually. So here you can see we
- [00:09:18.080] individually. So here you can see we click it, we go to our cut line type and
- [00:09:21.509] click it, we go to our cut line type and
- [00:09:21.519] click it, we go to our cut line type and then we can set it from cut to something
- [00:09:23.030] then we can set it from cut to something
- [00:09:23.040] then we can set it from cut to something else like draw or so. So now if I go on
- [00:09:25.110] else like draw or so. So now if I go on
- [00:09:25.120] else like draw or so. So now if I go on the preview here, we'll just quickly
- [00:09:27.829] the preview here, we'll just quickly
- [00:09:27.839] the preview here, we'll just quickly disable the draw function. So it's only
- [00:09:30.710] disable the draw function. So it's only
- [00:09:30.720] disable the draw function. So it's only going to show what's going to be
- [00:09:31.509] going to show what's going to be
- [00:09:31.519] going to show what's going to be cutting. And now we can see that it's
- [00:09:33.110] cutting. And now we can see that it's
- [00:09:33.120] cutting. And now we can see that it's only cutting the bottom shapes and not
- [00:09:34.949] only cutting the bottom shapes and not
- [00:09:34.959] only cutting the bottom shapes and not the top one. So some workflows, this is
- [00:09:38.310] the top one. So some workflows, this is
- [00:09:38.320] the top one. So some workflows, this is handy if you maybe have a form of guide
- [00:09:40.870] handy if you maybe have a form of guide
- [00:09:40.880] handy if you maybe have a form of guide like you have to follow along with
- [00:09:42.310] like you have to follow along with
- [00:09:42.320] like you have to follow along with measurements and so forth, but you don't
- [00:09:44.470] measurements and so forth, but you don't
- [00:09:44.480] measurements and so forth, but you don't actually want to cut those guides. So
- [00:09:46.070] actually want to cut those guides. So
- [00:09:46.080] actually want to cut those guides. So then you'll put the guides as maybe draw
- [00:09:48.070] then you'll put the guides as maybe draw
- [00:09:48.080] then you'll put the guides as maybe draw only or something on that line and you
- [00:09:50.630] only or something on that line and you
- [00:09:50.640] only or something on that line and you leave your cutting ones at cutting. You
- [00:09:52.710] leave your cutting ones at cutting. You
- [00:09:52.720] leave your cutting ones at cutting. You can obviously also
- [00:09:54.870] can obviously also
- [00:09:54.880] can obviously also switch one layer to cut the rest not
- [00:09:57.110] switch one layer to cut the rest not
- [00:09:57.120] switch one layer to cut the rest not then cut and then swap it. But it's
- [00:09:59.590] then cut and then swap it. But it's
- [00:09:59.600] then cut and then swap it. But it's almost irrelevant if you have a feature
- [00:10:01.030] almost irrelevant if you have a feature
- [00:10:01.040] almost irrelevant if you have a feature called cut by color. Unless obviously
- [00:10:02.790] called cut by color. Unless obviously
- [00:10:02.800] called cut by color. Unless obviously all your shapes are the same color then
- [00:10:04.230] all your shapes are the same color then
- [00:10:04.240] all your shapes are the same color then it's not going to make sense. But it's
- [00:10:06.150] it's not going to make sense. But it's
- [00:10:06.160] it's not going to make sense. But it's easy enough just to change the color of
- [00:10:08.070] easy enough just to change the color of
- [00:10:08.080] easy enough just to change the color of those shapes within the program.
- [00:10:10.630] those shapes within the program.
- [00:10:10.640] those shapes within the program. Okay. Next up we're going to be looking
- [00:10:12.389] Okay. Next up we're going to be looking
- [00:10:12.399] Okay. Next up we're going to be looking at cutting by tiles.
- [00:10:15.509] at cutting by tiles.
- [00:10:15.519] at cutting by tiles. Now, when it comes to the cut by tiles
- [00:10:17.190] Now, when it comes to the cut by tiles
- [00:10:17.200] Now, when it comes to the cut by tiles feature, you might be wondering why you
- [00:10:19.110] feature, you might be wondering why you
- [00:10:19.120] feature, you might be wondering why you might want to do that. Now, in some
- [00:10:21.750] might want to do that. Now, in some
- [00:10:21.760] might want to do that. Now, in some scenarios, you might be working, let's
- [00:10:23.910] scenarios, you might be working, let's
- [00:10:23.920] scenarios, you might be working, let's say, with a very big design. Maybe it
- [00:10:27.110] say, with a very big design. Maybe it
- [00:10:27.120] say, with a very big design. Maybe it has to go on like a big window or gas
- [00:10:29.990] has to go on like a big window or gas
- [00:10:30.000] has to go on like a big window or gas tank or something on that line, then you
- [00:10:33.509] tank or something on that line, then you
- [00:10:33.519] tank or something on that line, then you want to make sure you can get that whole
- [00:10:34.949] want to make sure you can get that whole
- [00:10:34.959] want to make sure you can get that whole design on there. Now, if your machine is
- [00:10:36.949] design on there. Now, if your machine is
- [00:10:36.959] design on there. Now, if your machine is too small or you cannot fit the entirety
- [00:10:39.509] too small or you cannot fit the entirety
- [00:10:39.519] too small or you cannot fit the entirety of that size, then you're going to have
- [00:10:41.750] of that size, then you're going to have
- [00:10:41.760] of that size, then you're going to have to cut that thing in panels or by tiles.
- [00:10:44.550] to cut that thing in panels or by tiles.
- [00:10:44.560] to cut that thing in panels or by tiles. as I said earlier. So what that will
- [00:10:46.630] as I said earlier. So what that will
- [00:10:46.640] as I said earlier. So what that will come down to is it will allow you to cut
- [00:10:48.470] come down to is it will allow you to cut
- [00:10:48.480] come down to is it will allow you to cut different sections of a design in
- [00:10:50.470] different sections of a design in
- [00:10:50.480] different sections of a design in different passes. So that way you can
- [00:10:52.790] different passes. So that way you can
- [00:10:52.800] different passes. So that way you can join them together afterwards. So now if
- [00:10:55.590] join them together afterwards. So now if
- [00:10:55.600] join them together afterwards. So now if we take this shape, let's pretend like
- [00:10:57.030] we take this shape, let's pretend like
- [00:10:57.040] we take this shape, let's pretend like this thing is very big, which it is not,
- [00:10:59.430] this thing is very big, which it is not,
- [00:10:59.440] this thing is very big, which it is not, but you'll still get the idea. So then
- [00:11:02.710] but you'll still get the idea. So then
- [00:11:02.720] but you'll still get the idea. So then what we want to do is we want to go to
- [00:11:04.310] what we want to do is we want to go to
- [00:11:04.320] what we want to do is we want to go to the actual cutter settings
- [00:11:06.949] the actual cutter settings
- [00:11:06.959] the actual cutter settings and then on the top tabs you want to
- [00:11:09.110] and then on the top tabs you want to
- [00:11:09.120] and then on the top tabs you want to navigate to tiles. Now under tiles by
- [00:11:12.310] navigate to tiles. Now under tiles by
- [00:11:12.320] navigate to tiles. Now under tiles by default it's still going to use it as
- [00:11:13.829] default it's still going to use it as
- [00:11:13.839] default it's still going to use it as one tile or it might not even have it
- [00:11:16.550] one tile or it might not even have it
- [00:11:16.560] one tile or it might not even have it active. What we can do then is we can go
- [00:11:18.470] active. What we can do then is we can go
- [00:11:18.480] active. What we can do then is we can go to edit tiles and here we can set up
- [00:11:21.590] to edit tiles and here we can set up
- [00:11:21.600] to edit tiles and here we can set up custom tiles. So at first you have the
- [00:11:24.550] custom tiles. So at first you have the
- [00:11:24.560] custom tiles. So at first you have the base ones here where we can kind of just
- [00:11:26.069] base ones here where we can kind of just
- [00:11:26.079] base ones here where we can kind of just multiply it. So maybe we cut it by two.
- [00:11:28.470] multiply it. So maybe we cut it by two.
- [00:11:28.480] multiply it. So maybe we cut it by two. So now it's going to go cut to one side
- [00:11:30.550] So now it's going to go cut to one side
- [00:11:30.560] So now it's going to go cut to one side and the other side. And then you also
- [00:11:33.030] and the other side. And then you also
- [00:11:33.040] and the other side. And then you also have an option here for overlap. So
- [00:11:34.550] have an option here for overlap. So
- [00:11:34.560] have an option here for overlap. So let's say you don't want to have a seam
- [00:11:36.790] let's say you don't want to have a seam
- [00:11:36.800] let's say you don't want to have a seam where you're trying to puzzle with or
- [00:11:38.710] where you're trying to puzzle with or
- [00:11:38.720] where you're trying to puzzle with or struggle with. Maybe you don't want to
- [00:11:40.310] struggle with. Maybe you don't want to
- [00:11:40.320] struggle with. Maybe you don't want to leave a gap between them. Then you can
- [00:11:41.910] leave a gap between them. Then you can
- [00:11:41.920] leave a gap between them. Then you can have a bit of overlap. So then you're
- [00:11:43.990] have a bit of overlap. So then you're
- [00:11:44.000] have a bit of overlap. So then you're basically sticking your vinyl over the
- [00:11:45.509] basically sticking your vinyl over the
- [00:11:45.519] basically sticking your vinyl over the other vinyl. So that way you have a
- [00:11:47.670] other vinyl. So that way you have a
- [00:11:47.680] other vinyl. So that way you have a clean seam. Now obviously you can do
- [00:11:50.790] clean seam. Now obviously you can do
- [00:11:50.800] clean seam. Now obviously you can do this both on vertical and the horizontal
- [00:11:53.910] this both on vertical and the horizontal
- [00:11:53.920] this both on vertical and the horizontal planes. Same thing with overlap which is
- [00:11:57.350] planes. Same thing with overlap which is
- [00:11:57.360] planes. Same thing with overlap which is handy. Now I'm just going to disable
- [00:11:59.350] handy. Now I'm just going to disable
- [00:11:59.360] handy. Now I'm just going to disable these. Now we have another option here
- [00:12:01.430] these. Now we have another option here
- [00:12:01.440] these. Now we have another option here called custom. Nice thing about this is
- [00:12:04.310] called custom. Nice thing about this is
- [00:12:04.320] called custom. Nice thing about this is now you can add your own custom shapes.
- [00:12:07.269] now you can add your own custom shapes.
- [00:12:07.279] now you can add your own custom shapes. Now let's say you're working with
- [00:12:08.470] Now let's say you're working with
- [00:12:08.480] Now let's say you're working with something like a window with multiple
- [00:12:09.910] something like a window with multiple
- [00:12:09.920] something like a window with multiple panels and that then you can customly
- [00:12:12.470] panels and that then you can customly
- [00:12:12.480] panels and that then you can customly can put in different shapes and so
- [00:12:14.710] can put in different shapes and so
- [00:12:14.720] can put in different shapes and so forth. Now we have a few different
- [00:12:16.949] forth. Now we have a few different
- [00:12:16.959] forth. Now we have a few different options. So we have the straight line
- [00:12:18.550] options. So we have the straight line
- [00:12:18.560] options. So we have the straight line which going to go through everything.
- [00:12:20.230] which going to go through everything.
- [00:12:20.240] which going to go through everything. But then we can also make it that it
- [00:12:21.750] But then we can also make it that it
- [00:12:21.760] But then we can also make it that it doesn't go through the whole design only
- [00:12:23.269] doesn't go through the whole design only
- [00:12:23.279] doesn't go through the whole design only one part of it. So as you can see there
- [00:12:25.670] one part of it. So as you can see there
- [00:12:25.680] one part of it. So as you can see there if we wanted to we can have an
- [00:12:26.870] if we wanted to we can have an
- [00:12:26.880] if we wanted to we can have an interesting design going with these
- [00:12:28.790] interesting design going with these
- [00:12:28.800] interesting design going with these panels.
- [00:12:30.550] panels.
- [00:12:30.560] panels. Now, this can definitely get a bit
- [00:12:31.990] Now, this can definitely get a bit
- [00:12:32.000] Now, this can definitely get a bit tricky getting used to the workflow. So,
- [00:12:35.030] tricky getting used to the workflow. So,
- [00:12:35.040] tricky getting used to the workflow. So, definitely try play around with it to
- [00:12:36.629] definitely try play around with it to
- [00:12:36.639] definitely try play around with it to get comfortable. You can also remove
- [00:12:38.870] get comfortable. You can also remove
- [00:12:38.880] get comfortable. You can also remove panels by clicking the little X.
- [00:12:42.310] panels by clicking the little X.
- [00:12:42.320] panels by clicking the little X. Now, let's say you've got a tile layout
- [00:12:45.190] Now, let's say you've got a tile layout
- [00:12:45.200] Now, let's say you've got a tile layout that you like. Then, like with cut by
- [00:12:48.389] that you like. Then, like with cut by
- [00:12:48.399] that you like. Then, like with cut by color, you'll see we have options here
- [00:12:50.150] color, you'll see we have options here
- [00:12:50.160] color, you'll see we have options here with the different tiles to show and
- [00:12:52.710] with the different tiles to show and
- [00:12:52.720] with the different tiles to show and hide which layers to cut. And that is
- [00:12:55.190] hide which layers to cut. And that is
- [00:12:55.200] hide which layers to cut. And that is how we'll dictate which layer will be
- [00:12:57.269] how we'll dictate which layer will be
- [00:12:57.279] how we'll dictate which layer will be cutting at what time.
- [00:13:00.310] cutting at what time.
- [00:13:00.320] cutting at what time. Then if you don't want to use tiles, you
- [00:13:01.910] Then if you don't want to use tiles, you
- [00:13:01.920] Then if you don't want to use tiles, you can simply go on top here and deselect
- [00:13:04.069] can simply go on top here and deselect
- [00:13:04.079] can simply go on top here and deselect the cut tiles. Then you can just use it
- [00:13:07.030] the cut tiles. Then you can just use it
- [00:13:07.040] the cut tiles. Then you can just use it like normal. But yeah, I think you guys
- [00:13:09.110] like normal. But yeah, I think you guys
- [00:13:09.120] like normal. But yeah, I think you guys that is it on the cutter settings. I
- [00:13:11.430] that is it on the cutter settings. I
- [00:13:11.440] that is it on the cutter settings. I will join you guys in the next one.
Keyframes
- /workspace/academy/media/1gTyUEYzHetLNWvNCvatBjrupVskh4v5Z/keyframes/last.jpg
- /workspace/academy/media/1gTyUEYzHetLNWvNCvatBjrupVskh4v5Z/keyframes/t003.jpg
- /workspace/academy/media/1gTyUEYzHetLNWvNCvatBjrupVskh4v5Z/keyframes/t007.jpg
- /workspace/academy/media/1gTyUEYzHetLNWvNCvatBjrupVskh4v5Z/keyframes/t010.jpg
- /workspace/academy/media/1gTyUEYzHetLNWvNCvatBjrupVskh4v5Z/keyframes/t014.jpg
- /workspace/academy/media/1gTyUEYzHetLNWvNCvatBjrupVskh4v5Z/keyframes/t017.jpg
- /workspace/academy/media/1gTyUEYzHetLNWvNCvatBjrupVskh4v5Z/keyframes/t021.jpg
- /workspace/academy/media/1gTyUEYzHetLNWvNCvatBjrupVskh4v5Z/keyframes/t024.jpg
- /workspace/academy/media/1gTyUEYzHetLNWvNCvatBjrupVskh4v5Z/keyframes/t027.jpg
- /workspace/academy/media/1gTyUEYzHetLNWvNCvatBjrupVskh4v5Z/keyframes/t031.jpg
- /workspace/academy/media/1gTyUEYzHetLNWvNCvatBjrupVskh4v5Z/keyframes/t034.jpg
- /workspace/academy/media/1gTyUEYzHetLNWvNCvatBjrupVskh4v5Z/keyframes/t038.jpg
- /workspace/academy/media/1gTyUEYzHetLNWvNCvatBjrupVskh4v5Z/keyframes/t041.jpg
- /workspace/academy/media/1gTyUEYzHetLNWvNCvatBjrupVskh4v5Z/keyframes/t045.jpg
- /workspace/academy/media/1gTyUEYzHetLNWvNCvatBjrupVskh4v5Z/keyframes/t048.jpg
- /workspace/academy/media/1gTyUEYzHetLNWvNCvatBjrupVskh4v5Z/keyframes/t052.jpg
- /workspace/academy/media/1gTyUEYzHetLNWvNCvatBjrupVskh4v5Z/keyframes/t055.jpg
- /workspace/academy/media/1gTyUEYzHetLNWvNCvatBjrupVskh4v5Z/keyframes/t058.jpg
- /workspace/academy/media/1gTyUEYzHetLNWvNCvatBjrupVskh4v5Z/keyframes/t062.jpg
- /workspace/academy/media/1gTyUEYzHetLNWvNCvatBjrupVskh4v5Z/keyframes/t065.jpg
- /workspace/academy/media/1gTyUEYzHetLNWvNCvatBjrupVskh4v5Z/keyframes/t069.jpg
- /workspace/academy/media/1gTyUEYzHetLNWvNCvatBjrupVskh4v5Z/keyframes/t072.jpg
- /workspace/academy/media/1gTyUEYzHetLNWvNCvatBjrupVskh4v5Z/keyframes/t076.jpg
- /workspace/academy/media/1gTyUEYzHetLNWvNCvatBjrupVskh4v5Z/keyframes/t079.jpg
19. Projects
- title: Projects
- status: publish
- author: 0
- is_previewable: (empty)
- video_duration: 0h 5m 52s (raw {"hours":0,"minutes":5,"seconds":52})
- video_source_type: embedded
- drive_file_id:
1OZr9XQbHTVSQBV-33KJKf8ygtYYx3nA9(source_ref; not a public link) - transcript pending / keyframes pending / presentation extract pending
- video_source_url: (Drive preview omitted as a public link; file id kept as source_ref)
drive_file_id 1OZr9XQbHTVSQBV-33KJKf8ygtYYx3nA9 (source_ref; not a public link). transcript pending / keyframes pending / presentation extract pending
"
- quizzes_following_this_lesson: 1 (full text in Quizzes)
- Projects (6 questions)
Drive extract
- file_id:
1OZr9XQbHTVSQBV-33KJKf8ygtYYx3nA9 - filename: 04 - SWVC - Projects.mp4
- kind: video
- local_path: /workspace/academy/media/1OZr9XQbHTVSQBV-33KJKf8ygtYYx3nA9/04 - SWVC - Projects.mp4
- source_ref: drive
1OZr9XQbHTVSQBV-33KJKf8ygtYYx3nA9· content_length 44651165 · original https://drive.google.com/file/d/1OZr9XQbHTVSQBV-33KJKf8ygtYYx3nA9/view - extract_status: done
- caption_source: drive_timedtext
- duration_s: 351.851995
- keyframe_count: 24
Transcript
- Howdy guys. Okay, in this next video
- [00:00:02.550] Howdy guys. Okay, in this next video
- [00:00:02.560] Howdy guys. Okay, in this next video we're going to be looking at projects
- [00:00:04.309] we're going to be looking at projects
- [00:00:04.319] we're going to be looking at projects and jobs.
- [00:00:06.869] and jobs.
- [00:00:06.879] and jobs. Okay, first of all, we're going to be
- [00:00:08.310] Okay, first of all, we're going to be
- [00:00:08.320] Okay, first of all, we're going to be covering how to make a new project and
- [00:00:10.390] covering how to make a new project and
- [00:00:10.400] covering how to make a new project and some important notes on that. Okay, so
- [00:00:13.190] some important notes on that. Okay, so
- [00:00:13.200] some important notes on that. Okay, so now when we start the program for the
- [00:00:14.709] now when we start the program for the
- [00:00:14.719] now when we start the program for the first time, we will be met by this nice
- [00:00:16.390] first time, we will be met by this nice
- [00:00:16.400] first time, we will be met by this nice welcome splash screen. Now over here,
- [00:00:18.790] welcome splash screen. Now over here,
- [00:00:18.800] welcome splash screen. Now over here, we'll find if we have previous jobs at
- [00:00:21.349] we'll find if we have previous jobs at
- [00:00:21.359] we'll find if we have previous jobs at the bottom there. You can see we also
- [00:00:23.429] the bottom there. You can see we also
- [00:00:23.439] the bottom there. You can see we also have new project, open project, and
- [00:00:26.550] have new project, open project, and
- [00:00:26.560] have new project, open project, and recovered projects. So in case your
- [00:00:29.029] recovered projects. So in case your
- [00:00:29.039] recovered projects. So in case your program crashed then you can go find it
- [00:00:30.950] program crashed then you can go find it
- [00:00:30.960] program crashed then you can go find it there. And like I mentioned at the
- [00:00:32.549] there. And like I mentioned at the
- [00:00:32.559] there. And like I mentioned at the bottom of that we have projects that
- [00:00:33.750] bottom of that we have projects that
- [00:00:33.760] bottom of that we have projects that we're currently already working on. But
- [00:00:36.069] we're currently already working on. But
- [00:00:36.079] we're currently already working on. But now to make a new project we're going to
- [00:00:37.510] now to make a new project we're going to
- [00:00:37.520] now to make a new project we're going to simply click new project. And then
- [00:00:39.350] simply click new project. And then
- [00:00:39.360] simply click new project. And then there's going to be a number of
- [00:00:40.630] there's going to be a number of
- [00:00:40.640] there's going to be a number of different settings here which we're
- [00:00:41.910] different settings here which we're
- [00:00:41.920] different settings here which we're going to be changing or parameters which
- [00:00:43.510] going to be changing or parameters which
- [00:00:43.520] going to be changing or parameters which is quite important. I would say
- [00:00:45.270] is quite important. I would say
- [00:00:45.280] is quite important. I would say definitely get in a good habit of naming
- [00:00:47.350] definitely get in a good habit of naming
- [00:00:47.360] definitely get in a good habit of naming your stuff relevant. Otherwise later if
- [00:00:49.750] your stuff relevant. Otherwise later if
- [00:00:49.760] your stuff relevant. Otherwise later if you have many projects it can get quite
- [00:00:51.430] you have many projects it can get quite
- [00:00:51.440] you have many projects it can get quite confusing. Then under that we have the
- [00:00:54.069] confusing. Then under that we have the
- [00:00:54.079] confusing. Then under that we have the mat size. Now you'll see we've got some
- [00:00:56.950] mat size. Now you'll see we've got some
- [00:00:56.960] mat size. Now you'll see we've got some preset ones. We've got ones in inches
- [00:00:58.950] preset ones. We've got ones in inches
- [00:00:58.960] preset ones. We've got ones in inches and centimeters. So, this is nice for
- [00:01:01.189] and centimeters. So, this is nice for
- [00:01:01.199] and centimeters. So, this is nice for like a base start. Once we've select
- [00:01:03.270] like a base start. Once we've select
- [00:01:03.280] like a base start. Once we've select one, you can see we can actually
- [00:01:04.789] one, you can see we can actually
- [00:01:04.799] one, you can see we can actually readjust the settings to our needs.
- [00:01:07.270] readjust the settings to our needs.
- [00:01:07.280] readjust the settings to our needs. Then, when it comes to the mat size,
- [00:01:08.950] Then, when it comes to the mat size,
- [00:01:08.960] Then, when it comes to the mat size, right underneath that, you can see we
- [00:01:10.230] right underneath that, you can see we
- [00:01:10.240] right underneath that, you can see we also have custom size. So, this is going
- [00:01:12.789] also have custom size. So, this is going
- [00:01:12.799] also have custom size. So, this is going to be handy if you have like strict
- [00:01:15.109] to be handy if you have like strict
- [00:01:15.119] to be handy if you have like strict design requirements maybe from a client
- [00:01:17.350] design requirements maybe from a client
- [00:01:17.360] design requirements maybe from a client or maybe your material size. Another
- [00:01:19.830] or maybe your material size. Another
- [00:01:19.840] or maybe your material size. Another thing to keep in mind is if we select a
- [00:01:21.510] thing to keep in mind is if we select a
- [00:01:21.520] thing to keep in mind is if we select a mat size and then we had to adjust it,
- [00:01:24.310] mat size and then we had to adjust it,
- [00:01:24.320] mat size and then we had to adjust it, you'll see it automatically switches
- [00:01:26.550] you'll see it automatically switches
- [00:01:26.560] you'll see it automatically switches over to custom size. Then underneath
- [00:01:29.510] over to custom size. Then underneath
- [00:01:29.520] over to custom size. Then underneath that we've got orientation. So we can
- [00:01:32.310] that we've got orientation. So we can
- [00:01:32.320] that we've got orientation. So we can select whether it is horizontal or
- [00:01:34.310] select whether it is horizontal or
- [00:01:34.320] select whether it is horizontal or vertical. Okay. Then right at the bottom
- [00:01:36.789] vertical. Okay. Then right at the bottom
- [00:01:36.799] vertical. Okay. Then right at the bottom we have our units. So depending on what
- [00:01:39.270] we have our units. So depending on what
- [00:01:39.280] we have our units. So depending on what you're working with, if it's a small
- [00:01:40.630] you're working with, if it's a small
- [00:01:40.640] you're working with, if it's a small design, you might want to go to
- [00:01:41.670] design, you might want to go to
- [00:01:41.680] design, you might want to go to millimeters, centimeters, and inches. So
- [00:01:44.149] millimeters, centimeters, and inches. So
- [00:01:44.159] millimeters, centimeters, and inches. So maybe if you're looking for someone in
- [00:01:45.749] maybe if you're looking for someone in
- [00:01:45.759] maybe if you're looking for someone in America or something, then you might
- [00:01:47.109] America or something, then you might
- [00:01:47.119] America or something, then you might want to go to inches. For now, I'm just
- [00:01:49.590] want to go to inches. For now, I'm just
- [00:01:49.600] want to go to inches. For now, I'm just going to select here a default. And then
- [00:01:51.670] going to select here a default. And then
- [00:01:51.680] going to select here a default. And then once you're happy, you say okay. And
- [00:01:54.710] once you're happy, you say okay. And
- [00:01:54.720] once you're happy, you say okay. And then we have a new project. Now, a
- [00:01:57.670] then we have a new project. Now, a
- [00:01:57.680] then we have a new project. Now, a important thing is once you've created a
- [00:01:59.109] important thing is once you've created a
- [00:01:59.119] important thing is once you've created a new project, I always encourage people
- [00:02:00.789] new project, I always encourage people
- [00:02:00.799] new project, I always encourage people first before you start editing and stuff
- [00:02:03.190] first before you start editing and stuff
- [00:02:03.200] first before you start editing and stuff and making a file, first go save it. Go
- [00:02:05.429] and making a file, first go save it. Go
- [00:02:05.439] and making a file, first go save it. Go have it a place where it can live. So if
- [00:02:07.270] have it a place where it can live. So if
- [00:02:07.280] have it a place where it can live. So if there's anything that happens, you're
- [00:02:09.190] there's anything that happens, you're
- [00:02:09.200] there's anything that happens, you're more likely to have a backup of that or
- [00:02:11.750] more likely to have a backup of that or
- [00:02:11.760] more likely to have a backup of that or like a recent version. So locate your
- [00:02:14.790] like a recent version. So locate your
- [00:02:14.800] like a recent version. So locate your location you want to save it and you
- [00:02:16.309] location you want to save it and you
- [00:02:16.319] location you want to save it and you simply leave it in the native file
- [00:02:17.830] simply leave it in the native file
- [00:02:17.840] simply leave it in the native file format as that is what the program
- [00:02:20.470] format as that is what the program
- [00:02:20.480] format as that is what the program supports. Now obviously under your menu
- [00:02:23.430] supports. Now obviously under your menu
- [00:02:23.440] supports. Now obviously under your menu you can also get stuff like new project,
- [00:02:25.830] you can also get stuff like new project,
- [00:02:25.840] you can also get stuff like new project, open project or save project. So if you
- [00:02:28.790] open project or save project. So if you
- [00:02:28.800] open project or save project. So if you have to but most importantly I would say
- [00:02:30.869] have to but most importantly I would say
- [00:02:30.879] have to but most importantly I would say look at the hotkey there for save
- [00:02:32.390] look at the hotkey there for save
- [00:02:32.400] look at the hotkey there for save project. I would say it's worthwhile
- [00:02:34.150] project. I would say it's worthwhile
- [00:02:34.160] project. I would say it's worthwhile getting into the habit where you rather
- [00:02:35.910] getting into the habit where you rather
- [00:02:35.920] getting into the habit where you rather spam your save button than not saving
- [00:02:38.869] spam your save button than not saving
- [00:02:38.879] spam your save button than not saving enough cuz sometimes you can get carried
- [00:02:41.750] enough cuz sometimes you can get carried
- [00:02:41.760] enough cuz sometimes you can get carried away. hour or two goes past while you're
- [00:02:43.589] away. hour or two goes past while you're
- [00:02:43.599] away. hour or two goes past while you're designing something crashes computer
- [00:02:45.670] designing something crashes computer
- [00:02:45.680] designing something crashes computer software and then you have to redo all
- [00:02:48.790] software and then you have to redo all
- [00:02:48.800] software and then you have to redo all that stuff if the recovery didn't work.
- [00:02:50.630] that stuff if the recovery didn't work.
- [00:02:50.640] that stuff if the recovery didn't work. So just keep that in mind. Okay. Now
- [00:02:52.869] So just keep that in mind. Okay. Now
- [00:02:52.879] So just keep that in mind. Okay. Now let's say you made your design and you
- [00:02:55.509] let's say you made your design and you
- [00:02:55.519] let's say you made your design and you actually got the wrong measurements or
- [00:02:56.949] actually got the wrong measurements or
- [00:02:56.959] actually got the wrong measurements or you need to change it afterwards. Then
- [00:02:59.190] you need to change it afterwards. Then
- [00:02:59.200] you need to change it afterwards. Then instead of going making a new project,
- [00:03:00.869] instead of going making a new project,
- [00:03:00.879] instead of going making a new project, you can simply just go here to the site
- [00:03:02.550] you can simply just go here to the site
- [00:03:02.560] you can simply just go here to the site control panel. We go to the documents
- [00:03:04.790] control panel. We go to the documents
- [00:03:04.800] control panel. We go to the documents tab and then you'll see we've got our
- [00:03:06.949] tab and then you'll see we've got our
- [00:03:06.959] tab and then you'll see we've got our mat size there. So now we can go
- [00:03:09.509] mat size there. So now we can go
- [00:03:09.519] mat size there. So now we can go readjust that if we want. We go to
- [00:03:11.350] readjust that if we want. We go to
- [00:03:11.360] readjust that if we want. We go to custom or pick a template. You'll see it
- [00:03:14.229] custom or pick a template. You'll see it
- [00:03:14.239] custom or pick a template. You'll see it at the updated there on our actual
- [00:03:15.990] at the updated there on our actual
- [00:03:16.000] at the updated there on our actual design side. Now we can also change the
- [00:03:18.869] design side. Now we can also change the
- [00:03:18.879] design side. Now we can also change the orientation and then we can do the
- [00:03:21.670] orientation and then we can do the
- [00:03:21.680] orientation and then we can do the units. So if we need to change and then
- [00:03:24.070] units. So if we need to change and then
- [00:03:24.080] units. So if we need to change and then you can also see it update here on the
- [00:03:25.509] you can also see it update here on the
- [00:03:25.519] you can also see it update here on the top ruler. So then you know which one
- [00:03:27.750] top ruler. So then you know which one
- [00:03:27.760] top ruler. So then you know which one you are in. Okay. Now next up let's look
- [00:03:30.710] you are in. Okay. Now next up let's look
- [00:03:30.720] you are in. Okay. Now next up let's look at some project information or project
- [00:03:33.190] at some project information or project
- [00:03:33.200] at some project information or project properties. This can be very handy when
- [00:03:35.030] properties. This can be very handy when
- [00:03:35.040] properties. This can be very handy when you're working on a big project and the
- [00:03:37.509] you're working on a big project and the
- [00:03:37.519] you're working on a big project and the client wants to know information about
- [00:03:38.949] client wants to know information about
- [00:03:38.959] client wants to know information about it or you need to maybe know what to buy
- [00:03:41.910] it or you need to maybe know what to buy
- [00:03:41.920] it or you need to maybe know what to buy or what to plan for. And this is also
- [00:03:44.470] or what to plan for. And this is also
- [00:03:44.480] or what to plan for. And this is also handy if you're working with multiple
- [00:03:46.550] handy if you're working with multiple
- [00:03:46.560] handy if you're working with multiple people on the same design or on the same
- [00:03:49.430] people on the same design or on the same
- [00:03:49.440] people on the same design or on the same project. So what it comes down to is
- [00:03:51.830] project. So what it comes down to is
- [00:03:51.840] project. So what it comes down to is let's say we have a basic project here.
- [00:03:53.350] let's say we have a basic project here.
- [00:03:53.360] let's say we have a basic project here. Obviously I don't know who would want to
- [00:03:54.789] Obviously I don't know who would want to
- [00:03:54.799] Obviously I don't know who would want to make this but we just have a few
- [00:03:56.630] make this but we just have a few
- [00:03:56.640] make this but we just have a few different things here which is handy.
- [00:03:58.470] different things here which is handy.
- [00:03:58.480] different things here which is handy. Got some text, some shapes and some
- [00:04:00.390] Got some text, some shapes and some
- [00:04:00.400] Got some text, some shapes and some colors. And now the project info does
- [00:04:03.110] colors. And now the project info does
- [00:04:03.120] colors. And now the project info does hold more than just these, but this will
- [00:04:04.949] hold more than just these, but this will
- [00:04:04.959] hold more than just these, but this will give you a general idea of what it's
- [00:04:06.789] give you a general idea of what it's
- [00:04:06.799] give you a general idea of what it's about. Now with our project open, we
- [00:04:09.190] about. Now with our project open, we
- [00:04:09.200] about. Now with our project open, we want to go on top here to window. Then
- [00:04:10.949] want to go on top here to window. Then
- [00:04:10.959] want to go on top here to window. Then we go project info.
- [00:04:13.429] we go project info.
- [00:04:13.439] we go project info. Then under project info, we have a few
- [00:04:15.270] Then under project info, we have a few
- [00:04:15.280] Then under project info, we have a few different tabs. But if we focus on the
- [00:04:17.509] different tabs. But if we focus on the
- [00:04:17.519] different tabs. But if we focus on the first one first, so this is a nice place
- [00:04:19.509] first one first, so this is a nice place
- [00:04:19.519] first one first, so this is a nice place where we put some information that as
- [00:04:21.189] where we put some information that as
- [00:04:21.199] where we put some information that as you can see here will be embedded into
- [00:04:22.710] you can see here will be embedded into
- [00:04:22.720] you can see here will be embedded into the saved file. Which means if you copy
- [00:04:25.110] the saved file. Which means if you copy
- [00:04:25.120] the saved file. Which means if you copy this anywhere else, if someone opens it,
- [00:04:26.870] this anywhere else, if someone opens it,
- [00:04:26.880] this anywhere else, if someone opens it, they can get all this information which
- [00:04:29.590] they can get all this information which
- [00:04:29.600] they can get all this information which is very handy. So under some of these
- [00:04:31.670] is very handy. So under some of these
- [00:04:31.680] is very handy. So under some of these options, we have obviously the title
- [00:04:33.189] options, we have obviously the title
- [00:04:33.199] options, we have obviously the title which is a title of the job, the author,
- [00:04:35.909] which is a title of the job, the author,
- [00:04:35.919] which is a title of the job, the author, we've got contact details if we need and
- [00:04:38.550] we've got contact details if we need and
- [00:04:38.560] we've got contact details if we need and then some additional notes. So maybe
- [00:04:40.950] then some additional notes. So maybe
- [00:04:40.960] then some additional notes. So maybe you're sending to another designer and
- [00:04:42.629] you're sending to another designer and
- [00:04:42.639] you're sending to another designer and they want to give some notes about it.
- [00:04:43.990] they want to give some notes about it.
- [00:04:44.000] they want to give some notes about it. You can do that or they want to make
- [00:04:45.990] You can do that or they want to make
- [00:04:46.000] You can do that or they want to make sure just they can contact the original
- [00:04:47.510] sure just they can contact the original
- [00:04:47.520] sure just they can contact the original designer or something like that. Then on
- [00:04:49.830] designer or something like that. Then on
- [00:04:49.840] designer or something like that. Then on the second one here, we've got some
- [00:04:50.950] the second one here, we've got some
- [00:04:50.960] the second one here, we've got some color information.
- [00:04:53.350] color information.
- [00:04:53.360] color information. So here we can see depending on our page
- [00:04:56.150] So here we can see depending on our page
- [00:04:56.160] So here we can see depending on our page we're on. We only have one page, but so
- [00:04:58.230] we're on. We only have one page, but so
- [00:04:58.240] we're on. We only have one page, but so on page one, you can see that we've got
- [00:05:00.150] on page one, you can see that we've got
- [00:05:00.160] on page one, you can see that we've got three colors. And then we've got some
- [00:05:02.950] three colors. And then we've got some
- [00:05:02.960] three colors. And then we've got some color information. So actual color
- [00:05:04.950] color information. So actual color
- [00:05:04.960] color information. So actual color codes. But another handy thing is if you
- [00:05:07.590] codes. But another handy thing is if you
- [00:05:07.600] codes. But another handy thing is if you look next to the right of that, we've
- [00:05:09.029] look next to the right of that, we've
- [00:05:09.039] look next to the right of that, we've got shapes. And that will actually show
- [00:05:11.749] got shapes. And that will actually show
- [00:05:11.759] got shapes. And that will actually show us how many shapes do we have within
- [00:05:13.909] us how many shapes do we have within
- [00:05:13.919] us how many shapes do we have within those colors. Now you might notice that
- [00:05:16.469] those colors. Now you might notice that
- [00:05:16.479] those colors. Now you might notice that the blue has got four shapes even though
- [00:05:19.270] the blue has got four shapes even though
- [00:05:19.280] the blue has got four shapes even though it is text. But if you had to look in
- [00:05:20.950] it is text. But if you had to look in
- [00:05:20.960] it is text. But if you had to look in the text, you'll see it consists out of
- [00:05:22.950] the text, you'll see it consists out of
- [00:05:22.960] the text, you'll see it consists out of four different shapes.
- [00:05:25.350] four different shapes.
- [00:05:25.360] four different shapes. Then to the right of that, we've got our
- [00:05:26.950] Then to the right of that, we've got our
- [00:05:26.960] Then to the right of that, we've got our font. So this is nice. So we can see
- [00:05:28.790] font. So this is nice. So we can see
- [00:05:28.800] font. So this is nice. So we can see which font is being used. And then we
- [00:05:30.710] which font is being used. And then we
- [00:05:30.720] which font is being used. And then we also have rhinestone information if we
- [00:05:33.110] also have rhinestone information if we
- [00:05:33.120] also have rhinestone information if we were using that. But yeah, very handy
- [00:05:35.749] were using that. But yeah, very handy
- [00:05:35.759] were using that. But yeah, very handy little feature this to know about. Now
- [00:05:37.749] little feature this to know about. Now
- [00:05:37.759] little feature this to know about. Now your workflow might not allow you to use
- [00:05:39.430] your workflow might not allow you to use
- [00:05:39.440] your workflow might not allow you to use it as often, but if you are in a
- [00:05:42.310] it as often, but if you are in a
- [00:05:42.320] it as often, but if you are in a workflow where you require it, then it's
- [00:05:43.990] workflow where you require it, then it's
- [00:05:44.000] workflow where you require it, then it's going to be very handy. But yeah,
- [00:05:45.430] going to be very handy. But yeah,
- [00:05:45.440] going to be very handy. But yeah, otherwise that is it for now on cutters
- [00:05:47.350] otherwise that is it for now on cutters
- [00:05:47.360] otherwise that is it for now on cutters in vinyl cut. And I'll check you guys in
- [00:05:49.990] in vinyl cut. And I'll check you guys in
- [00:05:50.000] in vinyl cut. And I'll check you guys in the next one. Cheers.
Keyframes
- /workspace/academy/media/1OZr9XQbHTVSQBV-33KJKf8ygtYYx3nA9/keyframes/last.jpg
- /workspace/academy/media/1OZr9XQbHTVSQBV-33KJKf8ygtYYx3nA9/keyframes/t002.jpg
- /workspace/academy/media/1OZr9XQbHTVSQBV-33KJKf8ygtYYx3nA9/keyframes/t003.jpg
- /workspace/academy/media/1OZr9XQbHTVSQBV-33KJKf8ygtYYx3nA9/keyframes/t005.jpg
- /workspace/academy/media/1OZr9XQbHTVSQBV-33KJKf8ygtYYx3nA9/keyframes/t006.jpg
- /workspace/academy/media/1OZr9XQbHTVSQBV-33KJKf8ygtYYx3nA9/keyframes/t008.jpg
- /workspace/academy/media/1OZr9XQbHTVSQBV-33KJKf8ygtYYx3nA9/keyframes/t009.jpg
- /workspace/academy/media/1OZr9XQbHTVSQBV-33KJKf8ygtYYx3nA9/keyframes/t011.jpg
- /workspace/academy/media/1OZr9XQbHTVSQBV-33KJKf8ygtYYx3nA9/keyframes/t012.jpg
- /workspace/academy/media/1OZr9XQbHTVSQBV-33KJKf8ygtYYx3nA9/keyframes/t014.jpg
- /workspace/academy/media/1OZr9XQbHTVSQBV-33KJKf8ygtYYx3nA9/keyframes/t015.jpg
- /workspace/academy/media/1OZr9XQbHTVSQBV-33KJKf8ygtYYx3nA9/keyframes/t017.jpg
- /workspace/academy/media/1OZr9XQbHTVSQBV-33KJKf8ygtYYx3nA9/keyframes/t018.jpg
- /workspace/academy/media/1OZr9XQbHTVSQBV-33KJKf8ygtYYx3nA9/keyframes/t020.jpg
- /workspace/academy/media/1OZr9XQbHTVSQBV-33KJKf8ygtYYx3nA9/keyframes/t021.jpg
- /workspace/academy/media/1OZr9XQbHTVSQBV-33KJKf8ygtYYx3nA9/keyframes/t023.jpg
- /workspace/academy/media/1OZr9XQbHTVSQBV-33KJKf8ygtYYx3nA9/keyframes/t024.jpg
- /workspace/academy/media/1OZr9XQbHTVSQBV-33KJKf8ygtYYx3nA9/keyframes/t026.jpg
- /workspace/academy/media/1OZr9XQbHTVSQBV-33KJKf8ygtYYx3nA9/keyframes/t027.jpg
- /workspace/academy/media/1OZr9XQbHTVSQBV-33KJKf8ygtYYx3nA9/keyframes/t029.jpg
- /workspace/academy/media/1OZr9XQbHTVSQBV-33KJKf8ygtYYx3nA9/keyframes/t030.jpg
- /workspace/academy/media/1OZr9XQbHTVSQBV-33KJKf8ygtYYx3nA9/keyframes/t032.jpg
- /workspace/academy/media/1OZr9XQbHTVSQBV-33KJKf8ygtYYx3nA9/keyframes/t033.jpg
- /workspace/academy/media/1OZr9XQbHTVSQBV-33KJKf8ygtYYx3nA9/keyframes/t035.jpg
20. Features
- title: Features
- status: publish
- author: 0
- is_previewable: (empty)
- video_duration: 0h 22m 50s (raw {"hours":0,"minutes":22,"seconds":50})
- video_source_type: embedded
- drive_file_id:
1VyVZahpn8ISD065i02_cS1wTQmarn8Ha(source_ref; not a public link) - transcript pending / keyframes pending / presentation extract pending
- video_source_url: (Drive preview omitted as a public link; file id kept as source_ref)
In this lesson we are going to be looking some key feature that we will be using often throughout VinylCut 5.
- quizzes_following_this_lesson: 1 (full text in Quizzes)
- Features (5 questions)
Drive extract
- file_id:
1VyVZahpn8ISD065i02_cS1wTQmarn8Ha - filename: 05 - SWVC - Key Features.mp4
- kind: video
- local_path: /workspace/academy/media/1VyVZahpn8ISD065i02_cS1wTQmarn8Ha/05 - SWVC - Key Features.mp4
- source_ref: drive
1VyVZahpn8ISD065i02_cS1wTQmarn8Ha· content_length 210577186 · original https://drive.google.com/file/d/1VyVZahpn8ISD065i02_cS1wTQmarn8Ha/view - extract_status: done
- caption_source: drive_timedtext
- duration_s: 1369.489002
- keyframe_count: 24
Transcript
- Howy guys. Okay, in this next section
- [00:00:02.710] Howy guys. Okay, in this next section
- [00:00:02.720] Howy guys. Okay, in this next section we're going to be looking at some key
- [00:00:04.070] we're going to be looking at some key
- [00:00:04.080] we're going to be looking at some key features which we're going to be using
- [00:00:05.910] features which we're going to be using
- [00:00:05.920] features which we're going to be using often throughout the program. So now the
- [00:00:09.430] often throughout the program. So now the
- [00:00:09.440] often throughout the program. So now the first one which is very important to
- [00:00:10.950] first one which is very important to
- [00:00:10.960] first one which is very important to understand how to work is the preview
- [00:00:13.430] understand how to work is the preview
- [00:00:13.440] understand how to work is the preview feature. So let's say we've got a design
- [00:00:16.150] feature. So let's say we've got a design
- [00:00:16.160] feature. So let's say we've got a design here and uh we have multiple layers.
- [00:00:19.429] here and uh we have multiple layers.
- [00:00:19.439] here and uh we have multiple layers. Then before we actually commit a job and
- [00:00:22.470] Then before we actually commit a job and
- [00:00:22.480] Then before we actually commit a job and uh maybe mess up some vinyl or so forth,
- [00:00:24.550] uh maybe mess up some vinyl or so forth,
- [00:00:24.560] uh maybe mess up some vinyl or so forth, we always want to first preview it. So,
- [00:00:28.070] we always want to first preview it. So,
- [00:00:28.080] we always want to first preview it. So, as you can see here, we've got two
- [00:00:29.830] as you can see here, we've got two
- [00:00:29.840] as you can see here, we've got two layers there. We've got one that's a cut
- [00:00:32.229] layers there. We've got one that's a cut
- [00:00:32.239] layers there. We've got one that's a cut and one that's a print. So, now if I go
- [00:00:34.310] and one that's a print. So, now if I go
- [00:00:34.320] and one that's a print. So, now if I go here on our top main features bar, we
- [00:00:37.110] here on our top main features bar, we
- [00:00:37.120] here on our top main features bar, we click the preview button or preview
- [00:00:39.910] click the preview button or preview
- [00:00:39.920] click the preview button or preview feature, you'll see a few things change.
- [00:00:43.030] feature, you'll see a few things change.
- [00:00:43.040] feature, you'll see a few things change. Now, we have a few different options on
- [00:00:44.790] Now, we have a few different options on
- [00:00:44.800] Now, we have a few different options on here. So, we can set it up the way we
- [00:00:46.549] here. So, we can set it up the way we
- [00:00:46.559] here. So, we can set it up the way we like or what we're trying to preview.
- [00:00:48.869] like or what we're trying to preview.
- [00:00:48.879] like or what we're trying to preview. Like you can see here, we've got like
- [00:00:50.630] Like you can see here, we've got like
- [00:00:50.640] Like you can see here, we've got like different shapes and so forth. So, now
- [00:00:53.189] different shapes and so forth. So, now
- [00:00:53.199] different shapes and so forth. So, now if we zoom in here and just look at a
- [00:00:54.869] if we zoom in here and just look at a
- [00:00:54.879] if we zoom in here and just look at a few of these. Okay. Okay. Now, so on the
- [00:00:56.869] few of these. Okay. Okay. Now, so on the
- [00:00:56.879] few of these. Okay. Okay. Now, so on the preview options, we've got your show
- [00:00:58.709] preview options, we've got your show
- [00:00:58.719] preview options, we've got your show draw lines. So that's anything that's
- [00:01:00.630] draw lines. So that's anything that's
- [00:01:00.640] draw lines. So that's anything that's going to be drawn, but we won't be
- [00:01:02.709] going to be drawn, but we won't be
- [00:01:02.719] going to be drawn, but we won't be focusing on that too much as most of the
- [00:01:04.549] focusing on that too much as most of the
- [00:01:04.559] focusing on that too much as most of the time we'll be just using the cutter or
- [00:01:06.310] time we'll be just using the cutter or
- [00:01:06.320] time we'll be just using the cutter or the cut setting. On top of that, we have
- [00:01:08.870] the cut setting. On top of that, we have
- [00:01:08.880] the cut setting. On top of that, we have the actual cut feature. So that's going
- [00:01:11.510] the actual cut feature. So that's going
- [00:01:11.520] the actual cut feature. So that's going to show anything that's going to be cut
- [00:01:12.950] to show anything that's going to be cut
- [00:01:12.960] to show anything that's going to be cut on it because keep in mind you can be
- [00:01:14.870] on it because keep in mind you can be
- [00:01:14.880] on it because keep in mind you can be working with print and cut. Then under
- [00:01:17.429] working with print and cut. Then under
- [00:01:17.439] working with print and cut. Then under that we've got the show printable. So if
- [00:01:19.429] that we've got the show printable. So if
- [00:01:19.439] that we've got the show printable. So if we put that then we can actually view
- [00:01:20.870] we put that then we can actually view
- [00:01:20.880] we put that then we can actually view what is going to be printed. So we can
- [00:01:23.030] what is going to be printed. So we can
- [00:01:23.040] what is going to be printed. So we can always put off the cut ones and leave on
- [00:01:25.190] always put off the cut ones and leave on
- [00:01:25.200] always put off the cut ones and leave on the print one. So we kind of have a
- [00:01:27.190] the print one. So we kind of have a
- [00:01:27.200] the print one. So we kind of have a sample of what's what. And under that we
- [00:01:30.310] sample of what's what. And under that we
- [00:01:30.320] sample of what's what. And under that we have the show print cut registration
- [00:01:32.630] have the show print cut registration
- [00:01:32.640] have the show print cut registration marks. Now as you can see here, here's
- [00:01:34.630] marks. Now as you can see here, here's
- [00:01:34.640] marks. Now as you can see here, here's these little marks. Now that's going to
- [00:01:36.950] these little marks. Now that's going to
- [00:01:36.960] these little marks. Now that's going to be very important later when we come to
- [00:01:38.950] be very important later when we come to
- [00:01:38.960] be very important later when we come to printing and cutting. And then another
- [00:01:41.030] printing and cutting. And then another
- [00:01:41.040] printing and cutting. And then another one that's important is the show nodes.
- [00:01:43.510] one that's important is the show nodes.
- [00:01:43.520] one that's important is the show nodes. So now we can actually enable this and
- [00:01:45.429] So now we can actually enable this and
- [00:01:45.439] So now we can actually enable this and we can see what's our node count to make
- [00:01:47.990] we can see what's our node count to make
- [00:01:48.000] we can see what's our node count to make sure it's nice and clean and maybe not
- [00:01:49.830] sure it's nice and clean and maybe not
- [00:01:49.840] sure it's nice and clean and maybe not overcluttered. But in general, probably
- [00:01:52.230] overcluttered. But in general, probably
- [00:01:52.240] overcluttered. But in general, probably only be mostly using the show cut lines
- [00:01:54.789] only be mostly using the show cut lines
- [00:01:54.799] only be mostly using the show cut lines and maybe the show printable. Okay. Now,
- [00:01:58.149] and maybe the show printable. Okay. Now,
- [00:01:58.159] and maybe the show printable. Okay. Now, another key feature which is very
- [00:01:59.749] another key feature which is very
- [00:01:59.759] another key feature which is very important to get the grasp of especially
- [00:02:02.469] important to get the grasp of especially
- [00:02:02.479] important to get the grasp of especially if you're going to be using some
- [00:02:03.510] if you're going to be using some
- [00:02:03.520] if you're going to be using some designing and so forth, and that is how
- [00:02:06.230] designing and so forth, and that is how
- [00:02:06.240] designing and so forth, and that is how to transform things. So now, let's say
- [00:02:09.589] to transform things. So now, let's say
- [00:02:09.599] to transform things. So now, let's say we've got this cube and we want to do
- [00:02:12.309] we've got this cube and we want to do
- [00:02:12.319] we've got this cube and we want to do some transformations to it. Now, it is
- [00:02:14.869] some transformations to it. Now, it is
- [00:02:14.879] some transformations to it. Now, it is important that we first select it with
- [00:02:16.630] important that we first select it with
- [00:02:16.640] important that we first select it with our selection tool, otherwise nothing's
- [00:02:19.350] our selection tool, otherwise nothing's
- [00:02:19.360] our selection tool, otherwise nothing's going to happen. And once we click that,
- [00:02:20.949] going to happen. And once we click that,
- [00:02:20.959] going to happen. And once we click that, you can see we get some transformation
- [00:02:22.790] you can see we get some transformation
- [00:02:22.800] you can see we get some transformation nodes here or transformation handles.
- [00:02:25.750] nodes here or transformation handles.
- [00:02:25.760] nodes here or transformation handles. Now depending on which one you are
- [00:02:27.990] Now depending on which one you are
- [00:02:28.000] Now depending on which one you are using, it will give you different
- [00:02:29.510] using, it will give you different
- [00:02:29.520] using, it will give you different options. And then also depending on the
- [00:02:31.750] options. And then also depending on the
- [00:02:31.760] options. And then also depending on the mode you're in. So if we go on the top
- [00:02:33.910] mode you're in. So if we go on the top
- [00:02:33.920] mode you're in. So if we go on the top left here, you can see we've got basic
- [00:02:36.550] left here, you can see we've got basic
- [00:02:36.560] left here, you can see we've got basic and then we have advanc. Now advanced
- [00:02:38.869] and then we have advanc. Now advanced
- [00:02:38.879] and then we have advanc. Now advanced looks a bit different, but we'll run
- [00:02:40.790] looks a bit different, but we'll run
- [00:02:40.800] looks a bit different, but we'll run through the basic and the advanced so
- [00:02:42.390] through the basic and the advanced so
- [00:02:42.400] through the basic and the advanced so you get idea of the difference. So now
- [00:02:44.070] you get idea of the difference. So now
- [00:02:44.080] you get idea of the difference. So now the first node here on the top left,
- [00:02:45.589] the first node here on the top left,
- [00:02:45.599] the first node here on the top left, this is for moving the location of this
- [00:02:48.070] this is for moving the location of this
- [00:02:48.080] this is for moving the location of this shape. and the top one will be right and
- [00:02:50.790] shape. and the top one will be right and
- [00:02:50.800] shape. and the top one will be right and left combined where if we look at the
- [00:02:53.270] left combined where if we look at the
- [00:02:53.280] left combined where if we look at the next two closest to it. This will be if
- [00:02:56.150] next two closest to it. This will be if
- [00:02:56.160] next two closest to it. This will be if you want to limit it in a certain
- [00:02:57.670] you want to limit it in a certain
- [00:02:57.680] you want to limit it in a certain direction. So this is handy if you maybe
- [00:02:59.990] direction. So this is handy if you maybe
- [00:03:00.000] direction. So this is handy if you maybe have text and they are all the same
- [00:03:02.309] have text and they are all the same
- [00:03:02.319] have text and they are all the same height the characters but you want to
- [00:03:03.670] height the characters but you want to
- [00:03:03.680] height the characters but you want to move them sideways perhaps and not
- [00:03:05.509] move them sideways perhaps and not
- [00:03:05.519] move them sideways perhaps and not adjust the height or keep it at in line
- [00:03:08.149] adjust the height or keep it at in line
- [00:03:08.159] adjust the height or keep it at in line or something then you can use these ones
- [00:03:09.750] or something then you can use these ones
- [00:03:09.760] or something then you can use these ones and constrain it basically to that uh
- [00:03:12.470] and constrain it basically to that uh
- [00:03:12.480] and constrain it basically to that uh plane or that angle. Then on the top
- [00:03:15.990] plane or that angle. Then on the top
- [00:03:16.000] plane or that angle. Then on the top right and the bottom left we have
- [00:03:17.750] right and the bottom left we have
- [00:03:17.760] right and the bottom left we have rotation. So if we click this and hold
- [00:03:20.790] rotation. So if we click this and hold
- [00:03:20.800] rotation. So if we click this and hold it in we can simply rotate this but also
- [00:03:23.270] it in we can simply rotate this but also
- [00:03:23.280] it in we can simply rotate this but also if you had to keep shifting you'll see
- [00:03:25.270] if you had to keep shifting you'll see
- [00:03:25.280] if you had to keep shifting you'll see it actually constrains it to a degree.
- [00:03:28.229] it actually constrains it to a degree.
- [00:03:28.239] it actually constrains it to a degree. It looks about 15° which um is good to
- [00:03:31.110] It looks about 15° which um is good to
- [00:03:31.120] It looks about 15° which um is good to be aware of. Now the last three we have
- [00:03:33.589] be aware of. Now the last three we have
- [00:03:33.599] be aware of. Now the last three we have here this is going to be in relation to
- [00:03:35.509] here this is going to be in relation to
- [00:03:35.519] here this is going to be in relation to scale. So the bottom right one will be
- [00:03:37.830] scale. So the bottom right one will be
- [00:03:37.840] scale. So the bottom right one will be the doing the scales together. And then
- [00:03:40.470] the doing the scales together. And then
- [00:03:40.480] the doing the scales together. And then once again like with the movement we can
- [00:03:42.390] once again like with the movement we can
- [00:03:42.400] once again like with the movement we can constrain the scale to either the
- [00:03:43.990] constrain the scale to either the
- [00:03:44.000] constrain the scale to either the horizontal or vertical plane. But
- [00:03:46.789] horizontal or vertical plane. But
- [00:03:46.799] horizontal or vertical plane. But likewise if you are to use something
- [00:03:48.710] likewise if you are to use something
- [00:03:48.720] likewise if you are to use something like shift and alt and those things you
- [00:03:51.430] like shift and alt and those things you
- [00:03:51.440] like shift and alt and those things you can also constrain these ones.
- [00:03:55.670] can also constrain these ones.
- [00:03:55.680] can also constrain these ones. Now another way we can transform the
- [00:03:57.429] Now another way we can transform the
- [00:03:57.439] Now another way we can transform the shapes especially like I always
- [00:03:58.710] shapes especially like I always
- [00:03:58.720] shapes especially like I always recommend to people if we you working
- [00:04:01.030] recommend to people if we you working
- [00:04:01.040] recommend to people if we you working with strict design rules then you want
- [00:04:03.589] with strict design rules then you want
- [00:04:03.599] with strict design rules then you want to go to your control panel and then we
- [00:04:05.589] to go to your control panel and then we
- [00:04:05.599] to go to your control panel and then we go to the position and size. Now this is
- [00:04:08.229] go to the position and size. Now this is
- [00:04:08.239] go to the position and size. Now this is a great place where you can do fine
- [00:04:10.550] a great place where you can do fine
- [00:04:10.560] a great place where you can do fine adjustments and to the millimeter you
- [00:04:12.789] adjustments and to the millimeter you
- [00:04:12.799] adjustments and to the millimeter you know things in that line. We can also
- [00:04:15.750] know things in that line. We can also
- [00:04:15.760] know things in that line. We can also set the scale. We can keep it in
- [00:04:17.990] set the scale. We can keep it in
- [00:04:18.000] set the scale. We can keep it in proportion. So if we want to lock it
- [00:04:19.670] proportion. So if we want to lock it
- [00:04:19.680] proportion. So if we want to lock it down we have some rotation and flipping
- [00:04:21.909] down we have some rotation and flipping
- [00:04:21.919] down we have some rotation and flipping options. Now this is important because
- [00:04:23.670] options. Now this is important because
- [00:04:23.680] options. Now this is important because obviously you cannot normally flip a
- [00:04:25.749] obviously you cannot normally flip a
- [00:04:25.759] obviously you cannot normally flip a shape just with normal transformation
- [00:04:27.590] shape just with normal transformation
- [00:04:27.600] shape just with normal transformation handles. So this is where you'll want to
- [00:04:29.830] handles. So this is where you'll want to
- [00:04:29.840] handles. So this is where you'll want to come do that. Now it's not obvious on
- [00:04:32.710] come do that. Now it's not obvious on
- [00:04:32.720] come do that. Now it's not obvious on the shape we're on but yeah you can flip
- [00:04:34.710] the shape we're on but yeah you can flip
- [00:04:34.720] the shape we're on but yeah you can flip it. Now let's look at the advanced
- [00:04:36.629] it. Now let's look at the advanced
- [00:04:36.639] it. Now let's look at the advanced transformation handles. So now what's
- [00:04:39.990] transformation handles. So now what's
- [00:04:40.000] transformation handles. So now what's going to happen is if we just simply
- [00:04:41.990] going to happen is if we just simply
- [00:04:42.000] going to happen is if we just simply click on the middle of the shape here
- [00:04:43.590] click on the middle of the shape here
- [00:04:43.600] click on the middle of the shape here holding our left mouse button then we
- [00:04:45.270] holding our left mouse button then we
- [00:04:45.280] holding our left mouse button then we can move it around. But if we keep
- [00:04:47.189] can move it around. But if we keep
- [00:04:47.199] can move it around. But if we keep something like shift in then we can
- [00:04:48.469] something like shift in then we can
- [00:04:48.479] something like shift in then we can actually constrain it to a angle. So we
- [00:04:51.270] actually constrain it to a angle. So we
- [00:04:51.280] actually constrain it to a angle. So we can still do both those things just way
- [00:04:53.110] can still do both those things just way
- [00:04:53.120] can still do both those things just way quicker but it doesn't have the nice
- [00:04:55.030] quicker but it doesn't have the nice
- [00:04:55.040] quicker but it doesn't have the nice little icons so we can easily understand
- [00:04:57.110] little icons so we can easily understand
- [00:04:57.120] little icons so we can easily understand what's happened. Then if we click on
- [00:04:59.350] what's happened. Then if we click on
- [00:04:59.360] what's happened. Then if we click on this corner you can see we can scale
- [00:05:01.749] this corner you can see we can scale
- [00:05:01.759] this corner you can see we can scale this. Then also if we go slightly off
- [00:05:05.430] this. Then also if we go slightly off
- [00:05:05.440] this. Then also if we go slightly off it, you'll see it gives us rotation
- [00:05:07.110] it, you'll see it gives us rotation
- [00:05:07.120] it, you'll see it gives us rotation little icon. Now we can use that same
- [00:05:09.029] little icon. Now we can use that same
- [00:05:09.039] little icon. Now we can use that same node for rotation. Then we have a new
- [00:05:12.469] node for rotation. Then we have a new
- [00:05:12.479] node for rotation. Then we have a new little feature here with advance. If we
- [00:05:14.230] little feature here with advance. If we
- [00:05:14.240] little feature here with advance. If we go here on these middle ones, we have a
- [00:05:16.230] go here on these middle ones, we have a
- [00:05:16.240] go here on these middle ones, we have a skewing option. So if we hover just off
- [00:05:19.189] skewing option. So if we hover just off
- [00:05:19.199] skewing option. So if we hover just off it, you'll see now we can actually skew
- [00:05:21.749] it, you'll see now we can actually skew
- [00:05:21.759] it, you'll see now we can actually skew the shape in an angle. Now depending
- [00:05:24.230] the shape in an angle. Now depending
- [00:05:24.240] the shape in an angle. Now depending obviously if you're on a horizontal or
- [00:05:25.749] obviously if you're on a horizontal or
- [00:05:25.759] obviously if you're on a horizontal or vertical, you can do different. But
- [00:05:27.749] vertical, you can do different. But
- [00:05:27.759] vertical, you can do different. But yeah, so that is it on the basic
- [00:05:29.270] yeah, so that is it on the basic
- [00:05:29.280] yeah, so that is it on the basic transformation. Like I said, you're
- [00:05:30.390] transformation. Like I said, you're
- [00:05:30.400] transformation. Like I said, you're going to be using this potentially a
- [00:05:32.230] going to be using this potentially a
- [00:05:32.240] going to be using this potentially a lot. So I would definitely recommend
- [00:05:33.909] lot. So I would definitely recommend
- [00:05:33.919] lot. So I would definitely recommend play around with it and get comfortable.
- [00:05:36.230] play around with it and get comfortable.
- [00:05:36.240] play around with it and get comfortable. Now another key feature which you might
- [00:05:37.830] Now another key feature which you might
- [00:05:37.840] Now another key feature which you might want to use is note points. Straight off
- [00:05:39.990] want to use is note points. Straight off
- [00:05:40.000] want to use is note points. Straight off the bat this one might be a little more
- [00:05:42.070] the bat this one might be a little more
- [00:05:42.080] the bat this one might be a little more tricky to get used to but it is
- [00:05:44.070] tricky to get used to but it is
- [00:05:44.080] tricky to get used to but it is important to know how it works. So worst
- [00:05:46.150] important to know how it works. So worst
- [00:05:46.160] important to know how it works. So worst case you can just kind of follow along.
- [00:05:48.310] case you can just kind of follow along.
- [00:05:48.320] case you can just kind of follow along. So now to locate the tool you can see
- [00:05:49.990] So now to locate the tool you can see
- [00:05:50.000] So now to locate the tool you can see here we've got this little icon called
- [00:05:51.830] here we've got this little icon called
- [00:05:51.840] here we've got this little icon called shape tool. Now this will allow us to
- [00:05:54.870] shape tool. Now this will allow us to
- [00:05:54.880] shape tool. Now this will allow us to control node points. Now this will
- [00:05:57.189] control node points. Now this will
- [00:05:57.199] control node points. Now this will affect stuff like the draw tool and
- [00:05:59.350] affect stuff like the draw tool and
- [00:05:59.360] affect stuff like the draw tool and shapes. So now let's quickly go to the
- [00:06:01.510] shapes. So now let's quickly go to the
- [00:06:01.520] shapes. So now let's quickly go to the draw tool. Let's make a shape. So I can
- [00:06:03.830] draw tool. Let's make a shape. So I can
- [00:06:03.840] draw tool. Let's make a shape. So I can just show you what the different points
- [00:06:05.670] just show you what the different points
- [00:06:05.680] just show you what the different points do. Now I can simply just leftclick and
- [00:06:09.189] do. Now I can simply just leftclick and
- [00:06:09.199] do. Now I can simply just leftclick and uh move to a new place. Left click. Left
- [00:06:11.350] uh move to a new place. Left click. Left
- [00:06:11.360] uh move to a new place. Left click. Left click. If we want a closed path, we have
- [00:06:13.909] click. If we want a closed path, we have
- [00:06:13.919] click. If we want a closed path, we have to move this thing. So we get a option
- [00:06:16.550] to move this thing. So we get a option
- [00:06:16.560] to move this thing. So we get a option where it shows not a plus but a little
- [00:06:18.950] where it shows not a plus but a little
- [00:06:18.960] where it shows not a plus but a little circle. It's hard to see here, but once
- [00:06:20.629] circle. It's hard to see here, but once
- [00:06:20.639] circle. It's hard to see here, but once you click that, it will close the actual
- [00:06:23.350] you click that, it will close the actual
- [00:06:23.360] you click that, it will close the actual uh shape for us. So now we can actually
- [00:06:24.870] uh shape for us. So now we can actually
- [00:06:24.880] uh shape for us. So now we can actually have a fill and not just the stroke
- [00:06:26.870] have a fill and not just the stroke
- [00:06:26.880] have a fill and not just the stroke where if we had to now not fill it all
- [00:06:29.510] where if we had to now not fill it all
- [00:06:29.520] where if we had to now not fill it all the way. Okay, currently you can't see
- [00:06:30.790] the way. Okay, currently you can't see
- [00:06:30.800] the way. Okay, currently you can't see it because there's no stroke. So, it is
- [00:06:32.790] it because there's no stroke. So, it is
- [00:06:32.800] it because there's no stroke. So, it is there, but let's just make sure that's
- [00:06:34.550] there, but let's just make sure that's
- [00:06:34.560] there, but let's just make sure that's selected. We go to our actual stroke and
- [00:06:37.670] selected. We go to our actual stroke and
- [00:06:37.680] selected. We go to our actual stroke and we put a color there. So, now there you
- [00:06:39.909] we put a color there. So, now there you
- [00:06:39.919] we put a color there. So, now there you can see we've got a stroke, but it is
- [00:06:42.150] can see we've got a stroke, but it is
- [00:06:42.160] can see we've got a stroke, but it is actually not a closed shape. So, even
- [00:06:43.749] actually not a closed shape. So, even
- [00:06:43.759] actually not a closed shape. So, even though there's a fill on it, we can't
- [00:06:45.189] though there's a fill on it, we can't
- [00:06:45.199] though there's a fill on it, we can't see the fill because it's a open shape.
- [00:06:47.830] see the fill because it's a open shape.
- [00:06:47.840] see the fill because it's a open shape. Now, let's say you need to make this a
- [00:06:49.430] Now, let's say you need to make this a
- [00:06:49.440] Now, let's say you need to make this a closed shape. You can simply select your
- [00:06:51.510] closed shape. You can simply select your
- [00:06:51.520] closed shape. You can simply select your shape or your layer and we go to path on
- [00:06:55.189] shape or your layer and we go to path on
- [00:06:55.199] shape or your layer and we go to path on top and then we go down till we see this
- [00:06:57.270] top and then we go down till we see this
- [00:06:57.280] top and then we go down till we see this one called close path. If we click that,
- [00:06:59.830] one called close path. If we click that,
- [00:06:59.840] one called close path. If we click that, it will close it for us and add an extra
- [00:07:02.950] it will close it for us and add an extra
- [00:07:02.960] it will close it for us and add an extra node. So now let's just quickly look at
- [00:07:05.510] node. So now let's just quickly look at
- [00:07:05.520] node. So now let's just quickly look at some node points, the differences you
- [00:07:08.150] some node points, the differences you
- [00:07:08.160] some node points, the differences you get. So we're going to select this shape
- [00:07:10.710] get. So we're going to select this shape
- [00:07:10.720] get. So we're going to select this shape and then we go one at a time. Now if we
- [00:07:14.070] and then we go one at a time. Now if we
- [00:07:14.080] and then we go one at a time. Now if we go on top here, you can see we've got a
- [00:07:15.749] go on top here, you can see we've got a
- [00:07:15.759] go on top here, you can see we've got a different node point, four different
- [00:07:16.950] different node point, four different
- [00:07:16.960] different node point, four different ones. Now this first one, what that's
- [00:07:18.790] ones. Now this first one, what that's
- [00:07:18.800] ones. Now this first one, what that's going to be doing is if we had to click
- [00:07:20.309] going to be doing is if we had to click
- [00:07:20.319] going to be doing is if we had to click that and move it around, you can see it
- [00:07:22.710] that and move it around, you can see it
- [00:07:22.720] that and move it around, you can see it relocates this point and adjust the
- [00:07:24.550] relocates this point and adjust the
- [00:07:24.560] relocates this point and adjust the shape accordingly. But just keep in mind
- [00:07:26.550] shape accordingly. But just keep in mind
- [00:07:26.560] shape accordingly. But just keep in mind it is sometimes a bit tricky selecting
- [00:07:28.390] it is sometimes a bit tricky selecting
- [00:07:28.400] it is sometimes a bit tricky selecting these note points and moving them. So
- [00:07:30.390] these note points and moving them. So
- [00:07:30.400] these note points and moving them. So you might want to zoom in a bit so you
- [00:07:32.230] you might want to zoom in a bit so you
- [00:07:32.240] you might want to zoom in a bit so you can get nice control over it. Now if we
- [00:07:34.309] can get nice control over it. Now if we
- [00:07:34.319] can get nice control over it. Now if we select the second one and we change this
- [00:07:36.150] select the second one and we change this
- [00:07:36.160] select the second one and we change this note point. Now if we select it again
- [00:07:37.909] note point. Now if we select it again
- [00:07:37.919] note point. Now if we select it again you'll notice we've got these control
- [00:07:39.189] you'll notice we've got these control
- [00:07:39.199] you'll notice we've got these control arms that's just appeared. So all four
- [00:07:42.550] arms that's just appeared. So all four
- [00:07:42.560] arms that's just appeared. So all four of these note points are going to react
- [00:07:43.749] of these note points are going to react
- [00:07:43.759] of these note points are going to react differently. But this one for instance I
- [00:07:45.350] differently. But this one for instance I
- [00:07:45.360] differently. But this one for instance I can move the one arm and then
- [00:07:47.270] can move the one arm and then
- [00:07:47.280] can move the one arm and then independently move the second one that
- [00:07:49.909] independently move the second one that
- [00:07:49.919] independently move the second one that can differ from the first one. And
- [00:07:51.270] can differ from the first one. And
- [00:07:51.280] can differ from the first one. And that's how we can create some nice weird
- [00:07:53.189] that's how we can create some nice weird
- [00:07:53.199] that's how we can create some nice weird shapes with curves in there. Now you can
- [00:07:55.990] shapes with curves in there. Now you can
- [00:07:56.000] shapes with curves in there. Now you can bring this closer, move it further,
- [00:07:58.150] bring this closer, move it further,
- [00:07:58.160] bring this closer, move it further, change the pitch and so forth. Now if we
- [00:08:00.309] change the pitch and so forth. Now if we
- [00:08:00.319] change the pitch and so forth. Now if we go to the third one, now these two is
- [00:08:03.189] go to the third one, now these two is
- [00:08:03.199] go to the third one, now these two is going to be very similar but with one
- [00:08:04.629] going to be very similar but with one
- [00:08:04.639] going to be very similar but with one key difference. So if I click this third
- [00:08:06.550] key difference. So if I click this third
- [00:08:06.560] key difference. So if I click this third one, let's go select that point. You'll
- [00:08:08.550] one, let's go select that point. You'll
- [00:08:08.560] one, let's go select that point. You'll see we've got two points but they will
- [00:08:10.790] see we've got two points but they will
- [00:08:10.800] see we've got two points but they will always stay in line with each other. So
- [00:08:13.670] always stay in line with each other. So
- [00:08:13.680] always stay in line with each other. So as I adjust the one, the other one will
- [00:08:15.350] as I adjust the one, the other one will
- [00:08:15.360] as I adjust the one, the other one will change. So this is great for smooth
- [00:08:17.029] change. So this is great for smooth
- [00:08:17.039] change. So this is great for smooth corners. But what makes this one
- [00:08:19.029] corners. But what makes this one
- [00:08:19.039] corners. But what makes this one different is these two little arms can
- [00:08:21.749] different is these two little arms can
- [00:08:21.759] different is these two little arms can be different lengths from each other,
- [00:08:23.270] be different lengths from each other,
- [00:08:23.280] be different lengths from each other, which means we can get some interesting
- [00:08:25.029] which means we can get some interesting
- [00:08:25.039] which means we can get some interesting curves without getting a sharp point.
- [00:08:28.390] curves without getting a sharp point.
- [00:08:28.400] curves without getting a sharp point. Then if we go to the last one, this
- [00:08:30.790] Then if we go to the last one, this
- [00:08:30.800] Then if we go to the last one, this one's going to be doing is it's going to
- [00:08:32.550] one's going to be doing is it's going to
- [00:08:32.560] one's going to be doing is it's going to make a equal distance between these two
- [00:08:35.430] make a equal distance between these two
- [00:08:35.440] make a equal distance between these two points. So then as I move this, you'll
- [00:08:38.389] points. So then as I move this, you'll
- [00:08:38.399] points. So then as I move this, you'll see the other one comes closer or
- [00:08:39.909] see the other one comes closer or
- [00:08:39.919] see the other one comes closer or further as I adjust. So this is
- [00:08:41.829] further as I adjust. So this is
- [00:08:41.839] further as I adjust. So this is definitely for the smoothest corners.
- [00:08:44.149] definitely for the smoothest corners.
- [00:08:44.159] definitely for the smoothest corners. you can be using this one. With the
- [00:08:46.230] you can be using this one. With the
- [00:08:46.240] you can be using this one. With the other one, you can get some nice sharp
- [00:08:48.070] other one, you can get some nice sharp
- [00:08:48.080] other one, you can get some nice sharp corners more easily. And then something
- [00:08:50.470] corners more easily. And then something
- [00:08:50.480] corners more easily. And then something to keep in mind with these note points
- [00:08:52.389] to keep in mind with these note points
- [00:08:52.399] to keep in mind with these note points is most complex shapes or most shapes
- [00:08:54.870] is most complex shapes or most shapes
- [00:08:54.880] is most complex shapes or most shapes consist of one of these four. So that is
- [00:08:57.829] consist of one of these four. So that is
- [00:08:57.839] consist of one of these four. So that is pretty much how you'll be manipulating
- [00:08:59.430] pretty much how you'll be manipulating
- [00:08:59.440] pretty much how you'll be manipulating shapes and making custom designs. Okay,
- [00:09:02.389] shapes and making custom designs. Okay,
- [00:09:02.399] shapes and making custom designs. Okay, that concludes it on the note points. I
- [00:09:04.710] that concludes it on the note points. I
- [00:09:04.720] that concludes it on the note points. I would definitely say once again, play
- [00:09:05.829] would definitely say once again, play
- [00:09:05.839] would definitely say once again, play with these things. This is one of those
- [00:09:07.350] with these things. This is one of those
- [00:09:07.360] with these things. This is one of those concepts which you need to grasp, but
- [00:09:09.110] concepts which you need to grasp, but
- [00:09:09.120] concepts which you need to grasp, but unfortunately you need some time on it
- [00:09:10.949] unfortunately you need some time on it
- [00:09:10.959] unfortunately you need some time on it as well to get comfortable. Okay, the
- [00:09:13.430] as well to get comfortable. Okay, the
- [00:09:13.440] as well to get comfortable. Okay, the next key feature we won't be looking at
- [00:09:14.870] next key feature we won't be looking at
- [00:09:14.880] next key feature we won't be looking at it is the trace image. Now, if you're
- [00:09:17.829] it is the trace image. Now, if you're
- [00:09:17.839] it is the trace image. Now, if you're going to be working with workflows where
- [00:09:19.829] going to be working with workflows where
- [00:09:19.839] going to be working with workflows where you're kind of doing registration marks
- [00:09:21.910] you're kind of doing registration marks
- [00:09:21.920] you're kind of doing registration marks and printing stickers and that, this is
- [00:09:23.670] and printing stickers and that, this is
- [00:09:23.680] and printing stickers and that, this is going to be a very handy tool. So, now
- [00:09:26.230] going to be a very handy tool. So, now
- [00:09:26.240] going to be a very handy tool. So, now to locate it, we're going to go on our
- [00:09:27.590] to locate it, we're going to go on our
- [00:09:27.600] to locate it, we're going to go on our main features bar on top here. And then
- [00:09:30.150] main features bar on top here. And then
- [00:09:30.160] main features bar on top here. And then you see we have this trace option. Then,
- [00:09:32.310] you see we have this trace option. Then,
- [00:09:32.320] you see we have this trace option. Then, if we open that, we're going to have a
- [00:09:34.230] if we open that, we're going to have a
- [00:09:34.240] if we open that, we're going to have a number of different settings. We don't
- [00:09:35.670] number of different settings. We don't
- [00:09:35.680] number of different settings. We don't need to cover all of them, but there's
- [00:09:37.350] need to cover all of them, but there's
- [00:09:37.360] need to cover all of them, but there's some key ones which we want to be
- [00:09:38.550] some key ones which we want to be
- [00:09:38.560] some key ones which we want to be looking at. So, first of all, we want to
- [00:09:40.310] looking at. So, first of all, we want to
- [00:09:40.320] looking at. So, first of all, we want to go here to the top where we can actually
- [00:09:42.070] go here to the top where we can actually
- [00:09:42.080] go here to the top where we can actually choose the image we want to trace. I'm
- [00:09:44.630] choose the image we want to trace. I'm
- [00:09:44.640] choose the image we want to trace. I'm just going to click this little doggy.
- [00:09:46.470] just going to click this little doggy.
- [00:09:46.480] just going to click this little doggy. And then you can see there we have
- [00:09:48.710] And then you can see there we have
- [00:09:48.720] And then you can see there we have something happening. So then basically
- [00:09:50.630] something happening. So then basically
- [00:09:50.640] something happening. So then basically what this feature allows us to do is we
- [00:09:52.790] what this feature allows us to do is we
- [00:09:52.800] what this feature allows us to do is we get to import an image like a raster or
- [00:09:55.350] get to import an image like a raster or
- [00:09:55.360] get to import an image like a raster or like a photo that concept and then try
- [00:09:57.829] like a photo that concept and then try
- [00:09:57.839] like a photo that concept and then try and make a outline cut of that. So
- [00:10:00.949] and make a outline cut of that. So
- [00:10:00.959] and make a outline cut of that. So imagine in a case of like you have a
- [00:10:02.790] imagine in a case of like you have a
- [00:10:02.800] imagine in a case of like you have a sticker and you want to be able to peel
- [00:10:04.710] sticker and you want to be able to peel
- [00:10:04.720] sticker and you want to be able to peel it off and stick it on the fridge or
- [00:10:06.550] it off and stick it on the fridge or
- [00:10:06.560] it off and stick it on the fridge or book or anything like that where it's
- [00:10:08.550] book or anything like that where it's
- [00:10:08.560] book or anything like that where it's got an image and then there's an actual
- [00:10:10.710] got an image and then there's an actual
- [00:10:10.720] got an image and then there's an actual cut line. So what we're doing is we want
- [00:10:12.870] cut line. So what we're doing is we want
- [00:10:12.880] cut line. So what we're doing is we want to isolate a cut line from that image
- [00:10:15.590] to isolate a cut line from that image
- [00:10:15.600] to isolate a cut line from that image because obviously we're going to be
- [00:10:16.790] because obviously we're going to be
- [00:10:16.800] because obviously we're going to be printing it and then we're going to be
- [00:10:18.150] printing it and then we're going to be
- [00:10:18.160] printing it and then we're going to be doing a cut line. Now there is a few
- [00:10:20.790] doing a cut line. Now there is a few
- [00:10:20.800] doing a cut line. Now there is a few things to keep in mind that's going to
- [00:10:22.150] things to keep in mind that's going to
- [00:10:22.160] things to keep in mind that's going to make it a little bit more tricky
- [00:10:23.750] make it a little bit more tricky
- [00:10:23.760] make it a little bit more tricky depending on the file format and the
- [00:10:25.509] depending on the file format and the
- [00:10:25.519] depending on the file format and the image quality and detail. But yeah,
- [00:10:28.630] image quality and detail. But yeah,
- [00:10:28.640] image quality and detail. But yeah, we'll start with this little one. I'm
- [00:10:29.910] we'll start with this little one. I'm
- [00:10:29.920] we'll start with this little one. I'm just going to make a bit bigger so you
- [00:10:30.870] just going to make a bit bigger so you
- [00:10:30.880] just going to make a bit bigger so you can see nicely. So, currently what's
- [00:10:33.030] can see nicely. So, currently what's
- [00:10:33.040] can see nicely. So, currently what's happening is it's making a cut line
- [00:10:34.790] happening is it's making a cut line
- [00:10:34.800] happening is it's making a cut line around the edge here, but you can see
- [00:10:36.550] around the edge here, but you can see
- [00:10:36.560] around the edge here, but you can see it's cutting out our eyes as and in the
- [00:10:39.269] it's cutting out our eyes as and in the
- [00:10:39.279] it's cutting out our eyes as and in the inside. So, this is not ideal if you
- [00:10:41.350] inside. So, this is not ideal if you
- [00:10:41.360] inside. So, this is not ideal if you want to stick it on something because
- [00:10:43.190] want to stick it on something because
- [00:10:43.200] want to stick it on something because things going to have no eyes and you're
- [00:10:44.790] things going to have no eyes and you're
- [00:10:44.800] things going to have no eyes and you're going to have to manually do it. So, if
- [00:10:46.550] going to have to manually do it. So, if
- [00:10:46.560] going to have to manually do it. So, if you want to try to fix that, that is
- [00:10:47.750] you want to try to fix that, that is
- [00:10:47.760] you want to try to fix that, that is where we're going to go into these
- [00:10:48.790] where we're going to go into these
- [00:10:48.800] where we're going to go into these settings. So, the actual image settings.
- [00:10:51.350] settings. So, the actual image settings.
- [00:10:51.360] settings. So, the actual image settings. Now, under the mode, we can do stuff
- [00:10:53.030] Now, under the mode, we can do stuff
- [00:10:53.040] Now, under the mode, we can do stuff like color layer and stuff like that.
- [00:10:55.990] like color layer and stuff like that.
- [00:10:56.000] like color layer and stuff like that. So, we got update here at the bottom.
- [00:10:57.829] So, we got update here at the bottom.
- [00:10:57.839] So, we got update here at the bottom. And then you can see what depending on
- [00:10:59.030] And then you can see what depending on
- [00:10:59.040] And then you can see what depending on the color, it will make cutouts of
- [00:11:00.630] the color, it will make cutouts of
- [00:11:00.640] the color, it will make cutouts of those. Now you can get creative. Maybe
- [00:11:02.310] those. Now you can get creative. Maybe
- [00:11:02.320] those. Now you can get creative. Maybe there's some places you'll use this when
- [00:11:04.470] there's some places you'll use this when
- [00:11:04.480] there's some places you'll use this when you want to be cutting by layer. So
- [00:11:06.550] you want to be cutting by layer. So
- [00:11:06.560] you want to be cutting by layer. So especially if you're working on more
- [00:11:07.670] especially if you're working on more
- [00:11:07.680] especially if you're working on more like ve type graphics. So it's more
- [00:11:11.030] like ve type graphics. So it's more
- [00:11:11.040] like ve type graphics. So it's more cartoon like 2D but like this then the
- [00:11:13.350] cartoon like 2D but like this then the
- [00:11:13.360] cartoon like 2D but like this then the cut by layer makes more sense. And then
- [00:11:16.069] cut by layer makes more sense. And then
- [00:11:16.079] cut by layer makes more sense. And then we also have single color. So you can
- [00:11:17.829] we also have single color. So you can
- [00:11:17.839] we also have single color. So you can isolate a color and try only cut that
- [00:11:20.230] isolate a color and try only cut that
- [00:11:20.240] isolate a color and try only cut that one. But most of the time you're just
- [00:11:22.310] one. But most of the time you're just
- [00:11:22.320] one. But most of the time you're just going to be using the monochrome. Now
- [00:11:24.870] going to be using the monochrome. Now
- [00:11:24.880] going to be using the monochrome. Now what you can do with the contrast if we
- [00:11:26.790] what you can do with the contrast if we
- [00:11:26.800] what you can do with the contrast if we adjust this you will see where it's
- [00:11:28.870] adjust this you will see where it's
- [00:11:28.880] adjust this you will see where it's cutting and what's trying to cut out
- [00:11:30.389] cutting and what's trying to cut out
- [00:11:30.399] cutting and what's trying to cut out will change as well. The lower this is
- [00:11:32.790] will change as well. The lower this is
- [00:11:32.800] will change as well. The lower this is we'll try cut out even more. So it'll
- [00:11:35.269] we'll try cut out even more. So it'll
- [00:11:35.279] we'll try cut out even more. So it'll become basically more detailed and the
- [00:11:37.110] become basically more detailed and the
- [00:11:37.120] become basically more detailed and the higher we make the contrast the more
- [00:11:39.190] higher we make the contrast the more
- [00:11:39.200] higher we make the contrast the more it's going to start treating it as one
- [00:11:40.949] it's going to start treating it as one
- [00:11:40.959] it's going to start treating it as one shape. So now ideally you obviously want
- [00:11:43.430] shape. So now ideally you obviously want
- [00:11:43.440] shape. So now ideally you obviously want it in this case to a point where it's
- [00:11:45.670] it in this case to a point where it's
- [00:11:45.680] it in this case to a point where it's not cutting out the eyes separately. So
- [00:11:48.310] not cutting out the eyes separately. So
- [00:11:48.320] not cutting out the eyes separately. So then we'll just adjust this up and up
- [00:11:49.990] then we'll just adjust this up and up
- [00:11:50.000] then we'll just adjust this up and up until we find one where the background's
- [00:11:51.750] until we find one where the background's
- [00:11:51.760] until we find one where the background's not green, but the doggy is green. Now
- [00:11:55.110] not green, but the doggy is green. Now
- [00:11:55.120] not green, but the doggy is green. Now we've got something like a despeckle. So
- [00:11:56.870] we've got something like a despeckle. So
- [00:11:56.880] we've got something like a despeckle. So sometimes you get some noise here around
- [00:11:58.630] sometimes you get some noise here around
- [00:11:58.640] sometimes you get some noise here around the edges. And then you can simply click
- [00:12:00.470] the edges. And then you can simply click
- [00:12:00.480] the edges. And then you can simply click that one and it will try to smooth it
- [00:12:02.310] that one and it will try to smooth it
- [00:12:02.320] that one and it will try to smooth it out for you. So that way you've got nice
- [00:12:04.389] out for you. So that way you've got nice
- [00:12:04.399] out for you. So that way you've got nice clean cut lines. So now let's say in our
- [00:12:07.030] clean cut lines. So now let's say in our
- [00:12:07.040] clean cut lines. So now let's say in our case we try to trace this little doggy
- [00:12:09.829] case we try to trace this little doggy
- [00:12:09.839] case we try to trace this little doggy but like we said the eyes and that is
- [00:12:12.550] but like we said the eyes and that is
- [00:12:12.560] but like we said the eyes and that is still going to be cut out and we don't
- [00:12:14.069] still going to be cut out and we don't
- [00:12:14.079] still going to be cut out and we don't want that. Then we can choose this
- [00:12:15.750] want that. Then we can choose this
- [00:12:15.760] want that. Then we can choose this option, the blackout. And now if we
- [00:12:18.470] option, the blackout. And now if we
- [00:12:18.480] option, the blackout. And now if we update, you can see it's no longer
- [00:12:19.829] update, you can see it's no longer
- [00:12:19.839] update, you can see it's no longer cutting out the eyes. So what that comes
- [00:12:21.829] cutting out the eyes. So what that comes
- [00:12:21.839] cutting out the eyes. So what that comes down to is any shapes within the shape
- [00:12:24.710] down to is any shapes within the shape
- [00:12:24.720] down to is any shapes within the shape that it's trying to cut out, it will
- [00:12:26.150] that it's trying to cut out, it will
- [00:12:26.160] that it's trying to cut out, it will treat that as not a shape and only cut
- [00:12:28.629] treat that as not a shape and only cut
- [00:12:28.639] treat that as not a shape and only cut the outline. So this can be very nice to
- [00:12:30.870] the outline. So this can be very nice to
- [00:12:30.880] the outline. So this can be very nice to have more clean shapes. Now, another
- [00:12:33.430] have more clean shapes. Now, another
- [00:12:33.440] have more clean shapes. Now, another very important feature which um it's
- [00:12:36.069] very important feature which um it's
- [00:12:36.079] very important feature which um it's very quick to forget, but like let's say
- [00:12:38.150] very quick to forget, but like let's say
- [00:12:38.160] very quick to forget, but like let's say you're going to be doing a registration
- [00:12:39.670] you're going to be doing a registration
- [00:12:39.680] you're going to be doing a registration mark. So you're going to be printing
- [00:12:40.949] mark. So you're going to be printing
- [00:12:40.959] mark. So you're going to be printing this design and then cutting out
- [00:12:42.949] this design and then cutting out
- [00:12:42.959] this design and then cutting out afterwards. Then it's quite important to
- [00:12:45.430] afterwards. Then it's quite important to
- [00:12:45.440] afterwards. Then it's quite important to add image layer. So this is control plus
- [00:12:48.629] add image layer. So this is control plus
- [00:12:48.639] add image layer. So this is control plus cut cuz what's going to happen is when
- [00:12:50.069] cut cuz what's going to happen is when
- [00:12:50.079] cut cuz what's going to happen is when we print this image, we want to make
- [00:12:51.670] we print this image, we want to make
- [00:12:51.680] we print this image, we want to make sure there's registration marks on that
- [00:12:54.790] sure there's registration marks on that
- [00:12:54.800] sure there's registration marks on that cutter can understand or this program.
- [00:12:57.430] cutter can understand or this program.
- [00:12:57.440] cutter can understand or this program. So then we want to make sure we check
- [00:12:59.269] So then we want to make sure we check
- [00:12:59.279] So then we want to make sure we check that one on because if we don't then
- [00:13:01.990] that one on because if we don't then
- [00:13:02.000] that one on because if we don't then it's going to import only the cut lines
- [00:13:03.910] it's going to import only the cut lines
- [00:13:03.920] it's going to import only the cut lines and not the actual image. So if I check
- [00:13:07.110] and not the actual image. So if I check
- [00:13:07.120] and not the actual image. So if I check that on, we say okay, we've got our
- [00:13:09.030] that on, we say okay, we've got our
- [00:13:09.040] that on, we say okay, we've got our images here. I'm just going to rescale
- [00:13:10.389] images here. I'm just going to rescale
- [00:13:10.399] images here. I'm just going to rescale that.
- [00:13:11.990] that.
- [00:13:12.000] that. And then if we had to now move here to
- [00:13:13.829] And then if we had to now move here to
- [00:13:13.839] And then if we had to now move here to the actual layers tab, then you will
- [00:13:15.910] the actual layers tab, then you will
- [00:13:15.920] the actual layers tab, then you will notice we've got a group. We open that.
- [00:13:18.230] notice we've got a group. We open that.
- [00:13:18.240] notice we've got a group. We open that. And there we go. We've got our cut and
- [00:13:20.550] And there we go. We've got our cut and
- [00:13:20.560] And there we go. We've got our cut and our print layer. So we can now hide one
- [00:13:23.110] our print layer. So we can now hide one
- [00:13:23.120] our print layer. So we can now hide one and see the one or hide the other one.
- [00:13:26.389] and see the one or hide the other one.
- [00:13:26.399] and see the one or hide the other one. If I go to preview once again, we can
- [00:13:28.710] If I go to preview once again, we can
- [00:13:28.720] If I go to preview once again, we can see over here. So we've got our show cut
- [00:13:31.750] see over here. So we've got our show cut
- [00:13:31.760] see over here. So we've got our show cut line. So we can make sure that is nice
- [00:13:33.030] line. So we can make sure that is nice
- [00:13:33.040] line. So we can make sure that is nice and clean.
- [00:13:35.190] and clean.
- [00:13:35.200] and clean. Now we're going to be looking at an
- [00:13:36.550] Now we're going to be looking at an
- [00:13:36.560] Now we're going to be looking at an image with an old photo. Now, my rule of
- [00:13:39.750] image with an old photo. Now, my rule of
- [00:13:39.760] image with an old photo. Now, my rule of thumb is if you can work with designs
- [00:13:41.269] thumb is if you can work with designs
- [00:13:41.279] thumb is if you can work with designs with alpha channels because this really
- [00:13:43.350] with alpha channels because this really
- [00:13:43.360] with alpha channels because this really makes your life more simple, especially
- [00:13:45.269] makes your life more simple, especially
- [00:13:45.279] makes your life more simple, especially when you get to complex things. So,
- [00:13:46.870] when you get to complex things. So,
- [00:13:46.880] when you get to complex things. So, let's say we take this image, which is
- [00:13:48.710] let's say we take this image, which is
- [00:13:48.720] let's say we take this image, which is rather complex. We're going to just
- [00:13:51.030] rather complex. We're going to just
- [00:13:51.040] rather complex. We're going to just reset the settings to more or less the
- [00:13:52.870] reset the settings to more or less the
- [00:13:52.880] reset the settings to more or less the same. And then let's scale this up. Now,
- [00:13:56.389] same. And then let's scale this up. Now,
- [00:13:56.399] same. And then let's scale this up. Now, if we update the preview, you can see
- [00:13:58.389] if we update the preview, you can see
- [00:13:58.399] if we update the preview, you can see this is going to be very messy because
- [00:13:59.910] this is going to be very messy because
- [00:13:59.920] this is going to be very messy because of all the detail. So, it is uh not sure
- [00:14:02.949] of all the detail. So, it is uh not sure
- [00:14:02.959] of all the detail. So, it is uh not sure what to follow. It's trying to cut out
- [00:14:04.710] what to follow. It's trying to cut out
- [00:14:04.720] what to follow. It's trying to cut out shapes within the shapes and so forth.
- [00:14:06.629] shapes within the shapes and so forth.
- [00:14:06.639] shapes within the shapes and so forth. Now, if your image actually has a alpha
- [00:14:09.189] Now, if your image actually has a alpha
- [00:14:09.199] Now, if your image actually has a alpha channel, like what it comes down to is a
- [00:14:10.870] channel, like what it comes down to is a
- [00:14:10.880] channel, like what it comes down to is a see-through background, you want to go
- [00:14:12.790] see-through background, you want to go
- [00:14:12.800] see-through background, you want to go here, use alpha channel when available.
- [00:14:15.189] here, use alpha channel when available.
- [00:14:15.199] here, use alpha channel when available. So, if we click that up and then we
- [00:14:17.509] So, if we click that up and then we
- [00:14:17.519] So, if we click that up and then we update the preview, then you can see
- [00:14:20.150] update the preview, then you can see
- [00:14:20.160] update the preview, then you can see it's going to make us a nice clean cut
- [00:14:22.470] it's going to make us a nice clean cut
- [00:14:22.480] it's going to make us a nice clean cut right around the edge and disregarding
- [00:14:25.110] right around the edge and disregarding
- [00:14:25.120] right around the edge and disregarding any form of information. And we don't
- [00:14:26.870] any form of information. And we don't
- [00:14:26.880] any form of information. And we don't even have the blackout selected. Now,
- [00:14:29.750] even have the blackout selected. Now,
- [00:14:29.760] even have the blackout selected. Now, I'm going to add the image and then we
- [00:14:31.269] I'm going to add the image and then we
- [00:14:31.279] I'm going to add the image and then we say okay. Now you can see we can print a
- [00:14:33.829] say okay. Now you can see we can print a
- [00:14:33.839] say okay. Now you can see we can print a nice detailed image, but we can also cut
- [00:14:36.949] nice detailed image, but we can also cut
- [00:14:36.959] nice detailed image, but we can also cut that out as maybe a sticker or something
- [00:14:39.670] that out as maybe a sticker or something
- [00:14:39.680] that out as maybe a sticker or something in that line. Okay, the next key feature
- [00:14:42.949] in that line. Okay, the next key feature
- [00:14:42.959] in that line. Okay, the next key feature we're going to be looking at is contour
- [00:14:45.030] we're going to be looking at is contour
- [00:14:45.040] we're going to be looking at is contour cutting. Now, the trace image will do a
- [00:14:48.949] cutting. Now, the trace image will do a
- [00:14:48.959] cutting. Now, the trace image will do a form of contour cutting, but now this is
- [00:14:51.030] form of contour cutting, but now this is
- [00:14:51.040] form of contour cutting, but now this is if you want to have a little bit more
- [00:14:52.550] if you want to have a little bit more
- [00:14:52.560] if you want to have a little bit more control, then we want to be diving into
- [00:14:55.430] control, then we want to be diving into
- [00:14:55.440] control, then we want to be diving into this feature. Okay, now I'm just going
- [00:14:57.829] this feature. Okay, now I'm just going
- [00:14:57.839] this feature. Okay, now I'm just going to quickly erase an image here, throw it
- [00:14:59.590] to quickly erase an image here, throw it
- [00:14:59.600] to quickly erase an image here, throw it in, and then um set up a basic setting.
- [00:15:02.389] in, and then um set up a basic setting.
- [00:15:02.399] in, and then um set up a basic setting. So, what it comes down to is we have a
- [00:15:04.230] So, what it comes down to is we have a
- [00:15:04.240] So, what it comes down to is we have a graphics or or something printable with
- [00:15:06.870] graphics or or something printable with
- [00:15:06.880] graphics or or something printable with a contour cut. So, we'll use this as a
- [00:15:08.949] a contour cut. So, we'll use this as a
- [00:15:08.959] a contour cut. So, we'll use this as a base start. Let's go show principle. So,
- [00:15:11.509] base start. Let's go show principle. So,
- [00:15:11.519] base start. Let's go show principle. So, we can see we've got our actual doggy
- [00:15:13.509] we can see we've got our actual doggy
- [00:15:13.519] we can see we've got our actual doggy with a cutout like we did in the
- [00:15:15.509] with a cutout like we did in the
- [00:15:15.519] with a cutout like we did in the previous tutorial. Now, let's say this
- [00:15:18.230] previous tutorial. Now, let's say this
- [00:15:18.240] previous tutorial. Now, let's say this line you didn't want to be exactly on
- [00:15:21.110] line you didn't want to be exactly on
- [00:15:21.120] line you didn't want to be exactly on the edge. Maybe you either wanted to
- [00:15:23.670] the edge. Maybe you either wanted to
- [00:15:23.680] the edge. Maybe you either wanted to come in a bit or extrude out a bit.
- [00:15:25.430] come in a bit or extrude out a bit.
- [00:15:25.440] come in a bit or extrude out a bit. Maybe you want a bit of a white border
- [00:15:26.870] Maybe you want a bit of a white border
- [00:15:26.880] Maybe you want a bit of a white border on your sticker for a cleaner finish.
- [00:15:30.550] on your sticker for a cleaner finish.
- [00:15:30.560] on your sticker for a cleaner finish. Now, just the trace image is not going
- [00:15:32.470] Now, just the trace image is not going
- [00:15:32.480] Now, just the trace image is not going to look nice. So, I'm going to duplicate
- [00:15:33.750] to look nice. So, I'm going to duplicate
- [00:15:33.760] to look nice. So, I'm going to duplicate here so we can see the difference. Now,
- [00:15:36.150] here so we can see the difference. Now,
- [00:15:36.160] here so we can see the difference. Now, if we go preview here, you can see both
- [00:15:37.829] if we go preview here, you can see both
- [00:15:37.839] if we go preview here, you can see both of them are cutting out the same. What
- [00:15:39.590] of them are cutting out the same. What
- [00:15:39.600] of them are cutting out the same. What we're going to do is I'm going to go
- [00:15:40.790] we're going to do is I'm going to go
- [00:15:40.800] we're going to do is I'm going to go into the group layer here on the layers.
- [00:15:43.829] into the group layer here on the layers.
- [00:15:43.839] into the group layer here on the layers. Then, we want to isolate,
- [00:15:46.230] Then, we want to isolate,
- [00:15:46.240] Then, we want to isolate, hide the print, and select the cut
- [00:15:48.470] hide the print, and select the cut
- [00:15:48.480] hide the print, and select the cut layer. Then, with that selected, we want
- [00:15:50.949] layer. Then, with that selected, we want
- [00:15:50.959] layer. Then, with that selected, we want to go under our main menu effects. And
- [00:15:52.949] to go under our main menu effects. And
- [00:15:52.959] to go under our main menu effects. And then we want to go down till we can find
- [00:15:55.269] then we want to go down till we can find
- [00:15:55.279] then we want to go down till we can find the shadow layer contour cut. Now what
- [00:15:58.870] the shadow layer contour cut. Now what
- [00:15:58.880] the shadow layer contour cut. Now what this is going to do is it's going to
- [00:16:00.150] this is going to do is it's going to
- [00:16:00.160] this is going to do is it's going to allow us to make a way more controlled
- [00:16:02.470] allow us to make a way more controlled
- [00:16:02.480] allow us to make a way more controlled and custom contour cut based off the
- [00:16:05.749] and custom contour cut based off the
- [00:16:05.759] and custom contour cut based off the shape we have selected. So now if we
- [00:16:08.710] shape we have selected. So now if we
- [00:16:08.720] shape we have selected. So now if we look under the settings here's a few
- [00:16:11.110] look under the settings here's a few
- [00:16:11.120] look under the settings here's a few things we want to be looking at. So we
- [00:16:13.030] things we want to be looking at. So we
- [00:16:13.040] things we want to be looking at. So we have the size and then we also have the
- [00:16:17.110] have the size and then we also have the
- [00:16:17.120] have the size and then we also have the actual color. So if we click on this we
- [00:16:18.790] actual color. So if we click on this we
- [00:16:18.800] actual color. So if we click on this we can change it. I'm just going to do this
- [00:16:19.990] can change it. I'm just going to do this
- [00:16:20.000] can change it. I'm just going to do this so it's obvious for now and make it red.
- [00:16:22.389] so it's obvious for now and make it red.
- [00:16:22.399] so it's obvious for now and make it red. while we adjust other things. Now, if we
- [00:16:23.990] while we adjust other things. Now, if we
- [00:16:24.000] while we adjust other things. Now, if we increase the size, you can see it
- [00:16:25.749] increase the size, you can see it
- [00:16:25.759] increase the size, you can see it increases the base of the shape we've
- [00:16:27.670] increases the base of the shape we've
- [00:16:27.680] increases the base of the shape we've got selected, which is very handy. Then
- [00:16:31.350] got selected, which is very handy. Then
- [00:16:31.360] got selected, which is very handy. Then top there, you can see we're currently
- [00:16:32.710] top there, you can see we're currently
- [00:16:32.720] top there, you can see we're currently getting a bit of a sharp corner there on
- [00:16:34.710] getting a bit of a sharp corner there on
- [00:16:34.720] getting a bit of a sharp corner there on the ear. So, let's say we want to change
- [00:16:36.310] the ear. So, let's say we want to change
- [00:16:36.320] the ear. So, let's say we want to change that. We just go to type and then we
- [00:16:38.310] that. We just go to type and then we
- [00:16:38.320] that. We just go to type and then we select round. Now, any corners, it's
- [00:16:40.629] select round. Now, any corners, it's
- [00:16:40.639] select round. Now, any corners, it's going to make round, which is handy. But
- [00:16:42.150] going to make round, which is handy. But
- [00:16:42.160] going to make round, which is handy. But you can also make it straight. So if you
- [00:16:44.470] you can also make it straight. So if you
- [00:16:44.480] you can also make it straight. So if you want it edge, so depending on your
- [00:16:45.829] want it edge, so depending on your
- [00:16:45.839] want it edge, so depending on your design or what you're going to be going
- [00:16:47.509] design or what you're going to be going
- [00:16:47.519] design or what you're going to be going for. If it's more dynamic or organic,
- [00:16:49.670] for. If it's more dynamic or organic,
- [00:16:49.680] for. If it's more dynamic or organic, you probably want to go for the round.
- [00:16:52.069] you probably want to go for the round.
- [00:16:52.079] you probably want to go for the round. And then I'm going to select this
- [00:16:53.509] And then I'm going to select this
- [00:16:53.519] And then I'm going to select this outline only. So it's easy to see where
- [00:16:55.430] outline only. So it's easy to see where
- [00:16:55.440] outline only. So it's easy to see where our previous cut mark was. Then we have
- [00:16:58.550] our previous cut mark was. Then we have
- [00:16:58.560] our previous cut mark was. Then we have this option insert shadow. So now let's
- [00:17:01.350] this option insert shadow. So now let's
- [00:17:01.360] this option insert shadow. So now let's say you have a big black border like
- [00:17:03.509] say you have a big black border like
- [00:17:03.519] say you have a big black border like this. You want to print on white and you
- [00:17:05.510] this. You want to print on white and you
- [00:17:05.520] this. You want to print on white and you want to cut it out. Now sometimes what
- [00:17:07.429] want to cut it out. Now sometimes what
- [00:17:07.439] want to cut it out. Now sometimes what happens is if your cut is not exactly
- [00:17:10.230] happens is if your cut is not exactly
- [00:17:10.240] happens is if your cut is not exactly parallel to the actual design some
- [00:17:13.029] parallel to the actual design some
- [00:17:13.039] parallel to the actual design some places it's going to cut onto the black
- [00:17:14.789] places it's going to cut onto the black
- [00:17:14.799] places it's going to cut onto the black and sometimes slightly off. It can be
- [00:17:16.710] and sometimes slightly off. It can be
- [00:17:16.720] and sometimes slightly off. It can be really off by point something of a
- [00:17:18.549] really off by point something of a
- [00:17:18.559] really off by point something of a millimeter and then you're going to on
- [00:17:20.549] millimeter and then you're going to on
- [00:17:20.559] millimeter and then you're going to on your design see a little white border.
- [00:17:23.029] your design see a little white border.
- [00:17:23.039] your design see a little white border. Then what you want to do is you want to
- [00:17:24.470] Then what you want to do is you want to
- [00:17:24.480] Then what you want to do is you want to insert shadow and cut slightly into the
- [00:17:27.350] insert shadow and cut slightly into the
- [00:17:27.360] insert shadow and cut slightly into the design especially if you're compensating
- [00:17:28.950] design especially if you're compensating
- [00:17:28.960] design especially if you're compensating with this uh with a form of border like
- [00:17:31.510] with this uh with a form of border like
- [00:17:31.520] with this uh with a form of border like this doggy has a black one. So then what
- [00:17:33.909] this doggy has a black one. So then what
- [00:17:33.919] this doggy has a black one. So then what will happen is you going to put it to
- [00:17:35.270] will happen is you going to put it to
- [00:17:35.280] will happen is you going to put it to the inside and your final product will
- [00:17:37.510] the inside and your final product will
- [00:17:37.520] the inside and your final product will look cleaner. I'm just going to leave
- [00:17:39.190] look cleaner. I'm just going to leave
- [00:17:39.200] look cleaner. I'm just going to leave that off for now. We also have obviously
- [00:17:42.150] that off for now. We also have obviously
- [00:17:42.160] that off for now. We also have obviously blackout shadow if we need to use that.
- [00:17:44.230] blackout shadow if we need to use that.
- [00:17:44.240] blackout shadow if we need to use that. So if you want to close off some of the
- [00:17:46.470] So if you want to close off some of the
- [00:17:46.480] So if you want to close off some of the gaps especially on some designs. Now I'm
- [00:17:49.270] gaps especially on some designs. Now I'm
- [00:17:49.280] gaps especially on some designs. Now I'm going to leave that like that and say
- [00:17:50.630] going to leave that like that and say
- [00:17:50.640] going to leave that like that and say okay. Now what's going to be important
- [00:17:52.470] okay. Now what's going to be important
- [00:17:52.480] okay. Now what's going to be important is we need to choose which one this is
- [00:17:56.150] is we need to choose which one this is
- [00:17:56.160] is we need to choose which one this is going to be using. So we've got the
- [00:17:57.350] going to be using. So we've got the
- [00:17:57.360] going to be using. So we've got the shadow layer here at the bottom and the
- [00:17:59.029] shadow layer here at the bottom and the
- [00:17:59.039] shadow layer here at the bottom and the cut layer on top. So you can see there's
- [00:18:01.590] cut layer on top. So you can see there's
- [00:18:01.600] cut layer on top. So you can see there's two different ones. So currently, if we
- [00:18:02.950] two different ones. So currently, if we
- [00:18:02.960] two different ones. So currently, if we had to cut it, what's going to happen is
- [00:18:04.870] had to cut it, what's going to happen is
- [00:18:04.880] had to cut it, what's going to happen is it's going to cut both of them, which is
- [00:18:06.789] it's going to cut both of them, which is
- [00:18:06.799] it's going to cut both of them, which is going to be a problem. It's not what we
- [00:18:08.310] going to be a problem. It's not what we
- [00:18:08.320] going to be a problem. It's not what we want. We want to only cut the outside
- [00:18:10.230] want. We want to only cut the outside
- [00:18:10.240] want. We want to only cut the outside one. So then what we want to do is we go
- [00:18:12.390] one. So then what we want to do is we go
- [00:18:12.400] one. So then what we want to do is we go to the cut layer and we can just simply
- [00:18:13.990] to the cut layer and we can just simply
- [00:18:14.000] to the cut layer and we can just simply delete that. I mean, unless you want to
- [00:18:15.590] delete that. I mean, unless you want to
- [00:18:15.600] delete that. I mean, unless you want to keep it, you can just hide it and stuff,
- [00:18:17.110] keep it, you can just hide it and stuff,
- [00:18:17.120] keep it, you can just hide it and stuff, but I'm going to delete it. And we put
- [00:18:19.350] but I'm going to delete it. And we put
- [00:18:19.360] but I'm going to delete it. And we put our print back. And now we can see we're
- [00:18:21.750] our print back. And now we can see we're
- [00:18:21.760] our print back. And now we can see we're going to have a nice little cut right
- [00:18:23.430] going to have a nice little cut right
- [00:18:23.440] going to have a nice little cut right around that, which going to leave us a
- [00:18:24.870] around that, which going to leave us a
- [00:18:24.880] around that, which going to leave us a white border, which in the end of the
- [00:18:26.070] white border, which in the end of the
- [00:18:26.080] white border, which in the end of the day, it's going to make the product just
- [00:18:27.430] day, it's going to make the product just
- [00:18:27.440] day, it's going to make the product just look slightly more professional. Now the
- [00:18:30.070] look slightly more professional. Now the
- [00:18:30.080] look slightly more professional. Now the nice thing about this is it does not
- [00:18:31.669] nice thing about this is it does not
- [00:18:31.679] nice thing about this is it does not just work on traced images. So let's say
- [00:18:34.789] just work on traced images. So let's say
- [00:18:34.799] just work on traced images. So let's say you made a vector type design. So let's
- [00:18:37.830] you made a vector type design. So let's
- [00:18:37.840] you made a vector type design. So let's just grab this triangle. We go preview.
- [00:18:39.430] just grab this triangle. We go preview.
- [00:18:39.440] just grab this triangle. We go preview. We can see okay currently it's going to
- [00:18:40.710] We can see okay currently it's going to
- [00:18:40.720] We can see okay currently it's going to be cutting out the triangle. But now
- [00:18:43.590] be cutting out the triangle. But now
- [00:18:43.600] be cutting out the triangle. But now there comes a trick like let's say we're
- [00:18:45.590] there comes a trick like let's say we're
- [00:18:45.600] there comes a trick like let's say we're going to be cutting out the shape but
- [00:18:47.750] going to be cutting out the shape but
- [00:18:47.760] going to be cutting out the shape but we're also going to put a border around.
- [00:18:51.270] we're also going to put a border around.
- [00:18:51.280] we're also going to put a border around. Think let's rather use the star cuz it's
- [00:18:52.870] Think let's rather use the star cuz it's
- [00:18:52.880] Think let's rather use the star cuz it's a little bit more fun. So select this,
- [00:18:55.830] a little bit more fun. So select this,
- [00:18:55.840] a little bit more fun. So select this, scale it a bit bigger,
- [00:18:58.549] scale it a bit bigger,
- [00:18:58.559] scale it a bit bigger, and then so by default, vector shapes,
- [00:19:00.470] and then so by default, vector shapes,
- [00:19:00.480] and then so by default, vector shapes, they're going to be cutting. So then
- [00:19:02.070] they're going to be cutting. So then
- [00:19:02.080] they're going to be cutting. So then what we can do is we go here to the
- [00:19:03.510] what we can do is we go here to the
- [00:19:03.520] what we can do is we go here to the shadow contour layer. We adjust it
- [00:19:07.029] shadow contour layer. We adjust it
- [00:19:07.039] shadow contour layer. We adjust it accordingly. So I'm going to also just
- [00:19:08.630] accordingly. So I'm going to also just
- [00:19:08.640] accordingly. So I'm going to also just increase the scale. Then maybe fix these
- [00:19:11.590] increase the scale. Then maybe fix these
- [00:19:11.600] increase the scale. Then maybe fix these edges so they're round so it looks
- [00:19:13.750] edges so they're round so it looks
- [00:19:13.760] edges so they're round so it looks pretty.
- [00:19:15.430] pretty.
- [00:19:15.440] pretty. And then um outline only.
- [00:19:18.710] And then um outline only.
- [00:19:18.720] And then um outline only. Yeah. And then I think we are good to
- [00:19:20.870] Yeah. And then I think we are good to
- [00:19:20.880] Yeah. And then I think we are good to go. We say okay. Now once again like I
- [00:19:23.669] go. We say okay. Now once again like I
- [00:19:23.679] go. We say okay. Now once again like I mentioned if we go into preview you can
- [00:19:24.870] mentioned if we go into preview you can
- [00:19:24.880] mentioned if we go into preview you can see it's going to cut out the star and
- [00:19:26.710] see it's going to cut out the star and
- [00:19:26.720] see it's going to cut out the star and the actual outside. So now how do we
- [00:19:29.990] the actual outside. So now how do we
- [00:19:30.000] the actual outside. So now how do we combat this or how do we come around
- [00:19:31.830] combat this or how do we come around
- [00:19:31.840] combat this or how do we come around this to fix it. So basically what we
- [00:19:33.669] this to fix it. So basically what we
- [00:19:33.679] this to fix it. So basically what we want to do is we want to select the star
- [00:19:35.430] want to do is we want to select the star
- [00:19:35.440] want to do is we want to select the star the inside shape. Then we want to go to
- [00:19:37.909] the inside shape. Then we want to go to
- [00:19:37.919] the inside shape. Then we want to go to the style layer and then under the cut
- [00:19:40.710] the style layer and then under the cut
- [00:19:40.720] the style layer and then under the cut line type it's important we go here and
- [00:19:44.549] line type it's important we go here and
- [00:19:44.559] line type it's important we go here and we change this to print only. And then
- [00:19:47.909] we change this to print only. And then
- [00:19:47.919] we change this to print only. And then now if we had to go to preview you'll
- [00:19:49.510] now if we had to go to preview you'll
- [00:19:49.520] now if we had to go to preview you'll see it's only cutting the outline.
- [00:19:52.789] see it's only cutting the outline.
- [00:19:52.799] see it's only cutting the outline. So, if we put there show printable, then
- [00:19:55.590] So, if we put there show printable, then
- [00:19:55.600] So, if we put there show printable, then it's going to show our star, but it's
- [00:19:57.190] it's going to show our star, but it's
- [00:19:57.200] it's going to show our star, but it's only going to be cutting the outline.
- [00:19:58.390] only going to be cutting the outline.
- [00:19:58.400] only going to be cutting the outline. So, this is a great way to go if you've
- [00:19:59.830] So, this is a great way to go if you've
- [00:19:59.840] So, this is a great way to go if you've made custom designs here within the
- [00:20:01.750] made custom designs here within the
- [00:20:01.760] made custom designs here within the program, but you only want to cut the
- [00:20:04.310] program, but you only want to cut the
- [00:20:04.320] program, but you only want to cut the outline.
- [00:20:06.150] outline.
- [00:20:06.160] outline. Okay. Another key feature you want to be
- [00:20:07.990] Okay. Another key feature you want to be
- [00:20:08.000] Okay. Another key feature you want to be looking at is QR codes.
- [00:20:10.870] looking at is QR codes.
- [00:20:10.880] looking at is QR codes. Now, if you working with making products
- [00:20:13.270] Now, if you working with making products
- [00:20:13.280] Now, if you working with making products or anything like that, to have people be
- [00:20:15.270] or anything like that, to have people be
- [00:20:15.280] or anything like that, to have people be able to find relevant information or
- [00:20:17.110] able to find relevant information or
- [00:20:17.120] able to find relevant information or your location or something like that is
- [00:20:19.430] your location or something like that is
- [00:20:19.440] your location or something like that is going to be very handy. These days, if
- [00:20:21.350] going to be very handy. These days, if
- [00:20:21.360] going to be very handy. These days, if you look at 90% of the products, they
- [00:20:23.110] you look at 90% of the products, they
- [00:20:23.120] you look at 90% of the products, they all have this little QR code on it. And
- [00:20:25.190] all have this little QR code on it. And
- [00:20:25.200] all have this little QR code on it. And if you had to scan it with your phone,
- [00:20:27.029] if you had to scan it with your phone,
- [00:20:27.039] if you had to scan it with your phone, most phone cameras automatically pick up
- [00:20:29.590] most phone cameras automatically pick up
- [00:20:29.600] most phone cameras automatically pick up that there's a QR code or you can get a
- [00:20:31.510] that there's a QR code or you can get a
- [00:20:31.520] that there's a QR code or you can get a QR code, scann it. And then what happens
- [00:20:33.350] QR code, scann it. And then what happens
- [00:20:33.360] QR code, scann it. And then what happens is you can redirect people to certain
- [00:20:35.669] is you can redirect people to certain
- [00:20:35.679] is you can redirect people to certain places. So some places you'll buy a
- [00:20:38.230] places. So some places you'll buy a
- [00:20:38.240] places. So some places you'll buy a product and then to download the
- [00:20:39.750] product and then to download the
- [00:20:39.760] product and then to download the software, you scan the code and it'll
- [00:20:41.350] software, you scan the code and it'll
- [00:20:41.360] software, you scan the code and it'll give you a link. Other places again, it
- [00:20:43.270] give you a link. Other places again, it
- [00:20:43.280] give you a link. Other places again, it can redirect you perhaps to a website or
- [00:20:46.390] can redirect you perhaps to a website or
- [00:20:46.400] can redirect you perhaps to a website or contact details. So you imagine a
- [00:20:48.789] contact details. So you imagine a
- [00:20:48.799] contact details. So you imagine a business card and you put contact
- [00:20:50.230] business card and you put contact
- [00:20:50.240] business card and you put contact details with a QR code. So when they
- [00:20:52.149] details with a QR code. So when they
- [00:20:52.159] details with a QR code. So when they scan it, it automatically puts it to the
- [00:20:54.070] scan it, it automatically puts it to the
- [00:20:54.080] scan it, it automatically puts it to the contacts which saves them a lot of time.
- [00:20:56.950] contacts which saves them a lot of time.
- [00:20:56.960] contacts which saves them a lot of time. So now this is one of those great
- [00:20:58.630] So now this is one of those great
- [00:20:58.640] So now this is one of those great features that the program has. So what
- [00:21:01.350] features that the program has. So what
- [00:21:01.360] features that the program has. So what you can do to locate it, we want to
- [00:21:02.950] you can do to locate it, we want to
- [00:21:02.960] you can do to locate it, we want to simply go up here to effects and we go
- [00:21:05.430] simply go up here to effects and we go
- [00:21:05.440] simply go up here to effects and we go down to QR code. Now I'm going to select
- [00:21:08.710] down to QR code. Now I'm going to select
- [00:21:08.720] down to QR code. Now I'm going to select that and then uh let's just have a
- [00:21:11.430] that and then uh let's just have a
- [00:21:11.440] that and then uh let's just have a closer look here. So now we can
- [00:21:13.590] closer look here. So now we can
- [00:21:13.600] closer look here. So now we can obviously we can set the scale of it and
- [00:21:15.430] obviously we can set the scale of it and
- [00:21:15.440] obviously we can set the scale of it and then we can do the data type. Now, this
- [00:21:17.510] then we can do the data type. Now, this
- [00:21:17.520] then we can do the data type. Now, this is where it becomes important. So, you
- [00:21:19.510] is where it becomes important. So, you
- [00:21:19.520] is where it becomes important. So, you can see we've got some different
- [00:21:20.710] can see we've got some different
- [00:21:20.720] can see we've got some different options, some contacts, some emails,
- [00:21:24.390] options, some contacts, some emails,
- [00:21:24.400] options, some contacts, some emails, we've got a basic location,
- [00:21:27.110] we've got a basic location,
- [00:21:27.120] we've got a basic location, simple text, SMS, telephone number, and
- [00:21:29.750] simple text, SMS, telephone number, and
- [00:21:29.760] simple text, SMS, telephone number, and a URL. The email is a very handy one,
- [00:21:32.549] a URL. The email is a very handy one,
- [00:21:32.559] a URL. The email is a very handy one, but I'm going to use a URL because it's
- [00:21:34.470] but I'm going to use a URL because it's
- [00:21:34.480] but I'm going to use a URL because it's quite a universal. So, now let's go and
- [00:21:37.029] quite a universal. So, now let's go and
- [00:21:37.039] quite a universal. So, now let's go and get one. So, what you can do is simply
- [00:21:38.470] get one. So, what you can do is simply
- [00:21:38.480] get one. So, what you can do is simply go to any website. I'm just going to use
- [00:21:41.190] go to any website. I'm just going to use
- [00:21:41.200] go to any website. I'm just going to use my own. Let's just search Yeshua now.
- [00:21:45.029] my own. Let's just search Yeshua now.
- [00:21:45.039] my own. Let's just search Yeshua now. Grab my uh Wix website. And then what
- [00:21:49.029] Grab my uh Wix website. And then what
- [00:21:49.039] Grab my uh Wix website. And then what you want to do is simply just go to
- [00:21:51.190] you want to do is simply just go to
- [00:21:51.200] you want to do is simply just go to where you want on the page and then you
- [00:21:52.710] where you want on the page and then you
- [00:21:52.720] where you want on the page and then you select the URL on top. Then you want to
- [00:21:55.430] select the URL on top. Then you want to
- [00:21:55.440] select the URL on top. Then you want to copy that. So I'm going to go simply
- [00:21:57.830] copy that. So I'm going to go simply
- [00:21:57.840] copy that. So I'm going to go simply right click copy
- [00:22:00.950] right click copy
- [00:22:00.960] right click copy to make sure it's in our clipboard. And
- [00:22:02.950] to make sure it's in our clipboard. And
- [00:22:02.960] to make sure it's in our clipboard. And then we want to go back to the program
- [00:22:04.470] then we want to go back to the program
- [00:22:04.480] then we want to go back to the program on the URL setting. We're going to right
- [00:22:06.390] on the URL setting. We're going to right
- [00:22:06.400] on the URL setting. We're going to right click there and say paste. Now we have a
- [00:22:10.070] click there and say paste. Now we have a
- [00:22:10.080] click there and say paste. Now we have a link there. We're going to go update
- [00:22:11.350] link there. We're going to go update
- [00:22:11.360] link there. We're going to go update preview. Now, depend on your length of
- [00:22:14.390] preview. Now, depend on your length of
- [00:22:14.400] preview. Now, depend on your length of your actual URL. It's going to add more
- [00:22:16.310] your actual URL. It's going to add more
- [00:22:16.320] your actual URL. It's going to add more information. So, if you have a very long
- [00:22:18.390] information. So, if you have a very long
- [00:22:18.400] information. So, if you have a very long one, you might want to have your QR code
- [00:22:20.470] one, you might want to have your QR code
- [00:22:20.480] one, you might want to have your QR code slightly bigger on your product. Then,
- [00:22:22.710] slightly bigger on your product. Then,
- [00:22:22.720] slightly bigger on your product. Then, what we're going to do is say, okay, I'm
- [00:22:25.110] what we're going to do is say, okay, I'm
- [00:22:25.120] what we're going to do is say, okay, I'm going to just rescale this. Obviously,
- [00:22:27.430] going to just rescale this. Obviously,
- [00:22:27.440] going to just rescale this. Obviously, depending on your product, you'll change
- [00:22:29.270] depending on your product, you'll change
- [00:22:29.280] depending on your product, you'll change this, but just for the sake of this
- [00:22:30.950] this, but just for the sake of this
- [00:22:30.960] this, but just for the sake of this tutorial. Now, if you want, you can
- [00:22:32.950] tutorial. Now, if you want, you can
- [00:22:32.960] tutorial. Now, if you want, you can actually test to see if this work. the
- [00:22:34.950] actually test to see if this work. the
- [00:22:34.960] actually test to see if this work. the little uh spam and promo for me. You can
- [00:22:37.590] little uh spam and promo for me. You can
- [00:22:37.600] little uh spam and promo for me. You can just take your phone camera, point it at
- [00:22:39.750] just take your phone camera, point it at
- [00:22:39.760] just take your phone camera, point it at the screen and see if the QR code
- [00:22:42.230] the screen and see if the QR code
- [00:22:42.240] the screen and see if the QR code worked. But yeah, otherwise that is it
- [00:22:44.390] worked. But yeah, otherwise that is it
- [00:22:44.400] worked. But yeah, otherwise that is it on key features I think is good to know
- [00:22:46.230] on key features I think is good to know
- [00:22:46.240] on key features I think is good to know in the program. See you guys in the next
- [00:22:48.149] in the program. See you guys in the next
- [00:22:48.159] in the program. See you guys in the next one. Cheers.
Keyframes
- /workspace/academy/media/1VyVZahpn8ISD065i02_cS1wTQmarn8Ha/keyframes/last.jpg
- /workspace/academy/media/1VyVZahpn8ISD065i02_cS1wTQmarn8Ha/keyframes/t006.jpg
- /workspace/academy/media/1VyVZahpn8ISD065i02_cS1wTQmarn8Ha/keyframes/t012.jpg
- /workspace/academy/media/1VyVZahpn8ISD065i02_cS1wTQmarn8Ha/keyframes/t018.jpg
- /workspace/academy/media/1VyVZahpn8ISD065i02_cS1wTQmarn8Ha/keyframes/t024.jpg
- /workspace/academy/media/1VyVZahpn8ISD065i02_cS1wTQmarn8Ha/keyframes/t030.jpg
- /workspace/academy/media/1VyVZahpn8ISD065i02_cS1wTQmarn8Ha/keyframes/t036.jpg
- /workspace/academy/media/1VyVZahpn8ISD065i02_cS1wTQmarn8Ha/keyframes/t042.jpg
- /workspace/academy/media/1VyVZahpn8ISD065i02_cS1wTQmarn8Ha/keyframes/t048.jpg
- /workspace/academy/media/1VyVZahpn8ISD065i02_cS1wTQmarn8Ha/keyframes/t054.jpg
- /workspace/academy/media/1VyVZahpn8ISD065i02_cS1wTQmarn8Ha/keyframes/t060.jpg
- /workspace/academy/media/1VyVZahpn8ISD065i02_cS1wTQmarn8Ha/keyframes/t066.jpg
- /workspace/academy/media/1VyVZahpn8ISD065i02_cS1wTQmarn8Ha/keyframes/t071.jpg
- /workspace/academy/media/1VyVZahpn8ISD065i02_cS1wTQmarn8Ha/keyframes/t077.jpg
- /workspace/academy/media/1VyVZahpn8ISD065i02_cS1wTQmarn8Ha/keyframes/t083.jpg
- /workspace/academy/media/1VyVZahpn8ISD065i02_cS1wTQmarn8Ha/keyframes/t089.jpg
- /workspace/academy/media/1VyVZahpn8ISD065i02_cS1wTQmarn8Ha/keyframes/t095.jpg
- /workspace/academy/media/1VyVZahpn8ISD065i02_cS1wTQmarn8Ha/keyframes/t101.jpg
- /workspace/academy/media/1VyVZahpn8ISD065i02_cS1wTQmarn8Ha/keyframes/t107.jpg
- /workspace/academy/media/1VyVZahpn8ISD065i02_cS1wTQmarn8Ha/keyframes/t113.jpg
- /workspace/academy/media/1VyVZahpn8ISD065i02_cS1wTQmarn8Ha/keyframes/t119.jpg
- /workspace/academy/media/1VyVZahpn8ISD065i02_cS1wTQmarn8Ha/keyframes/t125.jpg
- /workspace/academy/media/1VyVZahpn8ISD065i02_cS1wTQmarn8Ha/keyframes/t131.jpg
- /workspace/academy/media/1VyVZahpn8ISD065i02_cS1wTQmarn8Ha/keyframes/t137.jpg
21. Understanding
- title: Understanding
- status: publish
- author: 0
- is_previewable: (empty)
- video_duration: 0h 25m 45s (raw {"hours":0,"minutes":25,"seconds":45})
- video_source_type: embedded
- drive_file_id:
1jI5SduyqESIbtUZua6tUUR-0a_fGeX7u(source_ref; not a public link) - transcript pending / keyframes pending / presentation extract pending
- video_source_url: (Drive preview omitted as a public link; file id kept as source_ref)
In this lesson we going to be looking at some important things that you need to understand in VinylCut 5.
- quizzes_following_this_lesson: 1 (full text in Quizzes)
- Understanding (10 questions)
Drive extract
- file_id:
1jI5SduyqESIbtUZua6tUUR-0a_fGeX7u - filename: 06 - SWVC - Key Understanding.mp4
- kind: video
- local_path: /workspace/academy/media/1jI5SduyqESIbtUZua6tUUR-0a_fGeX7u/06 - SWVC - Key Understanding.mp4
- source_ref: drive
1jI5SduyqESIbtUZua6tUUR-0a_fGeX7u· content_length 231826597 · original https://drive.google.com/file/d/1jI5SduyqESIbtUZua6tUUR-0a_fGeX7u/view - extract_status: done
- caption_source: drive_timedtext
- duration_s: 1544.939002
- keyframe_count: 24
Transcript
- Howdy guys. Okay, in this next section
- [00:00:02.470] Howdy guys. Okay, in this next section
- [00:00:02.480] Howdy guys. Okay, in this next section we're going to be looking at some
- [00:00:04.070] we're going to be looking at some
- [00:00:04.080] we're going to be looking at some important things that you need to
- [00:00:06.550] important things that you need to
- [00:00:06.560] important things that you need to understand.
- [00:00:08.310] understand.
- [00:00:08.320] understand. Now, first of all, we're going to be
- [00:00:09.669] Now, first of all, we're going to be
- [00:00:09.679] Now, first of all, we're going to be looking at registration marks. Now, what
- [00:00:12.629] looking at registration marks. Now, what
- [00:00:12.639] looking at registration marks. Now, what is registration marks and why would we
- [00:00:14.709] is registration marks and why would we
- [00:00:14.719] is registration marks and why would we want to use them? So when it comes to
- [00:00:16.630] want to use them? So when it comes to
- [00:00:16.640] want to use them? So when it comes to registration marks, it's these little
- [00:00:18.390] registration marks, it's these little
- [00:00:18.400] registration marks, it's these little marks on a design that's pretty much
- [00:00:21.510] marks on a design that's pretty much
- [00:00:21.520] marks on a design that's pretty much going to work as a form of reference
- [00:00:23.189] going to work as a form of reference
- [00:00:23.199] going to work as a form of reference point that you can, how can I say
- [00:00:25.750] point that you can, how can I say
- [00:00:25.760] point that you can, how can I say translate between prints and cutting so
- [00:00:28.150] translate between prints and cutting so
- [00:00:28.160] translate between prints and cutting so they understand the universal sizes and
- [00:00:31.029] they understand the universal sizes and
- [00:00:31.039] they understand the universal sizes and locations. Now why would you want to use
- [00:00:33.430] locations. Now why would you want to use
- [00:00:33.440] locations. Now why would you want to use registration marks? Well, one format or
- [00:00:36.229] registration marks? Well, one format or
- [00:00:36.239] registration marks? Well, one format or workflow is let's say you printed
- [00:00:38.790] workflow is let's say you printed
- [00:00:38.800] workflow is let's say you printed something and then you want to cut maybe
- [00:00:41.110] something and then you want to cut maybe
- [00:00:41.120] something and then you want to cut maybe a contour cut around that. So maybe it's
- [00:00:43.110] a contour cut around that. So maybe it's
- [00:00:43.120] a contour cut around that. So maybe it's like a sticker or something like that.
- [00:00:45.190] like a sticker or something like that.
- [00:00:45.200] like a sticker or something like that. Then what you want to do is you want to
- [00:00:47.110] Then what you want to do is you want to
- [00:00:47.120] Then what you want to do is you want to make sure that like I mentioned before
- [00:00:49.270] make sure that like I mentioned before
- [00:00:49.280] make sure that like I mentioned before the actual vinyl cutter understands
- [00:00:51.910] the actual vinyl cutter understands
- [00:00:51.920] the actual vinyl cutter understands where's your design. So otherwise it's
- [00:00:54.150] where's your design. So otherwise it's
- [00:00:54.160] where's your design. So otherwise it's just going to cut random cuts over it.
- [00:00:56.389] just going to cut random cuts over it.
- [00:00:56.399] just going to cut random cuts over it. So we need some form of way of telling
- [00:00:58.150] So we need some form of way of telling
- [00:00:58.160] So we need some form of way of telling the vinyl cutter that okay this is where
- [00:00:59.830] the vinyl cutter that okay this is where
- [00:00:59.840] the vinyl cutter that okay this is where the print is. So then it understands
- [00:01:02.389] the print is. So then it understands
- [00:01:02.399] the print is. So then it understands where to cut around it. Now when it
- [00:01:04.630] where to cut around it. Now when it
- [00:01:04.640] where to cut around it. Now when it comes to these registration marks, what
- [00:01:06.710] comes to these registration marks, what
- [00:01:06.720] comes to these registration marks, what is important, it wants to basically know
- [00:01:08.789] is important, it wants to basically know
- [00:01:08.799] is important, it wants to basically know where is your X and where's your Y on
- [00:01:11.510] where is your X and where's your Y on
- [00:01:11.520] where is your X and where's your Y on the actual design and that's why you'll
- [00:01:14.390] the actual design and that's why you'll
- [00:01:14.400] the actual design and that's why you'll see there will always be more than two
- [00:01:16.710] see there will always be more than two
- [00:01:16.720] see there will always be more than two registration marks where if there's just
- [00:01:18.469] registration marks where if there's just
- [00:01:18.479] registration marks where if there's just one and can work out one of the
- [00:01:20.230] one and can work out one of the
- [00:01:20.240] one and can work out one of the directions but not the other. Okay. Now
- [00:01:22.310] directions but not the other. Okay. Now
- [00:01:22.320] directions but not the other. Okay. Now when it comes to these registration
- [00:01:23.429] when it comes to these registration
- [00:01:23.439] when it comes to these registration marks, there's two main ones we'll be
- [00:01:25.270] marks, there's two main ones we'll be
- [00:01:25.280] marks, there's two main ones we'll be using. So one is called a form of
- [00:01:28.230] using. So one is called a form of
- [00:01:28.240] using. So one is called a form of semi-automatic
- [00:01:29.749] semi-automatic
- [00:01:29.759] semi-automatic or and then another one is a automatic.
- [00:01:32.630] or and then another one is a automatic.
- [00:01:32.640] or and then another one is a automatic. The main difference is the one you must
- [00:01:34.870] The main difference is the one you must
- [00:01:34.880] The main difference is the one you must manually tell the laser eye where these
- [00:01:37.590] manually tell the laser eye where these
- [00:01:37.600] manually tell the laser eye where these registration marks are where the other
- [00:01:39.830] registration marks are where the other
- [00:01:39.840] registration marks are where the other one will use a form of camera system and
- [00:01:42.710] one will use a form of camera system and
- [00:01:42.720] one will use a form of camera system and look at contrast based off the lines and
- [00:01:45.590] look at contrast based off the lines and
- [00:01:45.600] look at contrast based off the lines and align all the rest according to the
- [00:01:47.590] align all the rest according to the
- [00:01:47.600] align all the rest according to the first one. Okay. Now first of all if we
- [00:01:50.149] first one. Okay. Now first of all if we
- [00:01:50.159] first one. Okay. Now first of all if we want to actually enable these
- [00:01:51.590] want to actually enable these
- [00:01:51.600] want to actually enable these registration marks in our program then
- [00:01:53.670] registration marks in our program then
- [00:01:53.680] registration marks in our program then what we want to do is we want to go to
- [00:01:55.030] what we want to do is we want to go to
- [00:01:55.040] what we want to do is we want to go to our control panel the document one and
- [00:01:57.590] our control panel the document one and
- [00:01:57.600] our control panel the document one and then we go down till we see the one
- [00:01:59.270] then we go down till we see the one
- [00:01:59.280] then we go down till we see the one called show regge marks. Now, if we
- [00:02:02.870] called show regge marks. Now, if we
- [00:02:02.880] called show regge marks. Now, if we enable that or disable it, you'll see it
- [00:02:05.990] enable that or disable it, you'll see it
- [00:02:06.000] enable that or disable it, you'll see it shows it or hides it. Now, just
- [00:02:08.150] shows it or hides it. Now, just
- [00:02:08.160] shows it or hides it. Now, just something to keep in mind, just because
- [00:02:09.589] something to keep in mind, just because
- [00:02:09.599] something to keep in mind, just because it is showing it yet does not mean when
- [00:02:11.510] it is showing it yet does not mean when
- [00:02:11.520] it is showing it yet does not mean when you finally exporting for print that it
- [00:02:13.750] you finally exporting for print that it
- [00:02:13.760] you finally exporting for print that it will be there. That will have to also
- [00:02:16.070] will be there. That will have to also
- [00:02:16.080] will be there. That will have to also ensure that we have it. But don't worry,
- [00:02:18.070] ensure that we have it. But don't worry,
- [00:02:18.080] ensure that we have it. But don't worry, we'll cover that a bit later. Now, let's
- [00:02:20.390] we'll cover that a bit later. Now, let's
- [00:02:20.400] we'll cover that a bit later. Now, let's have a quick sample here. So, this is
- [00:02:22.309] have a quick sample here. So, this is
- [00:02:22.319] have a quick sample here. So, this is basically what a registration alignment
- [00:02:24.550] basically what a registration alignment
- [00:02:24.560] basically what a registration alignment will look like, especially on the
- [00:02:26.070] will look like, especially on the
- [00:02:26.080] will look like, especially on the semi-automatic. So, you have your laser
- [00:02:28.309] semi-automatic. So, you have your laser
- [00:02:28.319] semi-automatic. So, you have your laser eye and you're basically trying to align
- [00:02:29.990] eye and you're basically trying to align
- [00:02:30.000] eye and you're basically trying to align it to those dots on the print. And then
- [00:02:33.030] it to those dots on the print. And then
- [00:02:33.040] it to those dots on the print. And then once you're happy, this thing's going to
- [00:02:34.390] once you're happy, this thing's going to
- [00:02:34.400] once you're happy, this thing's going to kind of contour around your design,
- [00:02:36.470] kind of contour around your design,
- [00:02:36.480] kind of contour around your design, which like I mentioned before, it's
- [00:02:37.910] which like I mentioned before, it's
- [00:02:37.920] which like I mentioned before, it's going to allow you to kind of peel it
- [00:02:39.430] going to allow you to kind of peel it
- [00:02:39.440] going to allow you to kind of peel it out like a sticker, as we can see here.
- [00:02:42.229] out like a sticker, as we can see here.
- [00:02:42.239] out like a sticker, as we can see here. Well, something to keep in mind also is
- [00:02:43.910] Well, something to keep in mind also is
- [00:02:43.920] Well, something to keep in mind also is that these registration marks are
- [00:02:45.589] that these registration marks are
- [00:02:45.599] that these registration marks are relevant to the machine you have
- [00:02:47.430] relevant to the machine you have
- [00:02:47.440] relevant to the machine you have selected. So, if we had to go here under
- [00:02:49.830] selected. So, if we had to go here under
- [00:02:49.840] selected. So, if we had to go here under our cutter settings or my cutter, and
- [00:02:52.550] our cutter settings or my cutter, and
- [00:02:52.560] our cutter settings or my cutter, and then we actually remove the cutter. Now
- [00:02:55.350] then we actually remove the cutter. Now
- [00:02:55.360] then we actually remove the cutter. Now you can see under the document tab if we
- [00:02:57.110] you can see under the document tab if we
- [00:02:57.120] you can see under the document tab if we have show reg marks on or off it makes
- [00:02:59.910] have show reg marks on or off it makes
- [00:02:59.920] have show reg marks on or off it makes no difference because like I said the
- [00:03:01.750] no difference because like I said the
- [00:03:01.760] no difference because like I said the registration marks is relevant to the
- [00:03:03.190] registration marks is relevant to the
- [00:03:03.200] registration marks is relevant to the machine. So if your machine is going to
- [00:03:04.550] machine. So if your machine is going to
- [00:03:04.560] machine. So if your machine is going to be semi-automatic it's going to have
- [00:03:06.149] be semi-automatic it's going to have
- [00:03:06.159] be semi-automatic it's going to have certain types versus automatic.
- [00:03:09.350] certain types versus automatic.
- [00:03:09.360] certain types versus automatic. Next up we're going to be adding a
- [00:03:10.470] Next up we're going to be adding a
- [00:03:10.480] Next up we're going to be adding a cutter. We're going to go here for the
- [00:03:12.149] cutter. We're going to go here for the
- [00:03:12.159] cutter. We're going to go here for the one of the V serieses which is not going
- [00:03:14.390] one of the V serieses which is not going
- [00:03:14.400] one of the V serieses which is not going to be automatic. Make sure we say add to
- [00:03:16.710] to be automatic. Make sure we say add to
- [00:03:16.720] to be automatic. Make sure we say add to list and say done. And then you'll see
- [00:03:19.589] list and say done. And then you'll see
- [00:03:19.599] list and say done. And then you'll see on a semi-automatic cutter we have only
- [00:03:22.070] on a semi-automatic cutter we have only
- [00:03:22.080] on a semi-automatic cutter we have only three registration points. Now when it
- [00:03:24.949] three registration points. Now when it
- [00:03:24.959] three registration points. Now when it comes to the actual automatic one. So we
- [00:03:26.630] comes to the actual automatic one. So we
- [00:03:26.640] comes to the actual automatic one. So we remove this. Let's quickly add a
- [00:03:27.910] remove this. Let's quickly add a
- [00:03:27.920] remove this. Let's quickly add a automatic machine.
- [00:03:30.149] automatic machine.
- [00:03:30.159] automatic machine. Okay. Let's go to a V smart. Okay. Let's
- [00:03:33.350] Okay. Let's go to a V smart. Okay. Let's
- [00:03:33.360] Okay. Let's go to a V smart. Okay. Let's add an automatic one. So add. Now you
- [00:03:35.350] add an automatic one. So add. Now you
- [00:03:35.360] add an automatic one. So add. Now you can see suddenly we have four points and
- [00:03:37.670] can see suddenly we have four points and
- [00:03:37.680] can see suddenly we have four points and they are different. They don't have
- [00:03:39.270] they are different. They don't have
- [00:03:39.280] they are different. They don't have those little dots in the middle. They
- [00:03:41.270] those little dots in the middle. They
- [00:03:41.280] those little dots in the middle. They just have solid lines. And like I
- [00:03:42.789] just have solid lines. And like I
- [00:03:42.799] just have solid lines. And like I mentioned before, what this comes down
- [00:03:43.830] mentioned before, what this comes down
- [00:03:43.840] mentioned before, what this comes down to is your machine's going to have a
- [00:03:45.430] to is your machine's going to have a
- [00:03:45.440] to is your machine's going to have a camera and it's actually going to pick
- [00:03:47.190] camera and it's actually going to pick
- [00:03:47.200] camera and it's actually going to pick up on contrast. So it's going to see
- [00:03:49.350] up on contrast. So it's going to see
- [00:03:49.360] up on contrast. So it's going to see everything as white, white, white. And
- [00:03:51.030] everything as white, white, white. And
- [00:03:51.040] everything as white, white, white. And then there's a contrast. And then that
- [00:03:53.110] then there's a contrast. And then that
- [00:03:53.120] then there's a contrast. And then that way it can start picking up where's
- [00:03:54.630] way it can start picking up where's
- [00:03:54.640] way it can start picking up where's these registration points. Okay. Now,
- [00:03:57.589] these registration points. Okay. Now,
- [00:03:57.599] these registration points. Okay. Now, let's say we now actually want to be
- [00:03:59.589] let's say we now actually want to be
- [00:03:59.599] let's say we now actually want to be able to translate this between a print
- [00:04:01.509] able to translate this between a print
- [00:04:01.519] able to translate this between a print and a cut. This is where it gets a
- [00:04:02.949] and a cut. This is where it gets a
- [00:04:02.959] and a cut. This is where it gets a little bit more tricky. So, what it
- [00:04:04.710] little bit more tricky. So, what it
- [00:04:04.720] little bit more tricky. So, what it comes down to is you're going to need a
- [00:04:07.190] comes down to is you're going to need a
- [00:04:07.200] comes down to is you're going to need a printable version of the same document
- [00:04:09.910] printable version of the same document
- [00:04:09.920] printable version of the same document or the same design. So, it doesn't we
- [00:04:12.390] or the same design. So, it doesn't we
- [00:04:12.400] or the same design. So, it doesn't we just have a cutter with registration
- [00:04:14.470] just have a cutter with registration
- [00:04:14.480] just have a cutter with registration marks. No, we're going to have to now
- [00:04:15.750] marks. No, we're going to have to now
- [00:04:15.760] marks. No, we're going to have to now print like I said your design with these
- [00:04:18.069] print like I said your design with these
- [00:04:18.079] print like I said your design with these exact same registration marks. What that
- [00:04:20.229] exact same registration marks. What that
- [00:04:20.239] exact same registration marks. What that comes down to is we're going to go here
- [00:04:21.749] comes down to is we're going to go here
- [00:04:21.759] comes down to is we're going to go here to file and then we go to export. Then
- [00:04:25.110] to file and then we go to export. Then
- [00:04:25.120] to file and then we go to export. Then we want to navigate to the location we
- [00:04:27.110] we want to navigate to the location we
- [00:04:27.120] we want to navigate to the location we want to save it to. And I would
- [00:04:28.390] want to save it to. And I would
- [00:04:28.400] want to save it to. And I would recommend use something like a TIFF file
- [00:04:30.790] recommend use something like a TIFF file
- [00:04:30.800] recommend use something like a TIFF file because that supports registration marks
- [00:04:32.629] because that supports registration marks
- [00:04:32.639] because that supports registration marks and transparency. So it's just in
- [00:04:34.469] and transparency. So it's just in
- [00:04:34.479] and transparency. So it's just in general it's a good one to be working
- [00:04:35.990] general it's a good one to be working
- [00:04:36.000] general it's a good one to be working with. Okay. And then when it comes to
- [00:04:38.230] with. Okay. And then when it comes to
- [00:04:38.240] with. Okay. And then when it comes to these export settings, there's one
- [00:04:39.830] these export settings, there's one
- [00:04:39.840] these export settings, there's one that's going to be very important. If we
- [00:04:41.909] that's going to be very important. If we
- [00:04:41.919] that's going to be very important. If we zoom in here, you can see it is the show
- [00:04:43.749] zoom in here, you can see it is the show
- [00:04:43.759] zoom in here, you can see it is the show registration marks. Now, if you do not
- [00:04:46.469] registration marks. Now, if you do not
- [00:04:46.479] registration marks. Now, if you do not have this selected, what's going to end
- [00:04:47.830] have this selected, what's going to end
- [00:04:47.840] have this selected, what's going to end up happening is you're going to export
- [00:04:49.189] up happening is you're going to export
- [00:04:49.199] up happening is you're going to export your image without registration marks.
- [00:04:51.830] your image without registration marks.
- [00:04:51.840] your image without registration marks. So, then when you actually print your
- [00:04:53.510] So, then when you actually print your
- [00:04:53.520] So, then when you actually print your file, there's going to be nothing. So,
- [00:04:55.430] file, there's going to be nothing. So,
- [00:04:55.440] file, there's going to be nothing. So, the vinyl cutter won't be able to read
- [00:04:57.110] the vinyl cutter won't be able to read
- [00:04:57.120] the vinyl cutter won't be able to read it. It's going to scan for registration
- [00:04:58.629] it. It's going to scan for registration
- [00:04:58.639] it. It's going to scan for registration marks, not see anything, and then it's
- [00:05:00.310] marks, not see anything, and then it's
- [00:05:00.320] marks, not see anything, and then it's not going to know where to do the actual
- [00:05:01.430] not going to know where to do the actual
- [00:05:01.440] not going to know where to do the actual cut marks. Okay. Now, let's say you
- [00:05:03.189] cut marks. Okay. Now, let's say you
- [00:05:03.199] cut marks. Okay. Now, let's say you finally printed your file and you've
- [00:05:05.510] finally printed your file and you've
- [00:05:05.520] finally printed your file and you've loaded into your vinyl cutter. Now, you
- [00:05:07.430] loaded into your vinyl cutter. Now, you
- [00:05:07.440] loaded into your vinyl cutter. Now, you want to actually cut these samples. Now,
- [00:05:09.749] want to actually cut these samples. Now,
- [00:05:09.759] want to actually cut these samples. Now, we're going to take a different example
- [00:05:10.790] we're going to take a different example
- [00:05:10.800] we're going to take a different example here of a design where it's multiple
- [00:05:12.550] here of a design where it's multiple
- [00:05:12.560] here of a design where it's multiple cutouts cuz most of the time if you're
- [00:05:13.830] cutouts cuz most of the time if you're
- [00:05:13.840] cutouts cuz most of the time if you're doing stickers, you may be
- [00:05:15.430] doing stickers, you may be
- [00:05:15.440] doing stickers, you may be mass-producing. So, it's not going to be
- [00:05:16.950] mass-producing. So, it's not going to be
- [00:05:16.960] mass-producing. So, it's not going to be a single one. So, then with our file
- [00:05:19.350] a single one. So, then with our file
- [00:05:19.360] a single one. So, then with our file open, we want to go to our actual cutter
- [00:05:21.270] open, we want to go to our actual cutter
- [00:05:21.280] open, we want to go to our actual cutter settings or cut. Then under there, what
- [00:05:23.830] settings or cut. Then under there, what
- [00:05:23.840] settings or cut. Then under there, what is going to be important is we're going
- [00:05:24.950] is going to be important is we're going
- [00:05:24.960] is going to be important is we're going to go to the bottom left here where it
- [00:05:26.790] to go to the bottom left here where it
- [00:05:26.800] to go to the bottom left here where it says print and cut where if you guys can
- [00:05:29.590] says print and cut where if you guys can
- [00:05:29.600] says print and cut where if you guys can remember previously when we said if
- [00:05:30.870] remember previously when we said if
- [00:05:30.880] remember previously when we said if you're just cutting plain vinyl, you're
- [00:05:32.469] you're just cutting plain vinyl, you're
- [00:05:32.479] you're just cutting plain vinyl, you're just going to use the cut. But now,
- [00:05:33.430] just going to use the cut. But now,
- [00:05:33.440] just going to use the cut. But now, we're going to use the print and cut.
- [00:05:35.350] we're going to use the print and cut.
- [00:05:35.360] we're going to use the print and cut. Now over here, the internet's not
- [00:05:36.629] Now over here, the internet's not
- [00:05:36.639] Now over here, the internet's not connected, but normally it'll tell you
- [00:05:37.830] connected, but normally it'll tell you
- [00:05:37.840] connected, but normally it'll tell you some basic information on the left here.
- [00:05:40.469] some basic information on the left here.
- [00:05:40.479] some basic information on the left here. But most of the time, it'll just leave
- [00:05:41.990] But most of the time, it'll just leave
- [00:05:42.000] But most of the time, it'll just leave these settings as is. But before we do
- [00:05:45.110] these settings as is. But before we do
- [00:05:45.120] these settings as is. But before we do that, what's going to be important is
- [00:05:46.629] that, what's going to be important is
- [00:05:46.639] that, what's going to be important is especially on the semi-automatic, we
- [00:05:48.950] especially on the semi-automatic, we
- [00:05:48.960] especially on the semi-automatic, we want to make sure we put our cutting
- [00:05:50.390] want to make sure we put our cutting
- [00:05:50.400] want to make sure we put our cutting blade close to the last registration
- [00:05:52.710] blade close to the last registration
- [00:05:52.720] blade close to the last registration mark or registration mark number three,
- [00:05:54.390] mark or registration mark number three,
- [00:05:54.400] mark or registration mark number three, a bottom right. Now, a general good
- [00:05:57.110] a bottom right. Now, a general good
- [00:05:57.120] a bottom right. Now, a general good practice is you put it slightly next to
- [00:05:59.350] practice is you put it slightly next to
- [00:05:59.360] practice is you put it slightly next to it on the right, leaving you some
- [00:06:01.990] it on the right, leaving you some
- [00:06:02.000] it on the right, leaving you some headroom or some uh movement space when
- [00:06:05.510] headroom or some uh movement space when
- [00:06:05.520] headroom or some uh movement space when you're finally doing the alignment. Then
- [00:06:07.749] you're finally doing the alignment. Then
- [00:06:07.759] you're finally doing the alignment. Then when you're happy there, you just simply
- [00:06:09.350] when you're happy there, you just simply
- [00:06:09.360] when you're happy there, you just simply press the origin button, reset the
- [00:06:11.270] press the origin button, reset the
- [00:06:11.280] press the origin button, reset the origin, and then you can adjust the
- [00:06:13.590] origin, and then you can adjust the
- [00:06:13.600] origin, and then you can adjust the rest. So now what you do after you've
- [00:06:15.430] rest. So now what you do after you've
- [00:06:15.440] rest. So now what you do after you've done that, you click next, and then it
- [00:06:17.909] done that, you click next, and then it
- [00:06:17.919] done that, you click next, and then it will automatically try and move it to
- [00:06:20.070] will automatically try and move it to
- [00:06:20.080] will automatically try and move it to the first registration mark based off
- [00:06:22.070] the first registration mark based off
- [00:06:22.080] the first registration mark based off your design. So that's why I say it's
- [00:06:23.909] your design. So that's why I say it's
- [00:06:23.919] your design. So that's why I say it's very important that your print and your
- [00:06:25.510] very important that your print and your
- [00:06:25.520] very important that your print and your design should be a similar size. If it's
- [00:06:27.909] design should be a similar size. If it's
- [00:06:27.919] design should be a similar size. If it's not 100% it's not the end of the world.
- [00:06:29.990] not 100% it's not the end of the world.
- [00:06:30.000] not 100% it's not the end of the world. I mean that's why we're using
- [00:06:31.110] I mean that's why we're using
- [00:06:31.120] I mean that's why we're using registration marks. So we're kind of
- [00:06:32.390] registration marks. So we're kind of
- [00:06:32.400] registration marks. So we're kind of telling it where's the scale and
- [00:06:34.230] telling it where's the scale and
- [00:06:34.240] telling it where's the scale and location. Then once it is more or less
- [00:06:36.870] location. Then once it is more or less
- [00:06:36.880] location. Then once it is more or less there you will see a little laser dot or
- [00:06:38.950] there you will see a little laser dot or
- [00:06:38.960] there you will see a little laser dot or at least you should. If you don't
- [00:06:40.309] at least you should. If you don't
- [00:06:40.319] at least you should. If you don't something is wrong. Then what you want
- [00:06:41.990] something is wrong. Then what you want
- [00:06:42.000] something is wrong. Then what you want to do is you want to align that laser to
- [00:06:44.390] to do is you want to align that laser to
- [00:06:44.400] to do is you want to align that laser to the little dot on the actual
- [00:06:45.990] the little dot on the actual
- [00:06:46.000] the little dot on the actual registration. Now to do that, we're
- [00:06:48.150] registration. Now to do that, we're
- [00:06:48.160] registration. Now to do that, we're going to simply use our arrow keys on
- [00:06:50.150] going to simply use our arrow keys on
- [00:06:50.160] going to simply use our arrow keys on our keyboard and then we can adjust it
- [00:06:53.749] our keyboard and then we can adjust it
- [00:06:53.759] our keyboard and then we can adjust it so we get that aligned. Now something to
- [00:06:56.629] so we get that aligned. Now something to
- [00:06:56.639] so we get that aligned. Now something to keep in mind if you had to keep shifting
- [00:06:58.230] keep in mind if you had to keep shifting
- [00:06:58.240] keep in mind if you had to keep shifting and use your arrow keys, it's going to
- [00:07:00.070] and use your arrow keys, it's going to
- [00:07:00.080] and use your arrow keys, it's going to move it in bigger segments or bigger
- [00:07:02.390] move it in bigger segments or bigger
- [00:07:02.400] move it in bigger segments or bigger sections where if you just use it normal
- [00:07:05.430] sections where if you just use it normal
- [00:07:05.440] sections where if you just use it normal without any modifier, it's going to move
- [00:07:07.029] without any modifier, it's going to move
- [00:07:07.039] without any modifier, it's going to move it normal. And if you use control, then
- [00:07:08.950] it normal. And if you use control, then
- [00:07:08.960] it normal. And if you use control, then you can finetune it. So then once again,
- [00:07:11.749] you can finetune it. So then once again,
- [00:07:11.759] you can finetune it. So then once again, you want to get this thing as close to
- [00:07:14.230] you want to get this thing as close to
- [00:07:14.240] you want to get this thing as close to that center as possible. Obviously
- [00:07:16.629] that center as possible. Obviously
- [00:07:16.639] that center as possible. Obviously depending on the how strict your design
- [00:07:18.469] depending on the how strict your design
- [00:07:18.479] depending on the how strict your design rules are, but in general obviously the
- [00:07:21.110] rules are, but in general obviously the
- [00:07:21.120] rules are, but in general obviously the closer the more accuracy you're going to
- [00:07:22.550] closer the more accuracy you're going to
- [00:07:22.560] closer the more accuracy you're going to have. Then once you are happy with that,
- [00:07:23.990] have. Then once you are happy with that,
- [00:07:24.000] have. Then once you are happy with that, you can either click that middle button
- [00:07:26.070] you can either click that middle button
- [00:07:26.080] you can either click that middle button or you just click next. Then this will
- [00:07:28.550] or you just click next. Then this will
- [00:07:28.560] or you just click next. Then this will take your cut ahead to the next
- [00:07:29.749] take your cut ahead to the next
- [00:07:29.759] take your cut ahead to the next registration point. And now you're going
- [00:07:31.589] registration point. And now you're going
- [00:07:31.599] registration point. And now you're going to repeat the process. So you're going
- [00:07:33.270] to repeat the process. So you're going
- [00:07:33.280] to repeat the process. So you're going to try align that one onto that dot.
- [00:07:37.110] to try align that one onto that dot.
- [00:07:37.120] to try align that one onto that dot. Then once you're happy, you're going to
- [00:07:39.110] Then once you're happy, you're going to
- [00:07:39.120] Then once you're happy, you're going to either click that little dot again or
- [00:07:41.430] either click that little dot again or
- [00:07:41.440] either click that little dot again or you're going to click next. And then
- [00:07:42.950] you're going to click next. And then
- [00:07:42.960] you're going to click next. And then you're going to align your last
- [00:07:44.469] you're going to align your last
- [00:07:44.479] you're going to align your last registration point. Then when you're
- [00:07:46.790] registration point. Then when you're
- [00:07:46.800] registration point. Then when you're finally done with that, you can see
- [00:07:47.830] finally done with that, you can see
- [00:07:47.840] finally done with that, you can see we've got this little cut option. And
- [00:07:50.230] we've got this little cut option. And
- [00:07:50.240] we've got this little cut option. And then we simply can click that or click
- [00:07:51.990] then we simply can click that or click
- [00:07:52.000] then we simply can click that or click cut in the bottom right. And it will
- [00:07:53.589] cut in the bottom right. And it will
- [00:07:53.599] cut in the bottom right. And it will start our process.
- [00:07:55.589] start our process.
- [00:07:55.599] start our process. Okay. The next thing we're going to be
- [00:07:56.790] Okay. The next thing we're going to be
- [00:07:56.800] Okay. The next thing we're going to be looking at, which is very important to
- [00:07:58.309] looking at, which is very important to
- [00:07:58.319] looking at, which is very important to understand, and that is the origin
- [00:08:00.790] understand, and that is the origin
- [00:08:00.800] understand, and that is the origin points. Now, if we go here under our
- [00:08:03.110] points. Now, if we go here under our
- [00:08:03.120] points. Now, if we go here under our cutter and cut settings, you'll see we
- [00:08:04.710] cutter and cut settings, you'll see we
- [00:08:04.720] cutter and cut settings, you'll see we have this option here called cut mode.
- [00:08:07.670] have this option here called cut mode.
- [00:08:07.680] have this option here called cut mode. Now, this is pretty much going to
- [00:08:08.950] Now, this is pretty much going to
- [00:08:08.960] Now, this is pretty much going to control or dictate how our origin points
- [00:08:11.189] control or dictate how our origin points
- [00:08:11.199] control or dictate how our origin points going to be working. Now default is
- [00:08:13.350] going to be working. Now default is
- [00:08:13.360] going to be working. Now default is going to be on W Y SI W Y G. What that
- [00:08:18.469] going to be on W Y SI W Y G. What that
- [00:08:18.479] going to be on W Y SI W Y G. What that comes down to is short for what you see
- [00:08:21.029] comes down to is short for what you see
- [00:08:21.039] comes down to is short for what you see is what you get. Can't get more simple
- [00:08:23.430] is what you get. Can't get more simple
- [00:08:23.440] is what you get. Can't get more simple than that. So pretty much then what
- [00:08:25.909] than that. So pretty much then what
- [00:08:25.919] than that. So pretty much then what you're going to be seeing on your
- [00:08:26.869] you're going to be seeing on your
- [00:08:26.879] you're going to be seeing on your design, that's the way it's going to be
- [00:08:28.629] design, that's the way it's going to be
- [00:08:28.639] design, that's the way it's going to be cutting. So if there's a certain
- [00:08:29.990] cutting. So if there's a certain
- [00:08:30.000] cutting. So if there's a certain spacing, it's going to do that spacing.
- [00:08:32.070] spacing, it's going to do that spacing.
- [00:08:32.080] spacing, it's going to do that spacing. If your design is in the middle, it's
- [00:08:33.430] If your design is in the middle, it's
- [00:08:33.440] If your design is in the middle, it's going to cut it in the middle. But
- [00:08:34.870] going to cut it in the middle. But
- [00:08:34.880] going to cut it in the middle. But obviously keeping in mind this is
- [00:08:36.469] obviously keeping in mind this is
- [00:08:36.479] obviously keeping in mind this is relative to your material size. So if
- [00:08:40.070] relative to your material size. So if
- [00:08:40.080] relative to your material size. So if you did it correctly where your material
- [00:08:41.990] you did it correctly where your material
- [00:08:42.000] you did it correctly where your material size is a similar or very close to your
- [00:08:43.909] size is a similar or very close to your
- [00:08:43.919] size is a similar or very close to your actual design size then pretty much as
- [00:08:46.389] actual design size then pretty much as
- [00:08:46.399] actual design size then pretty much as it cuts it what you see is what you're
- [00:08:48.310] it cuts it what you see is what you're
- [00:08:48.320] it cuts it what you see is what you're going to get. Now in most workflows it's
- [00:08:50.230] going to get. Now in most workflows it's
- [00:08:50.240] going to get. Now in most workflows it's probably what you're going to be going
- [00:08:51.269] probably what you're going to be going
- [00:08:51.279] probably what you're going to be going for. Now we've got another option here
- [00:08:53.750] for. Now we've got another option here
- [00:08:53.760] for. Now we've got another option here which you might want to look at and that
- [00:08:55.110] which you might want to look at and that
- [00:08:55.120] which you might want to look at and that is origin point. So what that comes down
- [00:08:58.310] is origin point. So what that comes down
- [00:08:58.320] is origin point. So what that comes down to it is going to take your design and
- [00:09:01.110] to it is going to take your design and
- [00:09:01.120] to it is going to take your design and cut it starting by the origin point.
- [00:09:03.509] cut it starting by the origin point.
- [00:09:03.519] cut it starting by the origin point. Now, the reason why you might want to do
- [00:09:05.190] Now, the reason why you might want to do
- [00:09:05.200] Now, the reason why you might want to do this is let's say you are cutting
- [00:09:07.190] this is let's say you are cutting
- [00:09:07.200] this is let's say you are cutting generic shapes and you don't want to
- [00:09:09.990] generic shapes and you don't want to
- [00:09:10.000] generic shapes and you don't want to waste vinyl because the other one
- [00:09:11.910] waste vinyl because the other one
- [00:09:11.920] waste vinyl because the other one obviously if your design was in the
- [00:09:13.350] obviously if your design was in the
- [00:09:13.360] obviously if your design was in the middle, it's going to go cut it in the
- [00:09:14.470] middle, it's going to go cut it in the
- [00:09:14.480] middle, it's going to go cut it in the middle of that vinyl. Where this one is,
- [00:09:16.150] middle of that vinyl. Where this one is,
- [00:09:16.160] middle of that vinyl. Where this one is, it's going to take it the closest to
- [00:09:17.829] it's going to take it the closest to
- [00:09:17.839] it's going to take it the closest to your origin point or at least what
- [00:09:19.590] your origin point or at least what
- [00:09:19.600] your origin point or at least what you've set your origin point. And that's
- [00:09:21.590] you've set your origin point. And that's
- [00:09:21.600] you've set your origin point. And that's where it comes to the other thing that
- [00:09:23.190] where it comes to the other thing that
- [00:09:23.200] where it comes to the other thing that you have to keep in mind is where you've
- [00:09:24.870] you have to keep in mind is where you've
- [00:09:24.880] you have to keep in mind is where you've set your machine's origin point, which
- [00:09:26.389] set your machine's origin point, which
- [00:09:26.399] set your machine's origin point, which we've looked at before. It's pretty much
- [00:09:27.750] we've looked at before. It's pretty much
- [00:09:27.760] we've looked at before. It's pretty much where you've zeroed it. Now, if you have
- [00:09:30.550] where you've zeroed it. Now, if you have
- [00:09:30.560] where you've zeroed it. Now, if you have zeroed it on the bottom right, let's say
- [00:09:32.550] zeroed it on the bottom right, let's say
- [00:09:32.560] zeroed it on the bottom right, let's say of the canvas, it's going to cut it over
- [00:09:34.550] of the canvas, it's going to cut it over
- [00:09:34.560] of the canvas, it's going to cut it over there. But let's say you want to cut it
- [00:09:36.630] there. But let's say you want to cut it
- [00:09:36.640] there. But let's say you want to cut it somewhere else on your vinyl, maybe you
- [00:09:38.550] somewhere else on your vinyl, maybe you
- [00:09:38.560] somewhere else on your vinyl, maybe you plan that part for another piece of
- [00:09:39.990] plan that part for another piece of
- [00:09:40.000] plan that part for another piece of design, then you can actually go set a
- [00:09:41.509] design, then you can actually go set a
- [00:09:41.519] design, then you can actually go set a custom origin, cut it out there, and uh
- [00:09:44.550] custom origin, cut it out there, and uh
- [00:09:44.560] custom origin, cut it out there, and uh this option will be used for that. Okay,
- [00:09:46.870] this option will be used for that. Okay,
- [00:09:46.880] this option will be used for that. Okay, so the next thing that we want to keep a
- [00:09:48.949] so the next thing that we want to keep a
- [00:09:48.959] so the next thing that we want to keep a good eye on is measurements. Now, when
- [00:09:52.150] good eye on is measurements. Now, when
- [00:09:52.160] good eye on is measurements. Now, when it comes to measurements, obviously this
- [00:09:53.829] it comes to measurements, obviously this
- [00:09:53.839] it comes to measurements, obviously this becomes way more important if you're
- [00:09:55.269] becomes way more important if you're
- [00:09:55.279] becomes way more important if you're working with strict design rules. So
- [00:09:57.829] working with strict design rules. So
- [00:09:57.839] working with strict design rules. So maybe a client has something he wants to
- [00:09:59.990] maybe a client has something he wants to
- [00:10:00.000] maybe a client has something he wants to be a certain size exactly and uh and so
- [00:10:02.949] be a certain size exactly and uh and so
- [00:10:02.959] be a certain size exactly and uh and so forth then that becomes very important
- [00:10:04.389] forth then that becomes very important
- [00:10:04.399] forth then that becomes very important but either way it's going to be
- [00:10:06.150] but either way it's going to be
- [00:10:06.160] but either way it's going to be important because you're obviously
- [00:10:07.509] important because you're obviously
- [00:10:07.519] important because you're obviously working with a real material and a
- [00:10:09.590] working with a real material and a
- [00:10:09.600] working with a real material and a digital design. So to make sure you
- [00:10:11.750] digital design. So to make sure you
- [00:10:11.760] digital design. So to make sure you don't make a design bigger than your
- [00:10:13.269] don't make a design bigger than your
- [00:10:13.279] don't make a design bigger than your material and then we need to follow this
- [00:10:15.829] material and then we need to follow this
- [00:10:15.839] material and then we need to follow this kind of process. Now by default we have
- [00:10:18.790] kind of process. Now by default we have
- [00:10:18.800] kind of process. Now by default we have these rulers on the top and left. This
- [00:10:20.710] these rulers on the top and left. This
- [00:10:20.720] these rulers on the top and left. This will obviously give you a general idea
- [00:10:21.990] will obviously give you a general idea
- [00:10:22.000] will obviously give you a general idea of what's the scale of it depending on
- [00:10:23.670] of what's the scale of it depending on
- [00:10:23.680] of what's the scale of it depending on the units you've set. But let's say you
- [00:10:25.910] the units you've set. But let's say you
- [00:10:25.920] the units you've set. But let's say you want to take custom measurements. I'm
- [00:10:27.990] want to take custom measurements. I'm
- [00:10:28.000] want to take custom measurements. I'm just going to quickly draw two
- [00:10:29.030] just going to quickly draw two
- [00:10:29.040] just going to quickly draw two rectangles here on the actual mat. Then
- [00:10:31.990] rectangles here on the actual mat. Then
- [00:10:32.000] rectangles here on the actual mat. Then I'm going to go select the ruler there
- [00:10:33.829] I'm going to go select the ruler there
- [00:10:33.839] I'm going to go select the ruler there at the bottom. And then you must keep in
- [00:10:36.230] at the bottom. And then you must keep in
- [00:10:36.240] at the bottom. And then you must keep in mind on this top bar when you have the
- [00:10:38.389] mind on this top bar when you have the
- [00:10:38.399] mind on this top bar when you have the ruler. This is where you'll be seeing
- [00:10:39.990] ruler. This is where you'll be seeing
- [00:10:40.000] ruler. This is where you'll be seeing all your information relevant to your
- [00:10:42.150] all your information relevant to your
- [00:10:42.160] all your information relevant to your measurement.
- [00:10:43.829] measurement.
- [00:10:43.839] measurement. So as you can see there, we've got the X
- [00:10:46.150] So as you can see there, we've got the X
- [00:10:46.160] So as you can see there, we've got the X and Y. Then we have the width and
- [00:10:48.630] and Y. Then we have the width and
- [00:10:48.640] and Y. Then we have the width and height. We have the distance and we have
- [00:10:50.630] height. We have the distance and we have
- [00:10:50.640] height. We have the distance and we have the angle. Now let's say we want to
- [00:10:52.550] the angle. Now let's say we want to
- [00:10:52.560] the angle. Now let's say we want to measure the distance between these two.
- [00:10:54.470] measure the distance between these two.
- [00:10:54.480] measure the distance between these two. We can simply left click and drag to the
- [00:10:56.310] We can simply left click and drag to the
- [00:10:56.320] We can simply left click and drag to the other side. But now let's say we want to
- [00:10:57.910] other side. But now let's say we want to
- [00:10:57.920] other side. But now let's say we want to go a little bit more complex. We want to
- [00:10:59.590] go a little bit more complex. We want to
- [00:10:59.600] go a little bit more complex. We want to go from the top right corner of this
- [00:11:01.750] go from the top right corner of this
- [00:11:01.760] go from the top right corner of this shape to the bottom left of the other.
- [00:11:03.910] shape to the bottom left of the other.
- [00:11:03.920] shape to the bottom left of the other. Then what we can do is we simply take it
- [00:11:05.990] Then what we can do is we simply take it
- [00:11:06.000] Then what we can do is we simply take it there and then you will see these values
- [00:11:08.389] there and then you will see these values
- [00:11:08.399] there and then you will see these values adjust on top there. Then as we let go
- [00:11:12.310] adjust on top there. Then as we let go
- [00:11:12.320] adjust on top there. Then as we let go it will keep the values there. So then
- [00:11:13.750] it will keep the values there. So then
- [00:11:13.760] it will keep the values there. So then if we zoom in here we can see the
- [00:11:15.269] if we zoom in here we can see the
- [00:11:15.279] if we zoom in here we can see the information. So then if we go here you
- [00:11:17.269] information. So then if we go here you
- [00:11:17.279] information. So then if we go here you can see now we can actually see the
- [00:11:18.630] can see now we can actually see the
- [00:11:18.640] can see now we can actually see the distance between that point. So not just
- [00:11:20.470] distance between that point. So not just
- [00:11:20.480] distance between that point. So not just the width or the height, you can also
- [00:11:22.230] the width or the height, you can also
- [00:11:22.240] the width or the height, you can also see what's the angle of it. So like I
- [00:11:25.509] see what's the angle of it. So like I
- [00:11:25.519] see what's the angle of it. So like I mentioned, that's going to be quite
- [00:11:26.630] mentioned, that's going to be quite
- [00:11:26.640] mentioned, that's going to be quite important if you have to get custom
- [00:11:28.150] important if you have to get custom
- [00:11:28.160] important if you have to get custom measurements, but in general working
- [00:11:29.910] measurements, but in general working
- [00:11:29.920] measurements, but in general working with measurements, um it's a good
- [00:11:32.069] with measurements, um it's a good
- [00:11:32.079] with measurements, um it's a good practice to follow when you're working
- [00:11:33.750] practice to follow when you're working
- [00:11:33.760] practice to follow when you're working with any form of program that translates
- [00:11:35.990] with any form of program that translates
- [00:11:36.000] with any form of program that translates it from a digital to the real life.
- [00:11:39.269] it from a digital to the real life.
- [00:11:39.279] it from a digital to the real life. Okay, so next up, we're going to be
- [00:11:40.630] Okay, so next up, we're going to be
- [00:11:40.640] Okay, so next up, we're going to be looking at some guides and ways to
- [00:11:42.949] looking at some guides and ways to
- [00:11:42.959] looking at some guides and ways to actually manipulate your actual cutting
- [00:11:45.430] actually manipulate your actual cutting
- [00:11:45.440] actually manipulate your actual cutting mat. So now when it comes to the layout
- [00:11:47.910] mat. So now when it comes to the layout
- [00:11:47.920] mat. So now when it comes to the layout and the cutting mat, there's a few
- [00:11:49.350] and the cutting mat, there's a few
- [00:11:49.360] and the cutting mat, there's a few things to keep in mind. We mentioned
- [00:11:51.269] things to keep in mind. We mentioned
- [00:11:51.279] things to keep in mind. We mentioned before, you have these little rulers top
- [00:11:53.190] before, you have these little rulers top
- [00:11:53.200] before, you have these little rulers top and left, but also depending on the
- [00:11:55.430] and left, but also depending on the
- [00:11:55.440] and left, but also depending on the material you're feeding and that you
- [00:11:57.350] material you're feeding and that you
- [00:11:57.360] material you're feeding and that you might want to adjust some of these
- [00:11:58.949] might want to adjust some of these
- [00:11:58.959] might want to adjust some of these things. Now what we can do is we have to
- [00:12:01.110] things. Now what we can do is we have to
- [00:12:01.120] things. Now what we can do is we have to right click here, we can just go if we
- [00:12:03.910] right click here, we can just go if we
- [00:12:03.920] right click here, we can just go if we have to set a custom size, like if we
- [00:12:06.230] have to set a custom size, like if we
- [00:12:06.240] have to set a custom size, like if we have to change it, we can do that here.
- [00:12:08.550] have to change it, we can do that here.
- [00:12:08.560] have to change it, we can do that here. But we can also do the mat orientation.
- [00:12:10.550] But we can also do the mat orientation.
- [00:12:10.560] But we can also do the mat orientation. So from horizontal to vertical. Just
- [00:12:13.190] So from horizontal to vertical. Just
- [00:12:13.200] So from horizontal to vertical. Just keep in mind where that little arrow is
- [00:12:15.190] keep in mind where that little arrow is
- [00:12:15.200] keep in mind where that little arrow is on your actual cutting mat because if we
- [00:12:17.190] on your actual cutting mat because if we
- [00:12:17.200] on your actual cutting mat because if we had to change that. So you see that
- [00:12:19.269] had to change that. So you see that
- [00:12:19.279] had to change that. So you see that arrow if we had to change that the arrow
- [00:12:21.829] arrow if we had to change that the arrow
- [00:12:21.839] arrow if we had to change that the arrow is going to move and that's pretty much
- [00:12:23.590] is going to move and that's pretty much
- [00:12:23.600] is going to move and that's pretty much indicating where your machine is going
- [00:12:26.230] indicating where your machine is going
- [00:12:26.240] indicating where your machine is going to be. Then what we can also do is we
- [00:12:29.030] to be. Then what we can also do is we
- [00:12:29.040] to be. Then what we can also do is we right click and we go to the bottom. We
- [00:12:30.949] right click and we go to the bottom. We
- [00:12:30.959] right click and we go to the bottom. We go to ruler units. And this is now where
- [00:12:33.910] go to ruler units. And this is now where
- [00:12:33.920] go to ruler units. And this is now where we can change this for inches,
- [00:12:35.509] we can change this for inches,
- [00:12:35.519] we can change this for inches, centimeters and millimeters. So
- [00:12:37.670] centimeters and millimeters. So
- [00:12:37.680] centimeters and millimeters. So obviously depending on the type of job
- [00:12:39.430] obviously depending on the type of job
- [00:12:39.440] obviously depending on the type of job you're working on or maybe the client
- [00:12:41.670] you're working on or maybe the client
- [00:12:41.680] you're working on or maybe the client then you want to adjust these
- [00:12:43.430] then you want to adjust these
- [00:12:43.440] then you want to adjust these appropriately. Now next up let's look at
- [00:12:45.670] appropriately. Now next up let's look at
- [00:12:45.680] appropriately. Now next up let's look at actual guides. Now there's multiple
- [00:12:48.550] actual guides. Now there's multiple
- [00:12:48.560] actual guides. Now there's multiple reasons why you might want to use these.
- [00:12:50.389] reasons why you might want to use these.
- [00:12:50.399] reasons why you might want to use these. It will obviously depend on your actual
- [00:12:52.710] It will obviously depend on your actual
- [00:12:52.720] It will obviously depend on your actual um requirement and workflow but common
- [00:12:55.590] um requirement and workflow but common
- [00:12:55.600] um requirement and workflow but common ones is perhaps you have strict design
- [00:12:57.910] ones is perhaps you have strict design
- [00:12:57.920] ones is perhaps you have strict design requirements and then you lay out some
- [00:12:59.670] requirements and then you lay out some
- [00:12:59.680] requirements and then you lay out some guides so you know either you don't go
- [00:13:01.269] guides so you know either you don't go
- [00:13:01.279] guides so you know either you don't go outside of that space or you make sure
- [00:13:03.509] outside of that space or you make sure
- [00:13:03.519] outside of that space or you make sure maybe stuff are aligned using these
- [00:13:05.670] maybe stuff are aligned using these
- [00:13:05.680] maybe stuff are aligned using these guides. So maybe you have logos and they
- [00:13:07.670] guides. So maybe you have logos and they
- [00:13:07.680] guides. So maybe you have logos and they must all be aligned in a certain way.
- [00:13:09.190] must all be aligned in a certain way.
- [00:13:09.200] must all be aligned in a certain way. You can also use that. So what we can do
- [00:13:11.670] You can also use that. So what we can do
- [00:13:11.680] You can also use that. So what we can do to add guides, we can simply leftclick
- [00:13:13.990] to add guides, we can simply leftclick
- [00:13:14.000] to add guides, we can simply leftclick and hold on one of these rulers and drag
- [00:13:17.190] and hold on one of these rulers and drag
- [00:13:17.200] and hold on one of these rulers and drag it in. Then we can move this around to
- [00:13:19.750] it in. Then we can move this around to
- [00:13:19.760] it in. Then we can move this around to where we like it. Obviously you can keep
- [00:13:21.750] where we like it. Obviously you can keep
- [00:13:21.760] where we like it. Obviously you can keep a eye out on your actual measuring
- [00:13:24.310] a eye out on your actual measuring
- [00:13:24.320] a eye out on your actual measuring rulers on top and left to make sure it
- [00:13:26.629] rulers on top and left to make sure it
- [00:13:26.639] rulers on top and left to make sure it is exactly where you want it. Then when
- [00:13:28.550] is exactly where you want it. Then when
- [00:13:28.560] is exactly where you want it. Then when you let go of your left mouse button, it
- [00:13:30.629] you let go of your left mouse button, it
- [00:13:30.639] you let go of your left mouse button, it will place the guide there. Now we can
- [00:13:33.269] will place the guide there. Now we can
- [00:13:33.279] will place the guide there. Now we can do the same with the top one. We can
- [00:13:34.550] do the same with the top one. We can
- [00:13:34.560] do the same with the top one. We can simply left click drag in and then we
- [00:13:36.470] simply left click drag in and then we
- [00:13:36.480] simply left click drag in and then we can use this ruler on the side and place
- [00:13:38.710] can use this ruler on the side and place
- [00:13:38.720] can use this ruler on the side and place it where we like it. Okay. Now, another
- [00:13:41.350] it where we like it. Okay. Now, another
- [00:13:41.360] it where we like it. Okay. Now, another thing to keep in mind is let's say you
- [00:13:43.269] thing to keep in mind is let's say you
- [00:13:43.279] thing to keep in mind is let's say you did that and you don't actually see
- [00:13:44.870] did that and you don't actually see
- [00:13:44.880] did that and you don't actually see guides or perhaps you've worked you've
- [00:13:47.509] guides or perhaps you've worked you've
- [00:13:47.519] guides or perhaps you've worked you've used your guides but now you don't want
- [00:13:49.030] used your guides but now you don't want
- [00:13:49.040] used your guides but now you don't want to remove them but you still want to
- [00:13:50.310] to remove them but you still want to
- [00:13:50.320] to remove them but you still want to keep them around but just not see them.
- [00:13:52.389] keep them around but just not see them.
- [00:13:52.399] keep them around but just not see them. Then we can simply go to the view on top
- [00:13:53.990] Then we can simply go to the view on top
- [00:13:54.000] Then we can simply go to the view on top here and then we go to the guidelines
- [00:13:56.790] here and then we go to the guidelines
- [00:13:56.800] here and then we go to the guidelines and then we have the option here show or
- [00:13:58.710] and then we have the option here show or
- [00:13:58.720] and then we have the option here show or hide guides. Then under that we have
- [00:14:01.110] hide guides. Then under that we have
- [00:14:01.120] hide guides. Then under that we have some other options like lock and unlock.
- [00:14:03.590] some other options like lock and unlock.
- [00:14:03.600] some other options like lock and unlock. So let's say you've set up your
- [00:14:05.269] So let's say you've set up your
- [00:14:05.279] So let's say you've set up your guidelines. You don't want to
- [00:14:06.310] guidelines. You don't want to
- [00:14:06.320] guidelines. You don't want to accidentally just then then I would al
- [00:14:08.230] accidentally just then then I would al
- [00:14:08.240] accidentally just then then I would al recommend you go and lock them. And then
- [00:14:10.550] recommend you go and lock them. And then
- [00:14:10.560] recommend you go and lock them. And then under that we have the clear and edit
- [00:14:12.790] under that we have the clear and edit
- [00:14:12.800] under that we have the clear and edit guidelines. Now if we had to open this
- [00:14:15.509] guidelines. Now if we had to open this
- [00:14:15.519] guidelines. Now if we had to open this edit guidelines. Now this might be the
- [00:14:18.230] edit guidelines. Now this might be the
- [00:14:18.240] edit guidelines. Now this might be the more important one to get familiar with.
- [00:14:20.629] more important one to get familiar with.
- [00:14:20.639] more important one to get familiar with. You will see where we met here by
- [00:14:22.470] You will see where we met here by
- [00:14:22.480] You will see where we met here by horizontal and vertical. So under the
- [00:14:25.350] horizontal and vertical. So under the
- [00:14:25.360] horizontal and vertical. So under the horizontal will be all our horizontal
- [00:14:27.030] horizontal will be all our horizontal
- [00:14:27.040] horizontal will be all our horizontal ones and under the vertical our
- [00:14:28.550] ones and under the vertical our
- [00:14:28.560] ones and under the vertical our vertical. Nice thing is also if we
- [00:14:30.550] vertical. Nice thing is also if we
- [00:14:30.560] vertical. Nice thing is also if we select one of these you can see we can
- [00:14:31.990] select one of these you can see we can
- [00:14:32.000] select one of these you can see we can adjust stuff like the color then um and
- [00:14:35.110] adjust stuff like the color then um and
- [00:14:35.120] adjust stuff like the color then um and make sure you click modify otherwise it
- [00:14:37.189] make sure you click modify otherwise it
- [00:14:37.199] make sure you click modify otherwise it will not actually confirm the effects
- [00:14:40.069] will not actually confirm the effects
- [00:14:40.079] will not actually confirm the effects then we can also readjust where we want
- [00:14:42.389] then we can also readjust where we want
- [00:14:42.399] then we can also readjust where we want it and then if we want we can remove it
- [00:14:45.590] it and then if we want we can remove it
- [00:14:45.600] it and then if we want we can remove it here as well. Now if you want to remove
- [00:14:47.430] here as well. Now if you want to remove
- [00:14:47.440] here as well. Now if you want to remove all of them you can obviously go here at
- [00:14:49.110] all of them you can obviously go here at
- [00:14:49.120] all of them you can obviously go here at the bottom remove all vertical or all
- [00:14:51.189] the bottom remove all vertical or all
- [00:14:51.199] the bottom remove all vertical or all horizontal. So let's quickly try one of
- [00:14:53.670] horizontal. So let's quickly try one of
- [00:14:53.680] horizontal. So let's quickly try one of the horizontal ones. Let's change that.
- [00:14:55.910] the horizontal ones. Let's change that.
- [00:14:55.920] the horizontal ones. Let's change that. Like let's say we want to make it
- [00:14:57.110] Like let's say we want to make it
- [00:14:57.120] Like let's say we want to make it exactly a certain uh amount. Then make
- [00:15:00.150] exactly a certain uh amount. Then make
- [00:15:00.160] exactly a certain uh amount. Then make sure we click modify after we're done
- [00:15:02.389] sure we click modify after we're done
- [00:15:02.399] sure we click modify after we're done and that will adjust it for us. Okay,
- [00:15:05.590] and that will adjust it for us. Okay,
- [00:15:05.600] and that will adjust it for us. Okay, let's say you want to remove them. You
- [00:15:06.949] let's say you want to remove them. You
- [00:15:06.959] let's say you want to remove them. You can obviously go to view, you go to
- [00:15:08.389] can obviously go to view, you go to
- [00:15:08.399] can obviously go to view, you go to guidelines and then you go to remove
- [00:15:11.350] guidelines and then you go to remove
- [00:15:11.360] guidelines and then you go to remove them. Okay, so that concludes our
- [00:15:13.590] them. Okay, so that concludes our
- [00:15:13.600] them. Okay, so that concludes our guidelines. Definitely play around with
- [00:15:15.350] guidelines. Definitely play around with
- [00:15:15.360] guidelines. Definitely play around with these. It's going to be very very handy
- [00:15:17.509] these. It's going to be very very handy
- [00:15:17.519] these. It's going to be very very handy under um like I say strict design
- [00:15:19.509] under um like I say strict design
- [00:15:19.519] under um like I say strict design requirements and then yeah I would
- [00:15:21.670] requirements and then yeah I would
- [00:15:21.680] requirements and then yeah I would definitely say play with it. get
- [00:15:22.870] definitely say play with it. get
- [00:15:22.880] definitely say play with it. get competent so that when you need to use
- [00:15:24.550] competent so that when you need to use
- [00:15:24.560] competent so that when you need to use it, you understand it better.
- [00:15:27.590] it, you understand it better.
- [00:15:27.600] it, you understand it better. Okay, next up we're going to be looking
- [00:15:29.509] Okay, next up we're going to be looking
- [00:15:29.519] Okay, next up we're going to be looking at snapping. Now, when it comes to
- [00:15:32.150] at snapping. Now, when it comes to
- [00:15:32.160] at snapping. Now, when it comes to snapping, this is going to be very handy
- [00:15:33.590] snapping, this is going to be very handy
- [00:15:33.600] snapping, this is going to be very handy when you want to make sure certain
- [00:15:34.870] when you want to make sure certain
- [00:15:34.880] when you want to make sure certain shapes are relevant in alignment and
- [00:15:38.069] shapes are relevant in alignment and
- [00:15:38.079] shapes are relevant in alignment and location to other shapes and so forth.
- [00:15:40.150] location to other shapes and so forth.
- [00:15:40.160] location to other shapes and so forth. Or you can use this as a form of guide
- [00:15:41.670] Or you can use this as a form of guide
- [00:15:41.680] Or you can use this as a form of guide as well and you snap things to it. So
- [00:15:45.189] as well and you snap things to it. So
- [00:15:45.199] as well and you snap things to it. So now there's a few different snapping
- [00:15:46.870] now there's a few different snapping
- [00:15:46.880] now there's a few different snapping types we do get. So let's say with these
- [00:15:49.590] types we do get. So let's say with these
- [00:15:49.600] types we do get. So let's say with these two shapes. Now what we're going to do
- [00:15:50.870] two shapes. Now what we're going to do
- [00:15:50.880] two shapes. Now what we're going to do is we go to view on our main menu. We go
- [00:15:53.269] is we go to view on our main menu. We go
- [00:15:53.279] is we go to view on our main menu. We go to snap to. And then you'll see we have
- [00:15:56.150] to snap to. And then you'll see we have
- [00:15:56.160] to snap to. And then you'll see we have a few options. So first of all we have
- [00:15:58.069] a few options. So first of all we have
- [00:15:58.079] a few options. So first of all we have grid. So this is going to try snap this
- [00:16:00.949] grid. So this is going to try snap this
- [00:16:00.959] grid. So this is going to try snap this to the grid depending on which point
- [00:16:02.949] to the grid depending on which point
- [00:16:02.959] to the grid depending on which point you're trying to snap it to. As you can
- [00:16:05.430] you're trying to snap it to. As you can
- [00:16:05.440] you're trying to snap it to. As you can see that it's normal normal till it gets
- [00:16:07.110] see that it's normal normal till it gets
- [00:16:07.120] see that it's normal normal till it gets close and then snaps to it. So this will
- [00:16:09.829] close and then snaps to it. So this will
- [00:16:09.839] close and then snaps to it. So this will help you to align things to a grid. So
- [00:16:11.430] help you to align things to a grid. So
- [00:16:11.440] help you to align things to a grid. So maybe you've set up your grid so it's
- [00:16:13.110] maybe you've set up your grid so it's
- [00:16:13.120] maybe you've set up your grid so it's exactly a certain size. Then um that
- [00:16:15.910] exactly a certain size. Then um that
- [00:16:15.920] exactly a certain size. Then um that will help. Okay. So next up here we've
- [00:16:18.310] will help. Okay. So next up here we've
- [00:16:18.320] will help. Okay. So next up here we've got snap to guidelines like we l before.
- [00:16:20.710] got snap to guidelines like we l before.
- [00:16:20.720] got snap to guidelines like we l before. Let's say we've got some guidelines
- [00:16:22.389] Let's say we've got some guidelines
- [00:16:22.399] Let's say we've got some guidelines placed as a form of guide. And then if
- [00:16:26.470] placed as a form of guide. And then if
- [00:16:26.480] placed as a form of guide. And then if we add these guidelines, we can simply
- [00:16:28.150] we add these guidelines, we can simply
- [00:16:28.160] we add these guidelines, we can simply take this shape and then we move it and
- [00:16:30.230] take this shape and then we move it and
- [00:16:30.240] take this shape and then we move it and gets close to those guidelines, it will
- [00:16:31.749] gets close to those guidelines, it will
- [00:16:31.759] gets close to those guidelines, it will snap to it. So like I said, let's say
- [00:16:33.910] snap to it. So like I said, let's say
- [00:16:33.920] snap to it. So like I said, let's say you've got design or logos that have to
- [00:16:36.550] you've got design or logos that have to
- [00:16:36.560] you've got design or logos that have to all be on the same horizontal plane or
- [00:16:38.629] all be on the same horizontal plane or
- [00:16:38.639] all be on the same horizontal plane or vertical plane and then this is also a
- [00:16:40.310] vertical plane and then this is also a
- [00:16:40.320] vertical plane and then this is also a great way to go about it. You can
- [00:16:42.389] great way to go about it. You can
- [00:16:42.399] great way to go about it. You can obviously also use this for getting
- [00:16:44.069] obviously also use this for getting
- [00:16:44.079] obviously also use this for getting equal spacing between things. So you set
- [00:16:46.550] equal spacing between things. So you set
- [00:16:46.560] equal spacing between things. So you set up your guides with the exact size and
- [00:16:48.949] up your guides with the exact size and
- [00:16:48.959] up your guides with the exact size and then you snap these to that. So I'm just
- [00:16:51.430] then you snap these to that. So I'm just
- [00:16:51.440] then you snap these to that. So I'm just going to quickly clear these guidelines.
- [00:16:52.949] going to quickly clear these guidelines.
- [00:16:52.959] going to quickly clear these guidelines. Now let's look at a few other options.
- [00:16:56.069] Now let's look at a few other options.
- [00:16:56.079] Now let's look at a few other options. So next up here we have object bounds.
- [00:17:00.550] So next up here we have object bounds.
- [00:17:00.560] So next up here we have object bounds. So what this will come down to is this
- [00:17:02.389] So what this will come down to is this
- [00:17:02.399] So what this will come down to is this shape will now snap to any boundary box
- [00:17:06.069] shape will now snap to any boundary box
- [00:17:06.079] shape will now snap to any boundary box or boundary plane of the other one. So
- [00:17:08.789] or boundary plane of the other one. So
- [00:17:08.799] or boundary plane of the other one. So either it will be the side or the height
- [00:17:10.630] either it will be the side or the height
- [00:17:10.640] either it will be the side or the height or anything like that. So once again,
- [00:17:12.630] or anything like that. So once again,
- [00:17:12.640] or anything like that. So once again, very nice way to make sure you've got a
- [00:17:14.309] very nice way to make sure you've got a
- [00:17:14.319] very nice way to make sure you've got a perfect edge between two things or the
- [00:17:17.909] perfect edge between two things or the
- [00:17:17.919] perfect edge between two things or the same height and so now there's a few
- [00:17:20.470] same height and so now there's a few
- [00:17:20.480] same height and so now there's a few different options under that where we
- [00:17:21.669] different options under that where we
- [00:17:21.679] different options under that where we can choose from. So we've got the object
- [00:17:23.429] can choose from. So we've got the object
- [00:17:23.439] can choose from. So we've got the object center as well. So then this thing will
- [00:17:26.470] center as well. So then this thing will
- [00:17:26.480] center as well. So then this thing will snap to the center of the object,
- [00:17:28.789] snap to the center of the object,
- [00:17:28.799] snap to the center of the object, whether it's next to it or you actually
- [00:17:30.950] whether it's next to it or you actually
- [00:17:30.960] whether it's next to it or you actually move it inside the object. So as you can
- [00:17:33.270] move it inside the object. So as you can
- [00:17:33.280] move it inside the object. So as you can imagine with some designs, if you have
- [00:17:34.950] imagine with some designs, if you have
- [00:17:34.960] imagine with some designs, if you have to do a cutout from the inside, this is
- [00:17:36.789] to do a cutout from the inside, this is
- [00:17:36.799] to do a cutout from the inside, this is going to be very nice. Okay. Now, next
- [00:17:39.350] going to be very nice. Okay. Now, next
- [00:17:39.360] going to be very nice. Okay. Now, next up, I'm going to quickly make a
- [00:17:40.549] up, I'm going to quickly make a
- [00:17:40.559] up, I'm going to quickly make a duplicate of this. And then I'm going to
- [00:17:42.390] duplicate of this. And then I'm going to
- [00:17:42.400] duplicate of this. And then I'm going to group the one. Now, if we had to take
- [00:17:44.789] group the one. Now, if we had to take
- [00:17:44.799] group the one. Now, if we had to take this shape and we had to move it, you
- [00:17:46.630] this shape and we had to move it, you
- [00:17:46.640] this shape and we had to move it, you can see it snaps here to the edge. But
- [00:17:48.630] can see it snaps here to the edge. But
- [00:17:48.640] can see it snaps here to the edge. But when it comes to actual inside shape
- [00:17:50.950] when it comes to actual inside shape
- [00:17:50.960] when it comes to actual inside shape where it's grouped, it does not read it
- [00:17:52.549] where it's grouped, it does not read it
- [00:17:52.559] where it's grouped, it does not read it as individual shapes. It reads this as
- [00:17:54.230] as individual shapes. It reads this as
- [00:17:54.240] as individual shapes. It reads this as one big square now depending on where
- [00:17:56.310] one big square now depending on where
- [00:17:56.320] one big square now depending on where the outer edges are. So, let's say we
- [00:17:58.789] the outer edges are. So, let's say we
- [00:17:58.799] the outer edges are. So, let's say we want to now be able to snap things
- [00:18:00.710] want to now be able to snap things
- [00:18:00.720] want to now be able to snap things within a group because obviously some
- [00:18:02.150] within a group because obviously some
- [00:18:02.160] within a group because obviously some designs it's a multiple things combined
- [00:18:05.270] designs it's a multiple things combined
- [00:18:05.280] designs it's a multiple things combined into a group to keep them organized. So
- [00:18:07.830] into a group to keep them organized. So
- [00:18:07.840] into a group to keep them organized. So then what we can simply do, we go to
- [00:18:10.310] then what we can simply do, we go to
- [00:18:10.320] then what we can simply do, we go to view, we go to snap to, and we're going
- [00:18:12.470] view, we go to snap to, and we're going
- [00:18:12.480] view, we go to snap to, and we're going to go sub layers. So now this is going
- [00:18:16.950] to go sub layers. So now this is going
- [00:18:16.960] to go sub layers. So now this is going to read it as if it's individual layers
- [00:18:18.870] to read it as if it's individual layers
- [00:18:18.880] to read it as if it's individual layers even though they grouped together. So
- [00:18:20.789] even though they grouped together. So
- [00:18:20.799] even though they grouped together. So now if I move it here, you can see it
- [00:18:22.070] now if I move it here, you can see it
- [00:18:22.080] now if I move it here, you can see it snaps it to this shape and the other
- [00:18:24.230] snaps it to this shape and the other
- [00:18:24.240] snaps it to this shape and the other shape as if they're individual layers.
- [00:18:27.830] shape as if they're individual layers.
- [00:18:27.840] shape as if they're individual layers. Okay. So now the next thing we want to
- [00:18:29.110] Okay. So now the next thing we want to
- [00:18:29.120] Okay. So now the next thing we want to be aware of is graphic types. This is
- [00:18:31.270] be aware of is graphic types. This is
- [00:18:31.280] be aware of is graphic types. This is important to understand if you're going
- [00:18:32.710] important to understand if you're going
- [00:18:32.720] important to understand if you're going to be working with different let's say
- [00:18:34.470] to be working with different let's say
- [00:18:34.480] to be working with different let's say file types like raster or maybe vector
- [00:18:38.710] file types like raster or maybe vector
- [00:18:38.720] file types like raster or maybe vector or um file format. So when you're going
- [00:18:41.190] or um file format. So when you're going
- [00:18:41.200] or um file format. So when you're going from PGs to JPEGs to bit maps like what
- [00:18:44.710] from PGs to JPEGs to bit maps like what
- [00:18:44.720] from PGs to JPEGs to bit maps like what is the main differences at least for
- [00:18:46.789] is the main differences at least for
- [00:18:46.799] is the main differences at least for what we need to know. So first of all
- [00:18:49.669] what we need to know. So first of all
- [00:18:49.679] what we need to know. So first of all we're going to be looking at vector and
- [00:18:51.830] we're going to be looking at vector and
- [00:18:51.840] we're going to be looking at vector and raster. So what it comes down to we've
- [00:18:54.150] raster. So what it comes down to we've
- [00:18:54.160] raster. So what it comes down to we've got the two main types we'll be working
- [00:18:55.830] got the two main types we'll be working
- [00:18:55.840] got the two main types we'll be working with throughout most design programs. So
- [00:18:59.029] with throughout most design programs. So
- [00:18:59.039] with throughout most design programs. So vector, this is something that's related
- [00:19:01.190] vector, this is something that's related
- [00:19:01.200] vector, this is something that's related to a form of mathematical equation. It's
- [00:19:04.070] to a form of mathematical equation. It's
- [00:19:04.080] to a form of mathematical equation. It's obviously the vector of something. So
- [00:19:06.230] obviously the vector of something. So
- [00:19:06.240] obviously the vector of something. So the nice thing about a vector is you can
- [00:19:08.549] the nice thing about a vector is you can
- [00:19:08.559] the nice thing about a vector is you can design this the size of a thumbnail and
- [00:19:11.110] design this the size of a thumbnail and
- [00:19:11.120] design this the size of a thumbnail and then scale it to the size of a bullboard
- [00:19:12.950] then scale it to the size of a bullboard
- [00:19:12.960] then scale it to the size of a bullboard and you won't lose any quality because
- [00:19:15.590] and you won't lose any quality because
- [00:19:15.600] and you won't lose any quality because everything is a form of mathematical
- [00:19:17.510] everything is a form of mathematical
- [00:19:17.520] everything is a form of mathematical equation. Then uh what it comes down to
- [00:19:19.750] equation. Then uh what it comes down to
- [00:19:19.760] equation. Then uh what it comes down to is you've got node points and they've
- [00:19:21.830] is you've got node points and they've
- [00:19:21.840] is you've got node points and they've got a calculation of xy. If it's 3D it
- [00:19:25.270] got a calculation of xy. If it's 3D it
- [00:19:25.280] got a calculation of xy. If it's 3D it will be the z as well. And then it will
- [00:19:28.470] will be the z as well. And then it will
- [00:19:28.480] will be the z as well. And then it will mark with how far they between each
- [00:19:30.390] mark with how far they between each
- [00:19:30.400] mark with how far they between each other. If there's a curvature, how many
- [00:19:32.150] other. If there's a curvature, how many
- [00:19:32.160] other. If there's a curvature, how many degrees is it and so forth and that is
- [00:19:33.990] degrees is it and so forth and that is
- [00:19:34.000] degrees is it and so forth and that is the way you can then recalculate that
- [00:19:35.990] the way you can then recalculate that
- [00:19:36.000] the way you can then recalculate that into any design.
- [00:19:38.549] into any design.
- [00:19:38.559] into any design. But the drawback and the limitation of
- [00:19:40.390] But the drawback and the limitation of
- [00:19:40.400] But the drawback and the limitation of this is the amount of information or
- [00:19:42.549] this is the amount of information or
- [00:19:42.559] this is the amount of information or quality you can have in your design.
- [00:19:44.870] quality you can have in your design.
- [00:19:44.880] quality you can have in your design. This tends to be very common or popular
- [00:19:46.950] This tends to be very common or popular
- [00:19:46.960] This tends to be very common or popular with like flat type designs like logos
- [00:19:49.669] with like flat type designs like logos
- [00:19:49.679] with like flat type designs like logos and so forth where it likes single
- [00:19:52.390] and so forth where it likes single
- [00:19:52.400] and so forth where it likes single colors, not a lot of variation in
- [00:19:55.350] colors, not a lot of variation in
- [00:19:55.360] colors, not a lot of variation in shading. And even though you can do it,
- [00:19:57.909] shading. And even though you can do it,
- [00:19:57.919] shading. And even though you can do it, it's going to mostly be looking like
- [00:19:59.750] it's going to mostly be looking like
- [00:19:59.760] it's going to mostly be looking like cartoonish you can say where once you
- [00:20:02.710] cartoonish you can say where once you
- [00:20:02.720] cartoonish you can say where once you sort of adding too much or too many
- [00:20:04.549] sort of adding too much or too many
- [00:20:04.559] sort of adding too much or too many different colors and shapes obviously
- [00:20:06.070] different colors and shapes obviously
- [00:20:06.080] different colors and shapes obviously your file gets bigger and it gets very
- [00:20:08.549] your file gets bigger and it gets very
- [00:20:08.559] your file gets bigger and it gets very slow. Now common and popular file
- [00:20:10.789] slow. Now common and popular file
- [00:20:10.799] slow. Now common and popular file formats for this is like Adobe
- [00:20:12.470] formats for this is like Adobe
- [00:20:12.480] formats for this is like Adobe Illustrator. So the AI got the EPS and
- [00:20:15.510] Illustrator. So the AI got the EPS and
- [00:20:15.520] Illustrator. So the AI got the EPS and another popular one is SVG. Then when it
- [00:20:19.110] another popular one is SVG. Then when it
- [00:20:19.120] another popular one is SVG. Then when it comes to the rastered type, now this is
- [00:20:21.750] comes to the rastered type, now this is
- [00:20:21.760] comes to the rastered type, now this is going to be pixelbased normally or
- [00:20:24.549] going to be pixelbased normally or
- [00:20:24.559] going to be pixelbased normally or pointbased. But if we're looking at
- [00:20:26.470] pointbased. But if we're looking at
- [00:20:26.480] pointbased. But if we're looking at digital and computer, this will be
- [00:20:28.149] digital and computer, this will be
- [00:20:28.159] digital and computer, this will be pixelbased. And this will be common
- [00:20:30.149] pixelbased. And this will be common
- [00:20:30.159] pixelbased. And this will be common among stuff like photographs or high
- [00:20:32.470] among stuff like photographs or high
- [00:20:32.480] among stuff like photographs or high quality artwork where what it comes down
- [00:20:35.110] quality artwork where what it comes down
- [00:20:35.120] quality artwork where what it comes down to is it's got a lot of individual
- [00:20:37.350] to is it's got a lot of individual
- [00:20:37.360] to is it's got a lot of individual little pixels that's assigned different
- [00:20:39.270] little pixels that's assigned different
- [00:20:39.280] little pixels that's assigned different color codes and then they are stacked
- [00:20:41.990] color codes and then they are stacked
- [00:20:42.000] color codes and then they are stacked next to each other and when you zoom out
- [00:20:43.590] next to each other and when you zoom out
- [00:20:43.600] next to each other and when you zoom out it makes a completed image. And
- [00:20:46.070] it makes a completed image. And
- [00:20:46.080] it makes a completed image. And obviously the smaller the pixels or the
- [00:20:49.190] obviously the smaller the pixels or the
- [00:20:49.200] obviously the smaller the pixels or the closer they are together and the bigger
- [00:20:50.870] closer they are together and the bigger
- [00:20:50.880] closer they are together and the bigger the image, the higher the quality,
- [00:20:52.789] the image, the higher the quality,
- [00:20:52.799] the image, the higher the quality, that's where you get stuff like DPI and
- [00:20:55.750] that's where you get stuff like DPI and
- [00:20:55.760] that's where you get stuff like DPI and so forth. So the higher quality it is,
- [00:20:58.149] so forth. So the higher quality it is,
- [00:20:58.159] so forth. So the higher quality it is, the higher your actual print is going to
- [00:21:00.310] the higher your actual print is going to
- [00:21:00.320] the higher your actual print is going to be. Now this is also similar to the idea
- [00:21:02.390] be. Now this is also similar to the idea
- [00:21:02.400] be. Now this is also similar to the idea of like uh 4K monitors, you know, 1080p
- [00:21:06.870] of like uh 4K monitors, you know, 1080p
- [00:21:06.880] of like uh 4K monitors, you know, 1080p and all of that. It follows a similar
- [00:21:08.390] and all of that. It follows a similar
- [00:21:08.400] and all of that. It follows a similar principle where it is the amount of
- [00:21:10.710] principle where it is the amount of
- [00:21:10.720] principle where it is the amount of pixels you can say or the amount of
- [00:21:12.149] pixels you can say or the amount of
- [00:21:12.159] pixels you can say or the amount of information you can store within that
- [00:21:14.630] information you can store within that
- [00:21:14.640] information you can store within that size. Now popular formats for these are
- [00:21:17.830] size. Now popular formats for these are
- [00:21:17.840] size. Now popular formats for these are like bit maps, JPEGs, PGs and then print
- [00:21:22.149] like bit maps, JPEGs, PGs and then print
- [00:21:22.159] like bit maps, JPEGs, PGs and then print especially the TIFF files. Now when it
- [00:21:24.710] especially the TIFF files. Now when it
- [00:21:24.720] especially the TIFF files. Now when it comes to the actual application and when
- [00:21:26.310] comes to the actual application and when
- [00:21:26.320] comes to the actual application and when to use these is going to vary a bit.
- [00:21:28.870] to use these is going to vary a bit.
- [00:21:28.880] to use these is going to vary a bit. When it comes to printing even if you've
- [00:21:30.870] When it comes to printing even if you've
- [00:21:30.880] When it comes to printing even if you've designed in vector it is going to they
- [00:21:34.549] designed in vector it is going to they
- [00:21:34.559] designed in vector it is going to they call it a rip process. So it's a
- [00:21:37.110] call it a rip process. So it's a
- [00:21:37.120] call it a rip process. So it's a rasterized image process. So what it
- [00:21:39.110] rasterized image process. So what it
- [00:21:39.120] rasterized image process. So what it comes down to is it'll take that vector
- [00:21:40.710] comes down to is it'll take that vector
- [00:21:40.720] comes down to is it'll take that vector design and basically convert it into a
- [00:21:44.070] design and basically convert it into a
- [00:21:44.080] design and basically convert it into a raster so that the printer can
- [00:21:46.230] raster so that the printer can
- [00:21:46.240] raster so that the printer can understand it and print it out
- [00:21:47.909] understand it and print it out
- [00:21:47.919] understand it and print it out correctly. So that is something to keep
- [00:21:50.230] correctly. So that is something to keep
- [00:21:50.240] correctly. So that is something to keep in mind. But let's say you are just
- [00:21:51.830] in mind. But let's say you are just
- [00:21:51.840] in mind. But let's say you are just working with vinyl cutting then most of
- [00:21:54.230] working with vinyl cutting then most of
- [00:21:54.240] working with vinyl cutting then most of the time actually just be working with
- [00:21:55.669] the time actually just be working with
- [00:21:55.679] the time actually just be working with vectors. So your cutting shapes are
- [00:21:57.430] vectors. So your cutting shapes are
- [00:21:57.440] vectors. So your cutting shapes are ultimately just a form of vector that um
- [00:22:00.630] ultimately just a form of vector that um
- [00:22:00.640] ultimately just a form of vector that um it tells it where to cut and which parts
- [00:22:02.950] it tells it where to cut and which parts
- [00:22:02.960] it tells it where to cut and which parts to follow. where when you start mixing
- [00:22:05.350] to follow. where when you start mixing
- [00:22:05.360] to follow. where when you start mixing the two with stuff like um stickers and
- [00:22:07.669] the two with stuff like um stickers and
- [00:22:07.679] the two with stuff like um stickers and that where you're using registration
- [00:22:08.950] that where you're using registration
- [00:22:08.960] that where you're using registration marks then you'll be printing in a
- [00:22:11.110] marks then you'll be printing in a
- [00:22:11.120] marks then you'll be printing in a raster with your obviously registration
- [00:22:13.510] raster with your obviously registration
- [00:22:13.520] raster with your obviously registration marks and then the cutout lines will be
- [00:22:15.909] marks and then the cutout lines will be
- [00:22:15.919] marks and then the cutout lines will be vector over that like a form of
- [00:22:17.590] vector over that like a form of
- [00:22:17.600] vector over that like a form of silhouette or something in that line.
- [00:22:19.669] silhouette or something in that line.
- [00:22:19.679] silhouette or something in that line. Now over here we can see a nice little
- [00:22:21.510] Now over here we can see a nice little
- [00:22:21.520] Now over here we can see a nice little example where we have both in vinyl cut.
- [00:22:24.310] example where we have both in vinyl cut.
- [00:22:24.320] example where we have both in vinyl cut. So if we had to look here on our right
- [00:22:26.310] So if we had to look here on our right
- [00:22:26.320] So if we had to look here on our right here you can see we've got two layers.
- [00:22:28.070] here you can see we've got two layers.
- [00:22:28.080] here you can see we've got two layers. The one is print. If I hide that, you
- [00:22:29.990] The one is print. If I hide that, you
- [00:22:30.000] The one is print. If I hide that, you can see it hides our actual image is
- [00:22:31.750] can see it hides our actual image is
- [00:22:31.760] can see it hides our actual image is going to be printing. And under that we
- [00:22:34.230] going to be printing. And under that we
- [00:22:34.240] going to be printing. And under that we have the cut layer which this will be
- [00:22:36.149] have the cut layer which this will be
- [00:22:36.159] have the cut layer which this will be our vector shape which is let's say the
- [00:22:38.789] our vector shape which is let's say the
- [00:22:38.799] our vector shape which is let's say the outline if it's a form of a sticker.
- [00:22:41.190] outline if it's a form of a sticker.
- [00:22:41.200] outline if it's a form of a sticker. Okay. Now another thing we're going to
- [00:22:42.390] Okay. Now another thing we're going to
- [00:22:42.400] Okay. Now another thing we're going to be working with often which is very
- [00:22:44.470] be working with often which is very
- [00:22:44.480] be working with often which is very important to understand and that is the
- [00:22:46.230] important to understand and that is the
- [00:22:46.240] important to understand and that is the idea of a alpha channel. So in this
- [00:22:49.029] idea of a alpha channel. So in this
- [00:22:49.039] idea of a alpha channel. So in this sample image you can see we've got our
- [00:22:51.350] sample image you can see we've got our
- [00:22:51.360] sample image you can see we've got our logo. The one side has got no background
- [00:22:54.070] logo. The one side has got no background
- [00:22:54.080] logo. The one side has got no background so it's transparent and the other side
- [00:22:55.750] so it's transparent and the other side
- [00:22:55.760] so it's transparent and the other side has a solid white color or it could be
- [00:22:57.830] has a solid white color or it could be
- [00:22:57.840] has a solid white color or it could be any color but what comes down to it's
- [00:22:59.270] any color but what comes down to it's
- [00:22:59.280] any color but what comes down to it's got a background. So now when you're
- [00:23:01.350] got a background. So now when you're
- [00:23:01.360] got a background. So now when you're coming to doing for instance certain
- [00:23:03.510] coming to doing for instance certain
- [00:23:03.520] coming to doing for instance certain types of applications you might want to
- [00:23:05.990] types of applications you might want to
- [00:23:06.000] types of applications you might want to not have a background. Most of the times
- [00:23:08.230] not have a background. Most of the times
- [00:23:08.240] not have a background. Most of the times this is probably the best way to go but
- [00:23:10.390] this is probably the best way to go but
- [00:23:10.400] this is probably the best way to go but you do get your exceptions. So what it
- [00:23:13.029] you do get your exceptions. So what it
- [00:23:13.039] you do get your exceptions. So what it comes down to is a alpha channel is a
- [00:23:16.149] comes down to is a alpha channel is a
- [00:23:16.159] comes down to is a alpha channel is a extra channel on your image that can
- [00:23:17.830] extra channel on your image that can
- [00:23:17.840] extra channel on your image that can save for transparency which means is
- [00:23:21.110] save for transparency which means is
- [00:23:21.120] save for transparency which means is something invisible or not where your
- [00:23:23.750] something invisible or not where your
- [00:23:23.760] something invisible or not where your basic raster type images won't have a
- [00:23:26.789] basic raster type images won't have a
- [00:23:26.799] basic raster type images won't have a alpha channel. So it will only be saving
- [00:23:29.190] alpha channel. So it will only be saving
- [00:23:29.200] alpha channel. So it will only be saving color information.
- [00:23:31.830] color information.
- [00:23:31.840] color information. Now the beauty of why the alpha channel
- [00:23:33.830] Now the beauty of why the alpha channel
- [00:23:33.840] Now the beauty of why the alpha channel is so powerful is the fact that it can
- [00:23:36.470] is so powerful is the fact that it can
- [00:23:36.480] is so powerful is the fact that it can work as a form of mask. So if we may be
- [00:23:39.830] work as a form of mask. So if we may be
- [00:23:39.840] work as a form of mask. So if we may be tracing an image or anything like that,
- [00:23:42.390] tracing an image or anything like that,
- [00:23:42.400] tracing an image or anything like that, it can read that. Okay, there's part of
- [00:23:44.630] it can read that. Okay, there's part of
- [00:23:44.640] it can read that. Okay, there's part of the image that's not there, which means
- [00:23:46.789] the image that's not there, which means
- [00:23:46.799] the image that's not there, which means let's not draw that, let's not make it.
- [00:23:48.710] let's not draw that, let's not make it.
- [00:23:48.720] let's not draw that, let's not make it. So when you want to turn a image into a
- [00:23:51.590] So when you want to turn a image into a
- [00:23:51.600] So when you want to turn a image into a cutting line where if you have a white
- [00:23:53.909] cutting line where if you have a white
- [00:23:53.919] cutting line where if you have a white background, it's going to see it as if
- [00:23:55.590] background, it's going to see it as if
- [00:23:55.600] background, it's going to see it as if there's a shape there as well, which
- [00:23:57.270] there's a shape there as well, which
- [00:23:57.280] there's a shape there as well, which means it's going to want to trace that.
- [00:23:58.470] means it's going to want to trace that.
- [00:23:58.480] means it's going to want to trace that. You're going to have to play with
- [00:23:59.350] You're going to have to play with
- [00:23:59.360] You're going to have to play with settings to try to get it um to see it
- [00:24:01.430] settings to try to get it um to see it
- [00:24:01.440] settings to try to get it um to see it as if it's not there. where we can do it
- [00:24:03.990] as if it's not there. where we can do it
- [00:24:04.000] as if it's not there. where we can do it but most of the time if there is no
- [00:24:05.909] but most of the time if there is no
- [00:24:05.919] but most of the time if there is no background it's just going to see okay
- [00:24:07.430] background it's just going to see okay
- [00:24:07.440] background it's just going to see okay whatever is there that is what we've got
- [00:24:09.430] whatever is there that is what we've got
- [00:24:09.440] whatever is there that is what we've got so let's try trace that so now here in
- [00:24:12.390] so let's try trace that so now here in
- [00:24:12.400] so let's try trace that so now here in vinyl cut you can see we have the option
- [00:24:14.070] vinyl cut you can see we have the option
- [00:24:14.080] vinyl cut you can see we have the option here use alpha channel when available
- [00:24:16.950] here use alpha channel when available
- [00:24:16.960] here use alpha channel when available like I mentioned so you can work the
- [00:24:19.269] like I mentioned so you can work the
- [00:24:19.279] like I mentioned so you can work the other way but this is always or in my
- [00:24:21.269] other way but this is always or in my
- [00:24:21.279] other way but this is always or in my case most of the time the better way to
- [00:24:23.110] case most of the time the better way to
- [00:24:23.120] case most of the time the better way to go if you have an image with a alpha
- [00:24:24.870] go if you have an image with a alpha
- [00:24:24.880] go if you have an image with a alpha channel and a transparent background now
- [00:24:27.430] channel and a transparent background now
- [00:24:27.440] channel and a transparent background now when it comes to file formats for images
- [00:24:29.590] when it comes to file formats for images
- [00:24:29.600] when it comes to file formats for images with alpha channels the ones you're most
- [00:24:31.909] with alpha channels the ones you're most
- [00:24:31.919] with alpha channels the ones you're most likely going to be is going to be TIFF
- [00:24:33.430] likely going to be is going to be TIFF
- [00:24:33.440] likely going to be is going to be TIFF and PNG. But obviously, they can also
- [00:24:36.310] and PNG. But obviously, they can also
- [00:24:36.320] and PNG. But obviously, they can also save things with background. So, it
- [00:24:38.070] save things with background. So, it
- [00:24:38.080] save things with background. So, it doesn't mean just because it's a TIFF or
- [00:24:39.590] doesn't mean just because it's a TIFF or
- [00:24:39.600] doesn't mean just because it's a TIFF or PNG, there's not going to be a
- [00:24:40.870] PNG, there's not going to be a
- [00:24:40.880] PNG, there's not going to be a background. No, you still have to
- [00:24:42.310] background. No, you still have to
- [00:24:42.320] background. No, you still have to isolate what is the background, remove
- [00:24:43.830] isolate what is the background, remove
- [00:24:43.840] isolate what is the background, remove it in your design software, and then
- [00:24:45.350] it in your design software, and then
- [00:24:45.360] it in your design software, and then export it in one of these formats. Now,
- [00:24:47.510] export it in one of these formats. Now,
- [00:24:47.520] export it in one of these formats. Now, there are more formats that can handle
- [00:24:49.190] there are more formats that can handle
- [00:24:49.200] there are more formats that can handle this, but when it comes to vinyl cutting
- [00:24:50.870] this, but when it comes to vinyl cutting
- [00:24:50.880] this, but when it comes to vinyl cutting and printing, this is going to be what
- [00:24:52.390] and printing, this is going to be what
- [00:24:52.400] and printing, this is going to be what we're going to be working with most of
- [00:24:53.750] we're going to be working with most of
- [00:24:53.760] we're going to be working with most of the time. Now, when it comes to images
- [00:24:56.310] the time. Now, when it comes to images
- [00:24:56.320] the time. Now, when it comes to images with backgrounds that can't actually
- [00:24:58.310] with backgrounds that can't actually
- [00:24:58.320] with backgrounds that can't actually save a alpha channel, which means even
- [00:25:00.390] save a alpha channel, which means even
- [00:25:00.400] save a alpha channel, which means even if you remove the background, if you had
- [00:25:01.990] if you remove the background, if you had
- [00:25:02.000] if you remove the background, if you had to save it in one of these file formats,
- [00:25:03.669] to save it in one of these file formats,
- [00:25:03.679] to save it in one of these file formats, it's going to automatically assign a
- [00:25:05.590] it's going to automatically assign a
- [00:25:05.600] it's going to automatically assign a form of default background, whether it's
- [00:25:07.190] form of default background, whether it's
- [00:25:07.200] form of default background, whether it's black or white. Some programs have a um
- [00:25:10.070] black or white. Some programs have a um
- [00:25:10.080] black or white. Some programs have a um generic default they go to. Now, the
- [00:25:12.630] generic default they go to. Now, the
- [00:25:12.640] generic default they go to. Now, the common file formats for these are JPEGs
- [00:25:15.830] common file formats for these are JPEGs
- [00:25:15.840] common file formats for these are JPEGs and bit maps or BMPs. So, most likely
- [00:25:19.669] and bit maps or BMPs. So, most likely
- [00:25:19.679] and bit maps or BMPs. So, most likely when you're working with files, it's
- [00:25:21.029] when you're working with files, it's
- [00:25:21.039] when you're working with files, it's going to be in one of these two for file
- [00:25:23.029] going to be in one of these two for file
- [00:25:23.039] going to be in one of these two for file formats. And then you can very quickly
- [00:25:25.430] formats. And then you can very quickly
- [00:25:25.440] formats. And then you can very quickly then also dictate whether the file might
- [00:25:27.430] then also dictate whether the file might
- [00:25:27.440] then also dictate whether the file might have a transparent background or not
- [00:25:28.950] have a transparent background or not
- [00:25:28.960] have a transparent background or not just based off the format. But yeah,
- [00:25:30.710] just based off the format. But yeah,
- [00:25:30.720] just based off the format. But yeah, otherwise that is some key
- [00:25:32.070] otherwise that is some key
- [00:25:32.080] otherwise that is some key understandings worth knowing of things
- [00:25:34.549] understandings worth knowing of things
- [00:25:34.559] understandings worth knowing of things we're going to be using throughout this
- [00:25:35.990] we're going to be using throughout this
- [00:25:36.000] we're going to be using throughout this course. So understanding that is going
- [00:25:37.909] course. So understanding that is going
- [00:25:37.919] course. So understanding that is going to be a big bonus. But yeah, otherwise
- [00:25:39.909] to be a big bonus. But yeah, otherwise
- [00:25:39.919] to be a big bonus. But yeah, otherwise thanks guys and I'll catch you guys in
- [00:25:41.510] thanks guys and I'll catch you guys in
- [00:25:41.520] thanks guys and I'll catch you guys in the next one. Cheers.
Keyframes
- /workspace/academy/media/1jI5SduyqESIbtUZua6tUUR-0a_fGeX7u/keyframes/last.jpg
- /workspace/academy/media/1jI5SduyqESIbtUZua6tUUR-0a_fGeX7u/keyframes/t007.jpg
- /workspace/academy/media/1jI5SduyqESIbtUZua6tUUR-0a_fGeX7u/keyframes/t013.jpg
- /workspace/academy/media/1jI5SduyqESIbtUZua6tUUR-0a_fGeX7u/keyframes/t020.jpg
- /workspace/academy/media/1jI5SduyqESIbtUZua6tUUR-0a_fGeX7u/keyframes/t027.jpg
- /workspace/academy/media/1jI5SduyqESIbtUZua6tUUR-0a_fGeX7u/keyframes/t033.jpg
- /workspace/academy/media/1jI5SduyqESIbtUZua6tUUR-0a_fGeX7u/keyframes/t040.jpg
- /workspace/academy/media/1jI5SduyqESIbtUZua6tUUR-0a_fGeX7u/keyframes/t047.jpg
- /workspace/academy/media/1jI5SduyqESIbtUZua6tUUR-0a_fGeX7u/keyframes/t054.jpg
- /workspace/academy/media/1jI5SduyqESIbtUZua6tUUR-0a_fGeX7u/keyframes/t060.jpg
- /workspace/academy/media/1jI5SduyqESIbtUZua6tUUR-0a_fGeX7u/keyframes/t067.jpg
- /workspace/academy/media/1jI5SduyqESIbtUZua6tUUR-0a_fGeX7u/keyframes/t074.jpg
- /workspace/academy/media/1jI5SduyqESIbtUZua6tUUR-0a_fGeX7u/keyframes/t080.jpg
- /workspace/academy/media/1jI5SduyqESIbtUZua6tUUR-0a_fGeX7u/keyframes/t087.jpg
- /workspace/academy/media/1jI5SduyqESIbtUZua6tUUR-0a_fGeX7u/keyframes/t094.jpg
- /workspace/academy/media/1jI5SduyqESIbtUZua6tUUR-0a_fGeX7u/keyframes/t100.jpg
- /workspace/academy/media/1jI5SduyqESIbtUZua6tUUR-0a_fGeX7u/keyframes/t107.jpg
- /workspace/academy/media/1jI5SduyqESIbtUZua6tUUR-0a_fGeX7u/keyframes/t114.jpg
- /workspace/academy/media/1jI5SduyqESIbtUZua6tUUR-0a_fGeX7u/keyframes/t121.jpg
- /workspace/academy/media/1jI5SduyqESIbtUZua6tUUR-0a_fGeX7u/keyframes/t127.jpg
- /workspace/academy/media/1jI5SduyqESIbtUZua6tUUR-0a_fGeX7u/keyframes/t134.jpg
- /workspace/academy/media/1jI5SduyqESIbtUZua6tUUR-0a_fGeX7u/keyframes/t141.jpg
- /workspace/academy/media/1jI5SduyqESIbtUZua6tUUR-0a_fGeX7u/keyframes/t147.jpg
- /workspace/academy/media/1jI5SduyqESIbtUZua6tUUR-0a_fGeX7u/keyframes/t154.jpg
22. Design Principles
- title: Design Principles
- status: publish
- author: 0
- is_previewable: (empty)
- video_duration: 0h 13m 52s (raw {"hours":0,"minutes":13,"seconds":52})
- video_source_type: embedded
- drive_file_id:
1_kN1ZBlYp-2zJnwEN8AjgSJr4Q-Tte16(source_ref; not a public link) - transcript pending / keyframes pending / presentation extract pending
- video_source_url: (Drive preview omitted as a public link; file id kept as source_ref)
In the is lesson we going to be looking at a few different design principles.
- quizzes_following_this_lesson: 1 (full text in Quizzes)
- Design Principles (6 questions)
Drive extract
- file_id:
1_kN1ZBlYp-2zJnwEN8AjgSJr4Q-Tte16 - filename: 07 - SWVC - Design Principles.mp4
- kind: video
- local_path: /workspace/academy/media/1_kN1ZBlYp-2zJnwEN8AjgSJr4Q-Tte16/07 - SWVC - Design Principles.mp4
- source_ref: drive
1_kN1ZBlYp-2zJnwEN8AjgSJr4Q-Tte16· content_length 130777544 · original https://drive.google.com/file/d/1_kN1ZBlYp-2zJnwEN8AjgSJr4Q-Tte16/view - extract_status: done
- caption_source: drive_timedtext
- duration_s: 832.946009
- keyframe_count: 24
Transcript
- Howdy guys. Okay, in this next video,
- [00:00:03.350] Howdy guys. Okay, in this next video,
- [00:00:03.360] Howdy guys. Okay, in this next video, we're going to be looking at a few
- [00:00:04.630] we're going to be looking at a few
- [00:00:04.640] we're going to be looking at a few different design principles.
- [00:00:08.390] different design principles.
- [00:00:08.400] different design principles. Okay, so the first principle we're going
- [00:00:09.910] Okay, so the first principle we're going
- [00:00:09.920] Okay, so the first principle we're going to be looking at is nesting and why you
- [00:00:13.350] to be looking at is nesting and why you
- [00:00:13.360] to be looking at is nesting and why you might want to do that.
- [00:00:15.749] might want to do that.
- [00:00:15.759] might want to do that. Okay, now when it comes to nesting,
- [00:00:18.790] Okay, now when it comes to nesting,
- [00:00:18.800] Okay, now when it comes to nesting, um, okay, we might want something else
- [00:00:20.390] um, okay, we might want something else
- [00:00:20.400] um, okay, we might want something else to work with, not the the surfing
- [00:00:22.550] to work with, not the the surfing
- [00:00:22.560] to work with, not the the surfing peacock. Then if we go here to our other
- [00:00:25.830] peacock. Then if we go here to our other
- [00:00:25.840] peacock. Then if we go here to our other tab. Okay. So now let's say you've got
- [00:00:28.230] tab. Okay. So now let's say you've got
- [00:00:28.240] tab. Okay. So now let's say you've got these shapes and you want to cut them
- [00:00:30.310] these shapes and you want to cut them
- [00:00:30.320] these shapes and you want to cut them out on a plain vinyl, but this obviously
- [00:00:33.830] out on a plain vinyl, but this obviously
- [00:00:33.840] out on a plain vinyl, but this obviously could be different design, something
- [00:00:35.110] could be different design, something
- [00:00:35.120] could be different design, something that you're cutting a lot of and you
- [00:00:36.950] that you're cutting a lot of and you
- [00:00:36.960] that you're cutting a lot of and you don't want to waste your actual vinyl.
- [00:00:38.630] don't want to waste your actual vinyl.
- [00:00:38.640] don't want to waste your actual vinyl. So currently if we go preview and we
- [00:00:40.310] So currently if we go preview and we
- [00:00:40.320] So currently if we go preview and we look at our print, we can see there's a
- [00:00:42.630] look at our print, we can see there's a
- [00:00:42.640] look at our print, we can see there's a lot of white space here between these
- [00:00:44.549] lot of white space here between these
- [00:00:44.559] lot of white space here between these shapes of vinyl we're going to be
- [00:00:46.389] shapes of vinyl we're going to be
- [00:00:46.399] shapes of vinyl we're going to be wasting. So now you can come and
- [00:00:48.790] wasting. So now you can come and
- [00:00:48.800] wasting. So now you can come and manually align these things to try and
- [00:00:50.950] manually align these things to try and
- [00:00:50.960] manually align these things to try and fit it better. But um if we have a
- [00:00:53.830] fit it better. But um if we have a
- [00:00:53.840] fit it better. But um if we have a nesting feature, I don't see why we need
- [00:00:55.350] nesting feature, I don't see why we need
- [00:00:55.360] nesting feature, I don't see why we need to do that. So what we can do is we
- [00:00:56.709] to do that. So what we can do is we
- [00:00:56.719] to do that. So what we can do is we simply select all of it. We go on top
- [00:00:58.709] simply select all of it. We go on top
- [00:00:58.719] simply select all of it. We go on top here to our actual effects.
- [00:01:01.510] here to our actual effects.
- [00:01:01.520] here to our actual effects. Then we go to nest.
- [00:01:04.229] Then we go to nest.
- [00:01:04.239] Then we go to nest. Now under the nesting we have a few
- [00:01:05.910] Now under the nesting we have a few
- [00:01:05.920] Now under the nesting we have a few different options here. So we have our
- [00:01:08.789] different options here. So we have our
- [00:01:08.799] different options here. So we have our area we want to nest it within.
- [00:01:11.510] area we want to nest it within.
- [00:01:11.520] area we want to nest it within. Then under that we have the spacing.
- [00:01:13.350] Then under that we have the spacing.
- [00:01:13.360] Then under that we have the spacing. This will be the spacing between these
- [00:01:15.270] This will be the spacing between these
- [00:01:15.280] This will be the spacing between these shapes. Then we have the rotation. So
- [00:01:17.990] shapes. Then we have the rotation. So
- [00:01:18.000] shapes. Then we have the rotation. So how many or how far can these shapes
- [00:01:19.990] how many or how far can these shapes
- [00:01:20.000] how many or how far can these shapes rotate? like for instance on this
- [00:01:21.510] rotate? like for instance on this
- [00:01:21.520] rotate? like for instance on this triangle to try fit in a better nest.
- [00:01:25.270] triangle to try fit in a better nest.
- [00:01:25.280] triangle to try fit in a better nest. Got some uh fit threshold and some other
- [00:01:27.510] Got some uh fit threshold and some other
- [00:01:27.520] Got some uh fit threshold and some other settings. So let's just go update
- [00:01:29.670] settings. So let's just go update
- [00:01:29.680] settings. So let's just go update preview. See what we get with with a
- [00:01:31.270] preview. See what we get with with a
- [00:01:31.280] preview. See what we get with with a default settings. And as you can see
- [00:01:33.670] default settings. And as you can see
- [00:01:33.680] default settings. And as you can see here now it is try to fit all these
- [00:01:36.310] here now it is try to fit all these
- [00:01:36.320] here now it is try to fit all these shapes nicely here together. Now like I
- [00:01:39.510] shapes nicely here together. Now like I
- [00:01:39.520] shapes nicely here together. Now like I mentioned this is a great tool if you
- [00:01:41.109] mentioned this is a great tool if you
- [00:01:41.119] mentioned this is a great tool if you want to try save material and that's why
- [00:01:44.069] want to try save material and that's why
- [00:01:44.079] want to try save material and that's why we'll be using it. But uh in this case I
- [00:01:46.310] we'll be using it. But uh in this case I
- [00:01:46.320] we'll be using it. But uh in this case I would say maybe for me it's a little bit
- [00:01:47.749] would say maybe for me it's a little bit
- [00:01:47.759] would say maybe for me it's a little bit close. So, let us add a bit of a spacing
- [00:01:51.749] close. So, let us add a bit of a spacing
- [00:01:51.759] close. So, let us add a bit of a spacing and then see what that looks like. I'm
- [00:01:53.190] and then see what that looks like. I'm
- [00:01:53.200] and then see what that looks like. I'm just going to change this something like
- [00:01:54.950] just going to change this something like
- [00:01:54.960] just going to change this something like 10. Say update.
- [00:01:58.469] 10. Say update.
- [00:01:58.479] 10. Say update. And we can see here now we've got better
- [00:02:00.550] And we can see here now we've got better
- [00:02:00.560] And we can see here now we've got better spacing. So, we've got a centimeter that
- [00:02:03.030] spacing. So, we've got a centimeter that
- [00:02:03.040] spacing. So, we've got a centimeter that gap between all of them. Now, another
- [00:02:05.749] gap between all of them. Now, another
- [00:02:05.759] gap between all of them. Now, another thing with nesting that's important
- [00:02:07.190] thing with nesting that's important
- [00:02:07.200] thing with nesting that's important seeing that we're trying to save
- [00:02:08.630] seeing that we're trying to save
- [00:02:08.640] seeing that we're trying to save material and that's going to be our
- [00:02:10.469] material and that's going to be our
- [00:02:10.479] material and that's going to be our cutting type or our origin.
- [00:02:13.270] cutting type or our origin.
- [00:02:13.280] cutting type or our origin. So then if we had to go up here to our
- [00:02:15.430] So then if we had to go up here to our
- [00:02:15.440] So then if we had to go up here to our actual cutter settings, then if we look
- [00:02:18.309] actual cutter settings, then if we look
- [00:02:18.319] actual cutter settings, then if we look at the preview here, you can see that
- [00:02:19.670] at the preview here, you can see that
- [00:02:19.680] at the preview here, you can see that okay, our machine is here on the right
- [00:02:21.110] okay, our machine is here on the right
- [00:02:21.120] okay, our machine is here on the right and the vinyl is going to feed it
- [00:02:22.550] and the vinyl is going to feed it
- [00:02:22.560] and the vinyl is going to feed it through to the right, which means all
- [00:02:24.790] through to the right, which means all
- [00:02:24.800] through to the right, which means all this extra space in front of this is
- [00:02:26.470] this extra space in front of this is
- [00:02:26.480] this extra space in front of this is going to be wasted. So then to save
- [00:02:30.150] going to be wasted. So then to save
- [00:02:30.160] going to be wasted. So then to save ourselves some trouble later, what I'm
- [00:02:32.229] ourselves some trouble later, what I'm
- [00:02:32.239] ourselves some trouble later, what I'm going to do, we're going to go here to
- [00:02:33.270] going to do, we're going to go here to
- [00:02:33.280] going to do, we're going to go here to cut mode and then we're going to change
- [00:02:34.949] cut mode and then we're going to change
- [00:02:34.959] cut mode and then we're going to change this from what you see is what you get
- [00:02:37.030] this from what you see is what you get
- [00:02:37.040] this from what you see is what you get to origin point. Now you can see it's
- [00:02:40.390] to origin point. Now you can see it's
- [00:02:40.400] to origin point. Now you can see it's going to take all our shapes and put it
- [00:02:41.990] going to take all our shapes and put it
- [00:02:42.000] going to take all our shapes and put it far right close to the edge of the vine.
- [00:02:44.949] far right close to the edge of the vine.
- [00:02:44.959] far right close to the edge of the vine. Now keeping in mind this is obviously
- [00:02:46.710] Now keeping in mind this is obviously
- [00:02:46.720] Now keeping in mind this is obviously still relevant to where you set your
- [00:02:48.309] still relevant to where you set your
- [00:02:48.319] still relevant to where you set your machine's origin and how you load your
- [00:02:50.309] machine's origin and how you load your
- [00:02:50.319] machine's origin and how you load your material. But if you follow the standard
- [00:02:52.710] material. But if you follow the standard
- [00:02:52.720] material. But if you follow the standard way we covered before then this way
- [00:02:54.710] way we covered before then this way
- [00:02:54.720] way we covered before then this way you're going to save the most material.
- [00:02:57.270] you're going to save the most material.
- [00:02:57.280] you're going to save the most material. Okay. So just a quick recap again on
- [00:02:58.790] Okay. So just a quick recap again on
- [00:02:58.800] Okay. So just a quick recap again on nesting. So, this is a tool you want to
- [00:03:00.309] nesting. So, this is a tool you want to
- [00:03:00.319] nesting. So, this is a tool you want to use if you're cutting a single color
- [00:03:02.949] use if you're cutting a single color
- [00:03:02.959] use if you're cutting a single color type shape and multiple ones and you
- [00:03:05.430] type shape and multiple ones and you
- [00:03:05.440] type shape and multiple ones and you want to try kind of save material
- [00:03:07.910] want to try kind of save material
- [00:03:07.920] want to try kind of save material because you're going to be doing a lot
- [00:03:09.190] because you're going to be doing a lot
- [00:03:09.200] because you're going to be doing a lot of them. Okay, so next up we're going to
- [00:03:11.910] of them. Okay, so next up we're going to
- [00:03:11.920] of them. Okay, so next up we're going to be looking at parts, what they do and
- [00:03:14.390] be looking at parts, what they do and
- [00:03:14.400] be looking at parts, what they do and how to use them. So, first of all, I'm
- [00:03:17.030] how to use them. So, first of all, I'm
- [00:03:17.040] how to use them. So, first of all, I'm just going to draw some shapes here. So,
- [00:03:18.790] just going to draw some shapes here. So,
- [00:03:18.800] just going to draw some shapes here. So, let's say we've got a square and a
- [00:03:20.710] let's say we've got a square and a
- [00:03:20.720] let's say we've got a square and a circle over that. Now, let's say you
- [00:03:22.949] circle over that. Now, let's say you
- [00:03:22.959] circle over that. Now, let's say you want to you made a unique shape like
- [00:03:24.550] want to you made a unique shape like
- [00:03:24.560] want to you made a unique shape like this and you want to cut it out. If I
- [00:03:26.869] this and you want to cut it out. If I
- [00:03:26.879] this and you want to cut it out. If I had to go here to preview, you're going
- [00:03:28.390] had to go here to preview, you're going
- [00:03:28.400] had to go here to preview, you're going to notice here that we have a problem
- [00:03:30.229] to notice here that we have a problem
- [00:03:30.239] to notice here that we have a problem because the circle is cutting through
- [00:03:31.750] because the circle is cutting through
- [00:03:31.760] because the circle is cutting through the square and the square through the
- [00:03:33.270] the square and the square through the
- [00:03:33.280] the square and the square through the circle. So the end product is going to
- [00:03:35.350] circle. So the end product is going to
- [00:03:35.360] circle. So the end product is going to be very messy. So now what we can do is
- [00:03:37.990] be very messy. So now what we can do is
- [00:03:38.000] be very messy. So now what we can do is if I make a copy of this, I'll put it on
- [00:03:40.550] if I make a copy of this, I'll put it on
- [00:03:40.560] if I make a copy of this, I'll put it on the side. Then it is important we select
- [00:03:43.190] the side. Then it is important we select
- [00:03:43.200] the side. Then it is important we select both the shapes. I'm going to go on top
- [00:03:45.670] both the shapes. I'm going to go on top
- [00:03:45.680] both the shapes. I'm going to go on top here to our main menu path. Then we have
- [00:03:48.390] here to our main menu path. Then we have
- [00:03:48.400] here to our main menu path. Then we have a few different options here to pick
- [00:03:50.390] a few different options here to pick
- [00:03:50.400] a few different options here to pick from. Now the first one we're going to
- [00:03:52.550] from. Now the first one we're going to
- [00:03:52.560] from. Now the first one we're going to be looking at is right on top. It's
- [00:03:54.309] be looking at is right on top. It's
- [00:03:54.319] be looking at is right on top. It's probably one you're going to be using
- [00:03:55.110] probably one you're going to be using
- [00:03:55.120] probably one you're going to be using the most often potentially and that is
- [00:03:57.030] the most often potentially and that is
- [00:03:57.040] the most often potentially and that is union. So if I had to click that and we
- [00:03:59.270] union. So if I had to click that and we
- [00:03:59.280] union. So if I had to click that and we go back to preview, you can see it is
- [00:04:01.270] go back to preview, you can see it is
- [00:04:01.280] go back to preview, you can see it is now made those two shapes one. Now it's
- [00:04:04.390] now made those two shapes one. Now it's
- [00:04:04.400] now made those two shapes one. Now it's going to cut it correctly.
- [00:04:06.470] going to cut it correctly.
- [00:04:06.480] going to cut it correctly. And uh when you finally peel the vinyl,
- [00:04:08.390] And uh when you finally peel the vinyl,
- [00:04:08.400] And uh when you finally peel the vinyl, it's going to look correct. So what I'm
- [00:04:10.869] it's going to look correct. So what I'm
- [00:04:10.879] it's going to look correct. So what I'm going to do is I'm going to scale this
- [00:04:11.910] going to do is I'm going to scale this
- [00:04:11.920] going to do is I'm going to scale this down and we look at a few of these other
- [00:04:13.670] down and we look at a few of these other
- [00:04:13.680] down and we look at a few of these other options. So let's make another copy of
- [00:04:15.750] options. So let's make another copy of
- [00:04:15.760] options. So let's make another copy of this.
- [00:04:17.430] this.
- [00:04:17.440] this. Then once again, you want to make sure
- [00:04:18.710] Then once again, you want to make sure
- [00:04:18.720] Then once again, you want to make sure your shapes are selected, the ones you
- [00:04:20.229] your shapes are selected, the ones you
- [00:04:20.239] your shapes are selected, the ones you wanted to affect. Then from these
- [00:04:22.550] wanted to affect. Then from these
- [00:04:22.560] wanted to affect. Then from these options here, now we the next one we're
- [00:04:24.150] options here, now we the next one we're
- [00:04:24.160] options here, now we the next one we're looking at is intersection. So what this
- [00:04:26.310] looking at is intersection. So what this
- [00:04:26.320] looking at is intersection. So what this comes down to is wherever these two
- [00:04:28.629] comes down to is wherever these two
- [00:04:28.639] comes down to is wherever these two shapes intersect. That is what's going
- [00:04:30.790] shapes intersect. That is what's going
- [00:04:30.800] shapes intersect. That is what's going to be left for us. So if I click that,
- [00:04:33.909] to be left for us. So if I click that,
- [00:04:33.919] to be left for us. So if I click that, you can see only those intersections is
- [00:04:35.990] you can see only those intersections is
- [00:04:36.000] you can see only those intersections is left. I'm going to undo that. Let's try
- [00:04:38.070] left. I'm going to undo that. Let's try
- [00:04:38.080] left. I'm going to undo that. Let's try the next one. So the next one here we
- [00:04:40.469] the next one. So the next one here we
- [00:04:40.479] the next one. So the next one here we have exclude. Now this is pretty much
- [00:04:42.390] have exclude. Now this is pretty much
- [00:04:42.400] have exclude. Now this is pretty much the opposite of what we just did. If we
- [00:04:44.870] the opposite of what we just did. If we
- [00:04:44.880] the opposite of what we just did. If we preview here though, you'll see it still
- [00:04:46.710] preview here though, you'll see it still
- [00:04:46.720] preview here though, you'll see it still gives the same result, which means we
- [00:04:48.710] gives the same result, which means we
- [00:04:48.720] gives the same result, which means we won't want to use that in our case. But
- [00:04:50.550] won't want to use that in our case. But
- [00:04:50.560] won't want to use that in our case. But there is some design uh scenarios where
- [00:04:52.710] there is some design uh scenarios where
- [00:04:52.720] there is some design uh scenarios where you might want to use them. Okay. And
- [00:04:54.469] you might want to use them. Okay. And
- [00:04:54.479] you might want to use them. Okay. And then and next up here we have the front
- [00:04:56.950] then and next up here we have the front
- [00:04:56.960] then and next up here we have the front minus back and the back minus front.
- [00:05:01.749] minus back and the back minus front.
- [00:05:01.759] minus back and the back minus front. Now with our current shape, it's going
- [00:05:03.670] Now with our current shape, it's going
- [00:05:03.680] Now with our current shape, it's going to be a bit confusing. So I'm just going
- [00:05:05.030] to be a bit confusing. So I'm just going
- [00:05:05.040] to be a bit confusing. So I'm just going to change the color of this circle. Then
- [00:05:07.990] to change the color of this circle. Then
- [00:05:08.000] to change the color of this circle. Then make sure it is in front of it. Now with
- [00:05:09.909] make sure it is in front of it. Now with
- [00:05:09.919] make sure it is in front of it. Now with both of these selected and with a circle
- [00:05:12.629] both of these selected and with a circle
- [00:05:12.639] both of these selected and with a circle in front, if we go back here to our main
- [00:05:14.710] in front, if we go back here to our main
- [00:05:14.720] in front, if we go back here to our main menu, you can see the first one is front
- [00:05:16.790] menu, you can see the first one is front
- [00:05:16.800] menu, you can see the first one is front minus back. So, what that comes down to
- [00:05:19.590] minus back. So, what that comes down to
- [00:05:19.600] minus back. So, what that comes down to is it's going to keep our front shape,
- [00:05:22.790] is it's going to keep our front shape,
- [00:05:22.800] is it's going to keep our front shape, but it's going to cut or minus the back
- [00:05:25.909] but it's going to cut or minus the back
- [00:05:25.919] but it's going to cut or minus the back shape from it. Can be a bit confusing,
- [00:05:28.469] shape from it. Can be a bit confusing,
- [00:05:28.479] shape from it. Can be a bit confusing, but eventually it'll start making sense
- [00:05:29.990] but eventually it'll start making sense
- [00:05:30.000] but eventually it'll start making sense more we play with. So, if we do that,
- [00:05:31.830] more we play with. So, if we do that,
- [00:05:31.840] more we play with. So, if we do that, you can see here we've just made a
- [00:05:34.230] you can see here we've just made a
- [00:05:34.240] you can see here we've just made a cutout from our front shape minus the
- [00:05:36.629] cutout from our front shape minus the
- [00:05:36.639] cutout from our front shape minus the back. Now, obviously in reverse, we can
- [00:05:39.670] back. Now, obviously in reverse, we can
- [00:05:39.680] back. Now, obviously in reverse, we can go back minus the front. So, now we can
- [00:05:42.550] go back minus the front. So, now we can
- [00:05:42.560] go back minus the front. So, now we can use the front shape to make a cutout of
- [00:05:45.029] use the front shape to make a cutout of
- [00:05:45.039] use the front shape to make a cutout of the back. I use this one very often when
- [00:05:48.070] the back. I use this one very often when
- [00:05:48.080] the back. I use this one very often when designing as it kind of helps to see
- [00:05:50.790] designing as it kind of helps to see
- [00:05:50.800] designing as it kind of helps to see what you're about to cut out. So now
- [00:05:53.110] what you're about to cut out. So now
- [00:05:53.120] what you're about to cut out. So now when it comes to these path features
- [00:05:55.510] when it comes to these path features
- [00:05:55.520] when it comes to these path features where it comes in very handy is when
- [00:05:57.350] where it comes in very handy is when
- [00:05:57.360] where it comes in very handy is when you're designing shapes or sh designing
- [00:05:59.830] you're designing shapes or sh designing
- [00:05:59.840] you're designing shapes or sh designing maybe custom designs and so forth then
- [00:06:02.790] maybe custom designs and so forth then
- [00:06:02.800] maybe custom designs and so forth then you're going to using a combination of
- [00:06:04.790] you're going to using a combination of
- [00:06:04.800] you're going to using a combination of these ones to make your final product.
- [00:06:06.870] these ones to make your final product.
- [00:06:06.880] these ones to make your final product. So when people are making logos and like
- [00:06:09.029] So when people are making logos and like
- [00:06:09.039] So when people are making logos and like those fancy things they normally use a
- [00:06:11.749] those fancy things they normally use a
- [00:06:11.759] those fancy things they normally use a combination of these. So you'll have a
- [00:06:13.510] combination of these. So you'll have a
- [00:06:13.520] combination of these. So you'll have a shape and then you cut out another one
- [00:06:15.270] shape and then you cut out another one
- [00:06:15.280] shape and then you cut out another one out of that. So you make a new unique
- [00:06:16.870] out of that. So you make a new unique
- [00:06:16.880] out of that. So you make a new unique shape. You join a few and then you kind
- [00:06:20.150] shape. You join a few and then you kind
- [00:06:20.160] shape. You join a few and then you kind of make a union so that it becomes a
- [00:06:22.390] of make a union so that it becomes a
- [00:06:22.400] of make a union so that it becomes a single shape and eventually you have a
- [00:06:23.830] single shape and eventually you have a
- [00:06:23.840] single shape and eventually you have a cool design just using these path tool
- [00:06:26.870] cool design just using these path tool
- [00:06:26.880] cool design just using these path tool features.
- [00:06:28.550] features.
- [00:06:28.560] features. Okay. So the next design principle we're
- [00:06:30.390] Okay. So the next design principle we're
- [00:06:30.400] Okay. So the next design principle we're going to be looking at is the wild
- [00:06:32.070] going to be looking at is the wild
- [00:06:32.080] going to be looking at is the wild option. Now shortly we're going to be
- [00:06:34.870] option. Now shortly we're going to be
- [00:06:34.880] option. Now shortly we're going to be looking at why you might want to use
- [00:06:36.469] looking at why you might want to use
- [00:06:36.479] looking at why you might want to use this, but let's first look at a few
- [00:06:38.150] this, but let's first look at a few
- [00:06:38.160] this, but let's first look at a few examples and I'll explain to you um the
- [00:06:40.790] examples and I'll explain to you um the
- [00:06:40.800] examples and I'll explain to you um the power of it. So let's say we've got
- [00:06:43.110] power of it. So let's say we've got
- [00:06:43.120] power of it. So let's say we've got these two shapes. Okay. And then I'm
- [00:06:44.950] these two shapes. Okay. And then I'm
- [00:06:44.960] these two shapes. Okay. And then I'm going to make a duplicate. Put it to the
- [00:06:46.390] going to make a duplicate. Put it to the
- [00:06:46.400] going to make a duplicate. Put it to the left. And then if we go to preview. Now
- [00:06:48.870] left. And then if we go to preview. Now
- [00:06:48.880] left. And then if we go to preview. Now we can see here like before they're
- [00:06:50.469] we can see here like before they're
- [00:06:50.479] we can see here like before they're cutting through each other. So it's
- [00:06:51.430] cutting through each other. So it's
- [00:06:51.440] cutting through each other. So it's going to be a messy designers or messy
- [00:06:53.350] going to be a messy designers or messy
- [00:06:53.360] going to be a messy designers or messy peel. So now let's say you wanted to
- [00:06:55.590] peel. So now let's say you wanted to
- [00:06:55.600] peel. So now let's say you wanted to actually have these a single shape. So
- [00:06:58.390] actually have these a single shape. So
- [00:06:58.400] actually have these a single shape. So you want to join these two like this
- [00:07:01.029] you want to join these two like this
- [00:07:01.039] you want to join these two like this could be a logo or something like that.
- [00:07:02.550] could be a logo or something like that.
- [00:07:02.560] could be a logo or something like that. Now the normal way will be we go here to
- [00:07:04.550] Now the normal way will be we go here to
- [00:07:04.560] Now the normal way will be we go here to path. We go union and then obviously
- [00:07:07.029] path. We go union and then obviously
- [00:07:07.039] path. We go union and then obviously this makes it one shape for us. But now
- [00:07:10.070] this makes it one shape for us. But now
- [00:07:10.080] this makes it one shape for us. But now the problem is this is called a
- [00:07:12.309] the problem is this is called a
- [00:07:12.319] the problem is this is called a destructive form of editing. So if we go
- [00:07:15.029] destructive form of editing. So if we go
- [00:07:15.039] destructive form of editing. So if we go here to our layers, you can see here it
- [00:07:16.790] here to our layers, you can see here it
- [00:07:16.800] here to our layers, you can see here it has taken those two shapes and made it
- [00:07:18.309] has taken those two shapes and made it
- [00:07:18.319] has taken those two shapes and made it one. So we can no longer edit that shape
- [00:07:21.909] one. So we can no longer edit that shape
- [00:07:21.919] one. So we can no longer edit that shape if we wanted to or move it around
- [00:07:24.390] if we wanted to or move it around
- [00:07:24.400] if we wanted to or move it around because we have made a union between the
- [00:07:27.270] because we have made a union between the
- [00:07:27.280] because we have made a union between the two and it's become a single layer. Now
- [00:07:30.550] two and it's become a single layer. Now
- [00:07:30.560] two and it's become a single layer. Now another workflow which you find in
- [00:07:33.029] another workflow which you find in
- [00:07:33.039] another workflow which you find in design a lot and a very good one and
- [00:07:34.710] design a lot and a very good one and
- [00:07:34.720] design a lot and a very good one and that is nondestructive editing. So what
- [00:07:38.309] that is nondestructive editing. So what
- [00:07:38.319] that is nondestructive editing. So what that comes down to is you can make a
- [00:07:40.790] that comes down to is you can make a
- [00:07:40.800] that comes down to is you can make a form of design that you can still alter
- [00:07:43.990] form of design that you can still alter
- [00:07:44.000] form of design that you can still alter to many ways and then it will not break
- [00:07:46.629] to many ways and then it will not break
- [00:07:46.639] to many ways and then it will not break the final thing where uh how can I say
- [00:07:49.029] the final thing where uh how can I say
- [00:07:49.039] the final thing where uh how can I say where it is set in stone. So to do that
- [00:07:51.510] where it is set in stone. So to do that
- [00:07:51.520] where it is set in stone. So to do that we're going to select these two shapes
- [00:07:53.510] we're going to select these two shapes
- [00:07:53.520] we're going to select these two shapes and go to our control panel and to the
- [00:07:55.350] and go to our control panel and to the
- [00:07:55.360] and go to our control panel and to the style
- [00:07:57.189] style
- [00:07:57.199] style and then under the style you'll see
- [00:07:58.550] and then under the style you'll see
- [00:07:58.560] and then under the style you'll see we've got this wild option. I'm going to
- [00:07:59.990] we've got this wild option. I'm going to
- [00:08:00.000] we've got this wild option. I'm going to click that but keep in mind like I said
- [00:08:01.670] click that but keep in mind like I said
- [00:08:01.680] click that but keep in mind like I said you have to make sure you select your
- [00:08:03.270] you have to make sure you select your
- [00:08:03.280] you have to make sure you select your shapes that you want to wild together.
- [00:08:06.230] shapes that you want to wild together.
- [00:08:06.240] shapes that you want to wild together. And then now if we had to go here to the
- [00:08:08.230] And then now if we had to go here to the
- [00:08:08.240] And then now if we had to go here to the preview, you can see it shows us a gray
- [00:08:10.070] preview, you can see it shows us a gray
- [00:08:10.080] preview, you can see it shows us a gray outline there. And that's pretty much
- [00:08:11.350] outline there. And that's pretty much
- [00:08:11.360] outline there. And that's pretty much what it's going to be avoiding or
- [00:08:13.189] what it's going to be avoiding or
- [00:08:13.199] what it's going to be avoiding or leaving out when it cuts. So now you can
- [00:08:15.909] leaving out when it cuts. So now you can
- [00:08:15.919] leaving out when it cuts. So now you can see where the power of this comes in.
- [00:08:17.749] see where the power of this comes in.
- [00:08:17.759] see where the power of this comes in. Now if I had to move this triangle, just
- [00:08:20.950] Now if I had to move this triangle, just
- [00:08:20.960] Now if I had to move this triangle, just selected it only that move it to the
- [00:08:23.189] selected it only that move it to the
- [00:08:23.199] selected it only that move it to the bottom. There we go. Preview. You can
- [00:08:24.390] bottom. There we go. Preview. You can
- [00:08:24.400] bottom. There we go. Preview. You can see now it's still going to cut out a
- [00:08:26.469] see now it's still going to cut out a
- [00:08:26.479] see now it's still going to cut out a single shape, but I can move this thing
- [00:08:29.189] single shape, but I can move this thing
- [00:08:29.199] single shape, but I can move this thing around where I want it. edit it and uh
- [00:08:32.149] around where I want it. edit it and uh
- [00:08:32.159] around where I want it. edit it and uh play around with the freedom that I know
- [00:08:33.990] play around with the freedom that I know
- [00:08:34.000] play around with the freedom that I know the final result is not going to give me
- [00:08:36.070] the final result is not going to give me
- [00:08:36.080] the final result is not going to give me ugly cut lines. But yeah, otherwise that
- [00:08:38.230] ugly cut lines. But yeah, otherwise that
- [00:08:38.240] ugly cut lines. But yeah, otherwise that is it on welding or the weld feature.
- [00:08:41.190] is it on welding or the weld feature.
- [00:08:41.200] is it on welding or the weld feature. Very useful, very handy, and it's pretty
- [00:08:44.149] Very useful, very handy, and it's pretty
- [00:08:44.159] Very useful, very handy, and it's pretty much it's a non-destructive way of
- [00:08:45.990] much it's a non-destructive way of
- [00:08:46.000] much it's a non-destructive way of editing your design. So you get a single
- [00:08:49.190] editing your design. So you get a single
- [00:08:49.200] editing your design. So you get a single shape out of multiple shapes. Okay, next
- [00:08:52.470] shape out of multiple shapes. Okay, next
- [00:08:52.480] shape out of multiple shapes. Okay, next up we're going to be looking at a design
- [00:08:53.990] up we're going to be looking at a design
- [00:08:54.000] up we're going to be looking at a design principle called grouping. Okay, so now
- [00:08:56.790] principle called grouping. Okay, so now
- [00:08:56.800] principle called grouping. Okay, so now let's say we have a design here. This
- [00:08:59.670] let's say we have a design here. This
- [00:08:59.680] let's say we have a design here. This could be maybe a logo or anything like
- [00:09:01.190] could be maybe a logo or anything like
- [00:09:01.200] could be maybe a logo or anything like that. I'm just going to put a rectangle
- [00:09:02.630] that. I'm just going to put a rectangle
- [00:09:02.640] that. I'm just going to put a rectangle with some text. But now this could be a
- [00:09:05.590] with some text. But now this could be a
- [00:09:05.600] with some text. But now this could be a fancy design, you know, nothing as
- [00:09:08.550] fancy design, you know, nothing as
- [00:09:08.560] fancy design, you know, nothing as simple as I just created. And let's say
- [00:09:10.310] simple as I just created. And let's say
- [00:09:10.320] simple as I just created. And let's say we've got like strict design
- [00:09:11.430] we've got like strict design
- [00:09:11.440] we've got like strict design requirements. So the spacing and all of
- [00:09:13.110] requirements. So the spacing and all of
- [00:09:13.120] requirements. So the spacing and all of that is correct. And we don't want to
- [00:09:15.350] that is correct. And we don't want to
- [00:09:15.360] that is correct. And we don't want to mess around with that because as you can
- [00:09:16.630] mess around with that because as you can
- [00:09:16.640] mess around with that because as you can see here, we've got two layers. So if I
- [00:09:18.389] see here, we've got two layers. So if I
- [00:09:18.399] see here, we've got two layers. So if I had to move one of them, it will move
- [00:09:21.350] had to move one of them, it will move
- [00:09:21.360] had to move one of them, it will move and the other one not. Now this can be
- [00:09:24.470] and the other one not. Now this can be
- [00:09:24.480] and the other one not. Now this can be fine in some cases, but maybe you're
- [00:09:26.230] fine in some cases, but maybe you're
- [00:09:26.240] fine in some cases, but maybe you're working on a design. you throw your logo
- [00:09:27.990] working on a design. you throw your logo
- [00:09:28.000] working on a design. you throw your logo in with all elements and then you need
- [00:09:29.750] in with all elements and then you need
- [00:09:29.760] in with all elements and then you need to move it around to another area
- [00:09:31.590] to move it around to another area
- [00:09:31.600] to move it around to another area without disturbing the layout of that.
- [00:09:34.870] without disturbing the layout of that.
- [00:09:34.880] without disturbing the layout of that. Now you can obviously just select
- [00:09:36.150] Now you can obviously just select
- [00:09:36.160] Now you can obviously just select everything and move it, but the more
- [00:09:37.750] everything and move it, but the more
- [00:09:37.760] everything and move it, but the more layers you have, the more confusing
- [00:09:39.110] layers you have, the more confusing
- [00:09:39.120] layers you have, the more confusing that's going to get. So the right way to
- [00:09:41.750] that's going to get. So the right way to
- [00:09:41.760] that's going to get. So the right way to go about this is we select both our
- [00:09:44.230] go about this is we select both our
- [00:09:44.240] go about this is we select both our shapes and we go right click and we go
- [00:09:46.870] shapes and we go right click and we go
- [00:09:46.880] shapes and we go right click and we go group.
- [00:09:48.790] group.
- [00:09:48.800] group. Now if you see on our layers we've
- [00:09:51.110] Now if you see on our layers we've
- [00:09:51.120] Now if you see on our layers we've updated now we've got a little folder
- [00:09:52.470] updated now we've got a little folder
- [00:09:52.480] updated now we've got a little folder with a G on it. And we expand that we
- [00:09:54.389] with a G on it. And we expand that we
- [00:09:54.399] with a G on it. And we expand that we can see we've got the two layers within
- [00:09:55.829] can see we've got the two layers within
- [00:09:55.839] can see we've got the two layers within that. So now a nice thing is if I single
- [00:09:57.829] that. So now a nice thing is if I single
- [00:09:57.839] that. So now a nice thing is if I single click this and I move it around it keeps
- [00:09:59.990] click this and I move it around it keeps
- [00:10:00.000] click this and I move it around it keeps everything connected as if we have
- [00:10:01.910] everything connected as if we have
- [00:10:01.920] everything connected as if we have somehow made it one layer. But if I had
- [00:10:05.190] somehow made it one layer. But if I had
- [00:10:05.200] somehow made it one layer. But if I had to go click on the little arrow and
- [00:10:06.949] to go click on the little arrow and
- [00:10:06.959] to go click on the little arrow and select individual layers I can still
- [00:10:08.790] select individual layers I can still
- [00:10:08.800] select individual layers I can still move those. So that means I can still
- [00:10:10.310] move those. So that means I can still
- [00:10:10.320] move those. So that means I can still edit the design if I want to but for
- [00:10:12.790] edit the design if I want to but for
- [00:10:12.800] edit the design if I want to but for general work it's going to treat it as a
- [00:10:14.870] general work it's going to treat it as a
- [00:10:14.880] general work it's going to treat it as a single layer. So then if I move it
- [00:10:17.269] single layer. So then if I move it
- [00:10:17.279] single layer. So then if I move it around it's not going to mess around
- [00:10:18.710] around it's not going to mess around
- [00:10:18.720] around it's not going to mess around with the actual layout in relation to
- [00:10:21.030] with the actual layout in relation to
- [00:10:21.040] with the actual layout in relation to each other. So otherwise that is it on
- [00:10:22.790] each other. So otherwise that is it on
- [00:10:22.800] each other. So otherwise that is it on grouping. It's one of those features I
- [00:10:24.470] grouping. It's one of those features I
- [00:10:24.480] grouping. It's one of those features I really love to use because it just keeps
- [00:10:26.630] really love to use because it just keeps
- [00:10:26.640] really love to use because it just keeps everything a little bit more neat and
- [00:10:27.910] everything a little bit more neat and
- [00:10:27.920] everything a little bit more neat and organized when you're actually working
- [00:10:29.670] organized when you're actually working
- [00:10:29.680] organized when you're actually working with it. Okay, next up we're going to be
- [00:10:32.710] with it. Okay, next up we're going to be
- [00:10:32.720] with it. Okay, next up we're going to be looking at the mirror feature. So now
- [00:10:36.310] looking at the mirror feature. So now
- [00:10:36.320] looking at the mirror feature. So now when it comes to mirroring, there is
- [00:10:38.389] when it comes to mirroring, there is
- [00:10:38.399] when it comes to mirroring, there is multiple reasons why we might want to do
- [00:10:40.069] multiple reasons why we might want to do
- [00:10:40.079] multiple reasons why we might want to do this, but one of the most common ones is
- [00:10:42.069] this, but one of the most common ones is
- [00:10:42.079] this, but one of the most common ones is let's say you designing a design and you
- [00:10:45.670] let's say you designing a design and you
- [00:10:45.680] let's say you designing a design and you want to stick it in the inside of a
- [00:10:47.269] want to stick it in the inside of a
- [00:10:47.279] want to stick it in the inside of a window. So, you know, that's obviously
- [00:10:49.509] window. So, you know, that's obviously
- [00:10:49.519] window. So, you know, that's obviously going to prevent from peeling and stuff
- [00:10:51.269] going to prevent from peeling and stuff
- [00:10:51.279] going to prevent from peeling and stuff like that. But then the trick comes
- [00:10:53.829] like that. But then the trick comes
- [00:10:53.839] like that. But then the trick comes obviously now, let's say we have this
- [00:10:55.430] obviously now, let's say we have this
- [00:10:55.440] obviously now, let's say we have this design. We know the sticky side's going
- [00:10:57.509] design. We know the sticky side's going
- [00:10:57.519] design. We know the sticky side's going to be on the back of this. So, now once
- [00:10:59.190] to be on the back of this. So, now once
- [00:10:59.200] to be on the back of this. So, now once you stick it on the inside of the
- [00:11:00.630] you stick it on the inside of the
- [00:11:00.640] you stick it on the inside of the window, maybe it's a shop or car or
- [00:11:02.310] window, maybe it's a shop or car or
- [00:11:02.320] window, maybe it's a shop or car or something like that, your text is going
- [00:11:04.150] something like that, your text is going
- [00:11:04.160] something like that, your text is going to be in reverse, which means it's
- [00:11:06.470] to be in reverse, which means it's
- [00:11:06.480] to be in reverse, which means it's obviously going to mess with the design.
- [00:11:07.750] obviously going to mess with the design.
- [00:11:07.760] obviously going to mess with the design. So, that's where this comes in. So, we
- [00:11:09.269] So, that's where this comes in. So, we
- [00:11:09.279] So, that's where this comes in. So, we want to make sure we have our shape
- [00:11:10.710] want to make sure we have our shape
- [00:11:10.720] want to make sure we have our shape selected or our design. Go to our
- [00:11:12.870] selected or our design. Go to our
- [00:11:12.880] selected or our design. Go to our position and size panel on our control
- [00:11:14.790] position and size panel on our control
- [00:11:14.800] position and size panel on our control panel. And you'll see at the bottom
- [00:11:16.069] panel. And you'll see at the bottom
- [00:11:16.079] panel. And you'll see at the bottom here, we've got the flip option.
- [00:11:18.230] here, we've got the flip option.
- [00:11:18.240] here, we've got the flip option. Now we have the flip horizontal and flip
- [00:11:20.150] Now we have the flip horizontal and flip
- [00:11:20.160] Now we have the flip horizontal and flip vertical. Most of the time you'll be
- [00:11:21.670] vertical. Most of the time you'll be
- [00:11:21.680] vertical. Most of the time you'll be using the horizontal. So now we can
- [00:11:24.069] using the horizontal. So now we can
- [00:11:24.079] using the horizontal. So now we can click that. You can see it flips it for
- [00:11:25.829] click that. You can see it flips it for
- [00:11:25.839] click that. You can see it flips it for us. So now obviously the sticky part's
- [00:11:28.150] us. So now obviously the sticky part's
- [00:11:28.160] us. So now obviously the sticky part's going to be on the back of this. So once
- [00:11:29.910] going to be on the back of this. So once
- [00:11:29.920] going to be on the back of this. So once you stick it on the inside of the
- [00:11:31.269] you stick it on the inside of the
- [00:11:31.279] you stick it on the inside of the window, your text is going to be the
- [00:11:32.790] window, your text is going to be the
- [00:11:32.800] window, your text is going to be the right way around. Now there's another
- [00:11:35.030] right way around. Now there's another
- [00:11:35.040] right way around. Now there's another way we can go about this which is
- [00:11:36.710] way we can go about this which is
- [00:11:36.720] way we can go about this which is probably the more correct way as the
- [00:11:38.870] probably the more correct way as the
- [00:11:38.880] probably the more correct way as the other way you kind of have to look at
- [00:11:41.190] other way you kind of have to look at
- [00:11:41.200] other way you kind of have to look at your design and work with it in a
- [00:11:42.870] your design and work with it in a
- [00:11:42.880] your design and work with it in a mirrored form. Now, you're not going to
- [00:11:46.069] mirrored form. Now, you're not going to
- [00:11:46.079] mirrored form. Now, you're not going to just use this for if you're going to be
- [00:11:47.590] just use this for if you're going to be
- [00:11:47.600] just use this for if you're going to be sticking something on the inside. You
- [00:11:49.430] sticking something on the inside. You
- [00:11:49.440] sticking something on the inside. You might just have a shape or something in
- [00:11:51.269] might just have a shape or something in
- [00:11:51.279] might just have a shape or something in your design you need to mirror, then
- [00:11:52.550] your design you need to mirror, then
- [00:11:52.560] your design you need to mirror, then you'll also use that. But let's say we
- [00:11:54.790] you'll also use that. But let's say we
- [00:11:54.800] you'll also use that. But let's say we want to still do the same result. We
- [00:11:56.389] want to still do the same result. We
- [00:11:56.399] want to still do the same result. We want to stick something on the inside of
- [00:11:57.829] want to stick something on the inside of
- [00:11:57.839] want to stick something on the inside of the window, but it must look right when
- [00:11:59.590] the window, but it must look right when
- [00:11:59.600] the window, but it must look right when we finally view it. Then the slightly
- [00:12:02.790] we finally view it. Then the slightly
- [00:12:02.800] we finally view it. Then the slightly more correct way to go about it, but you
- [00:12:04.470] more correct way to go about it, but you
- [00:12:04.480] more correct way to go about it, but you must just remember to check this on.
- [00:12:05.750] must just remember to check this on.
- [00:12:05.760] must just remember to check this on. Otherwise, you're going to be very
- [00:12:06.790] Otherwise, you're going to be very
- [00:12:06.800] Otherwise, you're going to be very disappointed when you waste material.
- [00:12:09.269] disappointed when you waste material.
- [00:12:09.279] disappointed when you waste material. And that is if we go here to the cut
- [00:12:10.870] And that is if we go here to the cut
- [00:12:10.880] And that is if we go here to the cut settings. And then you can see over here
- [00:12:13.269] settings. And then you can see over here
- [00:12:13.279] settings. And then you can see over here we got mirror horizontal or H and mirror
- [00:12:16.150] we got mirror horizontal or H and mirror
- [00:12:16.160] we got mirror horizontal or H and mirror Y. So this will now mirror our design
- [00:12:19.110] Y. So this will now mirror our design
- [00:12:19.120] Y. So this will now mirror our design when it finally cuts it, but it'll still
- [00:12:21.430] when it finally cuts it, but it'll still
- [00:12:21.440] when it finally cuts it, but it'll still look right in the actual design program.
- [00:12:24.150] look right in the actual design program.
- [00:12:24.160] look right in the actual design program. But yeah, so otherwise that is it on
- [00:12:25.750] But yeah, so otherwise that is it on
- [00:12:25.760] But yeah, so otherwise that is it on mirroring. Like I said, there's multiple
- [00:12:27.430] mirroring. Like I said, there's multiple
- [00:12:27.440] mirroring. Like I said, there's multiple reasons why you might want to do this.
- [00:12:29.750] reasons why you might want to do this.
- [00:12:29.760] reasons why you might want to do this. But in most vinyl application uh
- [00:12:32.949] But in most vinyl application uh
- [00:12:32.959] But in most vinyl application uh scenarios, you're probably going to be
- [00:12:34.389] scenarios, you're probably going to be
- [00:12:34.399] scenarios, you're probably going to be using this because you need to stick the
- [00:12:36.310] using this because you need to stick the
- [00:12:36.320] using this because you need to stick the vinyl in the inside of some form of
- [00:12:38.790] vinyl in the inside of some form of
- [00:12:38.800] vinyl in the inside of some form of transparent either perspects or windows.
- [00:12:42.389] transparent either perspects or windows.
- [00:12:42.399] transparent either perspects or windows. Okay, so next up, we're going to be
- [00:12:43.829] Okay, so next up, we're going to be
- [00:12:43.839] Okay, so next up, we're going to be looking at where you can find some extra
- [00:12:46.230] looking at where you can find some extra
- [00:12:46.240] looking at where you can find some extra training for the software. So let's say
- [00:12:48.550] training for the software. So let's say
- [00:12:48.560] training for the software. So let's say there's some more things you wanted to
- [00:12:49.670] there's some more things you wanted to
- [00:12:49.680] there's some more things you wanted to know, you wanted to deep dive a little
- [00:12:51.110] know, you wanted to deep dive a little
- [00:12:51.120] know, you wanted to deep dive a little bit more into the program. So like I
- [00:12:52.790] bit more into the program. So like I
- [00:12:52.800] bit more into the program. So like I mentioned, we're just covering what's
- [00:12:54.150] mentioned, we're just covering what's
- [00:12:54.160] mentioned, we're just covering what's essential for a form of workflow for
- [00:12:56.230] essential for a form of workflow for
- [00:12:56.240] essential for a form of workflow for vinyl cutting. So there's multiple other
- [00:12:58.870] vinyl cutting. So there's multiple other
- [00:12:58.880] vinyl cutting. So there's multiple other things you can do with it and more
- [00:13:00.389] things you can do with it and more
- [00:13:00.399] things you can do with it and more things you can understand. Now if we had
- [00:13:02.949] things you can understand. Now if we had
- [00:13:02.959] things you can understand. Now if we had to go here to Google and we just go type
- [00:13:05.750] to go here to Google and we just go type
- [00:13:05.760] to go here to Google and we just go type in software training
- hit enter and we follow this top link
- or alternatively you can just go in your
- [00:13:16.949] or alternatively you can just go in your
- [00:13:16.959] or alternatively you can just go in your URL and type in softwareing.co.za.
- [00:13:20.790] URL and type in softwareing.co.za.
- [00:13:20.800] URL and type in softwareing.co.za. Now if you go over here you can see
- [00:13:21.990] Now if you go over here you can see
- [00:13:22.000] Now if you go over here you can see we've got vinyl cut here and a few other
- [00:13:23.910] we've got vinyl cut here and a few other
- [00:13:23.920] we've got vinyl cut here and a few other programs that we've been working on.
- [00:13:26.150] programs that we've been working on.
- [00:13:26.160] programs that we've been working on. Now, we have a lot more content here
- [00:13:28.069] Now, we have a lot more content here
- [00:13:28.079] Now, we have a lot more content here than what we did cover in this course,
- [00:13:29.590] than what we did cover in this course,
- [00:13:29.600] than what we did cover in this course, but that will make the course way too
- [00:13:31.350] but that will make the course way too
- [00:13:31.360] but that will make the course way too long. So, you can obviously deep dive
- [00:13:33.750] long. So, you can obviously deep dive
- [00:13:33.760] long. So, you can obviously deep dive here. You also can search here on the
- [00:13:36.310] here. You also can search here on the
- [00:13:36.320] here. You also can search here on the right. If you're looking for something
- [00:13:37.509] right. If you're looking for something
- [00:13:37.519] right. If you're looking for something specific and if you don't find what
- [00:13:40.150] specific and if you don't find what
- [00:13:40.160] specific and if you don't find what you're actually looking for based on the
- [00:13:42.310] you're actually looking for based on the
- [00:13:42.320] you're actually looking for based on the software and that, you can always go
- [00:13:43.430] software and that, you can always go
- [00:13:43.440] software and that, you can always go here, request the video, fill in the
- [00:13:45.509] here, request the video, fill in the
- [00:13:45.519] here, request the video, fill in the mini form, and then we'll do our best to
- [00:13:46.949] mini form, and then we'll do our best to
- [00:13:46.959] mini form, and then we'll do our best to try and make that for you. But yeah,
- [00:13:48.870] try and make that for you. But yeah,
- [00:13:48.880] try and make that for you. But yeah, otherwise, thanks guys for watching, and
- [00:13:50.470] otherwise, thanks guys for watching, and
- [00:13:50.480] otherwise, thanks guys for watching, and I'll see you in the next one. Cheers.
Keyframes
- /workspace/academy/media/1_kN1ZBlYp-2zJnwEN8AjgSJr4Q-Tte16/keyframes/last.jpg
- /workspace/academy/media/1_kN1ZBlYp-2zJnwEN8AjgSJr4Q-Tte16/keyframes/t004.jpg
- /workspace/academy/media/1_kN1ZBlYp-2zJnwEN8AjgSJr4Q-Tte16/keyframes/t007.jpg
- /workspace/academy/media/1_kN1ZBlYp-2zJnwEN8AjgSJr4Q-Tte16/keyframes/t011.jpg
- /workspace/academy/media/1_kN1ZBlYp-2zJnwEN8AjgSJr4Q-Tte16/keyframes/t014.jpg
- /workspace/academy/media/1_kN1ZBlYp-2zJnwEN8AjgSJr4Q-Tte16/keyframes/t018.jpg
- /workspace/academy/media/1_kN1ZBlYp-2zJnwEN8AjgSJr4Q-Tte16/keyframes/t022.jpg
- /workspace/academy/media/1_kN1ZBlYp-2zJnwEN8AjgSJr4Q-Tte16/keyframes/t025.jpg
- /workspace/academy/media/1_kN1ZBlYp-2zJnwEN8AjgSJr4Q-Tte16/keyframes/t029.jpg
- /workspace/academy/media/1_kN1ZBlYp-2zJnwEN8AjgSJr4Q-Tte16/keyframes/t032.jpg
- /workspace/academy/media/1_kN1ZBlYp-2zJnwEN8AjgSJr4Q-Tte16/keyframes/t036.jpg
- /workspace/academy/media/1_kN1ZBlYp-2zJnwEN8AjgSJr4Q-Tte16/keyframes/t040.jpg
- /workspace/academy/media/1_kN1ZBlYp-2zJnwEN8AjgSJr4Q-Tte16/keyframes/t043.jpg
- /workspace/academy/media/1_kN1ZBlYp-2zJnwEN8AjgSJr4Q-Tte16/keyframes/t047.jpg
- /workspace/academy/media/1_kN1ZBlYp-2zJnwEN8AjgSJr4Q-Tte16/keyframes/t051.jpg
- /workspace/academy/media/1_kN1ZBlYp-2zJnwEN8AjgSJr4Q-Tte16/keyframes/t054.jpg
- /workspace/academy/media/1_kN1ZBlYp-2zJnwEN8AjgSJr4Q-Tte16/keyframes/t058.jpg
- /workspace/academy/media/1_kN1ZBlYp-2zJnwEN8AjgSJr4Q-Tte16/keyframes/t061.jpg
- /workspace/academy/media/1_kN1ZBlYp-2zJnwEN8AjgSJr4Q-Tte16/keyframes/t065.jpg
- /workspace/academy/media/1_kN1ZBlYp-2zJnwEN8AjgSJr4Q-Tte16/keyframes/t069.jpg
- /workspace/academy/media/1_kN1ZBlYp-2zJnwEN8AjgSJr4Q-Tte16/keyframes/t072.jpg
- /workspace/academy/media/1_kN1ZBlYp-2zJnwEN8AjgSJr4Q-Tte16/keyframes/t076.jpg
- /workspace/academy/media/1_kN1ZBlYp-2zJnwEN8AjgSJr4Q-Tte16/keyframes/t079.jpg
- /workspace/academy/media/1_kN1ZBlYp-2zJnwEN8AjgSJr4Q-Tte16/keyframes/t083.jpg
23. Homework - Software
- title: Homework - Software
- status: publish
- author: 0
- is_previewable: (empty)
- video_duration: 0h 0m 0s (raw {"hours":0,"minutes":0,"seconds":0})
- video_source_type: (empty)
Goal: Practice file import, scaling, welding, and the critical mirroring function in VinylCut 5.
Assignment
- Design File Prep:
- Create or import a simple design in VinylCut 5 that includes your initials and a small vector icon.
- Use the Weld (or Merge) feature to combine any overlapping shapes in your icon.
- Scale the entire design to precisely 15 cm wide.
- Mirror Practice: Make a copy of the 15 cm design.
- Label the first design \External\" (no mirroring).
- Apply the Mirror H (Flip Horizontal) function to the second design and label it \"Internal.\"
- Software Setup: Add your specific cutter make and model in the software and successfully use the Test Connection feature to ensure communication with your physical machine.
Submission
Submit two screenshots, one of your VinylCut 5 workspace showing the two identical designs (one mirrored, one not) clearly labeled \"External\" and \"Internal\".
Submit the second screenshot of your design in Preview Mode.
Submission Instructions:
Complete this practical then submit via email to the instructor at info@ambitious.co.za.
Keep up the practical skills!
"
24. Software-Conclusion
- title: Software-Conclusion
- status: publish
- author: 0
- is_previewable: (empty)
- video_duration: 0h 0m 24s (raw {"hours":0,"minutes":0,"seconds":24})
- video_source_type: embedded
- drive_file_id:
14pyk1T10Nz-0tMqIMAozs3VTMJke12L0(source_ref; not a public link) - transcript pending / keyframes pending / presentation extract pending
- video_source_url: (Drive preview omitted as a public link; file id kept as source_ref)
(no lesson_content HTML in export — video-only or empty body; metadata above kept in full)
Drive extract
- file_id:
14pyk1T10Nz-0tMqIMAozs3VTMJke12L0 - filename: 03 - Software Outro.mp4
- kind: video
- local_path: /workspace/academy/media/14pyk1T10Nz-0tMqIMAozs3VTMJke12L0/03 - Software Outro.mp4
- source_ref: drive
14pyk1T10Nz-0tMqIMAozs3VTMJke12L0· content_length 19867623 · original https://drive.google.com/file/d/14pyk1T10Nz-0tMqIMAozs3VTMJke12L0/view - extract_status: done
- caption_source: drive_timedtext_asr_srt
- duration_s: 17.182993
- keyframe_count: 3
Transcript
- [00:00:00.000] All right, guys. Okay, well that
- [00:00:02.399] concludes our actual software side of
- [00:00:04.720] things. Next up, we're going to be going
- [00:00:06.640] over to workflows where we're going to
- [00:00:08.320] be combining a few of these things.
- [00:00:11.120] Yeah. Otherwise, I'll see you guys in
- [00:00:12.559] the next section and enjoy.
Keyframes
- /workspace/academy/media/14pyk1T10Nz-0tMqIMAozs3VTMJke12L0/keyframes/last.jpg
- /workspace/academy/media/14pyk1T10Nz-0tMqIMAozs3VTMJke12L0/keyframes/t001.jpg
- /workspace/academy/media/14pyk1T10Nz-0tMqIMAozs3VTMJke12L0/keyframes/t002.jpg
25. Workflows-Overview
- title: Workflows-Overview
- status: publish
- author: 0
- is_previewable: (empty)
- video_duration: 0h 0m 45s (raw {"hours":0,"minutes":0,"seconds":45})
- video_source_type: embedded
- drive_file_id:
1AXRHoHv7k8rYK4zIGl0R4A5-eHWMpOyo(source_ref; not a public link) - transcript pending / keyframes pending / presentation extract pending
- video_source_url: (Drive preview omitted as a public link; file id kept as source_ref)
Overview of the workflows sections of the course.
Drive extract
- file_id:
1AXRHoHv7k8rYK4zIGl0R4A5-eHWMpOyo - filename: 04 - Workflow Intro.mp4
- kind: video
- local_path: /workspace/academy/media/1AXRHoHv7k8rYK4zIGl0R4A5-eHWMpOyo/04 - Workflow Intro.mp4
- source_ref: drive
1AXRHoHv7k8rYK4zIGl0R4A5-eHWMpOyo· content_length 54314618 · original https://drive.google.com/file/d/1AXRHoHv7k8rYK4zIGl0R4A5-eHWMpOyo/view - extract_status: done
- caption_source: drive_timedtext
- duration_s: 45.209002
- keyframe_count: 6
Transcript
- All righty guys, welcome to the next
- [00:00:02.710] All righty guys, welcome to the next
- [00:00:02.720] All righty guys, welcome to the next section which is workflows. Now, here's
- [00:00:05.749] section which is workflows. Now, here's
- [00:00:05.759] section which is workflows. Now, here's where we get to finally start joining
- [00:00:07.909] where we get to finally start joining
- [00:00:07.919] where we get to finally start joining some of the machining side and the
- [00:00:09.830] some of the machining side and the
- [00:00:09.840] some of the machining side and the software where we get to actually create
- [00:00:13.669] software where we get to actually create
- [00:00:13.679] software where we get to actually create things. So, we're going to look at how
- [00:00:15.190] things. So, we're going to look at how
- [00:00:15.200] things. So, we're going to look at how do we start, what's important when we
- [00:00:17.510] do we start, what's important when we
- [00:00:17.520] do we start, what's important when we mixing these two and how we kind of get
- [00:00:19.830] mixing these two and how we kind of get
- [00:00:19.840] mixing these two and how we kind of get it to a final product. Now, we're not
- [00:00:22.310] it to a final product. Now, we're not
- [00:00:22.320] it to a final product. Now, we're not going to qu go into proper application
- [00:00:24.710] going to qu go into proper application
- [00:00:24.720] going to qu go into proper application yet and those things that just going to
- [00:00:27.109] yet and those things that just going to
- [00:00:27.119] yet and those things that just going to or should I say that we're going to keep
- [00:00:28.230] or should I say that we're going to keep
- [00:00:28.240] or should I say that we're going to keep for a later section. But this will give
- [00:00:30.790] for a later section. But this will give
- [00:00:30.800] for a later section. But this will give you like the foundation of what is
- [00:00:33.430] you like the foundation of what is
- [00:00:33.440] you like the foundation of what is needed and that is from machine to
- [00:00:36.950] needed and that is from machine to
- [00:00:36.960] needed and that is from machine to software to production. Hope you guys
- [00:00:40.229] software to production. Hope you guys
- [00:00:40.239] software to production. Hope you guys enjoy and I'll talk you in the next
- [00:00:41.750] enjoy and I'll talk you in the next
- [00:00:41.760] enjoy and I'll talk you in the next video.
Keyframes
- /workspace/academy/media/1AXRHoHv7k8rYK4zIGl0R4A5-eHWMpOyo/keyframes/last.jpg
- /workspace/academy/media/1AXRHoHv7k8rYK4zIGl0R4A5-eHWMpOyo/keyframes/t001.jpg
- /workspace/academy/media/1AXRHoHv7k8rYK4zIGl0R4A5-eHWMpOyo/keyframes/t002.jpg
- /workspace/academy/media/1AXRHoHv7k8rYK4zIGl0R4A5-eHWMpOyo/keyframes/t003.jpg
- /workspace/academy/media/1AXRHoHv7k8rYK4zIGl0R4A5-eHWMpOyo/keyframes/t004.jpg
- /workspace/academy/media/1AXRHoHv7k8rYK4zIGl0R4A5-eHWMpOyo/keyframes/t005.jpg
26. Requirements
- title: Requirements
- status: publish
- author: 0
- is_previewable: (empty)
- video_duration: 0h 0m 0s (raw {"hours":0,"minutes":0,"seconds":0})
- video_source_type: (empty)
When it comes to workflows there are a few things to keep in mind, and that is the fact that the process will vary depending on the job and its requirements.
In the following lessons we will be covering a generic workflow for standard vinyl cutting, and then the registration marks cutting process.
Requirements
First stop on our list will be the job requirements.
Things that is important here will be.
- Job Measurements
- Material Availability
- Application Tools
- Costs
- Design
- Timeframe
1: Job Measurements
Measurements are one of the most important parts of any job.
It is a bit like the foundation of a house, if you get it wrong you might have to start from scratch.
So, when you take or receive your measurements, ensure that you have the following.
- Width and Height of the overall application surface
- Design size in relation to the surface
- Location and size relation within the desired design
2: Material Availability
After you acquired the relevant measurements, ensure that you have all the correct materials stocked in regard to type, size and colors.
It is very important to ensure that your material is large enough for the job at hand, else you will have to adapt a workflow that relies on cutting by tiles.
3: Application Tools
If you are going to be doing the application of the designs yourself, ensure that you have all the correct tools for the application.
Tools list (generic)
- Squeegee
- Pickers in various sizes
- Tweezer
- Scissors
- Dustbin
- Edge picking tool
- Water bottle with Sunlight liquid water
We will have a closer look at these in a later section of this course.
4: Costs
It is always a good idea to get in the habit of working out costs before committing to the job or project.
Oftentimes there are many hidden costs or updated prices that one needs to be aware of.
A list of costs to consider just to mention a few.
- Callout / Transport
- Designer / Designing
- Applicator / Application
- Material
- Cutter Blades
- Printing (Registration marks workflows)
- Labour
5: Design
Ensure that you have a plan in regard to the design.
A few things to consider in regard to the design will be whether you are making it, a contract designer or the client is supplying it.
If it is you making the design or you are using a contractor, ensure that the correct design principles are followed to save you time and resources.
- Clean designs
- No unwanted overlays or overlaps
- Correct sizes
- Elements grouped and merged where needed (Weld feature)
- Backup of file
However, if the client is supplying you with a design, it is very important to review the design beforehand to ensure it follows the above notes.
It is not uncommon that if the client did not make the design correctly that you will have to end up doing the cleanup, or in some cases even remake it. (Extra time and costs)
6: Timeframe
Work out a realistic timeframe built around the notes above and then add a little extra.
As like with the costs, there are often many little things that end up adding extra time to the overall project.
It always looks more professional when a project or job is completed on time.
- quizzes_following_this_lesson: 1 (full text in Quizzes)
- Requirements (6 questions)
27. Setup
- title: Setup
- status: publish
- author: 0
- is_previewable: (empty)
- video_duration: 0h 0m 0s (raw {"hours":0,"minutes":0,"seconds":0})
- video_source_type: (empty)
Setup
Next up on our list we want to ensure that the following are set up correctly and ready for use.
1: Machine
- Plugin and powered on
- Connected to PC (or Flash Ready)
- Material Loaded (based on requirements)
- Blade height set
2: Software
- New project (based on requirements)
- Add correct cutter
- Test connection
1: Machine
1a: Powered
When it comes to the machine setup, we want to start with ensuring that it is powers on as we covered earlier in this course.
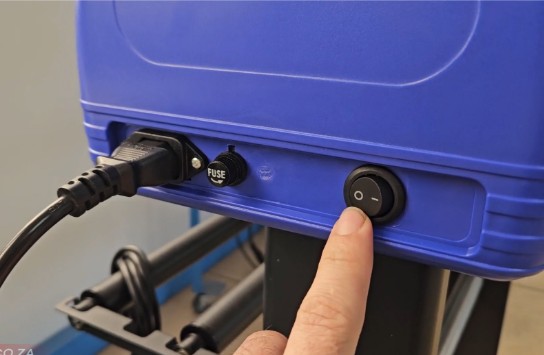
1b: Connected
Next up, make sure that the machine is connected to the computer via USB printer cable, COM port or wirelessly.
Alternatively, if you are using a flash drive, ensure that it is the correct format.
- Flash Drive = Fat32
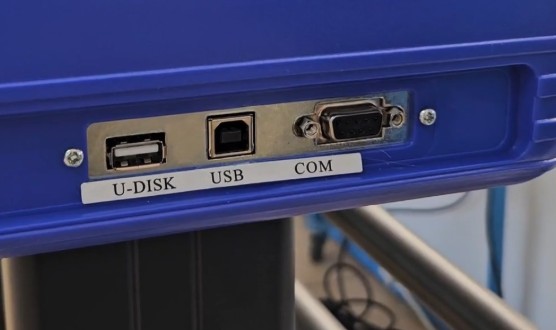
1c: Material
Now we will load our material, ensure that it is aligned and that you have removed any slack.
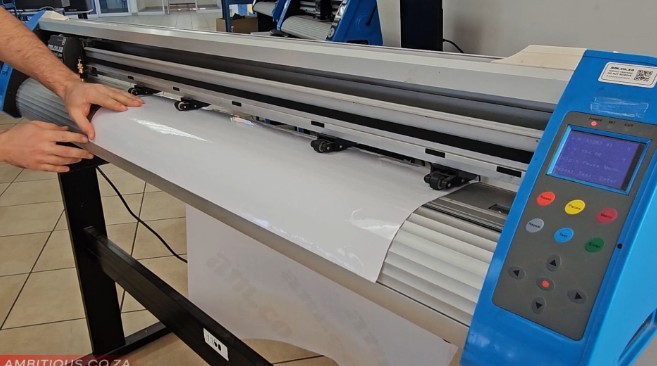
Alternatively, if you are working with smaller parts, you can use a cutting mat.
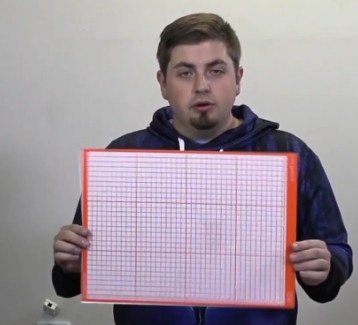
If you are working with large designs over a few meters, ensure that your pinch rollers have the correct tension.
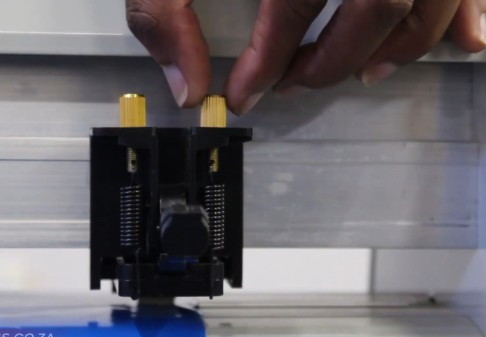
Check list
- Aligned
- Remove Slack
- Correct Tension
1d: Blade
Now that the material is loaded and ready, ensure that your blade is not blunt.
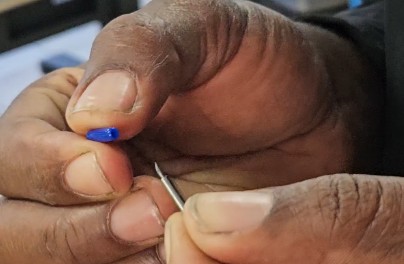
Next you want to make sure you adjust the blade to a generic height using the # method that we covered earlier in this course.
Then depending on the size of your material you want to do some test cuts along the bottom of your material, then readjust blade depth or machine force.
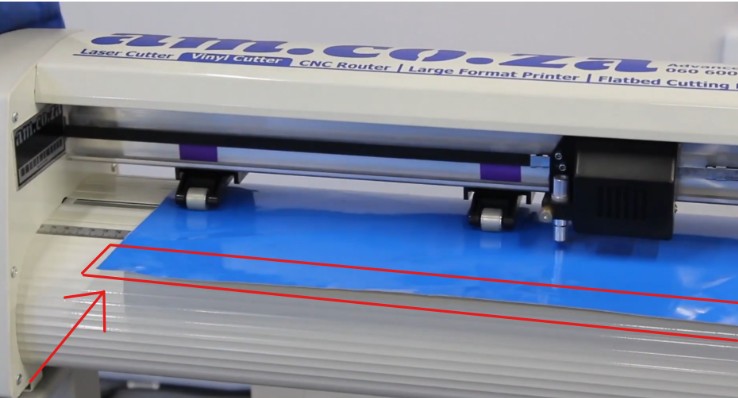
Remember that you only want to cut through the vinyl layer and not the backing.
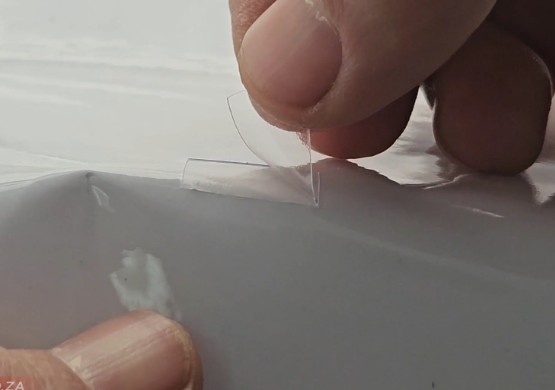
2: Software
1a: New
Now that the machine is set up and ready to go, we want to focus on the software side of things.
First off, we will be making a new file for the project / job, this is where we will be setting the size, orientation and units.
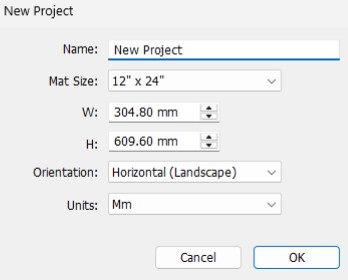
It is rather important to ensure that your project files dimensions do not exceed the dimensions of the material, as this will cause the machine to not cut the job out properly.
1b: Cutter
After we created a new project and ensured that it aligns with our job's requirements, we want to add our cutter to the software.
To do that we will be using the Main Menu / Cutter / My Cutter / Manage Cutters…
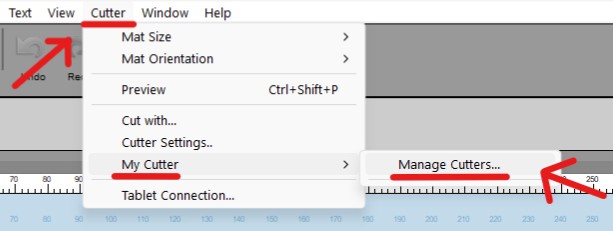
Important note: You will need your machine’s make and model in order to add the correct one.
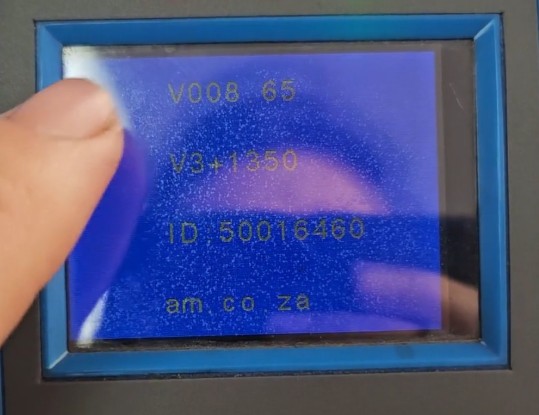
Make sure you say Add to List once you have the right machine selected, else it will not add it to the list.
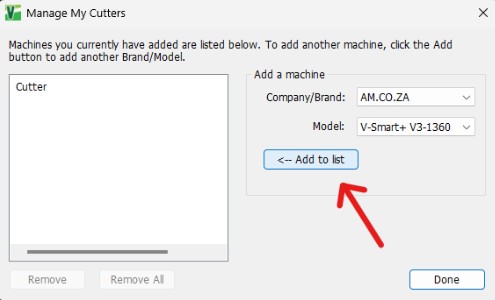
1c: Connection
Now that we have added a cutter, we want to see if there is a connection between the machine and the software.
To do that we will be using the Test Connection feature under the Cut Settings which can be located on your Main Features Bar.
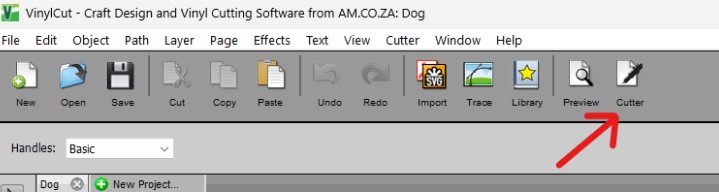
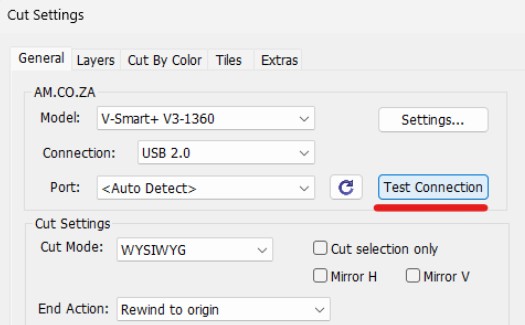
It is important that your connection is set to the correct one in regard to what you are using.
- USB
- COM
- TCP / IP
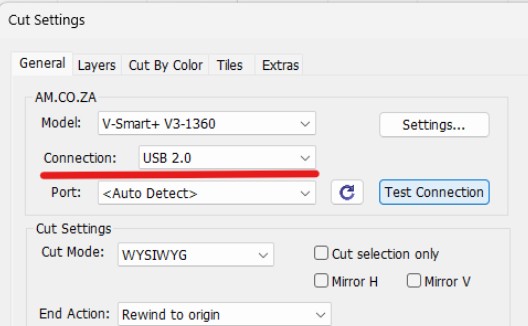
After you have completed all the steps above you should be ready to move over to the next section of your production, keeping in mind that this will vary depending on your final product.
- quizzes_following_this_lesson: 1 (full text in Quizzes)
- Setup (7 questions)
28. Standard Cutting
- title: Standard Cutting
- status: publish
- author: 0
- is_previewable: (empty)
- video_duration: 0h 0m 0s (raw {"hours":0,"minutes":0,"seconds":0})
- video_source_type: (empty)
In this lesson we will be looking at the standard vinyl cutting workflow.
This lesson builds on the previous ones about Requirements and Setup.
What we mean when we refer to the Standard Vinyl Cutting workflow, is that this process will cover workflows that use plain non printed vinyl.
In other words, we will not be covering the registration mark type process, that will be for the next lesson.
Standard Vinyl Cutting Workflow
Now that we have set up things according to the job requirements, we want to address the following for a Standard Vinyl Cutting workflow.
- Design
- Refine
- Cut
- Application
1: Design
When it comes to the design side, there are two main approaches we are most likely going to choose from.
The first one will be to create the design within Vinylcut 5 itself.
If that is your approach you will want to use some of the following key points while designing.
- Clean designs
- Correct sizes
- No unwanted cutline overlays or overlaps
- Elements grouped and merged where needed plus (Weld feature)
- Use layers and naming for management
- Backup design when finished
Following these steps will give you the best chance of getting a clean-cut ready design.
Now with the second approach we will be importing the design from a third-party source.
This would mean that it was designed using another program and then afterwards imported to VinylCut 5.
There are a few important things to look at while using this approach.
First off, we will be using the Import feature within VinylCut 5 and also ensure we use one of the following Vector formats.

Vector support formats (Just to mention some)
- SVG
- SCUT
- AI
- DXF
- PLT
After you have imported the design, it is important to comb through it to ensure that the design is in order.
You can use the same list of things to look at as we did when creating the design within VinylCut 5.
- Clean designs
- Correct sizes
- No unwanted cutline overlays or overlaps
- Elements grouped and merged where needed plus (Weld feature)
- Use layers and naming for management
- Backup design when finished
2: Refine
Next on our list will be refining the design.
It is always good practice to use the preview feature and look for any problem areas within the design.
Oftentimes while designing we overlook simple things, and it is cheaper doing an extra check then an extra cut.
That being said, oftentimes you will only notice the mistake when applying the materials.
Confirm Sizes
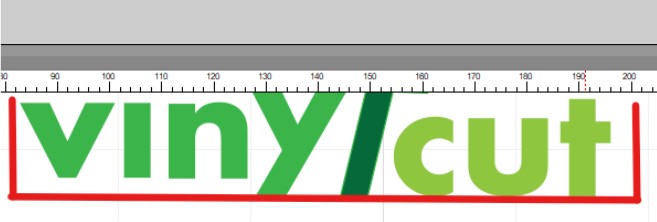
Overlaps / Cutlines
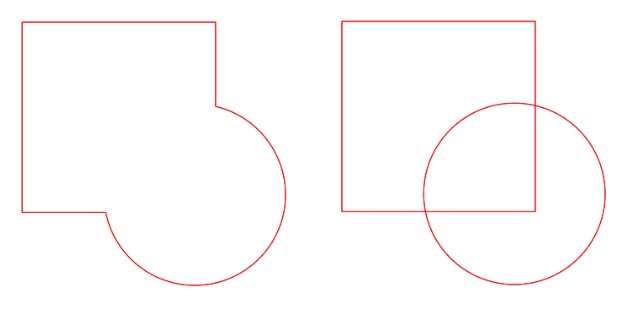
Clean Nodes
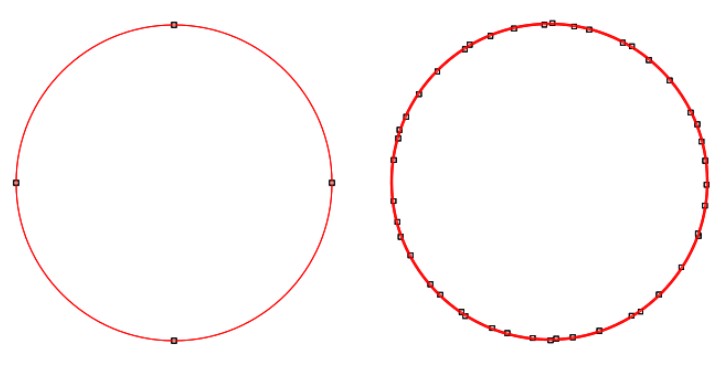
3: Cut
Ok by this point if you followed the previous steps correctly you should be ready to cut your job.
Depending on your project's requirements and final product there are a few key things to keep in mind.
Inner Widows.
Open our Cutter feature and address the following.
If you are cutting designs that will be stuck on the inside on a window or Perspex and be displayed to the outside, ensure that you enable the Mirror H option.
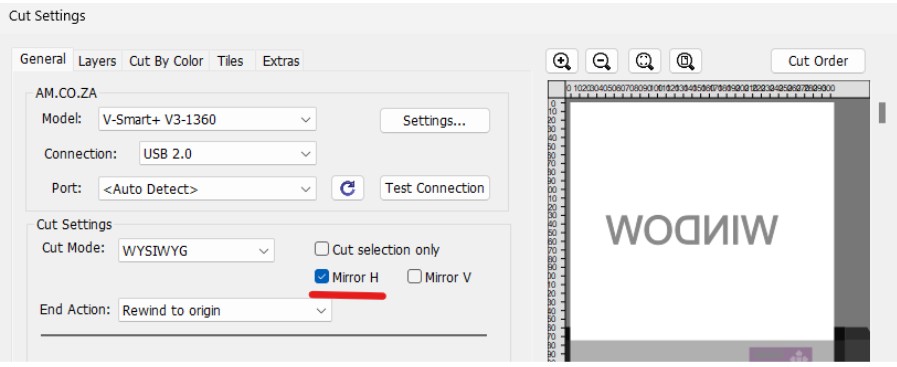
Cut by Color.
Open our Cutter feature and address the following.
If you are cutting your design on different colored vinyl's, use the Cut by Color feature and show and hide which colors to cut.
Then ideally set your Cut Mode to Origin Point to save material.
Cut by Color
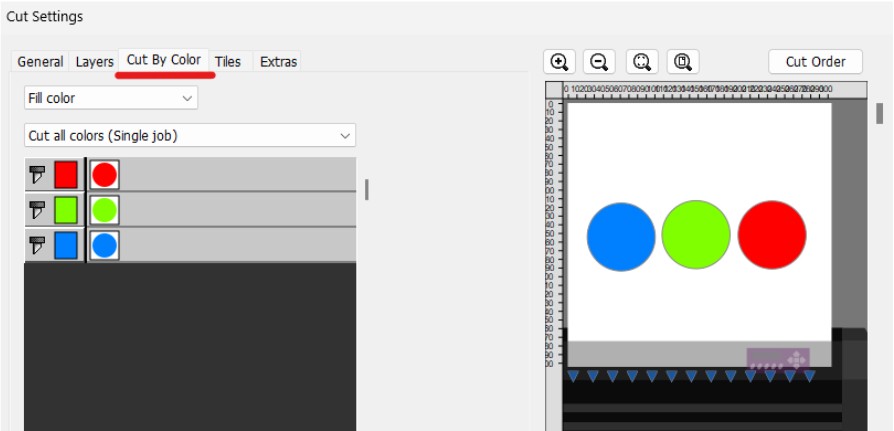
Cut Mode
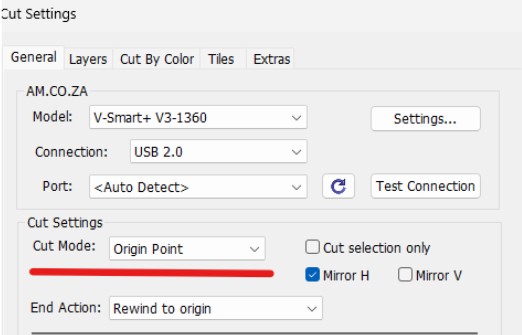
Large Design / Panels
Open our Cutter feature and address the following.
Setup different Tiles if your design is larger than the cutter can handle, or if you are working with an application that uses panels.
Tiles
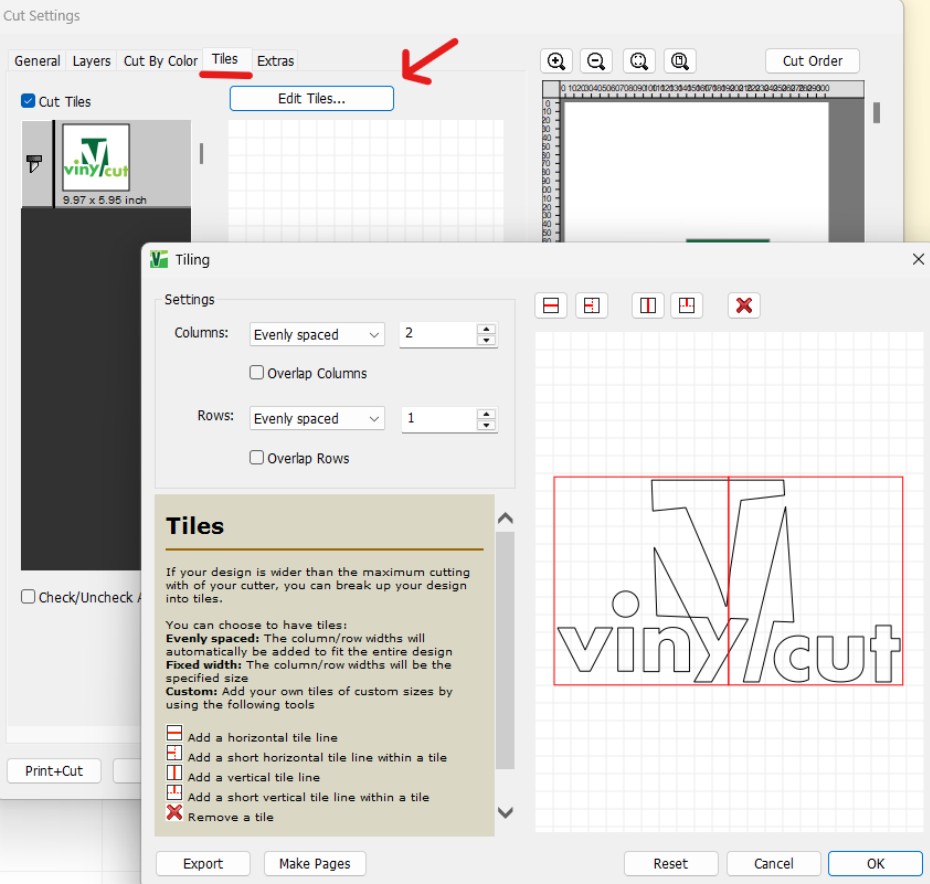
Mass Production
If you are working with multiple cutouts of the same design, there is a key effect to consider.
Nesting your design with the Nest effect could save you time and material.
Nest
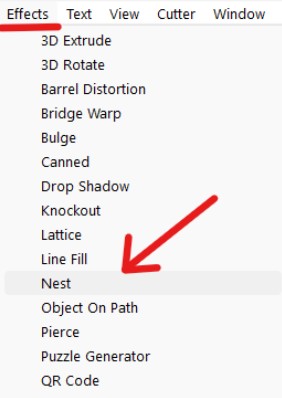
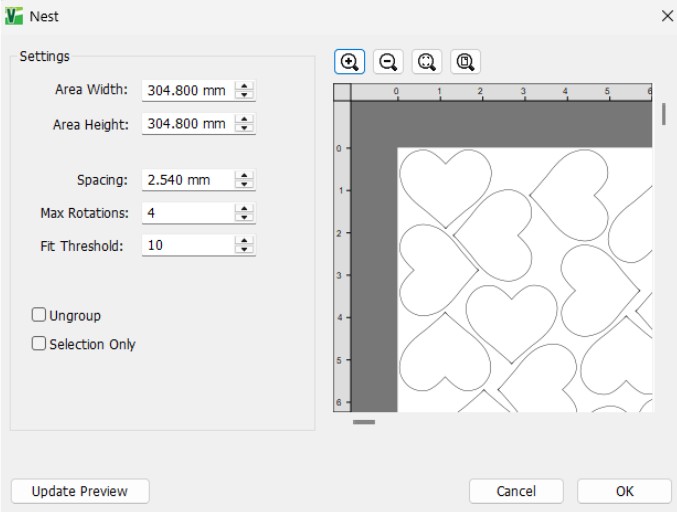
Just remember to set your Cut Mode to Origin Point to save material.
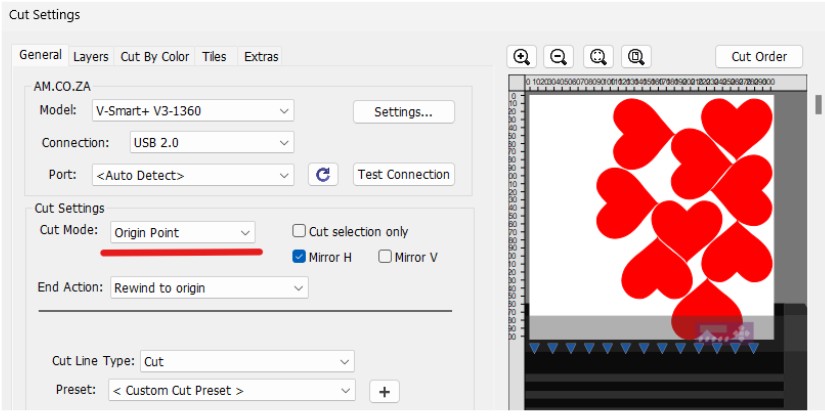
Another important thing right before you start cutting is to set the machine's origin to the desired location of your choosing.
It is also worth noting that you are able to adjust the Force and Velocity during the cutting process.
In my opinion I would only adjust the Velocity (speed) during the cutting process and not the force.
Just a safety reminder, it is always good practice to have oversight of the machine while cutting and not to leave it unattended.
4: Application
When it comes to the application side of things there are many different types that you could be doing.
We will not be covering all of them in this course, we will only be looking at some more generic applications.
That being said, there are a few important things that are universal across many different applications.
The first one is to ensure that you have all the correct tools on-hand required for the type of application that you will be doing.
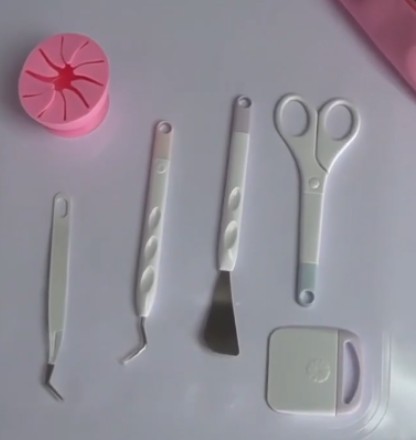
Next you would want to preview the vinyl on the surface if you are able, this will help you be sure about the measurements and layout.
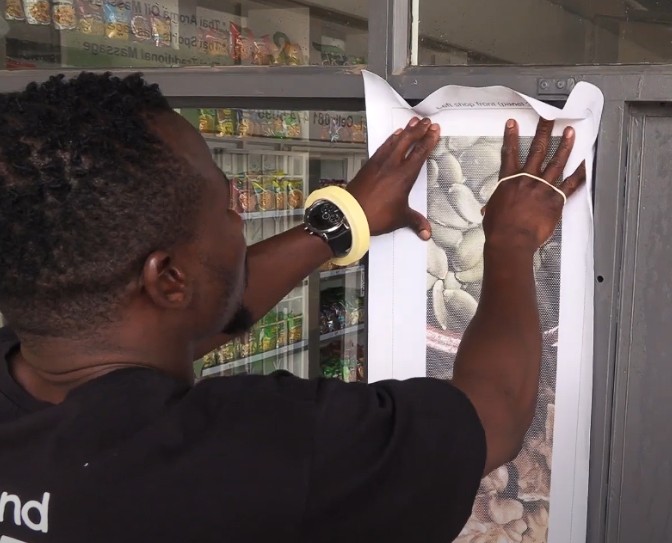
Then you want to prepare the surface, this will vary depending on your application type.
Something like a window, you would want to wash it first and make sure that there are no specks or dirt on it.
With something like a piece of wood you would want to give it a smooth surface by sanding it.
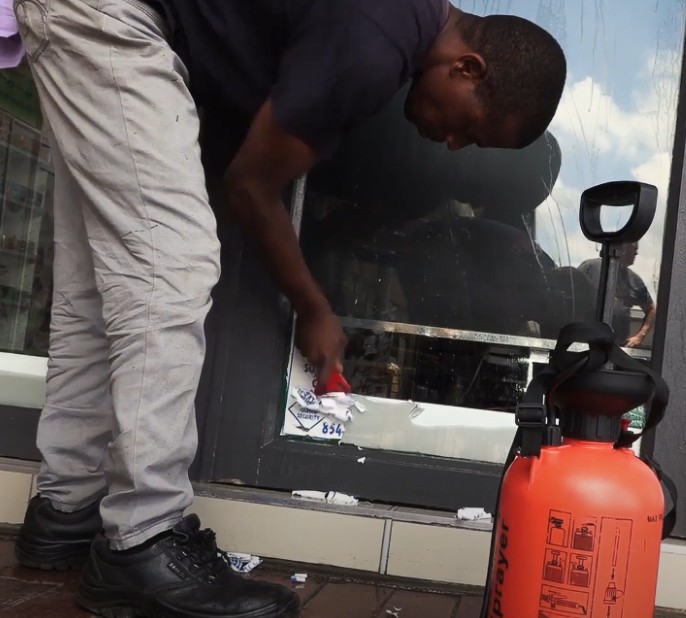
When it comes to the actual application, we will be covering that in an upcoming section of this course.
These are some universal practices when working with applications.
- Correct Tools for the Job
- Confirm Design Sizes and Preview Layout
-
Clean / Prepare Surface
-
quizzes_following_this_lesson: 1 (full text in Quizzes)
- Standard Cutting (5 questions)
29. Contour Cutting
- title: Contour Cutting
- status: publish
- author: 0
- is_previewable: (empty)
- video_duration: 0h 0m 0s (raw {"hours":0,"minutes":0,"seconds":0})
- video_source_type: (empty)
In this lesson we will be looking at the Contour cutting workflow.
This lesson builds on the previous ones about Requirements and Setup.
What we mean when we refer to the Contour Cutting workflow, is that this process will cover workflows that use printed vinyl with registration marks.
A contour cutting process with registration marks is used when you have a printed image of a design, and you would like to cut a contour around that image.
Popular examples are stickers.
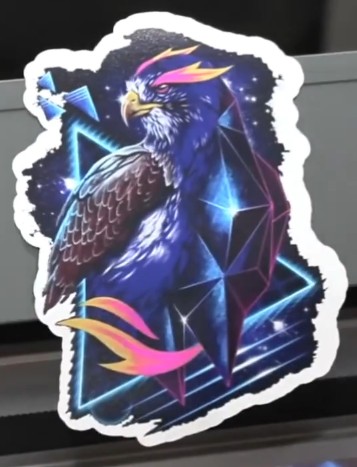
Registration Mark Cutting
Now that we have set up things according to the job requirements, we want to address the following for a Registration Mark Cutting.
- Contour Types
- Traced Image
- Shadow Layer
- Application
1: Contour Types
When it comes to cutting contours for our printed images, we have two types that we will be covering.
- Traced Images
- Shadow Layer
Traced Images will rely on the Trace feature within VinylCut 5 and help you add a source image for printing.
Where the Shadow Layer (Contour Cut) will allow you to adjust the distance from the edge of a design.
But keep in mind that these features can work quite well with each other.
2: Traced Image
Cutting a contour of an existing raster type image and prepping the image for print.
Now when it comes to using the workflow that requires registration marks, we need to follow the next few steps to achieve the desired result.
First of all, we want to use the Trace feature within the software.
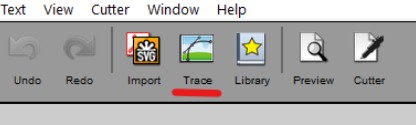
Choose an image, ideally something that is print ready (High DPI).
It will also help if your image has an alpha channel with a transparent background, this will make the masking process easier.
Alpha Channel
If your image has an alpha channel, make sure to click the Use Alpha Channel (when available) option.
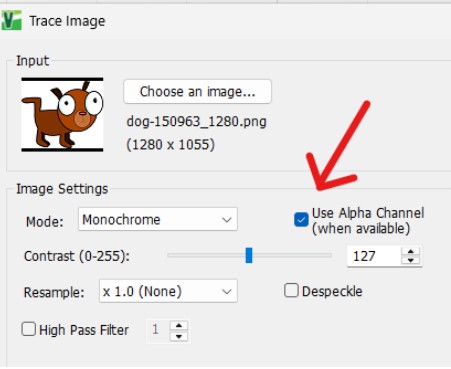
If it does not have an alpha channel, leave the Use Alpha Channel un-checked and adjust the Contrast till you have the desired effect.
Remember to click the Update Preview to see the changes.
If your design trace line has extra traced shapes within the main outline and you do not want that, make sure to click the Blackout option.
This should fill any holes within the shape.
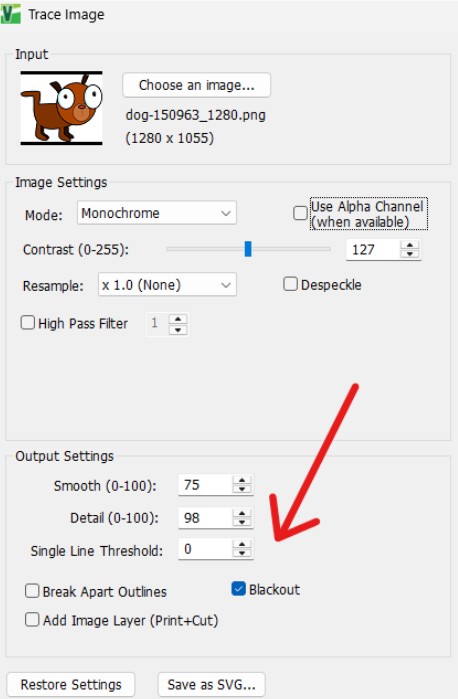
Then if you plan on printing the image as well and not just use this feature for the contour cut layer, then you will have to enable the Add Image Layer (Print + Cut) option.
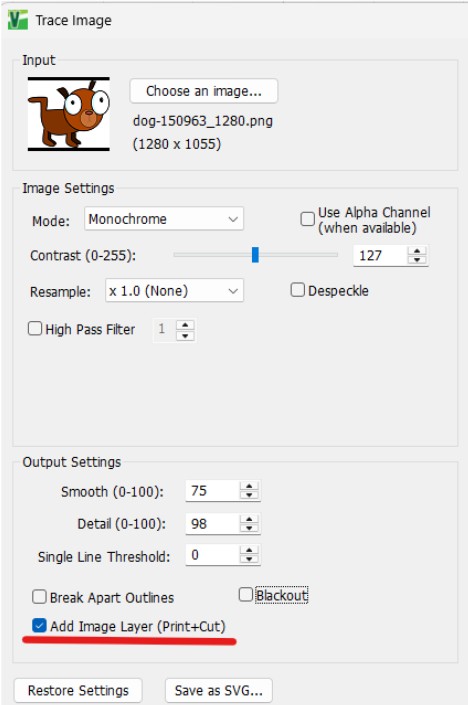
Click ok, this will add you an image with a cut layer.
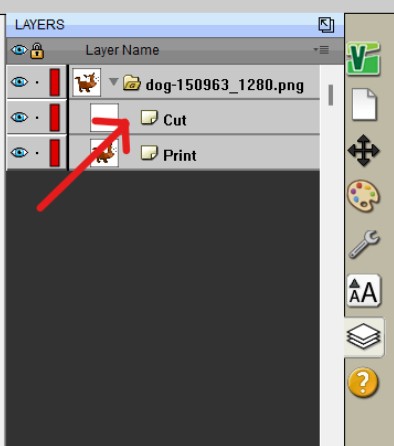
Next up ensure that your design is the correct size and add some registration marks.
First off, we will head to the Document tab on the Control Panel and enable Show Reg Marks.
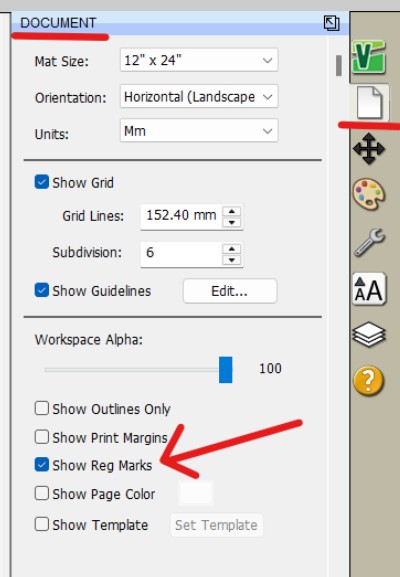
After that we want to Export the Image for print with the Show Registration Marks enabled.
Ideally use the .TIFF file format.
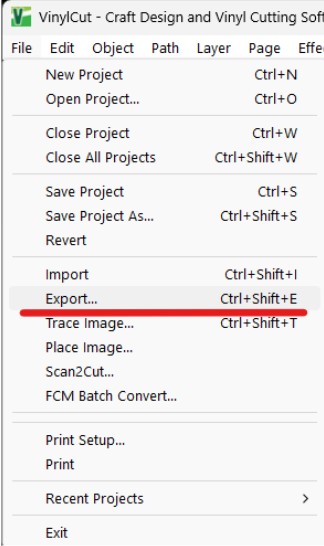
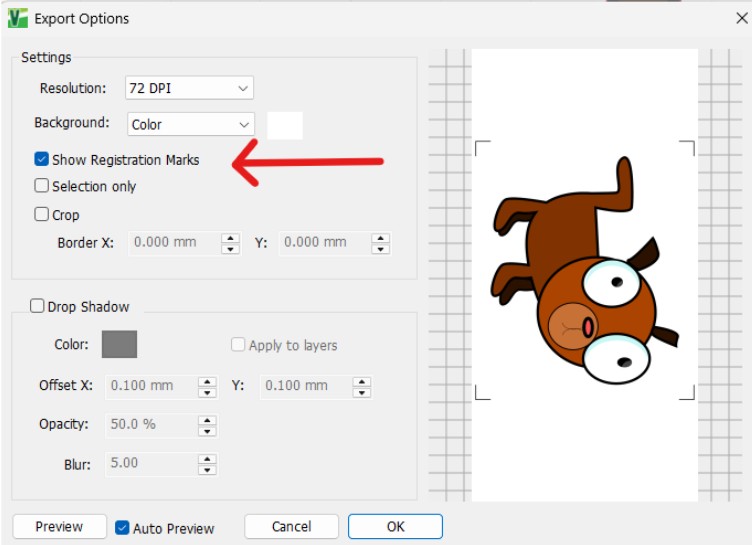
Print your file and then load it into the Vinyl Cutter correctly by making sure it is aligned and has no slack.
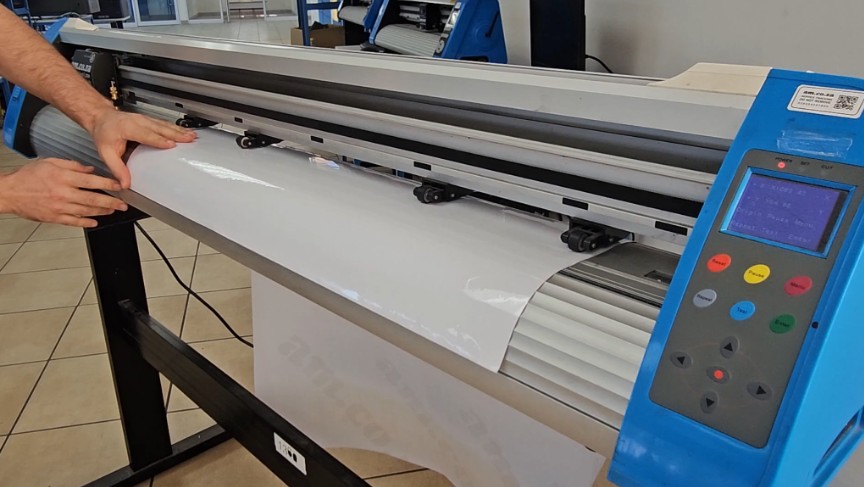
After that you want to set the Origin of your machine and zero it.
Semi-Automatic
Safe practice is to have it just off the right of the bottom right registration mark.
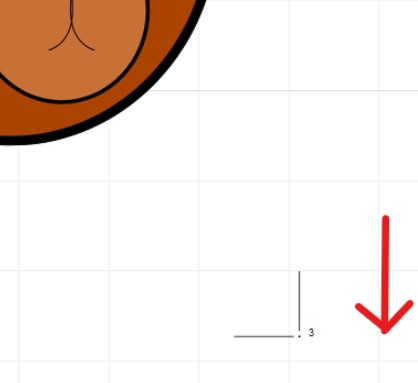
Automatic
Place your cutting blade snugly inside the two lines of the bottom right registration mark.
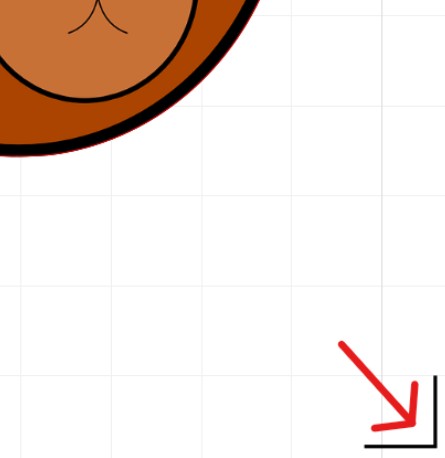
Then under VinylCut 5 Cut Settings make sure your cut mode is WYSIWYG
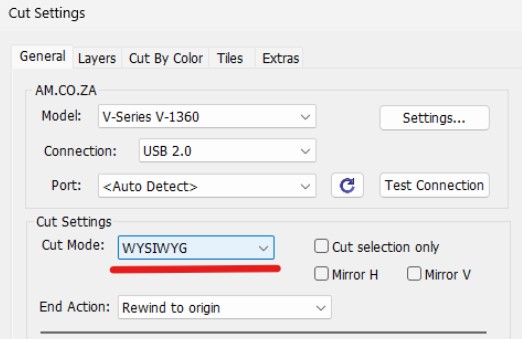
Once you are ready then you can simply press the Print+Cut button to start the cutting process.
Note: The Semi-Automatic will prompt and guide you to align the registration marks.
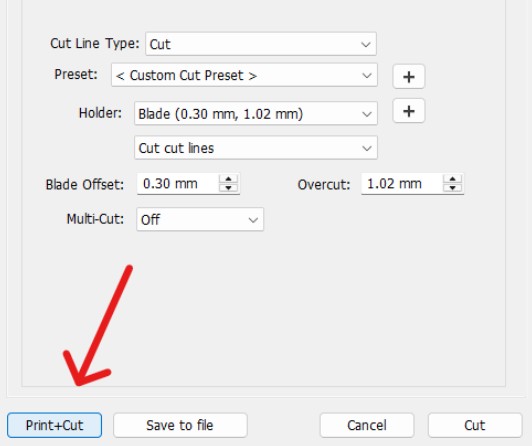
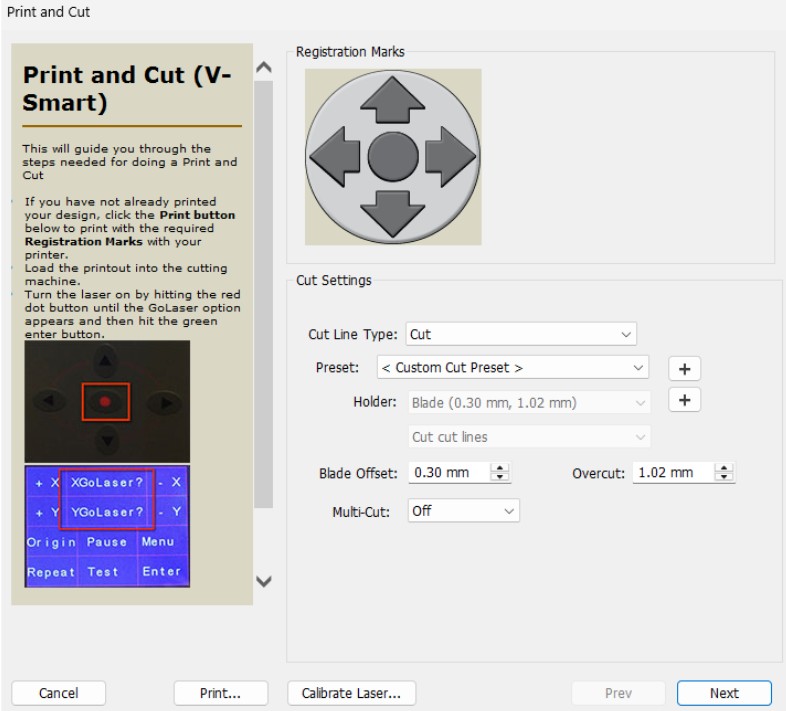
3: Shadow Layer
The Shadow Layer (Contour Cut) effect is great if you would like a custom sized cutline.
With some designs you might want to add a bleed or trim to the cut layer.
This will allow you to add a white rim around your design, or perhaps if you have a black border and would like to cut slightly into it to avoid a white rim.
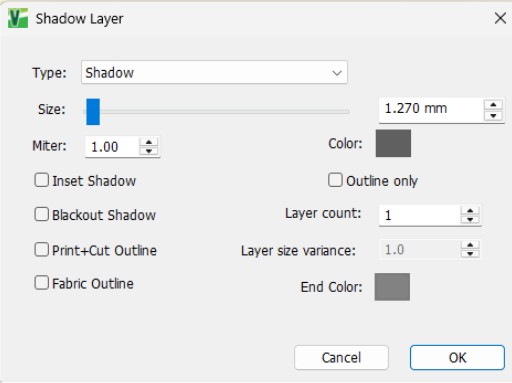
Like we covered in a previous section of this course there are a few things to keep in mind when using it.
First off, if you are making a new custom cut line using this effect based on another cut line, just remember to remove the old cut line.
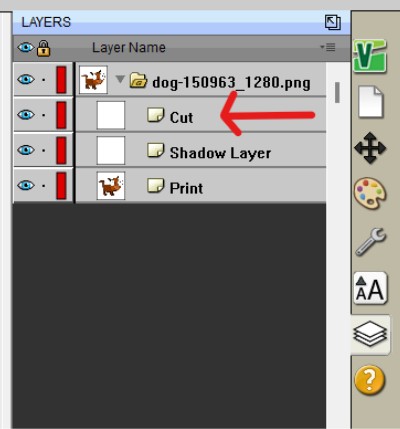
Secondly, if you are using this effect to make a cut line based on a vector design, but you would like to print the vector design with registration marks.
You should set the vector designs style to (Print+Cut) Print Only under the Style tab of the Control Panel
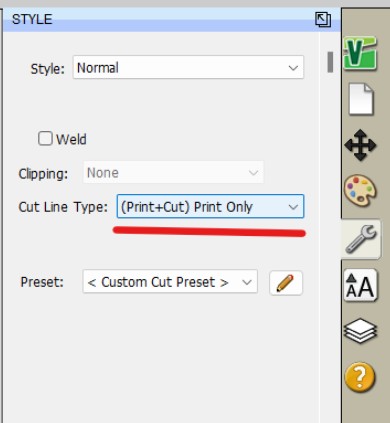
4: Application
For application see the previous lesson Standard Vinyl Cutting workflow.
- quizzes_following_this_lesson: 1 (full text in Quizzes)
- Contour Cutting (6 questions)
30. Workflow Checklist
- title: Workflow Checklist
- status: publish
- author: 0
- is_previewable: (empty)
- video_duration: 0h 0m 0s (raw {"hours":0,"minutes":0,"seconds":0})
- video_source_type: (empty)
Workflow Checklist
Vinyl Cutting Course by Ambitious Academy
In the beginning of a new process having a sort of checklist can be very helpful, so we’ve created a basic check list of the workflow that you are able to download and print.
This checklist will come in very handy, but eventually you should be able to run through the process without having to reference it.
Find Checklist Ready for Download by clicking this Link
31. Homework - Workflows
- title: Homework - Workflows
- status: publish
- author: 0
- is_previewable: (empty)
- video_duration: 0h 0m 0s (raw {"hours":0,"minutes":0,"seconds":0})
- video_source_type: (empty)
Goal: Simulate the administrative and planning steps required before committing to a job.
Assignment
Imagine you have received an order for a new business logo decal that is 90 cm wide for an exterior window.
- Measurements & Material: Determine if your existing stock 60 cm wide roll is sufficient. Since it is not, create a note detailing the need for the cutting by tiles workflow.
- Costing: Identify three separate costs (other than material or labor) that would apply to this specific job (e.g., transport, blade wear, design review).
- Design Review: Assume the client sent you a clean file, but you notice five small vector elements that overlap slightly. Briefly state the software action you would take to resolve these overlaps before cutting.
Submission
Submit a short written document (or bulleted list) addressing the three points above, demonstrating your pre-production planning decisions.
Submission Instructions:
Complete this practical then submit via email to the instructor at info@ambitious.co.za.
Keep up the practical skills!
32. Workflows-Conclusion
- title: Workflows-Conclusion
- status: publish
- author: 0
- is_previewable: (empty)
- video_duration: 0h 0m 33s (raw {"hours":0,"minutes":0,"seconds":33})
- video_source_type: embedded
- drive_file_id:
1WT5ZSi8q-1ysJiZ38d99FeTvNSpKKGqg(source_ref; not a public link) - transcript pending / keyframes pending / presentation extract pending
- video_source_url: (Drive preview omitted as a public link; file id kept as source_ref)
(no lesson_content HTML in export — video-only or empty body; metadata above kept in full)
Drive extract
- file_id:
1WT5ZSi8q-1ysJiZ38d99FeTvNSpKKGqg - filename: 04 - Workflow Outro.mp4
- kind: video
- local_path: /workspace/academy/media/1WT5ZSi8q-1ysJiZ38d99FeTvNSpKKGqg/04 - Workflow Outro.mp4
- source_ref: drive
1WT5ZSi8q-1ysJiZ38d99FeTvNSpKKGqg· content_length 39321694 · original https://drive.google.com/file/d/1WT5ZSi8q-1ysJiZ38d99FeTvNSpKKGqg/view - extract_status: done
- caption_source: drive_timedtext
- duration_s: 32.577007
- keyframe_count: 4
Transcript
- All righty guys, that concludes our
- [00:00:02.230] All righty guys, that concludes our
- [00:00:02.240] All righty guys, that concludes our workflow. So, I hope you guys enjoyed
- [00:00:04.070] workflow. So, I hope you guys enjoyed
- [00:00:04.080] workflow. So, I hope you guys enjoyed it. And now, like I said, this is kind
- [00:00:06.070] it. And now, like I said, this is kind
- [00:00:06.080] it. And now, like I said, this is kind of your bread and butter. There is many
- [00:00:08.790] of your bread and butter. There is many
- [00:00:08.800] of your bread and butter. There is many other workflows which um you know, some
- [00:00:12.150] other workflows which um you know, some
- [00:00:12.160] other workflows which um you know, some of it is maybe more specialized, so it's
- [00:00:14.629] of it is maybe more specialized, so it's
- [00:00:14.639] of it is maybe more specialized, so it's not so generic, so we don't cover it
- [00:00:16.310] not so generic, so we don't cover it
- [00:00:16.320] not so generic, so we don't cover it yet. But if you have this workflow down,
- [00:00:18.710] yet. But if you have this workflow down,
- [00:00:18.720] yet. But if you have this workflow down, you should be able to figure out the
- [00:00:20.310] you should be able to figure out the
- [00:00:20.320] you should be able to figure out the other ones pretty easily. But yeah,
- [00:00:23.189] other ones pretty easily. But yeah,
- [00:00:23.199] other ones pretty easily. But yeah, otherwise, next up, we're going to go
- [00:00:24.630] otherwise, next up, we're going to go
- [00:00:24.640] otherwise, next up, we're going to go over to actual materials and tools. And
- [00:00:28.230] over to actual materials and tools. And
- [00:00:28.240] over to actual materials and tools. And uh yeah, I'll see you guys in the next
- [00:00:29.750] uh yeah, I'll see you guys in the next
- [00:00:29.760] uh yeah, I'll see you guys in the next one.
Keyframes
- /workspace/academy/media/1WT5ZSi8q-1ysJiZ38d99FeTvNSpKKGqg/keyframes/last.jpg
- /workspace/academy/media/1WT5ZSi8q-1ysJiZ38d99FeTvNSpKKGqg/keyframes/t001.jpg
- /workspace/academy/media/1WT5ZSi8q-1ysJiZ38d99FeTvNSpKKGqg/keyframes/t002.jpg
- /workspace/academy/media/1WT5ZSi8q-1ysJiZ38d99FeTvNSpKKGqg/keyframes/t003.jpg
33. Materials-Overview
- title: Materials-Overview
- status: publish
- author: 0
- is_previewable: (empty)
- video_duration: 0h 0m 35s (raw {"hours":0,"minutes":0,"seconds":35})
- video_source_type: embedded
- drive_file_id:
1PP-wExX4o2NBBkTAjJS459Abx7IWDhYx(source_ref; not a public link) - transcript pending / keyframes pending / presentation extract pending
- video_source_url: (Drive preview omitted as a public link; file id kept as source_ref)
An Overview of the Materials & Tools section of the course.
Drive extract
- file_id:
1PP-wExX4o2NBBkTAjJS459Abx7IWDhYx - filename: 05 - Materials Intro.mp4
- kind: video
- local_path: /workspace/academy/media/1PP-wExX4o2NBBkTAjJS459Abx7IWDhYx/05 - Materials Intro.mp4
- source_ref: drive
1PP-wExX4o2NBBkTAjJS459Abx7IWDhYx· content_length 41401664 · original https://drive.google.com/file/d/1PP-wExX4o2NBBkTAjJS459Abx7IWDhYx/view - extract_status: done
- caption_source: drive_timedtext
- duration_s: 34.713991
- keyframe_count: 4
Transcript
- All righty guys, welcome to this next
- [00:00:02.389] All righty guys, welcome to this next
- [00:00:02.399] All righty guys, welcome to this next section where we'll be covering
- [00:00:03.909] section where we'll be covering
- [00:00:03.919] section where we'll be covering materials and tools. So, with the
- [00:00:06.390] materials and tools. So, with the
- [00:00:06.400] materials and tools. So, with the material side, we're going to be looking
- [00:00:07.590] material side, we're going to be looking
- [00:00:07.600] material side, we're going to be looking at what are some common materials we'll
- [00:00:09.509] at what are some common materials we'll
- [00:00:09.519] at what are some common materials we'll be using when vinyl cutting. Now, um
- [00:00:12.870] be using when vinyl cutting. Now, um
- [00:00:12.880] be using when vinyl cutting. Now, um yeah, there is a variation. I don't want
- [00:00:14.470] yeah, there is a variation. I don't want
- [00:00:14.480] yeah, there is a variation. I don't want to spoil it yet. We'll leave it for the
- [00:00:15.990] to spoil it yet. We'll leave it for the
- [00:00:16.000] to spoil it yet. We'll leave it for the video. And then we're also going to be
- [00:00:17.510] video. And then we're also going to be
- [00:00:17.520] video. And then we're also going to be looking at tools. So, kind of when
- [00:00:19.590] looking at tools. So, kind of when
- [00:00:19.600] looking at tools. So, kind of when you're actually applying these
- [00:00:20.950] you're actually applying these
- [00:00:20.960] you're actually applying these applications or the vinyls, but it's a
- [00:00:23.670] applications or the vinyls, but it's a
- [00:00:23.680] applications or the vinyls, but it's a handy set of tools to have to actually
- [00:00:25.670] handy set of tools to have to actually
- [00:00:25.680] handy set of tools to have to actually make the job easier and more efficient.
- [00:00:28.390] make the job easier and more efficient.
- [00:00:28.400] make the job easier and more efficient. But yeah, otherwise I'll check you guys
- [00:00:30.070] But yeah, otherwise I'll check you guys
- [00:00:30.080] But yeah, otherwise I'll check you guys in next video. Cheers.
Keyframes
- /workspace/academy/media/1PP-wExX4o2NBBkTAjJS459Abx7IWDhYx/keyframes/last.jpg
- /workspace/academy/media/1PP-wExX4o2NBBkTAjJS459Abx7IWDhYx/keyframes/t001.jpg
- /workspace/academy/media/1PP-wExX4o2NBBkTAjJS459Abx7IWDhYx/keyframes/t002.jpg
- /workspace/academy/media/1PP-wExX4o2NBBkTAjJS459Abx7IWDhYx/keyframes/t003.jpg
34. Material Types
- title: Material Types
- status: publish
- author: 0
- is_previewable: (empty)
- video_duration: 0h 0m 0s (raw {"hours":0,"minutes":0,"seconds":0})
- video_source_type: (empty)
Material Types
In this next lesson we will be looking at different materials used for vinyl cutting.
Printable / Adhesive Vinyl
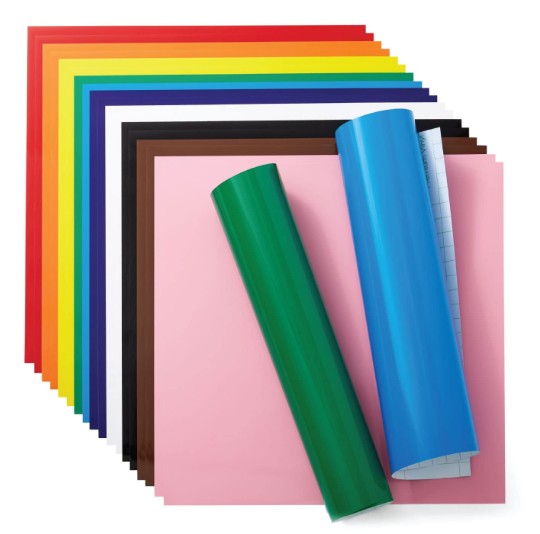
- Description
- Vinyl film with a pressure-sensitive adhesive backing. Available in various finishes (matte, gloss) and colors.
- Key Uses
- Stickers, decals, wall art, vehicle wraps, window graphics, general signage.
Heat Transfer Vinyl (HTV)
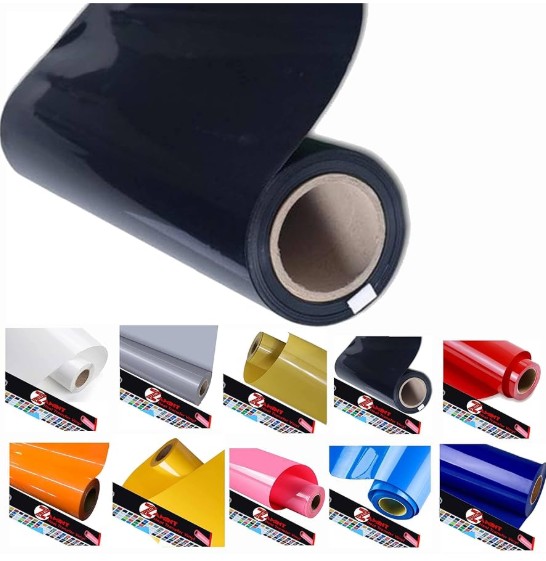
- Description
- A polyurethane material with a heat-activated adhesive on one side, designed to be applied to fabric using heat and pressure.
- Key Uses
- T-shirts, sportswear, hats, tote bags, fabric-based branding and personalization.
Reflective Vinyl
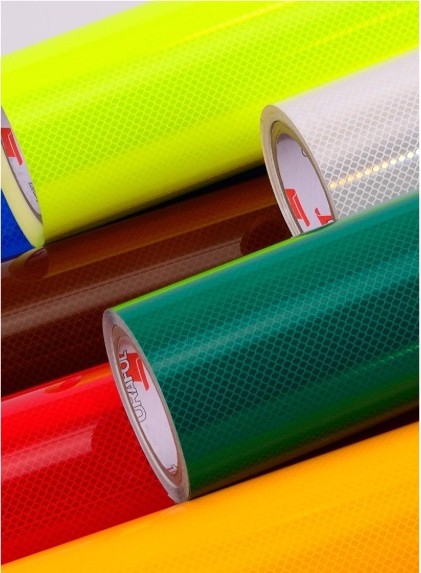
- Description
- Contains glass beads or microprismatic elements that reflect light back to the source, significantly enhancing visibility in low-light conditions.
- Key Uses
- Road signs, safety gear, vehicle striping, emergency vehicle markings.
Cardboard / Cardstock & Paper

- Description
- Non-vinyl materials cut using the machine's blade. They come in varying weights (g/m²) and textures.
- Key Uses
- Greeting cards, packaging prototypes, scrapbooking, 3D paper crafts.
Stencil Sheets
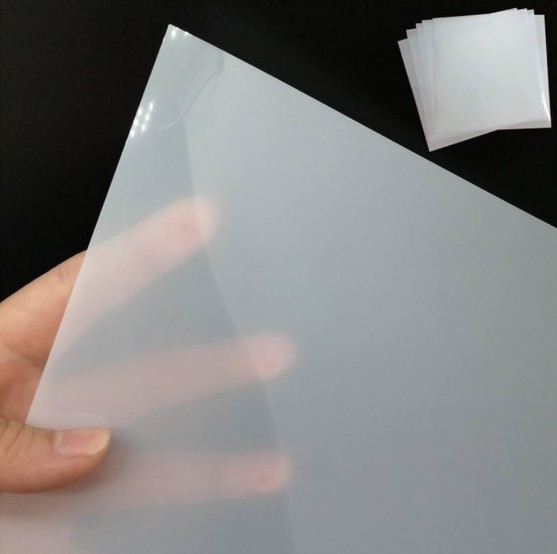
- Description
- Thin, flexible plastic or vinyl sheets used to create reusable masks. Often has a low-tack adhesive or no adhesive.
- Key Uses
- Spray painting masks, reusable stencils for crafts, marking objects.
Sandblast Vinyl

- Description
- A thick, highly durable, and flexible adhesive material designed to resist the abrasive force of sand or abrasive particles.
- Key Uses
- Stencils for etching glass, stone, marble, granite, or wood surfaces.
Transfer Tape (Application Tape)
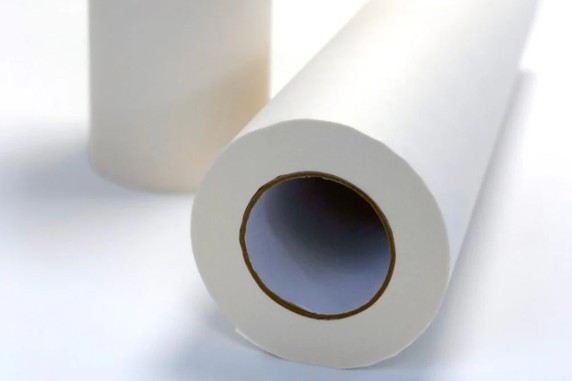
- Description
- An accessory (not a design material) with a temporary, low-tack adhesive used to lift and transfer cut adhesive vinyl designs to a final surface.
- Key Uses
- Used to apply Printable / Adhesive Vinyl designs without distorting spacing.
Industrial Uses
Printable / Adhesive Vinyl
Signage & Advertising: Large format printing for billboards, retail window displays, floor graphics, product labels, and fleet vehicle wraps (often using specialized cast or calendared vinyl for durability). Interior Design: Wall murals, decorative window film, and architectural signage.
Billboards

Window signage

Floor graphics
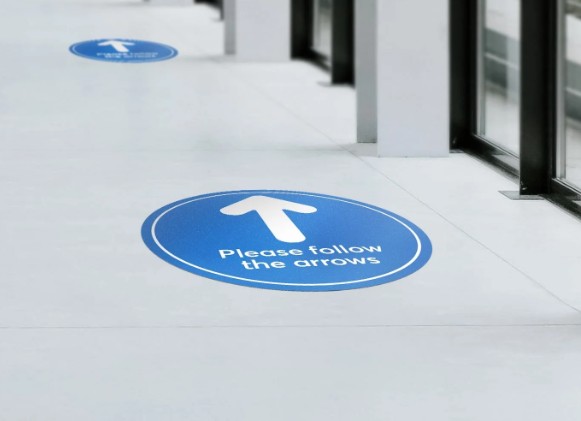
Product labels

Vehicle wraps

Wall murals

Heat Transfer Vinyl (HTV)
Apparel Manufacturing: Customizing uniforms for businesses (logos, employee names), professional sports jerseys, promotional merchandise, and creating specialized workwear (e.g., highly visible safety vests). Branding: Consistent application of company logos on fabric items.
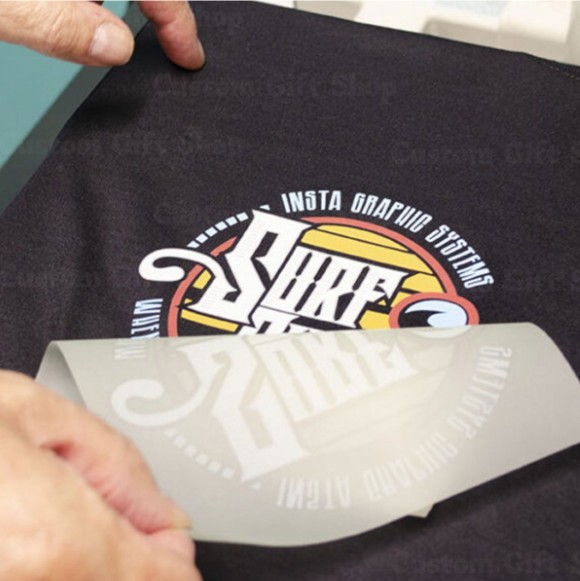
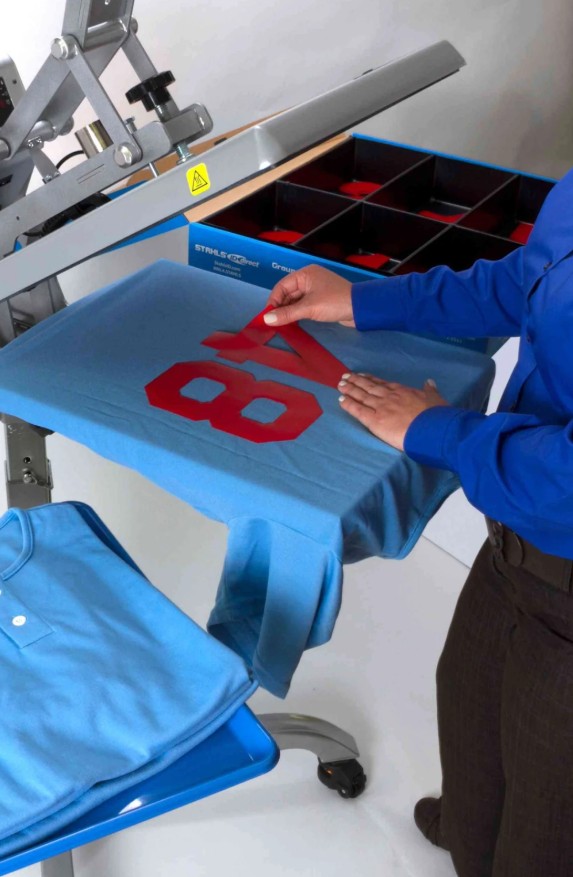

Reflective Vinyl
Traffic Safety: Mandated material for official road signs, traffic control devices, and highway markers. Vehicle Identification: Emergency vehicles (police, fire, ambulance) and utility vehicles for mandatory night visibility. Personal Protective Equipment (PPE): Applied to safety vests, helmets, and workwear.
Road signs

Emergency vehicles

Utility vehicles for night visibility

Personal Protective Equipment

Cardboard / Cardstock & Paper
Packaging Prototyping: Rapid creation of small-scale boxes, containers, and product displays for testing and visualization before mass production. Model Making: Architectural models, industrial design mock-ups, and structural paper engineering.
Packaging
Stencil Sheets
Industrial Marking: Creating durable, reusable stencils for marking crates, equipment, pavement, parking lots, and large machinery with safety warnings, serial numbers, or company logos. Surface Finishing: Masks for intricate painting or chemical finishing processes.
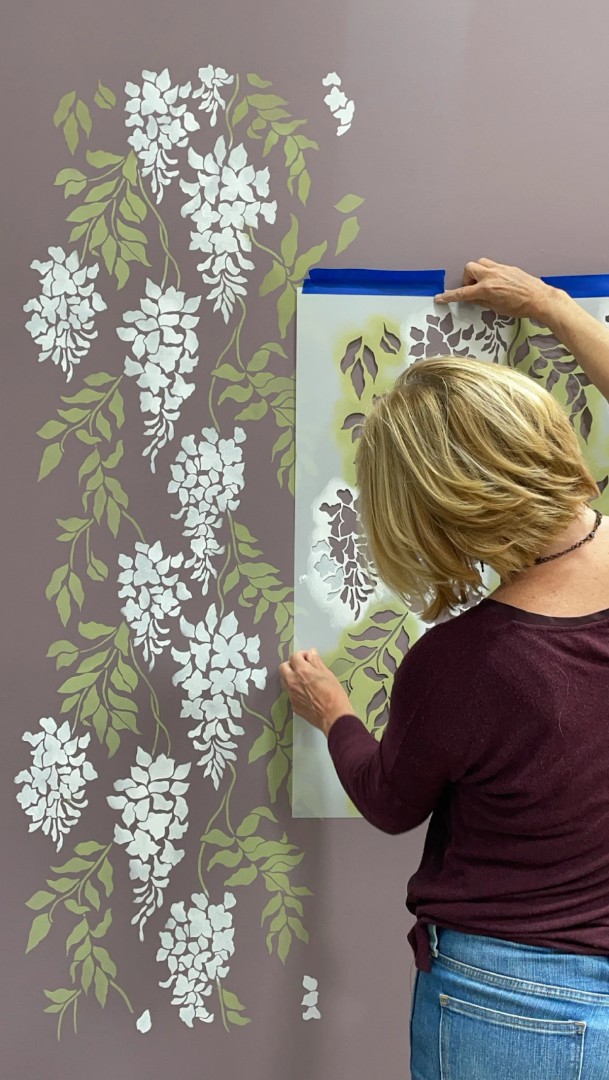
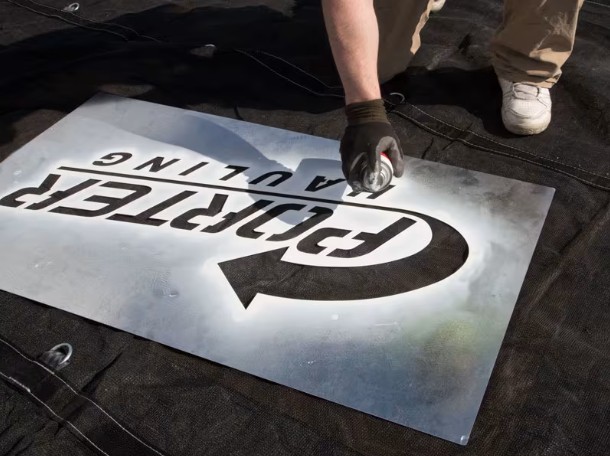
Sandblast Vinyl
Monument & Stone Work: Used by grave markers and countertop fabricators to mask areas of stone or glass that should remain untouched during abrasive blasting for lettering, decorative designs, or texture. Glass Etching: Creating highly precise frosted or etched designs on windows, mirrors, or glassware.
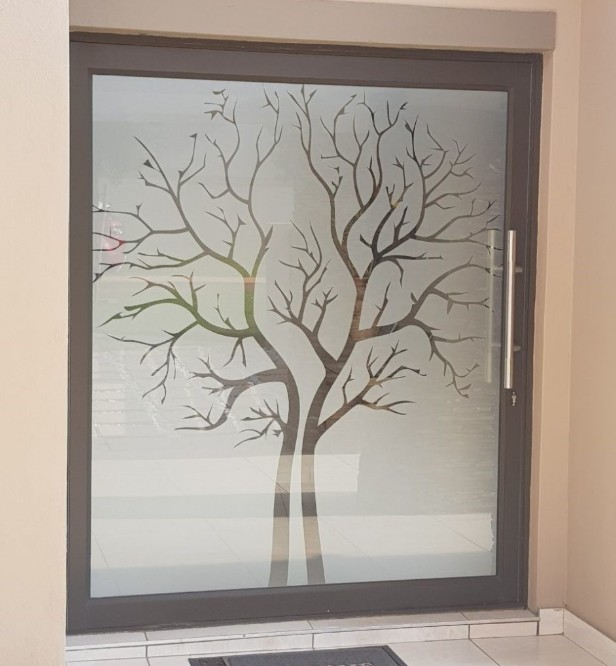
Gravestone

Transfer Tape (Application Tape)
Professional Installation: Ensures that large, multi-layered, or intricate adhesive vinyl graphics (like company vehicle logos or detailed window text) are installed perfectly aligned and spaced, maintaining a high level of professional finish.
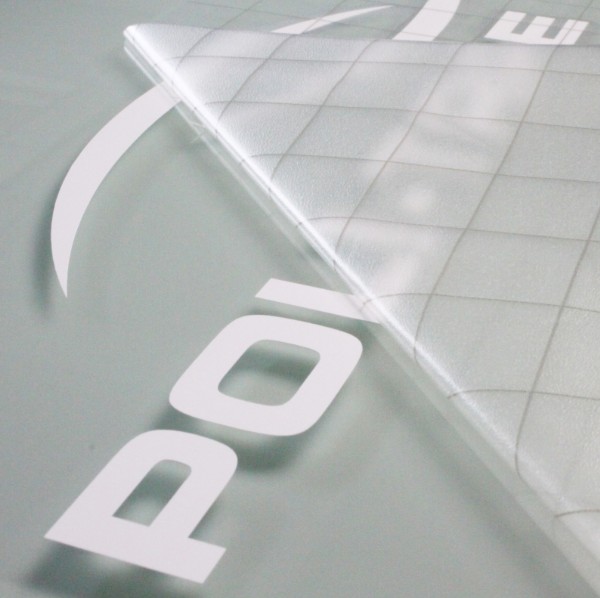
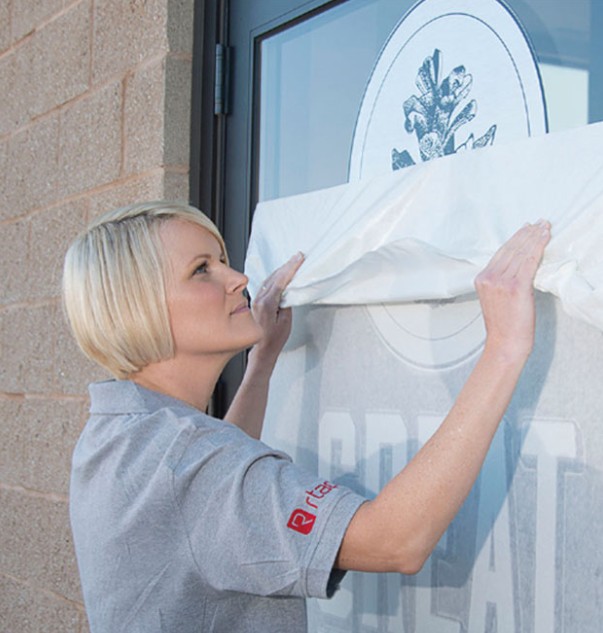
- If you would like to get your hands on a some of these materials, follow the link below.
-
Link
- https://buythis.co.za/printing-media
- https://buythis.co.za/screen-films
-
quizzes_following_this_lesson: 1 (full text in Quizzes)
- Material Types (5 questions)
35. Tool Types
- title: Tool Types
- status: publish
- author: 0
- is_previewable: (empty)
- video_duration: 0h 0m 0s (raw {"hours":0,"minutes":0,"seconds":0})
- video_source_type: (empty)
Tools
In this next lesson we will be looking at different tools used for vinyl cutting.
Tool Type
Vinyl Weeding Utensils
A category including various handheld tools with pointed or hooked ends.
Used for weeding-the removal of excess/negative vinyl from the backing or carrier sheet after cutting.
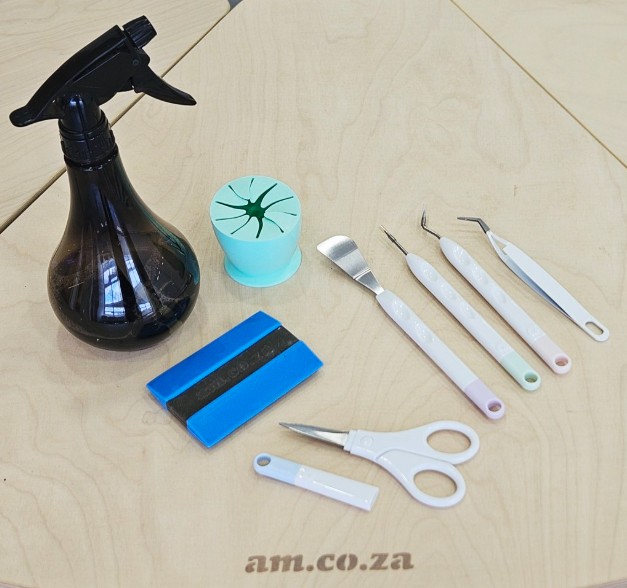
Squeegee
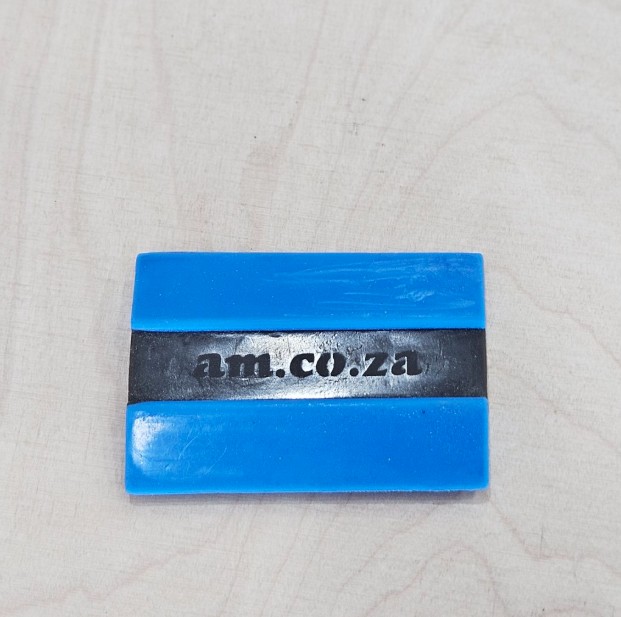
- Description
- A small, flat, semi-rigid applicator with a straight edge, often made of plastic or felt-covered plastic.
- Function
- Application/Burnishing: Used to firmly press vinyl onto the substrate or to press Transfer Tape onto the vinyl, smoothing out air bubbles and ensuring strong adhesion.
Tweezer
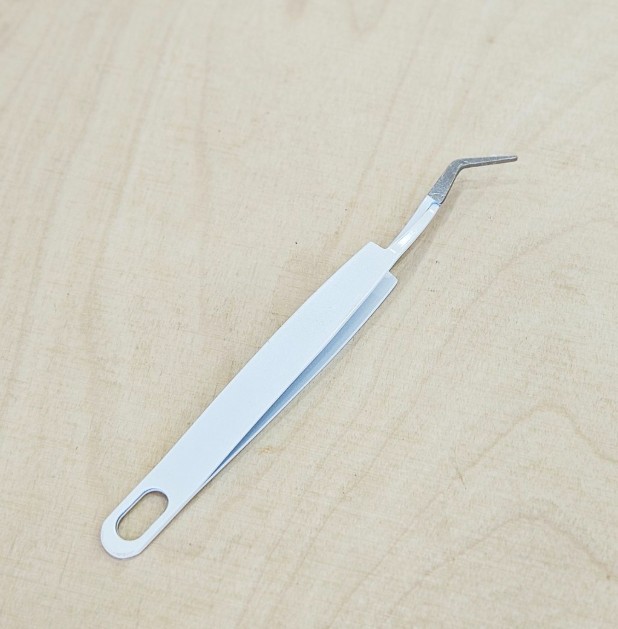
- Description
- A small, pincer-like tool, often with a fine point or broad tip.
- Function
- Precision Weeding & Placement: Excellent for picking up and removing very small vinyl pieces (like dots from an 'i' or centers of letters) or for carefully placing small design elements.
Scissors
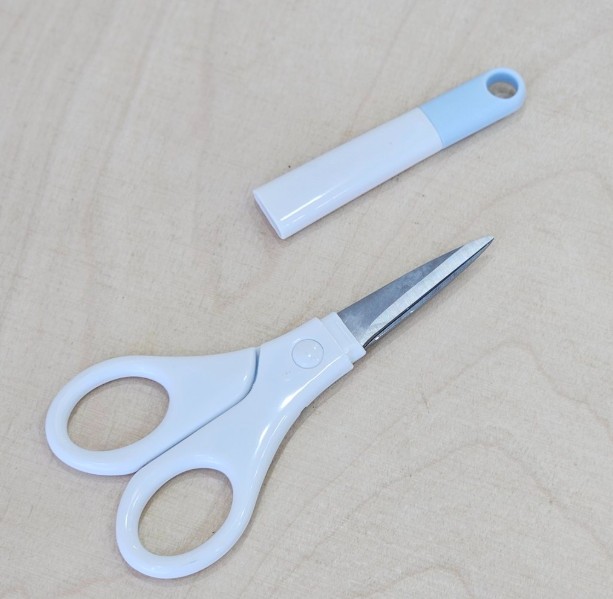
- Description
- Standard cutting tool.
- Function
- Prepping/Trimming: Used to rough-cut the vinyl sheet to size before/after the electronic cutter, or to trim away excess backing paper/transfer tape to reduce waste and bulk.
Pickers in various sizes
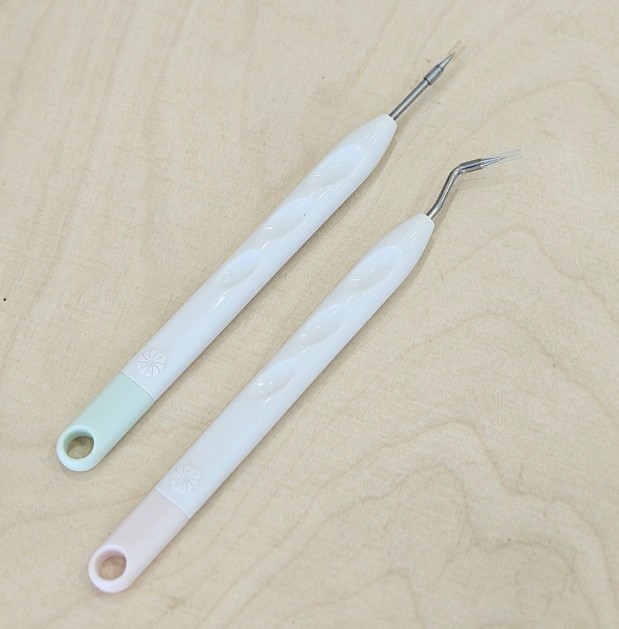
- Description
- Generic term for tools used to "pick" or remove vinyl, often referring to a set of weeder hooks, awls, or pins.
- Function
- Intricate Weeding: The sharp point allows the user to easily pierce and lift the edge of the waste vinyl, especially in tight corners or with thick materials or for poking air bubbles for a dry application).
Edge Picking Tool
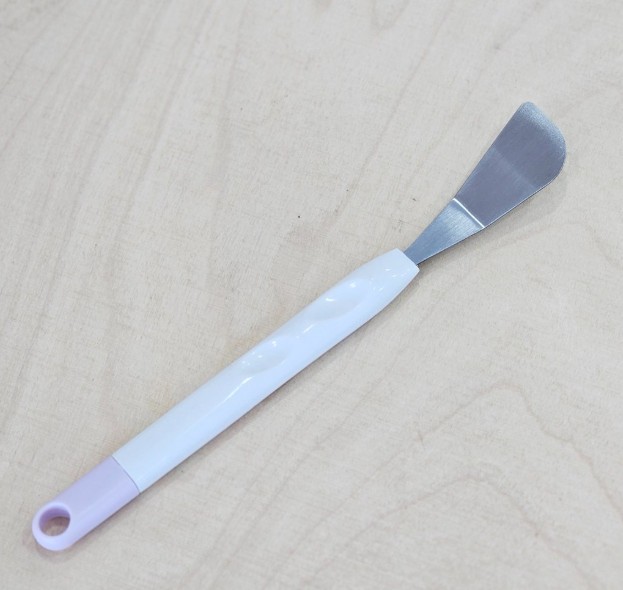
- Description
- Specifically refers to a tool with a flat edge or a specialized angle.
- Function
- Precision Edge Work: Used for beginning a weed by finding and lifting the initial edge of the waste vinyl.
Dustbin / Scrap Collector
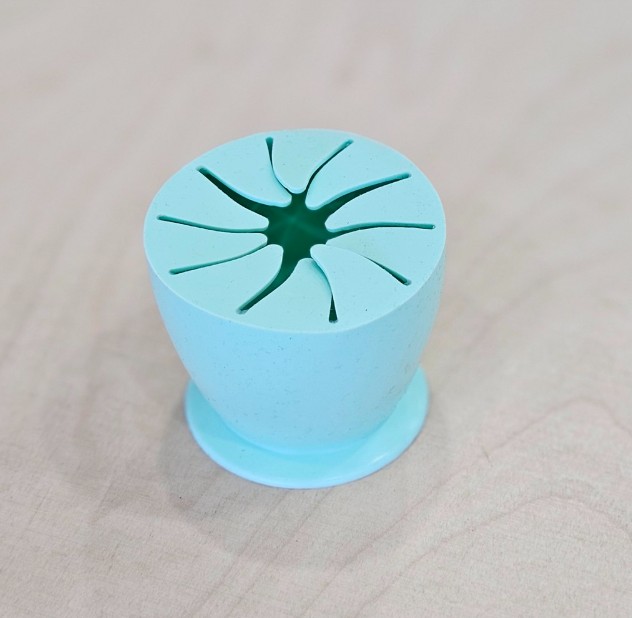
- Description
- A small, often silicone, receptacle for waste vinyl.
- Function
- Workspace Management: Provides a convenient, sticky, or flexible place to immediately discard small vinyl scraps during the weeding process, keeping the workspace clean and preventing static cling mess.
Water bottle (Spray Bottle) & Sunlight Liquid
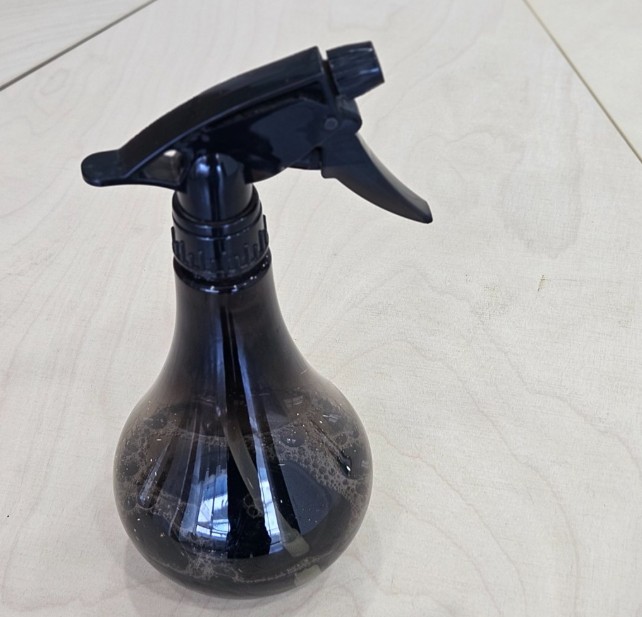
- Description
- A spray bottle filled with water and a tiny amount of mild dish soap (like Sunlight, a non-ammonia soap).
- Function
- Wet Application Method: The soapy water solution is misted onto the substrate (like glass or a vehicle panel) before applying adhesive vinyl. This delays the adhesive's bond, allowing the user to precisely position large graphics and squeegee out bubbles.
Heat Gun / Blow Torch

- Description
- Conforming Vinyl: this is critical for professionals working with vehicle wraps.
- Function
- Controlled heat is used to make cast vinyl soft and flexible, allowing it to conform and "stretch" around curves, rivets, and compound shapes without peeling back.
Where to Buy Vinyl Weeding Utensils
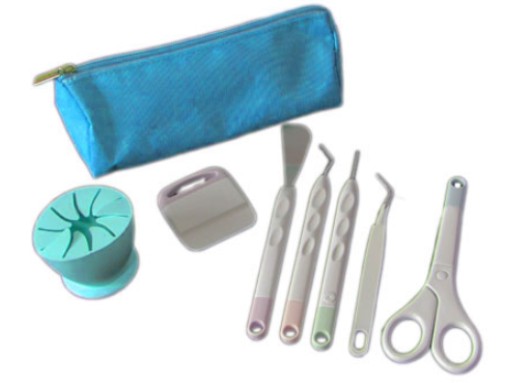
- If you would like to get your hands on a great starting kit that includes most of the Weeding Utensils covered above, follow the link below.
-
Link
-
quizzes_following_this_lesson: 1 (full text in Quizzes)
- Tool Types (7 questions)
36. Homework - Materials
- title: Homework - Materials
- status: publish
- author: 0
- is_previewable: (empty)
- video_duration: 0h 0m 0s (raw {"hours":0,"minutes":0,"seconds":0})
- video_source_type: (empty)
Goal: Achieve clean weeding and proper transfer tape application.
Assignment
- Intricate Weeding: Cut a small, intricate text design (at least 2 cm tall, using a font with small inner spaces like serifs or dots).
- Tool Mastery:
- Use your weeding hook to remove the large areas of excess vinyl.
- Use your tweezers or pickers to precisely remove the tiny inner pieces (e.g., inside the \'a\', \'o\', or \'e\').
- Transfer Prep: Apply transfer tape smoothly over the weeded design, ensuring you use the squeegee to firmly burnish the transfer tape onto the vinyl (known as \'pre-masking\') to prevent lifting during final application.
Submission
Submit two photos:
- One photo showing the weeded design with the waste vinyl collected in your scrap collector/dustbin (demonstrating clean workspace management).
- One close-up photo of the design with the transfer tape properly applied, showing no air bubbles underneath.
Submission Instructions:
Complete this practical then submit via email to the instructor at info@ambitious.co.za.
Keep up the practical skills!
37. Materials-Conclusion
- title: Materials-Conclusion
- status: publish
- author: 0
- is_previewable: (empty)
- video_duration: 0h 0m 45s (raw {"hours":0,"minutes":0,"seconds":45})
- video_source_type: embedded
- drive_file_id:
1FND8kSlGSn9HE9-RqFgAeTS5f9bxpVLr(source_ref; not a public link) - transcript pending / keyframes pending / presentation extract pending
- video_source_url: (Drive preview omitted as a public link; file id kept as source_ref)
(no lesson_content HTML in export — video-only or empty body; metadata above kept in full)
Drive extract
- file_id:
1FND8kSlGSn9HE9-RqFgAeTS5f9bxpVLr - filename: 05 - Meterials Outro.mp4
- kind: video
- local_path: /workspace/academy/media/1FND8kSlGSn9HE9-RqFgAeTS5f9bxpVLr/05 - Meterials Outro.mp4
- source_ref: drive
1FND8kSlGSn9HE9-RqFgAeTS5f9bxpVLr· content_length 54326310 · original https://drive.google.com/file/d/1FND8kSlGSn9HE9-RqFgAeTS5f9bxpVLr/view - extract_status: done
- caption_source: drive_timedtext
- duration_s: 45.603991
- keyframe_count: 6
Transcript
- Howdy guys. Well, that concludes our
- [00:00:02.550] Howdy guys. Well, that concludes our
- [00:00:02.560] Howdy guys. Well, that concludes our actual materials and tool section. So,
- [00:00:04.470] actual materials and tool section. So,
- [00:00:04.480] actual materials and tool section. So, just a quick summary. So, we in the
- [00:00:06.630] just a quick summary. So, we in the
- [00:00:06.640] just a quick summary. So, we in the materials, we covered what is different
- [00:00:08.710] materials, we covered what is different
- [00:00:08.720] materials, we covered what is different types we want to be using, what's common
- [00:00:11.030] types we want to be using, what's common
- [00:00:11.040] types we want to be using, what's common ones we'll be using with a vinyl cutter
- [00:00:12.549] ones we'll be using with a vinyl cutter
- [00:00:12.559] ones we'll be using with a vinyl cutter cuz obviously some ones is maybe a mix
- [00:00:14.310] cuz obviously some ones is maybe a mix
- [00:00:14.320] cuz obviously some ones is maybe a mix of print and so forth. And then also in
- [00:00:17.109] of print and so forth. And then also in
- [00:00:17.119] of print and so forth. And then also in the tool section, we looked at when
- [00:00:19.269] the tool section, we looked at when
- [00:00:19.279] the tool section, we looked at when you're finally applying these materials
- [00:00:21.109] you're finally applying these materials
- [00:00:21.119] you're finally applying these materials to your surface, what is great tools to
- [00:00:23.509] to your surface, what is great tools to
- [00:00:23.519] to your surface, what is great tools to have to get the job done nicely. But
- [00:00:26.150] have to get the job done nicely. But
- [00:00:26.160] have to get the job done nicely. But yeah, next up, we're going to be going
- [00:00:27.509] yeah, next up, we're going to be going
- [00:00:27.519] yeah, next up, we're going to be going into actual application. So, now we're
- [00:00:29.830] into actual application. So, now we're
- [00:00:29.840] into actual application. So, now we're going to look at how do we use these t
- [00:00:31.830] going to look at how do we use these t
- [00:00:31.840] going to look at how do we use these t materials and these tools to actually
- [00:00:34.310] materials and these tools to actually
- [00:00:34.320] materials and these tools to actually apply these things on different
- [00:00:37.350] apply these things on different
- [00:00:37.360] apply these things on different um surfaces. But yeah, I hope you guys
- [00:00:40.389] um surfaces. But yeah, I hope you guys
- [00:00:40.399] um surfaces. But yeah, I hope you guys enjoy and I'll see you guys in the next
- [00:00:41.590] enjoy and I'll see you guys in the next
- [00:00:41.600] enjoy and I'll see you guys in the next one. Cheers.
Keyframes
- /workspace/academy/media/1FND8kSlGSn9HE9-RqFgAeTS5f9bxpVLr/keyframes/last.jpg
- /workspace/academy/media/1FND8kSlGSn9HE9-RqFgAeTS5f9bxpVLr/keyframes/t001.jpg
- /workspace/academy/media/1FND8kSlGSn9HE9-RqFgAeTS5f9bxpVLr/keyframes/t002.jpg
- /workspace/academy/media/1FND8kSlGSn9HE9-RqFgAeTS5f9bxpVLr/keyframes/t003.jpg
- /workspace/academy/media/1FND8kSlGSn9HE9-RqFgAeTS5f9bxpVLr/keyframes/t004.jpg
- /workspace/academy/media/1FND8kSlGSn9HE9-RqFgAeTS5f9bxpVLr/keyframes/t005.jpg
38. Application-Overview
- title: Application-Overview
- status: publish
- author: 0
- is_previewable: (empty)
- video_duration: 0h 0m 27s (raw {"hours":0,"minutes":0,"seconds":27})
- video_source_type: embedded
- drive_file_id:
1DPPL5hWgwAJCe2MqMOb3YRsLlcDF9J9g(source_ref; not a public link) - transcript pending / keyframes pending / presentation extract pending
- video_source_url: (Drive preview omitted as a public link; file id kept as source_ref)
An overview of the application section of the course.
Drive extract
- file_id:
1DPPL5hWgwAJCe2MqMOb3YRsLlcDF9J9g - filename: 06 - Application Intro.mp4
- kind: video
- local_path: /workspace/academy/media/1DPPL5hWgwAJCe2MqMOb3YRsLlcDF9J9g/06 - Application Intro.mp4
- source_ref: drive
1DPPL5hWgwAJCe2MqMOb3YRsLlcDF9J9g· content_length 31671393 · original https://drive.google.com/file/d/1DPPL5hWgwAJCe2MqMOb3YRsLlcDF9J9g/view - extract_status: done
- caption_source: drive_timedtext
- duration_s: 26.633333
- keyframe_count: 4
Transcript
- Howdy guys. Okay, welcome to the next
- [00:00:02.310] Howdy guys. Okay, welcome to the next
- [00:00:02.320] Howdy guys. Okay, welcome to the next section where we'll be looking at
- [00:00:03.990] section where we'll be looking at
- [00:00:04.000] section where we'll be looking at application. So now when it comes to
- [00:00:06.789] application. So now when it comes to
- [00:00:06.799] application. So now when it comes to actual application, there's going to be
- [00:00:08.390] actual application, there's going to be
- [00:00:08.400] actual application, there's going to be some slight differences depending on
- [00:00:10.070] some slight differences depending on
- [00:00:10.080] some slight differences depending on what you're applying your let's say
- [00:00:11.830] what you're applying your let's say
- [00:00:11.840] what you're applying your let's say vinyl to. So maybe from a wall to a
- [00:00:15.430] vinyl to. So maybe from a wall to a
- [00:00:15.440] vinyl to. So maybe from a wall to a window, the application is going to vary
- [00:00:17.029] window, the application is going to vary
- [00:00:17.039] window, the application is going to vary a bit, but that's what we'll be covering
- [00:00:19.269] a bit, but that's what we'll be covering
- [00:00:19.279] a bit, but that's what we'll be covering in this video or just this section. And
- [00:00:21.910] in this video or just this section. And
- [00:00:21.920] in this video or just this section. And then yeah, I'll catch you guys in the
- [00:00:23.189] then yeah, I'll catch you guys in the
- [00:00:23.199] then yeah, I'll catch you guys in the next video.
Keyframes
- /workspace/academy/media/1DPPL5hWgwAJCe2MqMOb3YRsLlcDF9J9g/keyframes/last.jpg
- /workspace/academy/media/1DPPL5hWgwAJCe2MqMOb3YRsLlcDF9J9g/keyframes/t001.jpg
- /workspace/academy/media/1DPPL5hWgwAJCe2MqMOb3YRsLlcDF9J9g/keyframes/t002.jpg
- /workspace/academy/media/1DPPL5hWgwAJCe2MqMOb3YRsLlcDF9J9g/keyframes/t003.jpg
39. Application Process
- title: Application Process
- status: publish
- author: 0
- is_previewable: (empty)
- video_duration: 0h 0m 0s (raw {"hours":0,"minutes":0,"seconds":0})
- video_source_type: (empty)
List of Common Vinyl Applications
These are just a few common vinyl applications, but keep in mind that there are many more that we will not be covering here.
1: Vehicle Decals & Lettering
Creating names, numbers, logos, and custom graphics for cars, trucks, boats, and motorcycles. Used for company branding, fleet vehicle identification, and personal customization.
2: Window Graphics
Cutting out text, business hours, logos, and advertising graphics applied directly to storefront windows and glass doors. Frosted/Etched Vinyl is used for privacy and decorative effects.
3: Wall Decals & Home Decor
Large quotes, decorative patterns, murals, and graphic elements cut from vinyl and applied to interior walls.
4: Product Labels & Branding
Creating die-cut labels, temporary logos, serial numbers, and warning/instructional stickers for products, packaging, and equipment.
5: Banners & Rigid Signage
Cutting large vinyl letters and graphics that are applied to blank sign substrates like coroplast (yard signs) or PVC boards (sandwich boards).
Applications Process
The General Application Process
The decals you cut will typically come as a "sandwich" of three layers:
Transfer Tape/Masking: The top, clear or paper layer that holds the vinyl pieces together.
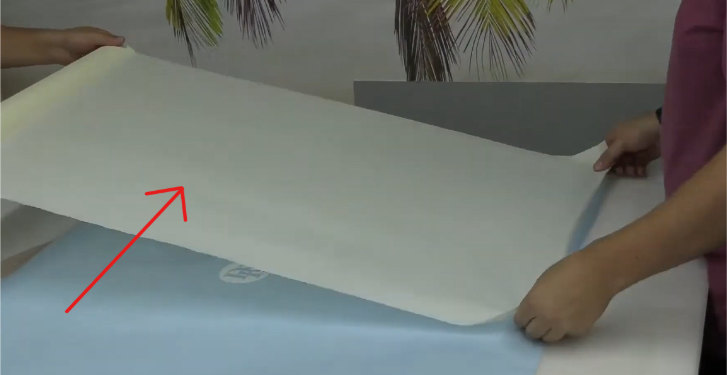
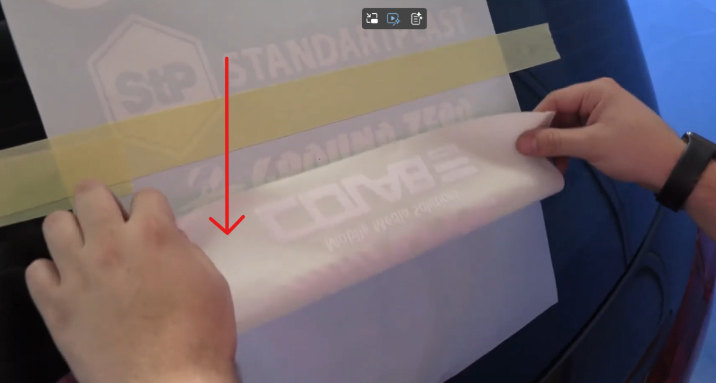
Vinyl Decal: The actual cut design.
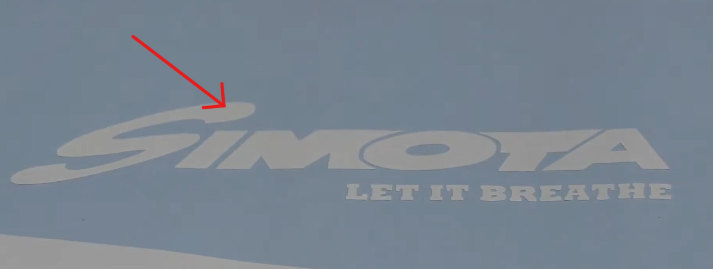
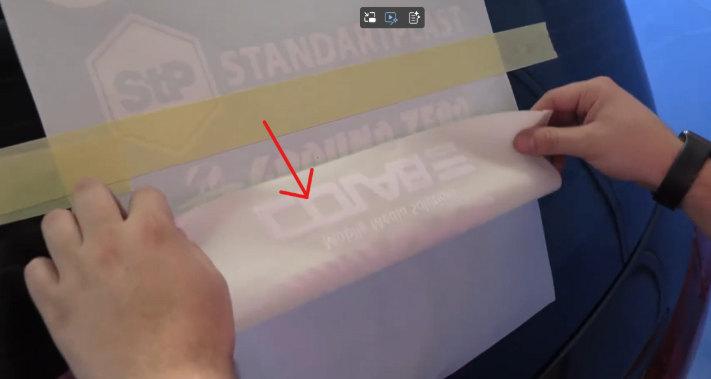
Backing Paper (Release Liner): The bottom, waxy paper that protects the adhesive.
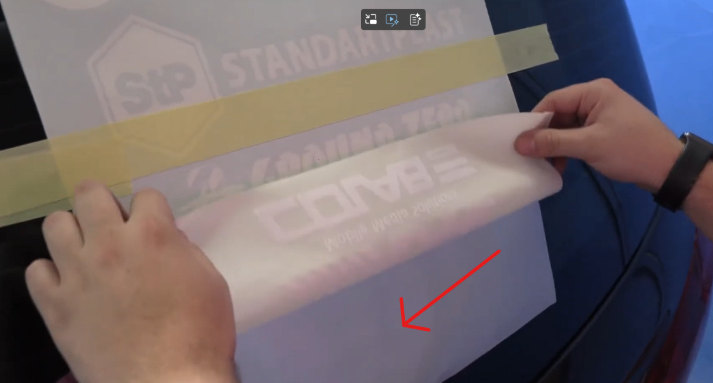
Required Tools:
- Measuring Tape / Ruler
- Masking Tape (for the hinge)
- Squeegee (or a credit card wrapped in a soft cloth)
- Cleaning Solution: Isopropyl alcohol (or a mix of water and mild dish soap) and a clean, lint-free cloth.
Hinge Method - Dry
Dry Application
Pros
Faster, less mess, instant adhesion.
Con
Once it touches, placement is permanent.
Step-by-Step Guide:
1. Prep the Surface
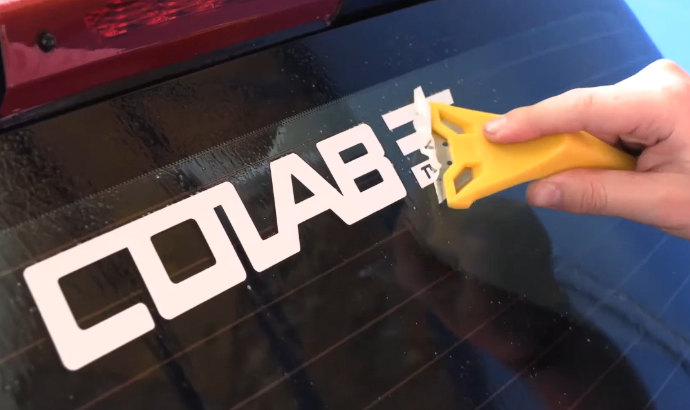
Thoroughly clean the entire surface (vehicle, window, wall, product) with your cleaner to remove all dust, dirt, and oils. Wipe dry with a lint-free cloth. Crucial: The surface must be completely dry.
2. Position the Decal
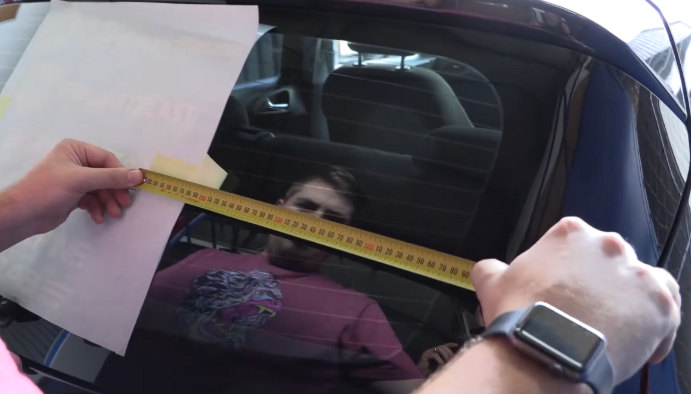
Lay the decal (with all three layers intact) on the surface exactly where you want it. Use a tape measure to ensure it's centered and straight. Secure it with a small piece of masking tape.
3. Create the Hinge
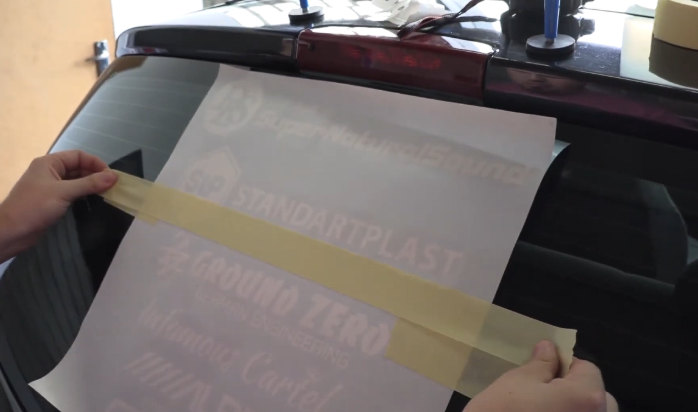
Once the position is perfect, place a long strip of masking tape vertically or horizontally across the middle of the decal. This is your "hinge."
4. Cut and Peel
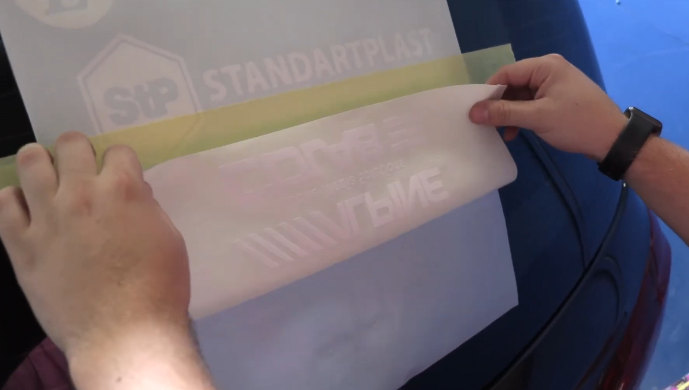
If the hinge is horizontal, fold one half of the decal back over the hinge.
Slowly and carefully peel the backing paper off, exposing the adhesive on the vinyl.
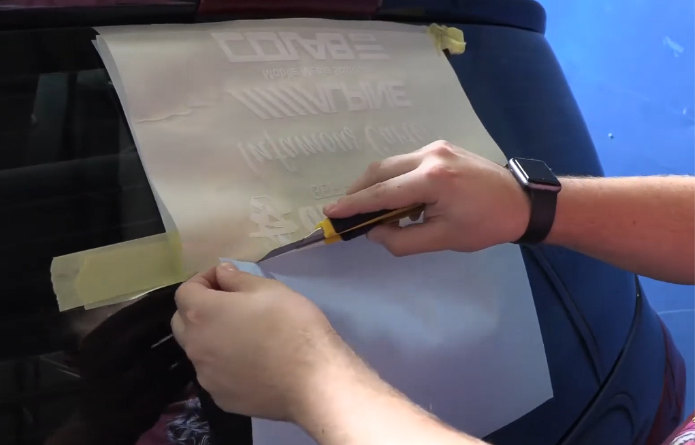
Cut the exposed backing paper away with scissors/knife and discard it.
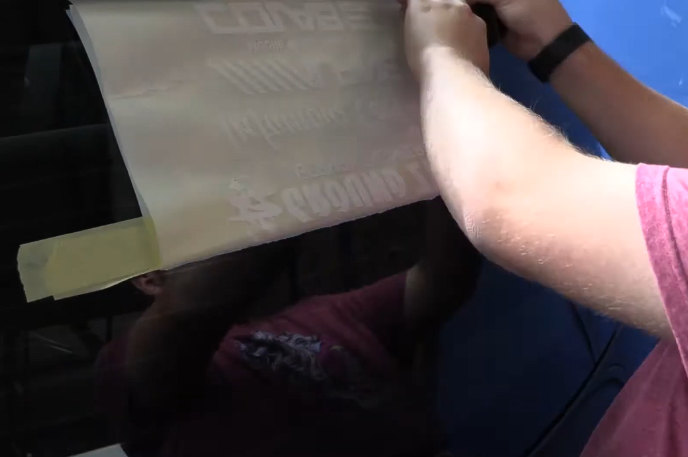
5. Apply the First Half
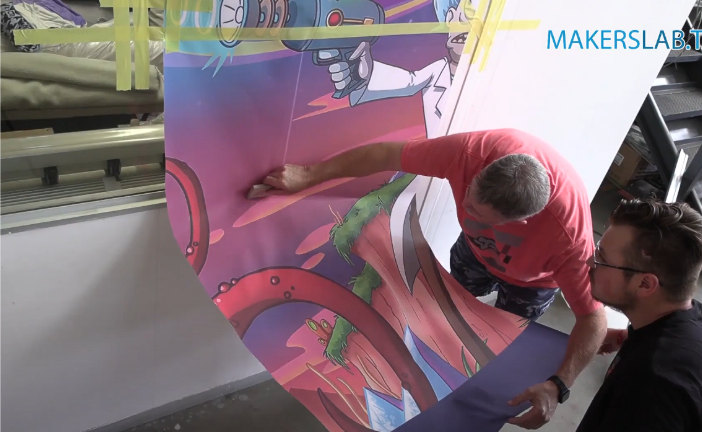
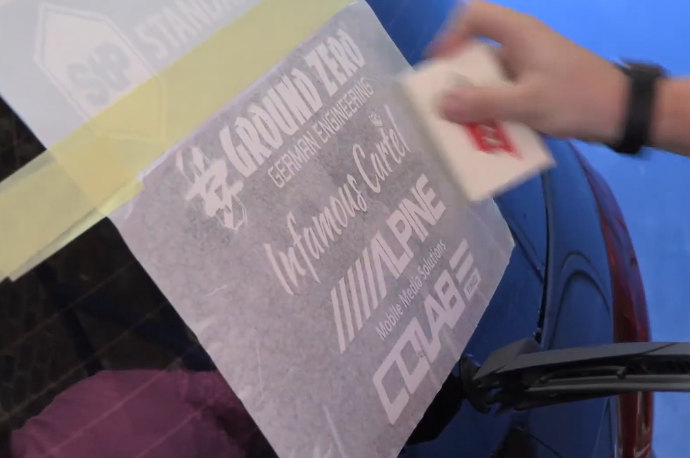
Hold the exposed vinyl taut, and using your squeegee, firmly press the vinyl onto the surface. Start at the hinge (the center line) and work outward with overlapping strokes.
6. Apply the Second Half
Remove the hinge tape. Fold the un-applied half of the decal back. Slowly peel off the remaining backing paper. Squeegee this half down, again starting from the center and working outward.
7. Remove Transfer Tape
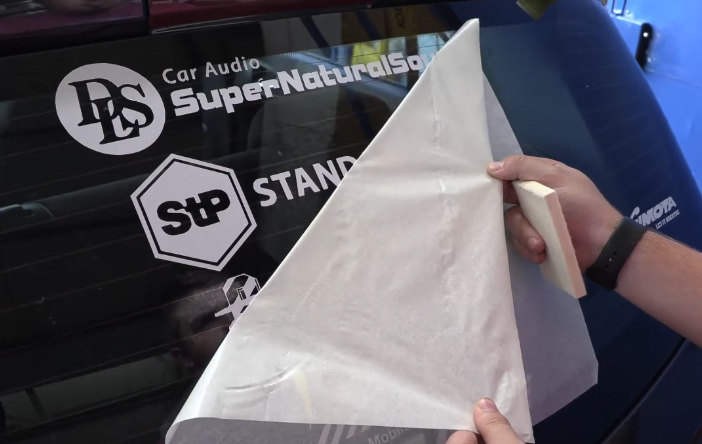
Slowly and carefully peel the top transfer tape off, pulling it back against itself at a 180-degree angle. If any part of the vinyl lifts with the tape, stop, squeegee it back down firmly, and continue peeling slowly.
8. Cure & Finish
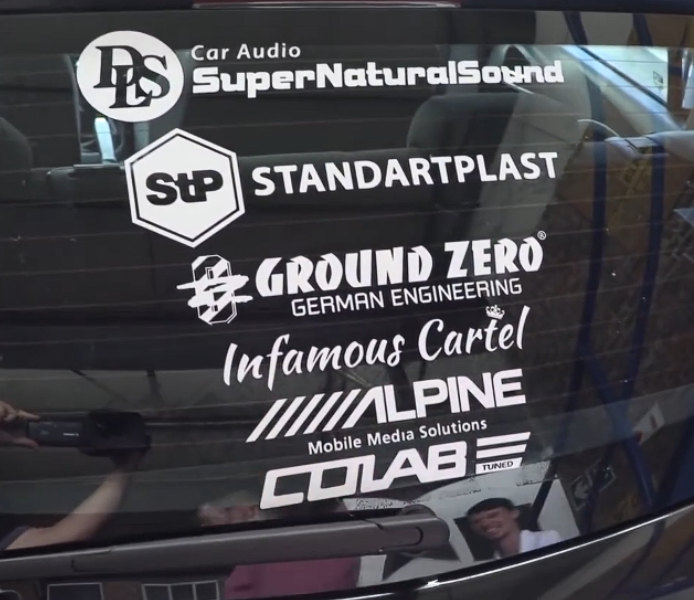
Once the transfer tape is off, give the entire vinyl design a final, firm rub with a cloth or squeegee. Allow the adhesive to cure (set) for 24-72 hours before exposing it to water or extreme cleaning.
Wet Method Steps
Wet Application
Pros
Allows for repositioning and easy removal of air bubbles.
Con
Requires more time to fully dry and cure (up to 48 hours).
Step-by-Step Guide:
1 - 4. Repeat
Follow Steps 1-4 (Clean, Position, Hinge, Remove Backing).
5. Apply the First Half
Before lowering the vinyl, lightly mist the glass surface with an application fluid (water with a drop of dish soap).
Lower the exposed vinyl onto the wet surface. It should slide easily.
Once positioned, firmly squeegee the water out from the center to the edges.
6. Apply the Second Half
Remove the hinge tape. Fold the un-applied half of the decal back.
Repeat step 5 on the second half of the vinyl.
Wait 15-30 minutes for the water to start evaporating before removing the transfer tape (Step 7).
7. Remove Transfer Tape
Slowly and carefully peel the top transfer tape off, pulling it back against itself at a 180-degree angle. If any part of the vinyl lifts with the tape, stop, squeegee it back down firmly, and continue peeling slowly.
8. Cure & Finish
Once the transfer tape is off, give the entire vinyl design a final, firm rub with a cloth or squeegee. Allow the adhesive to cure (set) for 48-72 hours before exposing it to water or extreme cleaning.
Specific Application Considerations
While the Hinge Method is universal, here's how the different applications vary:
Vehicle Decals & Lettering

- Temperature: Apply in a shaded area when the temperature is between 10°C to 32°C).
- Curved Surfaces: For complex curves (like bumpers or mirrors), you may need a heat gun or hair dryer on a low setting to gently stretch and conform the vinyl to the shape as you squeegee. Be cautious not to overheat.
- Method: Dry Application is most common for standard vehicle vinyl.
Wall Decals & Home Decor
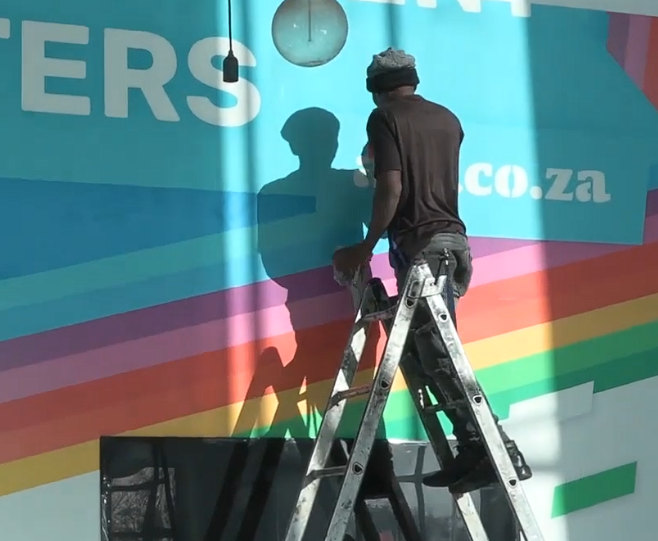
-
Surface Check: Walls must be primed and painted with a cured paint (wait at least 2 weeks after painting). Matte or flat paints can make adhesion difficult.
- Why should a freshly painted wall be left to cure for at least two weeks before applying a wall decal?
- The paint releases gasses ("off-gassing") that can cause bubbles and adhesion failure under the vinyl
-
Glue: Wallpaper adhesive could also be used if the vinyl struggles to stick to the surface.
- Cleaning: Use a mild cleaner or a wipe-down with Isopropyl Alcohol. Avoid harsh cleaners that leave residue.
- Method: Dry Application is standard. The Hinge Method is essential for keeping text and graphics straight.
Product Labels & Branding
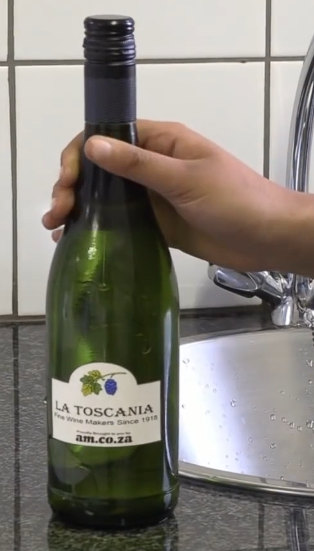
- Surface: Usually small items like mugs, tumblers, or packaging. Clean thoroughly, as finger oils are common on these items.
- Method: Often applied by hand without the "hinge" if they are very small. For logos or text, use the Dry Hinge Method for alignment.
- Curved Products (Mugs/Bottles): Cut the transfer tape around the design so you can make relief cuts in the transfer tape (not the vinyl) to help it bend without wrinkling.
Banners & Rigid Signage
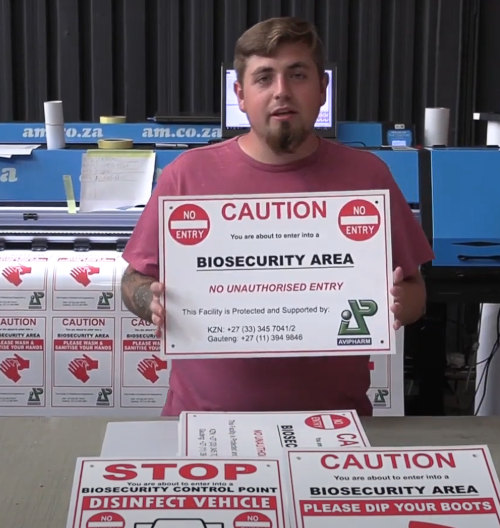
- Surface: Materials like Coroplast, PVC, or aluminum. Prep is simple: a good wipe-down with Isopropyl Alcohol.
- Method: Dry Hinge Method is standard for lettering and logos. For applying to plastic sign faces (like acrylic), the Wet Method is often recommended to prevent static and allow for easier repositioning.
- Alignment: Due to the size, always use a measuring tape and level to set your initial placement marks before creating the hinge.
Advanced Applications & Pro Tips
Vinyl Weeding Utensils (Hook/Awl)
- Sign Production Efficiency: For large-volume sign shops, ergonomic, sharp weeders significantly speed up the weeding of large lettering jobs, directly impacting production time and cost.
- Pro Tip: When weeding, pull the excess vinyl back at a sharp angle (close to 180 degrees) across itself to minimize the chance of lifting the actual design pieces.
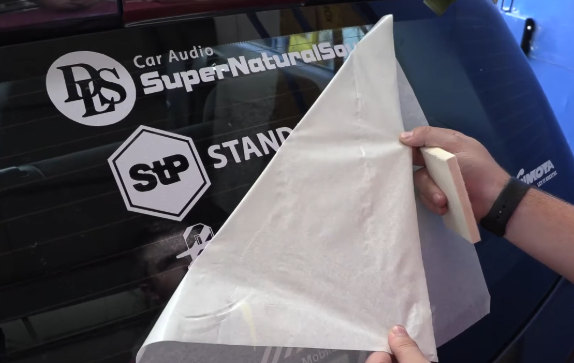
Squeegee (Felt-Edge & Micro-Squeegees)
- Vehicle Wraps & Window Graphics: Professionals use different flexibility squeegees for specific tasks: hard plastic for firm pressure on flat surfaces; felt-tipped for protecting delicate printed vinyl; and micro-squeegees for tucking vinyl into narrow channels, around seals, and under door handles on vehicles.
Silicone Rubber
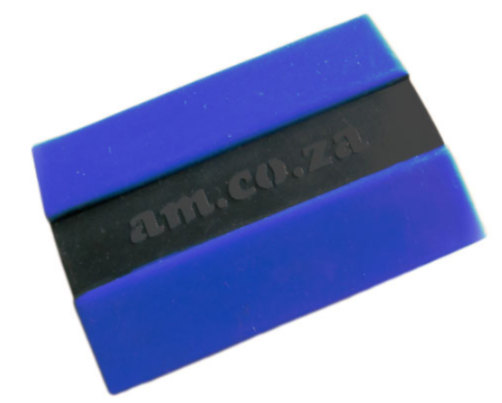
Felt
Micro
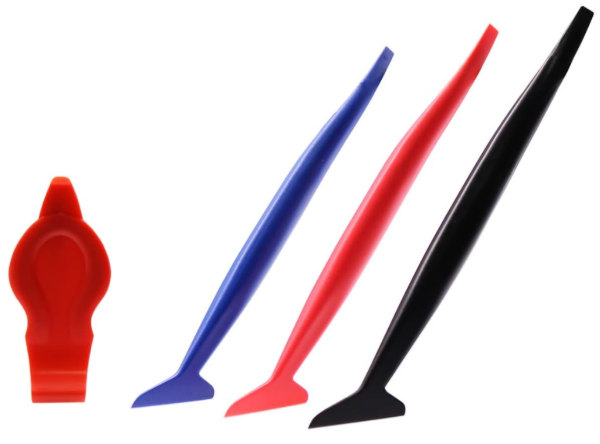
Tweezers (Reverse-Grip)
- Intricate Detail Work (e.g., electronic boards/tiny decals): Reverse-grip tweezers (which stay closed until squeezed) are often preferred as they can grasp a tiny piece of vinyl firmly without hand fatigue, which is crucial for multi-layered or highly detailed industrial labels.
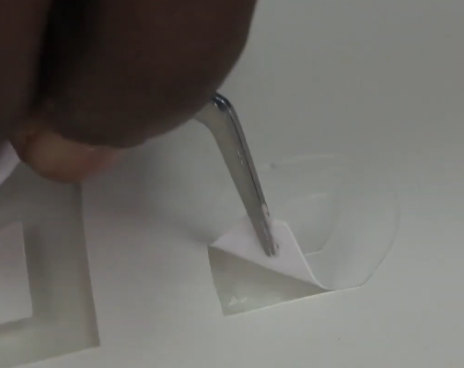
Water Bottle & Sunlight Liquid (Wet Method)
- Flawless Large Decals: This is essential for installing large adhesive graphics onto non-porous surfaces like glass, metal, or smooth plastic. The soapy solution acts as a temporary lubricant, preventing permanent, crooked placement and allowing for easy repositioning and bubble-free installation. Pro Tip: Use only 1-2 drops of pure, non-moisturizing dish soap per liter of water. Too much soap will prevent the adhesive from ever bonding properly.
Edge Picking Tool (Pin Pen)
- Bubble Control: In professional dry applications, a specialized pin-pen or a piercing tool is used to gently poke a microscopic hole at the edge of an air bubble, allowing the air to be pushed out with a squeegee without tearing or damaging the film.
Heat Gun / Blow Torch (Accessory)
- Conforming Vinyl: this is critical for professionals working with vehicle wraps. Controlled heat is used to make cast vinyl soft and flexible, allowing it to conform and "stretch" around curves, rivets, and compound shapes without peeling back.
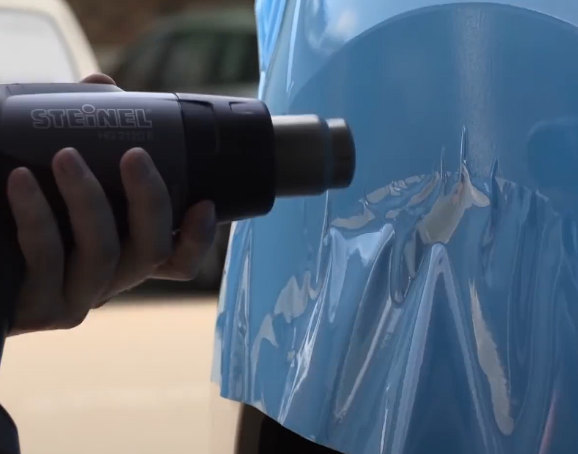
Note: when it comes to the vinyl applications, your first few times will most likely be challenging and not look the best.
But as you keep practising you will very quickly find an improvement, this is one of those skills that you need practical experience in for you to better understand the process.
- quizzes_following_this_lesson: 1 (full text in Quizzes)
- Application Process (8 questions)
40. Application Checklist
- title: Application Checklist
- status: publish
- author: 0
- is_previewable: (empty)
- video_duration: 0h 0m 0s (raw {"hours":0,"minutes":0,"seconds":0})
- video_source_type: (empty)
Application Checklist
Vinyl Cutting Course by Ambitious Academy
In the beginning of a new process having a sort of checklist can be very helpful, so we’ve created a basic check list for the application that you are able to download and print.
This checklist will come in very handy, but eventually you should be able to run through the process without having to reference it.
Find Checklist Ready for Download by clicking this Link
41. Multicolored Vinyl Application
- title: Multicolored Vinyl Application
- status: publish
- author: 0
- is_previewable: (empty)
- video_duration: 0h 13m 47s (raw {"hours":0,"minutes":13,"seconds":47})
- video_source_type: embedded
- youtube_id:
SNK4tzJDEgU— https://www.youtube.com/watch?v=SNK4tzJDEgU
In this demo video we will be looking at multicolored vinyl applications done on chromadek.
42. Vehicle Wrap Application
- title: Vehicle Wrap Application
- status: publish
- author: 0
- is_previewable: (empty)
- video_duration: 0h 6m 56s (raw {"hours":0,"minutes":6,"seconds":56})
- video_source_type: embedded
- youtube_id:
AclISf8stkM— https://www.youtube.com/watch?v=AclISf8stkM
In this demo video we will be looking at a vehicle wrap application.
43. Vehicle Vinyl Application
- title: Vehicle Vinyl Application
- status: publish
- author: 0
- is_previewable: (empty)
- video_duration: 0h 2m 59s (raw {"hours":0,"minutes":2,"seconds":59})
- video_source_type: embedded
- youtube_id:
iHQYZJtmpPg— https://www.youtube.com/watch?v=iHQYZJtmpPg
In this demo video we will be looking at a vehicle vinyl application done at AM.CO.ZA
44. Glass Application - Wet
- title: Glass Application - Wet
- status: publish
- author: 0
- is_previewable: (empty)
- video_duration: 0h 8m 25s (raw {"hours":0,"minutes":8,"seconds":25})
- video_source_type: embedded
- youtube_id:
qlAwSHdxxpA— https://www.youtube.com/watch?v=qlAwSHdxxpA
In this demo video we will be looking at a wet glass application done at AM.CO.ZA
45. Wall Application
- title: Wall Application
- status: publish
- author: 0
- is_previewable: (empty)
- video_duration: 0h 7m 58s (raw {"hours":0,"minutes":7,"seconds":58})
- video_source_type: embedded
- youtube_id:
x65K8oFs0sI— https://www.youtube.com/watch?v=x65K8oFs0sI
In this demo video we will be looking at a wall application.
46. Wall and Window Application
- title: Wall and Window Application
- status: publish
- author: 0
- is_previewable: (empty)
- video_duration: 0h 11m 24s (raw {"hours":0,"minutes":11,"seconds":24})
- video_source_type: embedded
- youtube_id:
nzOf62dSklI— https://www.youtube.com/watch?v=nzOf62dSklI
In this demo video we will be looking at a wall and window application done at AM.CO.ZA
47. Wood Application
- title: Wood Application
- status: publish
- author: 0
- is_previewable: (empty)
- video_duration: 0h 10m 54s (raw {"hours":0,"minutes":10,"seconds":54})
- video_source_type: embedded
- youtube_id:
wSgtnxyUkuM— https://www.youtube.com/watch?v=wSgtnxyUkuM
In this demo video we will be looking at a wood application.
48. ABS Sheeting Application
- title: ABS Sheeting Application
- status: publish
- author: 0
- is_previewable: (empty)
- video_duration: 0h 7m 26s (raw {"hours":0,"minutes":7,"seconds":26})
- video_source_type: embedded
- youtube_id:
iyueTMId9XA— https://www.youtube.com/watch?v=iyueTMId9XA
In this demo video we will be looking at ABS Sheeting application.
49. Homework - Applications
- title: Homework - Applications
- status: publish
- author: 0
- is_previewable: (empty)
- video_duration: 0h 0m 0s (raw {"hours":0,"minutes":0,"seconds":0})
- video_source_type: (empty)
Goal: Successfully execute the core Dry Hinge Method on a small scale.
Assignment
- Surface Prep: Select a small, flat, non-porous surface (e.g., a ceramic tile, a water bottle, or a piece of acrylic) and thoroughly clean it using isopropyl alcohol.
- Execution: Use the weeded decal from Homework 4. Apply it to your surface using the Dry Hinge Method. Ensure you follow all eight steps:
- Position and measure for straightness.
- Apply the central masking tape hinge.
- Remove the backing paper in two halves.
- Squeegee firmly from the center outward.
- Remove the transfer tape at a 180-degree angle.
Submission
Submit one clear photo of the final applied decal. The decal must be straight, bubble-free, and fully adhered to the surface.
Submission Instructions:
Complete this practical then submit via email to the instructor at info@ambitious.co.za.
Keep up the practical skills!
50. Application-Conclusion
- title: Application-Conclusion
- status: publish
- author: 0
- is_previewable: (empty)
- video_duration: 0h 0m 26s (raw {"hours":0,"minutes":0,"seconds":26})
- video_source_type: embedded
- drive_file_id:
1GHMe5VzHebXxvcKR9xLWrDCJGHbHk2Wi(source_ref; not a public link) - transcript pending / keyframes pending / presentation extract pending
- video_source_url: (Drive preview omitted as a public link; file id kept as source_ref)
(no lesson_content HTML in export — video-only or empty body; metadata above kept in full)
Drive extract
- file_id:
1GHMe5VzHebXxvcKR9xLWrDCJGHbHk2Wi - filename: 06 - Application Outro.mp4
- kind: video
- local_path: /workspace/academy/media/1GHMe5VzHebXxvcKR9xLWrDCJGHbHk2Wi/06 - Application Outro.mp4
- source_ref: drive
1GHMe5VzHebXxvcKR9xLWrDCJGHbHk2Wi· content_length 30671163 · original https://drive.google.com/file/d/1GHMe5VzHebXxvcKR9xLWrDCJGHbHk2Wi/view - extract_status: done
- caption_source: drive_timedtext
- duration_s: 26.169002
- keyframe_count: 4
Transcript
- Howy guys. Okay, that concludes our
- [00:00:02.070] Howy guys. Okay, that concludes our
- [00:00:02.080] Howy guys. Okay, that concludes our application section. I hope you guys
- [00:00:03.750] application section. I hope you guys
- [00:00:03.760] application section. I hope you guys enjoyed it where we looked at different
- [00:00:05.990] enjoyed it where we looked at different
- [00:00:06.000] enjoyed it where we looked at different ways to apply your materials to
- [00:00:07.749] ways to apply your materials to
- [00:00:07.759] ways to apply your materials to different surfaces. Yeah. So, in the
- [00:00:10.549] different surfaces. Yeah. So, in the
- [00:00:10.559] different surfaces. Yeah. So, in the next video, we're going to be covering
- [00:00:12.310] next video, we're going to be covering
- [00:00:12.320] next video, we're going to be covering some actual I'm going to say demo. So,
- [00:00:15.430] some actual I'm going to say demo. So,
- [00:00:15.440] some actual I'm going to say demo. So, we'll be running from start to finish on
- [00:00:17.430] we'll be running from start to finish on
- [00:00:17.440] we'll be running from start to finish on how to actually do the entire process.
- [00:00:20.390] how to actually do the entire process.
- [00:00:20.400] how to actually do the entire process. But yeah, otherwise take you guys in the
- [00:00:22.310] But yeah, otherwise take you guys in the
- [00:00:22.320] But yeah, otherwise take you guys in the next section.
Keyframes
- /workspace/academy/media/1GHMe5VzHebXxvcKR9xLWrDCJGHbHk2Wi/keyframes/last.jpg
- /workspace/academy/media/1GHMe5VzHebXxvcKR9xLWrDCJGHbHk2Wi/keyframes/t001.jpg
- /workspace/academy/media/1GHMe5VzHebXxvcKR9xLWrDCJGHbHk2Wi/keyframes/t002.jpg
- /workspace/academy/media/1GHMe5VzHebXxvcKR9xLWrDCJGHbHk2Wi/keyframes/t003.jpg
51. Demo-Overview
- title: Demo-Overview
- status: publish
- author: 0
- is_previewable: (empty)
- video_duration: 0h 0m 44s (raw {"hours":0,"minutes":0,"seconds":44})
- video_source_type: embedded
- drive_file_id:
1eCheGasSXgmnGE3qyTBIce8RrS5r_GbZ(source_ref; not a public link) - transcript pending / keyframes pending / presentation extract pending
- video_source_url: (Drive preview omitted as a public link; file id kept as source_ref)
An overview of the demo section of the course.
Drive extract
- file_id:
1eCheGasSXgmnGE3qyTBIce8RrS5r_GbZ - filename: 07 - Demo Intro.mp4
- kind: video
- local_path: /workspace/academy/media/1eCheGasSXgmnGE3qyTBIce8RrS5r_GbZ/07 - Demo Intro.mp4
- source_ref: drive
1eCheGasSXgmnGE3qyTBIce8RrS5r_GbZ· content_length 53138657 · original https://drive.google.com/file/d/1eCheGasSXgmnGE3qyTBIce8RrS5r_GbZ/view - extract_status: done
- caption_source: drive_timedtext
- duration_s: 43.886009
- keyframe_count: 5
Transcript
- Howdy, guys. We finally gotten to the
- [00:00:03.270] Howdy, guys. We finally gotten to the
- [00:00:03.280] Howdy, guys. We finally gotten to the last section, or we might add a little
- [00:00:05.510] last section, or we might add a little
- [00:00:05.520] last section, or we might add a little bonus thing afterwards for some extras,
- [00:00:07.349] bonus thing afterwards for some extras,
- [00:00:07.359] bonus thing afterwards for some extras, but this is the main part of the course.
- [00:00:09.830] but this is the main part of the course.
- [00:00:09.840] but this is the main part of the course. So, this is now where we finally get to
- [00:00:11.350] So, this is now where we finally get to
- [00:00:11.360] So, this is now where we finally get to the demo section, which we're going to
- [00:00:13.270] the demo section, which we're going to
- [00:00:13.280] the demo section, which we're going to go from start to finish, and then you
- [00:00:15.910] go from start to finish, and then you
- [00:00:15.920] go from start to finish, and then you guys get to kind of do the process as
- [00:00:17.990] guys get to kind of do the process as
- [00:00:18.000] guys get to kind of do the process as well. I'll give you guys some prompts of
- [00:00:20.070] well. I'll give you guys some prompts of
- [00:00:20.080] well. I'll give you guys some prompts of how to go about it. And then just for
- [00:00:22.470] how to go about it. And then just for
- [00:00:22.480] how to go about it. And then just for you to actually get your hands dirty and
- [00:00:24.310] you to actually get your hands dirty and
- [00:00:24.320] you to actually get your hands dirty and try the entire process. This is very
- [00:00:26.630] try the entire process. This is very
- [00:00:26.640] try the entire process. This is very important in my opinion cuz this is
- [00:00:28.710] important in my opinion cuz this is
- [00:00:28.720] important in my opinion cuz this is where you're going to be actually
- [00:00:30.550] where you're going to be actually
- [00:00:30.560] where you're going to be actually learning to do it for the industry is by
- [00:00:33.350] learning to do it for the industry is by
- [00:00:33.360] learning to do it for the industry is by actually putting your hands at it. But
- [00:00:35.910] actually putting your hands at it. But
- [00:00:35.920] actually putting your hands at it. But yeah, otherwise I hope you guys enjoy
- [00:00:37.270] yeah, otherwise I hope you guys enjoy
- [00:00:37.280] yeah, otherwise I hope you guys enjoy the section and then I'll catch you guys
- [00:00:39.110] the section and then I'll catch you guys
- [00:00:39.120] the section and then I'll catch you guys in the next video. Cheers.
Keyframes
- /workspace/academy/media/1eCheGasSXgmnGE3qyTBIce8RrS5r_GbZ/keyframes/last.jpg
- /workspace/academy/media/1eCheGasSXgmnGE3qyTBIce8RrS5r_GbZ/keyframes/t001.jpg
- /workspace/academy/media/1eCheGasSXgmnGE3qyTBIce8RrS5r_GbZ/keyframes/t002.jpg
- /workspace/academy/media/1eCheGasSXgmnGE3qyTBIce8RrS5r_GbZ/keyframes/t003.jpg
- /workspace/academy/media/1eCheGasSXgmnGE3qyTBIce8RrS5r_GbZ/keyframes/t004.jpg
52. Demo Project
- title: Demo Project
- status: publish
- author: 0
- is_previewable: (empty)
- video_duration: 0h 0m 0s (raw {"hours":0,"minutes":0,"seconds":0})
- video_source_type: (empty)
Demo Project: The Single-Color Decal
This project is a streamlined assignment designed to confirm successful operation of your machine, software, and the foundational application technique.

The Assignment
Your task is to create a simple, single-color vinyl decal using text and a basic shape, and apply it successfully to a flat, non-porous surface.
| Specification | Detail |
|---|---|
| Final Application Surface | Any small, flat, smooth surface (e.g., a laptop lid, a cup, a clipboard, or a small piece of scrap acrylic/glass). |
| Vinyl Type | Any single-color Adhesive Vinyl. |
| Dimensions | Max size: 15 cm wide or tall. |
| Design Requirement | Must include three components you create: 1. Your name (or a short word). 2. A simple geometric shape (circle, star, square). 3. A weeding box/border. |
| Key Skill Tested | Workflow mastery: Scaling, cutting, weeding, and successful, bubble-free application using the Dry Hinge Method. |
Project Workflow: Simplified Steps
Follow these steps to complete your initial decal. Focus on precision and clean execution at every stage.
Phase 1: Design & Cut Preparation (Software: VinylCut 5)
- Create Design: In VinylCut 5, create your design containing your name/word and your chosen simple shape.
- Size & Scale: Group the entire design and scale it so that the final width is no more than 15 cm.
- Add Weeding Box: Create a simple rectangular border (the "weeding box") around your design, at least 2 cm from your design's edges. This border helps contain the cut and speeds up the weeding process.
- Cut Settings Check: Ensure your force and velocity settings are calibrated for your vinyl and machine. Double-check that you have not mirrored the design, as you will be applying this decal normally (exterior application).
Phase 2: Cutting and Weeding (Machine & Tools)
- Load & Cut: Load your vinyl and send the job to your machine. Run a small test cut first if necessary.
- Weeding (Crucial Skill): Use your weeding tool to remove the outer vinyl (the area between the weeding box and the cut design) and all the interior pieces (like the centers of 'O', 'A', 'P', etc.). Only the final design should remain on the backing paper.
- Apply Transfer Tape: Apply transfer tape over your weeded design. Press it down firmly with your squeegee to ensure the vinyl adheres well to the tape.
Phase 3: Application (Dry Hinge Method)
- Clean Surface: Thoroughly clean your small, flat surface using rubbing alcohol and a lint-free cloth (microfiber cloth).
- Position & Hinge:
- Measure to center your decal on the surface.
- Secure the decal in place with a vertical masking tape hinge down the center.
- Application:
- Fold back one half and cut away the backing paper.
- Lay the vinyl down from the hinge outward, using the squeegee to apply pressure evenly.
- Repeat the process for the second half.
- Remove Tape: Slowly peel the transfer tape back at a 180-degree angle.
Submission Requirement
Submit one clear, high-resolution photo of your completed and applied decal on your chosen surface. The photo must clearly show the decal is bubble-free and the text is level.
Submit short writeup on your experience doing the Demo Project.
Submission Instructions:
Complete this practical then submit via email to the instructor at info@ambitious.co.za.
Keep up the practical skills!
53. Demo-Conclusion
- title: Demo-Conclusion
- status: publish
- author: 0
- is_previewable: (empty)
- video_duration: 0h 0m 46s (raw {"hours":0,"minutes":0,"seconds":46})
- video_source_type: embedded
- drive_file_id:
1DJ72TKEeOqsxUzJDs2Kn02zU0a7v1i_M(source_ref; not a public link) - transcript pending / keyframes pending / presentation extract pending
- video_source_url: (Drive preview omitted as a public link; file id kept as source_ref)
(no lesson_content HTML in export — video-only or empty body; metadata above kept in full)
Drive extract
- file_id:
1DJ72TKEeOqsxUzJDs2Kn02zU0a7v1i_M - filename: 07 - Demo Outro.mp4
- kind: video
- local_path: /workspace/academy/media/1DJ72TKEeOqsxUzJDs2Kn02zU0a7v1i_M/07 - Demo Outro.mp4
- source_ref: drive
1DJ72TKEeOqsxUzJDs2Kn02zU0a7v1i_M· content_length 55549314 · original https://drive.google.com/file/d/1DJ72TKEeOqsxUzJDs2Kn02zU0a7v1i_M/view - extract_status: done
- caption_source: drive_timedtext
- duration_s: 46.208005
- keyframe_count: 6
Transcript
- Howdy, guys. Well, that concludes our
- [00:00:03.110] Howdy, guys. Well, that concludes our
- [00:00:03.120] Howdy, guys. Well, that concludes our demo section. I hope you guys enjoyed
- [00:00:05.110] demo section. I hope you guys enjoyed
- [00:00:05.120] demo section. I hope you guys enjoyed it. I hope it went well. I look forward
- [00:00:06.630] it. I hope it went well. I look forward
- [00:00:06.640] it. I hope it went well. I look forward to seeing some of your guys' final
- [00:00:08.070] to seeing some of your guys' final
- [00:00:08.080] to seeing some of your guys' final results. And then obviously in the
- [00:00:10.709] results. And then obviously in the
- [00:00:10.719] results. And then obviously in the comments on that, leave some, you know,
- [00:00:12.790] comments on that, leave some, you know,
- [00:00:12.800] comments on that, leave some, you know, feedback. I like to hear what was your
- [00:00:14.629] feedback. I like to hear what was your
- [00:00:14.639] feedback. I like to hear what was your take on it. If there's something maybe
- [00:00:16.630] take on it. If there's something maybe
- [00:00:16.640] take on it. If there's something maybe we left out which needs to be added or
- [00:00:18.470] we left out which needs to be added or
- [00:00:18.480] we left out which needs to be added or always great. But um yeah, otherwise I'm
- [00:00:21.830] always great. But um yeah, otherwise I'm
- [00:00:21.840] always great. But um yeah, otherwise I'm going to leave a little extra section
- [00:00:23.429] going to leave a little extra section
- [00:00:23.439] going to leave a little extra section after this which is not quite part of
- [00:00:26.070] after this which is not quite part of
- [00:00:26.080] after this which is not quite part of the tutorial, but it could help some of
- [00:00:27.910] the tutorial, but it could help some of
- [00:00:27.920] the tutorial, but it could help some of you. And that's going to be bonus things
- [00:00:29.750] you. And that's going to be bonus things
- [00:00:29.760] you. And that's going to be bonus things we didn't add which now we get to add.
- [00:00:32.549] we didn't add which now we get to add.
- [00:00:32.559] we didn't add which now we get to add. So the order might not be 100% you know
- [00:00:36.150] So the order might not be 100% you know
- [00:00:36.160] So the order might not be 100% you know there but maybe you just find one of the
- [00:00:39.030] there but maybe you just find one of the
- [00:00:39.040] there but maybe you just find one of the topics that's relevant to you. But yeah
- [00:00:41.270] topics that's relevant to you. But yeah
- [00:00:41.280] topics that's relevant to you. But yeah otherwise I'll check you guys in the
- [00:00:42.630] otherwise I'll check you guys in the
- [00:00:42.640] otherwise I'll check you guys in the next one. Cheers.
Keyframes
- /workspace/academy/media/1DJ72TKEeOqsxUzJDs2Kn02zU0a7v1i_M/keyframes/last.jpg
- /workspace/academy/media/1DJ72TKEeOqsxUzJDs2Kn02zU0a7v1i_M/keyframes/t001.jpg
- /workspace/academy/media/1DJ72TKEeOqsxUzJDs2Kn02zU0a7v1i_M/keyframes/t002.jpg
- /workspace/academy/media/1DJ72TKEeOqsxUzJDs2Kn02zU0a7v1i_M/keyframes/t003.jpg
- /workspace/academy/media/1DJ72TKEeOqsxUzJDs2Kn02zU0a7v1i_M/keyframes/t004.jpg
- /workspace/academy/media/1DJ72TKEeOqsxUzJDs2Kn02zU0a7v1i_M/keyframes/t005.jpg
54. Bonus-Overview
- title: Bonus-Overview
- status: publish
- author: 0
- is_previewable: (empty)
- video_duration: 0h 1m 4s (raw {"hours":0,"minutes":1,"seconds":4})
- video_source_type: embedded
- drive_file_id:
1xhCTqCoIdVb94vL91ujEQngjYLhWTw3l(source_ref; not a public link) - transcript pending / keyframes pending / presentation extract pending
- video_source_url: (Drive preview omitted as a public link; file id kept as source_ref)
An Overview of the bonus section of the course.
Drive extract
- file_id:
1xhCTqCoIdVb94vL91ujEQngjYLhWTw3l - filename: 08 - Bonus Things Intro.mp4
- kind: video
- local_path: /workspace/academy/media/1xhCTqCoIdVb94vL91ujEQngjYLhWTw3l/08 - Bonus Things Intro.mp4
- source_ref: drive
1xhCTqCoIdVb94vL91ujEQngjYLhWTw3l· content_length 77904291 · original https://drive.google.com/file/d/1xhCTqCoIdVb94vL91ujEQngjYLhWTw3l/view - extract_status: done
- caption_source: drive_timedtext
- duration_s: 64.18
- keyframe_count: 7
Transcript
- All righty, guys. Okay, now we've gone
- [00:00:03.190] All righty, guys. Okay, now we've gone
- [00:00:03.200] All righty, guys. Okay, now we've gone over to some bonus section. I don't not
- [00:00:05.670] over to some bonus section. I don't not
- [00:00:05.680] over to some bonus section. I don't not sure what we're going to call it yet.
- [00:00:06.950] sure what we're going to call it yet.
- [00:00:06.960] sure what we're going to call it yet. Maybe other stuff, extra stuff. But like
- [00:00:09.910] Maybe other stuff, extra stuff. But like
- [00:00:09.920] Maybe other stuff, extra stuff. But like I mentioned in the previous section that
- [00:00:12.470] I mentioned in the previous section that
- [00:00:12.480] I mentioned in the previous section that we're going to be using this to kind of
- [00:00:14.070] we're going to be using this to kind of
- [00:00:14.080] we're going to be using this to kind of cover topics we maybe didn't or let's
- [00:00:16.870] cover topics we maybe didn't or let's
- [00:00:16.880] cover topics we maybe didn't or let's say this course goes along and you guys
- [00:00:19.510] say this course goes along and you guys
- [00:00:19.520] say this course goes along and you guys have a request for something which we
- [00:00:21.830] have a request for something which we
- [00:00:21.840] have a request for something which we didn't cover, then we'll add it in here.
- [00:00:24.150] didn't cover, then we'll add it in here.
- [00:00:24.160] didn't cover, then we'll add it in here. So this is not going to be maybe
- [00:00:26.390] So this is not going to be maybe
- [00:00:26.400] So this is not going to be maybe structured the best in the sense of you
- [00:00:29.109] structured the best in the sense of you
- [00:00:29.119] structured the best in the sense of you know it's going to be A B C D but in
- [00:00:31.189] know it's going to be A B C D but in
- [00:00:31.199] know it's going to be A B C D but in another way you know it's going to be
- [00:00:33.190] another way you know it's going to be
- [00:00:33.200] another way you know it's going to be kind of a index for a lot of random
- [00:00:35.510] kind of a index for a lot of random
- [00:00:35.520] kind of a index for a lot of random things that might be relevant to you and
- [00:00:37.750] things that might be relevant to you and
- [00:00:37.760] things that might be relevant to you and your workflow. So definitely comb
- [00:00:40.069] your workflow. So definitely comb
- [00:00:40.079] your workflow. So definitely comb through here if there's any questions or
- [00:00:42.069] through here if there's any questions or
- [00:00:42.079] through here if there's any questions or stuff you're not sure about go look
- [00:00:43.510] stuff you're not sure about go look
- [00:00:43.520] stuff you're not sure about go look there and then um check. And I also
- [00:00:45.830] there and then um check. And I also
- [00:00:45.840] there and then um check. And I also recommend go in this comment or this
- [00:00:47.510] recommend go in this comment or this
- [00:00:47.520] recommend go in this comment or this video area. Go in the comments and then
- [00:00:49.830] video area. Go in the comments and then
- [00:00:49.840] video area. Go in the comments and then you just give some ideas if we haven't
- [00:00:52.150] you just give some ideas if we haven't
- [00:00:52.160] you just give some ideas if we haven't covered it already. So, we can kind of
- [00:00:54.389] covered it already. So, we can kind of
- [00:00:54.399] covered it already. So, we can kind of populate this thing with cool stuff that
- [00:00:56.709] populate this thing with cool stuff that
- [00:00:56.719] populate this thing with cool stuff that you guys actually would use. But yeah,
- [00:00:59.189] you guys actually would use. But yeah,
- [00:00:59.199] you guys actually would use. But yeah, otherwise I hope you guys enjoy the
- [00:01:00.470] otherwise I hope you guys enjoy the
- [00:01:00.480] otherwise I hope you guys enjoy the section and cheers.
Keyframes
- /workspace/academy/media/1xhCTqCoIdVb94vL91ujEQngjYLhWTw3l/keyframes/last.jpg
- /workspace/academy/media/1xhCTqCoIdVb94vL91ujEQngjYLhWTw3l/keyframes/t001.jpg
- /workspace/academy/media/1xhCTqCoIdVb94vL91ujEQngjYLhWTw3l/keyframes/t002.jpg
- /workspace/academy/media/1xhCTqCoIdVb94vL91ujEQngjYLhWTw3l/keyframes/t003.jpg
- /workspace/academy/media/1xhCTqCoIdVb94vL91ujEQngjYLhWTw3l/keyframes/t004.jpg
- /workspace/academy/media/1xhCTqCoIdVb94vL91ujEQngjYLhWTw3l/keyframes/t005.jpg
- /workspace/academy/media/1xhCTqCoIdVb94vL91ujEQngjYLhWTw3l/keyframes/t006.jpg
55. Course Bonus Section
- title: Course Bonus Section
- status: publish
- author: 0
- is_previewable: (empty)
- video_duration: 0h 0m 0s (raw {"hours":0,"minutes":0,"seconds":0})
- video_source_type: (empty)
**Bonus Section: Advanced Topics and Requests **

This Bonus Section serves as a flexible, evolving repositories for all high-level technical skills and content that extends beyond this curriculum.
Purpose and Scope
The content in this section is designed to keep your knowledge current and responsive to specific industry needs. We utilize this section to introduce topics that were not part of the mandatory main course program, including request by students and industry professionals:
Continuous Learning
We encourage you to revisit this Bonus Section regularly. As the industry evolves, so too will this section. New tutorials, case studies, and advanced diagnostics will be added over time, ensuring your certification and skills remain at the cutting edge of a professional industry.
If you have a topic you'd like to see covered here, please submit your request to info@ambitious.co.za
56. Course Review
- title: Course Review
- status: publish
- author: 0
- is_previewable: (empty)
- video_duration: 0h 0m 0s (raw {"hours":0,"minutes":0,"seconds":0})
- video_source_type: (empty)
Your Feedback is Our Fuel!
As you move forward and put your new skills to use, we kindly ask for a minute of your time to share your experience with others on Google.
Your review not only helps future students decide if this course is right for them, but it also helps us continue to improve our curriculum, refine the courses, and ensure we're delivering the highest quality training in the industry.
Did you find the course:
- Clear and easy to follow?
- Helpful in understanding your machine?
Click the link below to leave your review and let us know about your journey from beginner to pro!
https://g.page/r/CR2xnJEt_BjOEBM/review

Thank you again for choosing our course. We can't wait to see the incredible projects you create!
Happy Creating!

The Ambitious Academy Team
57. Certification Reminder
- title: Certification Reminder
- status: publish
- author: 0
- is_previewable: (empty)
- video_duration: 0h 0m 0s (raw {"hours":0,"minutes":0,"seconds":0})
- video_source_type: (empty)
**

**
Reminder Message: Your Next Step
**

**
Get Certified!
You have successfully completed the entire Vinyl Cutting Course, aced the knowledge checks, and executed the practical Demo Project! You now possess the skills of a confident, competent vinyl cutting professional.
Your final step to professional recognition is the External Certification Exam.
This exam will independently test your mastery through both a theory component and a practical assessment, proving your skills to the industry.
Ready to turn your new expertise into official credentials?
Use the link below to register for the official certification exam:
Certification Exam Registration Link:
We are immensely proud of your hard work and know you are ready. Go get that certification!
58. Custom Cut Staring Point for Shapes
- title: Custom Cut Staring Point for Shapes
- status: publish
- author: 0
- is_previewable: (empty)
- video_duration: 0h 6m 30s (raw {"hours":0,"minutes":6,"seconds":30})
- video_source_type: embedded
- drive_file_id:
1Fry_V-T0rGJo4_BFl0bQM9TEB6B1ZBdF(source_ref; not a public link) - transcript pending / keyframes pending / presentation extract pending
- video_source_url: (Drive preview omitted as a public link; file id kept as source_ref)
(no lesson_content HTML in export — video-only or empty body; metadata above kept in full)
Drive extract
- file_id:
1Fry_V-T0rGJo4_BFl0bQM9TEB6B1ZBdF - filename: AM - Vinyl Custom Cut Origin Points for Shapes.mp4
- kind: video
- local_path: /workspace/academy/media/1Fry_V-T0rGJo4_BFl0bQM9TEB6B1ZBdF/AM - Vinyl Custom Cut Origin Points for Shapes.mp4
- source_ref: drive
1Fry_V-T0rGJo4_BFl0bQM9TEB6B1ZBdF· content_length 70044632 · original https://drive.google.com/file/d/1Fry_V-T0rGJo4_BFl0bQM9TEB6B1ZBdF/view - extract_status: done
- caption_source: drive_timedtext
- duration_s: 390.816009
- keyframe_count: 24
Transcript
- Howdy, guys. In today's video, we're
- [00:00:02.550] Howdy, guys. In today's video, we're
- [00:00:02.560] Howdy, guys. In today's video, we're going to be looking at can we make our
- [00:00:04.309] going to be looking at can we make our
- [00:00:04.319] going to be looking at can we make our vinyl cutters start at a certain place
- [00:00:06.550] vinyl cutters start at a certain place
- [00:00:06.560] vinyl cutters start at a certain place on a shape. So, let's say you want to
- [00:00:09.350] on a shape. So, let's say you want to
- [00:00:09.360] on a shape. So, let's say you want to cut and have a custom origin for your
- [00:00:12.470] cut and have a custom origin for your
- [00:00:12.480] cut and have a custom origin for your actual blade. Well, if we head here into
- [00:00:16.630] actual blade. Well, if we head here into
- [00:00:16.640] actual blade. Well, if we head here into Final Cut, I'm just going to make a
- [00:00:17.910] Final Cut, I'm just going to make a
- [00:00:17.920] Final Cut, I'm just going to make a rectangle here.
- [00:00:20.950] rectangle here.
- [00:00:20.960] rectangle here. Then, I'm going to select it. It's quite
- [00:00:23.189] Then, I'm going to select it. It's quite
- [00:00:23.199] Then, I'm going to select it. It's quite important. And then, if we go here to
- [00:00:24.710] important. And then, if we go here to
- [00:00:24.720] important. And then, if we go here to cut settings, cut order. Then what I'm
- [00:00:28.070] cut settings, cut order. Then what I'm
- [00:00:28.080] cut settings, cut order. Then what I'm going to do is I'm going to set this to
- [00:00:29.509] going to do is I'm going to set this to
- [00:00:29.519] going to do is I'm going to set this to slow. Say show moves and click play.
- [00:00:34.069] slow. Say show moves and click play.
- [00:00:34.079] slow. Say show moves and click play. Now we can see over there it shows us
- [00:00:35.990] Now we can see over there it shows us
- [00:00:36.000] Now we can see over there it shows us that the first movement is going to go
- [00:00:37.750] that the first movement is going to go
- [00:00:37.760] that the first movement is going to go to the top left corner. So I'm just
- [00:00:40.549] to the top left corner. So I'm just
- [00:00:40.559] to the top left corner. So I'm just going to go out of this.
- [00:00:43.750] going to go out of this.
- [00:00:43.760] going to go out of this. Now if we go to path or show say make
- [00:00:46.470] Now if we go to path or show say make
- [00:00:46.480] Now if we go to path or show say make sure your shape is selected. Then we go
- [00:00:48.229] sure your shape is selected. Then we go
- [00:00:48.239] sure your shape is selected. Then we go right click path and then we go right to
- [00:00:50.790] right click path and then we go right to
- [00:00:50.800] right click path and then we go right to the bottom path details.
- [00:00:53.910] the bottom path details.
- [00:00:53.920] the bottom path details. Now, if you had to click that and you'll
- [00:00:55.510] Now, if you had to click that and you'll
- [00:00:55.520] Now, if you had to click that and you'll see we've got different um path uh how
- [00:00:59.349] see we've got different um path uh how
- [00:00:59.359] see we've got different um path uh how can I say measurements
- [00:01:01.750] can I say measurements
- [00:01:01.760] can I say measurements then we've got one that says M. So that
- [00:01:04.549] then we've got one that says M. So that
- [00:01:04.559] then we've got one that says M. So that is important. If we click that we'll see
- [00:01:06.149] is important. If we click that we'll see
- [00:01:06.159] is important. If we click that we'll see that is the main one. So as we saw on
- [00:01:09.109] that is the main one. So as we saw on
- [00:01:09.119] that is the main one. So as we saw on our preview it starts on the top left
- [00:01:11.429] our preview it starts on the top left
- [00:01:11.439] our preview it starts on the top left corner.
- [00:01:13.190] corner.
- [00:01:13.200] corner. So then uh I'm just going to go switch
- [00:01:15.750] So then uh I'm just going to go switch
- [00:01:15.760] So then uh I'm just going to go switch this transform to basic. Let's turn this
- [00:01:18.550] this transform to basic. Let's turn this
- [00:01:18.560] this transform to basic. Let's turn this 180 just to verify things.
- [00:01:21.510] 180 just to verify things.
- [00:01:21.520] 180 just to verify things. Then we'll go again path path details
- [00:01:23.990] Then we'll go again path path details
- [00:01:24.000] Then we'll go again path path details click on M. Now we can see it's at the
- [00:01:26.149] click on M. Now we can see it's at the
- [00:01:26.159] click on M. Now we can see it's at the bottom right. So now if we go to the
- [00:01:29.190] bottom right. So now if we go to the
- [00:01:29.200] bottom right. So now if we go to the cutter cut order and we do the same
- [00:01:31.830] cutter cut order and we do the same
- [00:01:31.840] cutter cut order and we do the same thing again slow play then we can see
- [00:01:34.710] thing again slow play then we can see
- [00:01:34.720] thing again slow play then we can see now it's starting at the bottom right.
- [00:01:36.950] now it's starting at the bottom right.
- [00:01:36.960] now it's starting at the bottom right. So we know okay this is correct. It is
- [00:01:39.670] So we know okay this is correct. It is
- [00:01:39.680] So we know okay this is correct. It is actually cutting where um that point is.
- [00:01:43.830] actually cutting where um that point is.
- [00:01:43.840] actually cutting where um that point is. Now, I'm just going to go out of here
- [00:01:45.429] Now, I'm just going to go out of here
- [00:01:45.439] Now, I'm just going to go out of here again and let's just move this back to
- [00:01:48.710] again and let's just move this back to
- [00:01:48.720] again and let's just move this back to where it was just so we have an original
- [00:01:51.670] where it was just so we have an original
- [00:01:51.680] where it was just so we have an original base.
- So, let's just go back there to confirm.
- [00:01:57.190] So, let's just go back there to confirm.
- [00:01:57.200] So, let's just go back there to confirm. M top left corner cuz that is correct.
- [00:02:01.749] M top left corner cuz that is correct.
- [00:02:01.759] M top left corner cuz that is correct. Now, next up, what we want to do is we
- [00:02:04.709] Now, next up, what we want to do is we
- [00:02:04.719] Now, next up, what we want to do is we want to set some form of guide.
- [00:02:08.070] want to set some form of guide.
- [00:02:08.080] want to set some form of guide. So that way when we're setting up a
- [00:02:10.630] So that way when we're setting up a
- [00:02:10.640] So that way when we're setting up a custom point, we can align things and
- [00:02:13.750] custom point, we can align things and
- [00:02:13.760] custom point, we can align things and make sure our shape stays the same. Now,
- [00:02:16.309] make sure our shape stays the same. Now,
- [00:02:16.319] make sure our shape stays the same. Now, obviously, if you have more of a dynamic
- [00:02:17.910] obviously, if you have more of a dynamic
- [00:02:17.920] obviously, if you have more of a dynamic shape, this is not that important, but
- [00:02:20.070] shape, this is not that important, but
- [00:02:20.080] shape, this is not that important, but with something more symmetrical or um
- [00:02:21.990] with something more symmetrical or um
- [00:02:22.000] with something more symmetrical or um square, this is going to be an important
- [00:02:23.589] square, this is going to be an important
- [00:02:23.599] square, this is going to be an important point. Now, in order to do that, what we
- [00:02:26.309] point. Now, in order to do that, what we
- [00:02:26.319] point. Now, in order to do that, what we want to do is go here to our view on
- [00:02:28.150] want to do is go here to our view on
- [00:02:28.160] want to do is go here to our view on top, go to guidelines, and say show
- [00:02:30.869] top, go to guidelines, and say show
- [00:02:30.879] top, go to guidelines, and say show guidelines. Then after we've done that,
- [00:02:36.309] guidelines. Then after we've done that,
- [00:02:36.319] guidelines. Then after we've done that, we want to go on these rulers, top and
- [00:02:38.710] we want to go on these rulers, top and
- [00:02:38.720] we want to go on these rulers, top and left. So we'll start by the top one. We
- [00:02:40.309] left. So we'll start by the top one. We
- [00:02:40.319] left. So we'll start by the top one. We simply left click, hold in, and drag
- [00:02:42.710] simply left click, hold in, and drag
- [00:02:42.720] simply left click, hold in, and drag this to the top of this cube. And same
- [00:02:45.670] this to the top of this cube. And same
- [00:02:45.680] this to the top of this cube. And same with the left or this rectangle. Now
- [00:02:48.470] with the left or this rectangle. Now
- [00:02:48.480] with the left or this rectangle. Now let's say you're working with very
- [00:02:50.309] let's say you're working with very
- [00:02:50.319] let's say you're working with very specific measurements, then we can
- [00:02:52.390] specific measurements, then we can
- [00:02:52.400] specific measurements, then we can always go to view guidelines and then we
- [00:02:55.509] always go to view guidelines and then we
- [00:02:55.519] always go to view guidelines and then we say edit guidelines. Now you can see
- [00:02:57.830] say edit guidelines. Now you can see
- [00:02:57.840] say edit guidelines. Now you can see where we've put the horizontal and the
- [00:02:59.589] where we've put the horizontal and the
- [00:02:59.599] where we've put the horizontal and the vertical. And on the right here with the
- [00:03:02.229] vertical. And on the right here with the
- [00:03:02.239] vertical. And on the right here with the one selected we can say modify and then
- [00:03:05.190] one selected we can say modify and then
- [00:03:05.200] one selected we can say modify and then adjust that accordingly.
- Okay. Then next what I want to do is
- [00:03:11.990] Okay. Then next what I want to do is
- [00:03:12.000] Okay. Then next what I want to do is with it selected I want to go to our
- [00:03:13.910] with it selected I want to go to our
- [00:03:13.920] with it selected I want to go to our node tool.
- [00:03:15.830] node tool.
- [00:03:15.840] node tool. Then let's say we want to make our
- [00:03:17.990] Then let's say we want to make our
- [00:03:18.000] Then let's say we want to make our origin or our blade must start cutting
- [00:03:21.110] origin or our blade must start cutting
- [00:03:21.120] origin or our blade must start cutting the shape in the top middle about. Then
- [00:03:23.910] the shape in the top middle about. Then
- [00:03:23.920] the shape in the top middle about. Then I'm going to hover until it gives me the
- [00:03:25.750] I'm going to hover until it gives me the
- [00:03:25.760] I'm going to hover until it gives me the options to add a new one. Sometimes if
- [00:03:28.229] options to add a new one. Sometimes if
- [00:03:28.239] options to add a new one. Sometimes if you zoom also, you have better control.
- [00:03:31.589] you zoom also, you have better control.
- [00:03:31.599] you zoom also, you have better control. Um, let's just pan this up so you can
- [00:03:33.830] Um, let's just pan this up so you can
- [00:03:33.840] Um, let's just pan this up so you can see where we're placing it. Go back to
- [00:03:36.229] see where we're placing it. Go back to
- [00:03:36.239] see where we're placing it. Go back to the node tool and then I'm going to add
- [00:03:38.149] the node tool and then I'm going to add
- [00:03:38.159] the node tool and then I'm going to add one and I'm going to add one next to it
- [00:03:40.550] one and I'm going to add one next to it
- [00:03:40.560] one and I'm going to add one next to it as well. We will shortly see why we're
- [00:03:43.750] as well. We will shortly see why we're
- [00:03:43.760] as well. We will shortly see why we're doing that. Then I'm going to select
- [00:03:45.750] doing that. Then I'm going to select
- [00:03:45.760] doing that. Then I'm going to select those two, go to path, and then what we
- [00:03:48.229] those two, go to path, and then what we
- [00:03:48.239] those two, go to path, and then what we want to do is we want to say split path.
- [00:03:51.350] want to do is we want to say split path.
- [00:03:51.360] want to do is we want to say split path. So, what that's going to do, it's going
- [00:03:52.789] So, what that's going to do, it's going
- [00:03:52.799] So, what that's going to do, it's going to separate those two from the rest of
- [00:03:54.710] to separate those two from the rest of
- [00:03:54.720] to separate those two from the rest of the shape, which pretty much creates a
- [00:03:57.110] the shape, which pretty much creates a
- [00:03:57.120] the shape, which pretty much creates a open shape for us, but um that also
- [00:04:00.149] open shape for us, but um that also
- [00:04:00.159] open shape for us, but um that also allows us now to edit those paths. I'm
- [00:04:03.509] allows us now to edit those paths. I'm
- [00:04:03.519] allows us now to edit those paths. I'm going to select that joint, and then we
- [00:04:06.710] going to select that joint, and then we
- [00:04:06.720] going to select that joint, and then we can just remove that. I'm going to right
- [00:04:08.229] can just remove that. I'm going to right
- [00:04:08.239] can just remove that. I'm going to right click and say delete. Now, you can see
- [00:04:11.030] click and say delete. Now, you can see
- [00:04:11.040] click and say delete. Now, you can see if we go to preview here, we've got a
- [00:04:12.710] if we go to preview here, we've got a
- [00:04:12.720] if we go to preview here, we've got a little gap there.
- [00:04:15.350] little gap there.
- [00:04:15.360] little gap there. Then, what I'm going to do is I'm going
- [00:04:16.550] Then, what I'm going to do is I'm going
- [00:04:16.560] Then, what I'm going to do is I'm going to select this. Let's go to path. And
- [00:04:19.189] to select this. Let's go to path. And
- [00:04:19.199] to select this. Let's go to path. And then we say close path. Now that has
- [00:04:22.790] then we say close path. Now that has
- [00:04:22.800] then we say close path. Now that has closed our path again. So we're going to
- [00:04:24.870] closed our path again. So we're going to
- [00:04:24.880] closed our path again. So we're going to go to path path details. And now you can
- [00:04:27.590] go to path path details. And now you can
- [00:04:27.600] go to path path details. And now you can see we've got two M's here. So basically
- [00:04:30.150] see we've got two M's here. So basically
- [00:04:30.160] see we've got two M's here. So basically we have two main ones. We've got the one
- [00:04:32.390] we have two main ones. We've got the one
- [00:04:32.400] we have two main ones. We've got the one on top which is to the left. And then
- [00:04:34.070] on top which is to the left. And then
- [00:04:34.080] on top which is to the left. And then we've got one which is now by that new
- [00:04:36.150] we've got one which is now by that new
- [00:04:36.160] we've got one which is now by that new point we've created. So next up what I
- [00:04:38.790] point we've created. So next up what I
- [00:04:38.800] point we've created. So next up what I want to do is I want to go my path tool,
- [00:04:41.670] want to do is I want to go my path tool,
- [00:04:41.680] want to do is I want to go my path tool, select this old main one and then simply
- [00:04:45.030] select this old main one and then simply
- [00:04:45.040] select this old main one and then simply delete that so that it no longer exists.
- [00:04:47.350] delete that so that it no longer exists.
- [00:04:47.360] delete that so that it no longer exists. Then I'm going to go and create another
- [00:04:49.430] Then I'm going to go and create another
- [00:04:49.440] Then I'm going to go and create another path point over here. And then move
- [00:04:53.510] path point over here. And then move
- [00:04:53.520] path point over here. And then move this. It can be tricky sometimes to move
- [00:04:55.270] this. It can be tricky sometimes to move
- [00:04:55.280] this. It can be tricky sometimes to move it. So just some patience. And like I
- [00:04:57.430] it. So just some patience. And like I
- [00:04:57.440] it. So just some patience. And like I said, if you zoom, it's a bit easier.
- [00:04:59.670] said, if you zoom, it's a bit easier.
- [00:04:59.680] said, if you zoom, it's a bit easier. Then I'm going to move this to where the
- [00:05:01.749] Then I'm going to move this to where the
- [00:05:01.759] Then I'm going to move this to where the old one was. And as you guys could see
- [00:05:04.390] old one was. And as you guys could see
- [00:05:04.400] old one was. And as you guys could see there, mine kind of snapped it. So if
- [00:05:07.110] there, mine kind of snapped it. So if
- [00:05:07.120] there, mine kind of snapped it. So if yours doesn't snap, what you can do can
- [00:05:09.350] yours doesn't snap, what you can do can
- [00:05:09.360] yours doesn't snap, what you can do can simply go to view. We go to snap. And
- [00:05:11.909] simply go to view. We go to snap. And
- [00:05:11.919] simply go to view. We go to snap. And then you can see we've got the snap
- [00:05:13.590] then you can see we've got the snap
- [00:05:13.600] then you can see we've got the snap guidelines. I like to keep those on and
- [00:05:15.590] guidelines. I like to keep those on and
- [00:05:15.600] guidelines. I like to keep those on and my object ones. Now, what I'm going to
- [00:05:17.990] my object ones. Now, what I'm going to
- [00:05:18.000] my object ones. Now, what I'm going to do is I'm going to select the shape, go
- [00:05:19.590] do is I'm going to select the shape, go
- [00:05:19.600] do is I'm going to select the shape, go to path again, path details. Now, we've
- [00:05:22.870] to path again, path details. Now, we've
- [00:05:22.880] to path again, path details. Now, we've only got one M as you can see that. And
- [00:05:25.430] only got one M as you can see that. And
- [00:05:25.440] only got one M as you can see that. And if we click that, you can see it has got
- [00:05:26.950] if we click that, you can see it has got
- [00:05:26.960] if we click that, you can see it has got our new point. Now, obviously, we want
- [00:05:29.430] our new point. Now, obviously, we want
- [00:05:29.440] our new point. Now, obviously, we want to verify to make sure this is correct.
- [00:05:31.350] to verify to make sure this is correct.
- [00:05:31.360] to verify to make sure this is correct. So, what we can do is go to cut cutter
- [00:05:34.310] So, what we can do is go to cut cutter
- [00:05:34.320] So, what we can do is go to cut cutter order or cut order and then we're going
- [00:05:35.990] order or cut order and then we're going
- [00:05:36.000] order or cut order and then we're going to set this to slow show path and then
- [00:05:38.469] to set this to slow show path and then
- [00:05:38.479] to set this to slow show path and then click play and then pause it. As you can
- [00:05:41.430] click play and then pause it. As you can
- [00:05:41.440] click play and then pause it. As you can see, now it is going more or less to the
- [00:05:43.430] see, now it is going more or less to the
- [00:05:43.440] see, now it is going more or less to the middle of that. Obviously, we can move
- [00:05:44.710] middle of that. Obviously, we can move
- [00:05:44.720] middle of that. Obviously, we can move that if we want to be more precise, but
- [00:05:47.510] that if we want to be more precise, but
- [00:05:47.520] that if we want to be more precise, but now we no longer have the old starting
- [00:05:50.390] now we no longer have the old starting
- [00:05:50.400] now we no longer have the old starting point.
- [00:05:52.629] point.
- [00:05:52.639] point. And then also just a side note, if we go
- [00:05:55.990] And then also just a side note, if we go
- [00:05:56.000] And then also just a side note, if we go to that same path um feature with our
- [00:05:59.590] to that same path um feature with our
- [00:05:59.600] to that same path um feature with our object selected, we can actually reverse
- [00:06:02.230] object selected, we can actually reverse
- [00:06:02.240] object selected, we can actually reverse the path as well. So if you wanted to
- [00:06:04.070] the path as well. So if you wanted to
- [00:06:04.080] the path as well. So if you wanted to cut let's say instead of from left to
- [00:06:07.029] cut let's say instead of from left to
- [00:06:07.039] cut let's say instead of from left to right
- [00:06:08.950] right
- [00:06:08.960] right then you can just there go reverse the
- [00:06:11.110] then you can just there go reverse the
- [00:06:11.120] then you can just there go reverse the path and then it'll go in the opposite
- [00:06:13.029] path and then it'll go in the opposite
- [00:06:13.039] path and then it'll go in the opposite direction.
- [00:06:15.029] direction.
- [00:06:15.039] direction. Yeah. Otherwise that is it on creating a
- [00:06:17.270] Yeah. Otherwise that is it on creating a
- [00:06:17.280] Yeah. Otherwise that is it on creating a custom starting point for your blade on
- [00:06:19.670] custom starting point for your blade on
- [00:06:19.680] custom starting point for your blade on shapes. Now obviously you can do this
- [00:06:21.909] shapes. Now obviously you can do this
- [00:06:21.919] shapes. Now obviously you can do this with your different shapes. Just keep in
- [00:06:24.390] with your different shapes. Just keep in
- [00:06:24.400] with your different shapes. Just keep in mind to align things again to keep it
- [00:06:26.390] mind to align things again to keep it
- [00:06:26.400] mind to align things again to keep it nice and clean.
Keyframes
- /workspace/academy/media/1Fry_V-T0rGJo4_BFl0bQM9TEB6B1ZBdF/keyframes/last.jpg
- /workspace/academy/media/1Fry_V-T0rGJo4_BFl0bQM9TEB6B1ZBdF/keyframes/t002.jpg
- /workspace/academy/media/1Fry_V-T0rGJo4_BFl0bQM9TEB6B1ZBdF/keyframes/t003.jpg
- /workspace/academy/media/1Fry_V-T0rGJo4_BFl0bQM9TEB6B1ZBdF/keyframes/t005.jpg
- /workspace/academy/media/1Fry_V-T0rGJo4_BFl0bQM9TEB6B1ZBdF/keyframes/t007.jpg
- /workspace/academy/media/1Fry_V-T0rGJo4_BFl0bQM9TEB6B1ZBdF/keyframes/t008.jpg
- /workspace/academy/media/1Fry_V-T0rGJo4_BFl0bQM9TEB6B1ZBdF/keyframes/t010.jpg
- /workspace/academy/media/1Fry_V-T0rGJo4_BFl0bQM9TEB6B1ZBdF/keyframes/t012.jpg
- /workspace/academy/media/1Fry_V-T0rGJo4_BFl0bQM9TEB6B1ZBdF/keyframes/t014.jpg
- /workspace/academy/media/1Fry_V-T0rGJo4_BFl0bQM9TEB6B1ZBdF/keyframes/t015.jpg
- /workspace/academy/media/1Fry_V-T0rGJo4_BFl0bQM9TEB6B1ZBdF/keyframes/t017.jpg
- /workspace/academy/media/1Fry_V-T0rGJo4_BFl0bQM9TEB6B1ZBdF/keyframes/t019.jpg
- /workspace/academy/media/1Fry_V-T0rGJo4_BFl0bQM9TEB6B1ZBdF/keyframes/t020.jpg
- /workspace/academy/media/1Fry_V-T0rGJo4_BFl0bQM9TEB6B1ZBdF/keyframes/t022.jpg
- /workspace/academy/media/1Fry_V-T0rGJo4_BFl0bQM9TEB6B1ZBdF/keyframes/t024.jpg
- /workspace/academy/media/1Fry_V-T0rGJo4_BFl0bQM9TEB6B1ZBdF/keyframes/t025.jpg
- /workspace/academy/media/1Fry_V-T0rGJo4_BFl0bQM9TEB6B1ZBdF/keyframes/t027.jpg
- /workspace/academy/media/1Fry_V-T0rGJo4_BFl0bQM9TEB6B1ZBdF/keyframes/t029.jpg
- /workspace/academy/media/1Fry_V-T0rGJo4_BFl0bQM9TEB6B1ZBdF/keyframes/t031.jpg
- /workspace/academy/media/1Fry_V-T0rGJo4_BFl0bQM9TEB6B1ZBdF/keyframes/t032.jpg
- /workspace/academy/media/1Fry_V-T0rGJo4_BFl0bQM9TEB6B1ZBdF/keyframes/t034.jpg
- /workspace/academy/media/1Fry_V-T0rGJo4_BFl0bQM9TEB6B1ZBdF/keyframes/t036.jpg
- /workspace/academy/media/1Fry_V-T0rGJo4_BFl0bQM9TEB6B1ZBdF/keyframes/t037.jpg
- /workspace/academy/media/1Fry_V-T0rGJo4_BFl0bQM9TEB6B1ZBdF/keyframes/t039.jpg
59. Course-Conclusion
- title: Course-Conclusion
- status: publish
- author: 0
- is_previewable: (empty)
- video_duration: 0h 1m 5s (raw {"hours":0,"minutes":1,"seconds":5})
- video_source_type: embedded
- drive_file_id:
1iNLJ_YntmAtQ9V2ACNVy2FuSjtntBwL4(source_ref; not a public link) - transcript pending / keyframes pending / presentation extract pending
- video_source_url: (Drive preview omitted as a public link; file id kept as source_ref)
A conclusion video to the course\'s completion.
Drive extract
- file_id:
1iNLJ_YntmAtQ9V2ACNVy2FuSjtntBwL4 - filename: 08 - Bonus Things Outro.mp4
- kind: video
- local_path: /workspace/academy/media/1iNLJ_YntmAtQ9V2ACNVy2FuSjtntBwL4/08 - Bonus Things Outro.mp4
- source_ref: drive
1iNLJ_YntmAtQ9V2ACNVy2FuSjtntBwL4· content_length 75646339 · original https://drive.google.com/file/d/1iNLJ_YntmAtQ9V2ACNVy2FuSjtntBwL4/view - extract_status: done
- caption_source: drive_timedtext
- duration_s: 64.807007
- keyframe_count: 7
Transcript
- All righty guys, well that concludes our
- [00:00:02.950] All righty guys, well that concludes our
- [00:00:02.960] All righty guys, well that concludes our course. So I hope you guys enjoyed it. I
- [00:00:05.030] course. So I hope you guys enjoyed it. I
- [00:00:05.040] course. So I hope you guys enjoyed it. I hope uh you learned some valuable
- [00:00:07.349] hope uh you learned some valuable
- [00:00:07.359] hope uh you learned some valuable lessons and valuable skills through this
- [00:00:09.750] lessons and valuable skills through this
- [00:00:09.760] lessons and valuable skills through this and also really prepared you for the
- [00:00:11.669] and also really prepared you for the
- [00:00:11.679] and also really prepared you for the industry so you're actually more
- [00:00:12.870] industry so you're actually more
- [00:00:12.880] industry so you're actually more capable. Then I would always suggest for
- [00:00:15.669] capable. Then I would always suggest for
- [00:00:15.679] capable. Then I would always suggest for people like practice you know don't now
- [00:00:19.269] people like practice you know don't now
- [00:00:19.279] people like practice you know don't now have this behind your belt and think
- [00:00:20.870] have this behind your belt and think
- [00:00:20.880] have this behind your belt and think I've got it. No, no, no. Go and get
- [00:00:23.109] I've got it. No, no, no. Go and get
- [00:00:23.119] I've got it. No, no, no. Go and get personal projects, you know, if you're
- [00:00:25.189] personal projects, you know, if you're
- [00:00:25.199] personal projects, you know, if you're like maybe a hobbyist, get projects from
- [00:00:28.630] like maybe a hobbyist, get projects from
- [00:00:28.640] like maybe a hobbyist, get projects from friends, family, like the more time you
- [00:00:31.429] friends, family, like the more time you
- [00:00:31.439] friends, family, like the more time you put on this and the more experience you
- [00:00:32.870] put on this and the more experience you
- [00:00:32.880] put on this and the more experience you gain, the better you're going to get.
- [00:00:34.470] gain, the better you're going to get.
- [00:00:34.480] gain, the better you're going to get. And then I would say give it some time
- [00:00:35.750] And then I would say give it some time
- [00:00:35.760] And then I would say give it some time and what you do is come back here and
- [00:00:37.830] and what you do is come back here and
- [00:00:37.840] and what you do is come back here and actually like give us some feedback of
- [00:00:39.990] actually like give us some feedback of
- [00:00:40.000] actually like give us some feedback of what you learned. Maybe we can use some
- [00:00:41.830] what you learned. Maybe we can use some
- [00:00:41.840] what you learned. Maybe we can use some of your feedback in the industry, expand
- [00:00:44.470] of your feedback in the industry, expand
- [00:00:44.480] of your feedback in the industry, expand on this cost, make it even better for
- [00:00:46.470] on this cost, make it even better for
- [00:00:46.480] on this cost, make it even better for the next people watching it so that we
- [00:00:48.790] the next people watching it so that we
- [00:00:48.800] the next people watching it so that we can all as a industry grow and like make
- [00:00:52.150] can all as a industry grow and like make
- [00:00:52.160] can all as a industry grow and like make good products. But yeah, otherwise thank
- [00:00:54.549] good products. But yeah, otherwise thank
- [00:00:54.559] good products. But yeah, otherwise thank you guys again and then yeah, I'll check
- [00:00:56.790] you guys again and then yeah, I'll check
- [00:00:56.800] you guys again and then yeah, I'll check you guys maybe in the next course if you
- [00:00:58.389] you guys maybe in the next course if you
- [00:00:58.399] you guys maybe in the next course if you joined. Cheers.
Keyframes
- /workspace/academy/media/1iNLJ_YntmAtQ9V2ACNVy2FuSjtntBwL4/keyframes/last.jpg
- /workspace/academy/media/1iNLJ_YntmAtQ9V2ACNVy2FuSjtntBwL4/keyframes/t001.jpg
- /workspace/academy/media/1iNLJ_YntmAtQ9V2ACNVy2FuSjtntBwL4/keyframes/t002.jpg
- /workspace/academy/media/1iNLJ_YntmAtQ9V2ACNVy2FuSjtntBwL4/keyframes/t003.jpg
- /workspace/academy/media/1iNLJ_YntmAtQ9V2ACNVy2FuSjtntBwL4/keyframes/t004.jpg
- /workspace/academy/media/1iNLJ_YntmAtQ9V2ACNVy2FuSjtntBwL4/keyframes/t005.jpg
- /workspace/academy/media/1iNLJ_YntmAtQ9V2ACNVy2FuSjtntBwL4/keyframes/t006.jpg
Quizzes
21 quizzes in nest order, each under the lesson it followed. Every question and every answer is kept, including answer_is_correct.
After lesson: Stand Assembly
Quiz: Stand Assembly
- follows_lesson: Stand Assembly
- quiz_content: (empty)
- quiz_time: 0
- quiz_time_unit: minutes
- quiz_hide_time: (empty)
- quiz_feedback_mode: retry
- quiz_passing_grade: 80
- quiz_max_attempts_allowed: 0
- quiz_questions_order: rand
- quiz_hide_question_number: (empty)
- quiz_questions_layout: (empty)
- quiz_explanation_enabled: (empty)
- quiz_skip_question_showing: (empty)
- question_count: 6
Question 1: Level Adjusters
- question_type: singleChoice
- question_points: 1.00
- question_status: publish
- question_display_points: 1
- question_answer_required: 1
- question_randomize: 1
- question_order: 0
- question_negative_score: 0.00
- question_content: Which part of the stand do the level adjusters screw into?
- question_explanation: (empty)
Answers (3):
-
- [incorrect] answer_is_correct=0 · view_format=text · Cross Section
-
- [CORRECT] answer_is_correct=1 · view_format=text · Legs
-
- [incorrect] answer_is_correct=0 · view_format=text · Rollers
Question 2: Screws
- question_type: singleChoice
- question_points: 1.00
- question_status: publish
- question_display_points: 1
- question_answer_required: 1
- question_randomize: 1
- question_order: 0
- question_negative_score: 0.00
- question_content: Which screws should be used to attach the vinyl cutter to the stand?
- question_explanation: (empty)
Answers (3):
-
- [incorrect] answer_is_correct=0 · view_format=text · Long Screws
-
- [incorrect] answer_is_correct=0 · view_format=text · Any Screws
-
- [CORRECT] answer_is_correct=1 · view_format=text · Short Flush Screws
Question 3: Cutter Attachment
- question_type: singleChoice
- question_points: 1.00
- question_status: publish
- question_display_points: 1
- question_answer_required: 1
- question_randomize: 1
- question_order: 0
- question_negative_score: 0.00
- question_content: Which part will be used connect the vinyl cutter to the stand?
- question_explanation: (empty)
Answers (3):
-
- [CORRECT] answer_is_correct=1 · view_format=text · Base Plates
-
- [incorrect] answer_is_correct=0 · view_format=text · Squeegee
-
- [incorrect] answer_is_correct=0 · view_format=text · Arm Attachments
Question 4: Stand Orientation
- question_type: singleChoice
- question_points: 1.00
- question_status: publish
- question_display_points: 1
- question_answer_required: 1
- question_randomize: 1
- question_order: 0
- question_negative_score: 0.00
- question_content: When the stand is assembled and the vinyl cutter is attached, which way should the rollers face in relation to the vinyl cutter?
- question_explanation: (empty)
Answers (2):
-
- [incorrect] answer_is_correct=0 · view_format=text · To the front of the cutter
-
- [CORRECT] answer_is_correct=1 · view_format=text · To the back of the cutter
Question 5: Legs Stability
- question_type: singleChoice
- question_points: 1.00
- question_status: publish
- question_display_points: 1
- question_answer_required: 1
- question_randomize: 1
- question_order: 0
- question_negative_score: 0.00
- question_content: Which part should be used to keep the two stand legs stable?
- question_explanation: (empty)
Answers (3):
-
- [CORRECT] answer_is_correct=1 · view_format=text · Cross Section
-
- [incorrect] answer_is_correct=0 · view_format=text · Plotter
-
- [incorrect] answer_is_correct=0 · view_format=text · Base Plate
Question 6: Stand Parts
- question_type: multipleChoice
- question_points: 1.00
- question_status: publish
- question_display_points: 1
- question_answer_required: 1
- question_randomize: 1
- question_order: 0
- question_negative_score: 0.00
- question_content: Select all the correct vinyl cutter stand by part names.
- question_explanation: (empty)
Answers (9):
-
- [CORRECT] answer_is_correct=1 · view_format=text · Rollers
-
- [CORRECT] answer_is_correct=1 · view_format=text · Feet
-
- [CORRECT] answer_is_correct=1 · view_format=text · Base Plate
-
- [incorrect] answer_is_correct=0 · view_format=text · Brushes
-
- [CORRECT] answer_is_correct=1 · view_format=text · Legs
-
- [incorrect] answer_is_correct=0 · view_format=text · Cleaner
-
- [CORRECT] answer_is_correct=1 · view_format=text · Cross Section
-
- [incorrect] answer_is_correct=0 · view_format=text · Cutting Block
-
- [CORRECT] answer_is_correct=1 · view_format=text · Arm Attachment
After lesson: Parts
Quiz: Parts
- follows_lesson: Parts
- quiz_content: In this quiz you will be running through the vinyl cutter parts.
- quiz_time: 0
- quiz_time_unit: minutes
- quiz_hide_time: (empty)
- quiz_feedback_mode: retry
- quiz_passing_grade: 80
- quiz_max_attempts_allowed: 0
- quiz_questions_order: rand
- quiz_hide_question_number: (empty)
- quiz_questions_layout: (empty)
- quiz_explanation_enabled: (empty)
- quiz_skip_question_showing: (empty)
- question_count: 2
Question 1: Laser-Eye
- question_type: singleChoice
- question_points: 1.00
- question_status: publish
- question_display_points: 1
- question_answer_required: 1
- question_randomize: 1
- question_order: 0
- question_negative_score: 0.00
- question_content: What is the laser-eye used for?
- question_explanation: (empty)
Answers (3):
-
- [CORRECT] answer_is_correct=1 · view_format=text · Align Registration Marks
-
- [incorrect] answer_is_correct=0 · view_format=text · Fine-Tune the Blade Height
-
- [incorrect] answer_is_correct=0 · view_format=text · Calibrate Velocity
Question 2: Common Parts
- question_type: multipleChoice
- question_points: 4.00
- question_status: publish
- question_display_points: 1
- question_answer_required: 1
- question_randomize: 1
- question_order: 0
- question_negative_score: 0.00
- question_content: Select all the common parts of a vinyl cutter by name.
- question_explanation: (empty)
Answers (13):
-
- [CORRECT] answer_is_correct=1 · view_format=text · COM Port
-
- [CORRECT] answer_is_correct=1 · view_format=text · On / Off Switch
-
- [CORRECT] answer_is_correct=1 · view_format=text · Cutting Strip
-
- [CORRECT] answer_is_correct=1 · view_format=text · Power Port
-
- [CORRECT] answer_is_correct=1 · view_format=text · USB Port
-
- [CORRECT] answer_is_correct=1 · view_format=text · U-Disk Port
-
- [CORRECT] answer_is_correct=1 · view_format=text · Control Panel
-
- [CORRECT] answer_is_correct=1 · view_format=text · Pinch Rollers
-
- [CORRECT] answer_is_correct=1 · view_format=text · Registration Mark Laser
-
- [incorrect] answer_is_correct=0 · view_format=text · Auto Leveler
-
- [incorrect] answer_is_correct=0 · view_format=text · Printer Head
-
- [CORRECT] answer_is_correct=1 · view_format=text · Measuring Ruler
-
- [incorrect] answer_is_correct=0 · view_format=text · Sata Cable
After lesson: Operations
Quiz: Operation
- follows_lesson: Operations
- quiz_content: In this quiz we will be testing your knowledge based on what you learned in the vinyl cutter operations lesson.
- quiz_time: 0
- quiz_time_unit: minutes
- quiz_hide_time: (empty)
- quiz_feedback_mode: retry
- quiz_passing_grade: 80
- quiz_max_attempts_allowed: 0
- quiz_questions_order: rand
- quiz_hide_question_number: (empty)
- quiz_questions_layout: (empty)
- quiz_explanation_enabled: (empty)
- quiz_skip_question_showing: (empty)
- question_count: 9
Question 1: Material Stability
- question_type: multipleChoice
- question_points: 3.00
- question_status: publish
- question_display_points: 1
- question_answer_required: 1
- question_randomize: 1
- question_order: 0
- question_negative_score: 0.00
- question_content: Which of the following parts will be used for material stability?
- question_explanation: (empty)
Answers (5):
-
- [CORRECT] answer_is_correct=1 · view_format=text · Cutting Mat
-
- [CORRECT] answer_is_correct=1 · view_format=text · Pinch Rollers
-
- [incorrect] answer_is_correct=0 · view_format=text · Control Panel
-
- [incorrect] answer_is_correct=0 · view_format=text · USB Port
-
- [CORRECT] answer_is_correct=1 · view_format=text · Rollers
Question 2: Vinyl Storage
- question_type: singleChoice
- question_points: 1.00
- question_status: publish
- question_display_points: 1
- question_answer_required: 1
- question_randomize: 1
- question_order: 0
- question_negative_score: 0.00
- question_content: When storing vinyl rolls, what is the correct way to store them.
- question_explanation: (empty)
Answers (2):
-
- [CORRECT] answer_is_correct=1 · view_format=text · On Its Side
-
- [incorrect] answer_is_correct=0 · view_format=text · Up Right
Question 3: Small Material
- question_type: singleChoice
- question_points: 1.00
- question_status: publish
- question_display_points: 1
- question_answer_required: 1
- question_randomize: 1
- question_order: 0
- question_negative_score: 0.00
- question_content: When you are working with a small piece of vinyl, which of the following should be used?
- question_explanation: (empty)
Answers (3):
-
- [incorrect] answer_is_correct=0 · view_format=text · Material Rollers
-
- [CORRECT] answer_is_correct=1 · view_format=text · Cutting Mat
-
- [incorrect] answer_is_correct=0 · view_format=text · Laser-Eye
Question 4: Detailed Work
- question_type: singleChoice
- question_points: 1.00
- question_status: publish
- question_display_points: 1
- question_answer_required: 1
- question_randomize: 1
- question_order: 0
- question_negative_score: 0.00
- question_content: When you are working on detailed designs which of the following blades would be best suited for the job?
- question_explanation: (empty)
Answers (2):
-
- [CORRECT] answer_is_correct=1 · view_format=text · 30 Degrees
-
- [incorrect] answer_is_correct=0 · view_format=text · 60 Degrees
Question 5: Blade Alternitive
- question_type: singleChoice
- question_points: 1.00
- question_status: publish
- question_display_points: 1
- question_answer_required: 1
- question_randomize: 1
- question_order: 0
- question_negative_score: 0.00
- question_content: Which alternative tool will also work in the same housing as the blade holder?
- question_explanation: (empty)
Answers (3):
-
- [incorrect] answer_is_correct=0 · view_format=text · Arm Attachment
-
- [incorrect] answer_is_correct=0 · view_format=text · Clamp Roller
-
- [CORRECT] answer_is_correct=1 · view_format=text · Plotter Pen
Question 6: Material Tention
- question_type: trueFalse
- question_points: 1.00
- question_status: publish
- question_display_points: 1
- question_answer_required: 1
- question_randomize: 1
- question_order: 0
- question_negative_score: 0.00
- question_content: When loading vinyl material from a roll, should the material be under tension before clapping the pinch rollers?
- question_explanation: (empty)
Answers (2):
-
- [CORRECT] answer_is_correct=1 · view_format=text · True
-
- [incorrect] answer_is_correct=0 · view_format=text · False
Question 7: Stability
- question_type: singleChoice
- question_points: 1.00
- question_status: publish
- question_display_points: 1
- question_answer_required: 1
- question_randomize: 1
- question_order: 0
- question_negative_score: 0.00
- question_content: To ensure that the vinyl cutter is stable while moving, which of the following should be addressed?
- question_explanation: (empty)
Answers (3):
-
- [incorrect] answer_is_correct=0 · view_format=text · COM Port
-
- [CORRECT] answer_is_correct=1 · view_format=text · Level Adjusters
-
- [incorrect] answer_is_correct=0 · view_format=text · Origin Zeroing
Question 8: Connection
- question_type: multipleChoice
- question_points: 1.00
- question_status: publish
- question_display_points: 1
- question_answer_required: 1
- question_randomize: 1
- question_order: 0
- question_negative_score: 0.00
- question_content: To connect the vinyl cutter to a computer, which of the following should be used?
- question_explanation: (empty)
Answers (4):
-
- [CORRECT] answer_is_correct=1 · view_format=text · USB Printer Cable
-
- [incorrect] answer_is_correct=0 · view_format=text · Test Button
-
- [CORRECT] answer_is_correct=1 · view_format=text · COM Port
-
- [incorrect] answer_is_correct=0 · view_format=text · U-Disk Port
Question 9: Blades General
- question_type: singleChoice
- question_points: 1.00
- question_status: publish
- question_display_points: 1
- question_answer_required: 1
- question_randomize: 1
- question_order: 0
- question_negative_score: 0.00
- question_content: Which one of the following blades is the best suited for general cutting?
- question_explanation: (empty)
Answers (3):
-
- [incorrect] answer_is_correct=0 · view_format=text · 60 degree
-
- [incorrect] answer_is_correct=0 · view_format=text · 30 degree
-
- [CORRECT] answer_is_correct=1 · view_format=text · 45 degree
After lesson: Safety
Quiz: Safety
- follows_lesson: Safety
- quiz_content: In this quiz we will be covering safety practises from the safety lesson.
- quiz_time: 0
- quiz_time_unit: minutes
- quiz_hide_time: (empty)
- quiz_feedback_mode: retry
- quiz_passing_grade: 80
- quiz_max_attempts_allowed: 0
- quiz_questions_order: rand
- quiz_hide_question_number: (empty)
- quiz_questions_layout: (empty)
- quiz_explanation_enabled: (empty)
- quiz_skip_question_showing: (empty)
- question_count: 2
Question 1: Safety Rules
- question_type: multipleChoice
- question_points: 2.00
- question_status: publish
- question_display_points: 1
- question_answer_required: 1
- question_randomize: 1
- question_order: 0
- question_negative_score: 0.00
- question_content: Select important safety practises from the list below.
- question_explanation: (empty)
Answers (4):
-
- [incorrect] answer_is_correct=0 · view_format=text · Never adjust the force and velocity of the machine while cutting
-
- [CORRECT] answer_is_correct=1 · view_format=text · Watch out for moving parts while the machine is active
-
- [CORRECT] answer_is_correct=1 · view_format=text · Do not leave the cutter unattended while cutting
-
- [incorrect] answer_is_correct=0 · view_format=text · Always reset the machine after cutting
Question 2: Emergency
- question_type: singleChoice
- question_points: 1.00
- question_status: publish
- question_display_points: 1
- question_answer_required: 1
- question_randomize: 1
- question_order: 0
- question_negative_score: 0.00
- question_content: In case of an emergency which procedure should be followed?
- question_explanation: (empty)
Answers (3):
-
- [incorrect] answer_is_correct=0 · view_format=text · Set the Velocity to 0
-
- [CORRECT] answer_is_correct=1 · view_format=text · Switch the machine off
-
- [incorrect] answer_is_correct=0 · view_format=text · Press the reset button
After lesson: Controls
Quiz: Controls
- follows_lesson: Controls
- quiz_content: In this quiz we will be covering the controls section the machines.
- quiz_time: 0
- quiz_time_unit: minutes
- quiz_hide_time: (empty)
- quiz_feedback_mode: retry
- quiz_passing_grade: 80
- quiz_max_attempts_allowed: 0
- quiz_questions_order: rand
- quiz_hide_question_number: (empty)
- quiz_questions_layout: (empty)
- quiz_explanation_enabled: (empty)
- quiz_skip_question_showing: (empty)
- question_count: 10
Question 1: Common Buttons
- question_type: multipleChoice
- question_points: 1.00
- question_status: publish
- question_display_points: 1
- question_answer_required: 1
- question_randomize: 1
- question_order: 0
- question_negative_score: 0.00
- question_content: Which buttons from the list below could be located on a control panel?
- question_explanation: (empty)
Answers (11):
-
- [CORRECT] answer_is_correct=1 · view_format=text · Enter
-
- [CORRECT] answer_is_correct=1 · view_format=text · Repeat
-
- [CORRECT] answer_is_correct=1 · view_format=text · Reset
-
- [incorrect] answer_is_correct=0 · view_format=text · Backspace
-
- [CORRECT] answer_is_correct=1 · view_format=text · Pause
-
- [CORRECT] answer_is_correct=1 · view_format=text · Test
-
- [CORRECT] answer_is_correct=1 · view_format=text · Origin
-
- [CORRECT] answer_is_correct=1 · view_format=text · Arrows
-
- [incorrect] answer_is_correct=0 · view_format=text · Delete
-
- [CORRECT] answer_is_correct=1 · view_format=text · Menu
-
- [incorrect] answer_is_correct=0 · view_format=text · Shift
Question 2: Control Types
- question_type: trueFalse
- question_points: 1.00
- question_status: publish
- question_display_points: 1
- question_answer_required: 1
- question_randomize: 1
- question_order: 0
- question_negative_score: 0.00
- question_content: Do you get multiple types of control panels?
- question_explanation: (empty)
Answers (2):
-
- [CORRECT] answer_is_correct=1 · view_format=text · True
-
- [incorrect] answer_is_correct=0 · view_format=text · False
Question 3: Force & Velocity
- question_type: singleChoice
- question_points: 1.00
- question_status: publish
- question_display_points: 1
- question_answer_required: 1
- question_randomize: 1
- question_order: 0
- question_negative_score: 0.00
- question_content: If you would like to change settings from x & y location to force and velocity, which button should be used?
- question_explanation: (empty)
Answers (3):
-
- [incorrect] answer_is_correct=0 · view_format=text · Pause
-
- [incorrect] answer_is_correct=0 · view_format=text · Origin
-
- [CORRECT] answer_is_correct=1 · view_format=text · Menu
Question 4: New Location
- question_type: singleChoice
- question_points: 1.00
- question_status: publish
- question_display_points: 1
- question_answer_required: 1
- question_randomize: 1
- question_order: 0
- question_negative_score: 0.00
- question_content: To set a new cutter head location before cutting, which buttons should be used?
- question_explanation: (empty)
Answers (3):
-
- [CORRECT] answer_is_correct=1 · view_format=text · Arrows / Origin
-
- [incorrect] answer_is_correct=0 · view_format=text · Arrows / Reset
-
- [incorrect] answer_is_correct=0 · view_format=text · Arrows / Menu / Enter
Question 5: Location
- question_type: singleChoice
- question_points: 1.00
- question_status: publish
- question_display_points: 1
- question_answer_required: 1
- question_randomize: 1
- question_order: 0
- question_negative_score: 0.00
- question_content: If you would like to set the location of the cutter blade & vinyl, which button should be used?
- question_explanation: (empty)
Answers (3):
-
- [CORRECT] answer_is_correct=1 · view_format=text · Arrows
-
- [incorrect] answer_is_correct=0 · view_format=text · Menu
-
- [incorrect] answer_is_correct=0 · view_format=text · Auto Location
Question 6: Correct Force
- question_type: singleChoice
- question_points: 1.00
- question_status: publish
- question_display_points: 1
- question_answer_required: 1
- question_randomize: 1
- question_order: 0
- question_negative_score: 0.00
- question_content: Which button should be used to see if you have the correct force set?
- question_explanation: (empty)
Answers (3):
-
- [CORRECT] answer_is_correct=1 · view_format=text · Test
-
- [incorrect] answer_is_correct=0 · view_format=text · Menu / Depth
-
- [incorrect] answer_is_correct=0 · view_format=text · Auto Depth
Question 7: Machine Model
- question_type: singleChoice
- question_points: 1.00
- question_status: publish
- question_display_points: 1
- question_answer_required: 1
- question_randomize: 1
- question_order: 0
- question_negative_score: 0.00
- question_content: Which button on some vinyl cutters could be used to locate the machines model name and number?
- question_explanation: (empty)
Answers (3):
-
- [incorrect] answer_is_correct=0 · view_format=text · Menu
-
- [incorrect] answer_is_correct=0 · view_format=text · Test
-
- [CORRECT] answer_is_correct=1 · view_format=text · Reset
Question 8: Flash Drive Format
- question_type: singleChoice
- question_points: 1.00
- question_status: publish
- question_display_points: 1
- question_answer_required: 1
- question_randomize: 1
- question_order: 0
- question_negative_score: 0.00
- question_content: Which flash drive and file format types are used when cutting from a flash drive?
- question_explanation: (empty)
Answers (3):
-
- [incorrect] answer_is_correct=0 · view_format=text · NTFS = Flash Drive / PTL = File
-
- [incorrect] answer_is_correct=0 · view_format=text · Fat32 = Flash Drive / JPG = File
-
- [CORRECT] answer_is_correct=1 · view_format=text · Fat32 = Flash Drive / PTL = File
Question 9: Cut Again
- question_type: singleChoice
- question_points: 1.00
- question_status: publish
- question_display_points: 1
- question_answer_required: 1
- question_randomize: 1
- question_order: 0
- question_negative_score: 0.00
- question_content: If you would like to cut the last active job, which buttons should be used?
- question_explanation: (empty)
Answers (3):
-
- [CORRECT] answer_is_correct=1 · view_format=text · Repeat / Enter
-
- [incorrect] answer_is_correct=0 · view_format=text · Reset / Enter
-
- [incorrect] answer_is_correct=0 · view_format=text · Menu / Enter
Question 10: U-Dist
- question_type: singleChoice
- question_points: 1.00
- question_status: publish
- question_display_points: 1
- question_answer_required: 1
- question_randomize: 1
- question_order: 0
- question_negative_score: 0.00
- question_content: If you would like to cut a file from your flash drive (u-disk), which buttons should be used?
- question_explanation: (empty)
Answers (3):
-
- [incorrect] answer_is_correct=0 · view_format=text · Origin x2 / Enter
-
- [incorrect] answer_is_correct=0 · view_format=text · Menu / Enter
-
- [CORRECT] answer_is_correct=1 · view_format=text · Repeat x2 / Enter
After lesson: Maintenance
Quiz: Maintenance
- follows_lesson: Maintenance
- quiz_content: In this quiz we will be looking at different maintenance procedures.
- quiz_time: 0
- quiz_time_unit: minutes
- quiz_hide_time: (empty)
- quiz_feedback_mode: retry
- quiz_passing_grade: 80
- quiz_max_attempts_allowed: 0
- quiz_questions_order: rand
- quiz_hide_question_number: (empty)
- quiz_questions_layout: (empty)
- quiz_explanation_enabled: (empty)
- quiz_skip_question_showing: (empty)
- question_count: 6
Question 1: Off Cutter
- question_type: multipleChoice
- question_points: 1.00
- question_status: publish
- question_display_points: 1
- question_answer_required: 1
- question_randomize: 1
- question_order: 0
- question_negative_score: 0.00
- question_content: If your cutter is not powering on, which of the following could be likely causes?
- question_explanation: (empty)
Answers (5):
-
- [CORRECT] answer_is_correct=1 · view_format=text · Power plug did not insert all the way
-
- [CORRECT] answer_is_correct=1 · view_format=text · Power switch off on machine
-
- [CORRECT] answer_is_correct=1 · view_format=text · Power switch off on wall socket
-
- [CORRECT] answer_is_correct=1 · view_format=text · Blown fuse
-
- [CORRECT] answer_is_correct=1 · view_format=text · Blown Power Supply
Question 2: Consumables
- question_type: singleChoice
- question_points: 1.00
- question_status: publish
- question_display_points: 1
- question_answer_required: 1
- question_randomize: 1
- question_order: 0
- question_negative_score: 0.00
- question_content: If you need more vinyl cutter consumables, where could you get new ones?
- question_explanation: (empty)
Answers (3):
-
- [incorrect] answer_is_correct=0 · view_format=text · EveryConsumable.org
-
- [CORRECT] answer_is_correct=1 · view_format=text · BuyThis.co.za
-
- [incorrect] answer_is_correct=0 · view_format=text · VinylCutters.com
Question 3: Damaged Material
- question_type: multipleChoice
- question_points: 1.00
- question_status: publish
- question_display_points: 1
- question_answer_required: 1
- question_randomize: 1
- question_order: 0
- question_negative_score: 0.00
- question_content: If the material is being damaged while cutting, what is the most likely causes?
- question_explanation: (empty)
Answers (4):
-
- [incorrect] answer_is_correct=0 · view_format=text · Laser-Eye Not Synced
-
- [incorrect] answer_is_correct=0 · view_format=text · Wrong USB Cable
-
- [CORRECT] answer_is_correct=1 · view_format=text · Damaged Cutting Strip
-
- [CORRECT] answer_is_correct=1 · view_format=text · Blunt Blade
Question 4: Skew Materials
- question_type: multipleChoice
- question_points: 2.00
- question_status: publish
- question_display_points: 1
- question_answer_required: 1
- question_randomize: 1
- question_order: 0
- question_negative_score: 0.00
- question_content: If you have loaded your material correctly but it runs skew while feeding, what is the most likely causes?
- question_explanation: (empty)
Answers (4):
-
- [CORRECT] answer_is_correct=1 · view_format=text · Skew Vinyl Roll
-
- [CORRECT] answer_is_correct=1 · view_format=text · Pinch Roller Tension
-
- [incorrect] answer_is_correct=0 · view_format=text · Incorrect Origin Point
-
- [incorrect] answer_is_correct=0 · view_format=text · Blunt Blade
Question 5: Dust
- question_type: trueFalse
- question_points: 1.00
- question_status: publish
- question_display_points: 1
- question_answer_required: 1
- question_randomize: (empty)
- question_order: 0
- question_negative_score: 0.00
- question_content: Could excessive dust and debris from a workroom effect the vinyl cutter over time?
- question_explanation: (empty)
Answers (2):
-
- [CORRECT] answer_is_correct=1 · view_format=text · True
-
- [incorrect] answer_is_correct=0 · view_format=text · False
Question 6: Cable
- question_type: singleChoice
- question_points: 1.00
- question_status: publish
- question_display_points: 1
- question_answer_required: 1
- question_randomize: 1
- question_order: 0
- question_negative_score: 0.00
- question_content: When using a printer cable on the cutter, which side of the cable should rather be plug in and out to ensure longevity of the cutter?
- question_explanation: (empty)
Answers (2):
-
- [CORRECT] answer_is_correct=1 · view_format=text · Port on the Computer
-
- [incorrect] answer_is_correct=0 · view_format=text · Port on the Cutter
After lesson: VinylCut 5 - Setup
Quiz: Setup
- follows_lesson: VinylCut 5 - Setup
- quiz_content: Important knowledge in regard to setting up VinylCut 5.
- quiz_time: 0
- quiz_time_unit: minutes
- quiz_hide_time: (empty)
- quiz_feedback_mode: retry
- quiz_passing_grade: 80
- quiz_max_attempts_allowed: 0
- quiz_questions_order: rand
- quiz_hide_question_number: (empty)
- quiz_questions_layout: (empty)
- quiz_explanation_enabled: (empty)
- quiz_skip_question_showing: (empty)
- question_count: 3
Question 1: Deactivation
- question_type: trueFalse
- question_points: 1.00
- question_status: publish
- question_display_points: 1
- question_answer_required: 1
- question_randomize: 1
- question_order: 0
- question_negative_score: 0.00
- question_content: If you are unable to deactivate VinylCut 5 on your current system before activating it on another, would you need to do the offline deactivation first?
- question_explanation: (empty)
Answers (2):
-
- [incorrect] answer_is_correct=0 · view_format=text · False
-
- [CORRECT] answer_is_correct=1 · view_format=text · True
Question 2: Acquire a License
- question_type: multipleChoice
- question_points: 1.00
- question_status: publish
- question_display_points: 1
- question_answer_required: 1
- question_randomize: 1
- question_order: 0
- question_negative_score: 0.00
- question_content: If you would like to get a licensed version of VinylCut 5, where would you go to do that?
- question_explanation: (empty)
Answers (3):
-
- [CORRECT] answer_is_correct=1 · view_format=text · BuyThis.co.za
-
- [CORRECT] answer_is_correct=1 · view_format=text · VinylCut.co.za
-
- [incorrect] answer_is_correct=0 · view_format=text · CutVinyl.co.za
Question 3: Multiple Sessions
- question_type: singleChoice
- question_points: 1.00
- question_status: publish
- question_display_points: 1
- question_answer_required: 1
- question_randomize: 1
- question_order: 0
- question_negative_score: 0.00
- question_content: If you would like to use you licensed version of VinylCut 5 on another system, which of the following would be an important step?
- question_explanation: (empty)
Answers (3):
-
- [CORRECT] answer_is_correct=1 · view_format=text · Deactivate VinylCut 5 on the current system first
-
- [incorrect] answer_is_correct=0 · view_format=text · You can already use the licence on multiple systems at the same time
-
- [incorrect] answer_is_correct=0 · view_format=text · Buy the Muli-System key version of VinylCut 5
After lesson: User Interface - Part1
Quiz: UI Part 1
- follows_lesson: User Interface - Part1
- quiz_content: A quiz in regard to the first part of the User Interface of VinylCut 5.
- quiz_time: 0
- quiz_time_unit: minutes
- quiz_hide_time: (empty)
- quiz_feedback_mode: retry
- quiz_passing_grade: 80
- quiz_max_attempts_allowed: 0
- quiz_questions_order: rand
- quiz_hide_question_number: (empty)
- quiz_questions_layout: (empty)
- quiz_explanation_enabled: (empty)
- quiz_skip_question_showing: (empty)
- question_count: 6
Question 1: Adding Designs
- question_type: singleChoice
- question_points: 1.00
- question_status: publish
- question_display_points: 1
- question_answer_required: 1
- question_randomize: 1
- question_order: 0
- question_negative_score: 0.00
- question_content: If you would like to add designs from an external source, which one of the features would you use from the Main Features Bar?
- question_explanation: (empty)
Answers (3):
-
- [CORRECT] answer_is_correct=1 · view_format=text · Import
-
- [incorrect] answer_is_correct=0 · view_format=text · Optimizer
-
- [incorrect] answer_is_correct=0 · view_format=text · Preview
Question 2: Selection
- question_type: singleChoice
- question_points: 1.00
- question_status: publish
- question_display_points: 1
- question_answer_required: 1
- question_randomize: 1
- question_order: 0
- question_negative_score: 0.00
- question_content: If you would like to make a selection of a shape within the cutting mat, which UI section should be used?
- question_explanation: (empty)
Answers (3):
-
- [incorrect] answer_is_correct=0 · view_format=text · Control Panel
-
- [CORRECT] answer_is_correct=1 · view_format=text · Toolbar
-
- [incorrect] answer_is_correct=0 · view_format=text · Main Features Bar
Question 3: Hidden Features
- question_type: singleChoice
- question_points: 1.00
- question_status: publish
- question_display_points: 1
- question_answer_required: 1
- question_randomize: 1
- question_order: 0
- question_negative_score: 0.00
- question_content: If you are looking for a feature that is not openly visible by default, which of the following could be used to find it?
- question_explanation: (empty)
Answers (3):
-
- [incorrect] answer_is_correct=0 · view_format=text · Brush Presets
-
- [incorrect] answer_is_correct=0 · view_format=text · Main Features Bar
-
- [CORRECT] answer_is_correct=1 · view_format=text · Main Menu
Question 4: UI Components
- question_type: multipleChoice
- question_points: 3.00
- question_status: publish
- question_display_points: 1
- question_answer_required: 1
- question_randomize: 1
- question_order: 0
- question_negative_score: 0.00
- question_content: Which of the following UI components can be found in VinylCut 5
- question_explanation: (empty)
Answers (6):
-
- [incorrect] answer_is_correct=0 · view_format=text · Composition Panel
-
- [CORRECT] answer_is_correct=1 · view_format=text · Toolbar
-
- [CORRECT] answer_is_correct=1 · view_format=text · Main Features Bar
-
- [CORRECT] answer_is_correct=1 · view_format=text · Main Menu
-
- [incorrect] answer_is_correct=0 · view_format=text · Paint Brush Panel
-
- [CORRECT] answer_is_correct=1 · view_format=text · Cutting Mat
Question 5: Choices
- question_type: singleChoice
- question_points: 1.00
- question_status: publish
- question_display_points: 1
- question_answer_required: 1
- question_randomize: 1
- question_order: 0
- question_negative_score: 0.00
- question_content: If an Item on the Toolbar has a small black arrow on the bottom right of the icon, what does that indicate to the user?
- question_explanation: (empty)
Answers (3):
-
- [CORRECT] answer_is_correct=1 · view_format=text · There is more option within that tool
-
- [incorrect] answer_is_correct=0 · view_format=text · Same as the tools without one
-
- [incorrect] answer_is_correct=0 · view_format=text · It shows the current active tool in the Toolbar
Question 6: Key Effects
- question_type: multipleChoice
- question_points: 3.00
- question_status: publish
- question_display_points: 1
- question_answer_required: 1
- question_randomize: 1
- question_order: 0
- question_negative_score: 0.00
- question_content: Which of the effects within the effects menu are most commonly used?
- question_explanation: (empty)
Answers (5):
-
- [incorrect] answer_is_correct=0 · view_format=text · Bridge Warp
-
- [CORRECT] answer_is_correct=1 · view_format=text · Nest
-
- [CORRECT] answer_is_correct=1 · view_format=text · Shadow Layer (Contour Cut)
-
- [incorrect] answer_is_correct=0 · view_format=text · Barrel Distortion
-
- [CORRECT] answer_is_correct=1 · view_format=text · QR-Code
After lesson: User Interface - Part2
Quiz: UI Part 2
- follows_lesson: User Interface - Part2
- quiz_content: The send part of the User Interface of VinylCut 5.
- quiz_time: 0
- quiz_time_unit: minutes
- quiz_hide_time: (empty)
- quiz_feedback_mode: retry
- quiz_passing_grade: 80
- quiz_max_attempts_allowed: 0
- quiz_questions_order: rand
- quiz_hide_question_number: (empty)
- quiz_questions_layout: (empty)
- quiz_explanation_enabled: (empty)
- quiz_skip_question_showing: (empty)
- question_count: 7
Question 1: Colored
- question_type: singleChoice
- question_points: 1.00
- question_status: publish
- question_display_points: 1
- question_answer_required: 1
- question_randomize: 1
- question_order: 0
- question_negative_score: 0.00
- question_content: When wanting to change the color a shape, which Control Panel tab should be used?
- question_explanation: (empty)
Answers (3):
-
- [incorrect] answer_is_correct=0 · view_format=text · Style
-
- [CORRECT] answer_is_correct=1 · view_format=text · Fill & Stroke
-
- [incorrect] answer_is_correct=0 · view_format=text · Object Color
Question 2: Object Order
- question_type: singleChoice
- question_points: 1.00
- question_status: publish
- question_display_points: 1
- question_answer_required: 1
- question_randomize: 1
- question_order: 0
- question_negative_score: 0.00
- question_content: To adjust the stacking order of multiple shapes and objects, which tab from the Control Panel should be used?
- question_explanation: (empty)
Answers (3):
-
- [incorrect] answer_is_correct=0 · view_format=text · Objects & Shapes
-
- [incorrect] answer_is_correct=0 · view_format=text · Order List
-
- [CORRECT] answer_is_correct=1 · view_format=text · Layers
Question 3: Navigation
- question_type: singleChoice
- question_points: 1.00
- question_status: publish
- question_display_points: 1
- question_answer_required: 1
- question_randomize: 1
- question_order: 0
- question_negative_score: 0.00
- question_content: To navigate your cutting mat while designing, where would you find the correct tools to do that?
- question_explanation: (empty)
Answers (3):
-
- [CORRECT] answer_is_correct=1 · view_format=text · Toolbar
-
- [incorrect] answer_is_correct=0 · view_format=text · Control Panel
-
- [incorrect] answer_is_correct=0 · view_format=text · Main Features Bar
Question 4: More Shapes
- question_type: singleChoice
- question_points: 1.00
- question_status: publish
- question_display_points: 1
- question_answer_required: 1
- question_randomize: 1
- question_order: 0
- question_negative_score: 0.00
- question_content: If you would like to add shapes that is not found within the Shapes tool, which feature could you use?
- question_explanation: (empty)
Answers (3):
-
- [incorrect] answer_is_correct=0 · view_format=text · Extra Shapes
-
- [incorrect] answer_is_correct=0 · view_format=text · Control Panel
-
- [CORRECT] answer_is_correct=1 · view_format=text · Library
Question 5: Text
- question_type: singleChoice
- question_points: 1.00
- question_status: publish
- question_display_points: 1
- question_answer_required: 1
- question_randomize: 1
- question_order: 0
- question_negative_score: 0.00
- question_content: If you would like to make some more advanced adjustments to your text, which UI feature would you use?
- question_explanation: (empty)
Answers (3):
-
- [incorrect] answer_is_correct=0 · view_format=text · Cutting Mat
-
- [CORRECT] answer_is_correct=1 · view_format=text · Control Panel
-
- [incorrect] answer_is_correct=0 · view_format=text · Main Features Bar
Question 6: Navigation Tools
- question_type: multipleChoice
- question_points: 1.00
- question_status: publish
- question_display_points: 1
- question_answer_required: 1
- question_randomize: 1
- question_order: 0
- question_negative_score: 0.00
- question_content: Which of the following tools will be used to navigate the design / cutting mat?
- question_explanation: (empty)
Answers (4):
-
- [incorrect] answer_is_correct=0 · view_format=text · Gradient
-
- [incorrect] answer_is_correct=0 · view_format=text · Shape
-
- [CORRECT] answer_is_correct=1 · view_format=text · Zoom
-
- [CORRECT] answer_is_correct=1 · view_format=text · Hand
Question 7: Cutting Mat Size
- question_type: singleChoice
- question_points: 1.00
- question_status: publish
- question_display_points: 1
- question_answer_required: 1
- question_randomize: 1
- question_order: 0
- question_negative_score: 0.00
- question_content: If you have created a project and would like to change the size of the cutting mat, which of the following Control Panel tabs should you use?
- question_explanation: (empty)
Answers (3):
-
- [incorrect] answer_is_correct=0 · view_format=text · Position & Size
-
- [CORRECT] answer_is_correct=1 · view_format=text · Document
-
- [incorrect] answer_is_correct=0 · view_format=text · Text
After lesson: Cutters
Quiz: Cutter
- follows_lesson: Cutters
- quiz_content: In this quiz we will being looking at what relations a vinyl cutter and the VinylCut 5 software has in common.
- quiz_time: 0
- quiz_time_unit: minutes
- quiz_hide_time: (empty)
- quiz_feedback_mode: retry
- quiz_passing_grade: 80
- quiz_max_attempts_allowed: 0
- quiz_questions_order: rand
- quiz_hide_question_number: (empty)
- quiz_questions_layout: (empty)
- quiz_explanation_enabled: (empty)
- quiz_skip_question_showing: (empty)
- question_count: 8
Question 1: Adding a Cutter
- question_type: multipleChoice
- question_points: 2.00
- question_status: publish
- question_display_points: 1
- question_answer_required: 1
- question_randomize: 1
- question_order: 0
- question_negative_score: 0.00
- question_content: Which of the following could be used to add a cutter to VinylCut 5?
- question_explanation: (empty)
Answers (3):
-
- [incorrect] answer_is_correct=0 · view_format=text · Main Menu / Help / Auto Add Cutter
-
- [CORRECT] answer_is_correct=1 · view_format=text · Main Menu / Cutter / My Cutter / Manage Cutters...
-
- [CORRECT] answer_is_correct=1 · view_format=text · Cutter button on Main Features bar
Question 2: Cutter Make and Model
- question_type: singleChoice
- question_points: 1.00
- question_status: publish
- question_display_points: 1
- question_answer_required: 1
- question_randomize: 1
- question_order: 0
- question_negative_score: 0.00
- question_content: Where could one find the make and model of a vinyl cutter?
- question_explanation: (empty)
Answers (3):
-
- [incorrect] answer_is_correct=0 · view_format=text · On the cutting strip
-
- [CORRECT] answer_is_correct=1 · view_format=text · Invoice or Support
-
- [incorrect] answer_is_correct=0 · view_format=text · On the vinyl cutter data cable
Question 3: Communication
- question_type: singleChoice
- question_points: 1.00
- question_status: publish
- question_display_points: 1
- question_answer_required: 1
- question_randomize: 1
- question_order: 0
- question_negative_score: 0.00
- question_content: Which option under the Cut Settings should be used to ensure that cutter and VinylCut 5 is communicating.
- question_explanation: (empty)
Answers (3):
-
- [incorrect] answer_is_correct=0 · view_format=text · Save to File
-
- [incorrect] answer_is_correct=0 · view_format=text · Cut Mode
-
- [CORRECT] answer_is_correct=1 · view_format=text · Test Connection
Question 4: Normal Cutting
- question_type: singleChoice
- question_points: 1.00
- question_status: publish
- question_display_points: 1
- question_answer_required: 1
- question_randomize: 1
- question_order: 0
- question_negative_score: 0.00
- question_content: Which cut button should be used when cutting designs that has no registration marks?
- question_explanation: (empty)
Answers (3):
-
- [incorrect] answer_is_correct=0 · view_format=text · Print + Cut
-
- [incorrect] answer_is_correct=0 · view_format=text · Cut Lines Type
-
- [CORRECT] answer_is_correct=1 · view_format=text · Cut
Question 5: Flash Drive
- question_type: trueFalse
- question_points: 1.00
- question_status: publish
- question_display_points: 1
- question_answer_required: 1
- question_randomize: 1
- question_order: 0
- question_negative_score: 0.00
- question_content: If you would like to cut your job from a flash drive, should you be using the Save to file feature?
- question_explanation: (empty)
Answers (2):
-
- [incorrect] answer_is_correct=0 · view_format=text · False
-
- [CORRECT] answer_is_correct=1 · view_format=text · True
Question 6: Large Designs
- question_type: singleChoice
- question_points: 1.00
- question_status: publish
- question_display_points: 1
- question_answer_required: 1
- question_randomize: 1
- question_order: 0
- question_negative_score: 0.00
- question_content: When you are working with a design that is larger than your cutter is capable of cutting, which feature should be used?
- question_explanation: (empty)
Answers (3):
-
- [incorrect] answer_is_correct=0 · view_format=text · Cut by Color
-
- [incorrect] answer_is_correct=0 · view_format=text · Layers
-
- [CORRECT] answer_is_correct=1 · view_format=text · Tiles
Question 7: Registration Marks
- question_type: singleChoice
- question_points: 1.00
- question_status: publish
- question_display_points: 1
- question_answer_required: 1
- question_randomize: 1
- question_order: 0
- question_negative_score: 0.00
- question_content: Under your cut setting which cut button should be used when cutting with registration mark designs?
- question_explanation: (empty)
Answers (3):
-
- [incorrect] answer_is_correct=0 · view_format=text · Cut Images
-
- [incorrect] answer_is_correct=0 · view_format=text · Cut
-
- [CORRECT] answer_is_correct=1 · view_format=text · Print + Cut
Question 8: Cutter Requirements
- question_type: multipleChoice
- question_points: 3.00
- question_status: publish
- question_display_points: 1
- question_answer_required: 1
- question_randomize: 1
- question_order: 0
- question_negative_score: 0.00
- question_content: Select a few options below of what we need to have in order before adding a vinyl cutter to VinylCut 5.
- question_explanation: (empty)
Answers (5):
-
- [incorrect] answer_is_correct=0 · view_format=text · Black Vinyl
-
- [CORRECT] answer_is_correct=1 · view_format=text · A connection between software & hardware
-
- [CORRECT] answer_is_correct=1 · view_format=text · Vinyl Cutter Model
-
- [CORRECT] answer_is_correct=1 · view_format=text · Vinyl Cutter Make
-
- [incorrect] answer_is_correct=0 · view_format=text · Registration Marks
After lesson: Projects
Quiz: Projects
- follows_lesson: Projects
- quiz_content: In this section we will be looking what is relevant for making projects within VinylCut 5
- quiz_time: 0
- quiz_time_unit: minutes
- quiz_hide_time: (empty)
- quiz_feedback_mode: retry
- quiz_passing_grade: 80
- quiz_max_attempts_allowed: 0
- quiz_questions_order: rand
- quiz_hide_question_number: (empty)
- quiz_questions_layout: (empty)
- quiz_explanation_enabled: (empty)
- quiz_skip_question_showing: (empty)
- question_count: 6
Question 1: Units
- question_type: trueFalse
- question_points: 1.00
- question_status: publish
- question_display_points: 1
- question_answer_required: 1
- question_randomize: 1
- question_order: 0
- question_negative_score: 0.00
- question_content: To change the Units of a project, could that be done within the Document tab of the Control Panel?
- question_explanation: (empty)
Answers (2):
-
- [incorrect] answer_is_correct=0 · view_format=text · False
-
- [CORRECT] answer_is_correct=1 · view_format=text · True
Question 2: Project Size
- question_type: singleChoice
- question_points: 1.00
- question_status: publish
- question_display_points: 1
- question_answer_required: 1
- question_randomize: 1
- question_order: 0
- question_negative_score: 0.00
- question_content: If you want to change the dimension of a project after it has been created, which Control Panel tab should be used?
- question_explanation: (empty)
Answers (3):
-
- [incorrect] answer_is_correct=0 · view_format=text · Help
-
- [CORRECT] answer_is_correct=1 · view_format=text · Document
-
- [incorrect] answer_is_correct=0 · view_format=text · Style
Question 3: Shortcut Key
- question_type: singleChoice
- question_points: 1.00
- question_status: publish
- question_display_points: 1
- question_answer_required: 1
- question_randomize: 1
- question_order: 0
- question_negative_score: 0.00
- question_content: Which of the following places can you find shortcut keys for different operations within VinylCut 5?
- question_explanation: (empty)
Answers (3):
-
- [incorrect] answer_is_correct=0 · view_format=text · Properties Panel
-
- [CORRECT] answer_is_correct=1 · view_format=text · Main Menu
-
- [incorrect] answer_is_correct=0 · view_format=text · Cutting Mat
Question 4: More Details
- question_type: trueFalse
- question_points: 1.00
- question_status: publish
- question_display_points: 1
- question_answer_required: 1
- question_randomize: 1
- question_order: 0
- question_negative_score: 0.00
- question_content: Are you able to store notes and extra information to a project file?
- question_explanation: (empty)
Answers (2):
-
- [CORRECT] answer_is_correct=1 · view_format=text · True
-
- [incorrect] answer_is_correct=0 · view_format=text · False
Question 5: Project Details
- question_type: trueFalse
- question_points: 1.00
- question_status: publish
- question_display_points: 1
- question_answer_required: 1
- question_randomize: 1
- question_order: 0
- question_negative_score: 0.00
- question_content: Could you use the Project Info feature to add or find more information about the current project?
- question_explanation: (empty)
Answers (2):
-
- [incorrect] answer_is_correct=0 · view_format=text · False
-
- [CORRECT] answer_is_correct=1 · view_format=text · True
Question 6: Safety
- question_type: singleChoice
- question_points: 1.00
- question_status: publish
- question_display_points: 1
- question_answer_required: 1
- question_randomize: 1
- question_order: 0
- question_negative_score: 0.00
- question_content: After making a new project, what is a safe practise before starting with your design?
- question_explanation: (empty)
Answers (3):
-
- [incorrect] answer_is_correct=0 · view_format=text · Reset Document
-
- [incorrect] answer_is_correct=0 · view_format=text · Delete Temperley Files
-
- [CORRECT] answer_is_correct=1 · view_format=text · Save File
After lesson: Features
Quiz: Features
- follows_lesson: Features
- quiz_content: in this quiz we will be looking at a few key features that one should be aware of.
- quiz_time: 0
- quiz_time_unit: minutes
- quiz_hide_time: (empty)
- quiz_feedback_mode: retry
- quiz_passing_grade: 80
- quiz_max_attempts_allowed: 0
- quiz_questions_order: rand
- quiz_hide_question_number: (empty)
- quiz_questions_layout: (empty)
- quiz_explanation_enabled: (empty)
- quiz_skip_question_showing: (empty)
- question_count: 5
Question 1: Transformation
- question_type: trueFalse
- question_points: 1.00
- question_status: publish
- question_display_points: 1
- question_answer_required: 1
- question_randomize: 1
- question_order: 0
- question_negative_score: 0.00
- question_content: Is it true or false that you have two different transformation modes (Basic and Advanced)?
- question_explanation: (empty)
Answers (2):
-
- [CORRECT] answer_is_correct=1 · view_format=text · True
-
- [incorrect] answer_is_correct=0 · view_format=text · False
Question 2: Closed Shapes
- question_type: singleChoice
- question_points: 1.00
- question_status: publish
- question_display_points: 1
- question_answer_required: 1
- question_randomize: 1
- question_order: 0
- question_negative_score: 0.00
- question_content: If you have an open shape that needs to be closed, which dropdown menu from the main menu will contain the correct tool?
- question_explanation: (empty)
Answers (3):
-
- [CORRECT] answer_is_correct=1 · view_format=text · Path
-
- [incorrect] answer_is_correct=0 · view_format=text · File
-
- [incorrect] answer_is_correct=0 · view_format=text · Cutter
Question 3: Precise Transformations
- question_type: singleChoice
- question_points: 1.00
- question_status: publish
- question_display_points: 1
- question_answer_required: 1
- question_randomize: 1
- question_order: 0
- question_negative_score: 0.00
- question_content: If you would like to make precise transformations based on strict design requirements, which of the following should be used?
- question_explanation: (empty)
Answers (3):
-
- [incorrect] answer_is_correct=0 · view_format=text · Basic Transform Handles
-
- [CORRECT] answer_is_correct=1 · view_format=text · Position & Size Tab from Control Panel
-
- [incorrect] answer_is_correct=0 · view_format=text · Advanced Transform Handle
Question 4: Final Step
- question_type: singleChoice
- question_points: 1.00
- question_status: publish
- question_display_points: 1
- question_answer_required: 1
- question_randomize: 1
- question_order: 0
- question_negative_score: 0.00
- question_content: What is the key feature that you should always consider using before cutting your design?
- question_explanation: (empty)
Answers (3):
-
- [CORRECT] answer_is_correct=1 · view_format=text · Preview
-
- [incorrect] answer_is_correct=0 · view_format=text · Trace
-
- [incorrect] answer_is_correct=0 · view_format=text · Shadow Layer
Question 5: Trace Image
- question_type: singleChoice
- question_points: 1.00
- question_status: publish
- question_display_points: 1
- question_answer_required: 1
- question_randomize: 1
- question_order: 0
- question_negative_score: 0.00
- question_content: What does the trace image feature do?
- question_explanation: (empty)
Answers (3):
-
- [incorrect] answer_is_correct=0 · view_format=text · Turn your image into a sketch drawing
-
- [incorrect] answer_is_correct=0 · view_format=text · Adds registration marks to your image
-
- [CORRECT] answer_is_correct=1 · view_format=text · Add a contour cut to your image
After lesson: Understanding
Quiz: Understanding
- follows_lesson: Understanding
- quiz_content: In this quiz we will be covering some key things that you should have an understanding of.
- quiz_time: 0
- quiz_time_unit: minutes
- quiz_hide_time: (empty)
- quiz_feedback_mode: retry
- quiz_passing_grade: 80
- quiz_max_attempts_allowed: 0
- quiz_questions_order: rand
- quiz_hide_question_number: (empty)
- quiz_questions_layout: (empty)
- quiz_explanation_enabled: (empty)
- quiz_skip_question_showing: (empty)
- question_count: 10
Question 1: Alpha Channel
- question_type: multipleChoice
- question_points: 1.00
- question_status: publish
- question_display_points: 1
- question_answer_required: 1
- question_randomize: 1
- question_order: 0
- question_negative_score: 0.00
- question_content: Which of the following file formats are ideal for images with alpha channels?
- question_explanation: (empty)
Answers (5):
-
- [incorrect] answer_is_correct=0 · view_format=text · Bmp
-
- [CORRECT] answer_is_correct=1 · view_format=text · Tiff
-
- [CORRECT] answer_is_correct=1 · view_format=text · Png
-
- [incorrect] answer_is_correct=0 · view_format=text · Avi
-
- [incorrect] answer_is_correct=0 · view_format=text · Jpg
Question 2: Registration Marks
- question_type: singleChoice
- question_points: 1.00
- question_status: publish
- question_display_points: 1
- question_answer_required: 1
- question_randomize: 1
- question_order: 0
- question_negative_score: 0.00
- question_content: What is the use of registration marks when it comes to vinyl cutting?
- question_explanation: (empty)
Answers (3):
-
- [incorrect] answer_is_correct=0 · view_format=text · For the cutter to separate cutting layers
-
- [CORRECT] answer_is_correct=1 · view_format=text · For the cutter to understand where's the printed image
-
- [incorrect] answer_is_correct=0 · view_format=text · To register your design online
Question 3: Export
- question_type: trueFalse
- question_points: 1.00
- question_status: publish
- question_display_points: 1
- question_answer_required: 1
- question_randomize: 1
- question_order: 0
- question_negative_score: 0.00
- question_content: When exporting files that will be cutout via a contour cut, is it important to enable (Show Registration Marks)?
- question_explanation: (empty)
Answers (2):
-
- [incorrect] answer_is_correct=0 · view_format=text · False
-
- [CORRECT] answer_is_correct=1 · view_format=text · True
Question 4: Raster Formats
- question_type: multipleChoice
- question_points: 4.00
- question_status: publish
- question_display_points: 1
- question_answer_required: 1
- question_randomize: 1
- question_order: 0
- question_negative_score: 0.00
- question_content: Select the common Raster file formats.
- question_explanation: (empty)
Answers (6):
-
- [incorrect] answer_is_correct=0 · view_format=text · Svg
-
- [incorrect] answer_is_correct=0 · view_format=text · AI
-
- [CORRECT] answer_is_correct=1 · view_format=text · Jpg
-
- [CORRECT] answer_is_correct=1 · view_format=text · Bmp
-
- [CORRECT] answer_is_correct=1 · view_format=text · Tiff
-
- [CORRECT] answer_is_correct=1 · view_format=text · Png
Question 5: Vector
- question_type: singleChoice
- question_points: 1.00
- question_status: publish
- question_display_points: 1
- question_answer_required: 1
- question_randomize: 1
- question_order: 0
- question_negative_score: 0.00
- question_content: For which of the following will vector graphics be used for?
- question_explanation: (empty)
Answers (3):
-
- [incorrect] answer_is_correct=0 · view_format=text · Document Size
-
- [incorrect] answer_is_correct=0 · view_format=text · Pixeled Image
-
- [CORRECT] answer_is_correct=1 · view_format=text · Cut Lines
Question 6: Vector Formats
- question_type: multipleChoice
- question_points: 2.00
- question_status: publish
- question_display_points: 1
- question_answer_required: 1
- question_randomize: 1
- question_order: 0
- question_negative_score: 0.00
- question_content: Select the common file formats for vector design.
- question_explanation: (empty)
Answers (5):
-
- [CORRECT] answer_is_correct=1 · view_format=text · AI
-
- [incorrect] answer_is_correct=0 · view_format=text · Gif
-
- [incorrect] answer_is_correct=0 · view_format=text · Jpg
-
- [CORRECT] answer_is_correct=1 · view_format=text · Svg
-
- [incorrect] answer_is_correct=0 · view_format=text · Bmp
Question 7: Registration Mark Types
- question_type: multipleChoice
- question_points: 1.00
- question_status: publish
- question_display_points: 1
- question_answer_required: 1
- question_randomize: 1
- question_order: 0
- question_negative_score: 0.00
- question_content: Which of the following are registration mark types that we covered?
- question_explanation: (empty)
Answers (4):
-
- [CORRECT] answer_is_correct=1 · view_format=text · Automatic
-
- [CORRECT] answer_is_correct=1 · view_format=text · Semi-Automatic
-
- [incorrect] answer_is_correct=0 · view_format=text · 100% Manual
-
- [incorrect] answer_is_correct=0 · view_format=text · Sub-Manual
Question 8: Channel Type
- question_type: singleChoice
- question_points: 1.00
- question_status: publish
- question_display_points: 1
- question_answer_required: 1
- question_randomize: 1
- question_order: 0
- question_negative_score: 0.00
- question_content: What does it mean when an image supports an alpha channel?
- question_explanation: (empty)
Answers (3):
-
- [incorrect] answer_is_correct=0 · view_format=text · It adds a channel that is greater than all the other channels
-
- [CORRECT] answer_is_correct=1 · view_format=text · You are able to save transparency within your image
-
- [incorrect] answer_is_correct=0 · view_format=text · You are able to save 3d information to your file
Question 9: Printed Reg Marks
- question_type: singleChoice
- question_points: 1.00
- question_status: publish
- question_display_points: 1
- question_answer_required: 1
- question_randomize: 1
- question_order: 0
- question_negative_score: 0.00
- question_content: When we send our design to be printed with registration marks, what type of image would that print file end up being?
- question_explanation: (empty)
Answers (3):
-
- [CORRECT] answer_is_correct=1 · view_format=text · Raster
-
- [incorrect] answer_is_correct=0 · view_format=text · Polygon
-
- [incorrect] answer_is_correct=0 · view_format=text · Vecor
Question 10: Cutting Contours
- question_type: singleChoice
- question_points: 1.00
- question_status: publish
- question_display_points: 1
- question_answer_required: 1
- question_randomize: 1
- question_order: 0
- question_negative_score: 0.00
- question_content: When you finally ready to cutout your printed sticker with a contour cut, which of the following cut options are correct?
- question_explanation: (empty)
Answers (2):
-
- [incorrect] answer_is_correct=0 · view_format=text · Cut
-
- [CORRECT] answer_is_correct=1 · view_format=text · Print + Cut
After lesson: Design Principles
Quiz: Design Principles
- follows_lesson: Design Principles
- quiz_content: A few quizzes about the different design principles learned within the previous section.
- quiz_time: 0
- quiz_time_unit: minutes
- quiz_hide_time: (empty)
- quiz_feedback_mode: retry
- quiz_passing_grade: 80
- quiz_max_attempts_allowed: 0
- quiz_questions_order: rand
- quiz_hide_question_number: (empty)
- quiz_questions_layout: (empty)
- quiz_explanation_enabled: (empty)
- quiz_skip_question_showing: (empty)
- question_count: 6
Question 1: Joining Objects
- question_type: singleChoice
- question_points: 1.00
- question_status: publish
- question_display_points: 1
- question_answer_required: 1
- question_randomize: 1
- question_order: 0
- question_negative_score: 0.00
- question_content: If you would like to merge two different shapes into one, which of the following options should be used?
- question_explanation: (empty)
Answers (3):
-
- [incorrect] answer_is_correct=0 · view_format=text · Paths / One
-
- [CORRECT] answer_is_correct=1 · view_format=text · Paths / Union
-
- [incorrect] answer_is_correct=0 · view_format=text · Paths / Join
Question 2: Grouping
- question_type: trueFalse
- question_points: 1.00
- question_status: publish
- question_display_points: 1
- question_answer_required: 1
- question_randomize: 1
- question_order: 0
- question_negative_score: 0.00
- question_content: Grouping is used to keep selected objects within a design grouped together for better management.
- question_explanation: (empty)
Answers (2):
-
- [CORRECT] answer_is_correct=1 · view_format=text · True
-
- [incorrect] answer_is_correct=0 · view_format=text · False
Question 3: Welding
- question_type: singleChoice
- question_points: 1.00
- question_status: publish
- question_display_points: 1
- question_answer_required: 1
- question_randomize: 1
- question_order: 0
- question_negative_score: 0.00
- question_content: What will the Weld option be used for?
- question_explanation: (empty)
Answers (2):
-
- [incorrect] answer_is_correct=0 · view_format=text · Makes that you are not able to remove two shapes from each other
-
- [CORRECT] answer_is_correct=1 · view_format=text · Join multiple shapes in a non-destructive workflow
Question 4: Nesting
- question_type: singleChoice
- question_points: 1.00
- question_status: publish
- question_display_points: 1
- question_answer_required: 1
- question_randomize: 1
- question_order: 0
- question_negative_score: 0.00
- question_content: What is the purpose of the nesting feature?
- question_explanation: (empty)
Answers (3):
-
- [incorrect] answer_is_correct=0 · view_format=text · To make a form of home for all the designs where they are all grouped together
-
- [incorrect] answer_is_correct=0 · view_format=text · To scale the designs larger and smaller depending on your size values
-
- [CORRECT] answer_is_correct=1 · view_format=text · To arrange designs more efficiently on the cutting mat
Question 5: Destructive Editing
- question_type: singleChoice
- question_points: 1.00
- question_status: publish
- question_display_points: 1
- question_answer_required: 1
- question_randomize: 1
- question_order: 0
- question_negative_score: 0.00
- question_content: Which of the following would be considered destructive editing when joining two shapes into one?
- question_explanation: (empty)
Answers (2):
-
- [incorrect] answer_is_correct=0 · view_format=text · Weld
-
- [CORRECT] answer_is_correct=1 · view_format=text · Union
Question 6: Window Designs
- question_type: singleChoice
- question_points: 1.00
- question_status: publish
- question_display_points: 1
- question_answer_required: 1
- question_randomize: 1
- question_order: 0
- question_negative_score: 0.00
- question_content: When working with a design that has to be stuck on the inside of a window but viewed on the outside, which one of the following features should be used?
- question_explanation: (empty)
Answers (3):
-
- [CORRECT] answer_is_correct=1 · view_format=text · Mirror
-
- [incorrect] answer_is_correct=0 · view_format=text · Rotate
-
- [incorrect] answer_is_correct=0 · view_format=text · Window
After lesson: Requirements
Quiz: Requirements
- follows_lesson: Requirements
- quiz_content: Answer the following questions based on the "Workflows" section of the course material.
- quiz_time: 0
- quiz_time_unit: minutes
- quiz_hide_time: (empty)
- quiz_feedback_mode: retry
- quiz_passing_grade: 80
- quiz_max_attempts_allowed: 0
- quiz_questions_order: rand
- quiz_hide_question_number: (empty)
- quiz_questions_layout: (empty)
- quiz_explanation_enabled: (empty)
- quiz_skip_question_showing: (empty)
- question_count: 6
Question 1: Reviewing Design
- question_type: singleChoice
- question_points: 1.00
- question_status: publish
- question_display_points: 1
- question_answer_required: 1
- question_randomize: (empty)
- question_order: 0
- question_negative_score: 0.00
- question_content: When reviewing a design, especially one supplied by a client, what software feature is mentioned as a way to ensure "elements are grouped and merged where needed"?
- question_explanation: (empty)
Answers (4):
-
- [incorrect] answer_is_correct=0 · view_format=text · D. Offset
-
- [incorrect] answer_is_correct=0 · view_format=text · B. Align
-
- [CORRECT] answer_is_correct=1 · view_format=text · C. Weld (or Merge)
-
- [incorrect] answer_is_correct=0 · view_format=text · A. Trace Bitmap
Question 2: Consider Costs
- question_type: singleChoice
- question_points: 1.00
- question_status: publish
- question_display_points: 1
- question_answer_required: 1
- question_randomize: (empty)
- question_order: 0
- question_negative_score: 0.00
- question_content: Which of the following is NOT explicitly listed as a cost to consider when working out the finances for a job?
- question_explanation: (empty)
Answers (4):
-
- [incorrect] answer_is_correct=0 · view_format=text · A. Cutter Blades
-
- [incorrect] answer_is_correct=0 · view_format=text · D. Applicator / Application
-
- [incorrect] answer_is_correct=0 · view_format=text · C. Callout / Transport
-
- [CORRECT] answer_is_correct=1 · view_format=text · B. Software license fee
Question 3: Alternative Workflow
- question_type: singleChoice
- question_points: 1.00
- question_status: publish
- question_display_points: 1
- question_answer_required: 1
- question_randomize: (empty)
- question_order: 0
- question_negative_score: 0.00
- question_content: If your available material is too small for a large job, what alternative workflow must you rely on to complete the project?
- question_explanation: (empty)
Answers (4):
-
- [incorrect] answer_is_correct=0 · view_format=text · A. Outsourcing the application.
-
- [CORRECT] answer_is_correct=1 · view_format=text · C. Cutting by tiles.
-
- [incorrect] answer_is_correct=0 · view_format=text · D. Using a different type of transfer tape.
-
- [incorrect] answer_is_correct=0 · view_format=text · B. Increasing the blade pressure.
Question 4: Timeframe
- question_type: singleChoice
- question_points: 1.00
- question_status: publish
- question_display_points: 1
- question_answer_required: 1
- question_randomize: (empty)
- question_order: 0
- question_negative_score: 0.00
- question_content: Regarding the timeframe, what professional advice is given for ensuring a project is completed on time?
- question_explanation: (empty)
Answers (4):
-
- [incorrect] answer_is_correct=0 · view_format=text · D. Do not apply the vinyl yourself
-
- [incorrect] answer_is_correct=0 · view_format=text · C. Do not let the client supply the design
-
- [incorrect] answer_is_correct=0 · view_format=text · A. Only accept simple jobs
-
- [CORRECT] answer_is_correct=1 · view_format=text · B. Work out a realistic timeframe and add a little extra time to account for hidden issues
Question 5: Household Liquid
- question_type: singleChoice
- question_points: 1.00
- question_status: publish
- question_display_points: 1
- question_answer_required: 1
- question_randomize: (empty)
- question_order: 0
- question_negative_score: 0.00
- question_content: According to the material on application tools, what household liquid is mixed with water for one of the application methods?
- question_explanation: (empty)
Answers (4):
-
- [CORRECT] answer_is_correct=1 · view_format=text · C. Sunlight liquid (dish soap)
-
- [incorrect] answer_is_correct=0 · view_format=text · A. Window cleaner
-
- [incorrect] answer_is_correct=0 · view_format=text · B. Rubbing alcohol
-
- [incorrect] answer_is_correct=0 · view_format=text · D. Vinegar
Question 6: Foundation
- question_type: singleChoice
- question_points: 1.00
- question_status: publish
- question_display_points: 1
- question_answer_required: 1
- question_randomize: (empty)
- question_order: 0
- question_negative_score: 0.00
- question_content: Which element is compared to "the foundation of a house" because getting it wrong might require you to start the entire job from scratch?
- question_explanation: (empty)
Answers (4):
-
- [incorrect] answer_is_correct=0 · view_format=text · A. Design
-
- [incorrect] answer_is_correct=0 · view_format=text · C. Costs
-
- [CORRECT] answer_is_correct=1 · view_format=text · B. Job Measurements
-
- [incorrect] answer_is_correct=0 · view_format=text · D. Material Availability
After lesson: Setup
Quiz: Setup
- follows_lesson: Setup
- quiz_content: Answer the following questions based on the "Setup" section of the course material.
- quiz_time: 0
- quiz_time_unit: minutes
- quiz_hide_time: (empty)
- quiz_feedback_mode: retry
- quiz_passing_grade: 80
- quiz_max_attempts_allowed: 0
- quiz_questions_order: rand
- quiz_hide_question_number: (empty)
- quiz_questions_layout: (empty)
- quiz_explanation_enabled: (empty)
- quiz_skip_question_showing: (empty)
- question_count: 7
Question 1: Loading Material
- question_type: singleChoice
- question_points: 1.00
- question_status: publish
- question_display_points: 1
- question_answer_required: 1
- question_randomize: (empty)
- question_order: 0
- question_negative_score: 0.00
- question_content: When loading material, which component should you ensure has the correct tension if you are working with large designs that are several meters long?
- question_explanation: (empty)
Answers (4):
-
- [incorrect] answer_is_correct=0 · view_format=text · A. The Blade Holder.
-
- [CORRECT] answer_is_correct=1 · view_format=text · C. The Pinch Rollers.
-
- [incorrect] answer_is_correct=0 · view_format=text · B. The USB Cable.
-
- [incorrect] answer_is_correct=0 · view_format=text · D. The Cutting Mat.
Question 2: Correct Selection
- question_type: singleChoice
- question_points: 1.00
- question_status: publish
- question_display_points: 1
- question_answer_required: 1
- question_randomize: (empty)
- question_order: 0
- question_negative_score: 0.00
- question_content: After selecting the correct cutter in the software list, what step must be performed to ensure the cutter is available for use?
- question_explanation: (empty)
Answers (4):
-
- [CORRECT] answer_is_correct=1 · view_format=text · C. Click "Add to List".
-
- [incorrect] answer_is_correct=0 · view_format=text · D. Set the Blade Offset.
-
- [incorrect] answer_is_correct=0 · view_format=text · A. Click the "Test Connection" button.
-
- [incorrect] answer_is_correct=0 · view_format=text · B. Unplug and replug the USB cable.
Question 3: Flash Drive Format
- question_type: singleChoice
- question_points: 1.00
- question_status: publish
- question_display_points: 1
- question_answer_required: 1
- question_randomize: (empty)
- question_order: 0
- question_negative_score: 0.00
- question_content: Which file format must a flash drive be set to if it is being used to transfer cut files directly to the cutting machine?
- question_explanation: (empty)
Answers (4):
-
- [CORRECT] answer_is_correct=1 · view_format=text · B. Fat32
-
- [incorrect] answer_is_correct=0 · view_format=text · C. exFAT
-
- [incorrect] answer_is_correct=0 · view_format=text · A. NTFS
-
- [incorrect] answer_is_correct=0 · view_format=text · D. HFS+
Question 4: Important Requirement
- question_type: singleChoice
- question_points: 1.00
- question_status: publish
- question_display_points: 1
- question_answer_required: 1
- question_randomize: (empty)
- question_order: 0
- question_negative_score: 0.00
- question_content: What information is an important requirement for the student to have when adding their specific cutter to the software using the "Manage Cutters..." feature?
- question_explanation: (empty)
Answers (4):
-
- [incorrect] answer_is_correct=0 · view_format=text · D. The cutting mat dimensions.
-
- [incorrect] answer_is_correct=0 · view_format=text · A. The purchase date and price.
-
- [CORRECT] answer_is_correct=1 · view_format=text · B. The Machine's Make and Model
-
- [incorrect] answer_is_correct=0 · view_format=text · C. The current blade height setting.
Question 5: Dimensions
- question_type: singleChoice
- question_points: 1.00
- question_status: publish
- question_display_points: 1
- question_answer_required: 1
- question_randomize: (empty)
- question_order: 0
- question_negative_score: 0.00
- question_content: Before starting a new project in the software, why is it critical to ensure the project file dimensions do not exceed the dimensions of the material loaded in the machine?
- question_explanation: (empty)
Answers (4):
-
- [incorrect] answer_is_correct=0 · view_format=text · A. It will cause the flash drive to fail.
-
- [incorrect] answer_is_correct=0 · view_format=text · B. The machine will overheat.
-
- [incorrect] answer_is_correct=0 · view_format=text · D. It will automatically adjust the blade height.
-
- [CORRECT] answer_is_correct=1 · view_format=text · C. It will cause the machine to not cut the job out properly.
Question 6: Software Feature
- question_type: singleChoice
- question_points: 1.00
- question_status: publish
- question_display_points: 1
- question_answer_required: 1
- question_randomize: (empty)
- question_order: 0
- question_negative_score: 0.00
- question_content: What software feature, located on the Main Features Bar under Cut Settings, is used to confirm the connection (USB, COM, or TCP/IP) between the machine and the software is active?
- question_explanation: (empty)
Answers (4):
-
- [CORRECT] answer_is_correct=1 · view_format=text · A. Test Connection.
-
- [incorrect] answer_is_correct=0 · view_format=text · D. Material Load Status.
-
- [incorrect] answer_is_correct=0 · view_format=text · B. Send to Plotter.
-
- [incorrect] answer_is_correct=0 · view_format=text · C. Blade Offset Check.
Question 7: Blade Depth
- question_type: singleChoice
- question_points: 1.00
- question_status: publish
- question_display_points: 1
- question_answer_required: 1
- question_randomize: (empty)
- question_order: 0
- question_negative_score: 0.00
- question_content: What is the goal when adjusting your blade depth and/or machine force via test cuts?
- question_explanation: (empty)
Answers (4):
-
- [incorrect] answer_is_correct=0 · view_format=text · B. To dull the blade slightly before a final job.
-
- [CORRECT] answer_is_correct=1 · view_format=text · C. To cut only through the vinyl layer and not the backing paper.
-
- [incorrect] answer_is_correct=0 · view_format=text · A. To cut completely through the material and the backing.
-
- [incorrect] answer_is_correct=0 · view_format=text · D. To ensure the pinch rollers are correctly tensioned.
After lesson: Standard Cutting
Quiz: Standard Cutting
- follows_lesson: Standard Cutting
- quiz_content: Answer the following questions based on the "Standard Vinyl Cutting Workflow" section of the course material.
- quiz_time: 0
- quiz_time_unit: minutes
- quiz_hide_time: (empty)
- quiz_feedback_mode: retry
- quiz_passing_grade: 80
- quiz_max_attempts_allowed: 0
- quiz_questions_order: rand
- quiz_hide_question_number: (empty)
- quiz_questions_layout: (empty)
- quiz_explanation_enabled: (empty)
- quiz_skip_question_showing: (empty)
- question_count: 5
Question 1: Multiple Cuts
- question_type: singleChoice
- question_points: 1.00
- question_status: publish
- question_display_points: 1
- question_answer_required: 1
- question_randomize: (empty)
- question_order: 0
- question_negative_score: 0.00
- question_content: Which key feature should be utilized when you are cutting the same design multiple times on one sheet of vinyl and want to maximize material usage?
- question_explanation: (empty)
Answers (4):
-
- [CORRECT] answer_is_correct=1 · view_format=text · C. Nest
-
- [incorrect] answer_is_correct=0 · view_format=text · D. Cut by Color
-
- [incorrect] answer_is_correct=0 · view_format=text · B. Mirror H
-
- [incorrect] answer_is_correct=0 · view_format=text · A. Tiles
Question 2: Face Outward
- question_type: singleChoice
- question_points: 1.00
- question_status: publish
- question_display_points: 1
- question_answer_required: 1
- question_randomize: (empty)
- question_order: 0
- question_negative_score: 0.00
- question_content: If a design is intended to be applied to the inside of a shop window to face outward, which option must be enabled in the Cutter feature?
- question_explanation: (empty)
Answers (4):
-
- [incorrect] answer_is_correct=0 · view_format=text · B. Nest
-
- [CORRECT] answer_is_correct=1 · view_format=text · D. Mirror H
-
- [incorrect] answer_is_correct=0 · view_format=text · A. Cut by Color
-
- [incorrect] answer_is_correct=0 · view_format=text · C. Tiles
Question 3: Larger Designs
- question_type: singleChoice
- question_points: 1.00
- question_status: publish
- question_display_points: 1
- question_answer_required: 1
- question_randomize: (empty)
- question_order: 0
- question_negative_score: 0.00
- question_content: If your design is larger than your vinyl cutter can handle in a single run, which feature or concept must you set up in the software?
- question_explanation: (empty)
Answers (4):
-
- [CORRECT] answer_is_correct=1 · view_format=text · C. Tiles
-
- [incorrect] answer_is_correct=0 · view_format=text · D. Origin Point
-
- [incorrect] answer_is_correct=0 · view_format=text · B. Nesting
-
- [incorrect] answer_is_correct=0 · view_format=text · A. Cut by Color
Question 4: Preview Feature
- question_type: singleChoice
- question_points: 1.00
- question_status: publish
- question_display_points: 1
- question_answer_required: 1
- question_randomize: (empty)
- question_order: 0
- question_negative_score: 0.00
- question_content: Which core workflow stage involves using the preview feature to look for issues like unwanted cutlines or overlaps before the design is sent to the cutter?
- question_explanation: (empty)
Answers (3):
-
- [incorrect] answer_is_correct=0 · view_format=text · D. Application
-
- [incorrect] answer_is_correct=0 · view_format=text · C. Cut
-
- [CORRECT] answer_is_correct=1 · view_format=text · B. Refine
Question 5: Cut by Color
- question_type: singleChoice
- question_points: 1.00
- question_status: publish
- question_display_points: 1
- question_answer_required: 1
- question_randomize: (empty)
- question_order: 0
- question_negative_score: 0.00
- question_content: If you are using the "Cut by Color" feature to cut different parts of your design separately, which Cut Mode is ideally set to save material?
- question_explanation: (empty)
Answers (4):
-
- [incorrect] answer_is_correct=0 · view_format=text · D. Manual
-
- [CORRECT] answer_is_correct=1 · view_format=text · B. Origin Point
-
- [incorrect] answer_is_correct=0 · view_format=text · A. Automatic
-
- [incorrect] answer_is_correct=0 · view_format=text · C. Start Here
After lesson: Contour Cutting
Quiz: Contour Cutting
- follows_lesson: Contour Cutting
- quiz_content: Answer the following questions based on the "Contour Cutting Workflow" section of the course material.
- quiz_time: 0
- quiz_time_unit: minutes
- quiz_hide_time: (empty)
- quiz_feedback_mode: retry
- quiz_passing_grade: 80
- quiz_max_attempts_allowed: 0
- quiz_questions_order: rand
- quiz_hide_question_number: (empty)
- quiz_questions_layout: (empty)
- quiz_explanation_enabled: (empty)
- quiz_skip_question_showing: (empty)
- question_count: 6
Question 1: Unwanted Holes
- question_type: singleChoice
- question_points: 1.00
- question_status: publish
- question_display_points: 1
- question_answer_required: 1
- question_randomize: (empty)
- question_order: 0
- question_negative_score: 0.00
- question_content: If a design trace line has unwanted "holes" or internal shapes within the main outline, which option should be enabled in the Trace feature to fill these spaces?
- question_explanation: (empty)
Answers (3):
-
- [incorrect] answer_is_correct=0 · view_format=text · D. Update Preview
-
- [incorrect] answer_is_correct=0 · view_format=text · B. Add Image Layer
-
- [CORRECT] answer_is_correct=1 · view_format=text · C. Blackout
Question 2: Shadow Layer
- question_type: singleChoice
- question_points: 1.00
- question_status: publish
- question_display_points: 1
- question_answer_required: 1
- question_randomize: (empty)
- question_order: 0
- question_negative_score: 0.00
- question_content: If you are using the Shadow Layer effect to create a cut line for a separate vector design, what style setting should be applied to the original vector design so that only the new shadow layer cuts?
- question_explanation: (empty)
Answers (4):
-
- [CORRECT] answer_is_correct=1 · view_format=text · C. (Print+Cut) Print Only
-
- [incorrect] answer_is_correct=0 · view_format=text · B. Shadow Only
-
- [incorrect] answer_is_correct=0 · view_format=text · D. Cut Only
-
- [incorrect] answer_is_correct=0 · view_format=text · A. Mirror H
Question 3: Tracing Images
- question_type: singleChoice
- question_points: 1.00
- question_status: publish
- question_display_points: 1
- question_answer_required: 1
- question_randomize: (empty)
- question_order: 0
- question_negative_score: 0.00
- question_content: When tracing a raster image in VinylCut 5, which feature should be enabled if you want to print the image along with the cut layer?
- question_explanation: (empty)
Answers (4):
-
- [CORRECT] answer_is_correct=1 · view_format=text · C. Add Image Layer (Print + Cut)
-
- [incorrect] answer_is_correct=0 · view_format=text · B. Use Alpha Channel
-
- [incorrect] answer_is_correct=0 · view_format=text · D. Show Reg Marks
-
- [incorrect] answer_is_correct=0 · view_format=text · A. Blackout
Question 4: Defining Characteristic
- question_type: singleChoice
- question_points: 1.00
- question_status: publish
- question_display_points: 1
- question_answer_required: 1
- question_randomize: (empty)
- question_order: 0
- question_negative_score: 0.00
- question_content: What is the defining characteristic of the Contour Cutting workflow that distinguishes it from the Standard Vinyl Cutting workflow?
- question_explanation: (empty)
Answers (4):
-
- [CORRECT] answer_is_correct=1 · view_format=text · D. It uses printed vinyl with registration marks.
-
- [incorrect] answer_is_correct=0 · view_format=text · A. It uses only vector files.
-
- [incorrect] answer_is_correct=0 · view_format=text · C. It requires the use of a heat gun.
-
- [incorrect] answer_is_correct=0 · view_format=text · B. It is used for vehicle wraps.
Question 5: Cut Mode
- question_type: singleChoice
- question_points: 1.00
- question_status: publish
- question_display_points: 1
- question_answer_required: 1
- question_randomize: (empty)
- question_order: 0
- question_negative_score: 0.00
- question_content: After printing your file, which option should be selected for the Cut Mode / (Origin Type) in VinylCut 5 when using the registration marks for contour cutting?
- question_explanation: (empty)
Answers (4):
-
- [CORRECT] answer_is_correct=1 · view_format=text · C. WYSIWYG
-
- [incorrect] answer_is_correct=0 · view_format=text · D. Mirror H
-
- [incorrect] answer_is_correct=0 · view_format=text · A. Origin Point
-
- [incorrect] answer_is_correct=0 · view_format=text · B. Manual
Question 6: Image Characteristic
- question_type: singleChoice
- question_points: 1.00
- question_status: publish
- question_display_points: 1
- question_answer_required: 1
- question_randomize: (empty)
- question_order: 0
- question_negative_score: 0.00
- question_content: Which type of image characteristic helps make the masking process easier when tracing an image?
- question_explanation: (empty)
Answers (3):
-
- [incorrect] answer_is_correct=0 · view_format=text · A. Low DPI
-
- [incorrect] answer_is_correct=0 · view_format=text · C. Vector format
-
- [CORRECT] answer_is_correct=1 · view_format=text · B. An Alpha Channel with a transparent background
After lesson: Material Types
Quiz: Material Types
- follows_lesson: Material Types
- quiz_content: Answer the following questions based on the "Materials and Tools" section of the course material.
- quiz_time: 0
- quiz_time_unit: minutes
- quiz_hide_time: (empty)
- quiz_feedback_mode: retry
- quiz_passing_grade: 80
- quiz_max_attempts_allowed: 0
- quiz_questions_order: rand
- quiz_hide_question_number: (empty)
- quiz_questions_layout: (empty)
- quiz_explanation_enabled: (empty)
- quiz_skip_question_showing: (empty)
- question_count: 5
Question 1: Transfer Tape
- question_type: singleChoice
- question_points: 1.00
- question_status: publish
- question_display_points: 1
- question_answer_required: 1
- question_randomize: (empty)
- question_order: 0
- question_negative_score: 0.00
- question_content: In the professional installation of an intricate company logo decal on a window, what is the primary role of Transfer Tape?
- question_explanation: (empty)
Answers (4):
-
- [incorrect] answer_is_correct=0 · view_format=text · B. To chemically activate the main vinyl adhesive.
-
- [incorrect] answer_is_correct=0 · view_format=text · D. To make the vinyl easier to cut in the machine.
-
- [CORRECT] answer_is_correct=1 · view_format=text · C. To lift and hold the cut vinyl pieces in their correct alignment during application.
-
- [incorrect] answer_is_correct=0 · view_format=text · A. To protect the vinyl from UV damage.
Question 2: Heat-Activated
- question_type: singleChoice
- question_points: 1.00
- question_status: publish
- question_display_points: 1
- question_answer_required: 1
- question_randomize: (empty)
- question_order: 0
- question_negative_score: 0.00
- question_content: Which material is primarily defined by its use of a heat-activated adhesive and is most commonly used for customizing T-shirts and sportswear?
- question_explanation: (empty)
Answers (4):
-
- [incorrect] answer_is_correct=0 · view_format=text · B. Reflective Vinyl
-
- [CORRECT] answer_is_correct=1 · view_format=text · D. Heat Transfer Vinyl (HTV)
-
- [incorrect] answer_is_correct=0 · view_format=text · A. Printable / Adhesive Vinyl
-
- [incorrect] answer_is_correct=0 · view_format=text · C. Sandblast Vinyl
Question 3: Road Signs and Emergency Vehicle
- question_type: singleChoice
- question_points: 1.00
- question_status: publish
- question_display_points: 1
- question_answer_required: 1
- question_randomize: (empty)
- question_order: 0
- question_negative_score: 0.00
- question_content: Which material contains glass beads or microprismatic elements and is often mandated for official road signs and emergency vehicle markings?
- question_explanation: (empty)
Answers (4):
-
- [incorrect] answer_is_correct=0 · view_format=text · B. Stencil Sheets
-
- [incorrect] answer_is_correct=0 · view_format=text · A. Printable / Adhesive Vinyl
-
- [CORRECT] answer_is_correct=1 · view_format=text · C. Reflective Vinyl
-
- [incorrect] answer_is_correct=0 · view_format=text · D. HTV
Question 4: Cardboard / Cardstock
- question_type: singleChoice
- question_points: 1.00
- question_status: publish
- question_display_points: 1
- question_answer_required: 1
- question_randomize: (empty)
- question_order: 0
- question_negative_score: 0.00
- question_content: Cardboard / Cardstock is primarily listed for which industrial use that occurs before mass production begins?
- question_explanation: (empty)
Answers (4):
-
- [CORRECT] answer_is_correct=1 · view_format=text · B. Packaging Prototyping and Model Making.
-
- [incorrect] answer_is_correct=0 · view_format=text · C. Manufacturing vehicle striping.
-
- [incorrect] answer_is_correct=0 · view_format=text · A. Creating temporary floor graphics.
-
- [incorrect] answer_is_correct=0 · view_format=text · D. Making reusable spray painting masks.
Question 5: Sandblast Vinyl
- question_type: singleChoice
- question_points: 1.00
- question_status: publish
- question_display_points: 1
- question_answer_required: 1
- question_randomize: (empty)
- question_order: 0
- question_negative_score: 0.00
- question_content: What industrial use is unique to Sandblast Vinyl due to its thick, durable nature?
- question_explanation: (empty)
Answers (4):
-
- [incorrect] answer_is_correct=0 · view_format=text · A. Creating large wall murals.
-
- [incorrect] answer_is_correct=0 · view_format=text · D. Manufacturing reflective safety gear.
-
- [CORRECT] answer_is_correct=1 · view_format=text · C. Stencils for etching stone, granite, or glass.
-
- [incorrect] answer_is_correct=0 · view_format=text · B. Marking parking lots.
After lesson: Tool Types
Quiz: Tool Types
- follows_lesson: Tool Types
- quiz_content: Answer the following questions based on the "Tool Type" section of the course material.
- quiz_time: 0
- quiz_time_unit: minutes
- quiz_hide_time: (empty)
- quiz_feedback_mode: retry
- quiz_passing_grade: 80
- quiz_max_attempts_allowed: 0
- quiz_questions_order: rand
- quiz_hide_question_number: (empty)
- quiz_questions_layout: (empty)
- quiz_explanation_enabled: (empty)
- quiz_skip_question_showing: (empty)
- question_count: 7
Question 1: Prepping / Trimming
- question_type: singleChoice
- question_points: 1.00
- question_status: publish
- question_display_points: 1
- question_answer_required: 1
- question_randomize: (empty)
- question_order: 0
- question_negative_score: 0.00
- question_content: The function of Scissors is described as Prepping/Trimming. Which task is specifically mentioned under this function?
- question_explanation: (empty)
Answers (4):
-
- [CORRECT] answer_is_correct=1 · view_format=text · B. Trimming away excess backing paper/transfer tape to reduce waste and bulk.
-
- [incorrect] answer_is_correct=0 · view_format=text · D. Cleaning the application surface.
-
- [incorrect] answer_is_correct=0 · view_format=text · A. Removing air bubbles.
-
- [incorrect] answer_is_correct=0 · view_format=text · C. Separating the vinyl from the adhesive.
Question 2: Removing Small Vinyl
- question_type: singleChoice
- question_points: 1.00
- question_status: publish
- question_display_points: 1
- question_answer_required: 1
- question_randomize: (empty)
- question_order: 0
- question_negative_score: 0.00
- question_content: Which tool is specifically noted for its excellence in picking up and removing very small vinyl pieces, such as the dots over an 'i' or centers of letters?
- question_explanation: (empty)
Answers (4):
-
- [CORRECT] answer_is_correct=1 · view_format=text · C. Tweezer
-
- [incorrect] answer_is_correct=0 · view_format=text · A. Edge Picking Tool
-
- [incorrect] answer_is_correct=0 · view_format=text · B. Scissors
-
- [incorrect] answer_is_correct=0 · view_format=text · D. Squeegee
Question 3: Squeegee
- question_type: singleChoice
- question_points: 1.00
- question_status: publish
- question_display_points: 1
- question_answer_required: 1
- question_randomize: (empty)
- question_order: 0
- question_negative_score: 0.00
- question_content: What is the primary function of a Squeegee in the vinyl application process?
- question_explanation: (empty)
Answers (4):
-
- [incorrect] answer_is_correct=0 · view_format=text · C. Trimming excess vinyl from the roll.
-
- [CORRECT] answer_is_correct=1 · view_format=text · B. Firmly pressing vinyl onto the substrate and smoothing out air bubbles.
-
- [incorrect] answer_is_correct=0 · view_format=text · A. Removing the backing paper.
-
- [incorrect] answer_is_correct=0 · view_format=text · D. Creating the initial cut line.
Question 4: Dustbin / Scrap Collector
- question_type: singleChoice
- question_points: 1.00
- question_status: publish
- question_display_points: 1
- question_answer_required: 1
- question_randomize: (empty)
- question_order: 0
- question_negative_score: 0.00
- question_content: What is the main function of the Dustbin / Scrap Collector in the workflow?
- question_explanation: (empty)
Answers (4):
-
- [incorrect] answer_is_correct=0 · view_format=text · A. To contain the cutting machine's material waste.
-
- [incorrect] answer_is_correct=0 · view_format=text · C. To hold the application tools.
-
- [CORRECT] answer_is_correct=1 · view_format=text · B. To provide a convenient place to immediately discard small vinyl scraps during weeding.
-
- [incorrect] answer_is_correct=0 · view_format=text · D. To collect water from the wet application process.
Question 5: Pickers
- question_type: singleChoice
- question_points: 1.00
- question_status: publish
- question_display_points: 1
- question_answer_required: 1
- question_randomize: (empty)
- question_order: 0
- question_negative_score: 0.00
- question_content: The generic term "Pickers in various sizes" is primarily used for intricate weeding because their sharp point allows the user to easily perform what action?
- question_explanation: (empty)
Answers (4):
-
- [CORRECT] answer_is_correct=1 · view_format=text · B. Pierce and lift the edge of the waste vinyl.
-
- [incorrect] answer_is_correct=0 · view_format=text · C. Cut the vinyl on the backing paper.
-
- [incorrect] answer_is_correct=0 · view_format=text · A. Smoothen wrinkles.
-
- [incorrect] answer_is_correct=0 · view_format=text · D. Measure the design size.
Question 6: Vehicle Wrapping
- question_type: singleChoice
- question_points: 1.00
- question_status: publish
- question_display_points: 1
- question_answer_required: 1
- question_randomize: (empty)
- question_order: 0
- question_negative_score: 0.00
- question_content: In professional vehicle wrapping, what is the primary role of a Heat Gun / Blow Torch?
- question_explanation: (empty)
Answers (4):
-
- [incorrect] answer_is_correct=0 · view_format=text · C. To melt the waste vinyl for easy removal.
-
- [incorrect] answer_is_correct=0 · view_format=text · A. To dry the wet application solution.
-
- [CORRECT] answer_is_correct=1 · view_format=text · B. To make cast vinyl soft and flexible for conforming around complex curves and shapes.
-
- [incorrect] answer_is_correct=0 · view_format=text · D. To quickly cure the adhesive.
Question 7: Dish Soap
- question_type: singleChoice
- question_points: 1.00
- question_status: publish
- question_display_points: 1
- question_answer_required: 1
- question_randomize: (empty)
- question_order: 0
- question_negative_score: 0.00
- question_content: What is the purpose of adding a small amount of Sunlight Liquid (mild dish soap) to the water in the spray bottle?
- question_explanation: (empty)
Answers (4):
-
- [incorrect] answer_is_correct=0 · view_format=text · B. To clean the surface thoroughly.
-
- [incorrect] answer_is_correct=0 · view_format=text · D. To make the vinyl glossy.
-
- [incorrect] answer_is_correct=0 · view_format=text · A. To make the vinyl stick immediately.
-
- [CORRECT] answer_is_correct=1 · view_format=text · C. To delay the adhesive's bond, allowing for precise positioning during application.
After lesson: Application Process
Quiz: Application Process
- follows_lesson: Application Process
- quiz_content: Answer the following questions based on the "Application" section of the course material.
- quiz_time: 0
- quiz_time_unit: minutes
- quiz_hide_time: (empty)
- quiz_feedback_mode: retry
- quiz_passing_grade: 80
- quiz_max_attempts_allowed: 0
- quiz_questions_order: rand
- quiz_hide_question_number: (empty)
- quiz_questions_layout: (empty)
- quiz_explanation_enabled: (empty)
- quiz_skip_question_showing: (empty)
- question_count: 8
Question 1: Hinge Method
- question_type: singleChoice
- question_points: 1.00
- question_status: publish
- question_display_points: 1
- question_answer_required: 1
- question_randomize: (empty)
- question_order: 0
- question_negative_score: 0.00
- question_content: In the Dry Hinge Method, what is the primary purpose of the long strip of masking tape placed across the middle of the decal?
- question_explanation: (empty)
Answers (4):
-
- [incorrect] answer_is_correct=0 · view_format=text · A. To protect the surface from the squeegee.
-
- [incorrect] answer_is_correct=0 · view_format=text · D. To prevent the vinyl from lifting during curing.
-
- [incorrect] answer_is_correct=0 · view_format=text · C. To hold the transfer tape down after application.
-
- [CORRECT] answer_is_correct=1 · view_format=text · B. To anchor the vinyl and act as a pivot point for applying one half at a time.
Question 2: 180-Degrees
- question_type: singleChoice
- question_points: 1.00
- question_status: publish
- question_display_points: 1
- question_answer_required: 1
- question_randomize: (empty)
- question_order: 0
- question_negative_score: 0.00
- question_content: When applying vinyl, why must the top transfer tape be peeled back against itself at a 180-degree angle?
- question_explanation: (empty)
Answers (4):
-
- [incorrect] answer_is_correct=0 · view_format=text · D. To remove any residual cleaning solution.
-
- [CORRECT] answer_is_correct=1 · view_format=text · C. To minimize the chance of lifting the vinyl decal off the final surface.
-
- [incorrect] answer_is_correct=0 · view_format=text · A. To speed up the application process.
-
- [incorrect] answer_is_correct=0 · view_format=text · B. To activate the adhesive's final cure.
Question 3: Wall Decals
- question_type: singleChoice
- question_points: 1.00
- question_status: publish
- question_display_points: 1
- question_answer_required: 1
- question_randomize: (empty)
- question_order: 0
- question_negative_score: 0.00
- question_content: For Wall Decals, why should a freshly painted wall be left to cure for at least two weeks before application?
- question_explanation: (empty)
Answers (4):
-
- [incorrect] answer_is_correct=0 · view_format=text · D. The wall must be cleaned with the water/soap solution first.
-
- [incorrect] answer_is_correct=0 · view_format=text · C. The wall temperature must stabilize.
-
- [CORRECT] answer_is_correct=1 · view_format=text · B. The paint releases gasses ("off-gassing") that can cause bubbles and adhesion failure.
-
- [incorrect] answer_is_correct=0 · view_format=text · A. The paint needs time to fully harden to prevent scratches.
Question 4: Privacy and Decorative
- question_type: singleChoice
- question_points: 1.00
- question_status: publish
- question_display_points: 1
- question_answer_required: 1
- question_randomize: (empty)
- question_order: 0
- question_negative_score: 0.00
- question_content: Which common vinyl application uses a specialized vinyl (Frosted/Etched Vinyl) to achieve privacy and decorative effects?
- question_explanation: (empty)
Answers (4):
-
- [incorrect] answer_is_correct=0 · view_format=text · C. Product Labels & Branding
-
- [incorrect] answer_is_correct=0 · view_format=text · B. Wall Decals & Home Decor
-
- [CORRECT] answer_is_correct=1 · view_format=text · D. Window Graphics
-
- [incorrect] answer_is_correct=0 · view_format=text · A. Vehicle Decals & Lettering
Question 5: Complex Curves
- question_type: singleChoice
- question_points: 1.00
- question_status: publish
- question_display_points: 1
- question_answer_required: 1
- question_randomize: (empty)
- question_order: 0
- question_negative_score: 0.00
- question_content: When applying vinyl to complex curves on vehicles, what tool is used to make the vinyl soft and flexible so it can conform without wrinkles?
- question_explanation: (empty)
Answers (4):
-
- [incorrect] answer_is_correct=0 · view_format=text · B. Scissors
-
- [incorrect] answer_is_correct=0 · view_format=text · A. Tweezer
-
- [incorrect] answer_is_correct=0 · view_format=text · C. Squeegee
-
- [CORRECT] answer_is_correct=1 · view_format=text · D. Heat Gun / Hair Dryer
Question 6: Sandwich
- question_type: singleChoice
- question_points: 1.00
- question_status: publish
- question_display_points: 1
- question_answer_required: 1
- question_randomize: (empty)
- question_order: 0
- question_negative_score: 0.00
- question_content: In the standard "sandwich" of a cut vinyl decal, what is the protective, waxy layer on the bottom called?
- question_explanation: (empty)
Answers (4):
-
- [incorrect] answer_is_correct=0 · view_format=text · D. Masking Tape
-
- [CORRECT] answer_is_correct=1 · view_format=text · C. Backing Paper (Release Liner)
-
- [incorrect] answer_is_correct=0 · view_format=text · A. Transfer Tape
-
- [incorrect] answer_is_correct=0 · view_format=text · B. Vinyl Decal
Question 7: Wet Application
- question_type: singleChoice
- question_points: 1.00
- question_status: publish
- question_display_points: 1
- question_answer_required: 1
- question_randomize: (empty)
- question_order: 0
- question_negative_score: 0.00
- question_content: What is the main disadvantage of using the Wet Application Method for a decal?
- question_explanation: (empty)
Answers (4):
-
- [CORRECT] answer_is_correct=1 · view_format=text · C. It requires more time (up to 48-72 hours) to fully dry and cure.
-
- [incorrect] answer_is_correct=0 · view_format=text · B. The hinge method cannot be used.
-
- [incorrect] answer_is_correct=0 · view_format=text · A. The vinyl adhesive is ruined permanently.
-
- [incorrect] answer_is_correct=0 · view_format=text · D. It can only be used on glass.
Question 8: Product Labels
- question_type: singleChoice
- question_points: 1.00
- question_status: publish
- question_display_points: 1
- question_answer_required: 1
- question_randomize: (empty)
- question_order: 0
- question_negative_score: 0.00
- question_content: For the application of Product Labels onto curved items like mugs or bottles, what technique is recommended for the transfer tape (not the vinyl) to help it bend without wrinkling?
- question_explanation: (empty)
Answers (4):
-
- [CORRECT] answer_is_correct=1 · view_format=text · B. Making relief cuts in the transfer tape.
-
- [incorrect] answer_is_correct=0 · view_format=text · A. Applying the decal wet.
-
- [incorrect] answer_is_correct=0 · view_format=text · D. Applying the decal at a high temperature.
-
- [incorrect] answer_is_correct=0 · view_format=text · C. Using the Squeegee from the center outward.
Sources
- source_url: https://ambitious.academy/course/vinyl-cutting-course
- source_ref: academy.jsonl (dumps-check; public catalog dump)
- source_ref: nested Course export b72d7de272f4c30d9f4c6640d2ac20ff9ac8aa6376479e9601dcfd04593de203.csv
- source_ref: drive_file_id list (extract pending — this pass did not download Drive files)
1D9bmY-A_IvJs1csSvE65jNbRjV91ZjPJ— extract done · /workspace/academy/media/1D9bmY-A_IvJs1csSvE65jNbRjV91ZjPJ/1xdNqPjBBRpM8a2ur6rS7YNmSO17VJ9k5— extract done · /workspace/academy/media/1xdNqPjBBRpM8a2ur6rS7YNmSO17VJ9k5/1zRle_W_EMEp51CV3fupxTjxSWIdo5yaO— extract done · /workspace/academy/media/1zRle_W_EMEp51CV3fupxTjxSWIdo5yaO/1bDurZXPoL5Q3QvWME2lbph0QSEyNdiLL— extract done · /workspace/academy/media/1bDurZXPoL5Q3QvWME2lbph0QSEyNdiLL/1kn5Yl5PHB505qbH6JAKlJwIeIxN6WJ7e— extract done · /workspace/academy/media/1kn5Yl5PHB505qbH6JAKlJwIeIxN6WJ7e/1XMyqe07SGAebU9FJEcV1YA3kgST3yu3u— extract done · /workspace/academy/media/1XMyqe07SGAebU9FJEcV1YA3kgST3yu3u/1fs3Yyu27k_hCI1KHnTggmAJBSmohatDO— extract done · /workspace/academy/media/1fs3Yyu27k_hCI1KHnTggmAJBSmohatDO/1NHFZ8RnfeEFVUvx6MWlXdqirMsZmdSFt— extract done · /workspace/academy/media/1NHFZ8RnfeEFVUvx6MWlXdqirMsZmdSFt/1F2ZJiE4MxH-gHFwFMzAofqLPRCyrzR6U— extract done · /workspace/academy/media/1F2ZJiE4MxH-gHFwFMzAofqLPRCyrzR6U/1QHZ5_TmuGcjTPN0IDWB8PqGnLhunxS_0— extract done · /workspace/academy/media/1QHZ5_TmuGcjTPN0IDWB8PqGnLhunxS_0/1nMNpiQwz6c_SIu1lYaqD43AkKFqikPXR— extract done · /workspace/academy/media/1nMNpiQwz6c_SIu1lYaqD43AkKFqikPXR/1oaUOYzkcg9xor1_7opLHGx3Rxwf__T1d— extract done · /workspace/academy/media/1oaUOYzkcg9xor1_7opLHGx3Rxwf__T1d/1rphoKaEb-YC8z98m3ceG-qQ4ziGie65e— extract done · /workspace/academy/media/1rphoKaEb-YC8z98m3ceG-qQ4ziGie65e/1gTyUEYzHetLNWvNCvatBjrupVskh4v5Z— extract done · /workspace/academy/media/1gTyUEYzHetLNWvNCvatBjrupVskh4v5Z/1OZr9XQbHTVSQBV-33KJKf8ygtYYx3nA9— extract done · /workspace/academy/media/1OZr9XQbHTVSQBV-33KJKf8ygtYYx3nA9/1VyVZahpn8ISD065i02_cS1wTQmarn8Ha— extract done · /workspace/academy/media/1VyVZahpn8ISD065i02_cS1wTQmarn8Ha/1jI5SduyqESIbtUZua6tUUR-0a_fGeX7u— extract done · /workspace/academy/media/1jI5SduyqESIbtUZua6tUUR-0a_fGeX7u/1_kN1ZBlYp-2zJnwEN8AjgSJr4Q-Tte16— extract done · /workspace/academy/media/1_kN1ZBlYp-2zJnwEN8AjgSJr4Q-Tte16/14pyk1T10Nz-0tMqIMAozs3VTMJke12L0— extract done · /workspace/academy/media/14pyk1T10Nz-0tMqIMAozs3VTMJke12L0/1AXRHoHv7k8rYK4zIGl0R4A5-eHWMpOyo— extract done · /workspace/academy/media/1AXRHoHv7k8rYK4zIGl0R4A5-eHWMpOyo/1WT5ZSi8q-1ysJiZ38d99FeTvNSpKKGqg— extract done · /workspace/academy/media/1WT5ZSi8q-1ysJiZ38d99FeTvNSpKKGqg/1PP-wExX4o2NBBkTAjJS459Abx7IWDhYx— extract done · /workspace/academy/media/1PP-wExX4o2NBBkTAjJS459Abx7IWDhYx/1FND8kSlGSn9HE9-RqFgAeTS5f9bxpVLr— extract done · /workspace/academy/media/1FND8kSlGSn9HE9-RqFgAeTS5f9bxpVLr/1DPPL5hWgwAJCe2MqMOb3YRsLlcDF9J9g— extract done · /workspace/academy/media/1DPPL5hWgwAJCe2MqMOb3YRsLlcDF9J9g/1GHMe5VzHebXxvcKR9xLWrDCJGHbHk2Wi— extract done · /workspace/academy/media/1GHMe5VzHebXxvcKR9xLWrDCJGHbHk2Wi/1eCheGasSXgmnGE3qyTBIce8RrS5r_GbZ— extract done · /workspace/academy/media/1eCheGasSXgmnGE3qyTBIce8RrS5r_GbZ/1DJ72TKEeOqsxUzJDs2Kn02zU0a7v1i_M— extract done · /workspace/academy/media/1DJ72TKEeOqsxUzJDs2Kn02zU0a7v1i_M/1xhCTqCoIdVb94vL91ujEQngjYLhWTw3l— extract done · /workspace/academy/media/1xhCTqCoIdVb94vL91ujEQngjYLhWTw3l/1Fry_V-T0rGJo4_BFl0bQM9TEB6B1ZBdF— extract done · /workspace/academy/media/1Fry_V-T0rGJo4_BFl0bQM9TEB6B1ZBdF/1iNLJ_YntmAtQ9V2ACNVy2FuSjtntBwL4— extract done · /workspace/academy/media/1iNLJ_YntmAtQ9V2ACNVy2FuSjtntBwL4/- timestamp: 2026-08-21 SAST
- dest (do not write from this pass): T:\V\sources\academy\vinyl-cutting-course.md